We are currently updating our site; thank you for your patience.
Service
Calls - Add a Credit Note
Note that there are changes to the Call Centre screens due to the Call Centre Performance Enhancements rolled out in part of the
Extended Call Centre - Version Compatibility![]() . The functionality that is available to you may differ depending on the Call Centre mode configured and your user rights. For more information related to this, refer to the Call Centre Mode notes.
. The functionality that is available to you may differ depending on the Call Centre mode configured and your user rights. For more information related to this, refer to the Call Centre Mode notes.
When Call Credit Notes are raised, remember the following:
- Partial credit notes can be raised.
- Select whether or not to return the stock to store.
- If you select to return to store, you must complete a return request in order to move your stock back to the warehouse.
- When credit notes are raised in order to adjust incorrect pricing on an invoice, there is no need to return the stock to store.
Ribbon Select Service > Calls

- The Call Listing screen will be displayed.

- The Calls are listed by Site and will display calls for the first Site listed.
- Click on the relevant Site for the calls you wish to view.

- Select the Call you wish to work with.

- Click on the Edit button.

- The Call maintenance: Call ref. - [call number] screen will be displayed.
- Click on the Credit Notes tile.

Credit Note Listing
- The Sales Credit Notes for Call [call number] screen will be displayed.
- Click on Add.


- The Related References panel will be expanded.
- Click in the text box under the Reference No. column, in the Invoice No. row.

- An ellipsis [...] button will be revealed.
- Click on this ellipsis button to display a Select the related invoice for this order pop up screen.

- Click on the row selector in front of the invoice that you wish to raise a credit note for.
- Click on Ok.

- The selected invoice details will populate the Items data grid in the credit note screen.
- If a stock item was invoiced, a message box will pop up asking;
- Do you wish to return the items to store?
- If you do want to return the items (if, for example, the incorrect part was invoiced) then click on Yes.
- Note: Remember that you still need to return the stock using the Return Request screen, when the credit note is authorised and printed.

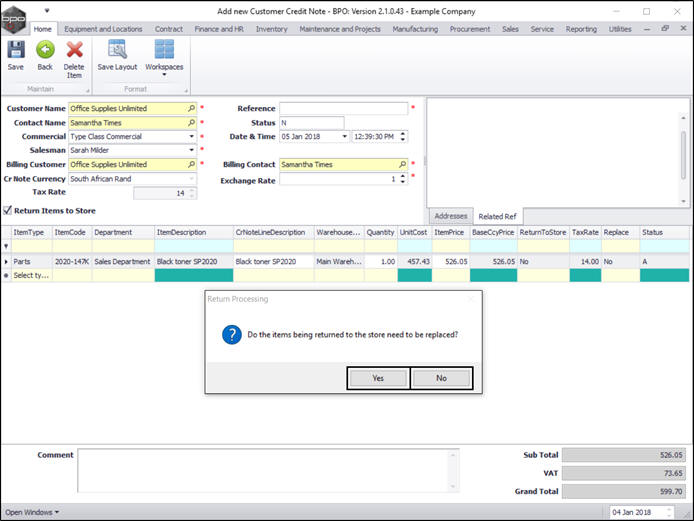
- If you have selected to Return the Item to Store, then a Return Processing message box will pop up, asking:
- Do the items being returned to the store need to be replaced?
- Select Yes If the part issued was the correct part, but is damaged / or has the incorrect serial number, and a new part of the same part code needs to be issued.
- Note: Once the part has been returned to store, the part request will re-open to be fulfilled - a new part / correct serial number must be issued.
- Select No If you issued the incorrect part, or the order is cancelled.
- Note: This will set the part request required quantity to zero - as it is no longer required.
- If you not do want to return the items to store (if, for example, the incorrect selling price was charged) then click on No.

- You do have the option to use the Return Items to Store flag if you made the incorrect choice.

- When you click on the Return Items to Store check box, a Return Processing screen will pop up asking;
- Do the items being returned to the store need to be replaced?
- You now have the opportunity to correct your previous choice, if required, and click on Yes.

- In the Items data grid, each part line item will show whether;
- a part will be returned to stores or,
- a replacement part is required.

- Ensure you have a Reference and Comment relating to the reason for this credit note.

- In the Related References panel, scroll down until you can view the Reason Code row.
- Click in the text box under the Reference No. column, in the Reason Code row.

- An ellipsis [...] button will be revealed.
- Click on this ellipsis button to display a Select the reason code for this credit note pop up screen.

- Click on the row selector in front of the reason code that you wish to select for this credit note.
- Click on Ok.
- Note: If no codes have not yet been configured, or the code that you need to use has not been set up, then this needs to be added in Static Data: Credit Note Reason.

- The selected reason code will now populate the Related References panel.

- If you leave the credit note as is and click on Save, it will be credited it in full.
- Note: You can also do a partial credit note.
- Click on Save.

- You will return to the Sales Credit Notes for Call [call number] listing screen where you can now view the new credit note.
- Note: Complete the credit note process with the following steps:

MNU.122.024