Equipment
Assets - Edit - User Defined
A User Defined panel has been added to the Asset Maintain screen (the Equipment Maintenance for Serial No: [] screen).
At present, these fields in the Equipment - Assets module can be used to add extra information relevant to the selected asset. The added fields will reflect in the User Defined panel in the Asset Maintain screen across all assets on the system, but the Variable Values selected for each User Defined field will be unique to the selected asset.
This information will also reflect in the Call Maintain screen where the asset is linked. Although the fields can be viewed from the Call Maintain screen, the actual information can only be edited in the Asset Maintain screen.
This topic will expand on how to edit the User Defined custom fields for a selected asset. Not all custom fields can be edited in the same way, it depends on what Input Type they have been set up with.
![]() Note: It will be useful to familiarise yourself with the Add Asset User Defined topic before progressing with this manual.
Note: It will be useful to familiarise yourself with the Add Asset User Defined topic before progressing with this manual.
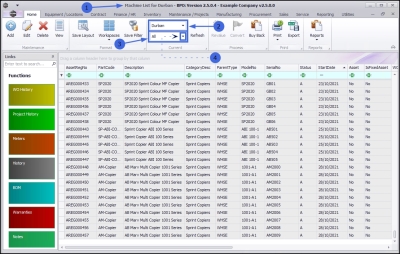
| Ribbon Access: Equipment and Locations > Assets |
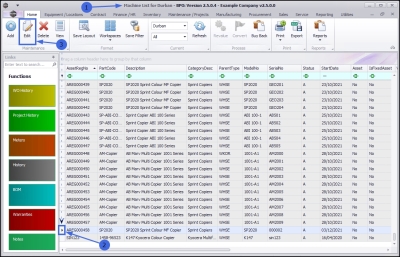
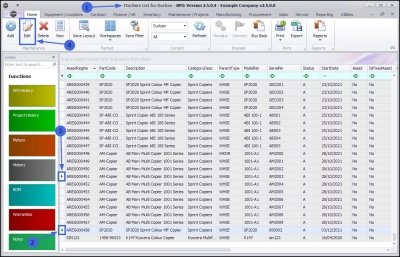
- The Machine List for [] screen will display.
The Site and Type Filters
- The screen will open with the default Site setting configured on the user.
Note: Refer to Site Selection for more information.
- By default, this screen will open with the Type filter set to 'All', listing all of the assets on the system (Customer Assets, Internal Assets and Serialised Stock items).
- You can click on the drop-down arrow in the Type field and select an alternative Type, (such as Client Machines), if required.
Select the Asset
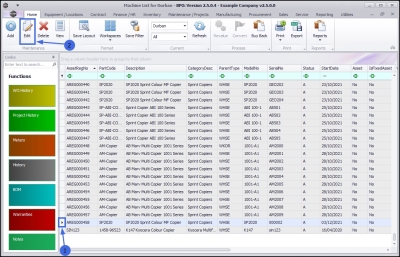
- Select the row of the asset where you wish to edit the User Defined custom fields.
- Click on Edit.
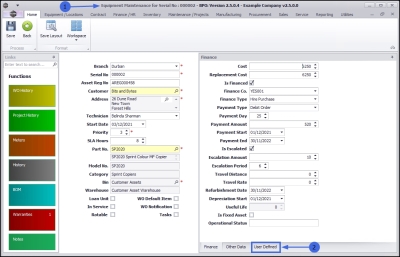
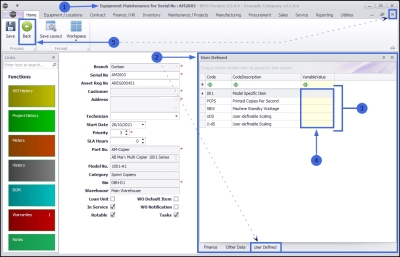
- The Equipment Maintenance for Serial No: [] screen will open.
- If the User Defined field is not yet extended, click on the User Defined tab.
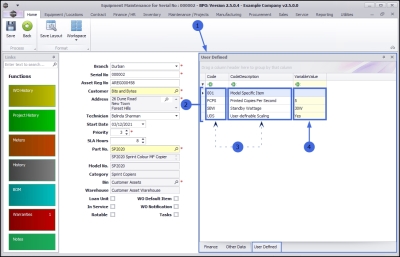
- The User Defined panel will open.
- In this example, there are custom fields already set up in the system.
- The Code and Code Description fields will reflect across all assets.
- The data entered or added to the Variable Value field is unique to the selected asset and will not reflect in any other asset or other module User Defined fields.
![]() Note: The content of these fields can be populated according to individual company requirements. The examples given here are pertinent to the system being demonstrated and are not universal.
Note: The content of these fields can be populated according to individual company requirements. The examples given here are pertinent to the system being demonstrated and are not universal.
Although the data selected or entered into the Variable Value field is unique to the selected asset, the Input Type set up in the Variable Value field will reflect across all assets.
The capacity to edit the Variable Value field will then depend on the Input Type set up:
Edit Variable Values
Lookup List
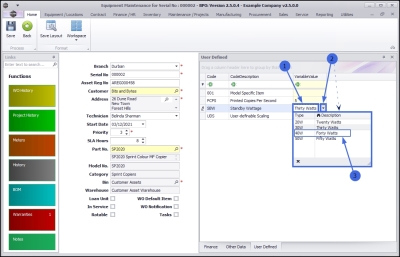
- In this example, the SBW - Standby Wattage User Defined field has a Lookup list as the Input Type.
- Currently, the Variable Value is 30W - Thirty Watts.
- Click in the Variable Value field.
- A drop-down arrow and list will appear - this is a Lookup List Input Type.
- Select the row of the alternative Type you wish to link to this custom field.
- In this example, 40W - Forty Watts is selected.
- The edited selection will populate the Variable Value field.
Free Input Text
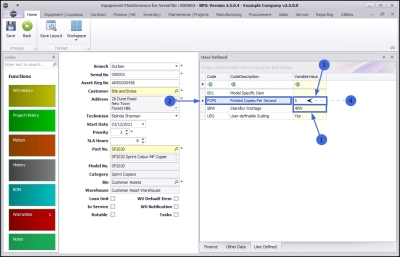
- In the next example, the PCPS - Printed Copies Per Second User Defined field has Free Input Text as the Input Type.
- Currently, the Variable Value is 5.
- Click in the Variable Value field and either modify the original text or delete and add new text, as required to make the correct changes.
- The edited text will populate the Variable Value field.
Yes or No Value
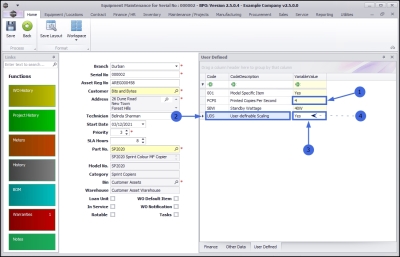
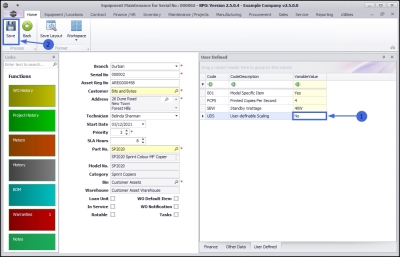
- In the next example, the UDS - User definable Scaling User Defined field has Yes or No value as the Input Type.
- Currently, the Variable Value is Yes.
- Click in the Variable Value field.
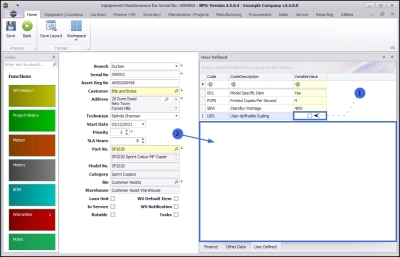
- The "Yes" text will be replaced with a check box that is unselected.
- Click anywhere in the panel, outside of the Variable Value field.
- "No" will now populate the Variable Value field.
- When you have finished editing the Variable Values of the asset User Defined fields, click on Save.
- Your changes will be saved and you will return to the Machine List for [] screen.
- The edited asset will be selected in the data grid.
Edit Custom Fields
Follow the processes set out below to edit the custom fields.
- Select the asset where you wish to make changes to a custom field and click on Edit.
Lookup List
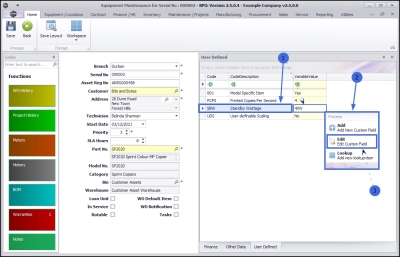
- Right-click in the row of the custom field where you wish to make changes.
- Ensure that you have selected a custom field that has Input Type: Lookup List.
- A Process menu will pop up.
- Click on Edit - Edit Custom Field.
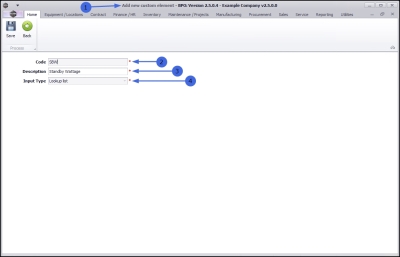
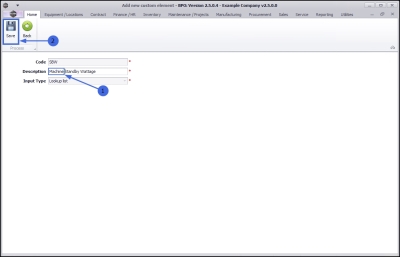
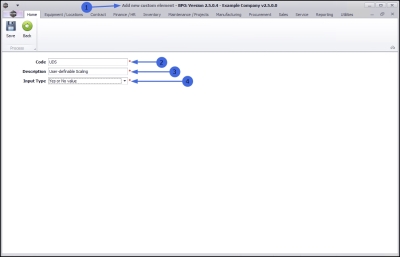
- The Add new custom element screen will open.
- Even though the screen title is Add new custom element, you can edit some of the details from here.
Edit Code
- This field is greyed out, it is not possible to edit the Code from this screen.
Edit Description
- Click in this field and either add new text or remove text from the Description, as required.
Edit Input Type
- This field is greyed out, it is not possible to edit the Input Type: Lookup List from this screen.
- In this example, the Description has been edited to include the text: "Machine".
- When you have made the required changes, click on Save.
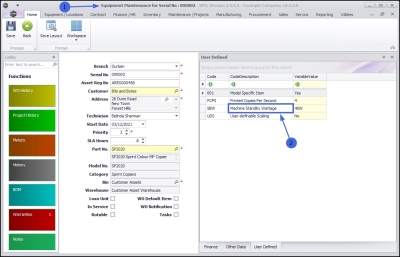
- You will return to the Equipment Maintenance for Serial No: [] screen.
- The Code Description has been updated in the User Defined panel.
Reminder: These custom elements are available to all assets in the New Equipment and Equipment Maintenance screens. This update will reflect across all assets.
Free Input Text
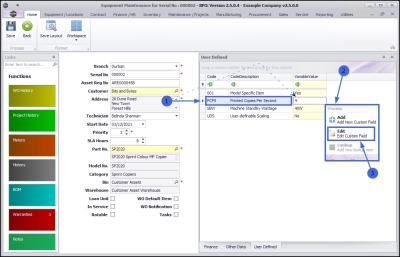
- Right-click in the row of the custom field where you wish to make changes.
- Ensure that you have selected a custom field that has Input Type: Free Input Text.
- A Process menu will pop up.
- Click on Edit - Edit Custom Field.
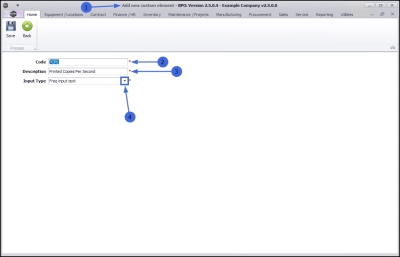
- The Add new custom element screen will open.
- Even though the screen title is Add new custom element, you can edit the details from here.
Edit Code
- Click in this field and either add new text or remove text from the Code, as required.
Edit Description
- Click in this field and either add new text or remove text from the Description, as required.
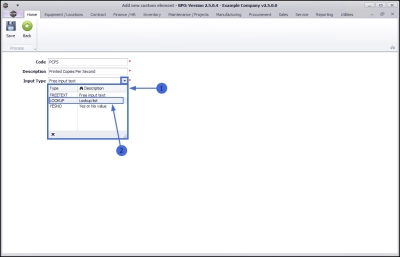
Edit Input Type
In this exercise, the Input Type will be edited as an example.
Reminder: This update will reflect across all assets.
- Click on the drop-down arrow in this field
- The Input Type menu will display.
- Select the alternativeType you wish to link to this custom field.
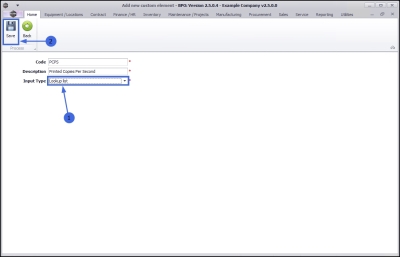
- The selected Type will populate the Input Type field.
- Click on Save.
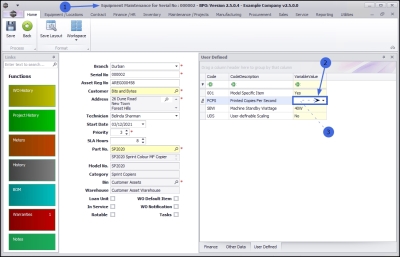
- You will return to the Equipment Maintenance for Serial No: screen.
- You may need to click in the Variable Value field to refresh the panel and display the changes
- In this example, the field has updated to display a drop-down arrow, inherent of the Lookup list Input Type.
![]() Note 1: For this list to display any data , follow the process to add Lookup fields to this custom element.
Note 1: For this list to display any data , follow the process to add Lookup fields to this custom element.
![]() Note 2: This Input Type is not necessarily applicable to the linked custom field but is for demonstration purposes only to show how the Input Type can be edited.
Note 2: This Input Type is not necessarily applicable to the linked custom field but is for demonstration purposes only to show how the Input Type can be edited.
Yes or No Value
- Right-click in the row of the custom field where you wish to make changes.
- Ensure that you have selected a custom field that has Input Type: Yes or No value.
- A Process menu will pop up.
- Click on Edit - Edit Custom Field.
- The Add new custom element screen will open.
- Even though the screen title is Add new custom element, you can edit the details from here.
Edit Code
- Click in this field and either add new text or remove text from the Code, as required.
Edit Description
- Click in this field and either add new text or remove text from the Description, as required.
Edit Input Type
- You can click on the drop-down arrow in this field and select an alternative Input Type if required.
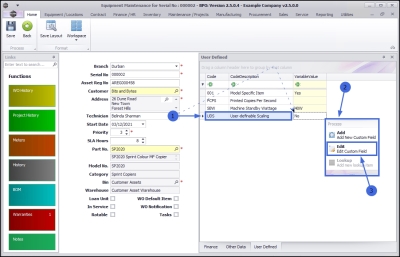
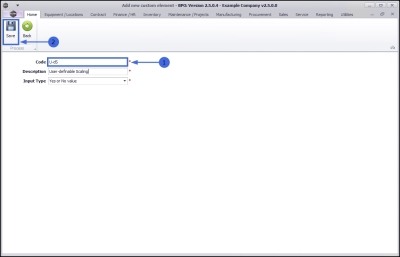
- In this example, the Code has been edited to: "U-dS".
- When you have made the required changes, click on Save.
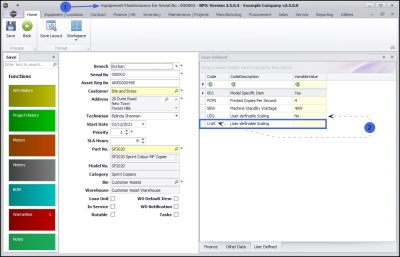
- Your changes will be saved and you will return to the Equipment Maintenance for Serial No: [] screen.
- Note that editing the Code of the custom field has resulted in a new custom field being created.
Conclusion
Where the custom field Input Type is Lookup List, it is only possible to edit the Code Description of the custom field
Where the custom field Input Type is either Free Input Text or Yes or No value, it is possible to edit the Code, Description and Input Type of the custom field
- However, if the Code is edited in either of these custom fields (Free Input Text or Yes or No value) then a new custom field will be created.
Save Edited Custom Fields
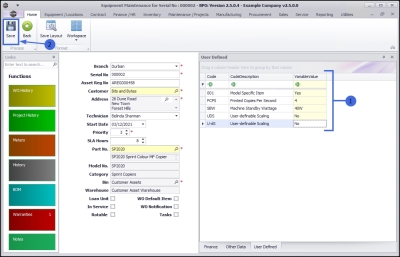
- When you have finished making changes to the User Defined fields, as required,
- Click on Save.
- You will return to the Machine List for [] screen.
- The edited asset will be selected.
View Edited Custom Fields Now Linked to All Assets
- Select the row of a different asset in the data grid.
- Click on Edit.
- The Equipment Maintenance for Serial No: [] screen will open.
- If not already extended, click on the User Defined tab to open the panel.
- The changes made to the custom elements of the previous asset are now available to this asset.
- Note that the Variable Value column is not populated.
Reminder: The data added to this Variable Value field is unique to the selected asset and will not reflect in any other asset or other module User Defined fields.
- Click on Back or Close the screen to return to the Part Listing screen.
View User Defined Fields in Call Maintain Screen
The custom elements edited in this process will also reflect in the Call Maintain screen where this asset is linked to a Call. Either a new Call or an existing Call will have these new details available in the Calls User Defined panel.
Follow the process to navigate to the Call Maintenance screen and view the Used Defined panel with the updated custom fields.
MNU.007.016

