Service
Calls - Assign a Call
By assigning a Technician, Driver, or Responsible Person to a call, identifies who will be working on the call.
If Tech Connect is not used, then the call will move to the In Progress status. The call centre person will accept the call on the Technician's behalf.
![]() If the technician uses Tech Connect - he will accept the call on his device, and only then will the call move to In Progress.
If the technician uses Tech Connect - he will accept the call on his device, and only then will the call move to In Progress.
Refer to the Call State column on the Call Listing screen, to see if the call has been assigned or not.
The call can be in either:
- status New with Call State Unassigned
- status New with Call State Awaiting Acceptance
A technician can only be assigned to one call at a time. He will End Work then Accept the next call.
The call can be re-assigned.
Set up the employee as a technician, if the person you wish to assign to a call, is an employee, but does not display on the list when searching in the assign screen.
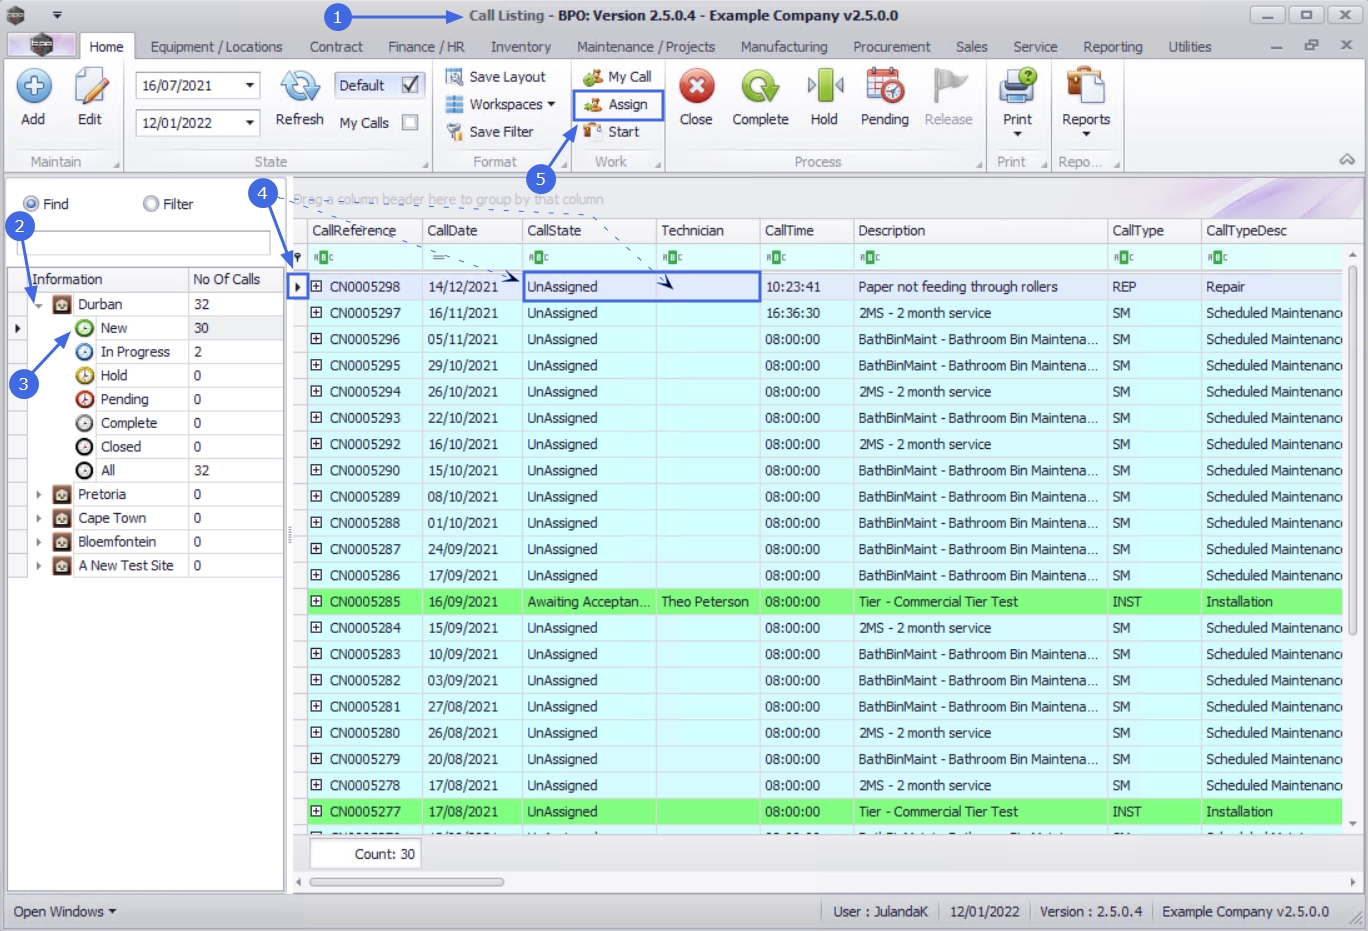
| Ribbon Access: Service > Calls |

- The Call Listing screen will be displayed.
- Select the Site.
- The example has Durban selected
- The
Status must be set to
New.
 Note that only calls in the New status can be assigned.
 - Select the
row of the
call you wish to
assign.
- Note the example:
- Status - New
- Call State - Unassigned
- Technician - not linked (blank)
- Note the example:
- Click on Assign.
- The Call Assignment: Reference No: [call ref number] screen will be displayed.
- Assigned To: Click on the down arrow to select the employee from the menu.
- Assignment Detail: This field will populate with the call reference description. Add the technician assignment details as required.
- Assignment Date: The current date and time will display.
- Date: Type in or click on the down arrow to use the calendar function to select an alternative date, if required.
- Time: Type in or use the arrow indicators to select an alternative time, if required.
- Assigned By: The person currently logged onto the system, and assigning the call, will display in this field. Click on the down arrow to select a different employee from the drop down list, if required.
- Create new Work Order: Click on the check box if you need to create a new work order. This feature is used if the technician needs to follow up on the same call, but for a different task, for instance when a call has been re-assigned. The assignment details needs to be changed accordingly.
- Open Work Orders: Click to select the Work Order Code to link the employee to the current open work order.
- When you have finished adding details to this screen, click on Save.

- You will return to the Call Listing screen.
- When you receive the Call Processing message to confirm;
- Call No: [call ref. number] has been assigned.
- Click on OK.

-
The call has now been assigned. Note the changes to the example;
- the Status - Is set to New (as before)
- the State - Is now Awaiting Acceptance
- the Technician column - now has an Assigned Technician Name

![]() Reminder:
Reminder:
- If the technician uses Tech Connect - he will accept the call on his device, and only then will the call move to the In Progress status.
- If the technician does not use Tech Connect - the call centre person will accept the call on his behalf and it will move to the In Progress status.
MNU.122.005