Service
Time Review - Flag Reviewed
Time review enables managers to allocate regular time logged by employees as SLA or non billable time. For example, if an employee books 4 hours against a work order, and the manager knows that the task should only require 2 hours to complete, then the manager can allocate 2 hours as Billable or SLA hours and the remaining 2 hours as Non Billable hours in the Time Review screen.
The Time Review flag must be set to Yes in Configurator.
| Ribbon Access: Service > Time Review |

- The Time Review listing screen will be displayed.
-
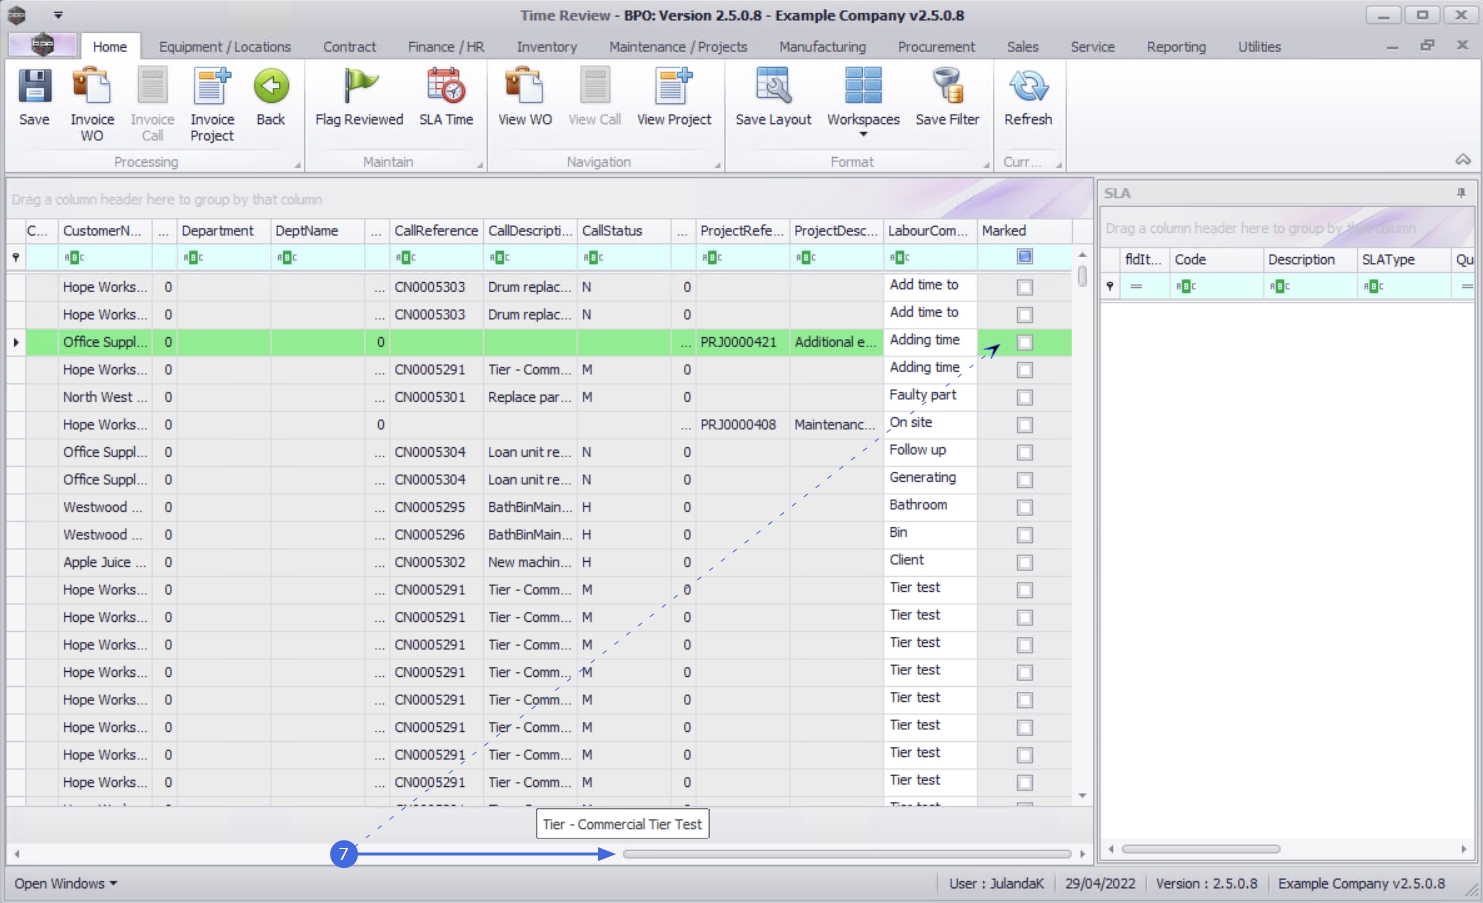
This screen is divided into 2 sections:
- The Work Orders frame and the
- SLA frame.
- The Work Order frame displays all work orders with time records.
- The SLA frame displays all contract inclusions linked to an item on the selected work order.

- Click on the row of the Work Order you would like to review time for.
Review Time - No Linked Craft Inclusions
- The item linked to the selected Work Order has no linked contract inclusions and therefore will have no SLA information.
 Note that only craft inclusions (CRFT) are affected by Time Review.
- The Billable column indicates whether the labour time is billable or non-billable.
- Regular Hours displays the time logged by the employee against the work order. This field cannot be changed.
- Any overtime logged against the work order will display in the Overtime Hours column. This field cannot be changed.
 All Work Orders created after the Time Review flag has been set to 'Yes' in the Configurator will have the Billable flag set to 'No' by default but all hours allocated as Regular Hours will be billable by default.
- Time allocated as SLA Hours on the work order, will be deducted from the client's contractual agreement as service or support time.
- Note on SLA Hours
- Time allocated as SLA Hours will be deducted from Regular Hours. The example has no time was allocated as SLA Hours and therefore the Regular Hours remained the same. If 1hour had been allocated as SLA Hours, then the Regular Hours would have changed to 1.25.
- The Overtime Hours field is not affected by changes in the Regular Hours, SLA Hours and Non Billable Hours fields.

- Use the Scroll bar at the bottom of the frame to scroll until the Marked column is visible.
![]() Note that the Marked field will remain unchecked as no time was allocated as SLA Hours. If time had been allocated as SLA Hours, then this field would have been checked.
Note that the Marked field will remain unchecked as no time was allocated as SLA Hours. If time had been allocated as SLA Hours, then this field would have been checked.
- Time allocated to Non Billable Hours will not be billed. Click in this field to type in or use the arrow indicators to allocate non billable hours for the work order, if required.
- Time allocated as non billable hours will be deducted from Regular Hours.
![]() Overtime Hours will not be affected by changes in the Regular Hours, SLA Hours or Non Billable Hours fields.
Overtime Hours will not be affected by changes in the Regular Hours, SLA Hours or Non Billable Hours fields.
Total Hours = Regular Hours + Overtime Hours + SLA Hours + Non Billable Hours.
- Total Hours is greyed out and cannot be adjusted.

- When you are done reviewing the time click on the Is Reviewed check box or click on Flag Reviewed to mark the check box.
- Click on Save.
- When you receive the Time Review Processing message to confirm that;
- Time Review processing successfully updated.
- Click on OK.

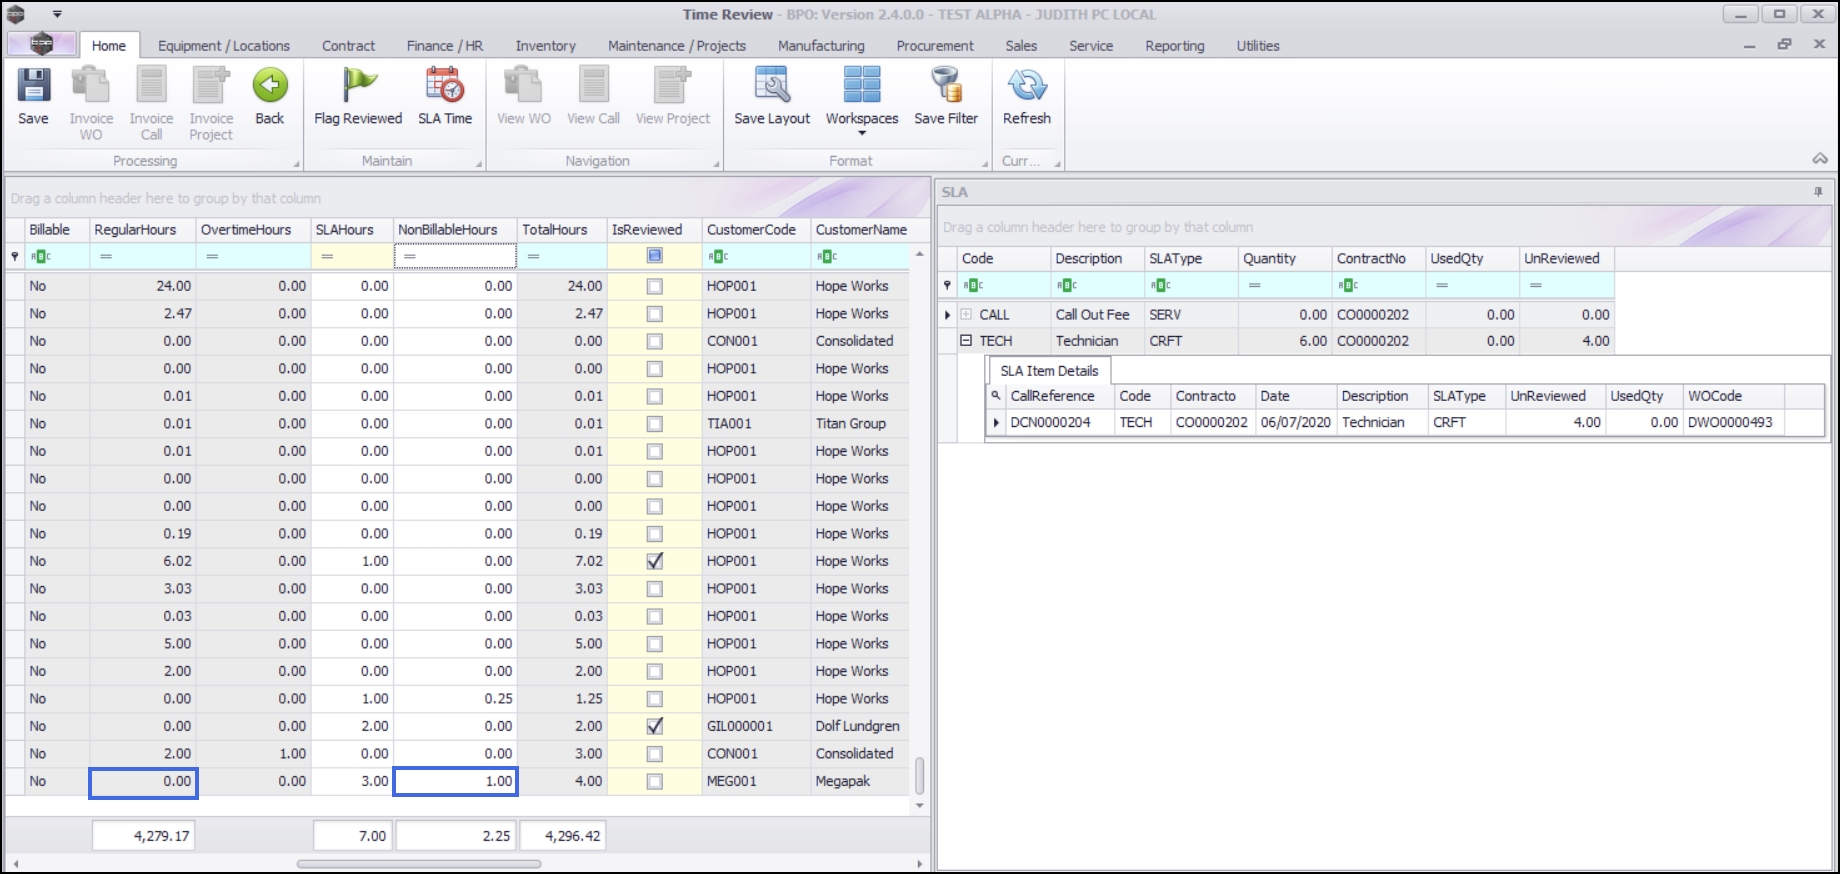
Time Review with Linked Craft Inclusions
- In this image, the item on the selected work order has linked contract inclusions and they are displayed in the SLA section.
- Note 1: Although all contract inclusions linked to an item on a selected work order will be displayed in the SLA section, only craft inclusions (CRFT) are affected by time review.
- Note 2: The information displayed in the SLA section can also be viewed in the Call screen - SLAs tab and the Contract Balances screen. In the Contract Balances screen, only SLA information for craft inclusions is displayed.

In the SLA panel,
- the SLA Item Details for the
- the craft inclusion linked to the item on the selected work order will auto display.

- Code: This shows the code of the contract inclusion.
- Description: This shows the description of the contract inclusion.
- SLA Type: This shows the type of the contract inclusion.
- Quantity: This shows the quantity of the contract inclusion.
- Contract No: This shows the contract number where the item on the selected work order is linked to.
- Used Qty: This shows the quantity of the contract inclusion that has been used up.
- UnReviewed: This shows time logged against the item on the selected work order that has not been reviewed.

In the SLA Item Details panel:
- Call Reference: This shows the call number where the selected work order is linked to.
- Code: This shows the code of the contract inclusion.
- Contract No: This shows the contract number where the item on the selected work order is linked to.
- Date: This shows the date when time was logged.
- SLA Type: This shows the type of the contract inclusion.
- UnReviewed: This shows time logged against the work order that has not been reviewed.
- Used Qty: This shows the SLA hours that have been allocated to this craft inclusion.
- WO Code: This shows the work order number of the selected work order.

In the work orders panel, scroll to the right until you see the fields described below;
- The Billable field shows whether the labour time is billable or non-billable. In this example, the billable field is No.
- The Regular Hours field shows the employee time logged against the work order. This field cannot be changed. In this example, the Regulars Hours = 4.
- If an employee logs overtime against a work order, it will be displayed in the Overtime Hours field. This field cannot be changed. In this example, no Overtime Hours have been logged.
- Note: All work orders that are created after the Time Review flag has been set to Yes in the Configurator will have the Billable flag set to No by default but all hours allocated as Regular Hours will be billable by default.

- SLA Hours: Time allocated to this field will be deducted from the service / support time from a client's contractual agreement.
- You can choose to allocate a portion of or allRegular Hours logged by an employee as SLA Hours.

Allocate 'All' Regular Hours
- To allocate all Regular Hours as SLA Hours, click on SLA Time.

- An Input Validation message will pop up asking you;
- Are you sure you want to move all the regular hours to SLA for the selected items.
- Click on Yes.

- All Regular Hours will now be allocated as SLA Hours.

Allocate a 'Portion' of Regular Hours
- To allocate a portion of the Regular Hours as SLA Hours, type in the number of hours you wish to apportion as SLA Hours.
- In this example, 3 hrs have been allocated as SLA Hours.
- The time allocated as SLA Hours has now been deducted from Regular Hours. Click away from this field to see the changes. In this case, Regular Hours now display as 1.
- Note: The Overtime Hours field is no affected by changes in the Regular Hours, SLA Hours and Non Billable Hours fields.

- Scroll right until you see the Marked field.
- Since time was allocated as SLA Hours, this field is now be checked.
- Scroll left to go back.

- Non Billable Hours: Time allocated to this field will not be billed. In this example, 1 hr was allocated as non billable hours.
- The time allocated as Non Billable Hours has now been deducted from Regular Hours. Click away from this field to see the changes. In this case, Regular Hours field now has 0 hrs.
- Note: The Overtime Hours field is not affected by changes in the SLA Hours or Non Billable Hours fields.
- Total Hours = Regular Hours + Overtime Hours + SLA Hours + Non Billable Hours.
- This field is greyed out and cannot be changed.

You can now mark the time as reviewed by either clicking on the Is Reviewed check box or the Flag Reviewed button.

Review Time using the 'Flag Reviewed' Button
- Click on Flag Reviewed.

- An Input Validation message will pop up asking you;
- Are you sure you want to flag the following items.
- Click on Yes.

- The Is Reviewed field will now be checked.

Save Reviewed Time
- Click on Save.

- A Time Review Processing message will pop up telling you;
- Time Review processing successfully updated.
- Click on Ok.

- Scroll to the right to view more fields.

In the SLA panel,
- the Quantity will now be auto adjusted to reflect the balance of unused service or support hours left after time has been reviewed for the selected craft inclusion.
- The Used Qty will now show the total number of service or support hours that have been consumed for the selected craft inclusion.
- The UnReviewed field will now show the total number of hours that have not been reviewed for the selected craft inclusion.

In the SLA Items Details panel,
- The UnReviewed field will now show the total number of hours that have not been reviewed on the selected call.
- The Used Qty will now show the total number of service or support hours that have been consumed on the selected call.

- If multiple time records were logged against a craft inclusion, all the individual time records will be displayed in the SLA Item Details panel.
- In this image, three time records relating to the ADMN craft were logged and
- each individual transaction for ADMN can be seen in the SLA Item Details.

- Scroll to the right in the work orders section to view more columns.
- In this image, the first two time records were reviewed and 1hr and 2hrs were allocated as SLA Hours respectively.
- These individual transactions can be viewed in the SLA Items Details panel, where 1 hr and 2 hrs are displayed in the Used Quantity field and 0 is displayed in the UnReviewed field for both transactions.

In the SLA panel:
- the Used Quantity is the summation of all the
- individual Used Quantity transactions displayed in the SLA Item Details frame. In this case Used Quantity = 1 + 2 + 0 = 3.
- the Quantity = Initial Quantity (you can view this in the Balances screen) - Used Quantity. In this case it is 7.

- In the work orders panel, the last record is not reviewed and all hours are still allocated as Regular Hours.
- This transaction can also be viewed in the SLA Item Details panel, where UnReviewed = 2 and Used Quantity = 0.

In the SLA panel:
- the UnReviewed (hours) are the summation of all the
- individual UnReviewed transactions displayed in the SLA Item Details frame. In this case, Unreviewed = 0 + 0 + 2 = 2 since there is only 1 transaction that has not been reviewed yet.

- Note: For a record to be removed from this screen, the Work Order has to be closed.
MNU.075.001