We are currently updating our site; thank you for your patience.
CRM Basics
Add a Contact
Each customer needs to have a contact , in order to:
- Call
- Send Emails
- Send Activity Notes
A customer must have a contact linked, who is set to Receive Sales Calls.
It is important to remember that additional contact people will need to be configured later within Nucleus Service:
- In order for a customer to be approved within BPO, an Accounts Contact is required. This contact will receive invoicing.
- Each customer should have a Primary Contact. This person will receive notifications regarding service call status changes.
- You can also add a contact in the Save Customer page.
| Access: Webpage - http://[servername]:[portno]/BPOCRM/User.aspx |
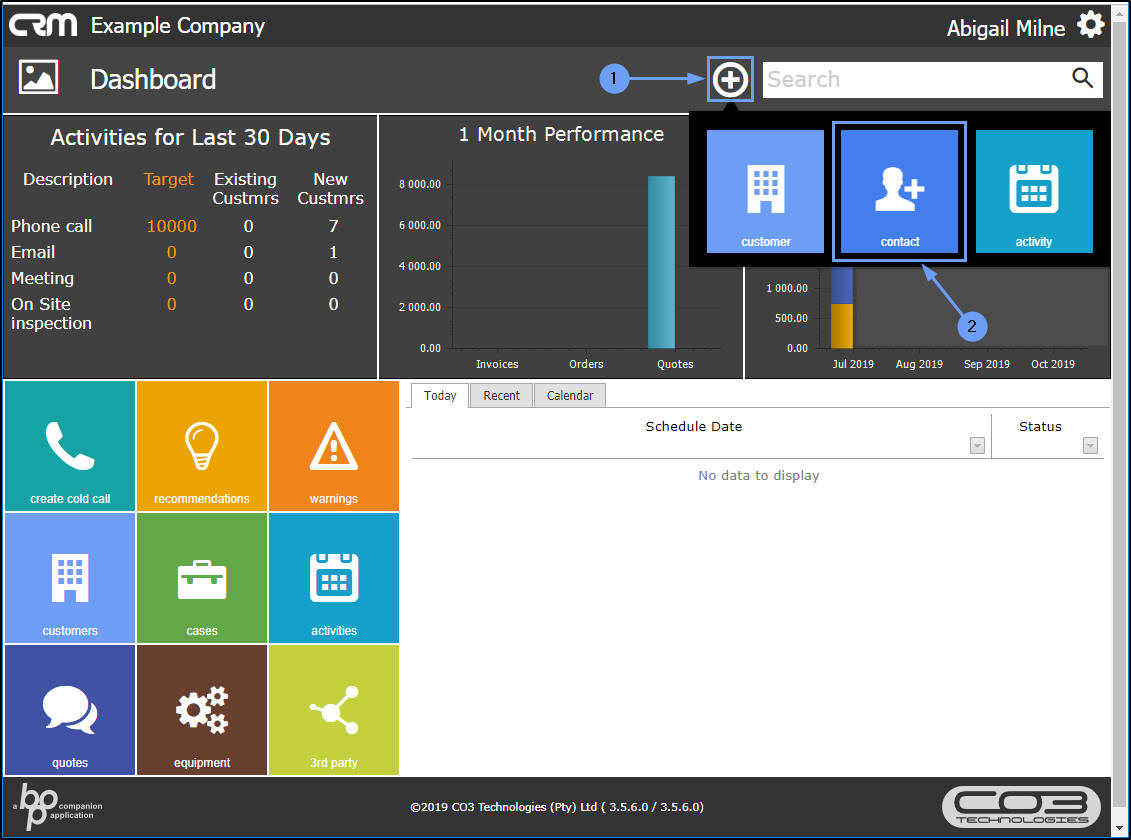
Add New Contact from the Homepage
- Click on the Add new items... icon.
- Click on the Contact tile.
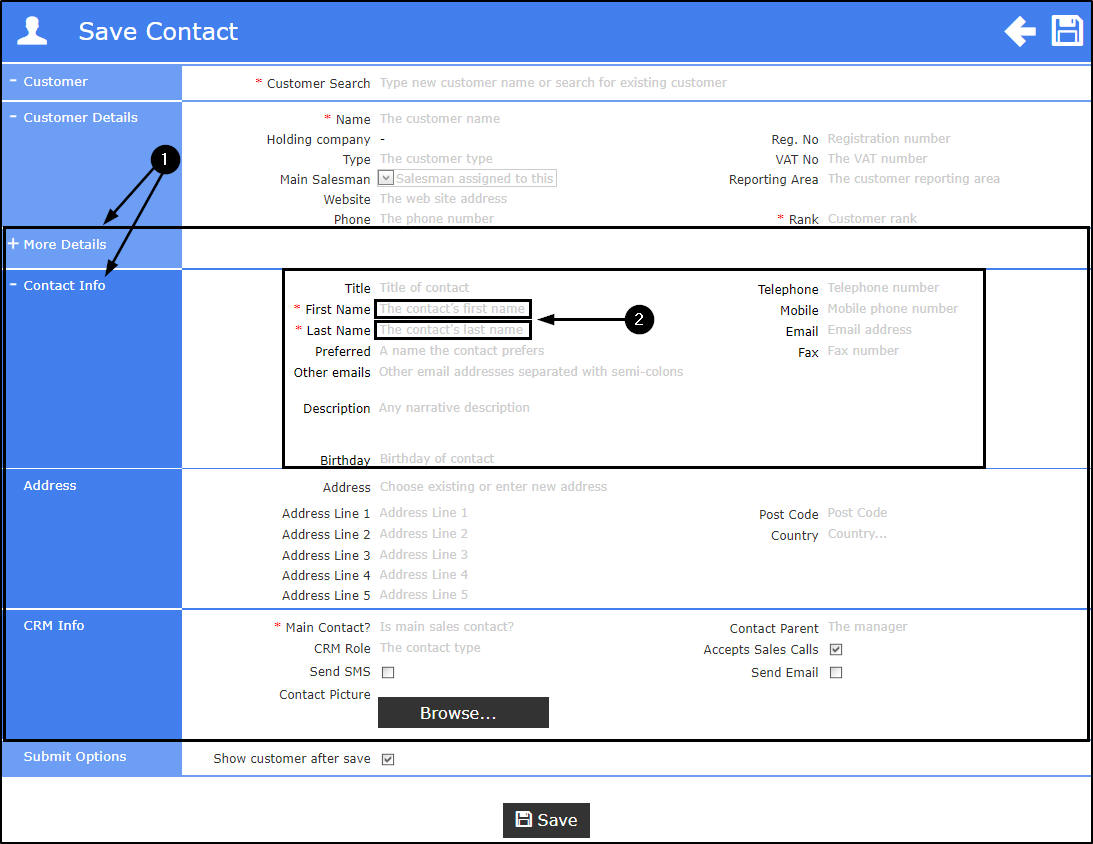
Contact Info Mandatory Fields
- The Save Contact screen will open with the More Details section automatically expanded to display the Contact Info frame.
- Click in the mandatory fields [*] and type in the contact details.
- Note: that only the First Name and Last Name fields are mandatory but you can add details to all the fields in this section if you have the information on hand.
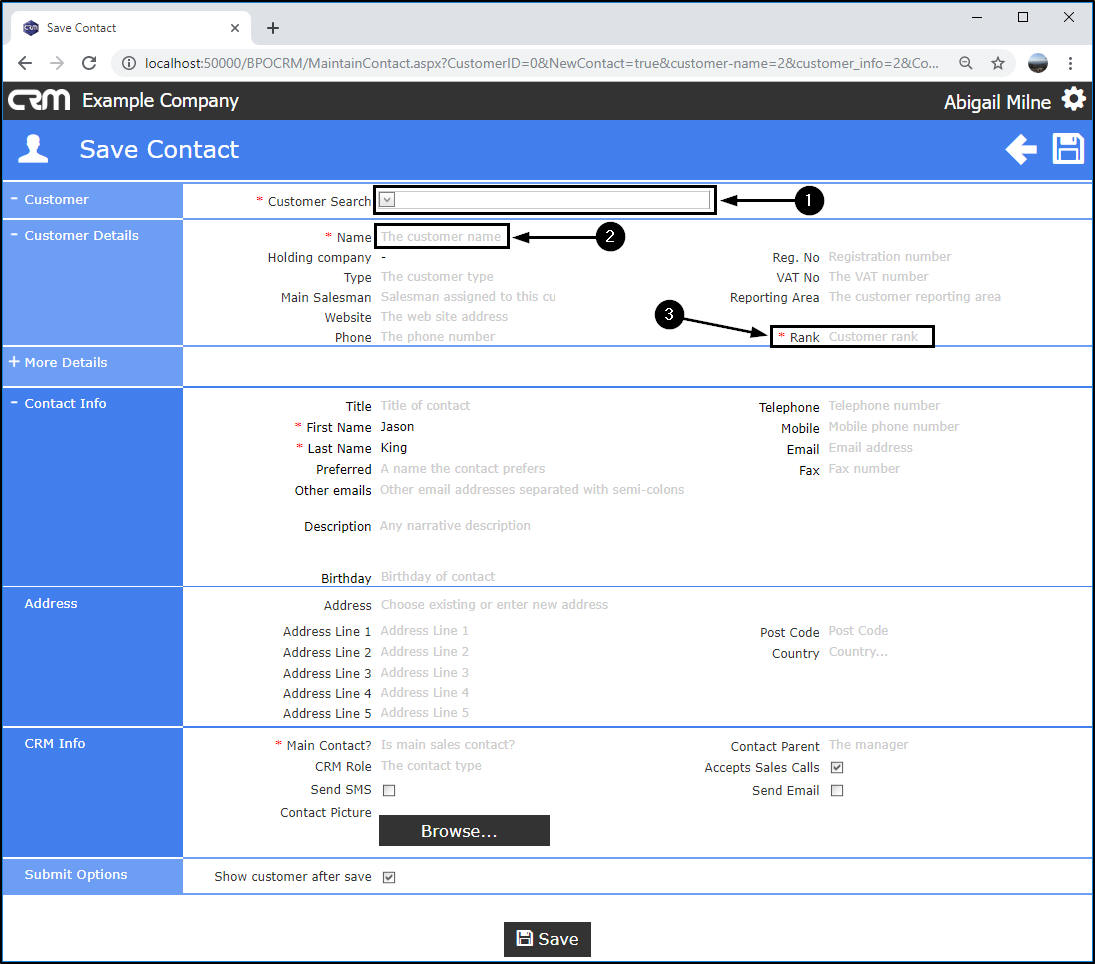
Customer Search
New Customer
If you are adding the contact details for a new customer:
- Go to the Customer frame, click in the Customer Search field and type in the new customer name.
- Go to the Customer Details frame. As you click anywhere in this frame, the Name field will auto populate with the same text that was typed into the Customer Search field.
- Click in the Rank field and select from the drop-down list the Rank Call Cycle for this new customer (e.g. Platinum Rank = the call cycle for this customer is every 15 days).
- Rank is based on how much you
value this customer and helps to define the call cycle per client.
For example, a
Wood
ranking indicates that you will only contact this customer every
365 days
- this customer is not valuable to you. However a
Platinum ranking indicates that this is a
very important customer that you wish to maintain a good relationship with, therefore you will contact them every
15 days.
Each customer must be linked to a Rank in CRM. Customer Rank can also be linked in the Customer Maintenance screen in Nucleus Service.
The above mentioned fields are mandatory [*] but you can add details to all the fields in these frames if you have the information on hand.
Current Customer
If you are adding the contact details for a current customer:
- Hover over the Customer Search field, a drop-down arrow will be revealed. Click on this arrow to display a list of all the customers on the system.
- Select the relevant customer to be linked to the new contact.

Select an Address
If this is a current customer already loaded into CRM, you can select an address.
- Hover over the Address field, a drop-down arrow will be revealed. Click on this arrow to display a list of all the shipping addresses linked to this customer.
- Select the relevant address to be linked to the new contact.
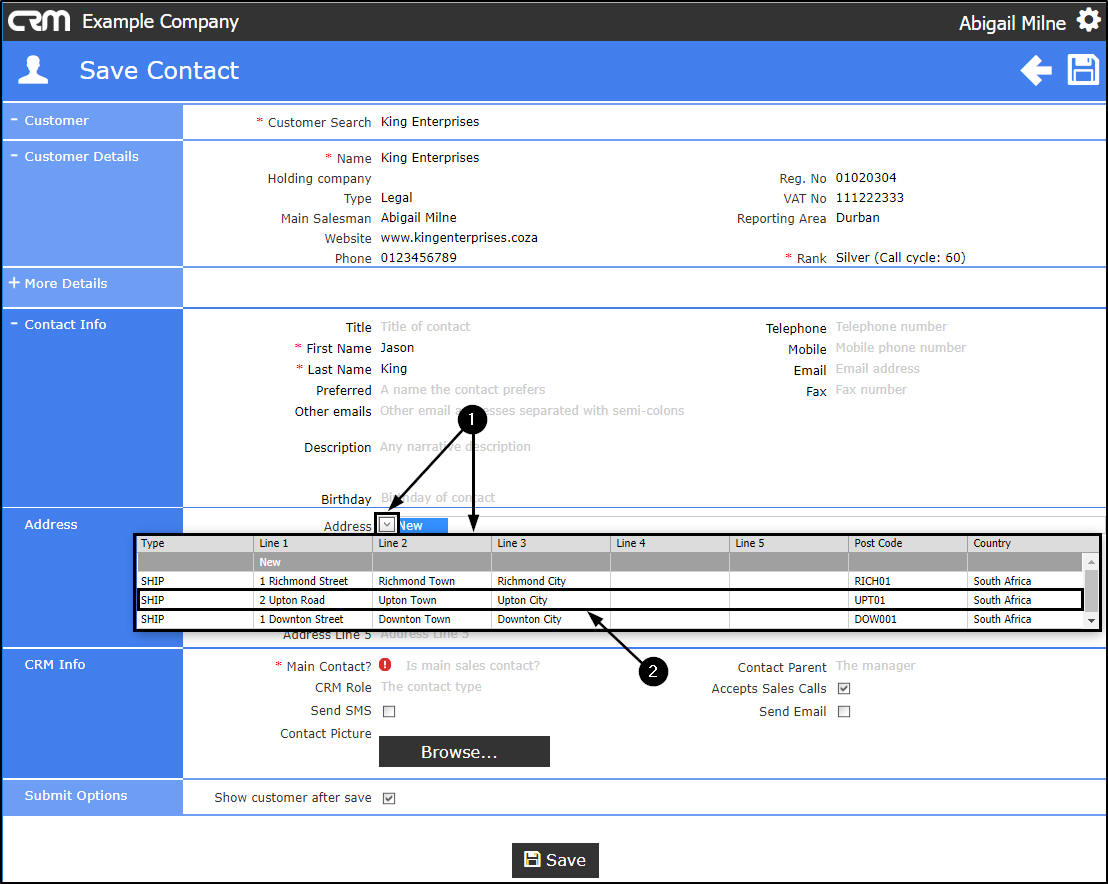
Create a New Address
If the new contact address is not on this list:
- As you click in the Address field ensure that you select New.
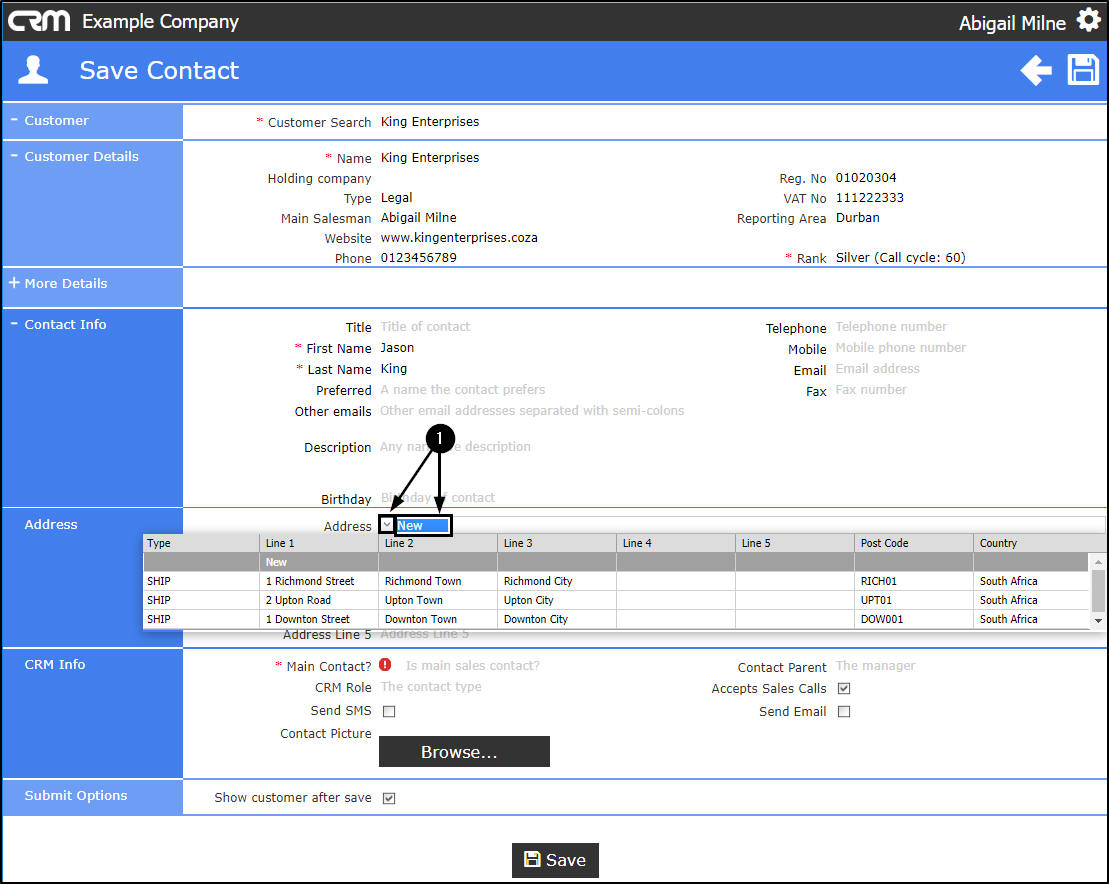
- With New selected,
- You can now type in the new address in all the relevant fields

The 'CRM Info' frame.
Move down the page to the CRM Info frame.
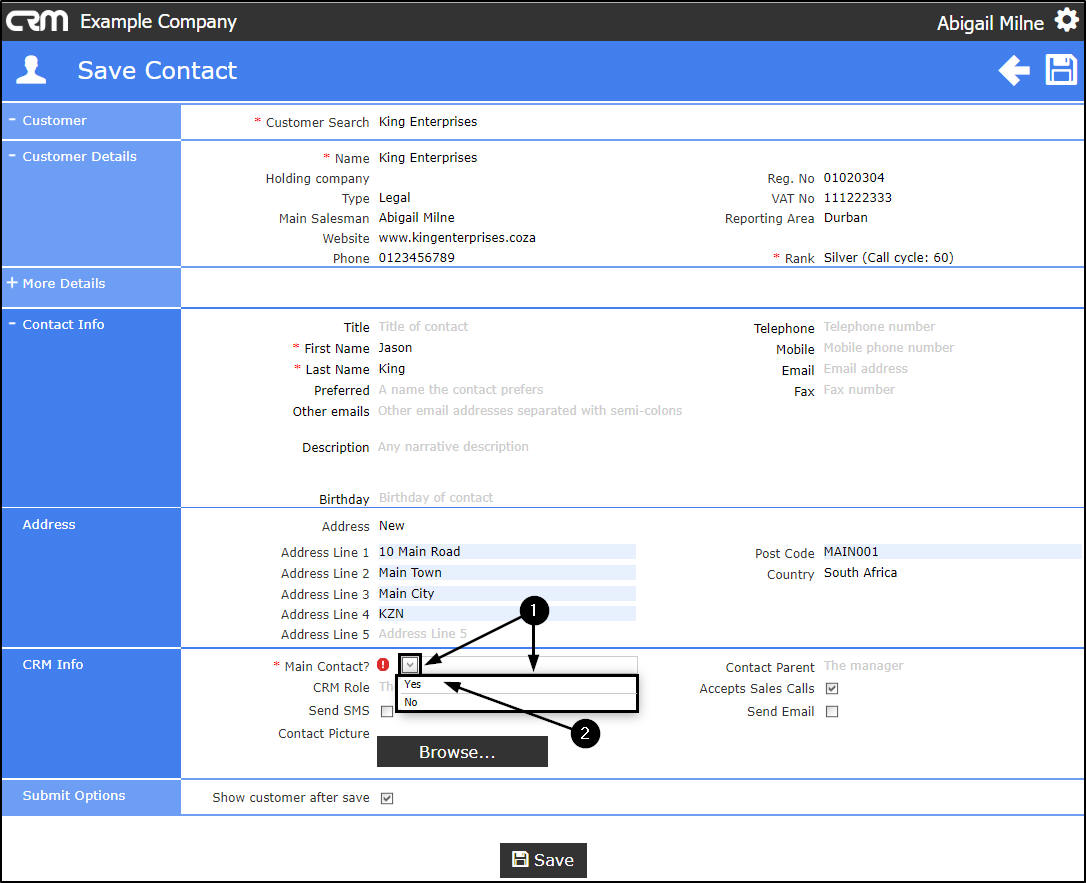
Main Contact
- Hover over the Main Contact field to reveal a drop-down arrow. Click on this arrow to display a drop-down list with the options: Yes and No.
- In this example, Yes is selected.
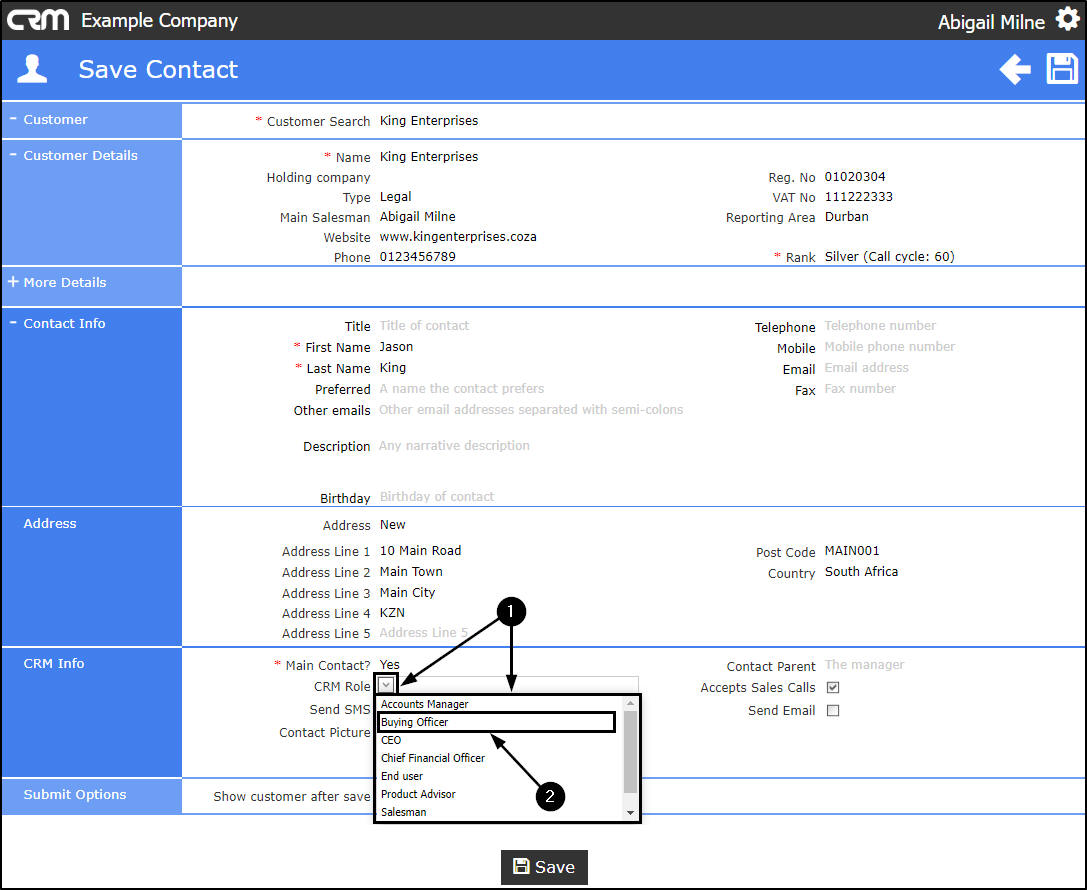
CRM Role
- Hover over the CRM Role field to reveal a drop-down arrow. Click on this arrow to display a Contact Type/Role list.
- Select from this list the specific role that this contact holds in their company. In this example, Buying Officer is selected.
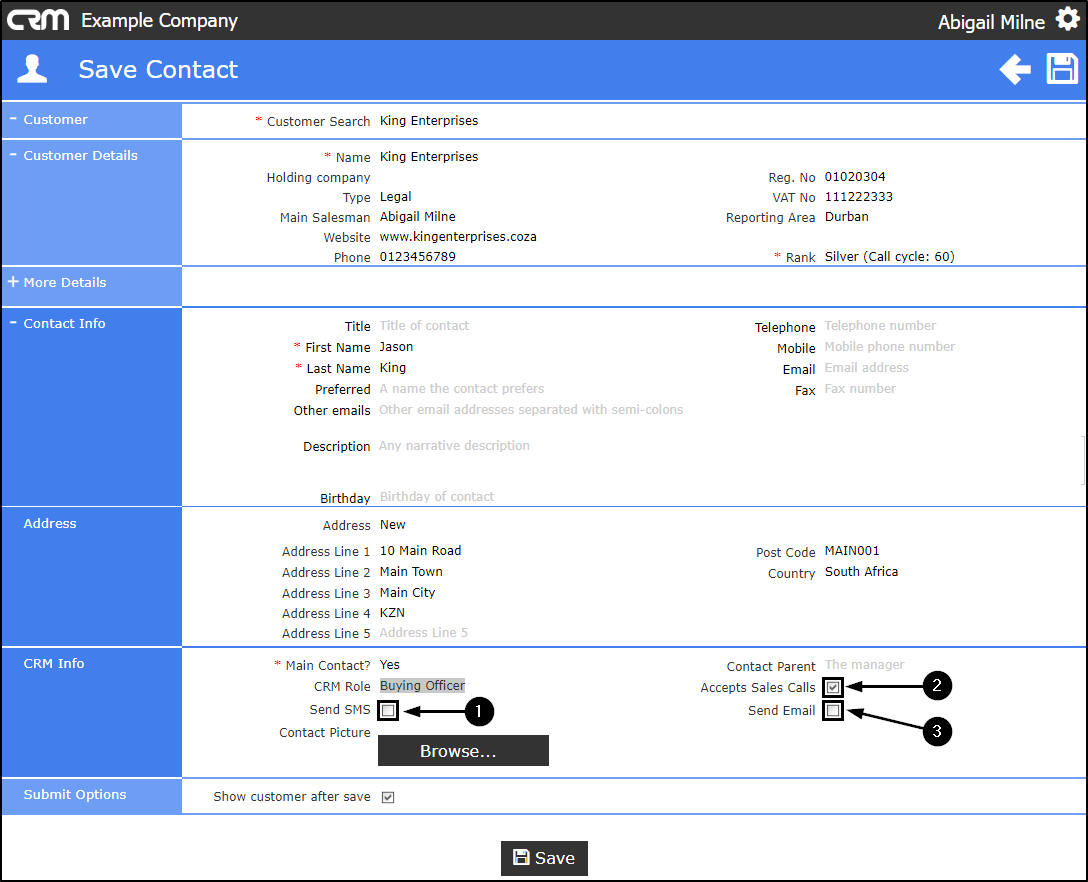
- Send SMS : Select this check box if this contact accepts SMS communication.
- Accept Sales Calls : Select this check box if this contact accepts sales calls.
- Note : This check box is auto selected by the system, you can un-check it, if required.
- Send Email : Select this check box if this contact accepts Email communication.
Link a Contact Picture
- Click on Browse...
- An Open screen will pop up.
- Double click on the file that contains the image.
- Click on the image.
- Click on Open.
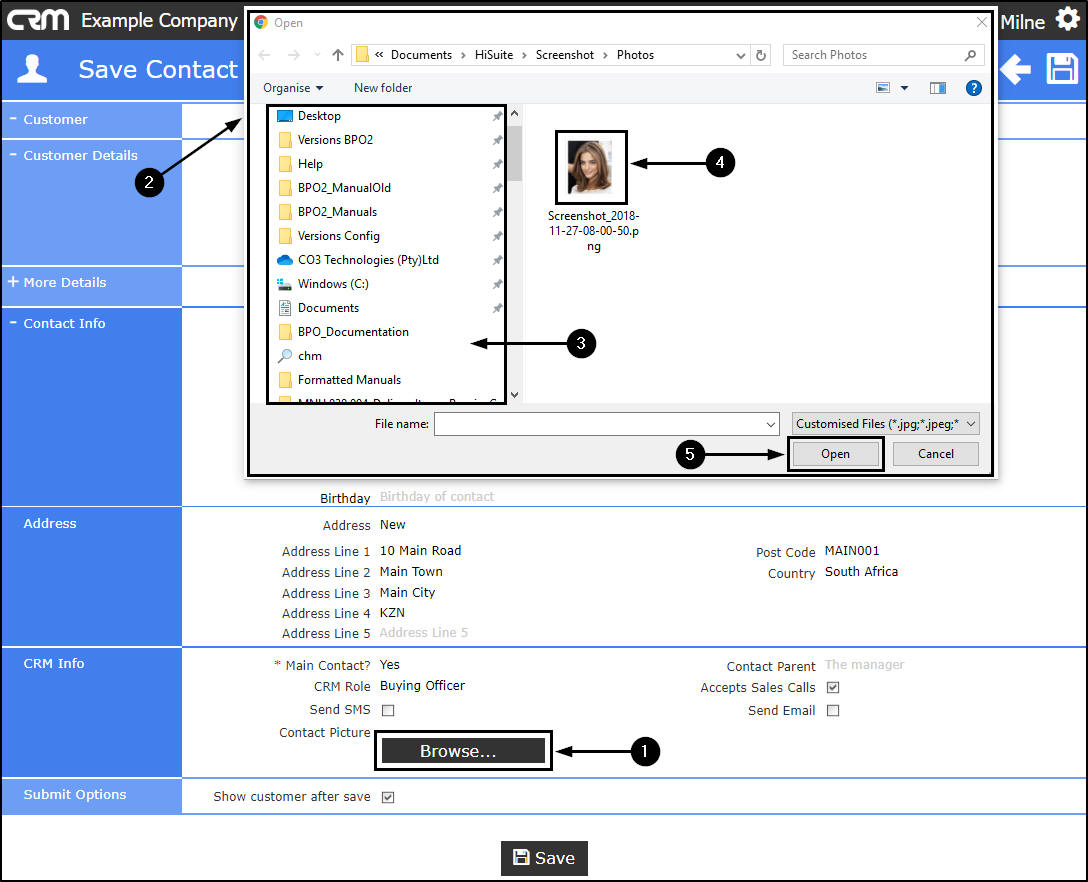
- The contact picture will be inserted into this CRM Info frame
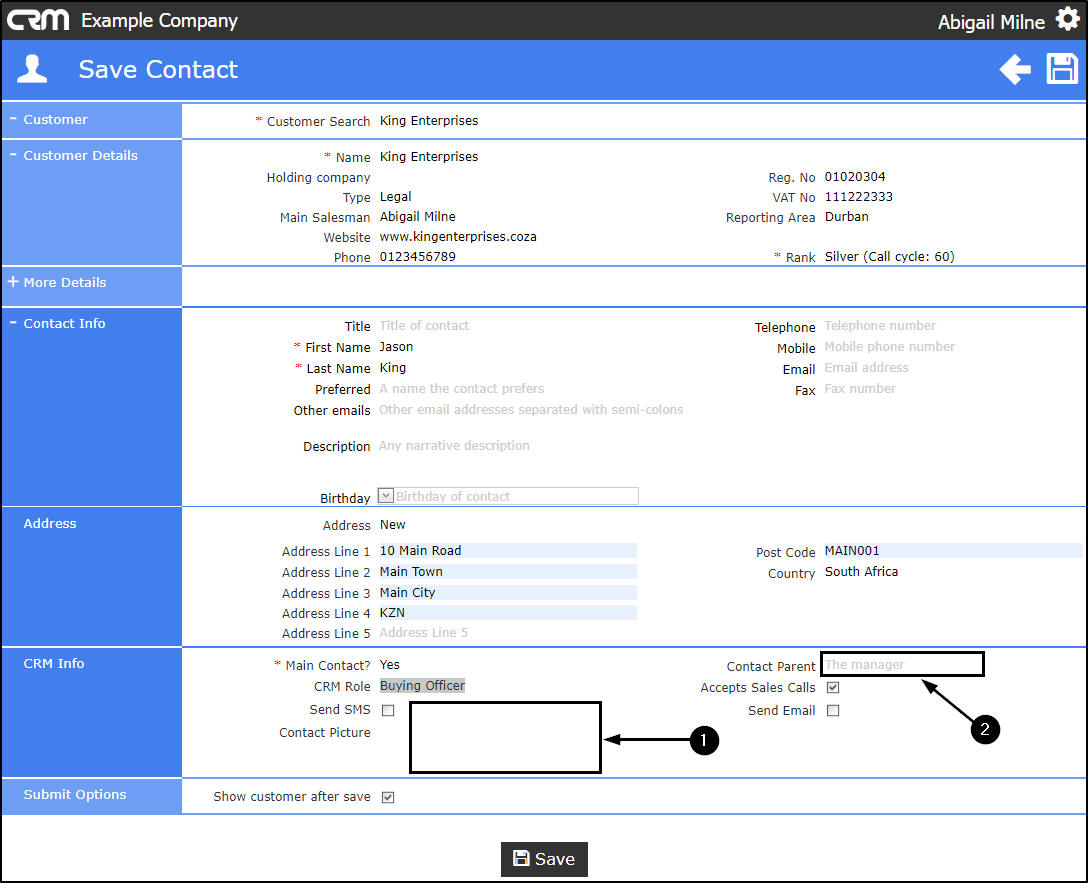
Contact Parent
- Click in this field and type in the 'report to' person for this contact e.g. the Buying Manager
- Note: If there are Contact Parents set up against this customer, a drop-down arrow will appear as you hover over this field. Click on this arrow to display a list of contact parents from which you can make a selection.
Submit Options
Show Customer After Save
- This check box is auto selected. You can un-select it if you do not wish to view the customer details in the Homepage after you have saved this contact.
Save New Contact
- Click on Save.
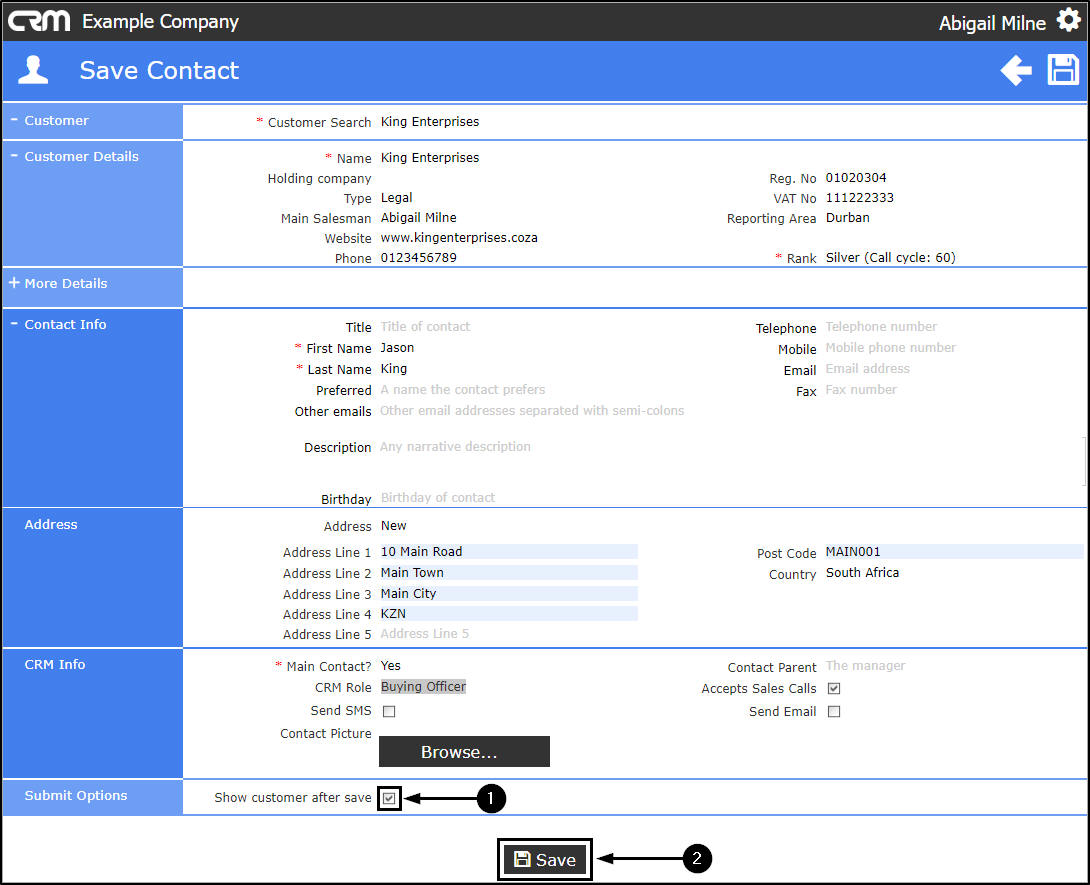
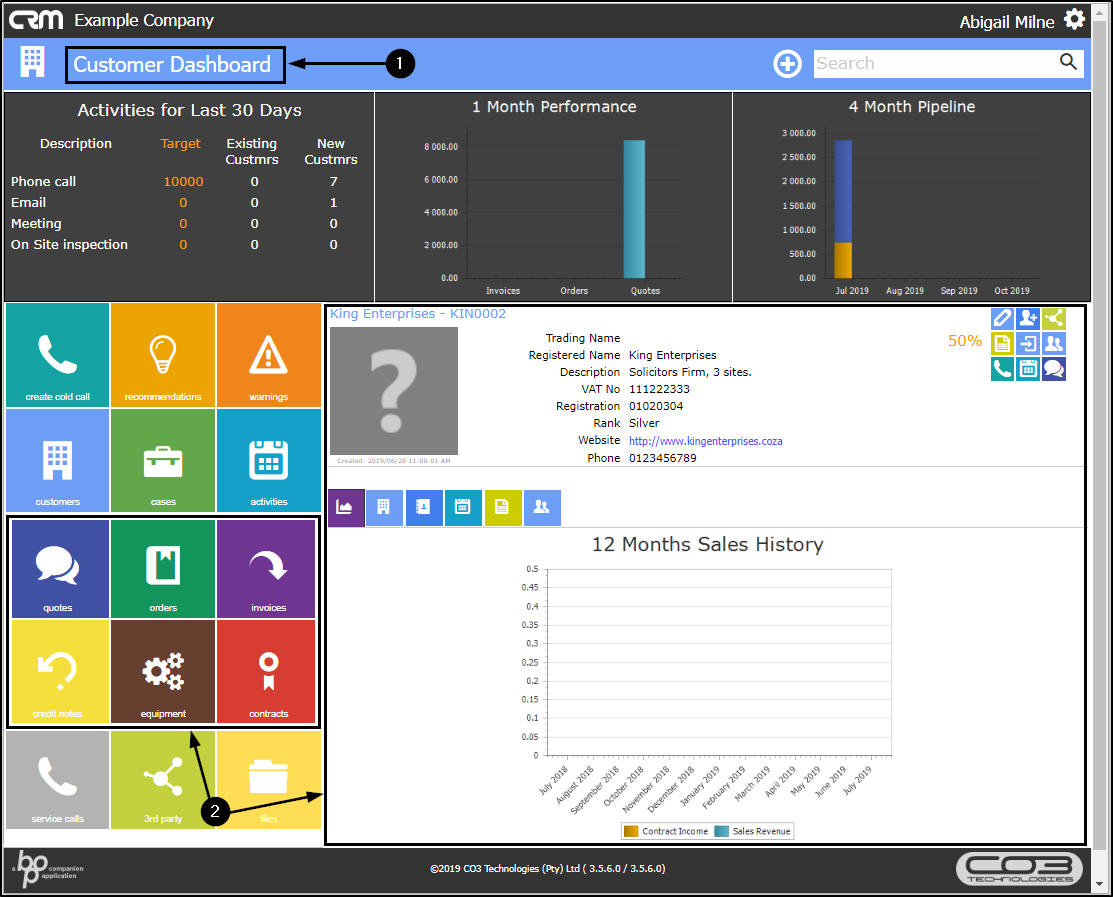
- You will either return to the Homepage or Customer Homepage depending on your selection in the previous step.
- If you selected to 'Show Customer After Save', then you will now be able to view the customer details (e.g. 12 Months Sales History) in this screen as well as customer-specific tiles that are not available in the Main Homepage.
CRM.000.005