We are currently updating our site; thank you for your patience.
CRM Customers
Customer Actions Buttons
You can access and add more customer information to CRM using the customer Action buttons, available in both the Customers listing screen and the Customer Dashboard (Customer Home page).
| Ribbon Access: Webpage > http://[servername]:[portno]/BPOCRM/User.aspx |
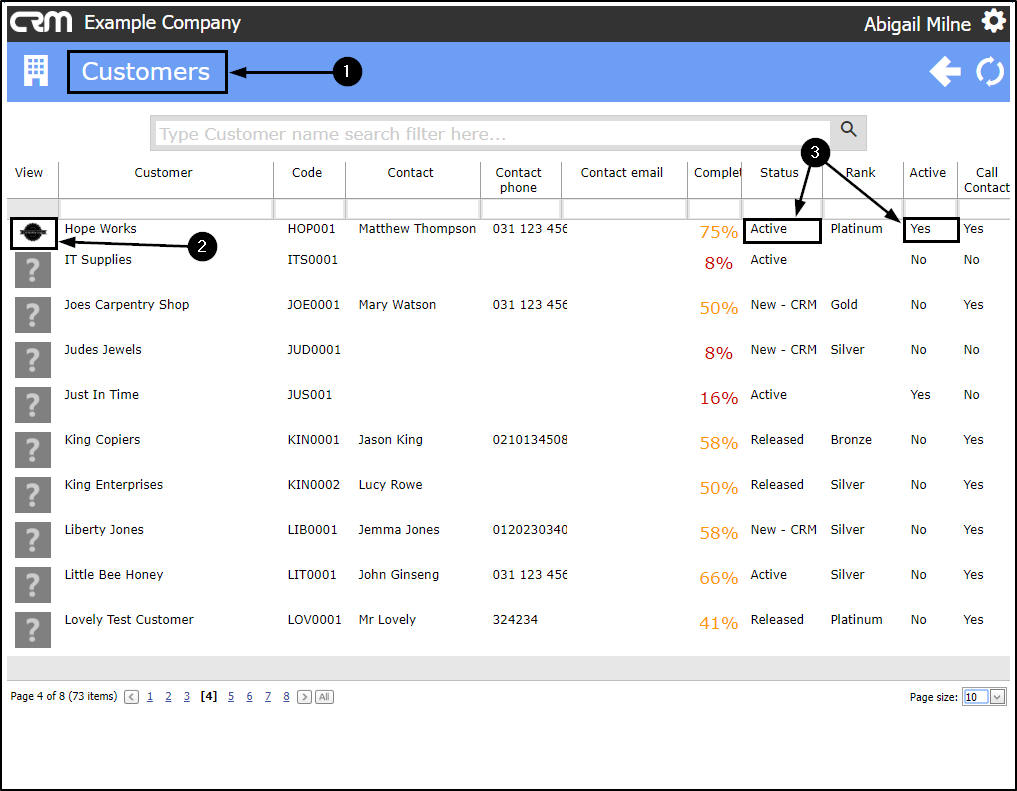
Navigate to the Customers listing page:
- In the Dashboard (Home page),
- Click on the Customers tile.
- Note: The number in the top left of the tile indicates how many customers that you are linked to.
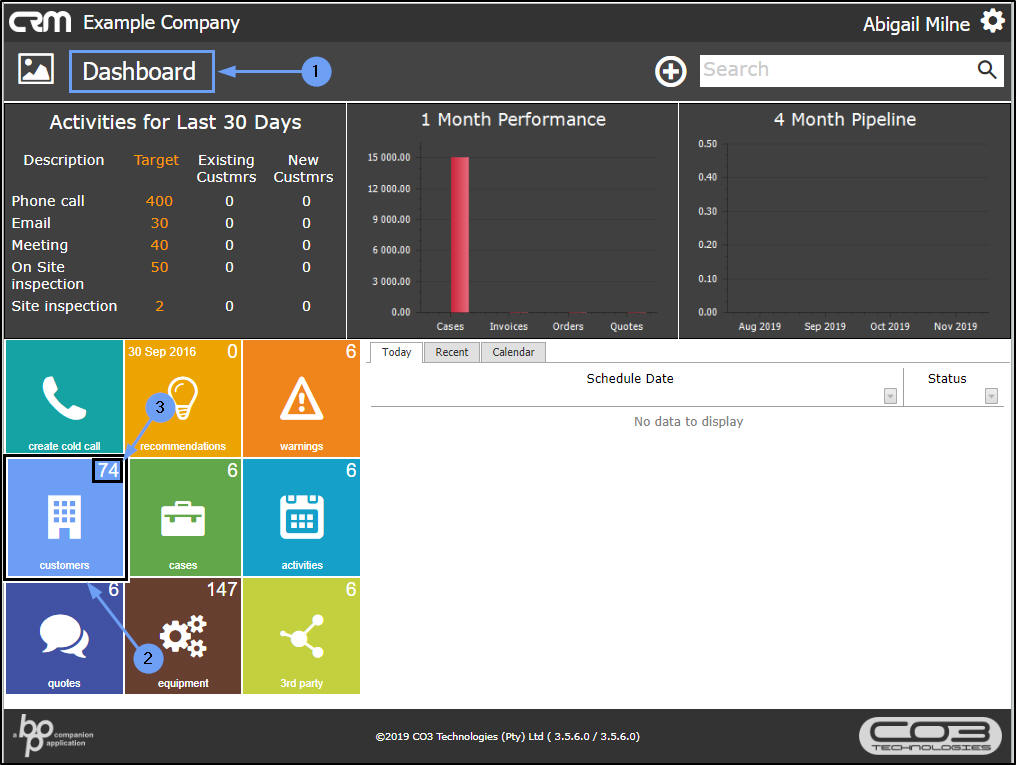
- The Customers (listing) page will open.
View Active or Released customer Action buttons
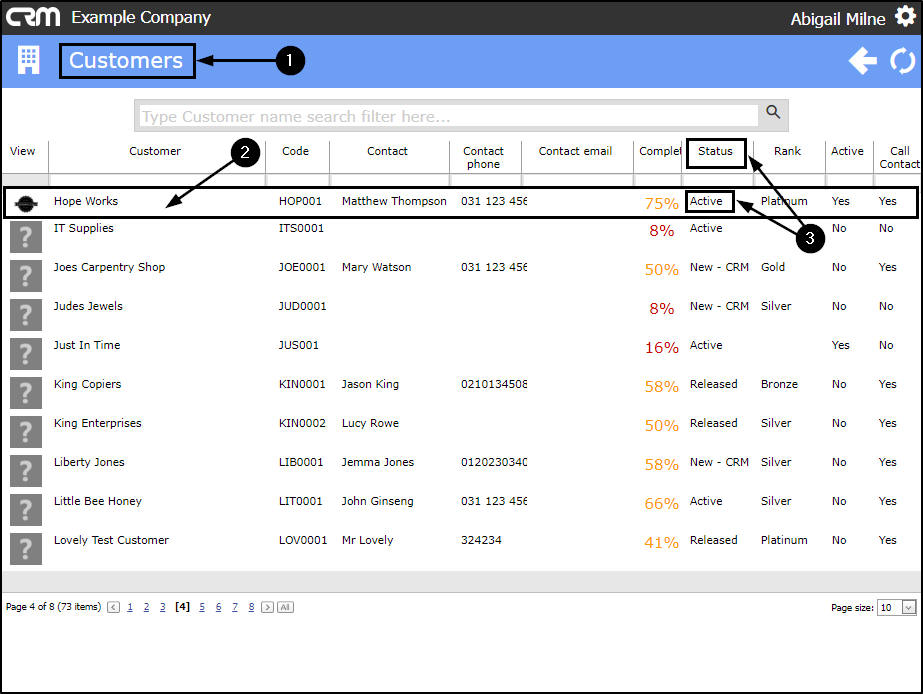
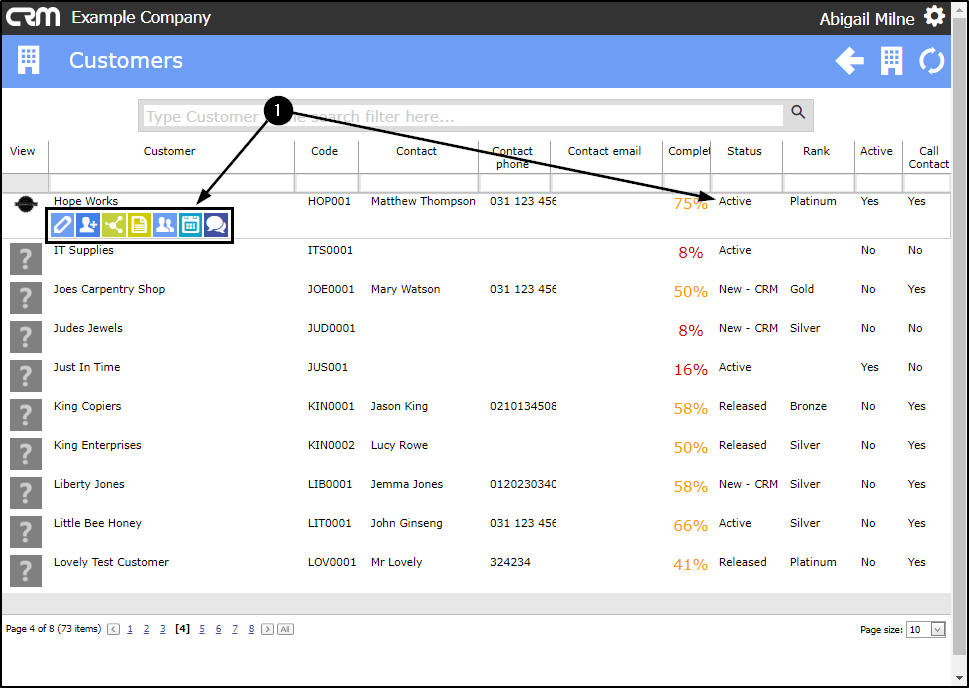
- Hover anywhere in the row of a selected customer.
- You will note that the customer status in this example is Active. (Active and Released customers will display the same Action buttons.)
- The Active customer Action buttons will be displayed:
- Edit Customer
- Add Contact
- Add Third Party
- Add Note
- Maintain Customer Salesmen
- New Activity
- New Quote
View New-CRM customer Action buttons
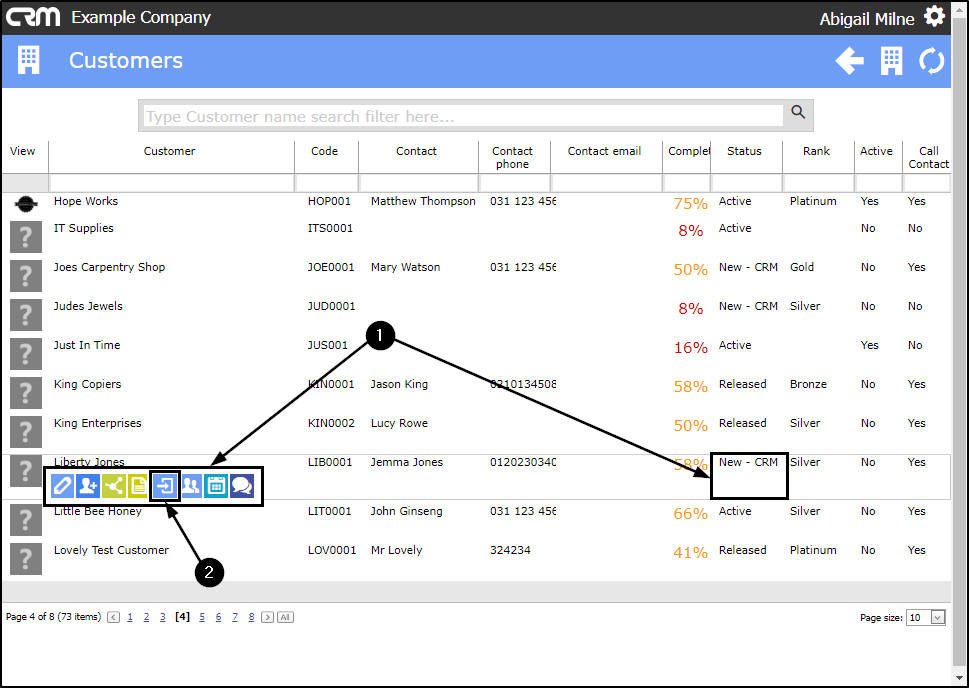
- Hover anywhere in the row of a New - CRM customer.
- With New-CRM customers, the Action buttons displayed will include the Release Customer button.
You can either view and add customer information directly from this Customers page or you can navigate to the selected Customer Dashboard to view the same buttons.
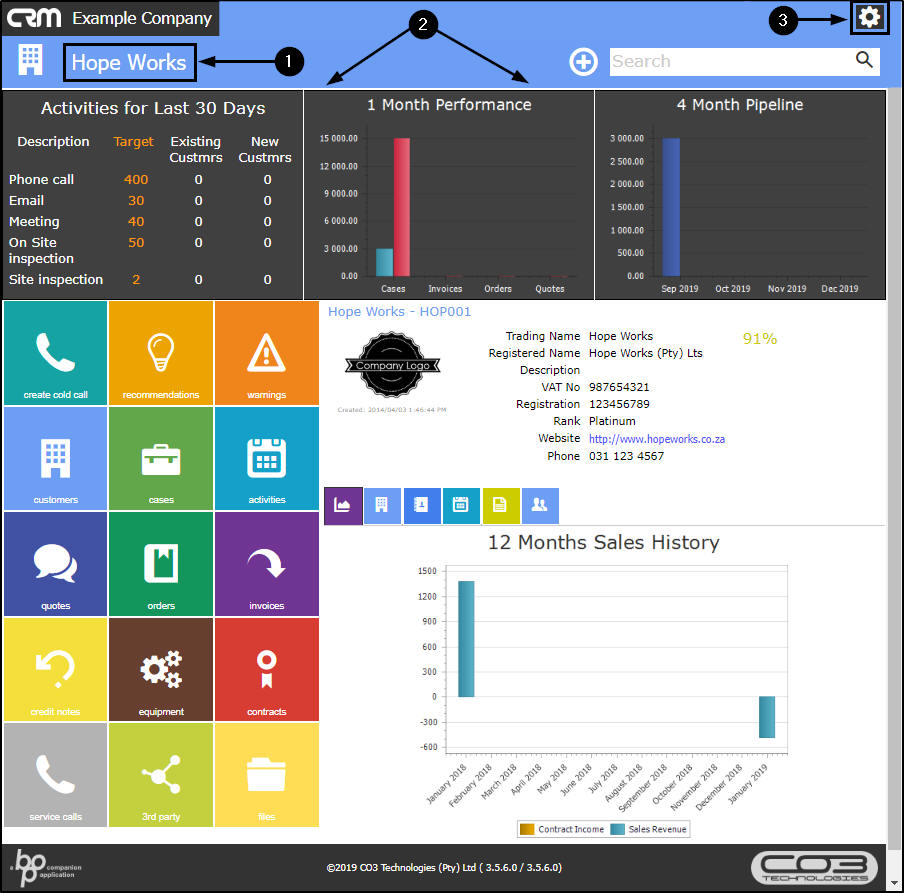
Navigate to the Customers Dashboard(Customer Home page) page:
- In the Customers listing page,
- Select a specific customer by clicking on the icon next to that customer name, in the View column.
- You will note that the customer selected in this example (Hope Works) is an Active customer - this will affect the Action button options that will be available.
- The Customer Dashboard (Customer Home page) page will open.
- Note: If you wish to have more space on this page to view your customer information more clearly, you can change your page
Settings.
- This will hide the customer dashboard panel.
-
Select the 'Hide dashboard panel on customer page' setting
- Click on the Settings icon.
- The Setting panel will be expanded.
- Select the 'Hide dashboard panel on customer page' checkbox.
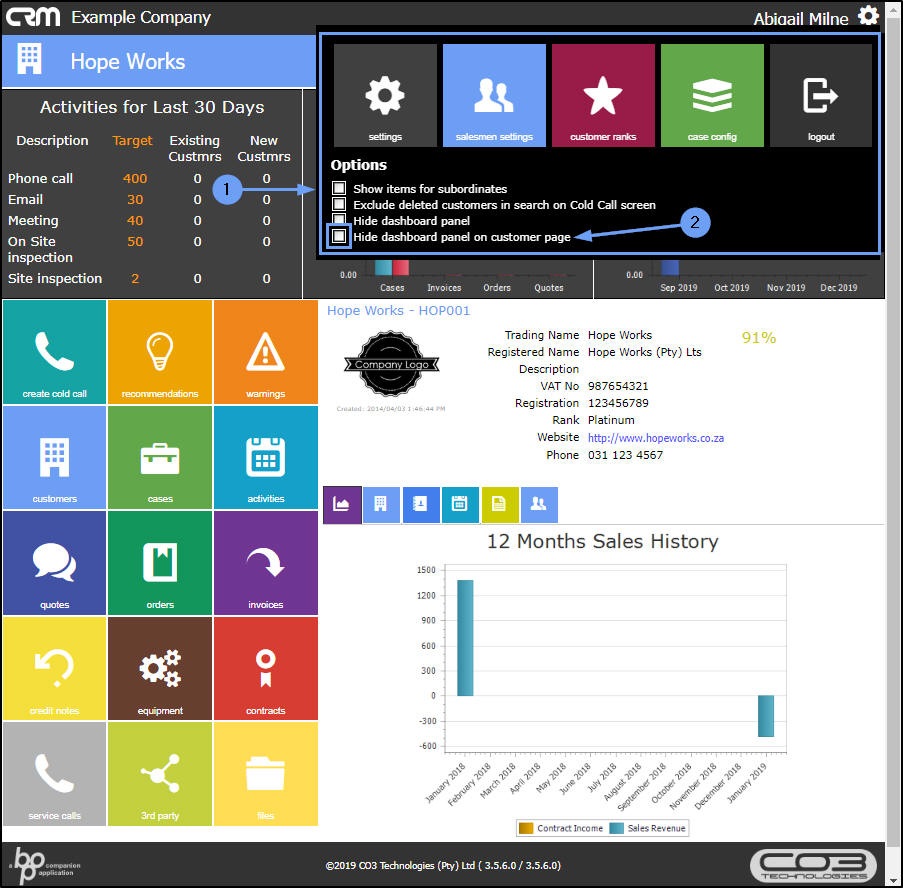
- As you select the check box,
- The Dashboard panel will disappear from the screen.

- Click outside of the Settings frame to view the full page without the Dashboard.
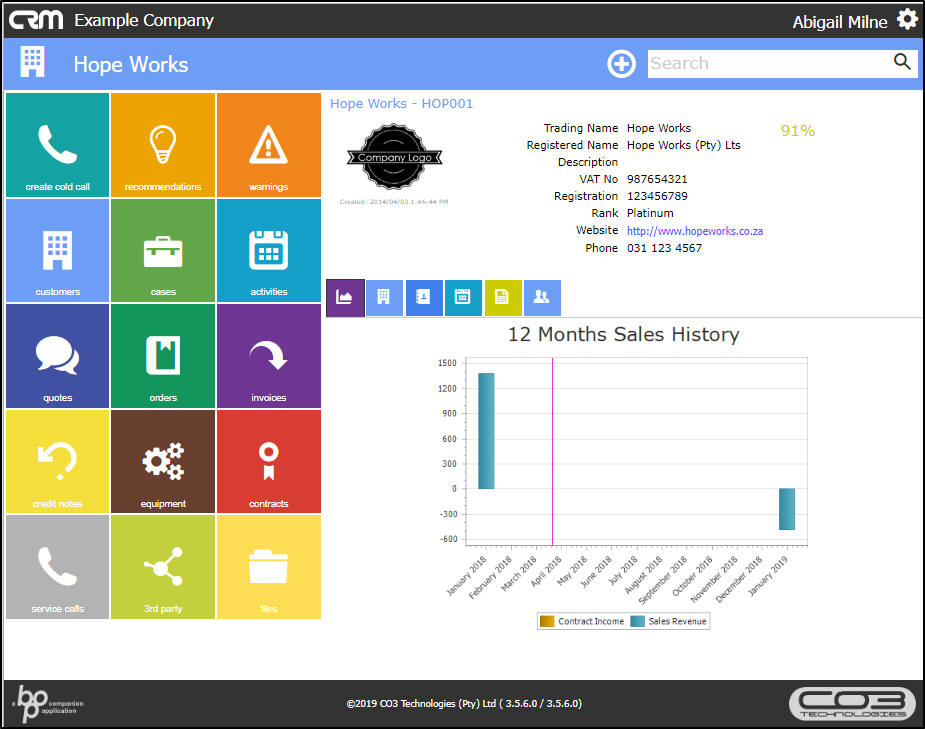
View Customer Information: Action Buttons
- Hover anywhere over the Customer Information frame to display the Action buttons.
- Edit Customer
- Add Contact
- Add Third Party
- Add Note
- Maintain Customer Salesman
- Create Cold Call
- New Activity
- New Quote
- Hover over a specific Action button to display that button description:
- Note:
You can single click on the Customer Information frame to keep the Action buttons consistently displayed in this frame.

Edit Customer
- Click on the Edit Customer action button.
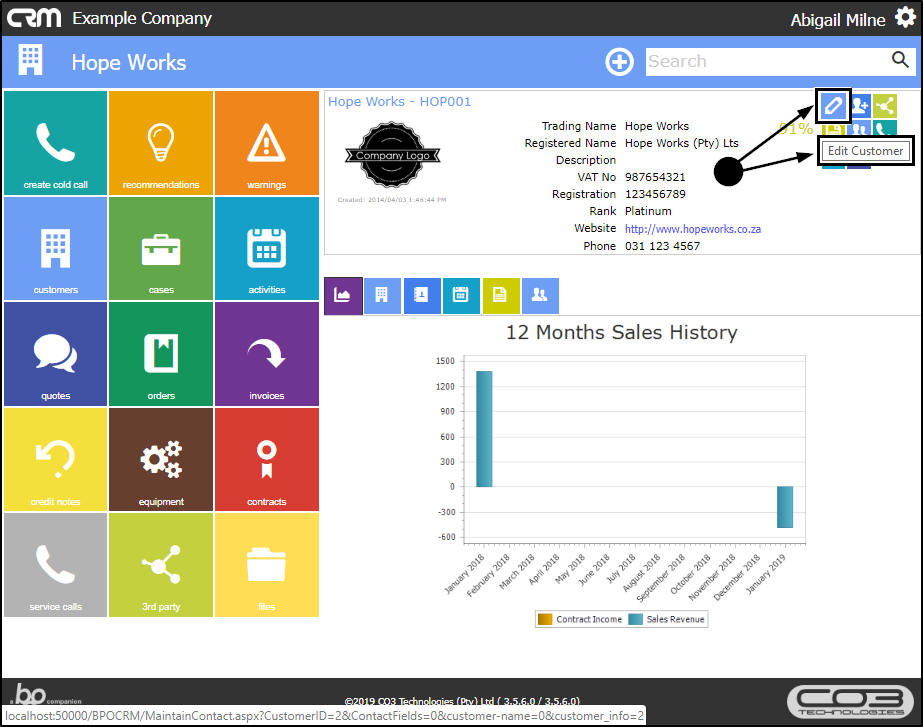
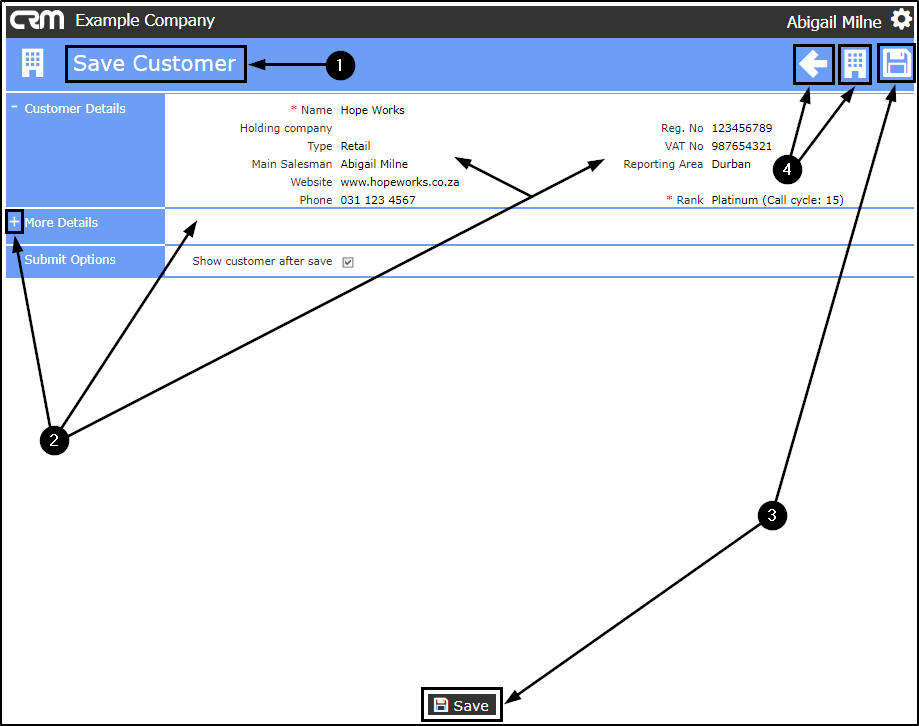
- The Save Customer page will open.
- In this page you can expand the More Details frame and add to or edit the customer details, as required.
- When you are done, you can either Save any changes made,
- Or click on either the Back icon or the Customer icon to return to the previous/Customer page.
Add Contact
- In the Customer home page,
- Click on the Add Contact action button.
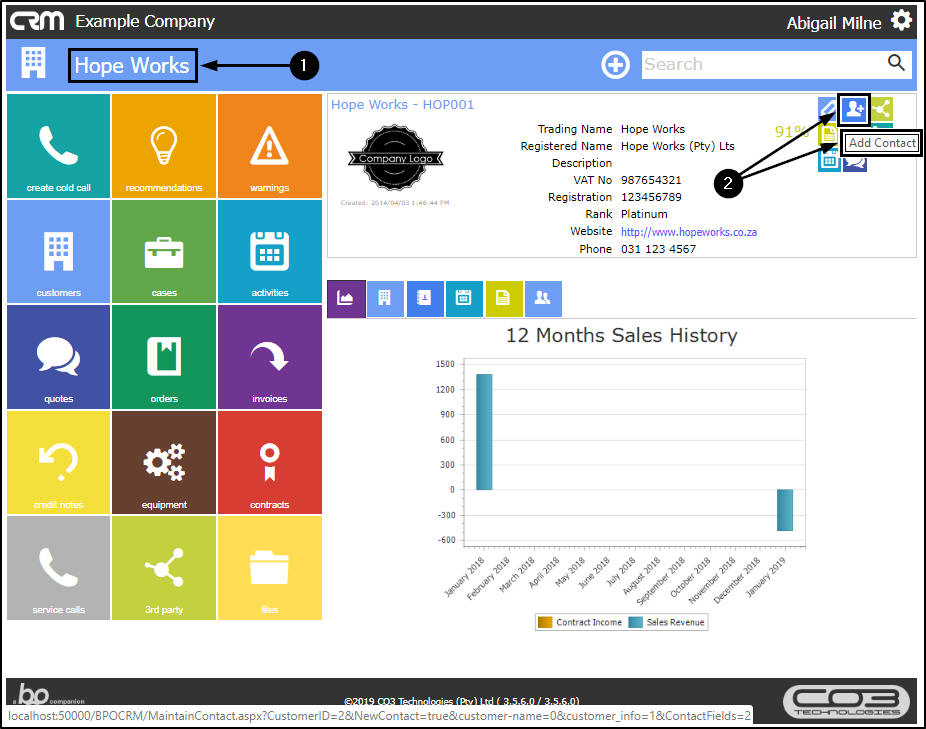
- The Save Contact page will open.
- In this page you can expand the Customer Details frame and add to or edit the contact details, as required.
- When you are done, you can either Save any changes made,
- Or click on either the Back icon or the Customer icon to return to the previous/Customer page.

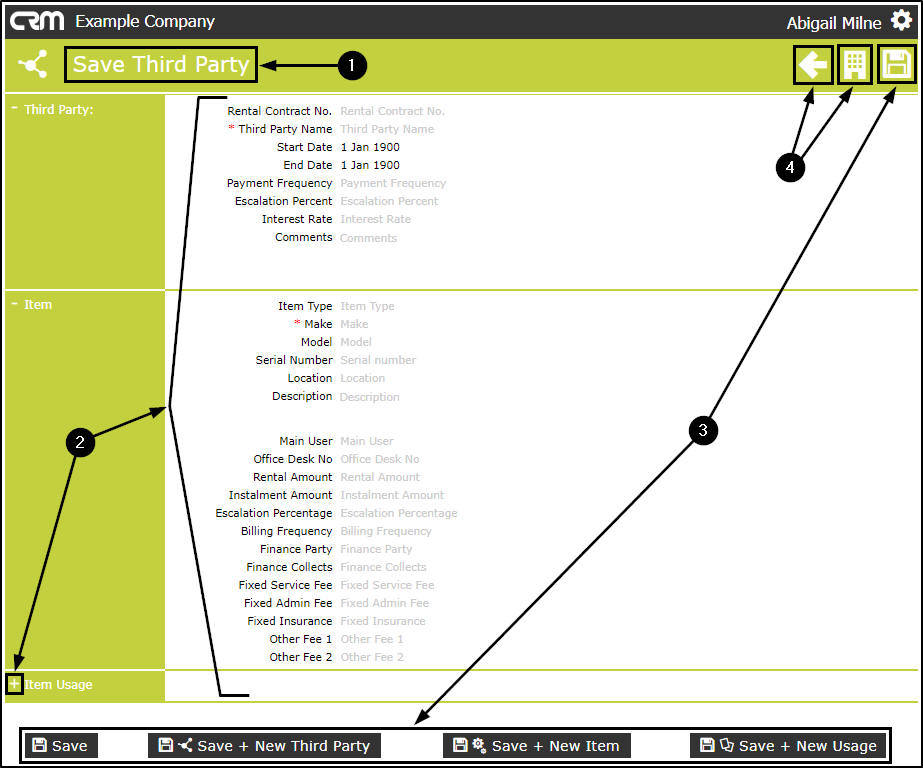
Add Third Party
- In the Customer home page,
- Click on the Add Third Party action button.
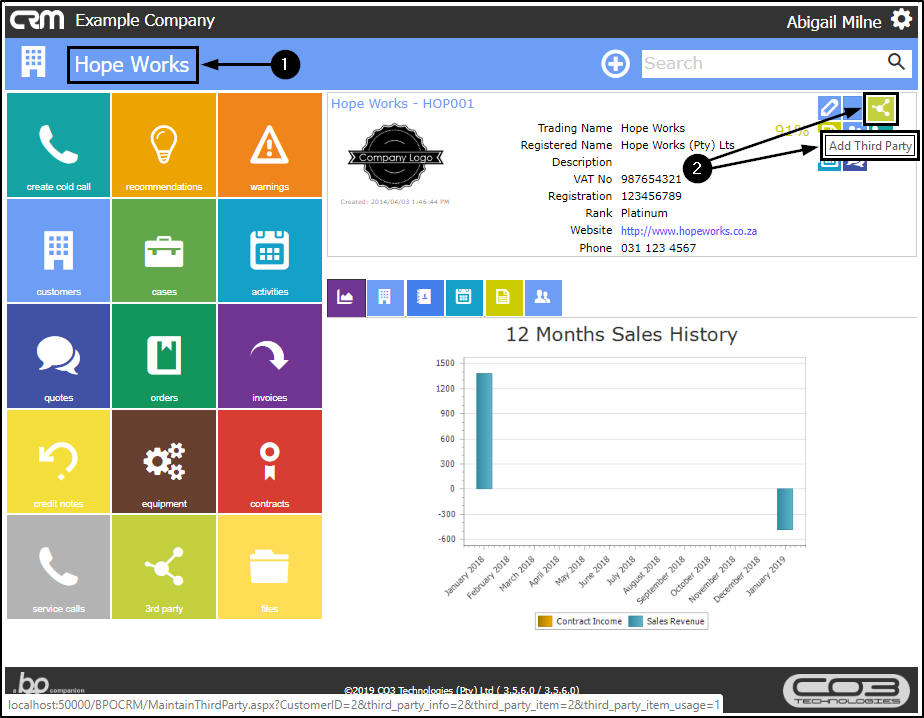
- The Save Third Party page will open. This page is for main information regarding the Third Party and the contract details.
- In this page you can expand the Item Usage frame and add to or edit the third party details, as required.
- When you are done, you can either select one of the Save options to keep any changes made,
- Or click on either the Back icon or the Customer icon to return to the previous/Customer page.
- Note:
You may not have all the third party
information, but CRM provides fields for all relevant contract
information. Fields with a red asterisk (*) are mandatory.
Add Note
- In the Customer home page,
- Click on the Add Note action button.
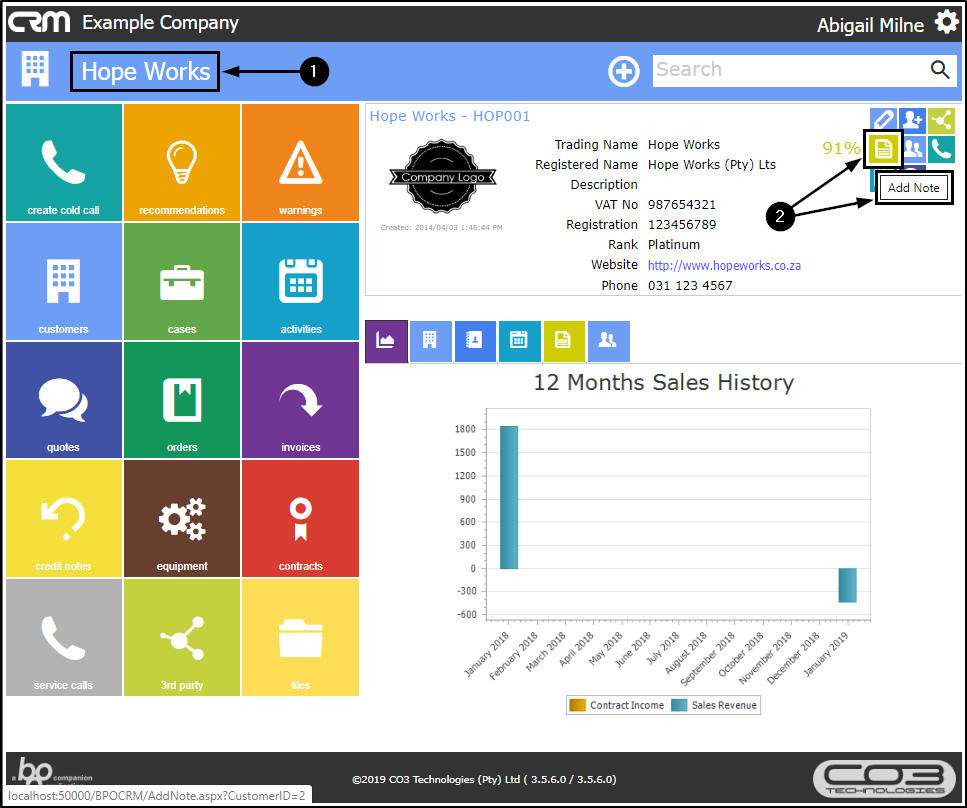
- The Add Note page will open.
- Type in a note about the customer in the frame outlined.
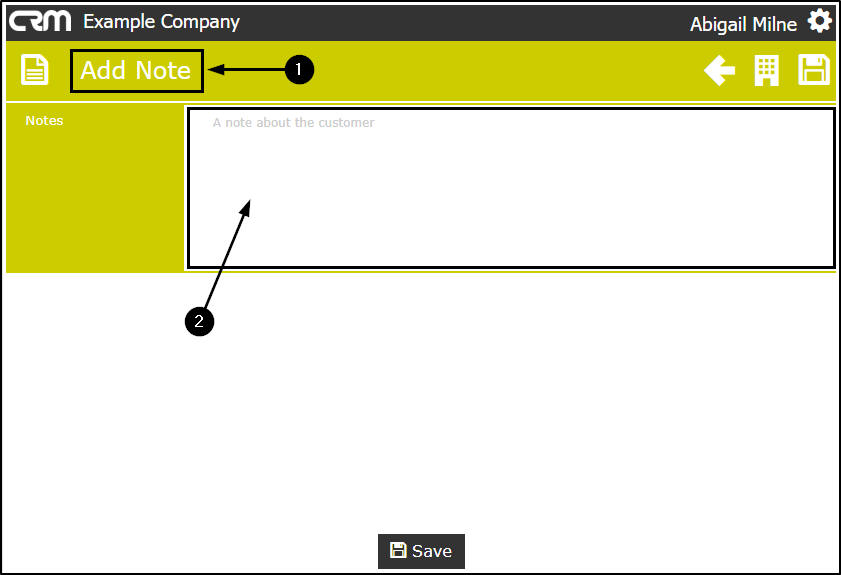
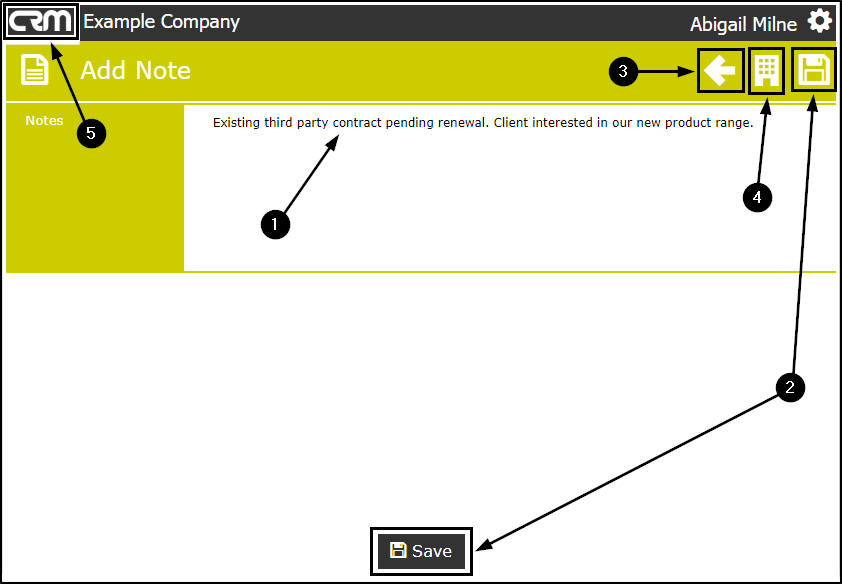
- When you have typed in the required note,
- Click on Save, the note will be saved and you will return to the Customer home page.
- Click on Back to return to the previous page,
- Click on the Customer icon to return to the Customer home page,
- Click on the CRM logo to return to the Dashboard (Home page).
-
Either,
-
Or, if you do not wish to save the note:
-
or,
-
or,
- Note:
You can
view this note (and any other notes linked to this customer) by clicking on the Notes Detail tile in the Customer home page.
Maintain Customer Salesmen
- In the Customer home page,
- Click on the Maintain Customer Salesmen action button.
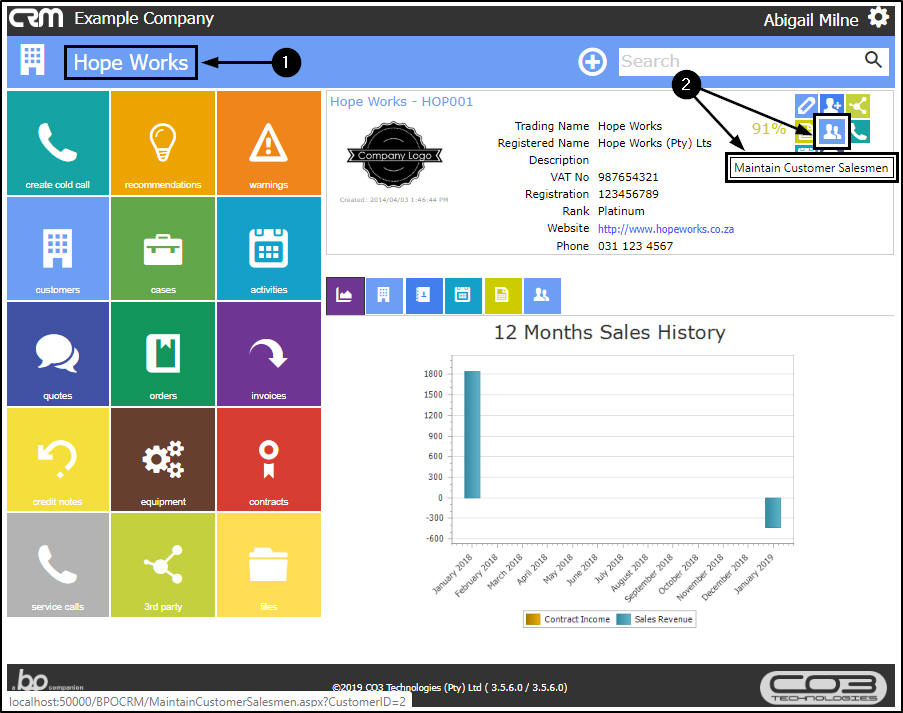
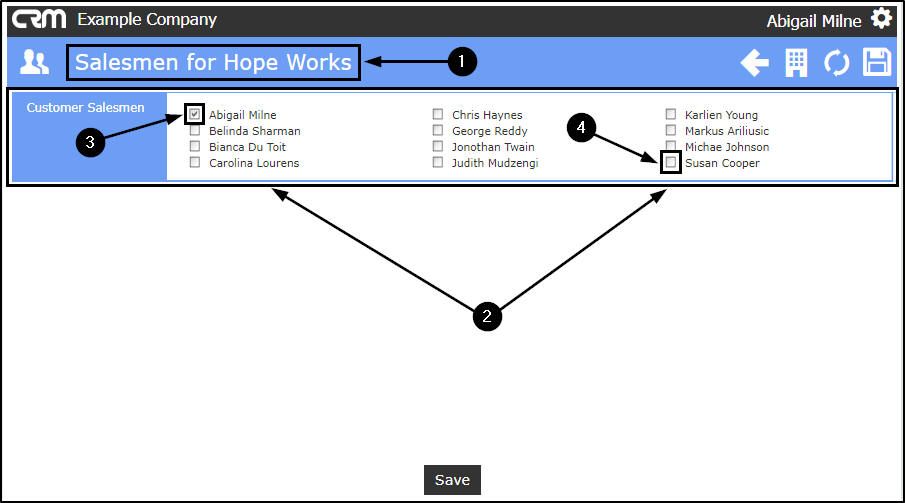
- The Salesmen for [Customer] page will open.
- Here you can view a list of all the company salespersons (currently set up on the system).
- The names that have a ticked check box in front are currently linked to this customer.
- To link another salesman, select the check box in front of that salesman's name.
-
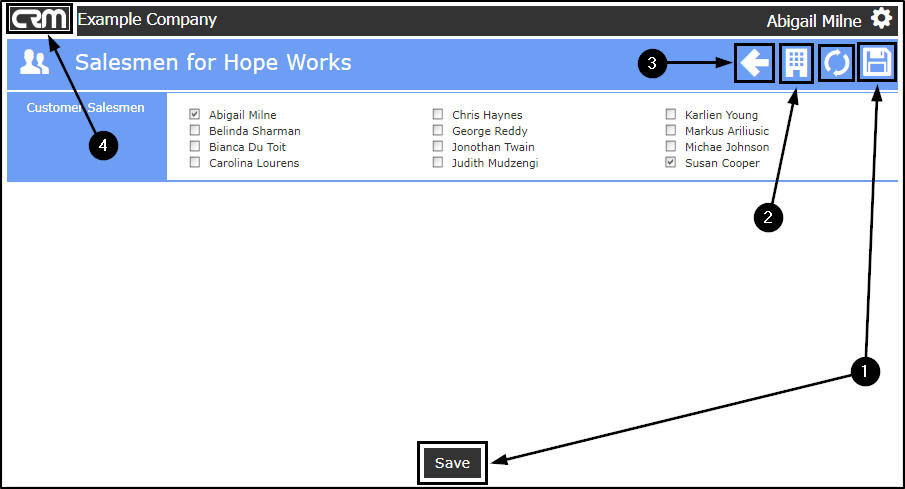
When you have finished making the required changes,
-
Either,
- Click on Save, your changes will be saved and you will return to the Customer home page.
- Click on Back to return to the previous page,
- Click on the Customer icon to return to the Customer home page,
- Click on the CRM logo to return to the Dashboard (Home page).
-
Or, if you do not wish to save your changes:
-
or,
-
or,
- Note:
You can
view the customer salesmen
by clicking on the Salesman Details tile in the Customer home page.
Customer Details - Action Items
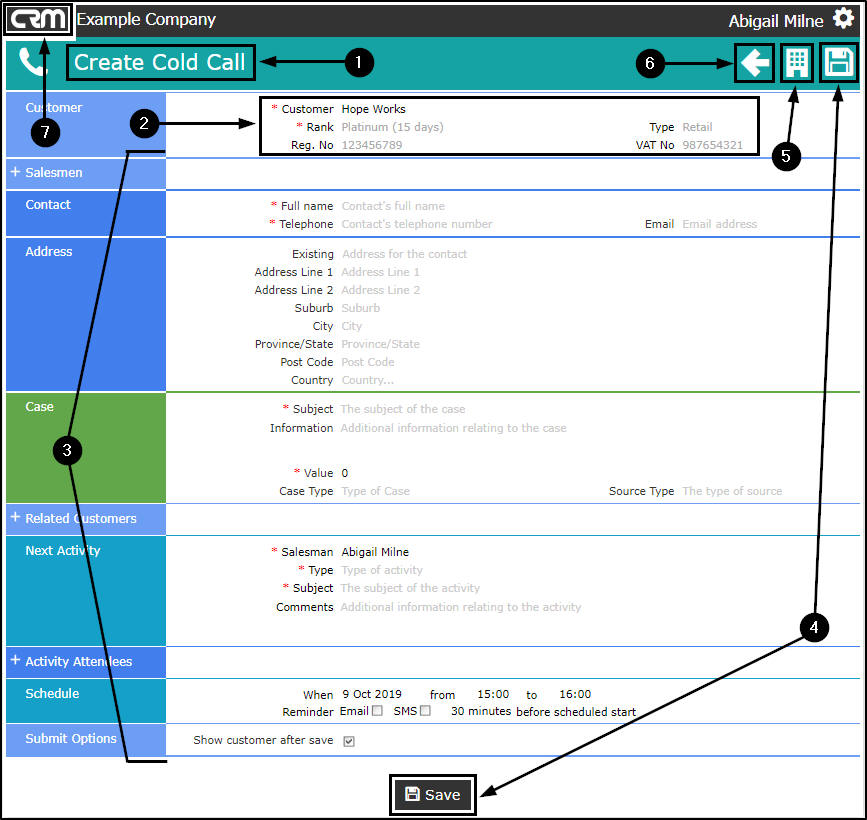
Create Cold Call for Customer
This will enable creating a cold call specifically for this customer.
- In the Customer Home page,
- Click on the Create Cold Call for Customer action button.
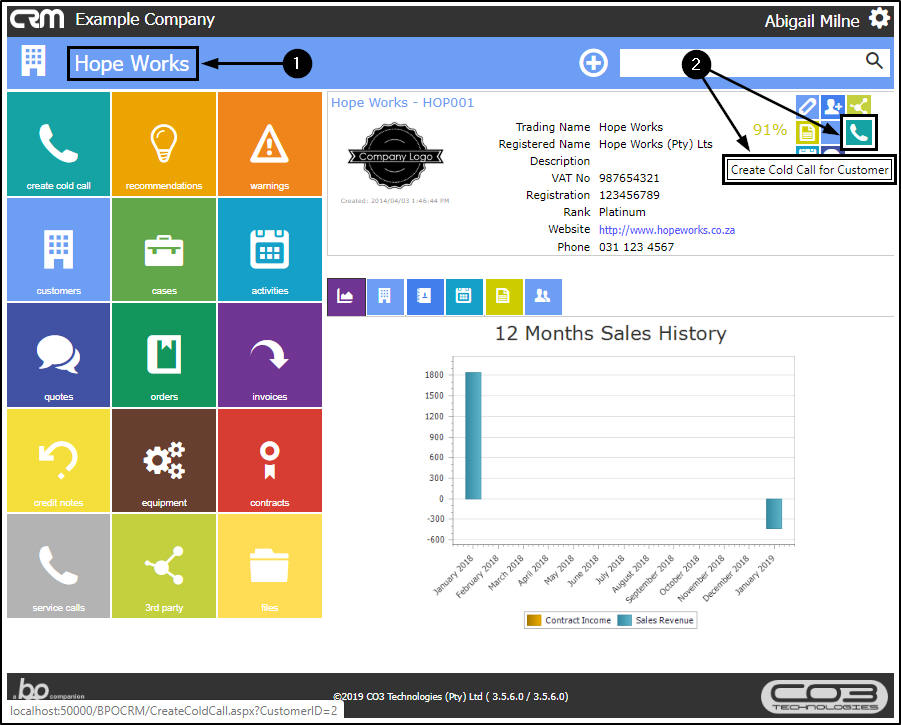
- The Create Cold call page will open.
- As this is a cold call created for this existing customer, you will note that the Customer frame will already be populated with this customer's details.
- Complete the remaining cold call details as required. Refer to Creating a Cold Call for more information/directions.
-
When you have finished making the required changes,
-
Either,
- Click on Save, your cold call information will be saved and you will return to the Customer home page.
- Click on the Customer icon to return to the Customer home page,
- Click on Back to return to the previous page,
- Click on the CRM logo to return to the Dashboard (Home page).
-
Or, if you do not wish to save your changes:
-
or,
-
or,
New Activity
This gives you the ability to add a new Case/Activity for the current customer.
- In the Customer Home page,
- Click on the New Activity action button.
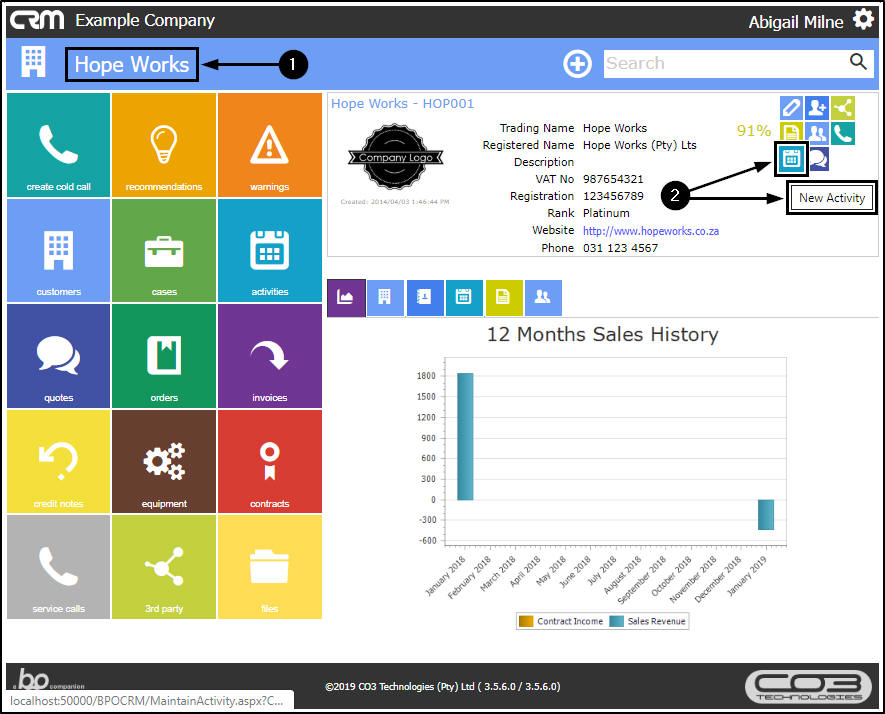
- The Save Activity page will open.
- You will note that the Customer Name has auto populated in the Case frame.
- Fill in the remaining Case, Activity and Quote details, as required. Refer to Add/Edit an Activity for more information/directions.
-
When you have finished making the required changes,
-
Either,
- Click on Save, the new activity will be saved and you will return to the Customer home page.
- Click on the Customer icon to return to the Customer home page,
- Click on Back to return to the previous page,
- Click on the CRM logo to return to the Dashboard (Home page).
-
Or, if you do not wish to save your changes:
-
or,
-
or,

New Quote
- In the Customer Home page,
- Click on the New Quote action button.
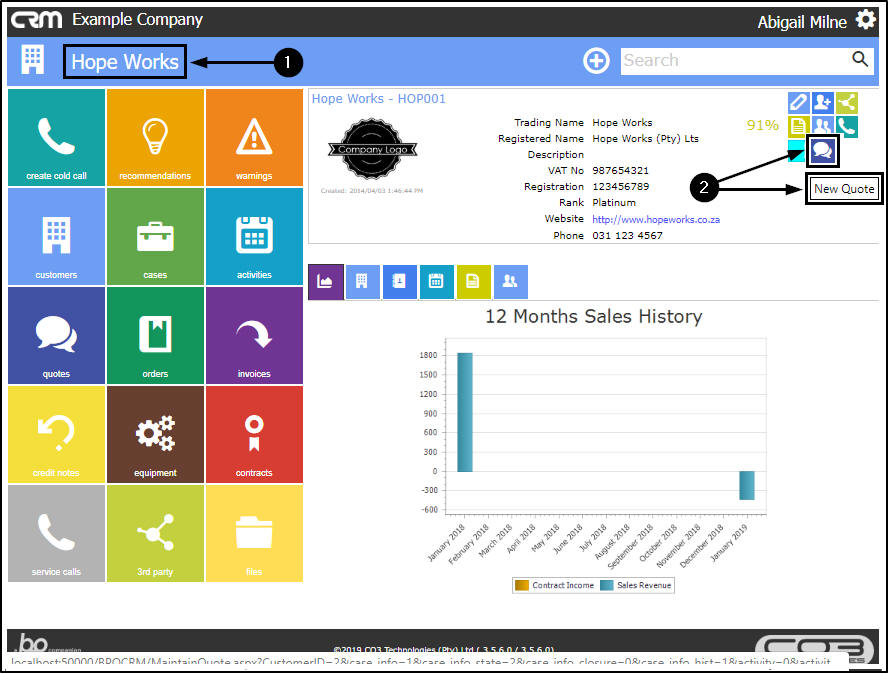
- The Save Quote page will open.
- You will note that some of the details in this page have auto populated.
- Fill in the remaining Case, Quote, Quote Financials and Quote Items details, as required. Refer to Add a New Quote for more information/directions.
-
When you have finished making the required changes,
-
Either,
- Click on Save, the new activity will be saved and you will return to the Customer home page.
- Click on the Customer icon to return to the Customer home page,
- Click on Back to return to the previous page,
- Click on the CRM logo to return to the Dashboard (Home page).
-
Or, if you do not wish to save your changes:
-
or,
-
or,

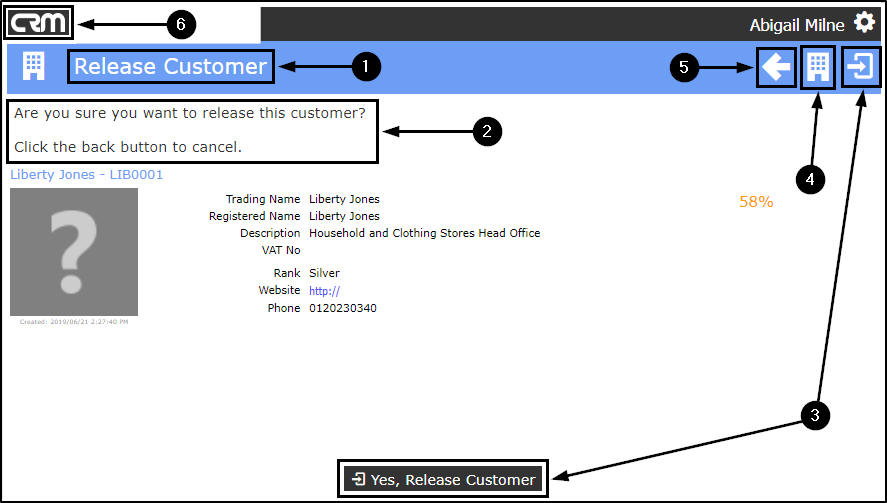
Release Customer
Note: This Release action button is only available for a customer that is in status: New - CRM. Once the customer has moved from New - CRM to Released, your accounts department can check/update all financial details and then either Approve or Decline the Customer (this will move the customer to the Active status if Approved or back to the New status if Declined).
- In the (New - CRM) Customer Home page,
- Click on the Release Customer action button.
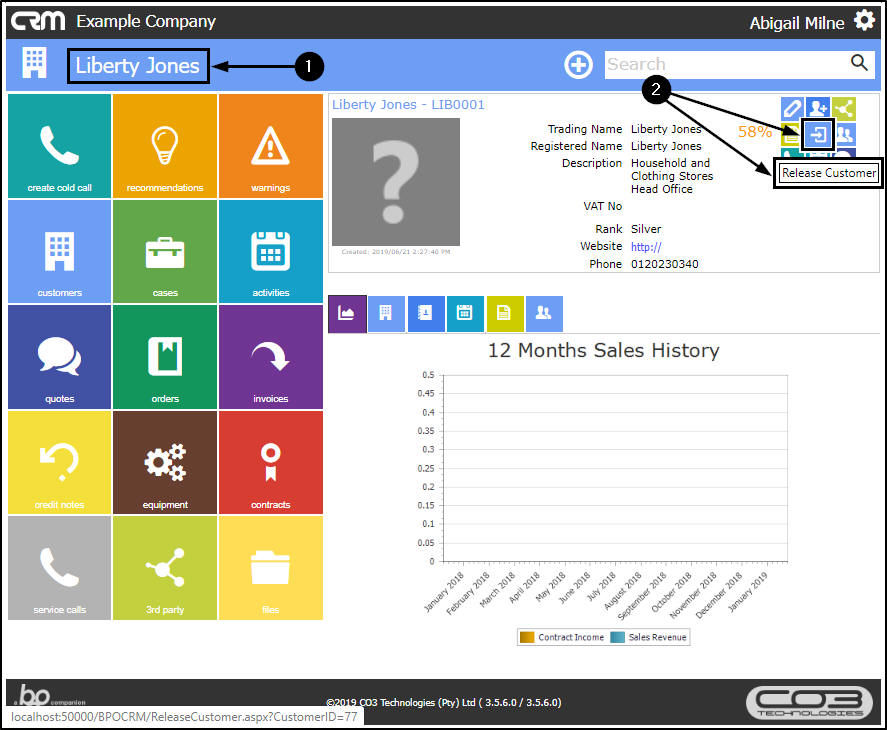
- The Release Customer page will open.
- A message will display on this page:
- Are you sure you want to release this customer? Click the Back button to cancel.
- Click on the Yes, Release Customer button or the Save button to release this customer.
- Click on the Customer icon to return to the Customer home page,
- Click on Back to return to the previous page,
- Click on the CRM logo to return to the Dashboard (Home page).
-
Either,
-
Or, if you do not wish to release this customer:
-
or,
-
or,
- If you released the customer, you will return to the Customer Home page.
- Note that the Release Customer button is no longer available.
-
This customer will now need to be
Approved
in BPO in order to become Active.

CRM.002.014