We are currently updating our site; thank you for your patience.
Contract
Aggregate Billing Contract
BPO2 now accommodates aggregate billing.
Where the previous aggregate billing work-around was used, with Aggregate Meter Definitions, these contracts should now be reviewed and configured as described in the manual below.
Contracts cannot be configured for aggregate billing where the customer is consolidated.
Fees - contract item fees are still charged / calculated separately.
- Meters
- Meter min (minimum) billing is global per meter type.
- An aggregate billing contract only supports a single billing customer on meters.
The Aggregate Billing flag can be found in the Contract Info panel in the Add New Contract screen (when creating a new contract) or the Maintenance for Contract No.: [] screen (when editing an existing contract).
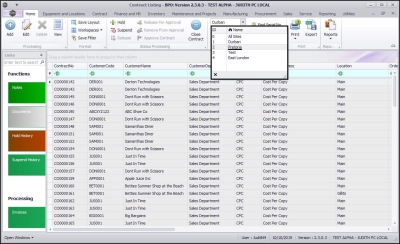
| Ribbon Access:Contract > Contracts |
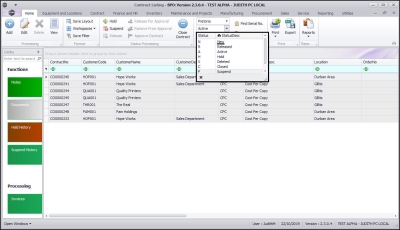
The Contract Listing screen will be displayed.
- To select the Site that you wish to work in, click on the drop-down arrow and select the relevant site.
- In this example, Pretoria is selected.
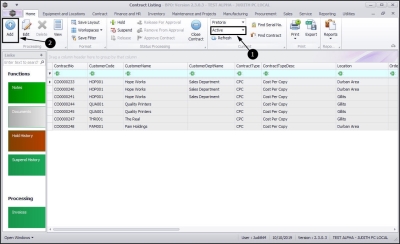
- By default, this screen will list all the Active contracts for the selected site.
- You do not need to change this status to create / add a new contract.
Create Aggregate Billing Contract
- Click on Add.
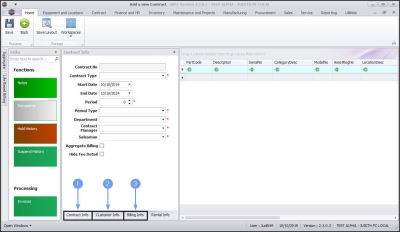
- The Add a new Contract screen will be displayed.
- Populate the following frames with the relevant information:
Aggregate Billing Flag
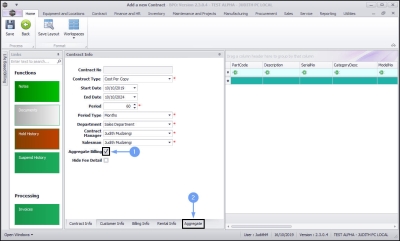
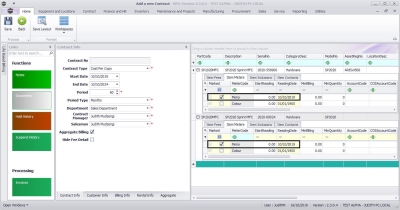
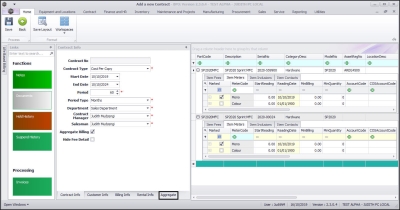
- In the Contract Info frame, select the Aggregate Billing flag.
- The Aggregate tab will move to the bottom of the screen.
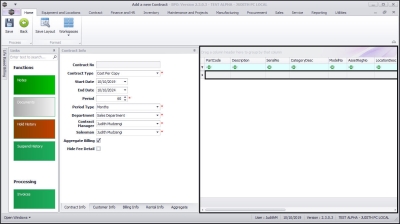
Contract Parts Frame
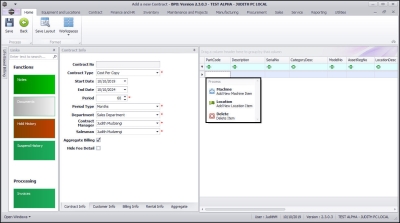
- Right click anywhere in the row of the Parts frame.
- A Process menu will pop up.
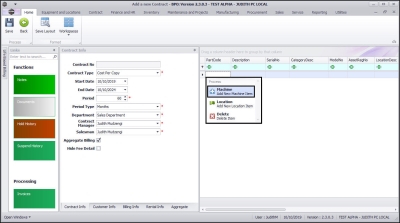
Add Contract Item
- Click on Machine - Add New Machine Item.
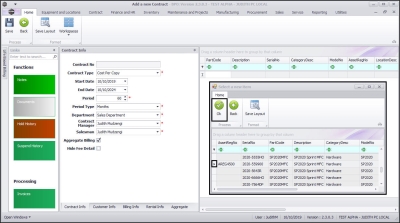
- The Select a new item pop up screen will appear.
- Click on the row selector in front of the machine that you wish to link to this contract.
- Click on Ok.
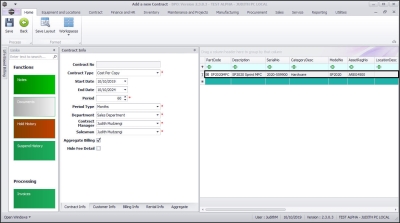
- The following columns will auto populate according to your item selection:
- Part Code
- Description
- Category Description
- Model No
- Serial No
- Asset Register No
- The Location Desc field is only used when adding a new location item.
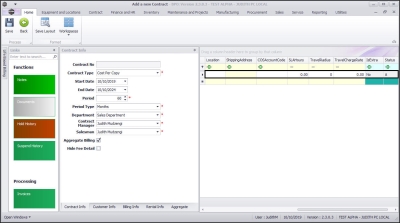
- Link the following to the contract item:
- Location
- Shipping Address
- COS Account Code
- SLA Hours if applicable
- Travel Radius if applicable
- Travel Charge if applicable
- The Is Extra and Status fields are static.
- Follow the steps above to link additional contract items, as required.
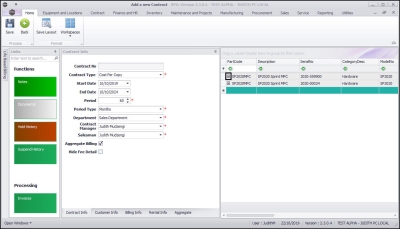
Part Items Frame
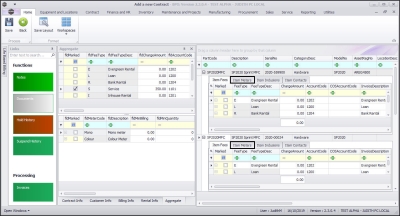
- Click on the expand button in the row of a Part Code linked to the contract.
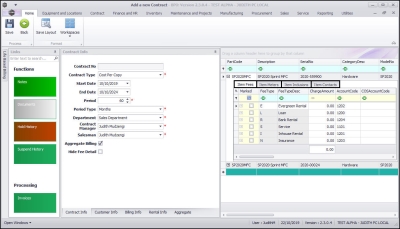
The Item frames will be expanded. Here you can add details of:
- Fees
- Meters
- Inclusions and
- Contacts
- to the selected contract item.
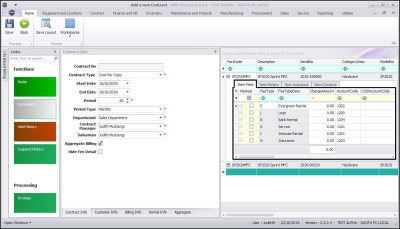
- The Item Fees tab is selected by default.
Aggregate Fees Set Up
If you have aggregate billing on item fees:
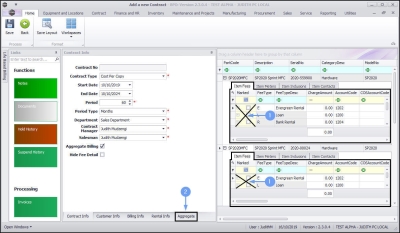
- Do not select any Item Fee in the Item Fees tab as you would do on a standard contract.
- Instead, click on the Aggregate tab.
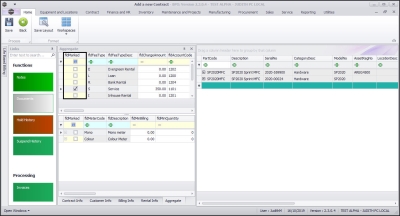
Aggregate Fees Section
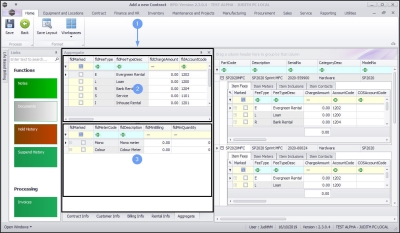
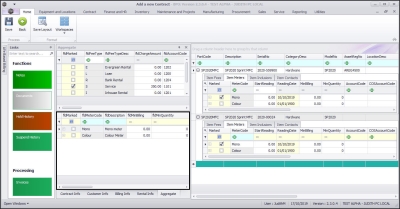
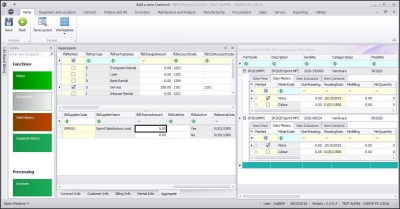
- The Aggregate frame will be expanded and is divided into the following sections:
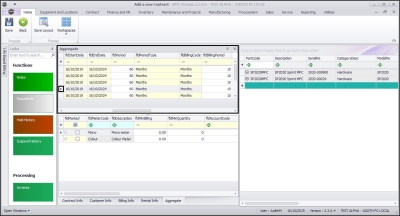
- Aggregate Fees
- Aggregate Meters
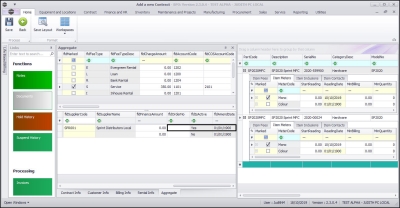
Set up the fees that need to be aggregate in the Aggregate Fees section.
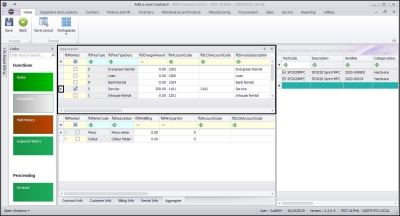
- Marked: Click on the check box in front of the aggregate Fee Type to be charged.
- In this image S - Service has been selected as an example.
- Charge Amount: Type in or use the arrow indicators to select the fee amount to be charged.
- Account Code: This will auto populate with the account code linked to this fee item.
- COS Account Code: Type in the cost of sale account code where this fee should be posted to.
- Invoice Description: This will auto populate but you can type in an alternative description to be used for this fee on the invoice. The description will reflect on the contract invoice.
Scroll right to view the next columns in this frame.
- Start Date and End Date: These fields will auto populate, click on the drop-down arrow and use the calendar function to select the correct start and end date if applicable.
- Note: Take note that the contract fee will only bill from the start date, and will stop billing at the end date.
- Period & Period Type: These fields will auto populate, click on the text boxes and either type in or use the drop-down arrows to select the correct period and period type if applicable.
- Billing Cycle: This field will auto populate, click on the text boxes and use the drop-down arrow to select the correct billing cycle if applicable.
- Billing Period: This will auto populate, click on the text boxes and either type in or use the drop-down arrow to select the correct billing period if applicable.
Scroll right to view the remaining columns in this frame.
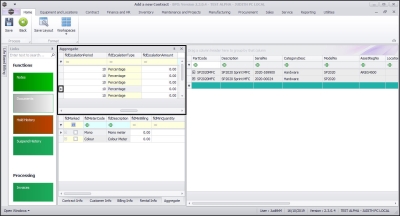
- Escalation Period: This field will auto populate, click on the text boxes and either type in or use the drop-down arrow to select the correct escalation period if applicable.
- Escalation Type: This will auto populate, click on the drop-down arrow in the text box to select the correct escalation type if applicable.
- Escalation Amount: Click on the text box and either type in or use the arrow indicators to select the escalation amount if required.
Customer Code and Customer Name
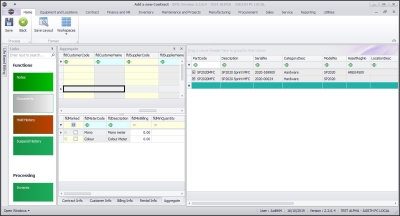
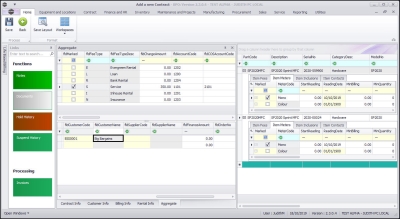
- Only populate these 2 fields if another party (a separate billing customer) is going to pay the Item Fees on behalf of the customer.
- If these fields are left blank, BPO will bill the customer linked to the contract.
- Note 1: BPO only supports different billing customers on an aggregate contract from BPO v2.3.0.4.
- Note 2: Follow the next 4 screenshots only if you wish to link another party as the billing customer.
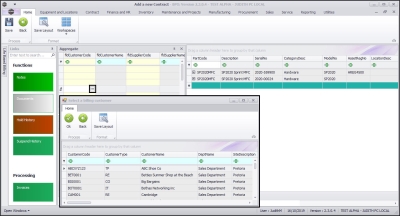
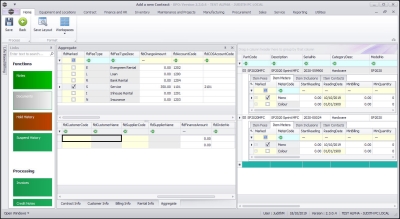
- Customer Code:
- Click in the Customer Code text box.
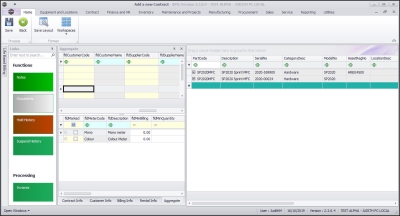
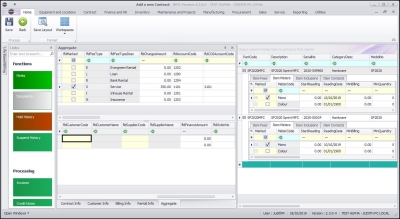
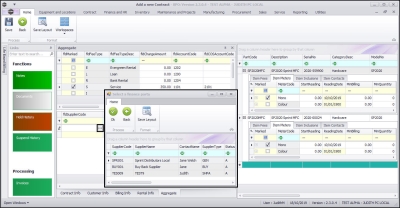
- Customer Code:
- An Ellipsis button will be revealed.
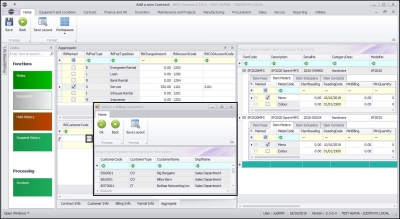
- Click on this button to display the Select a billing customer pop up screen.
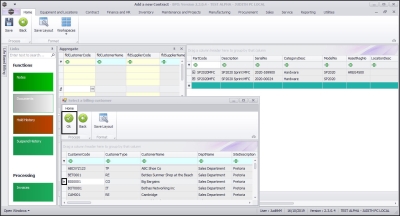
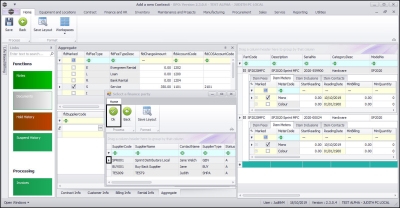
- Customer Code:
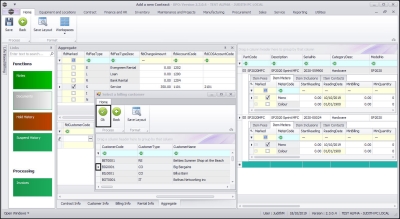
- Click on the row selector in front of the Billing customer that you wish to link to this contract.
- Click on Ok.
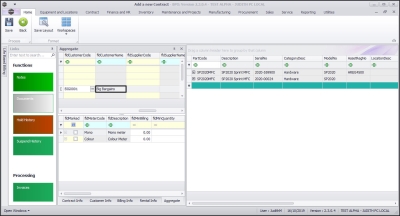
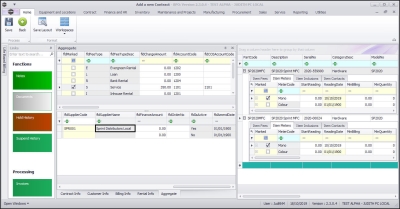
- Customer Name: Once you have selected the customer code, the customer name will auto populate with the customer name linked to that code on the system.
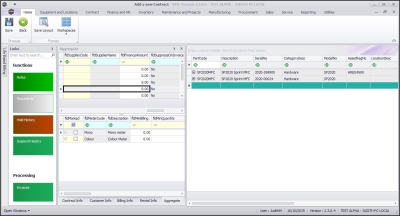
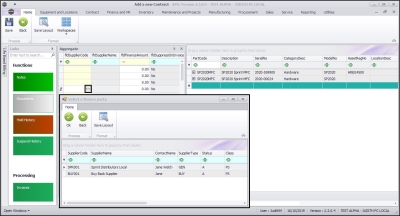
- Supplier Code / Supplier Name / Finance Amount
- These fields should only be populated if there is a Back to Back Deal with a third party who is set up on BPO as a Supplier.
Follow the next 5 screenshots only if you wish to link a supplier for rental back-to-back (finance house bills company & company bills client).
- Supplier Code:
- Click on the Supplier Code text box to reveal an Ellipsis button.
- Click on this button to display the Select a finance party pop up screen.
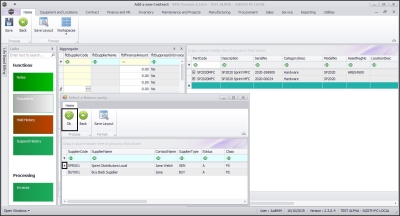
- Supplier Code:
- Select the row of the Supplier that you wish to link to this item.
- Click on Ok.
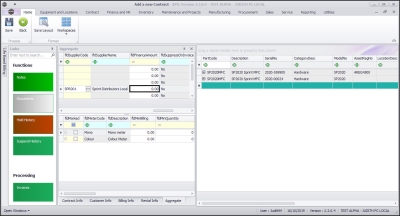
- Supplier Name: This will auto populate once the supplier code has been selected.
- Finance Amount: Click in this text box and either type in or use the arrow indicators to select the finance amount.
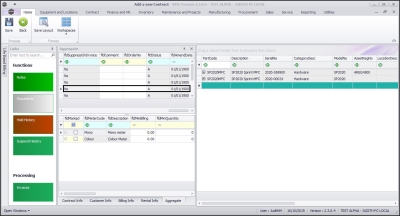
- Suppress on Invoice: This is set to No and cannot be changed. This means you cannot hide the aggregate fee information on the invoice.
- Comment: Click in this text box and type in a comment regarding this aggregate fee, if required.
- Order No: Type in a customer order number relevant to this item, if required.
- Status: This field defaults as A (Active).
- Amend Date: This field is static.
- The Add an Item Fee process is now complete.
Link Additional Fees
- Scroll back to the Marked column.
- You can now set up additional fees for this machine by following the above process, if required, before moving on to the next frame.
Aggregate Meters Set Up
Item Meters Frame
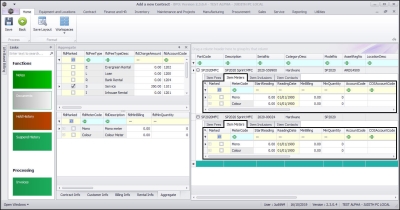
- If you have aggregate billing on item meters , click on the Item Meters tab.
The Item Meters frame will be displayed.
- Note 1: If there are no meters linked to the contract item, you can complete setting up the contract and link the meters and meter charges afterwards by following these 2 steps:
- Note 2: To avoid linking up meters to items every time you want to add items on a contract, link meters to the part codes of the items. This way, when new items are received / adjusted into stores, they will already have meters linked to them. This will not apply to items that are already in stores prior to this step.
- In the Item Meters frame, only populate the following fields for the meters that need to be aggregate:
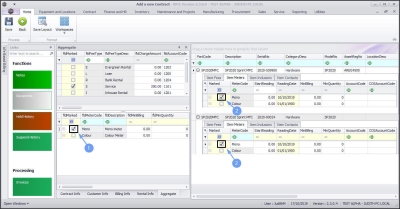
- Marked: Select the item meters that need to be aggregate in the Item Meters tab on all contract items included in aggregate billing.eg if Mono meter is aggregate, select the Mono meter on all contract items included in aggregate billing.
- Start Reading: Type in the start reading of the meter.
- Reading Date: Click in this text box to display the calendar function, use this to select the reading date.
Aggregate Meters Section
- Click on the Aggregate tab if this tab is closed.
- The Aggregate frame will be expanded and is divided into the following sections:
- Aggregate Fees
- Aggregate Meters
- Go to the Aggregate Meters section.
Populate the following fields:
- Marked:
- Select the same meter type
- as you selected in the Item Meters frame.
- In this image the Mono meter has been selected.
- Min Billing: Type in the minimum billing amount (in Rand value).
- In this case, minimum billing is global per meter type. This means a fixed price is charged on the sum of all copies made (from 0 up to and including the Minimum Quantity) per meter type on all contract items included in aggregate billing.
- For example - in this image, a minimum billing fee of R500 for a minimum quantity of 1000 copies on a mono meter means R500 will be charged if the sum of mono meter copies made on serial numbers - 2020-559900 and 2020-00024 is any value from 0 up to and including 1000.
- If no minimum billing should be applied, leave the MinBilling and MinQuantity fields as 0.
- For a more detailed explanation, read this important note on Minimum Billing and Meter Charge Setup.
- Min Quantity: Type in the minimum quantity (the copies that are included in the minimum billing amount).
- Account Code: Type in the sales account code for these meter charges to post to.
- COS Account Code: Type in the cost of sale account code where this fee should be posted to.
- Escalation Period, Escalation Type and Escalation Amount: These will auto populate, click in the text boxes and amend the details if required.
Scroll right until you can view the remaining columns in this frame.
- Customer Code and Customer Name:
- Only populate these 2 fields if another party (a separate billing customer) is going to pay for the charges on behalf of the customer.
- If these fields are left blank, BPO will bill the customer linked to the contract.
- Note 1: BPO only supports different billing customers on an aggregate contract from BPO v2.3.0.4.
- Note 2: Follow the next 4 screenshots only if you wish to link another party as the billing customer.
- Customer Code:
- Click in the Customer Code text box.
- Customer Code:
- An Ellipsis button will be revealed.
- Click on this button to display the Select a billing customer pop up screen.
- Customer Code:
- Click on the row selector in front of the Billing customer that you wish to link to this contract.
- Click on Ok.
- Customer Name: Once you have selected the customer code, the customer name will auto populate with the customer name linked to that code on the system.
- Supplier Code, Supplier Name and Finance Amount: These fields should only be populated if there is a Back to Back Deal with a third party who is set up in BPO as a Supplier. Follow the next 5 screenshots only if you wish to link a supplier here.
- Supplier Code:
- Click on the Supplier Code text box to reveal an Ellipsis button.
- Click on this button to display the Select a finance party pop up screen.
- Supplier Code:
- Click on the row selector in front of the Supplier that you wish to link to this item meter.
- Click on Ok.
- Supplier Name: This will auto populate once the supplier code has been selected.
- Finance Amount: Click in this text box and either type in or use the arrow indicators to select the finance amount.
- Order No: Type in a customer order number relevant to this item, if required.
- Is Active: This field is set to Yes (Active) once you have clicked on the Marked checkbox.
- Amend Date: This field is static.
Add Meter Levels
- Scroll left to return to the Marked column.
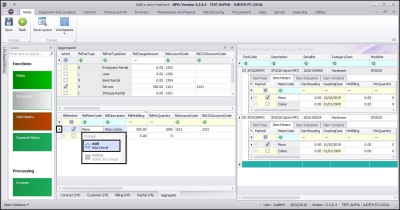
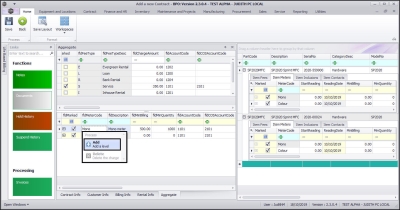
- Right click in the row of the item you wish to add a meter level to. The item should be active (marked).
- In this image the Mono meter has been selected.
- A Process menu will pop up.
- Click on Add - Add a level.
Levels with Minimum Billing
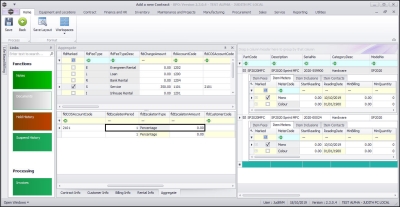
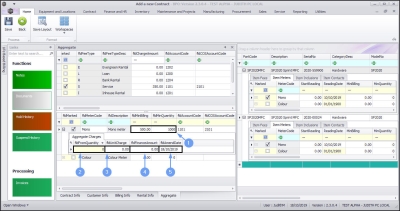
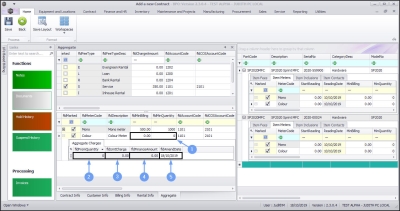
The Aggregate Charges frame will be expanded.
- For this mono meter, there is a minimum billing set up of a R500 charge for the first combined 1000 copies (Minimum Quantity) made on all contract items included in aggregate billing. BPO calculates the usage charges by first calculating the minimum billing set up.
- In this example, it means in BPO, a fixed charge of R500 will be charged for any number of mono copies made across all machines (total usage) included in aggregate billing from 0 up to and including 1000, thereafter a unit charge per copy will be applied i.e., from 1001.
- From Quantity: This is the number from which the unit charge will be effective.
- The first row in the Meter Charges matrix, is static at 0. This means if there is minimum billing set up on the meter, the first row looks incorrect as the From Quantity field is static at 0.
- If there is minimum billing set up on the meter, BPO does not read the From Quantity in the first row as 0 (although it displays as 0) but starts counting from (Minimum Quantity + 1). In this case, since (minimum billing level) is up to and including 1000, BPO will start counting from 1001.
- For a more detailed explanation, read this important note on Minimum Billing and Meter Charge Setup.
- Unit Charge: Type in the unit charge for the meter (charge per copy when Minimum Quantity is exceeded).
- Finance Amount: This should only be populated if there is a Back to Back Deal with a third party who is set up on BPO as a Supplier.
- Amend Date: This is a static field.
- You can add additional charge levels.
Levels with no Minimum Billing
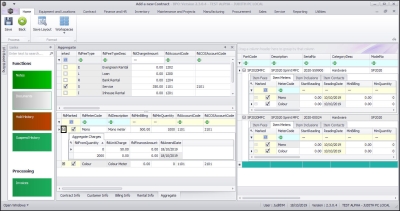
- The Aggregate Charges frame will be expanded.
- Note: The Colour meter will be used as an example.
- There is no minimum billing set up on this meter. This means the usage calculation will only be based on what's set up in the Aggregate Charges matrix.
- From Quantity: This is the number from which the unit charge will be effective.
- The first row in the Meter Charges matrix, is static at 0.
- For a more detailed explanation, read this important note on Minimum Billing and Meter Charge Setup.
- Unit Charge: Type in the unit charge for the meter (charge per copy).
- Finance Amount: This should only be populated if there is a Back to Back Deal with a third party who is set up in BPO as Supplier.
- Finance Amount: This field cannot be edited.
- You can add additional charge levels.
Link Additional Levels
- Right click anywhere in the row of the item that you wish to add anothermeter level to. (You can do this whilst the aggregate charges matrix is open / closed).
- Note: The Mono meter will be used as an example.
- The Process menu will pop up again.
- Click on Add - Add a level.
A second level has now been added to the Aggregate Charges matrix.
- From Quantity: Type in or use the arrow indicators to select the number of copies from which this charge will be effective.
- For a more detailed explanation, read this important note on Minimum Billing and Meter Charge Setup.
- Unit Charge: Type in or use the arrow indicators to select the unit charge for this additional meter (charge per copy). This charge will usually increase with each new level.
- Finance Amount: This should only be populated if there is a Back to Back Deal with a third party who is set up in BPO as a Supplier.
- Amend Date: This field cannot be edited.
Repeat this process to add more meter charges, as required.
- When you have finished working in the Aggregate Charges frame, collapse the frame.
Save the Contract
- Add contract inclusions if applicable and item contacts.
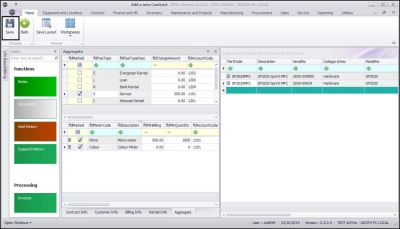
- When you are finished, click on Save.
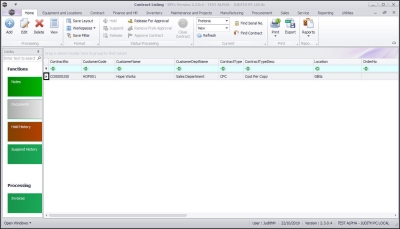
- The new contract will be saved, and you will return to the Contract Listing screen where the status defaults to Active.
- Click on the drop-down arrow in the Status field and select status - New.
- The new contract can be found within the New contract status listing screen.
- From here the contract will need to be Released and then Approved before it becomes active.
Examples of Aggregate Billing Contracts
Below are different scenarios of Aggregate contracts. These scenarios are not exhaustive.
Example 1:
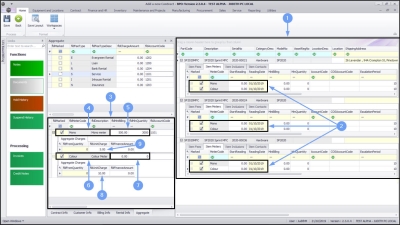
A contract with aggregate fees and aggregate meters.
- Service Fee: R450
- Mono Meter:
- This will bill a total R450 in total, but this charge will be linked to the contract and not to items on the contract.
- Min Billing: R500 (for all three machines)
- Min Quantity: 3000 copies (across all three machines)
- Copy Charge: 5c after total usage of 3000 (across all 3 machines)
- Colour Meter:
- No Min Billing
- Copy Charge: 10c
- The configuration will be as below:
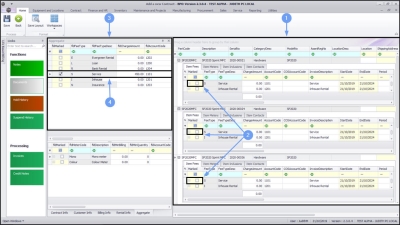
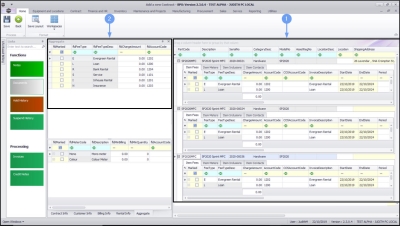
- Item Fees
- Right side of the screen - Items Fees Frame
- Serial No: 2020-00021 - nothing is selected in the Item Fees frame.
- Serial No: 2020-00024 - nothing is selected in the Item Fees frame.
- Serial No: 2020-00036 - nothing is selected in the Item Fees frame.
- Left side of the screen - Aggregate Fees Frame
- The Service Fee is selected and set up in the Aggregate Fees section as explained in this manual.
- Item Meters
- Right side of the screen - Items Fees Frame
- Serial No: 2020-00021 - the mono and colour meters are selected. For both meters, only the Start Reading and Reading Date fields are updated.
- Serial No: 2020-00024 - the mono and colour meters are selected. For both meters, only the Start Reading and Reading Date fields are updated.
- Serial No: 2020-00036 - the mono and colour meters are selected. For both meters, only the Start Reading and Reading Date fields are updated.
- Left side of the screen - Aggregate Meters Frame
- Mono Meter
- Min Billing: R500, Min Qty: 3000
- Copy Charge: 5c
- Colour Meter
- Min Billing: 0, Min Qty: 0
- Copy Charge: 10c
- The remaining fields are set up as explained in this manual.
Example 2:
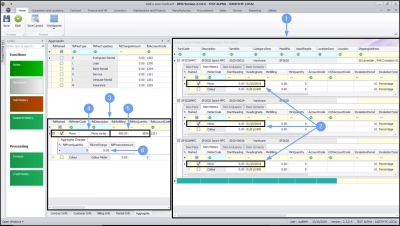
A contract with non-aggregate fees and aggregate meters.
- Service Fee:
- Serial No: 2020-00021 the charge is R150
- Serial No: 2020-00024 the charge is R170
- Serial No: 2020-00036 the charge is R130
- Mono Meter:
- This will bill R450 in total, but this charge will be split per machine.
- Min Billing: R500 (for all three machines)
- Min Quantity: 3000 copies (across all three machines)
- Copy Charge: 5c after total usage of 3000 (across all 3 machines)
- Colour Meter:
- No Min Billing
- Copy Charge: 10c
- The configuration will be as below:
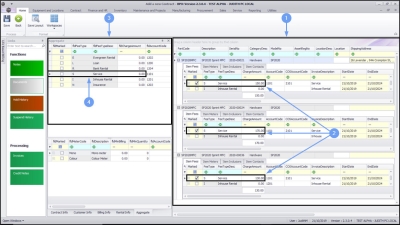
- Item Fees
- Right side of the screen - Items Fees Frame
- Serial No: 2020-00021 - the Service fee is selected with a charge of R150 in the Item Fees frame.
- Serial No: 2020-00024 - the Service fee is selected with a charge of R170 in the Item Fees frame.
- Serial No: 2020-00036 - the Service fee is selected with a charge of R130 in the Item Fees frame.
- The remaining fields are set up as explained in this manual.
- Left side of the screen - Aggregate Fees Frame
- The Service Fee is not selected and set up in the Aggregate Fees section since the fee is non aggregate.
- Item Meters
- Right side of the screen - Items Fees Frame
- Serial No: 2020-00021 - the mono and colour meters are selected. For both meters, only the Start Reading and Reading Date fields are updated.
- Serial No: 2020-00024 - the mono and colour meters are selected. For both meters, only the Start Reading and Reading Date fields are updated.
- Serial No: 2020-00036 - the mono and colour meters are selected. For both meters, only the Start Reading and Reading Date fields are updated.
- Left side of the screen - Aggregate Meters Frame
- Mono Meter
- Min Billing: R500, Min Qty: 3000
- Copy Charge: 5c
- Colour Meter
- Min Billing: 0, Min Qty: 0
- Copy Charge: 10c
- The remaining fields are set up as explained in this manual.
Example 3:
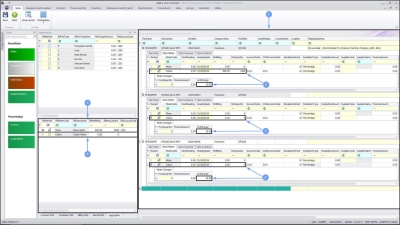
A contract with no fees, aggregate mono meters and non-aggregate colour meters.
- Serial No: 2020-00024
- No Min Billing
- Copy Charge: 15c
- No Min Billing
- Copy Charge: 10c
- Serial No: 2020-00036
- The configuration will be as below:
- Item Fees
- Right side of the screen - Items Fees Frame
- No fee will be selected since the contract has no fees.
- Left side of the screen - Aggregate Fees Frame
- No fee will be selected since the contract has no fees.
- Item Meters
- Right side of the screen - Items Fees Frame
- Serial No: 2020-00021 - The mono meter is selected and the Start Reading and Reading Date are the only fields that have been updated.
- Serial No: 2020-00024 - The mono meter is selected and the Start Reading and Reading Date are the only fields that have been updated.
- Serial No: 2020-00036 - The mono meter is selected and the Start Reading and Reading Date are the only fields that have been updated.
- Mono Meter: Aggregate
- Left side of the screen - Aggregate Meters Frame
- Mono Meter
- Min Billing: R500, Min Qty: 3000
- Copy Charge: 5c
- The remaining fields are set up as explained in this manual.
- Right side of the screen - Items Meters Frame
- Serial No: 2020-00021 - The colour meter is selected with a Minimum Billing of R500, Minimum Quantity of 1 000 and a Copy Charge of 15c set up. For more information, refer to creating a new contract manual.
- Serial No: 2020-00024 - The colour meter is selected with no Minimum Billing and a Copy Charge of 15c set up. For more information, creating a new contract manual.
- Serial No: 2020-00036 - The colour meter is selected with no Minimum Billing and a Copy Charge of 10c set up. For more information, refer to creating a new contract manual.
- Colour Meter: Non Aggregate
- The other fields are set up as outlined in creating a new contract manual.
- Left side of the screen - Aggregate Meters Frame
- The colour meter is not selected or set up here because it is non-aggregate.
MNU.112.055

