We are currently updating our site; thank you for your patience.
Procurement
Add a Supplier
| Ribbon Access: Procurement > Suppliers |
Add a Supplier
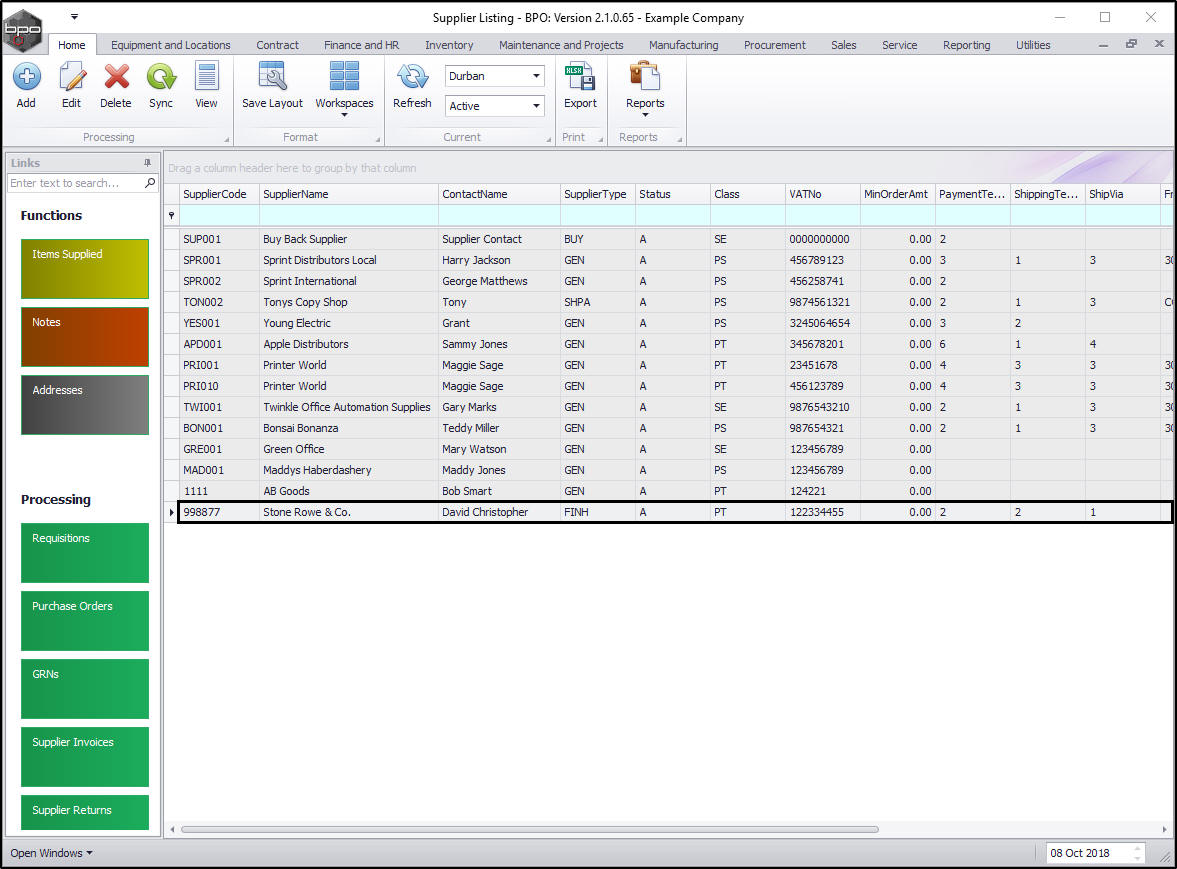
The Supplier Listing screen will be displayed.
Select the Site
- In this image Durban has been selected.
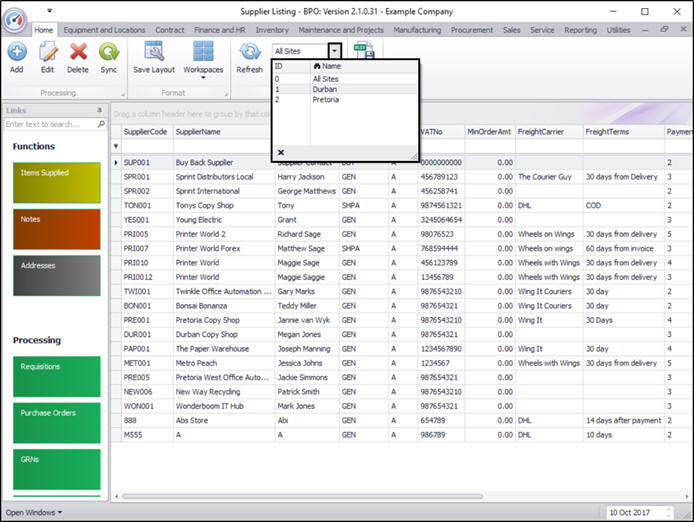
- Click on Add.
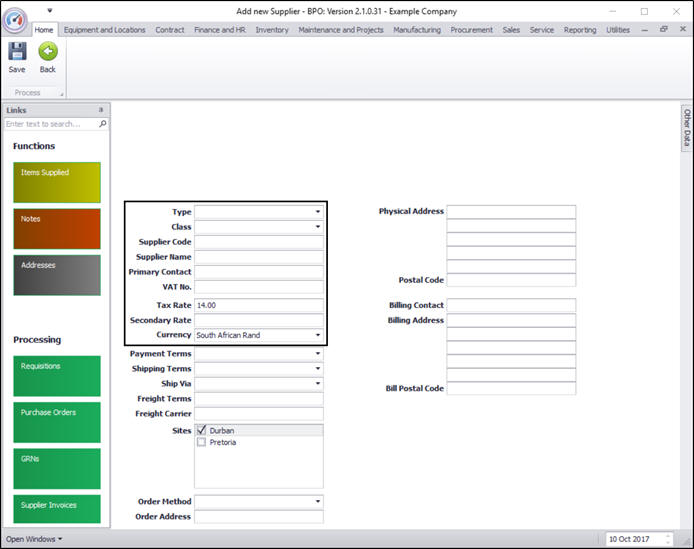
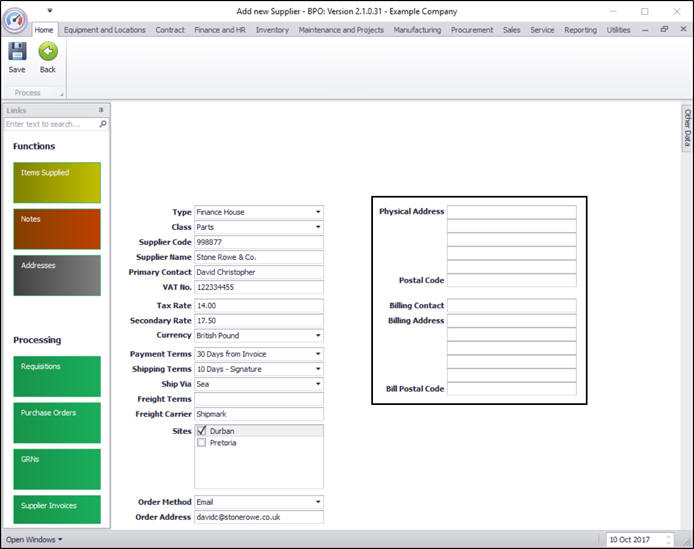
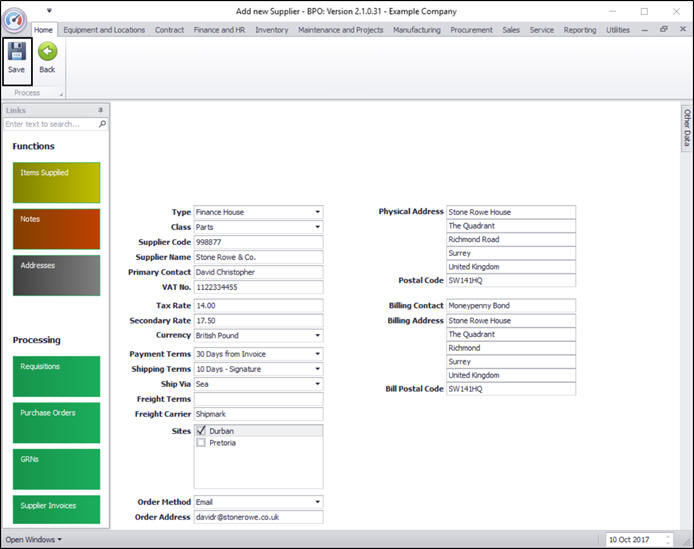
Add Supplier Details
- Type: Click on the drop-down arrow and select from the list the Supplier Type, e.g. General Supplier or Finance House.
- Class: Click on the drop-down arrow and select from the list the Class of Item Supplied or Service Rendered.
- Supplier Code: Type in the code you wish to use to identify the Supplier.
![]() Note 1:
The Supplier Code is very important because it is linked to Pastel Evolution
and all the supplier information and history will be linked to this code and not the Supplier Name.
Note 1:
The Supplier Code is very important because it is linked to Pastel Evolution
and all the supplier information and history will be linked to this code and not the Supplier Name.
![]() Note 2:
If you are manually entering the Supplier Code, the recommended standard is using a supplier code which is 6 characters long starting
with 3 letters and then 3 numbers.
Note 2:
If you are manually entering the Supplier Code, the recommended standard is using a supplier code which is 6 characters long starting
with 3 letters and then 3 numbers.
![]() Note 3:
From BPO2 v2.5.1.4 restrictions have been put into place to prevent special characters from being saved. You will only be allowed to save upper case characters and digits from 0 to 9.
Note 3:
From BPO2 v2.5.1.4 restrictions have been put into place to prevent special characters from being saved. You will only be allowed to save upper case characters and digits from 0 to 9.
- Supplier Name: Type in the name of the Supplier.
- Primary Contact: Type in the person who is your contact at this Supplier.
- VAT No: Type in the VAT No. of the Supplier.
- Tax Rate: Type in the tax rate. If the tax rate is not set, your procurement documentation will not calculate a tax value onto your items.
- Secondary Rate: Type in a secondary rate, if applicable.
- Currency: Click on the drop-down arrow and select from the list the currency applicable to this supplier.
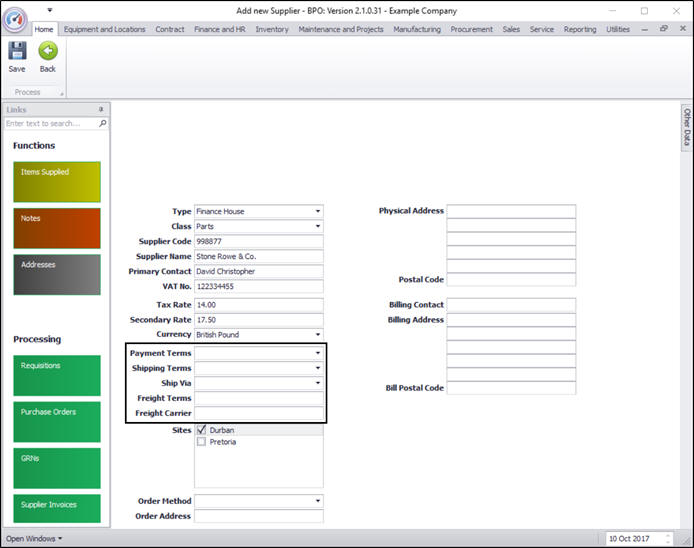
- Payment Terms: Click on the drop-down arrow and select from the list the payment terms of the Supplier.
- Shipping Terms: Click on the drop-down arrow and select from the list the shipping terms of the Supplier, if applicable.
- Ship Via: Click on the drop-down arrow and select from the list the type of transport used for shipping the item, if applicable.
- Freight Terms: Type in the Freight Terms, if applicable.
- Freight Carrier: Type the Freight Carrier, if applicable.
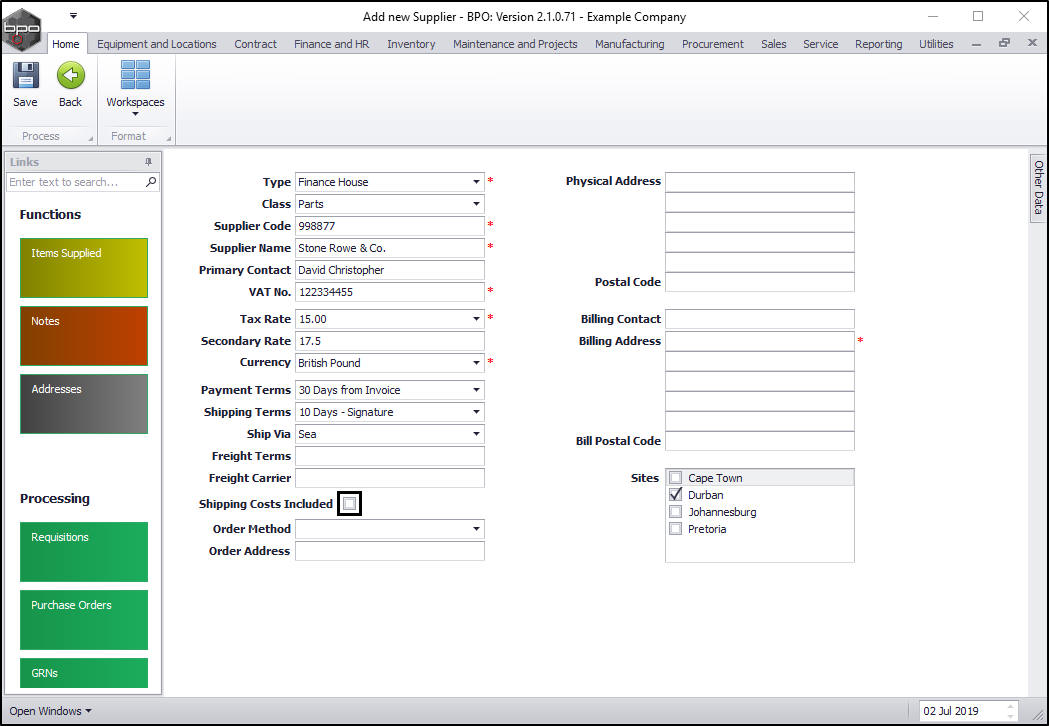
Shipping Costs Included Flag
- If you wish Shipping Costs to be included in the cost of parts/items received from this supplier then ensure that this flag is selected.
- If you wish Shipping Costs not to be included in the cost of parts/items received from this supplier and would like the ability to add shipping costs to items/parts received then ensure that this flag is not selected.
Important Notes:
- If the flag is un-ticked, then any goods received from this supplier will then be received into quarantine, where they must have shipping costs added before the goods can be released, and then received into store.
- The Company Configuration Enforce Quarantine must be selected.
- In the Configurator, the Include Shipping flag on the Purchasing Centre must be ticked.
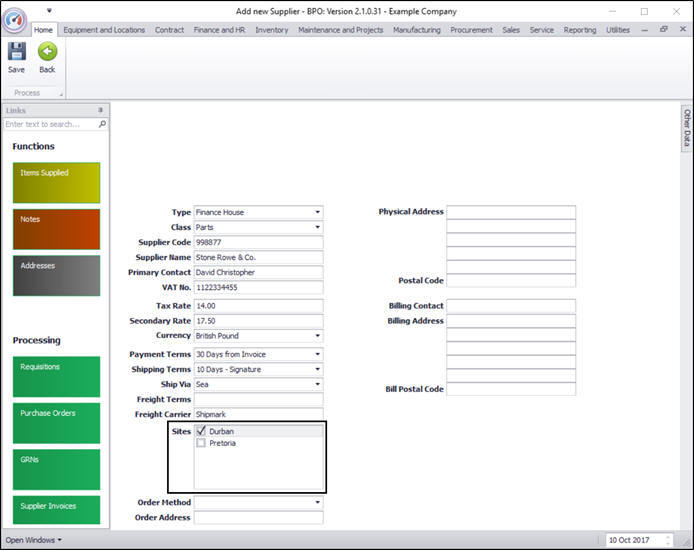
Sites
- Sites: The particular Site check box will be auto populated according to your site selection in the beginning of this process.
- Make sure that the correct site(s) have been selected for the Supplier that you are setting up.
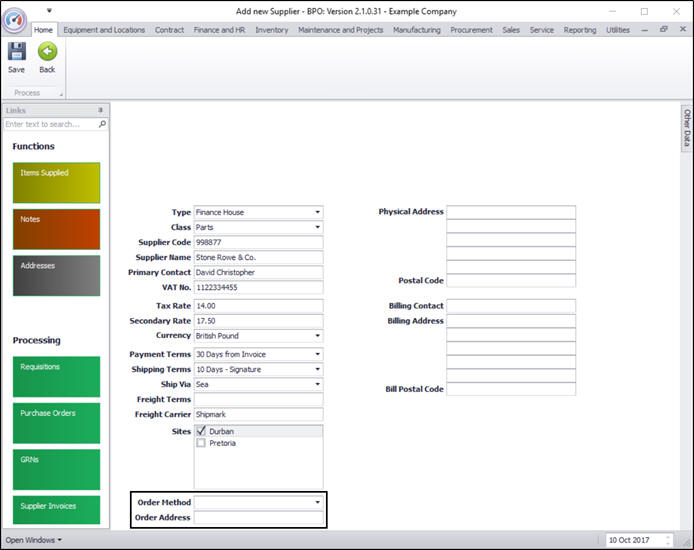
Order Method
- Order Method: Click on the drop-down arrow and select the Order Method e.g. Email or Telephone.
- Order Address: Type in the Order Address e.g. the Email Address if the order method is Email.
Addresses
- Physical Address: Type in the Physical Address.
- Postal Code: Type in the Postal Code.
- Billing Contact: Type in the Billing Contact.
- Billing Address: Type in the Billing Address.
- Bill Postal Code: Type in the Bill Postal Code.
Additional Data
Additional data allows for 10 extra fields of information that can be used depending on your company's requirements. The definition for these fields should be pre-determined and used as allocated. The labels for these fields can be configured via user rights.
- Click on the User Defined dock panel tab to open the panel
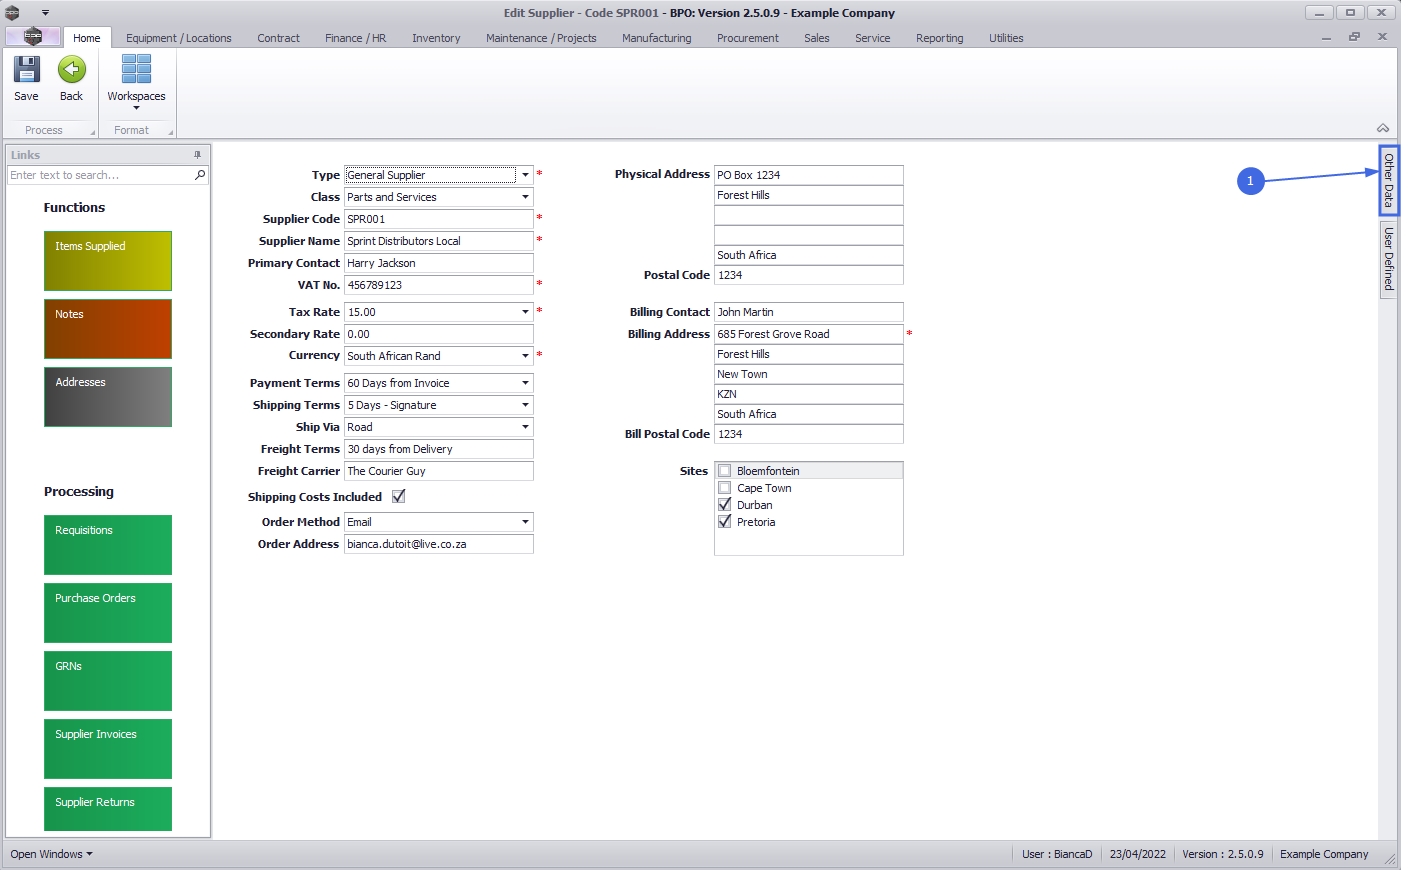
- Type in the values as required if used by your company.

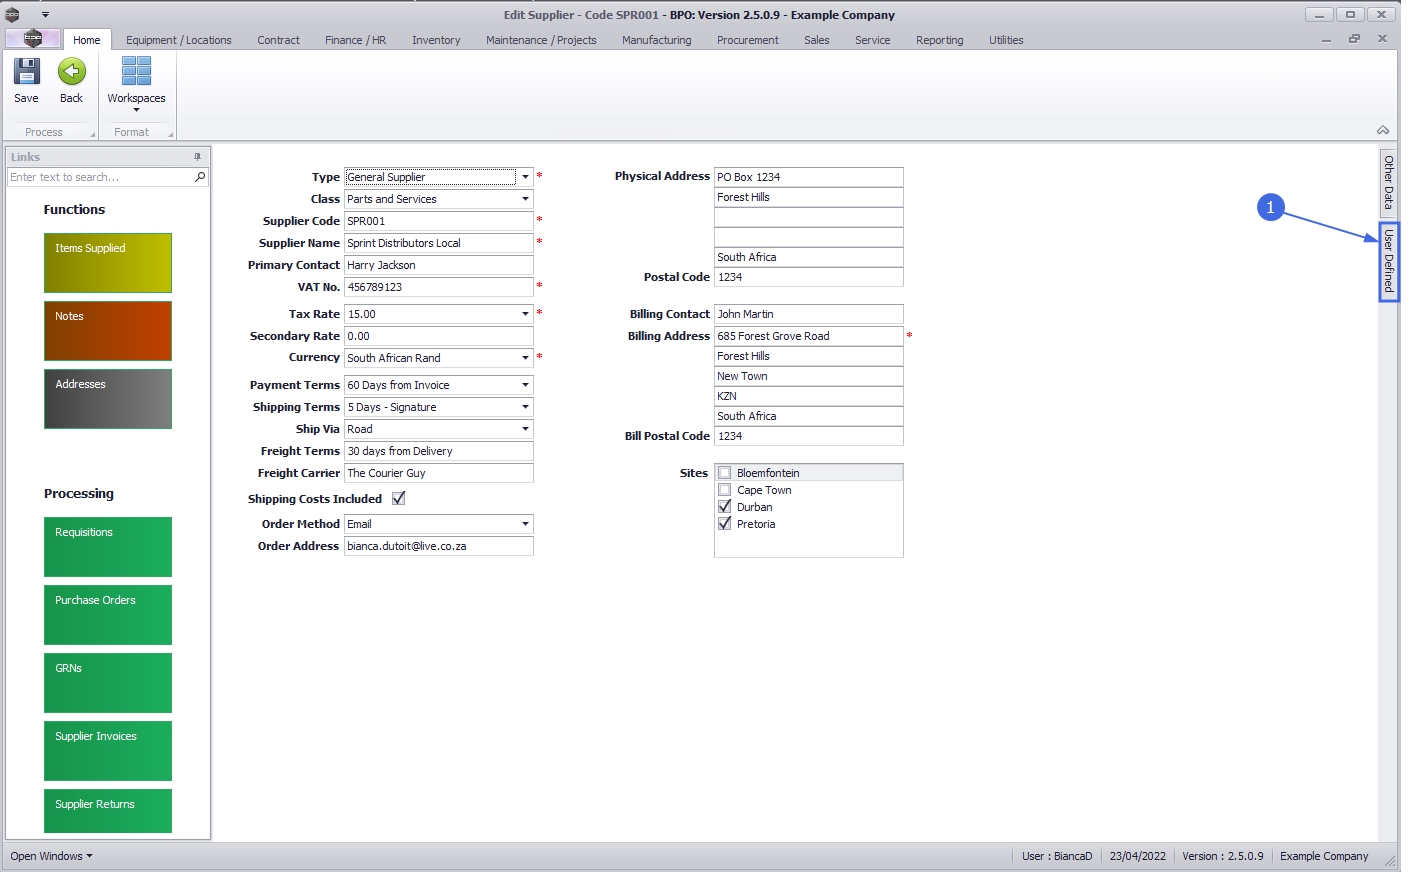
User Defined Fields
The inclusion of User Defined Fields is to provide more information within the Asset, Contract, Customer and Location modules so that associated work/processes can be carried out more efficiently. It will serve as connective tissue between contracts and call center functions to improve call center performance by having readily accessible information.
- Click on the User Defined dock panel tab to open the panel
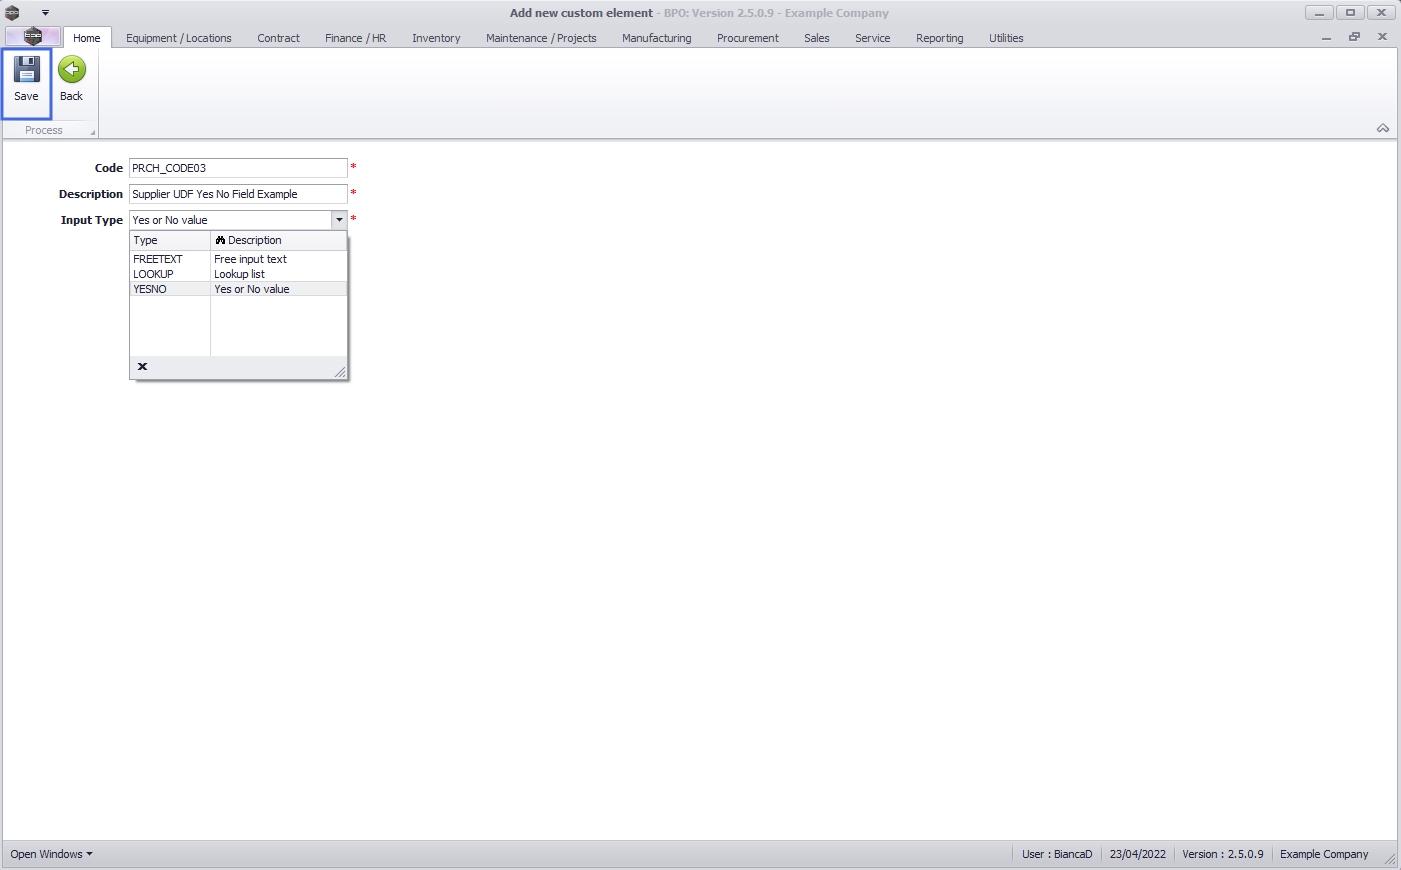
Add New Custom Field
New User Defined Customer Fields can be created from here. Any User Defined field created will be available for update on all suppliers.
- Right click in User Defined panel and select Add New Custom Field
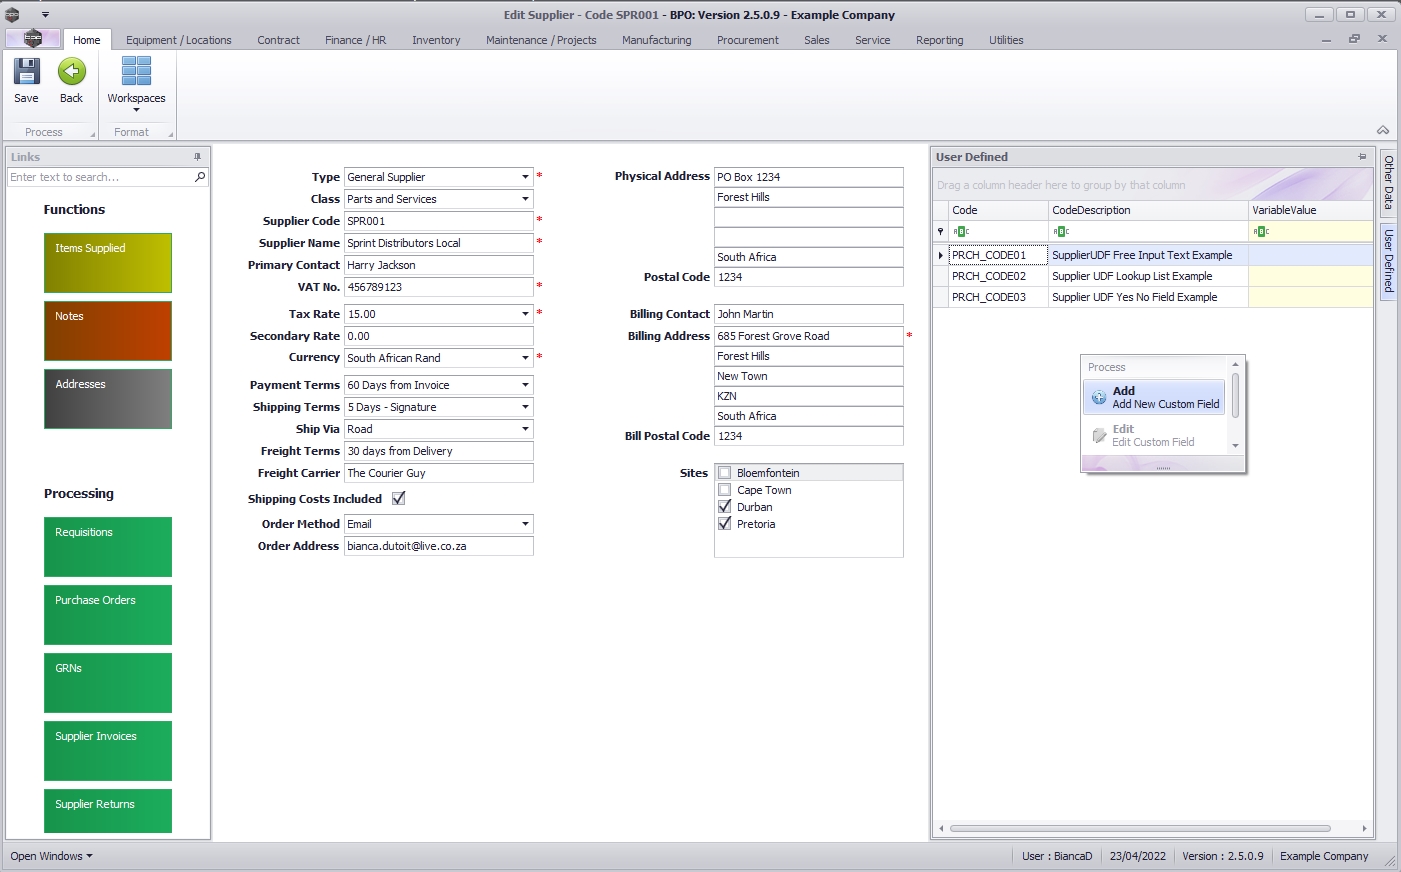
- Type in a Code and Description for the new User Defined Field.
- Select the Input Type.
- Click on the Save button.
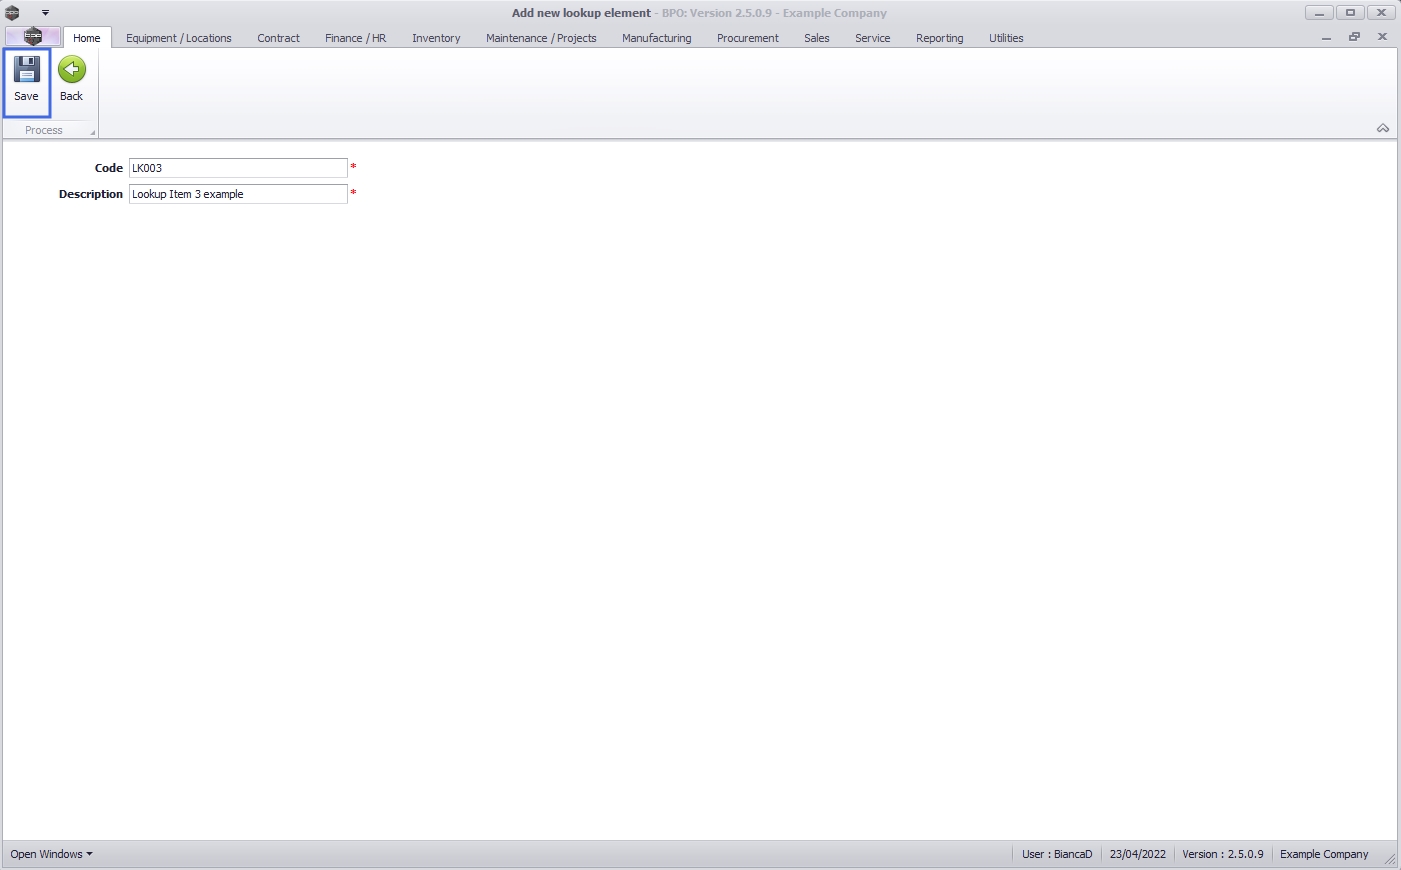
Add Lookup Items
For Lookup Input Variables - the right click context menu includes the option to add items to the Lookup List.
- Right click on Lookup input type Custom Field and select Add new lookup item (you may need to scroll down).

- Type in the lookup item Code and Description.
- Click on the Save button.
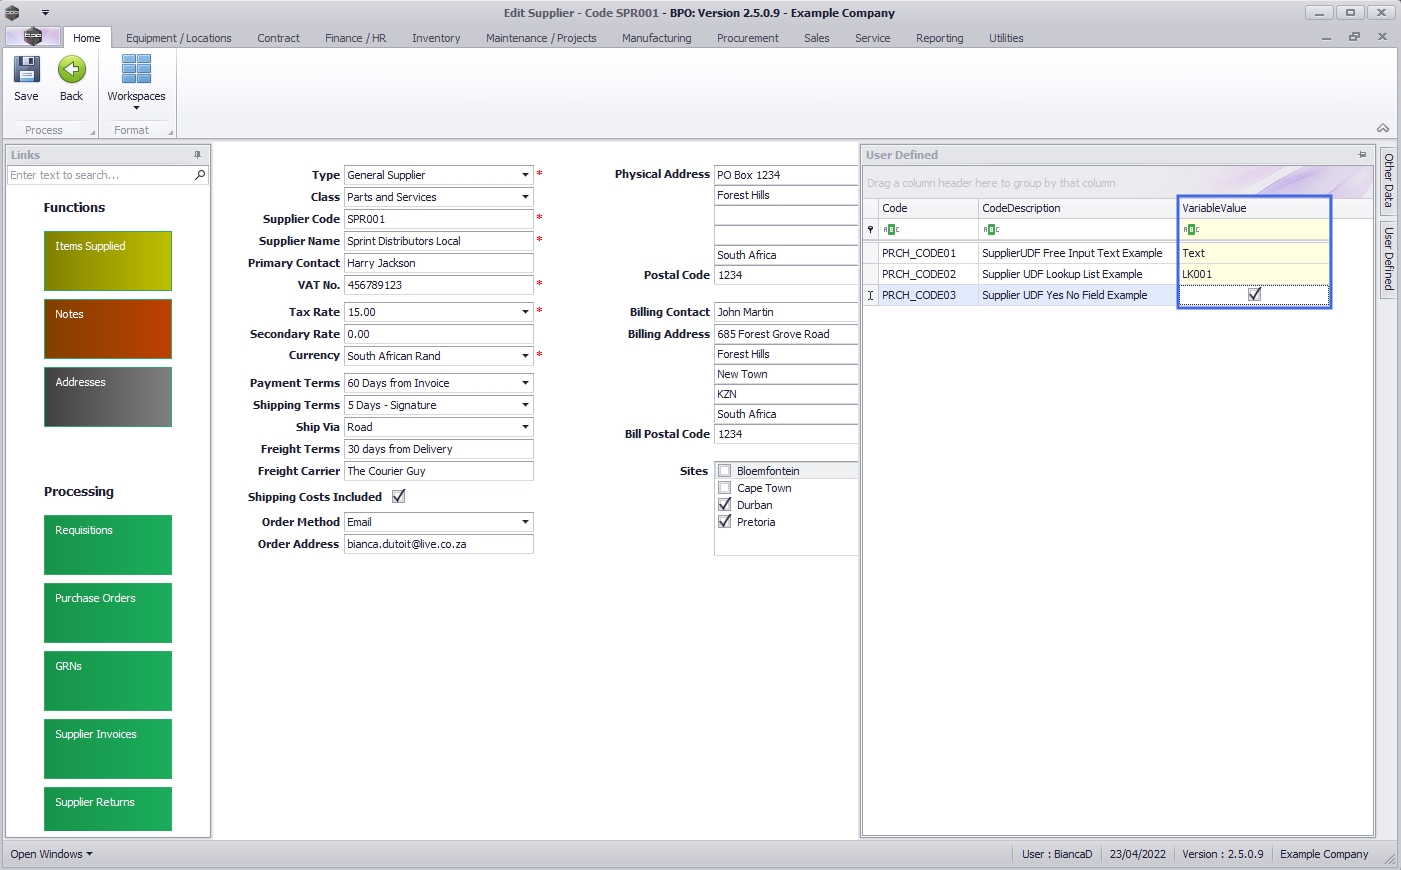
Update Custom Field
This will update the detail for the User Defined Field for this contract.
- Variable Value: Type in, pick from the Lookup List or Toggle Yes/No depending on the Input type.
Save Supplier
- When you have finished entering all the new Supplier details, click on Save.
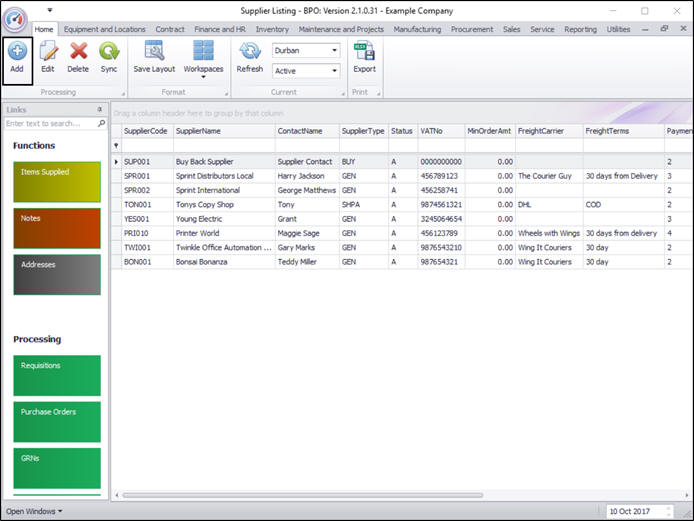
View New Supplier
- You will return to the Supplier Listing screen where you can see the new supplier has now been added to the list.
MNU.056.001