Inventory
Receive - Goods into Quarantine Warehouse
![]() Refer to Receiving Goods with Landed Cost Revaluation process overview for more information.
Refer to Receiving Goods with Landed Cost Revaluation process overview for more information.
Once you have added and printed the relevant Purchase Order(s) for the stock, you can receive the stock into the Quarantine Warehouse.
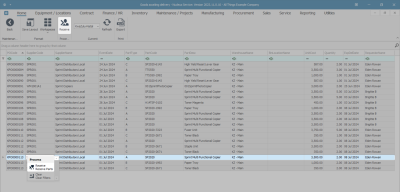
Ribbon Select Inventory > Deliveries
- The Goods awaiting delivery screen will be displayed.
Purchase Order to be Received into Quarantine
- Select the Purchase Order for the goods that you wish to receive into Quarantine.
- There may be 2 or more lines in the data grid with the same purchase order number - as there will be a separate line for each Part Code ordered. You can select any one of the lines to receive the Purchase Order.
- Click on Receive.
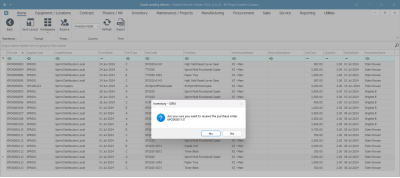
- An Inventory - GRN message box will pop up asking -
- Are you sure you want to receive the purchase order [ ]
- Click on Yes.
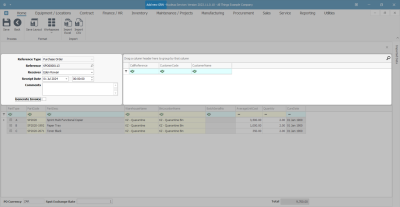
- Reference Type: This will auto populate with Purchase Order.
- Reference: This will auto populate with the original purchase order number.
- Receiver:This will auto populate with the person currently logged on to the system. You can click on the drop-down arrow and select from the list, an alternative person if required.
- Receipt Date and Time: This will auto populate with the current date and time.
- Date: You can either type in or click on the drop-down arrow and use the calendar function to select an alternative date, if required.
- Time: You can either type in or use the arrow indicators to select an alternative time, if required.
- Comments: Type a comment relevant to this new GRN, if required.
- Generate Invoice: Leave this check box un-ticked.
- If this GRN is linked to a call then the call reference number and customer code and name will be displayed here.
Parts Data Grid
- The Parts data grid will auto populate with the details of the:
- Part Type
- Part Code
- Part Description
- Average Unit Cost
- Quantity as on the purchase order.
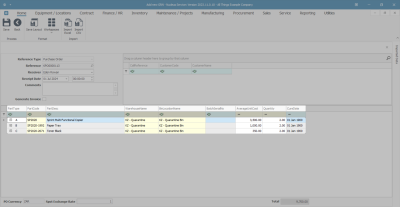
- If you have set up the required configuration, you will see the goods have been automatically received into the Quarantine Warehouse and Bin.
Receive A or B-Class Item
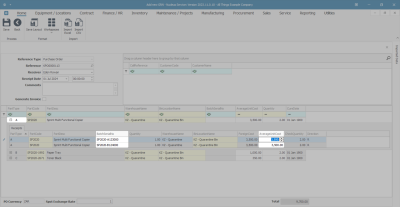
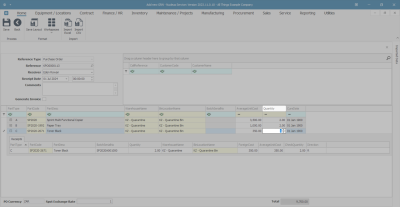
- Click on the expand button in the Part Type column of the first item row.
- Note that this is an A-Class item.
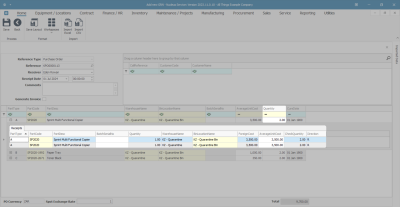
- The Receipts frame will be expanded.
Check / Edit Quantity A or B-Class Item
- As this is an A-Class part/item, if there is more than one A-Class part ordered then each item is placed on an individual line (row). This is because each A or B-Class item needs to have a unique serial number. There will only ever be 1 item per row.
- In this example, there is a Quantity of 2 items ordered so there are 2 corresponding receipt lines.
If the number of A or B-Class items delivered differs from the quantity on the purchase order, then the total quantity in the Parts frame, (not the Receipts frame), must be changed.
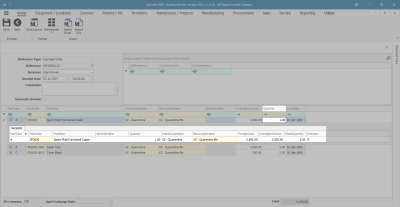
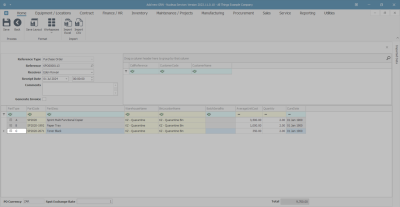
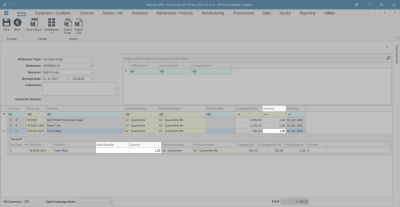
- In the Parts frame, (not the Receipts frame), click in the Quantity field and either type in or use the directional arrows to select the actual quantity received.
- In this image, the quantity has been changed to 1.
- Either click outside of the Quantity field or press Enter on your keyboard.
- The Receipts frame will now display a list of only 1 item line which corresponds with the edited quantity.
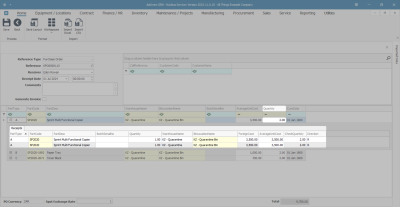
- To edit the quantity back to the original amount, type 2 back into the Quantity field, then click away (or press Enter). The frame will re-adjust and create 2 item lines again.
Note on Over Supply
If you have received more items than expected, you have the option to do either of the following:
Option 1
Receive the original order quantity and continue with this GRN, and then create a new Purchase Requisition and Order to receive the remaining surplus quantity.
Option 2
If you want to match your Supplier Invoice to your GRN, you will need to close / discard the current GRN and create a new Purchase Requisition and Order for the new quantity.
Add Serial Numbers - A or B-Class Item
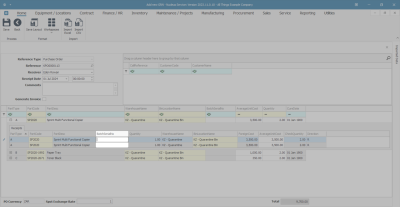
Each A or B-Class item must have it's own unique serial number typed into the Batch Serial No field.
- Click in each field and type a unique number in each one.
Note: This example uses an A-Class item but B-Class items are received in exactly the same way as an A-Class item, each item on a separate line, each needing it's own unique serial number.
- When you have added the serial numbers, move across to the Average Unit Cost fields.
Check/ Edit Average Unit Cost - A or B-Class Item
It may be that each A or B-Class item has either increased or decreased in price since the purchase order was first raised.
- Click in the Average Unit Cost field of each item and either type in or use the directional arrows to select the actual unit cost per line, if it has changed.
- When you have finished adding Serial Numbers and checking the Unit Cost of each A or B-Class item.
- Collapse this Receipts frame.
Receive C-Class Item
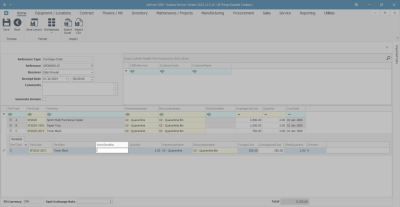
- Click on the expand button in the row of the C-Class item.
- The Receipts frame will be expanded.
Add Batch No. to C-Class Item
- You will note that there is only 1 receipt line for this item, although there are 2 items on order. This is because you can receive C-Class items in batches and link more than one C-Class item to a batch number.
If you are using the Stock Batch Tracking option, make sure you type in the batch number for C-Class (non-serialised) items when doing the GRN. For more details, refer to Inventory: Stock Batches.
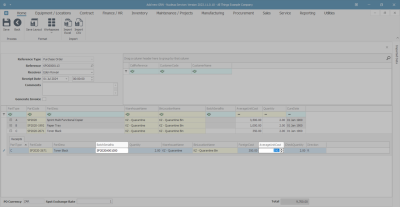
- Click in the Batch Serial No field and type in a batch number for these C-Class items, if required.
- When you have added the batch number, if required, move across to the Average Unit Cost field.
Check / Edit the Average Unit Cost - C-Class Item
It may be that this C-Class item has either increased or decreased in price since the purchase order was first raised.
- Click in the Average Unit Cost field and either type in or use the direction arrows to edit the average cost of these C-Class items, if required.
Check / Edit the Quantity - C-Class Item
If the number of items delivered differs from the quantity on the purchase order, then the total quantity in the Parts frame (not the Receipts frame) must be changed.
- In the Parts frame, click in the Quantity field, and either type in or use the direction arrows to select the actual quantity received. (If, for example, the delivery contained less than the purchase order quantity.)
- In this example, the quantity has been changed to 1.
- The Receipts frame Quantity has not yet changed - you will need to click outside of the Quantity field or press Enter on your keyboard.
- The Quantity in the Receipts frame will now correspond with the edited quantity.
- You may need to type the Batch No in again.
- To edit the quantity back to the original amount, type the original number back into the Parts frame Quantity field. Click outside of the frame. The Receipts frame will re-adjust to the original quantity.
Note: A GRN cannot record or receive more than the purchase order quantity.
Note on Over Supply
If you have received more items than expected, you have the option to do either of the following:
Option 1
Receive the original order quantity and continue with this GRN, and then create a new Purchase Requisition and Order to receive the remaining surplus quantity.
Option 2
If you want to match your Supplier Invoice to your GRN, you will need to close / discard the current GRN and create a new Purchase Requisition and Order for the new quantity.
Save the GRN
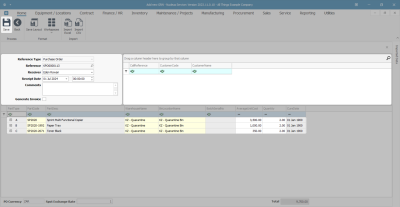
- When you have finished checking / editing the details on the GRN, click on Save.
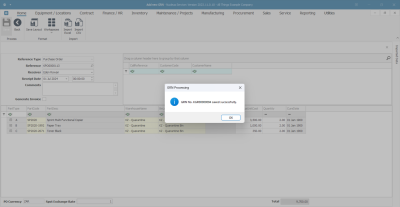
- A GRN Processing message box will pop up informing you that -
- GRN No. [ ] saved successfully.
- Click on Ok.
Print the GRN
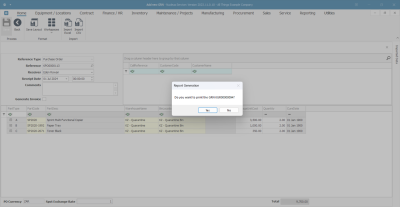
- A Report Generation message box will pop up asking -
- Do you want to Print the GRN [ ]?
- Click on Yes.
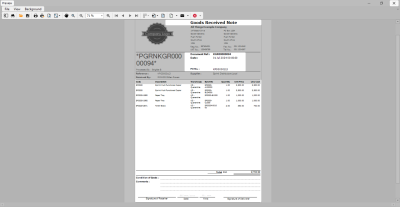
The Report Preview screen will be displayed.
Here you can see -
- The goods have been received into the Quarantine Warehouse.
- The Batch/Serial Numbers that you entered have been linked to the items.
- The Quantity, Unit Price and Line Costs have pulled through (with any changes made in the Add new GRN screen).
- From here you can View, Print, Export or Email the Goods Received Note.
- Close the Report Preview screen when you are done.
- You will return to the Goods Awaiting Delivery screen, the purchase order that you received will no longer be in this screen.
- You now need to follow the process to Create a Non-Stock Service Requisition for the Shipping Costs - Quarantine for these items received.
MNU.030.004

