We are currently updating our site; thank you for your patience.
Contract
Contracts - Link Item Meter Charges
Contracts can have meter charges linked to the items on that contract.
This process sets out how to link these meter charges to the contract.
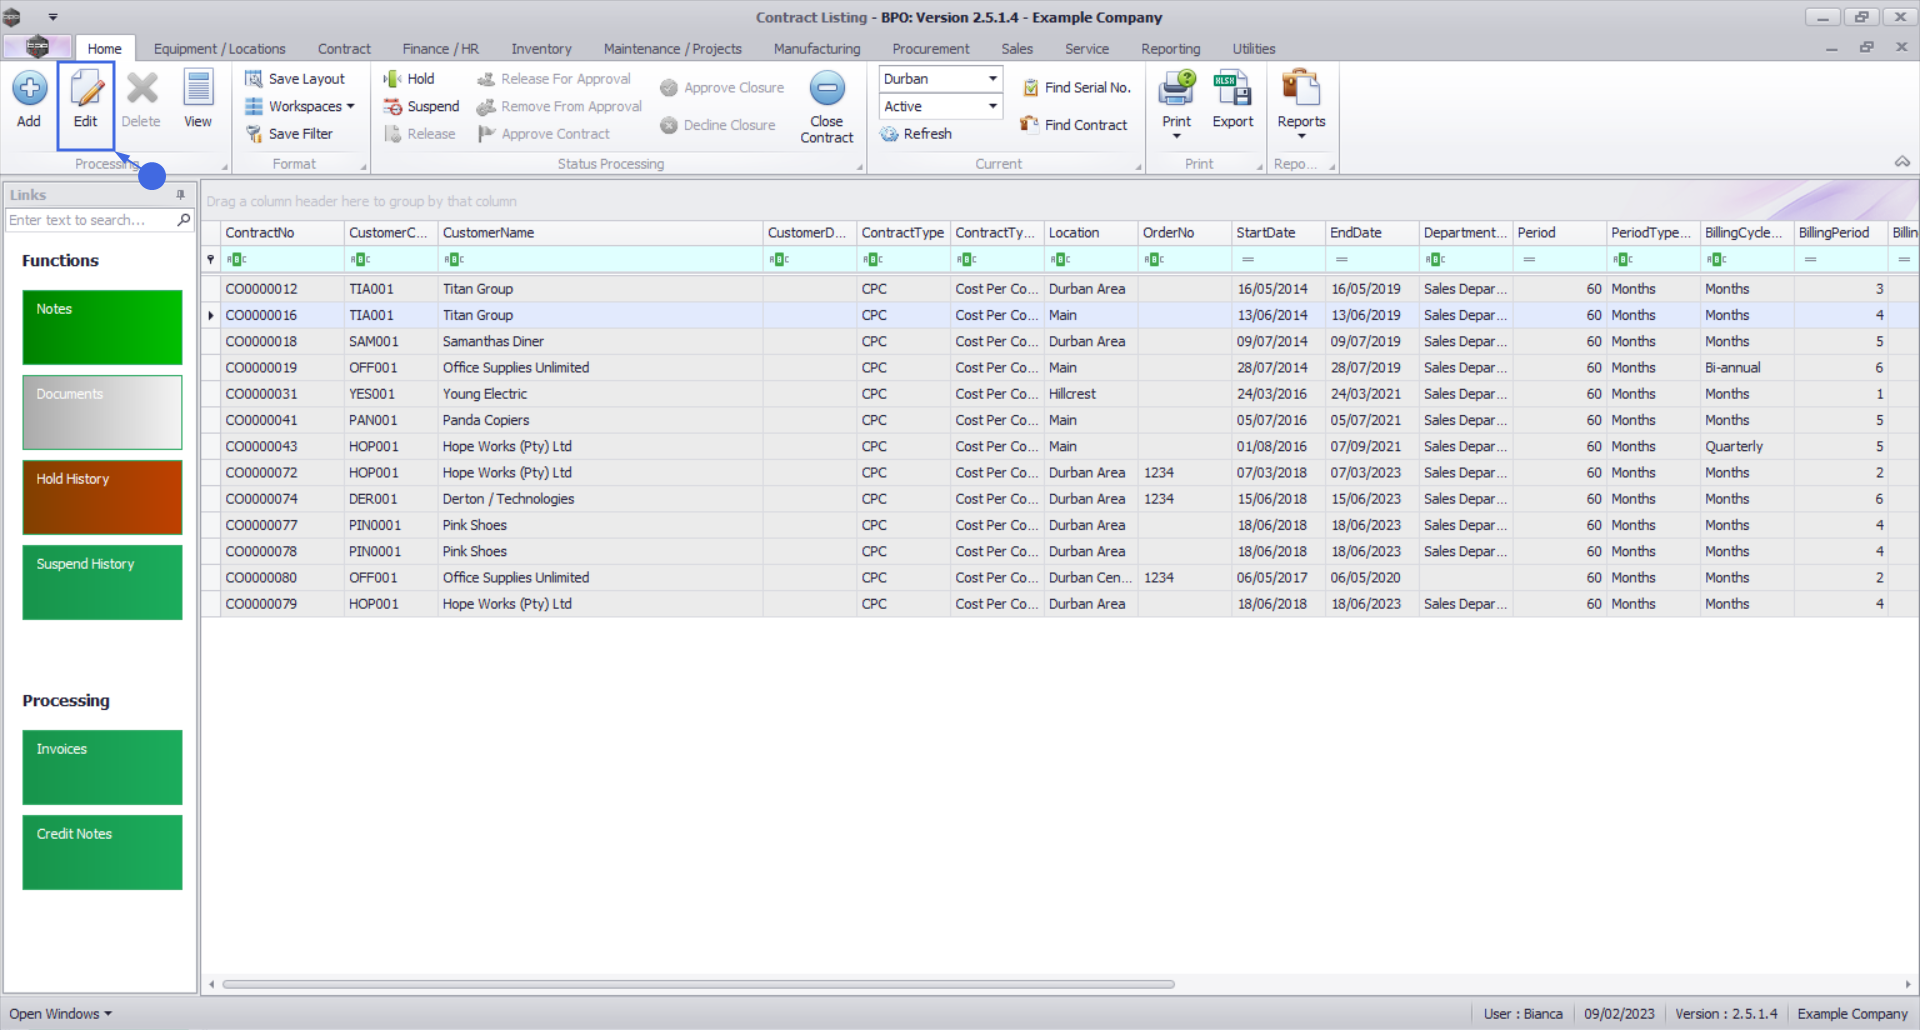
Ribbon Select Contract > Contracts

The Contract Listing screen will be displayed.
Your employee user record should be linked to a default site. In this case, the site will auto populate with this default, otherwise the site must be manually selected.
Another site can be selected, if required, and if you have the security rights to access the site.
If All Sites displays here, then you do not have a default site configured on your user record, and need to select the required site.
Upon opening, this screen will default to the Active status, listing all the Active contracts for the selected site.

Select the Contract
- Select the row of the contract that you wish to process.

- Click on the Edit button.
The Contract Maintenance screen will be displayed.
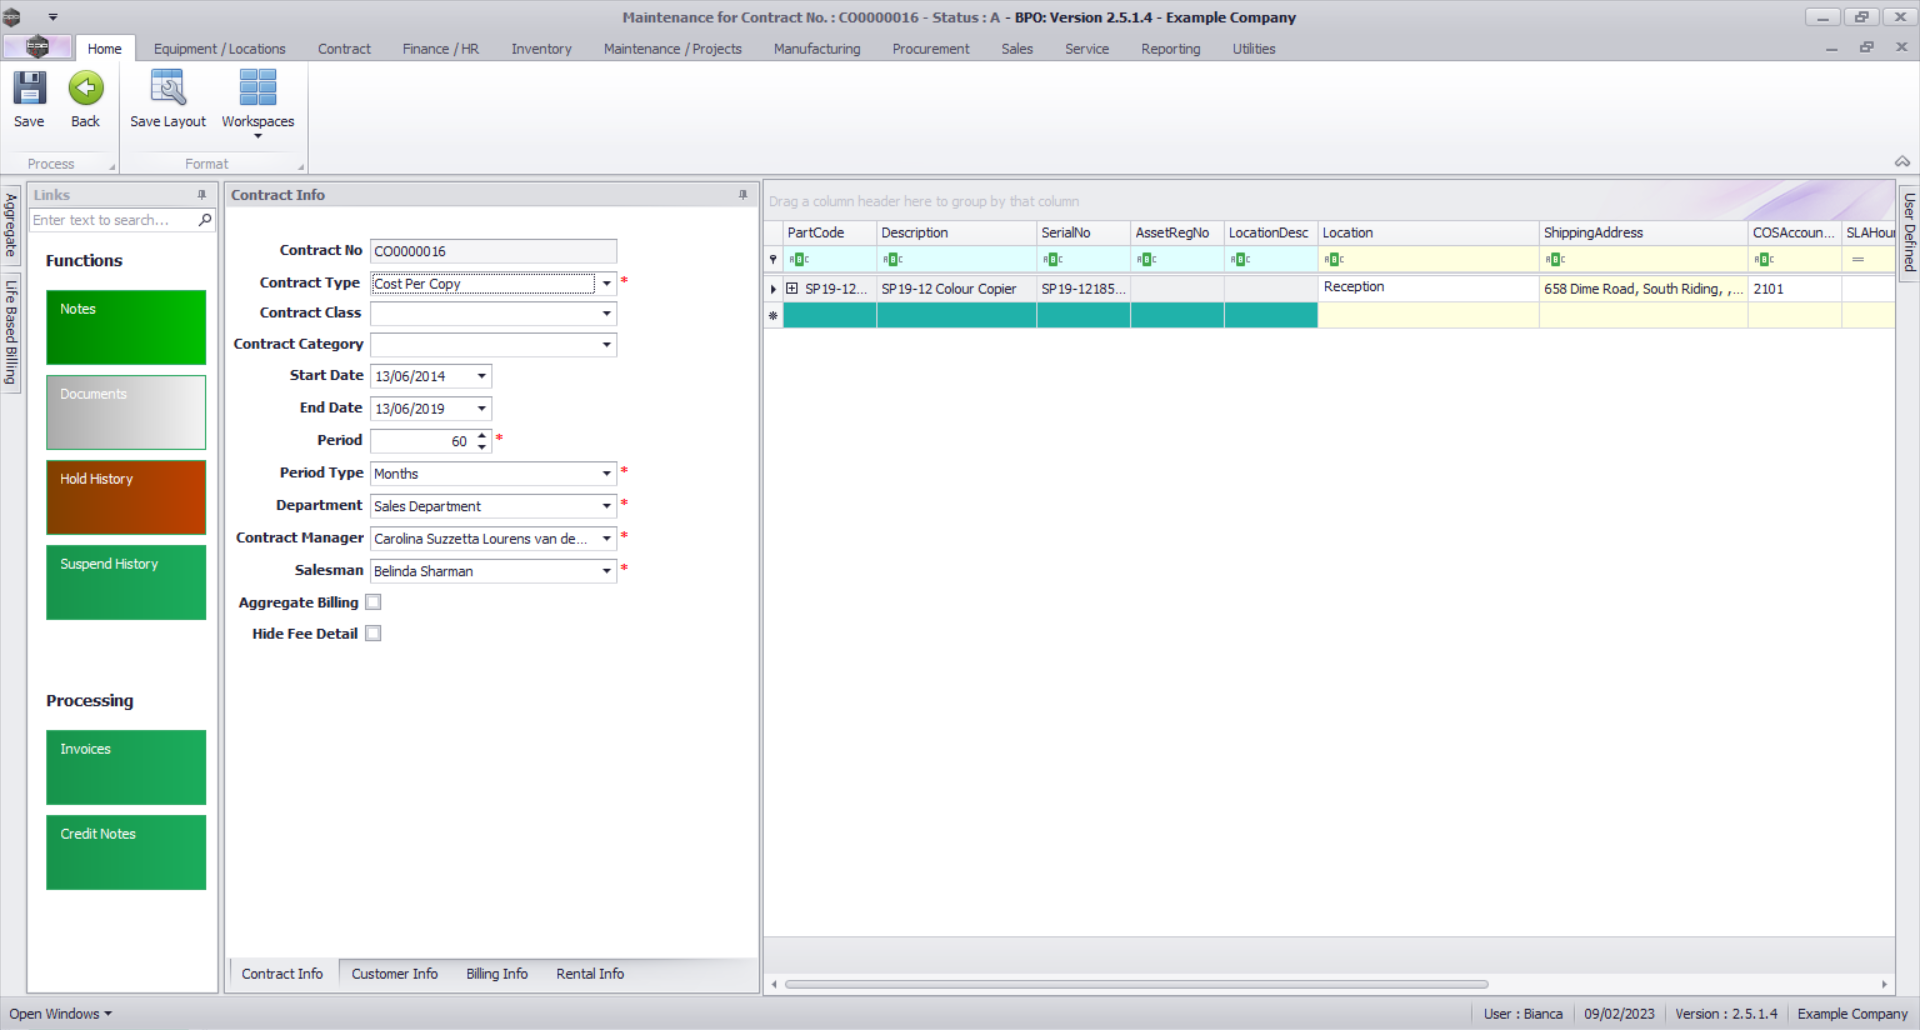
Select the Item
- Click on the row of the contract item you wish to work with.

- Click on the expand button in the row of the item where you wish to link or edit a meter charge.
-
The Items sub grid will open.
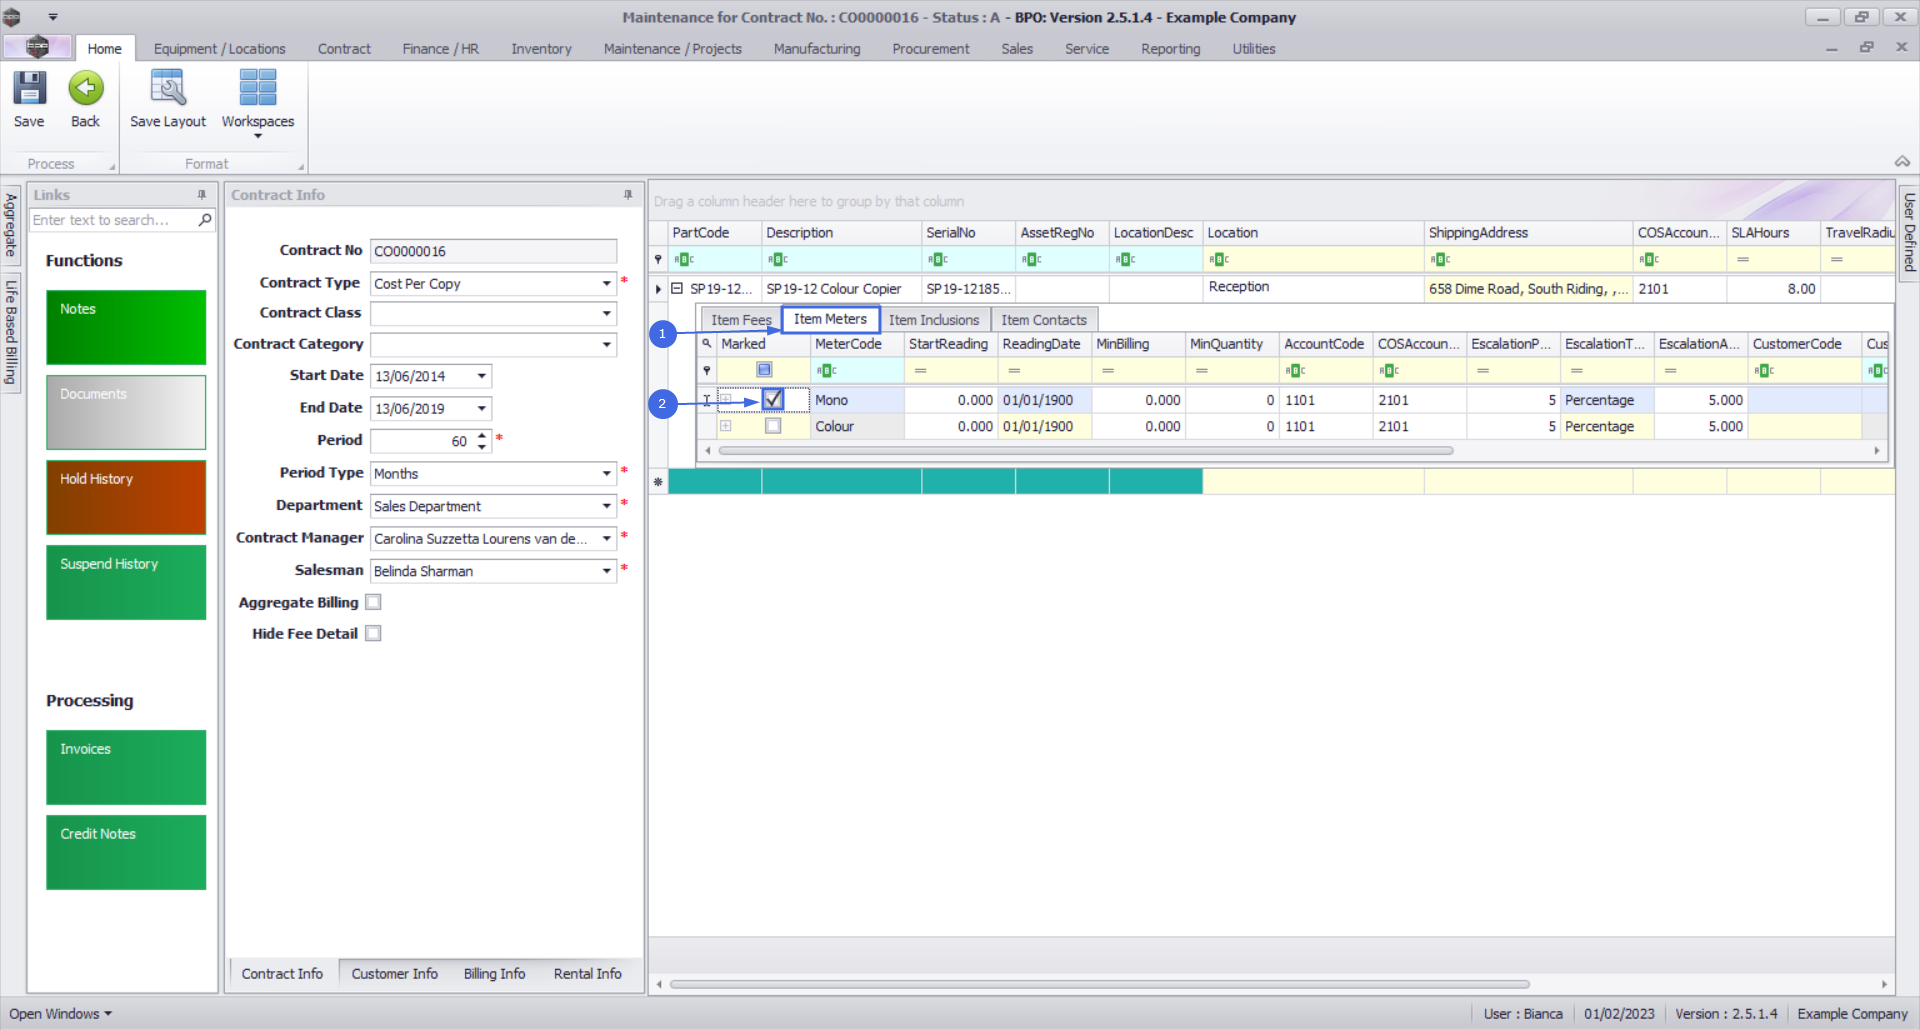
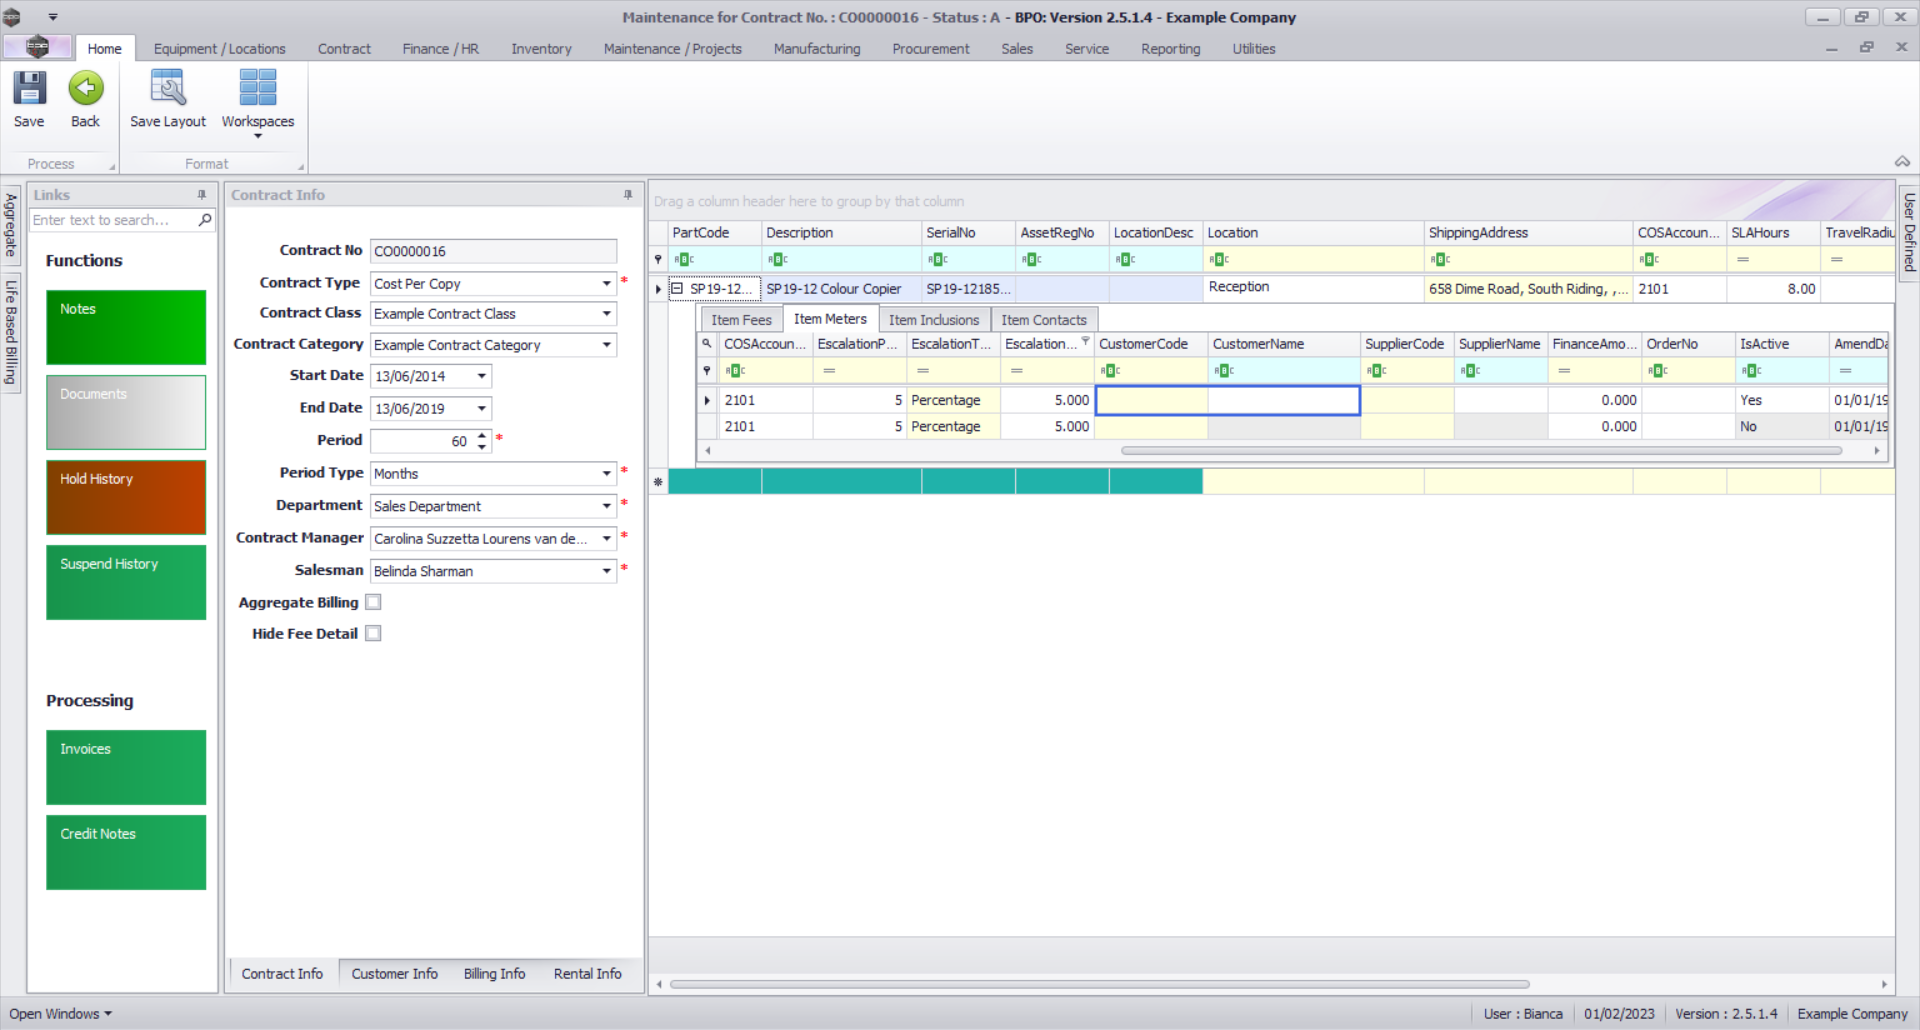
Item Meters
Meters charges can only be configured on Machine Items (assets).
The meter types available for selection are dependant on the meters configured for the selected contract type, and where the relevant meters are linked to the selected asset.
To avoid linking meter definitions to items every time you want to add items on a contract, link meters to the part codes of the items. This way, when new items are received / adjusted into stores, they will already have meters linked to them. This will not apply to items that are already in stores prior to this step.
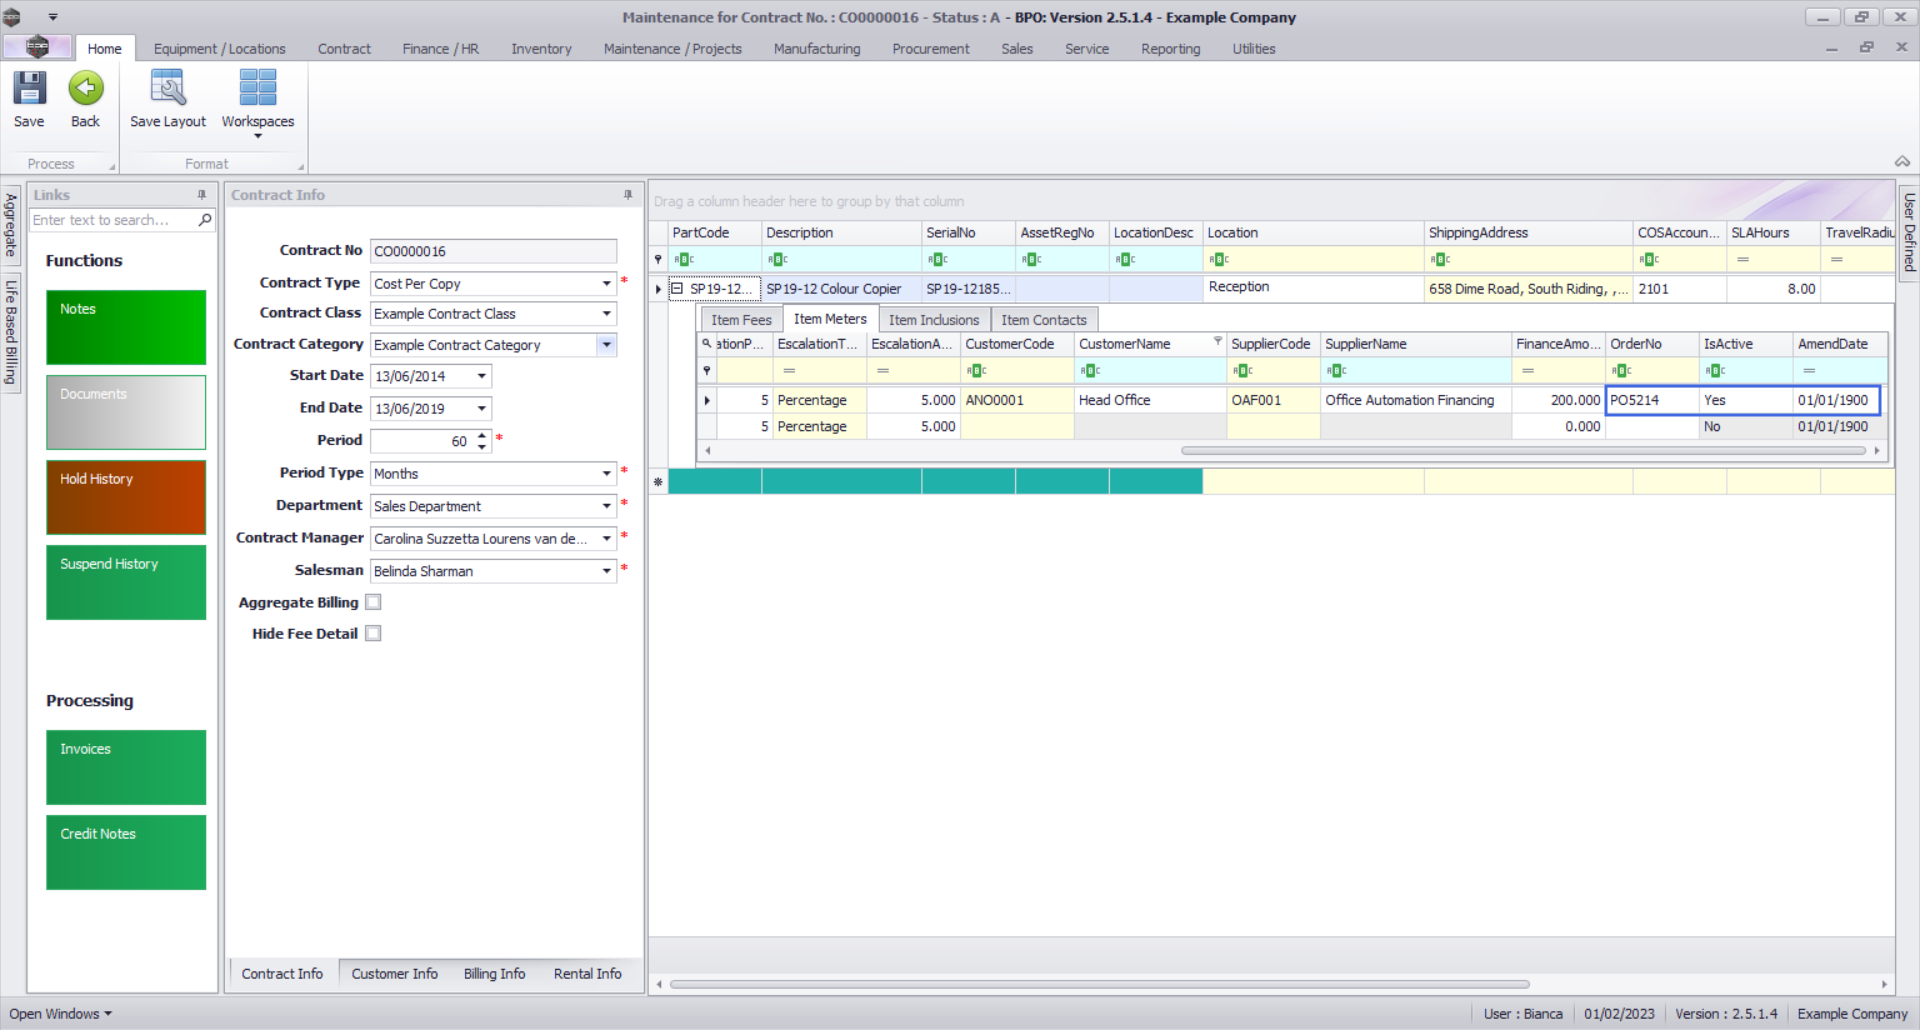
- Click on the Item Meters tab.
- Marked: Click on the check box in front of the name of the Meter to be billed on this contract.
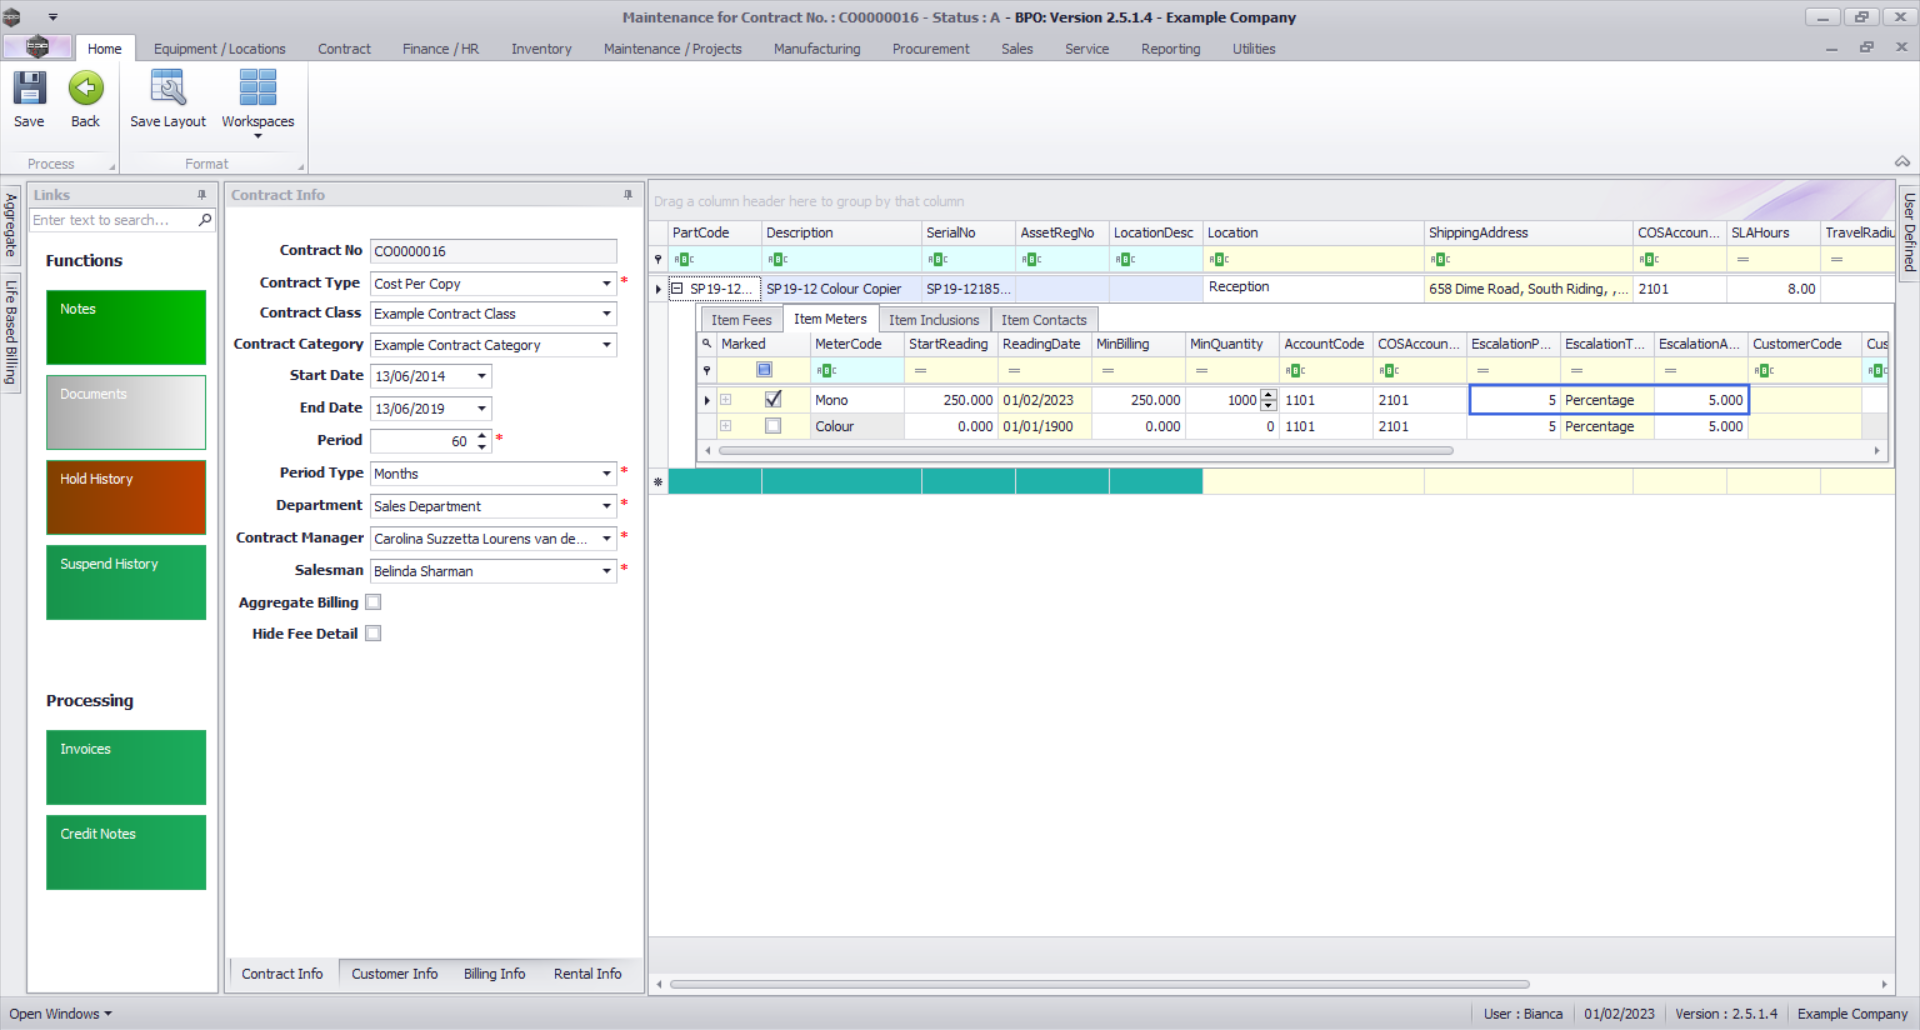
Meter Header and Minimum Billing Details
- Start Reading: Type in the start reading of the meter. This will be the reading taken from the contract item at the point of installation
- Reading Date: Click in this text box to display the calendar function, use this to select the reading date that corresponds to the Start Reading.
- Min Billing: Type in the minimum billing amount (in Rand value).
- Minimum billing is a fixed charge; charged on copies up to and including the Minimum Quantity. For example, a minimum billing fee of R250 for a minimum quantity of 1000 copies means R250 will be charged for any number of copies made from the first copy up to and including 1000.
- If no minimum billing should be applied, leave the MinBilling and MinQuantity fields as 0.
- For a more detailed explanation, read this important note on Minimum Billing and Meter Charge Setup
- Min Quantity: Type in the minimum quantity (the copies that are included in the minimum billing amount).
- Account Code: This will auto populate with the Sales GL Account code set on the meter as configured for the contract type. This code can be changed if required, but ensure a valid general ledger code is used.
- COS Account Code: This will auto populate with the Sales GL Account code set on the meter as configured for the contract type. This code can be changed if required, but ensure a valid general ledger code is used.

- Scroll right to view the remaining columns in this frame.
Escalation Details
- Escalation Period: This will auto populate according to the escalation period recorded in the Billing Info panel. You can click on the text boxes and either type in or use the drop-down arrow to select an alternative escalation period if required.
- Escalation Type: This will auto populate according to the escalation type recorded in the Billing Info panel. You can click on the drop-down arrow in the text box to select an alternative escalation type if required.
- Escalation Amount: This will auto populate according to the escalation amount recorded in the Billing Info panel. You can click on the text box and either type in or use the arrow indicators to select an alternative escalation amount if required.
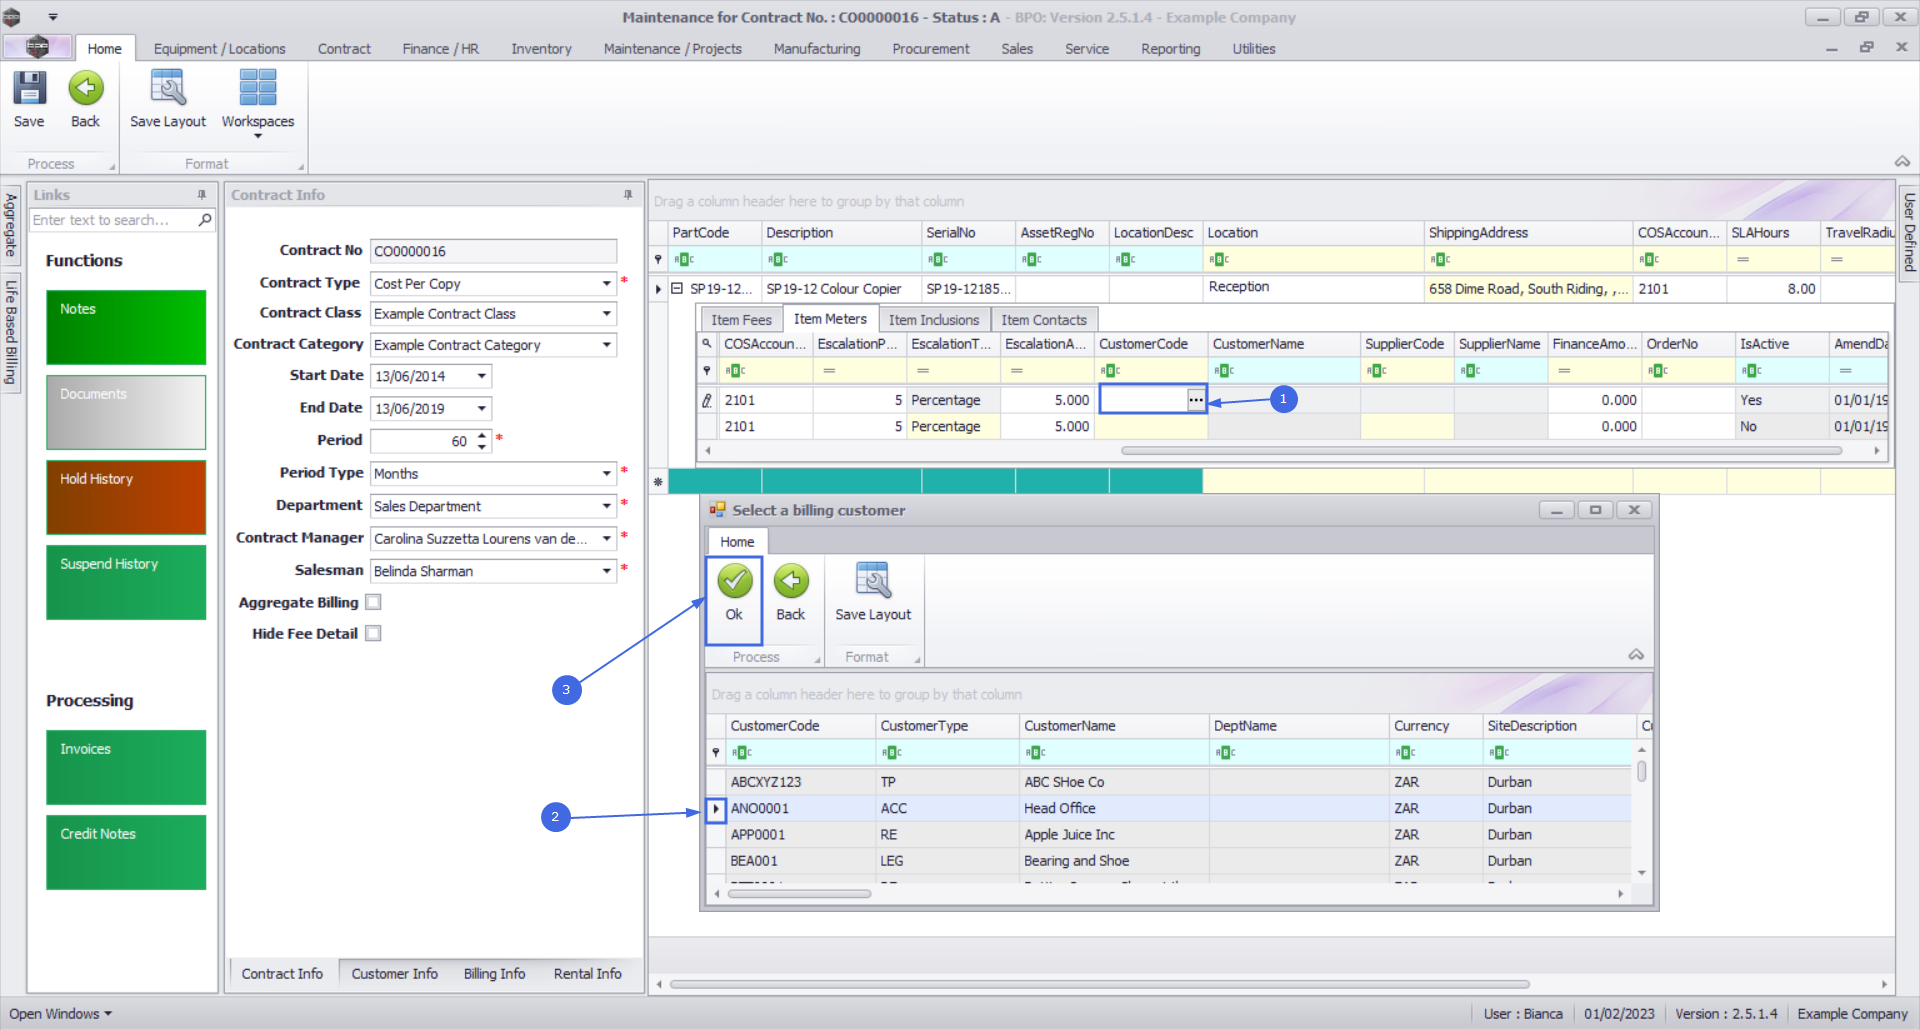
Billing Customer
- Only populate these 2 fields if another party (a separate billing customer) is going to pay the Item Fees on behalf of the customer.
- If these fields are left blank, BPO will bill the customer linked to the contract.
- Note 1: BPO only supports different billing customers on an aggregate contract from BPO v2.3.0.4.
- Note 2: Follow the next 2 steps only if you wish to link another customer as the billing customer.
- Click in the Customer Code text box.
- An Ellipsis button will be revealed.
- Click on this button to display the Select a billing customer pop up screen.
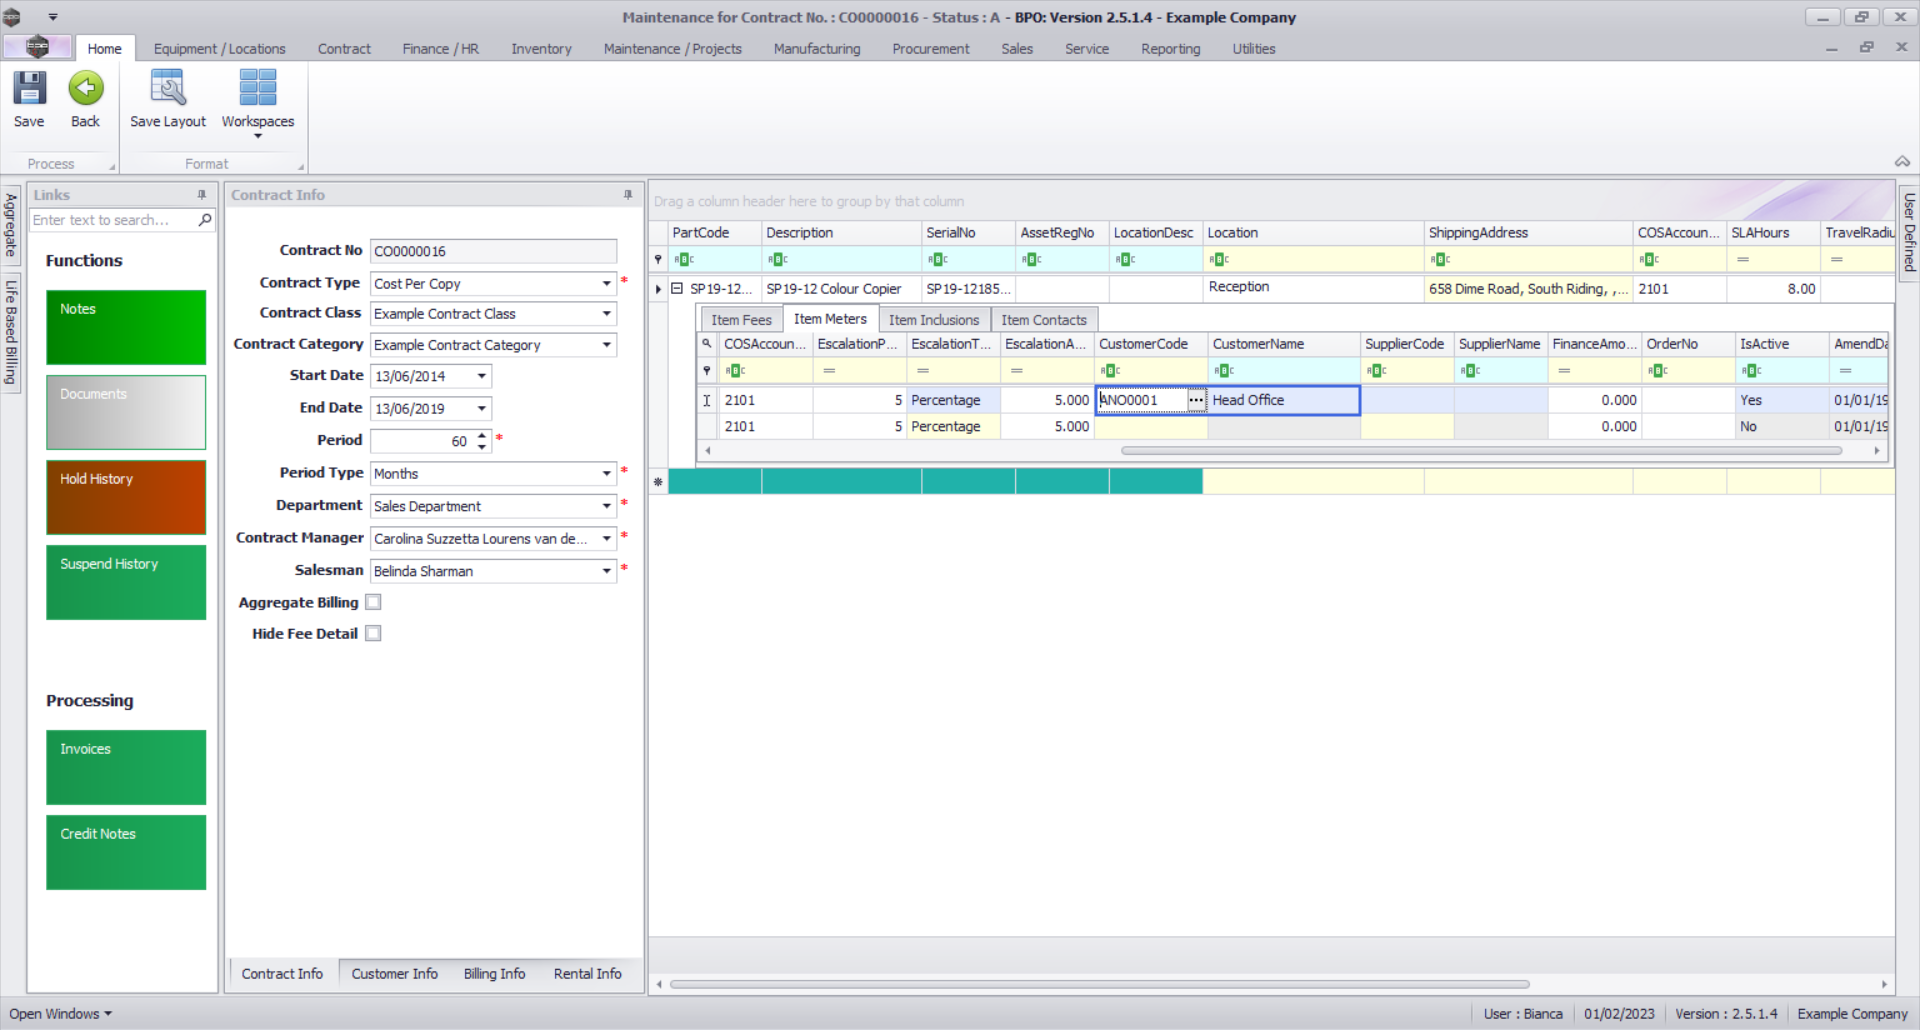
- Click on the row selector in front of the Billing customer that you wish to link to this contract
- Click on Ok.
- Customer Name: Once you have selected the customer code, the customer name will auto populate with the customer name linked to that code on the system.
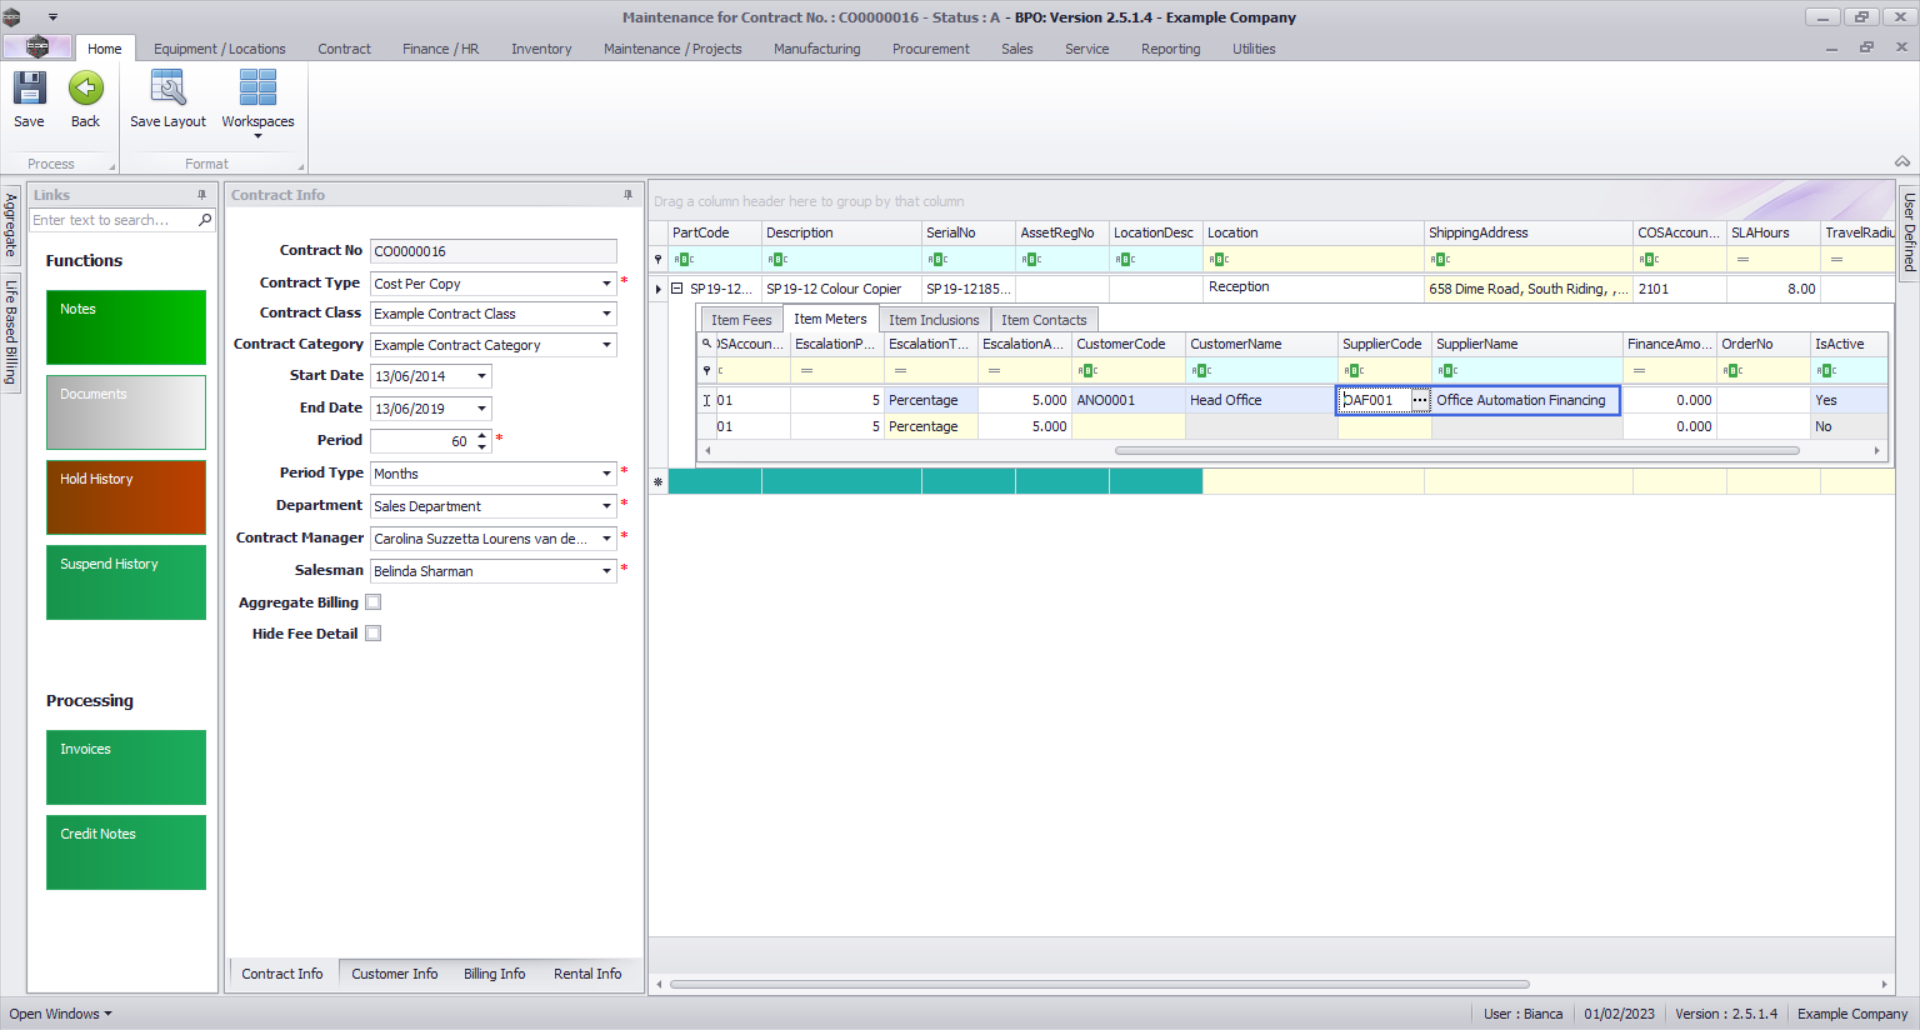
Back to Back / Finance Details
- These fields should only be populated if there is a Back to Back Deal with a third party who is set up on BPO as a Supplier.
- Follow the next 2 images only if you wish to link a supplier for rental back-to-backs (finance house bills company & company bills client).

- Click on the Supplier Code text box to reveal an Ellipsis button.
- Click on this button to display the Select a finance party pop up screen.
- Click on the row selector in front of the Supplier that you wish to link to this item.
- Click on Ok.

- Supplier Name: This will auto populate once the supplier code has been selected.
- Finance Amount: Click in this text box and either type in or use the arrow indicators to select the finance amount.

Additional Details
- Order No: Type in a customer order number relevant to this item, if required. This will be displayed on the contract invoice.
- Status: This field will be set to A (Active) once the fee has been saved, and is static.
- Amend Date: This shows the date the item was last modified and the field is static.
Add Meter Levels
- Scroll left to return to the Marked column.
- Right click in the row of the 'active' item you wish to add a meter level to.
- In this image the Mono meter has been selected.
- A Process menu will pop up.
- Click on Add - Add a level.

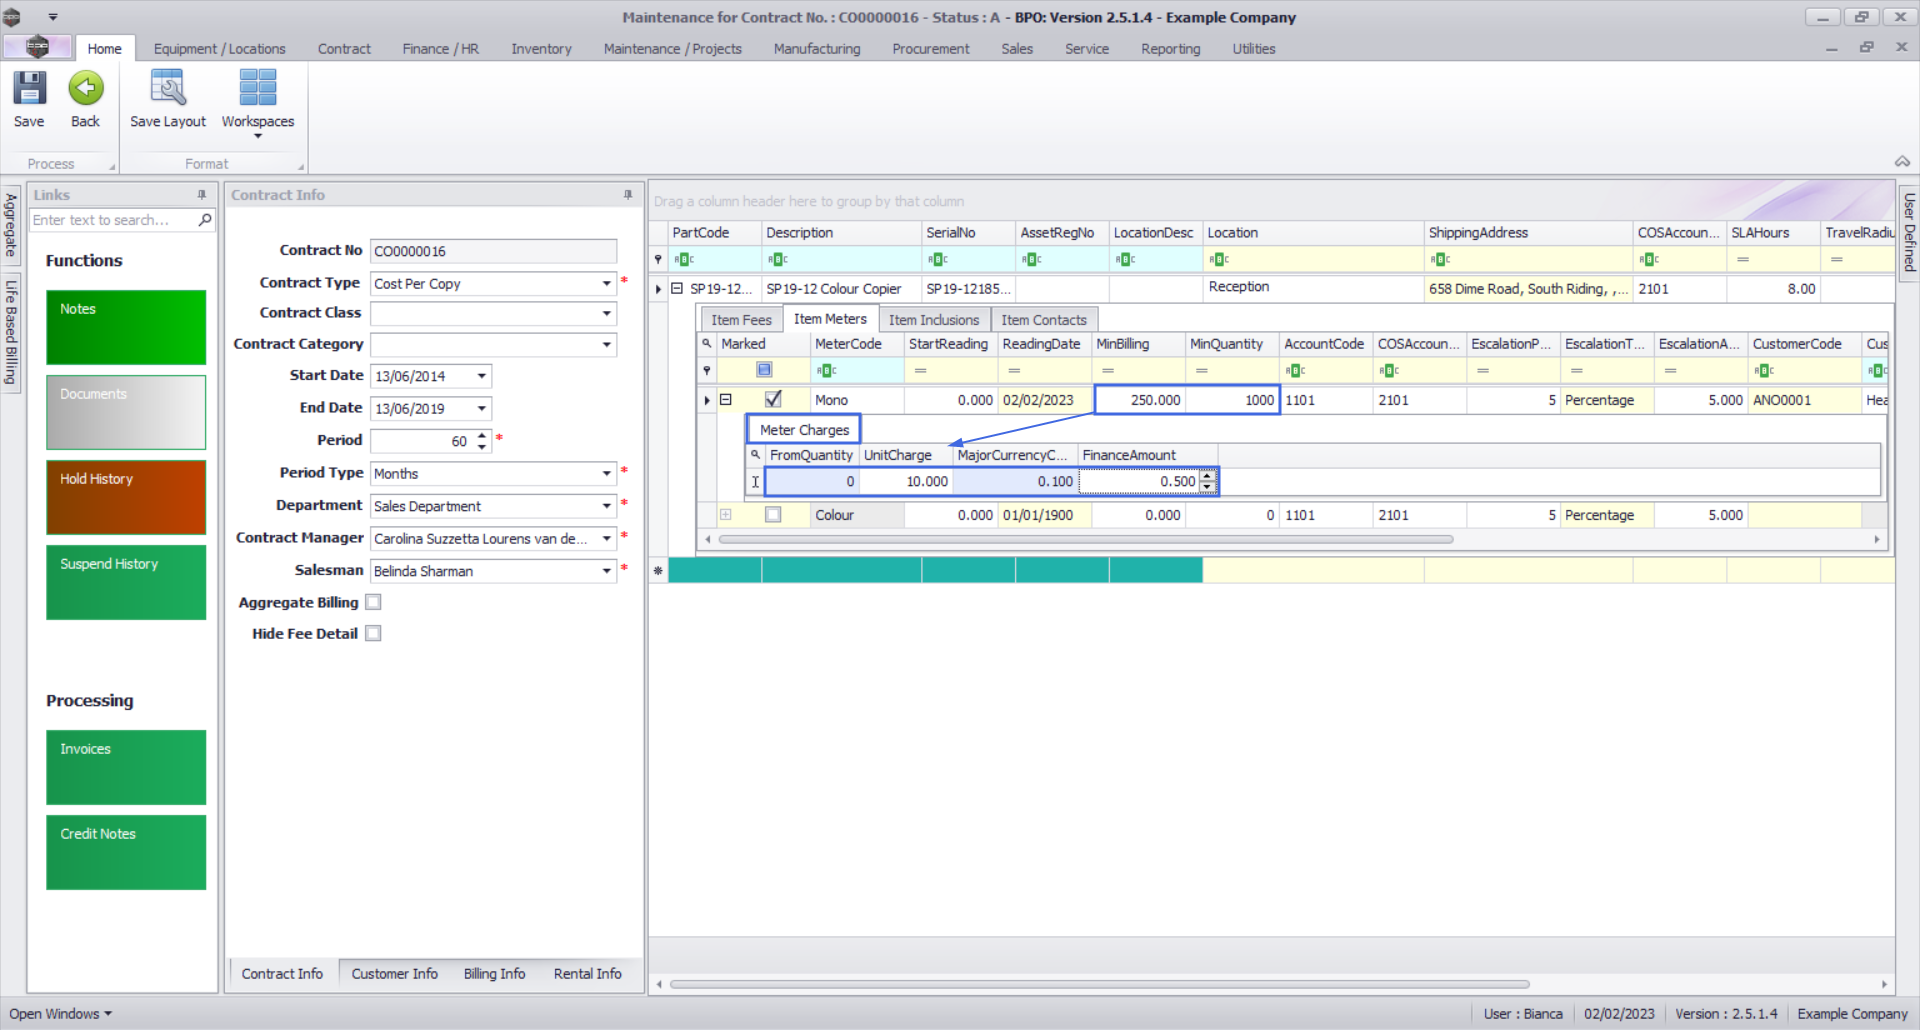
Add Meter Levels - For A Meter with Minimum Billing
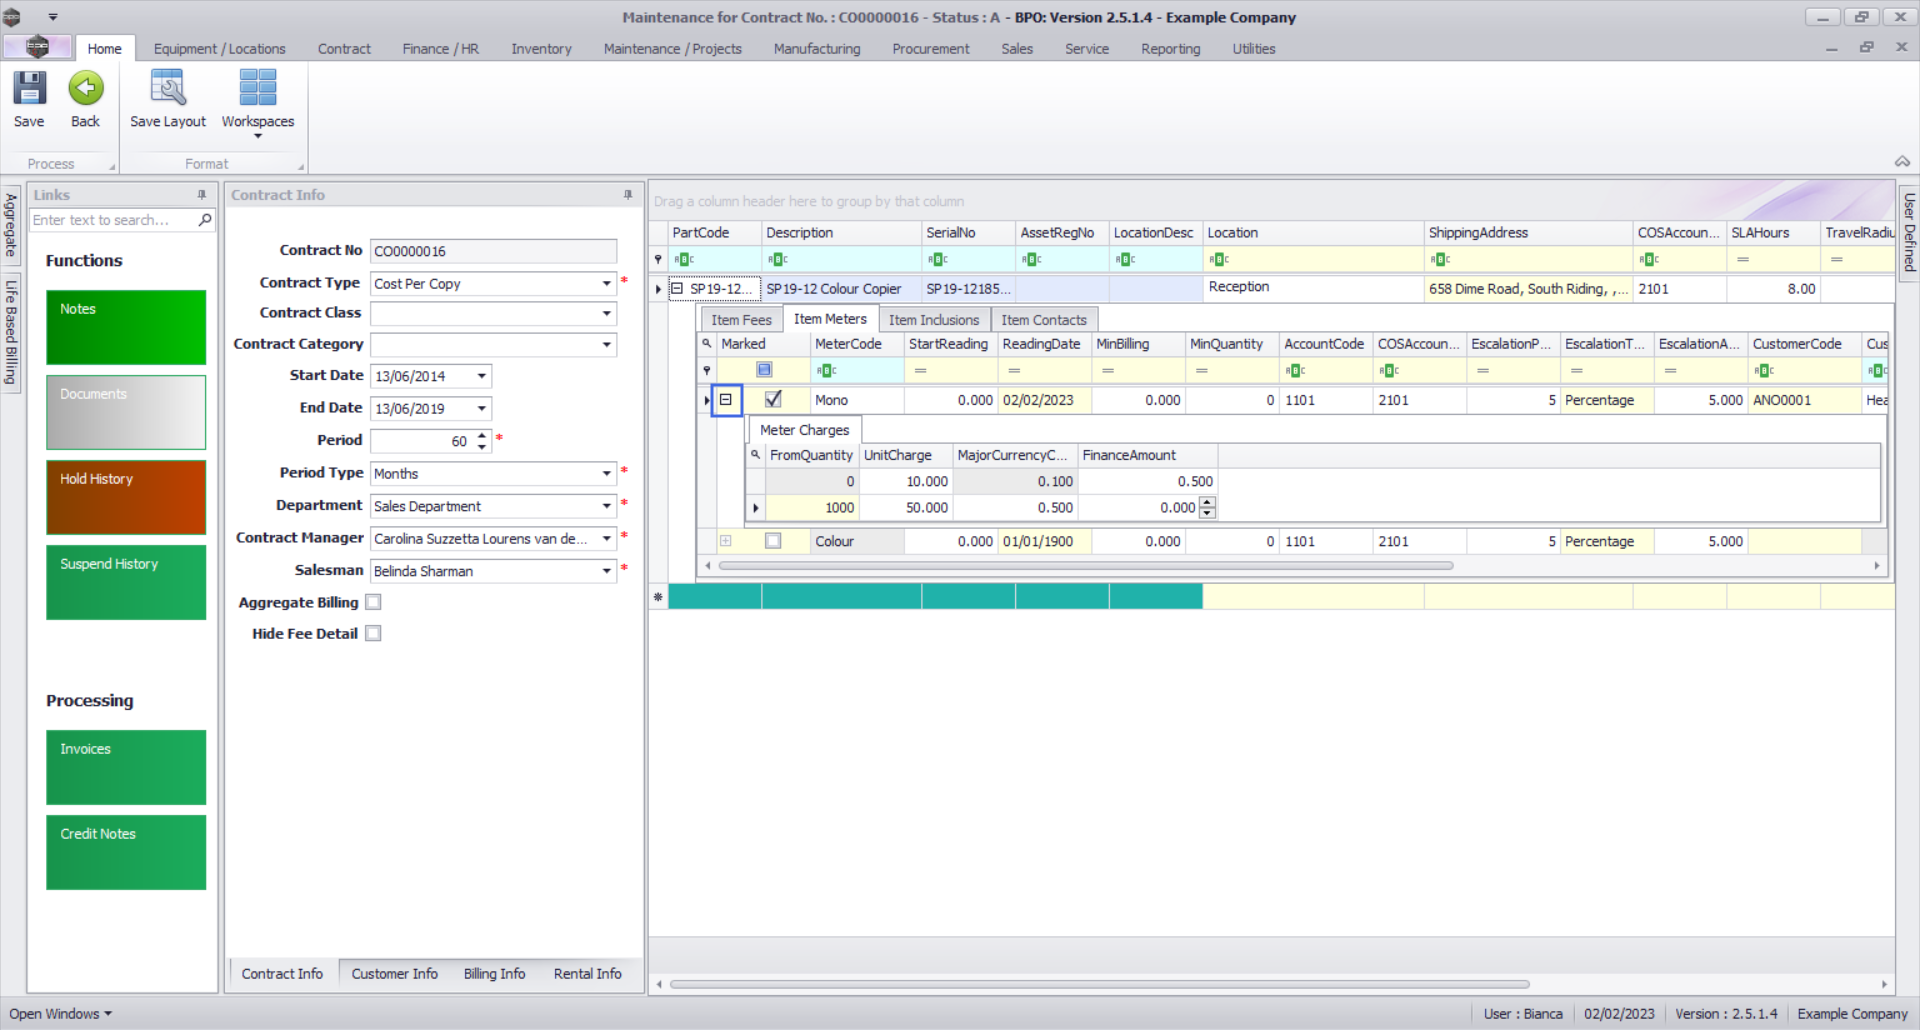
- The Meter Charges frame will be expanded.
- In this image, the mono meter has a minimum billing set up of a R250 charge for the first 1000 copies (Minimum Quantity). BPO calculates the usage charges by first calculating the minimum billing set up. In this example, it means in BPO, a fixed charge of R250 will be applied for any number of mono copies made on this contract item the first copy up to and including 1 000 thereafter a unit charge per copy will be applied i.e from 1001.
- From Quantity: This is the number from which the unit charge will be effective.
- The first row in the Meter Charges matrix, is static at 0. This means if there is minimum billing set up on the meter, the first row looks incorrect as the From Quantity field is static at 0.
- If there is minimum billing set up on the meter, BPO does not read the From Quantity in the first row as 0 (although it displays as 0) but starts counting from (Minimum Quantity + 1). In this case, since (minimum billing level) is up to and including 1000, BPO will start counting from 1001.
- For a more detailed explanation, read this important note on Minimum Billing and Meter Charge Setup.
- Major Currency Charge: (only viewable for standard meter set up) Once the Unit Charge has been input as cents, the Major Currency Charge will automatically round the value to two decimal places.
- Unit Charge: Type in the unit charge for the meter (charge per copy) - this needs to be input as the cents value.
- Finance Amount: This should only be populated if there is a Back to Back Deal with a third party who is set up in BPO as Supplier.
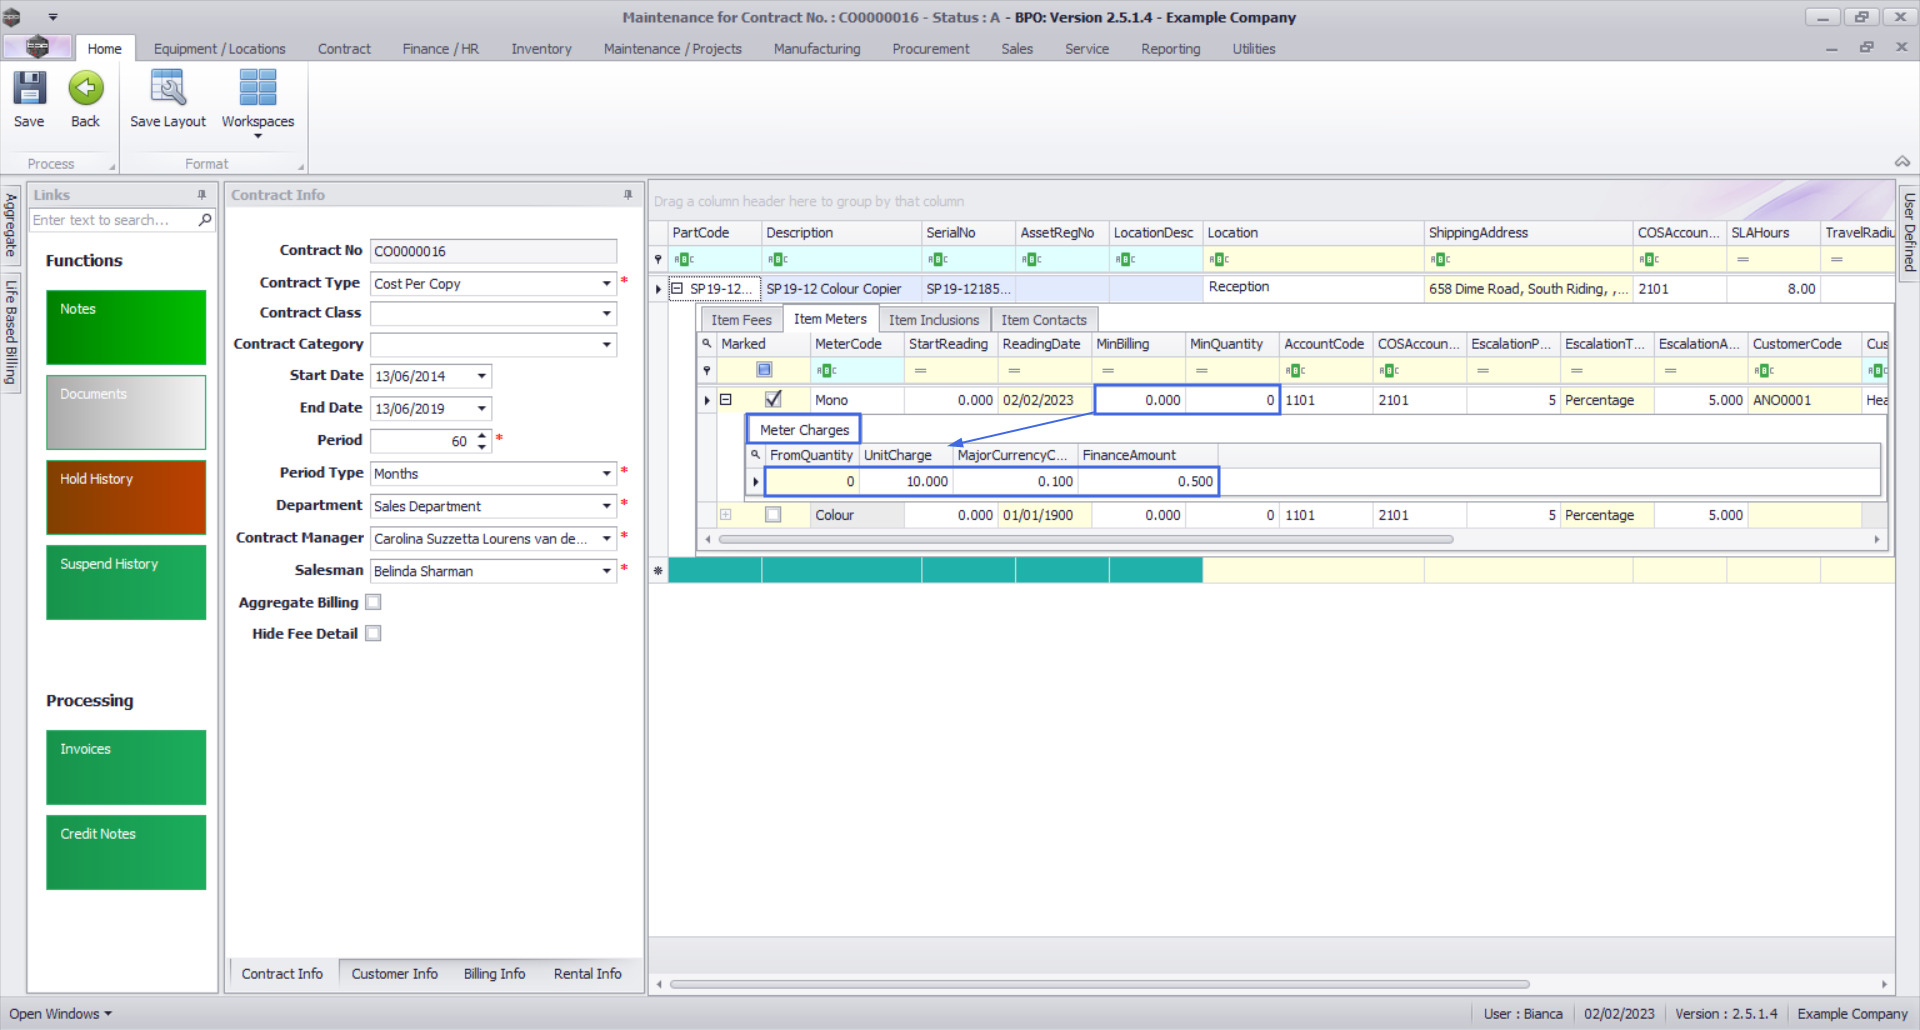
Add Meter Levels - For A Meter with No Minimum Billing
- The Meter Charges frame will be expanded.
- Note: The Colour meter will be used as an example.
- There is no minimum billing set up on this meter. This means the usage calculation will only be based on what's set up in the Meter Charges matrix.
- From Quantity: This is the number from which the unit charge will be effective.
- The first row in the Meter Charges matrix, is static at 0.
- For a more detailed explanation, read this important note on Minimum Billing and Meter Charge Setup.
- Finance Amount: This should only be populated if there is a Back to Back Deal with a third party who is set up in BPO as a Supplier.
- Major Currency Charge:Once the Unit Charge has been input as cents, the Major Currency Charge will automatically round the value to two decimal places.
- Unit Charge: Type in or use the arrow indicators to select the unit charge for this additional meter (charge per copy) - this needs to be input as the cents value. This charge will usually increase with each new level.
Add an Additional Charge Level
- Right click anywhere in the row of the item that you wish to add anothermeter level to. (You can do this whilst the meter charges matrix is open or closed).
- The Process menu will pop up again.
- Click on Add - Add a level.
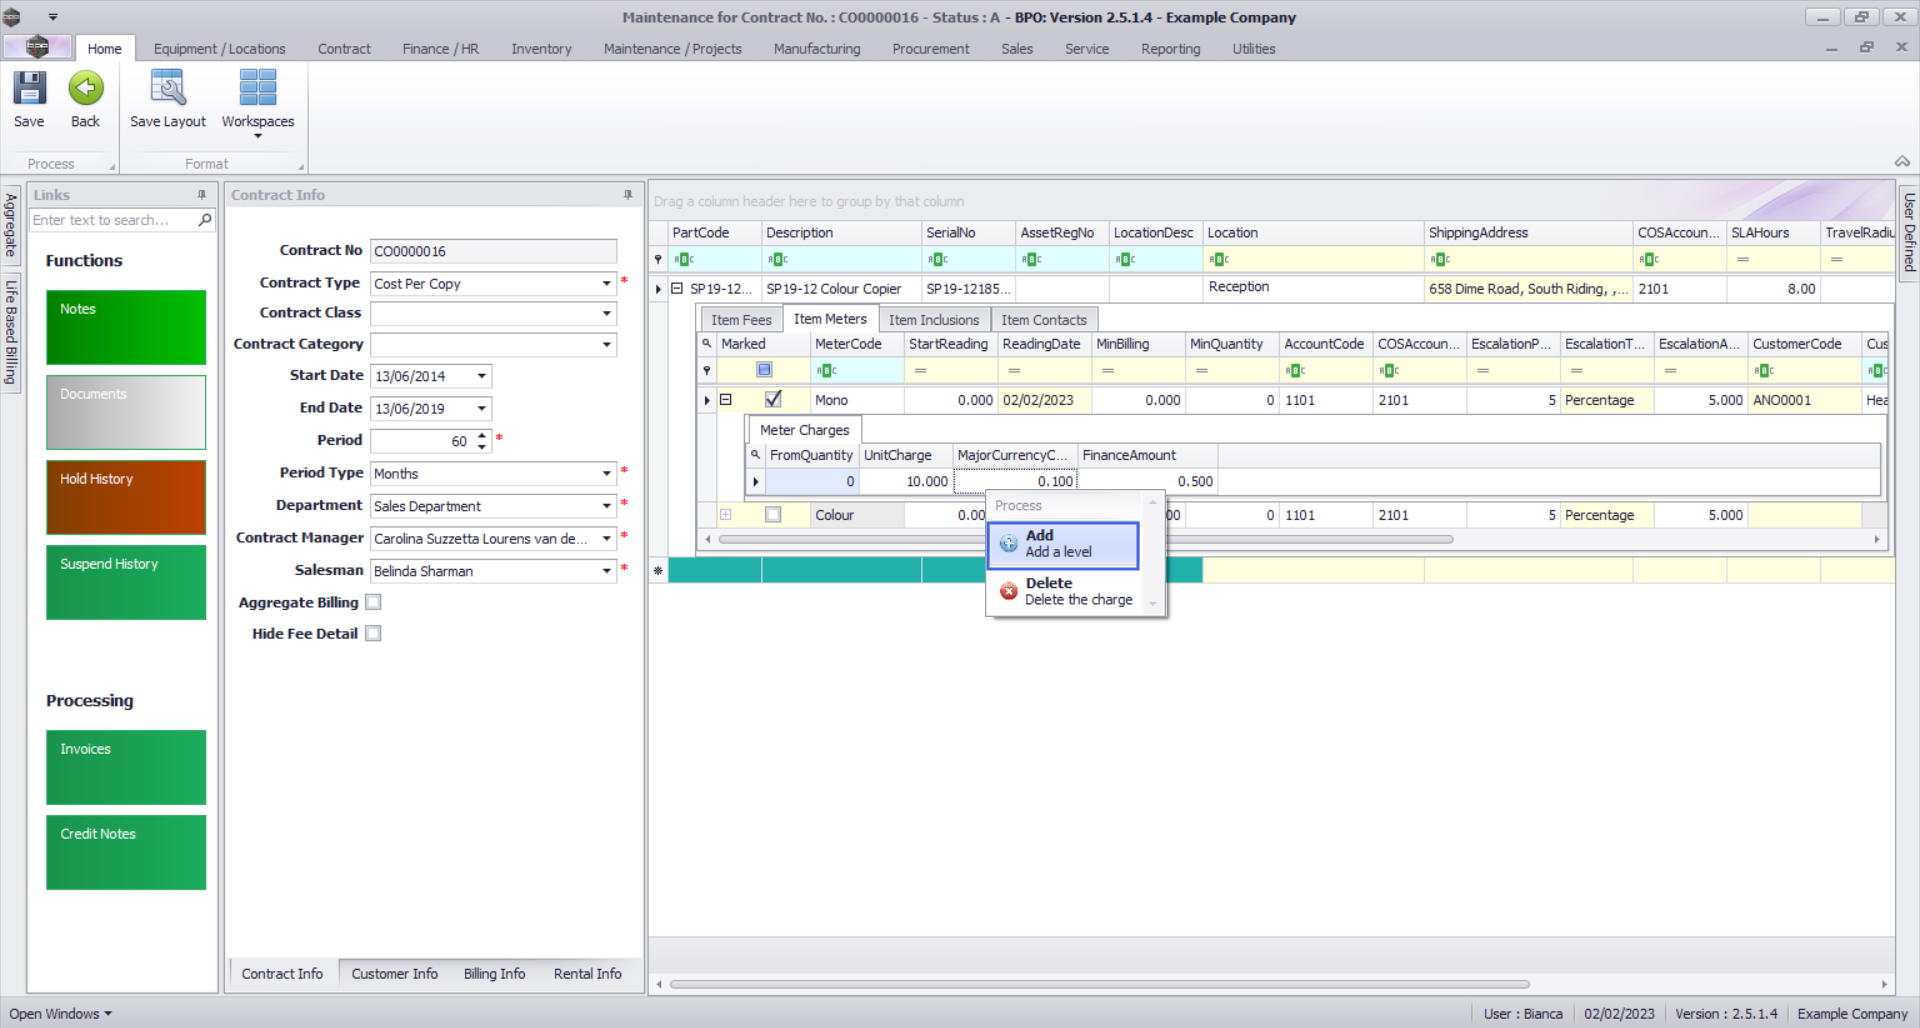
- A second level has now been added to the Meter Charges matrix.
- From Quantity: Type in or use the arrow indicators to select the number of copies from which this charge will be effective.
- For a more detailed explanation, read this important note on Minimum Billing and Meter Charge Setup.
- Finance Amount: This should only be populated if there is a Back to Back Deal with a third party who is set up in BPO as a Supplier.
- Unit Charge: Type in or use the arrow indicators to select the unit charge for this additional meter (charge per copy). This charge will usually increase with each new level.
- Repeat this process to add more meter charges as required.

- When you have finished working in the Meter Charge Levels, click on the Hide button to close the sub grid.
Delete A Meter Level
- The final option in the Add Meter Level Process menu is Delete the Charge.
- Right click in the row of the meter level that you wish to delete from the meter.
- The Process menu will pop up.
- Click on Delete - Delete the Charge.
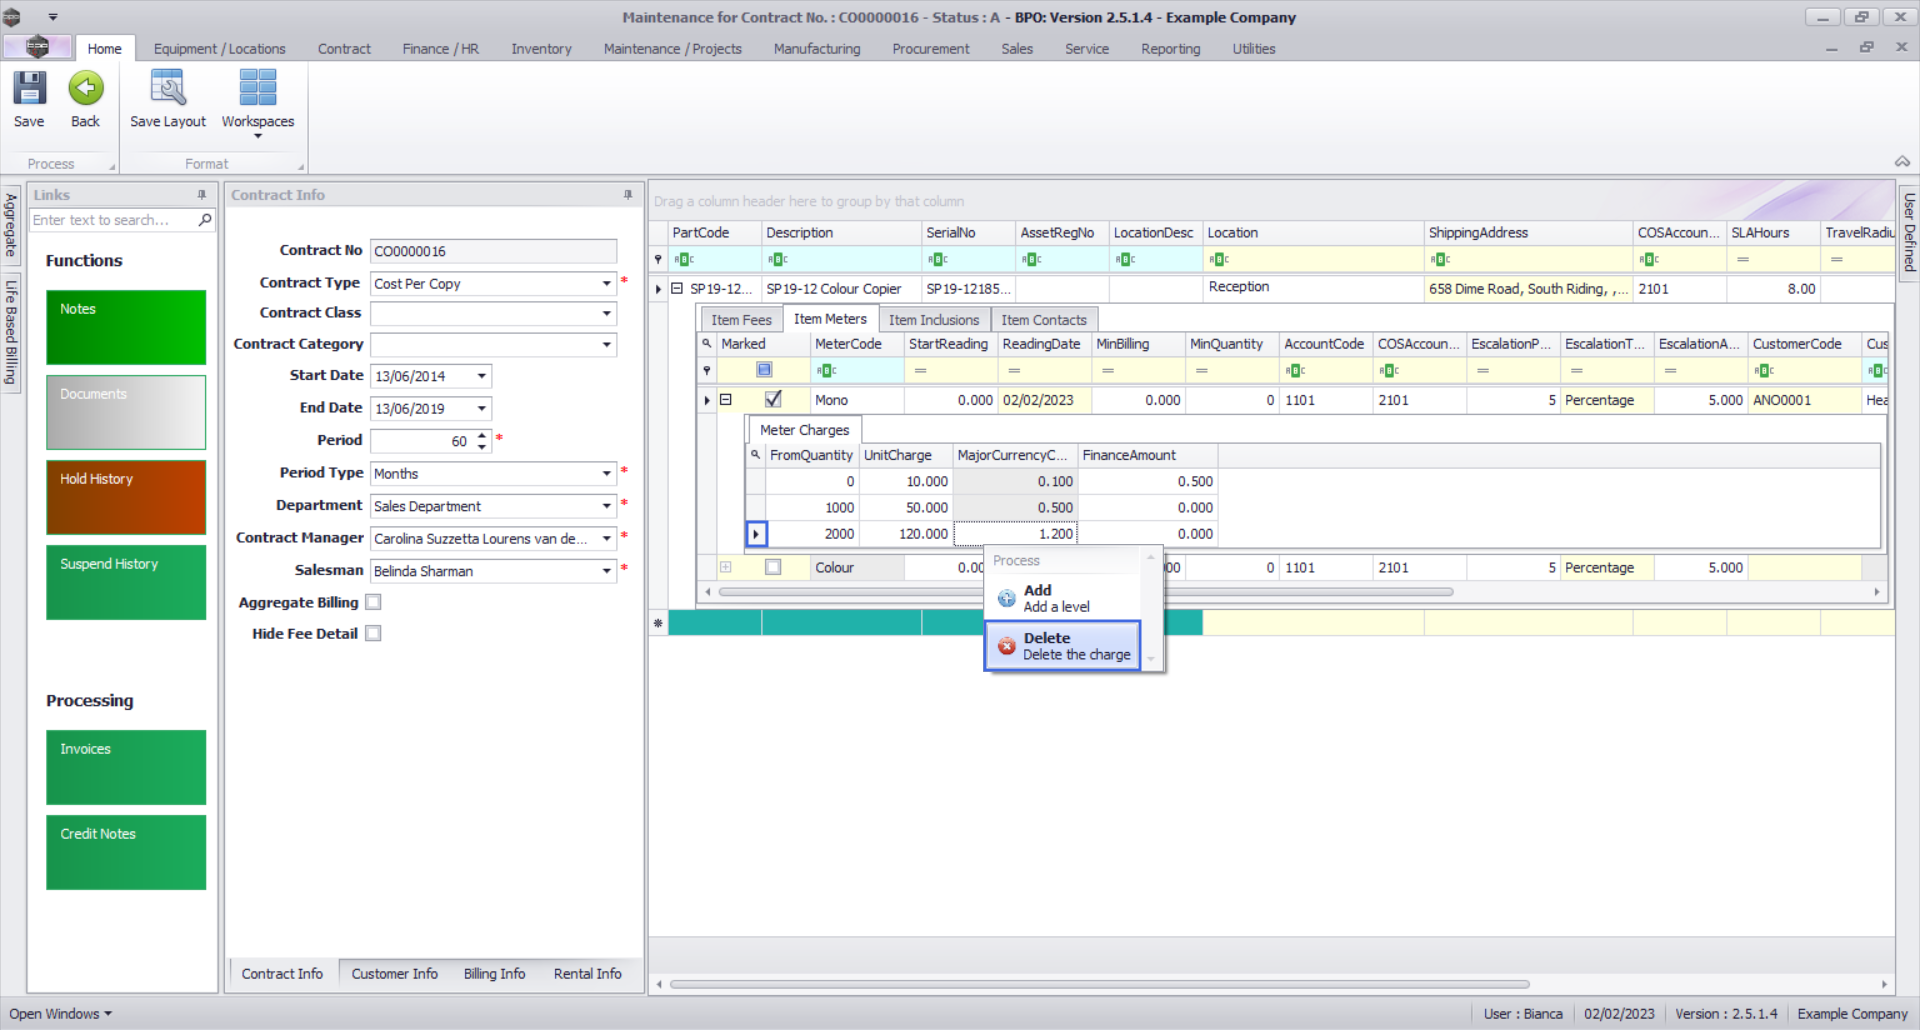
- The selected meter level will now be removed from the Meter Charges matrix.
- Click on the Hide button to close the Meter Charges matrix.
MNU.112.025