We are currently updating our site; thank you for your patience.
Contract
Add New Contract
Ribbon Select Contract > Contracts

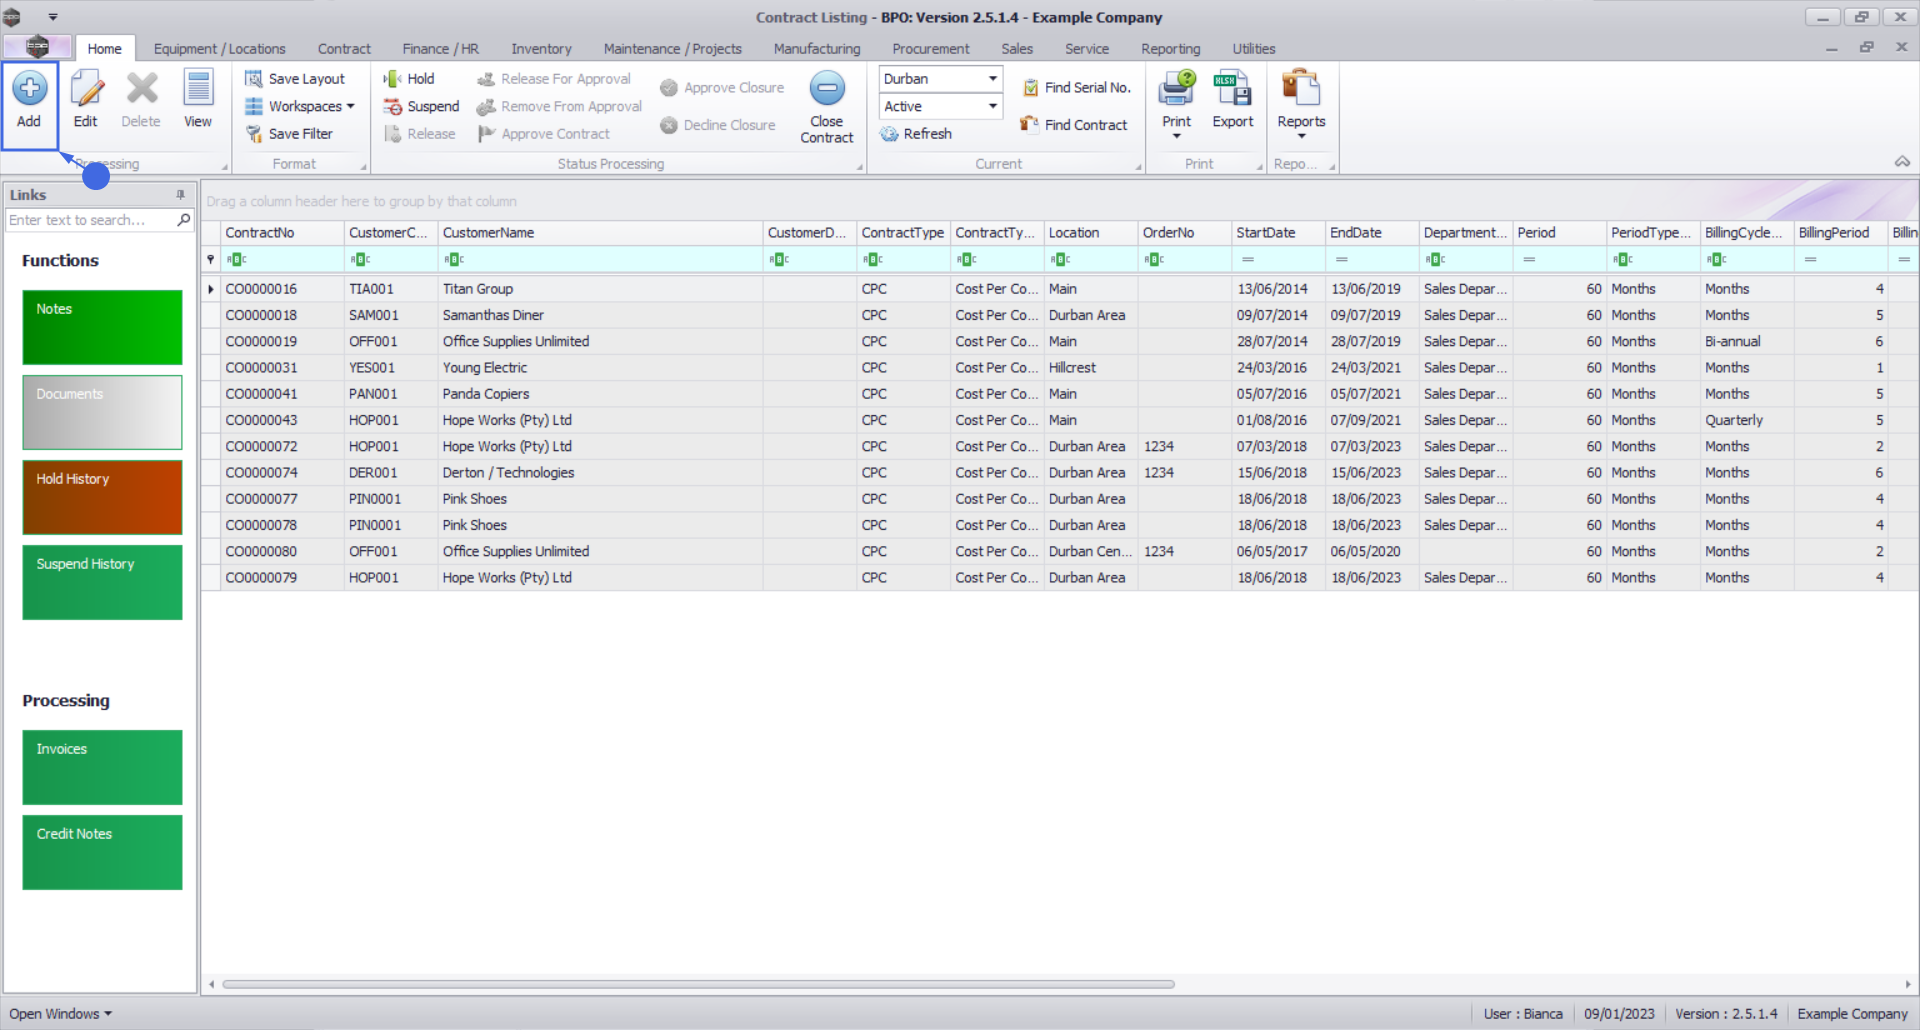
The Contract Listing screen will be displayed.
Your employee user record should be linked to a default site. In this case, the site will auto populate with this default, otherwise the site must be manually selected.
Another site can be selected, if required, and if you have the security rights to access the site.
If All Sites displays here, then you do not have a default site configured on your user record, and need to select the required site.
Upon opening, this screen will default to the Active status, listing all the Active contracts for the selected site.

- Click on the Add button.
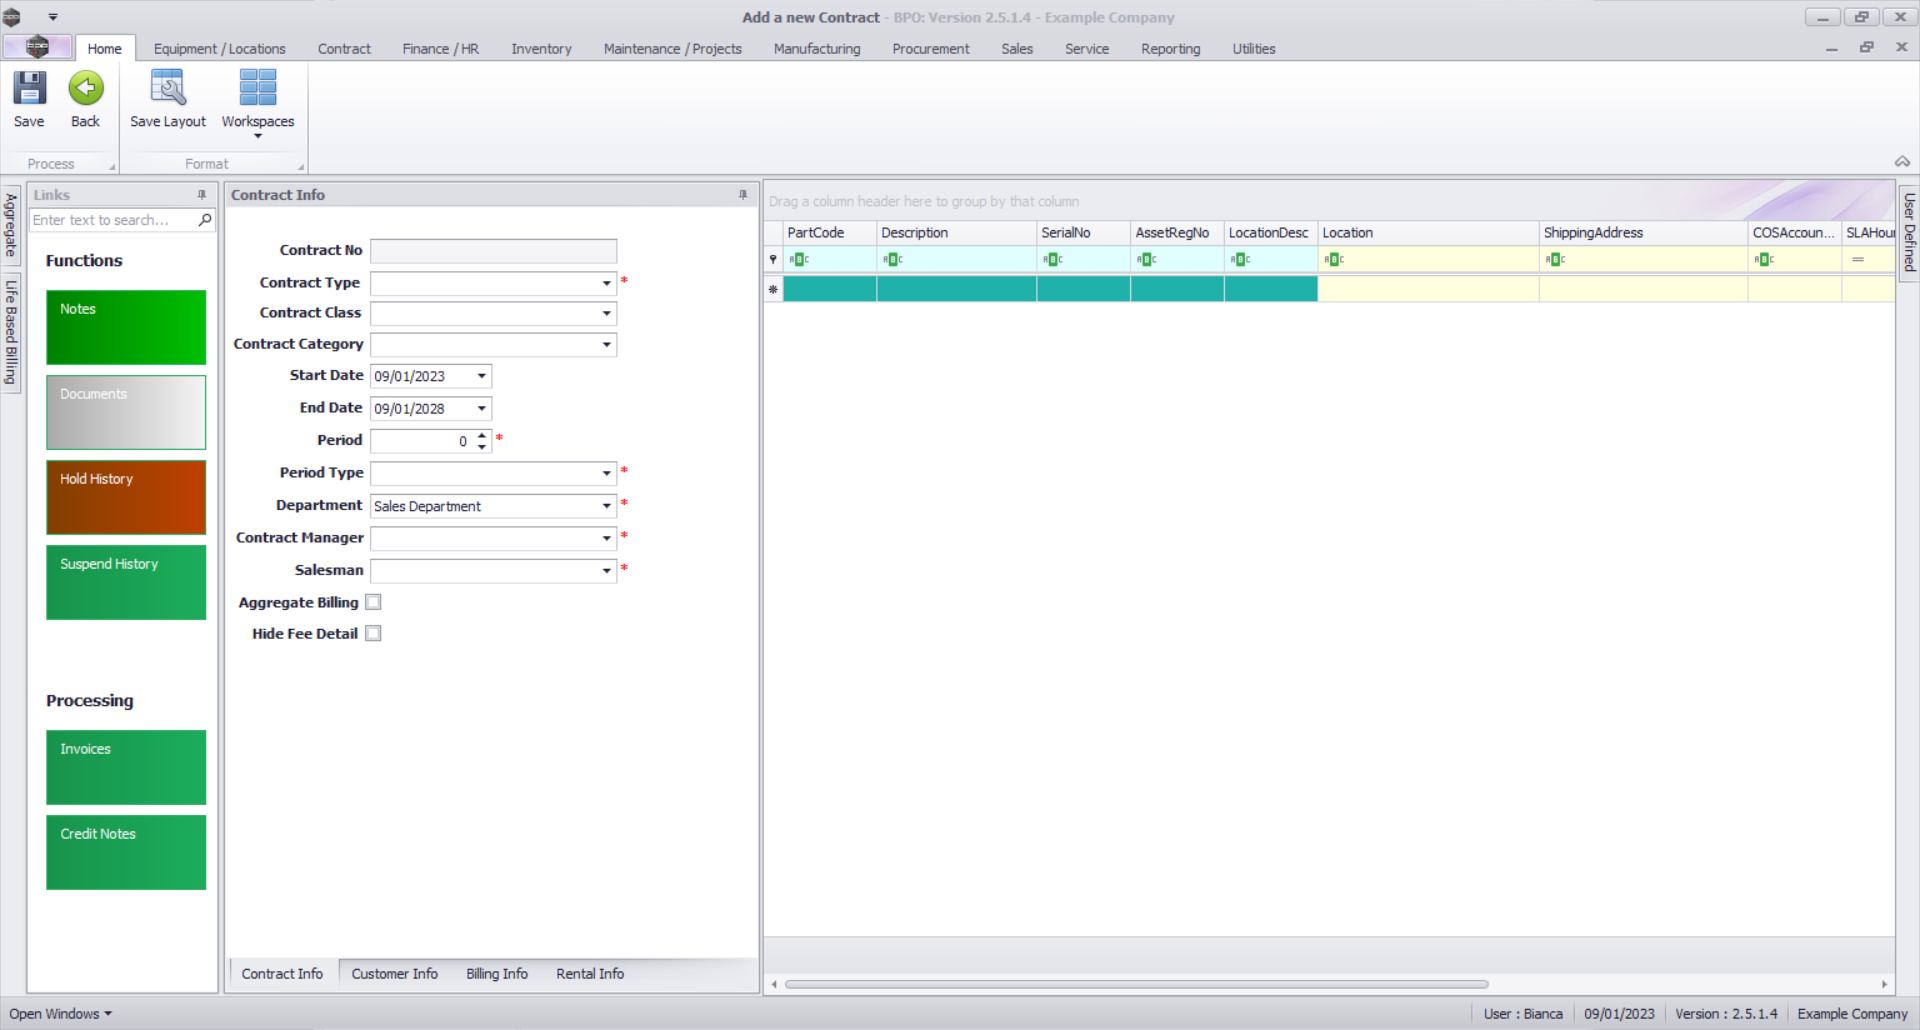
The Add a new Contract screen will be displayed.
Contract Info Panel
Upon opening this screen, the Info panels are docked, with the Contract Info panel at the fore. If not, click on the Contract Info tab.
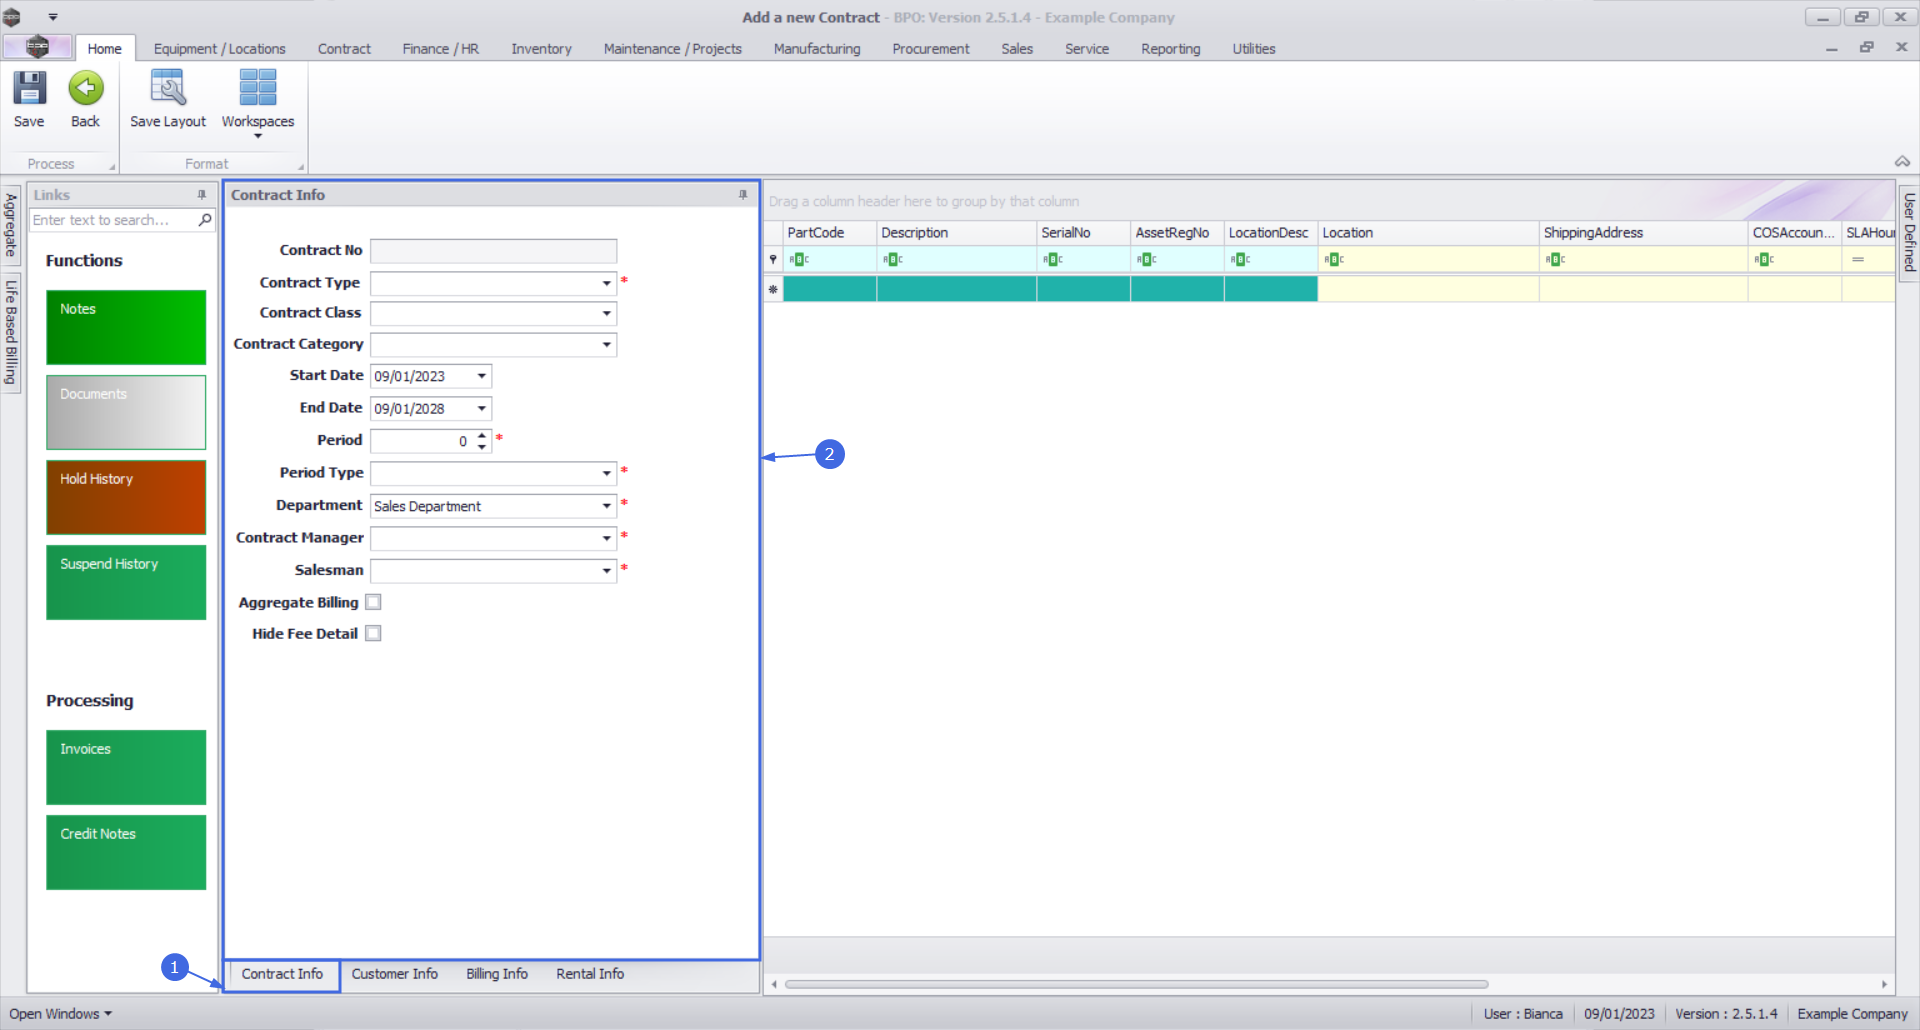
- Contract No:
- If this field is greyed out, then your system is configured to auto generate the contract number upon saving the contract. This is generated by the system (if the Auto Contract flag is selected in BPO Configurator).
- Contract Type: Click on the drop-down arrow and select the Contract Type, e.g. Cost per Copy.
 For Prepaid Contracts:
- This is used when creating a Prepaid / Life Based contract.
- Before you select the Contract Type, you will note that the Life Based Billing tab is currently docked on the left side of the screen.
- In the Contract Type field, Prepaid Contract must be selected from the drop-down menu.
- After selecting the Prepaid Contract option, the Life Based Billing tab will move to the bottom of the screen.
- Contract Class A Call Request is logged to form a record of a request from a customer whose account is in arrears, on hold, or whose contract is on hold. No corresponding action will be performed to address the request until the customer or contract is no longer on hold, or the account has been settled.: Click on the drop-down arrow and select the Contract Class
- Contract Category: Click on the drop-down arrow and select the Contract Category
- Start Date: This will auto populate with the current date, but you can click on the drop-down arrow and use the calendar function to select an alternative date.
- End Date: This will auto populate 5 years from the start date, but you can click on the drop-down arrow and use the calendar function to select an alternative end date if required.
- Note: If this is an evergreen contract, set your end date to 31/12/2999
- Period: This will auto populate when the Contract Type is selected but you can either type in or use the arrow indicators to select an alternative period (life span of the contract).
- Period Type: This will auto populate when the Contract Type is selected but you can click on the drop-down arrow and select an alternative period type (measure relating to the lifespan), e.g. months.
- Department: Click on the drop-down arrow and select the department.
- Contract Manager: Click on the drop-down arrow and select the contract manager.
- Salesman: Click on the drop-down arrow and select the salesman.
- Aggregate Billing: Click on this check box if the customer will receive aggregate billing.
- For Aggregate Billing Contracts:
- This is used when creating an Aggregate contract or Prepaid / Life Based contract.
- Note that the Aggregate tab is currently docked on the left side of the screen.
- Select the Aggregate Billing check box.
- The Aggregate tab will move to the bottom of the screen.
- Hide Fee Detail: Select this option if you don't want to show individual contract invoice fee amounts on the customer invoice.
Customer Info Panel
- When you have finished editing the contract info details, click on the Customer Info tab.
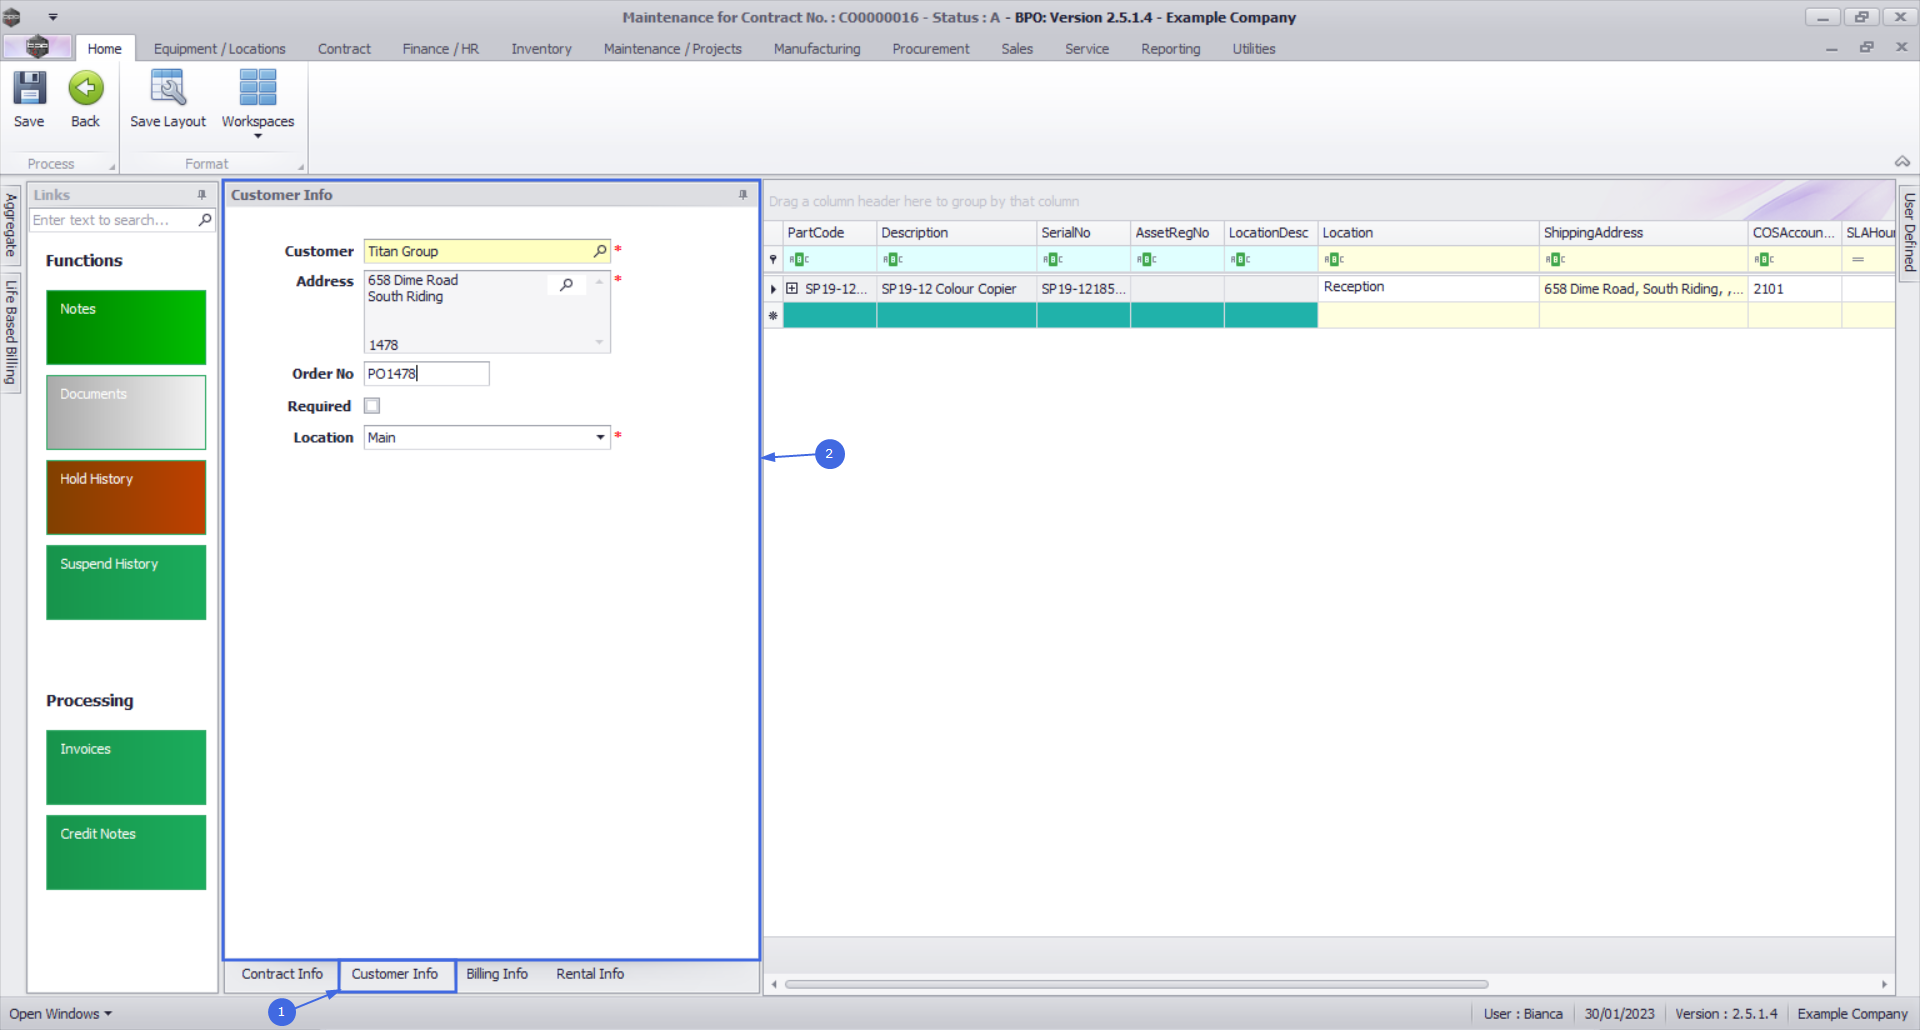
The Customer Info panel will move to the fore.
- Customer: Click on the search button and select the customer from the Select a customer for this contract pop up screen.
- Address: This will auto populate when the Customer is selected but you can click on the search button and select an alternative address from the Select an address for this contract pop up screen.
- Order No: Type in the customer order number if required.
- Required: Only select this check box if the client must supply an order number before a technician is sent to site.
- Location: Click on the drop-down arrow and select the contract location from the menu.
Billing Info Panel
- When you have finished editing the contract info details, click on the Billing Info tab.
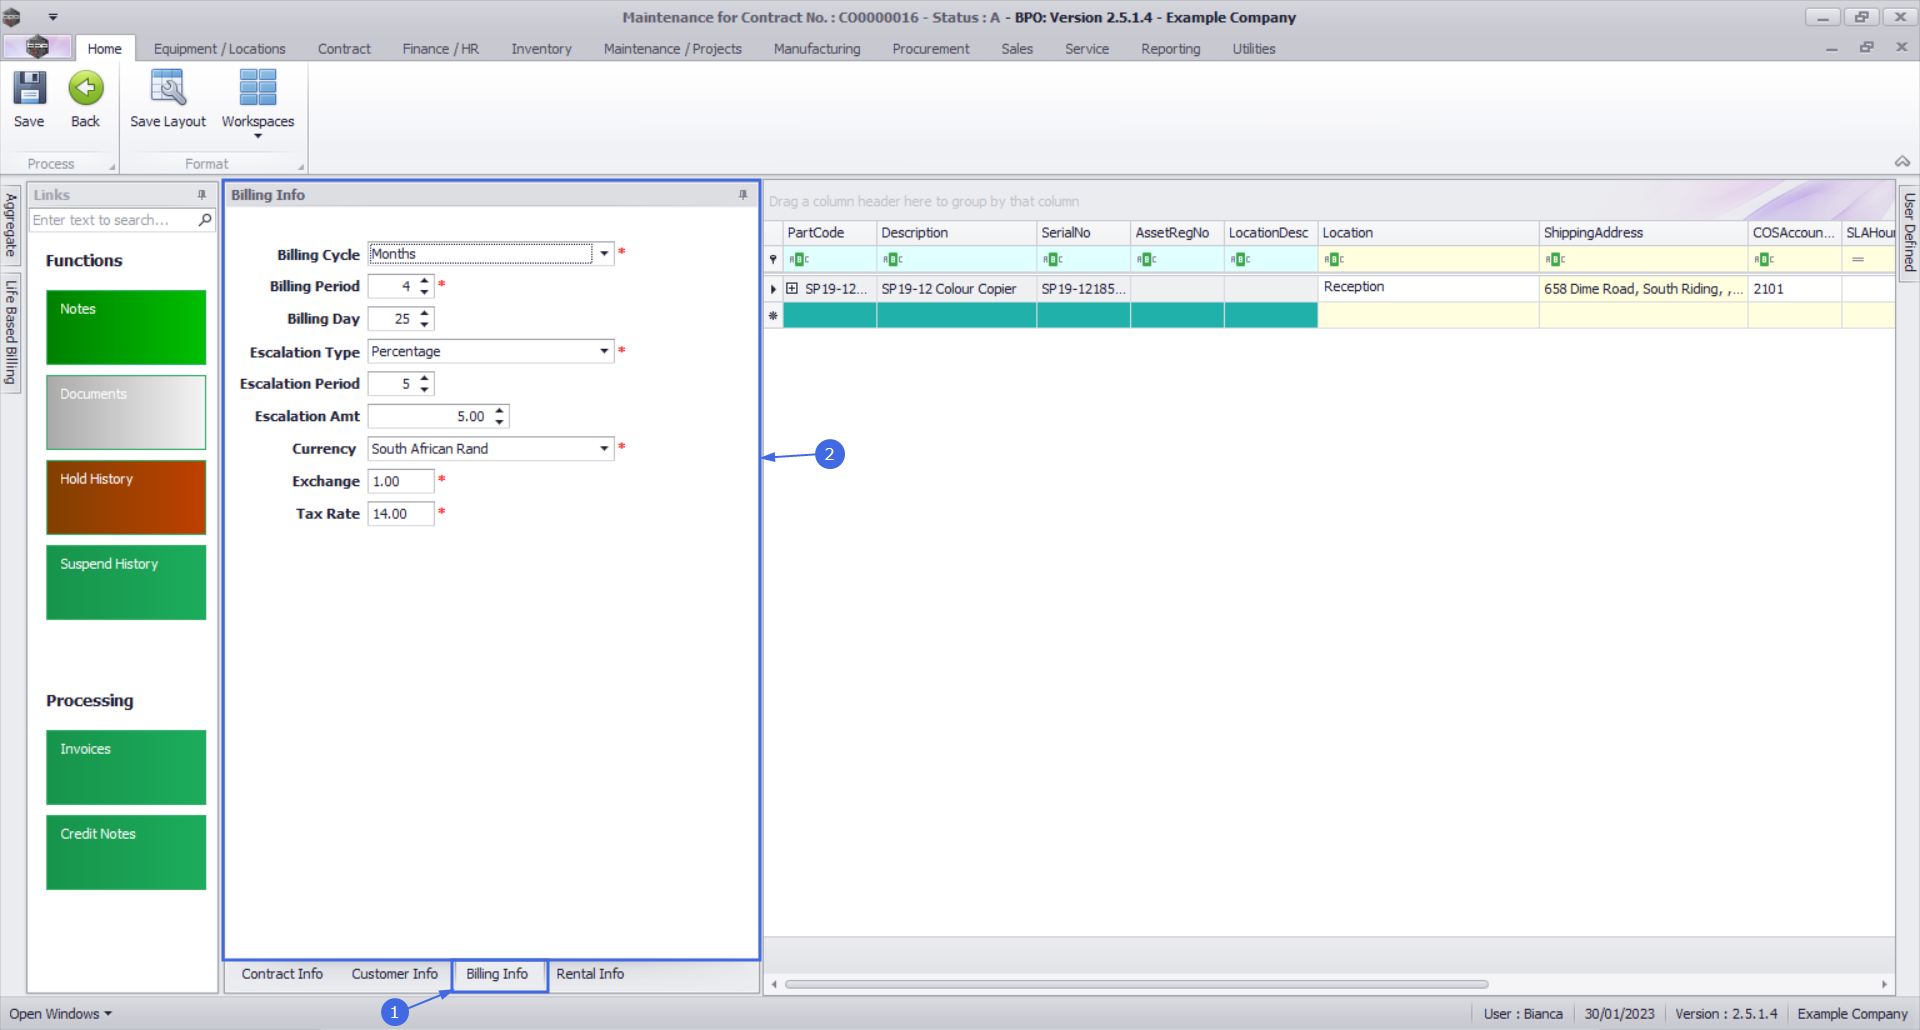
The Billing Info panel will move to the fore.
- Note: Most of these details will auto populate but they can be changed, as explained below.
- Billing Cycle: Click on the drop-down arrow and select the billing cycle (billing frequency, e.g. monthly).
- Billing Period: This is the period when the contract will be billed for the first time. Type in or use the arrow indicators to select the period number.
- Note: The Billing Period relates to the financial period of the company e.g. if the company's financial year ends on 31 December and a contract is to be billed in February, the Billing Period would be 2.
- Billing Day: The Billing Day can be used if you are billing different contracts on different days or can be used as a filter in the Contract Billing screen. The Billing Day is limited to 31. Type in the day that the customer will be billed (e.g. on the 25th of each billing cycle) otherwise leave as 0.
- Escalation Type: Search for and select an escalation type (usually percentage is used).
- Escalation Amount: Type in the escalation amount, depending on the escalation type selected (e.g. 10 if the escalation should be 10%).
- Escalation Period: Type in the financial month at which the system should escalate the contract.
- Note: The Escalation Period relates to the financial period of the company e.g. if the company's financial year ends on 31 December and a contract is to be escalated in March, the Escalation Period would be 3. If the escalation is on the anniversary of the contract, then use the same financial period as the billing period.
- Currency: The system will auto populate with the currency already set up on the customer, but you can click on the drop-down arrow and select an alternative currency if required.
- Note: For foreign currency contracts, all fee and meters charges must be set up in the currency selected e.g. type in the Dollar amount if the currency is USD.
- Exchange: The system will auto populate with the exchange rate set up in the system, but you can type in an alternative exchange rate.
- Tax Rate: The system will auto populate with the tax rate set up in the system, but you can type in an alternative tax rate.
Rental Info Panel
This is used where a New Deal Rental was processed on the system and is a tool for calculating the rental amount for the deal on the contract, especially where the deal is financed and the correct repayment is claimed from the customer and paid to the finance house.
- Click on the Rental Info tab.
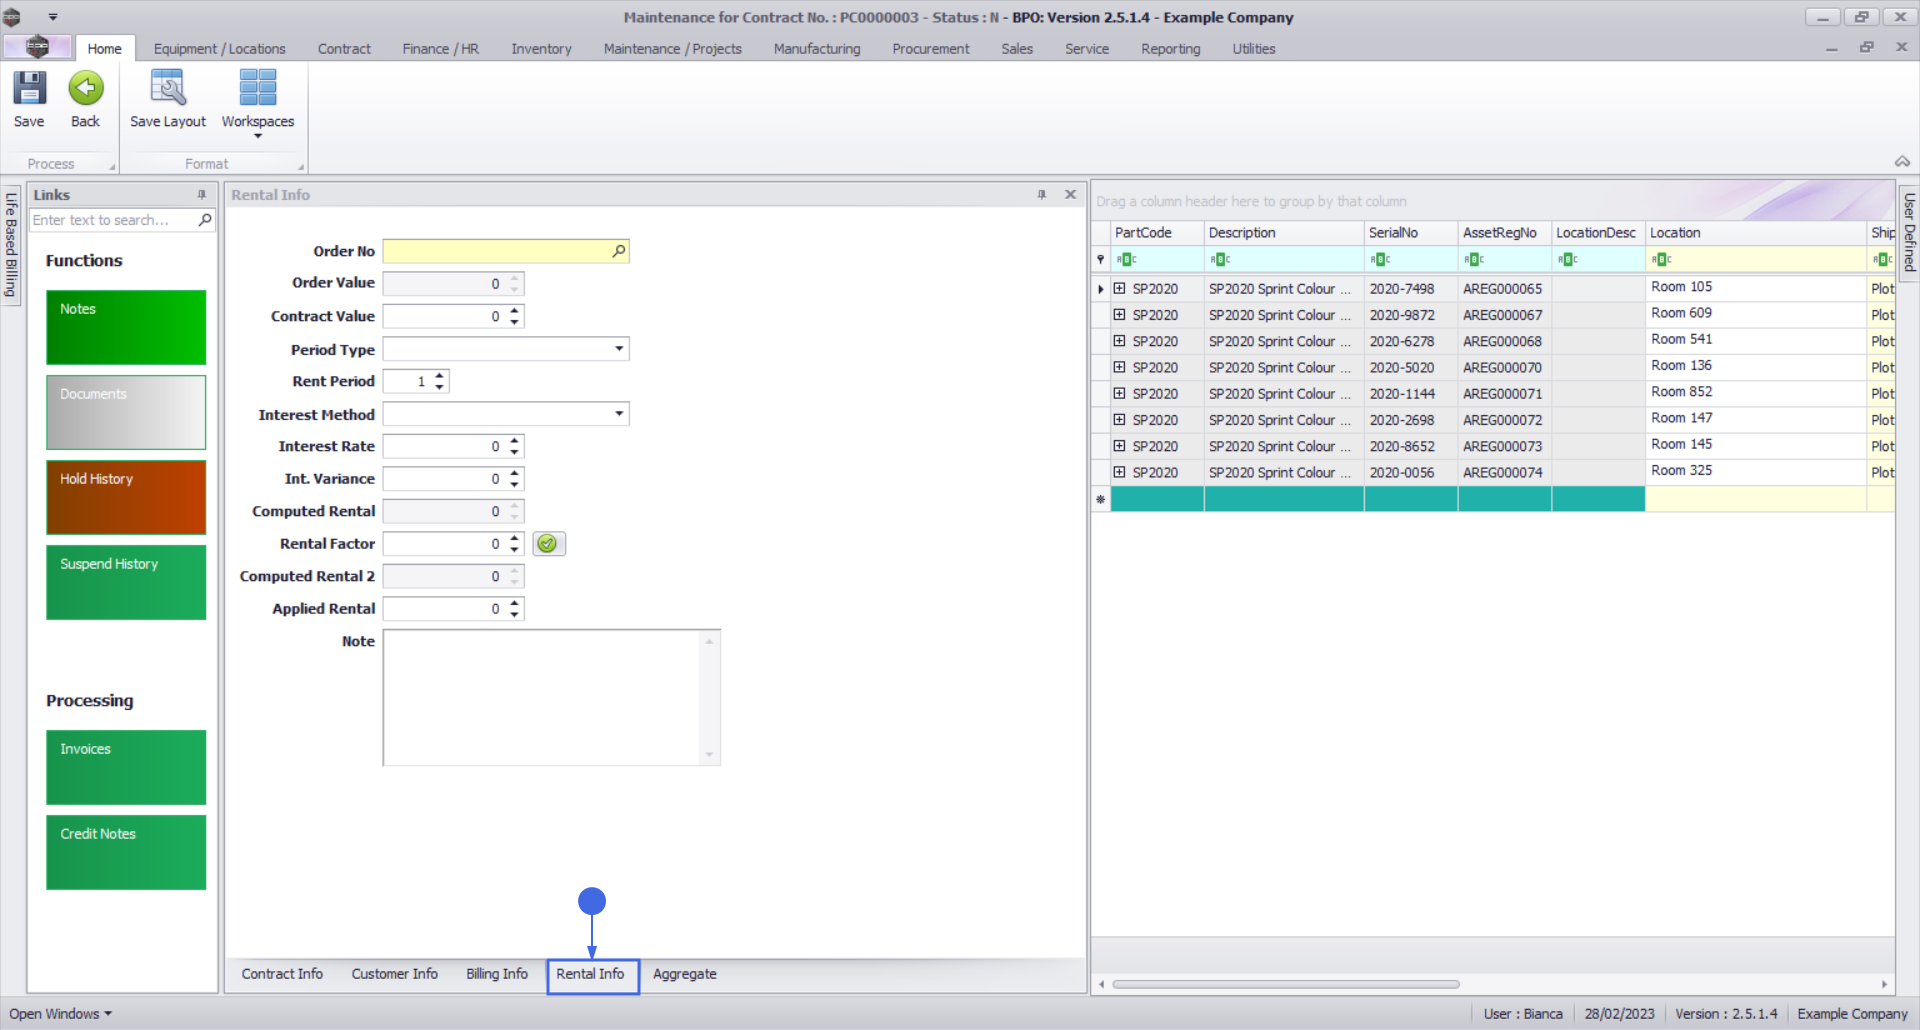
The Rental Info panel will move to the fore.
- Order No: Search for and select the sales order created for the New Deal Rental.
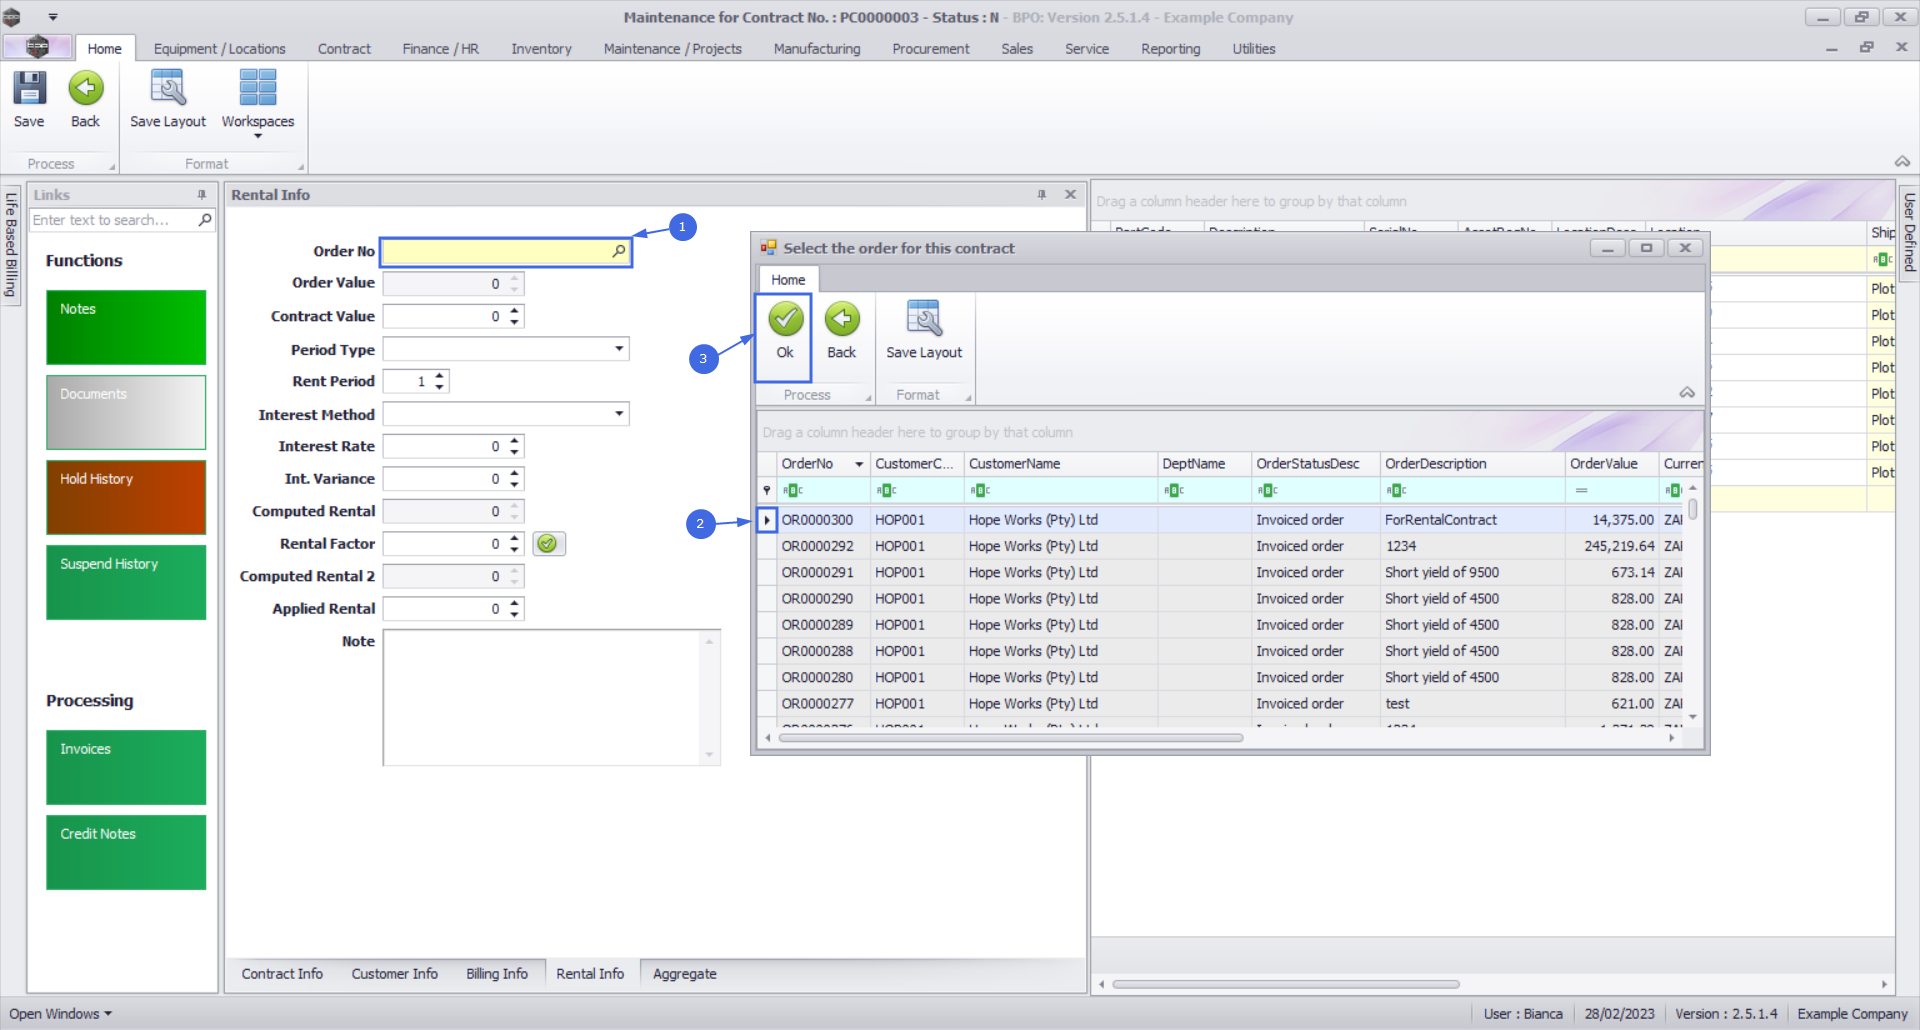
You will note that the Order No and a number of fields auto populate once the Order Number has been selected.
- Order Value: Upon selection of the Sales Order Number, this value will populate with the total from the Sales Order (including VAT). This field is read only and cannot be changed.
- Contract Value: Upon selection of the Sales Order Number, this value will populate with the total from the Sales Order (including VAT). You can amend this value if the Contract Value differs due to additional costs not logged on the originating Sales Order.
- Period Type: Use the drop down list to select the rental period type. This field correlates to Rent Period. For example, you might set this field to Months where you are noting the number of months for the rental period, e.g. 60 months.
- Rent Period: Type in or use the spin edit to set the number related to the Period Type above, e.g. 60 months.
- Interest Period: Use the drop down list to select whether the Interest Period is Fixed or Variable.
- Interest Rate: Upon selection of the Sales Order Number, this value will populate with the rate as configured in Interest Rates. This can be changed by typing into the field or using the spin edit.
- Interest Variance: This variance relates to Variable interest method. Type in or use the spin edit to set this value, if required.
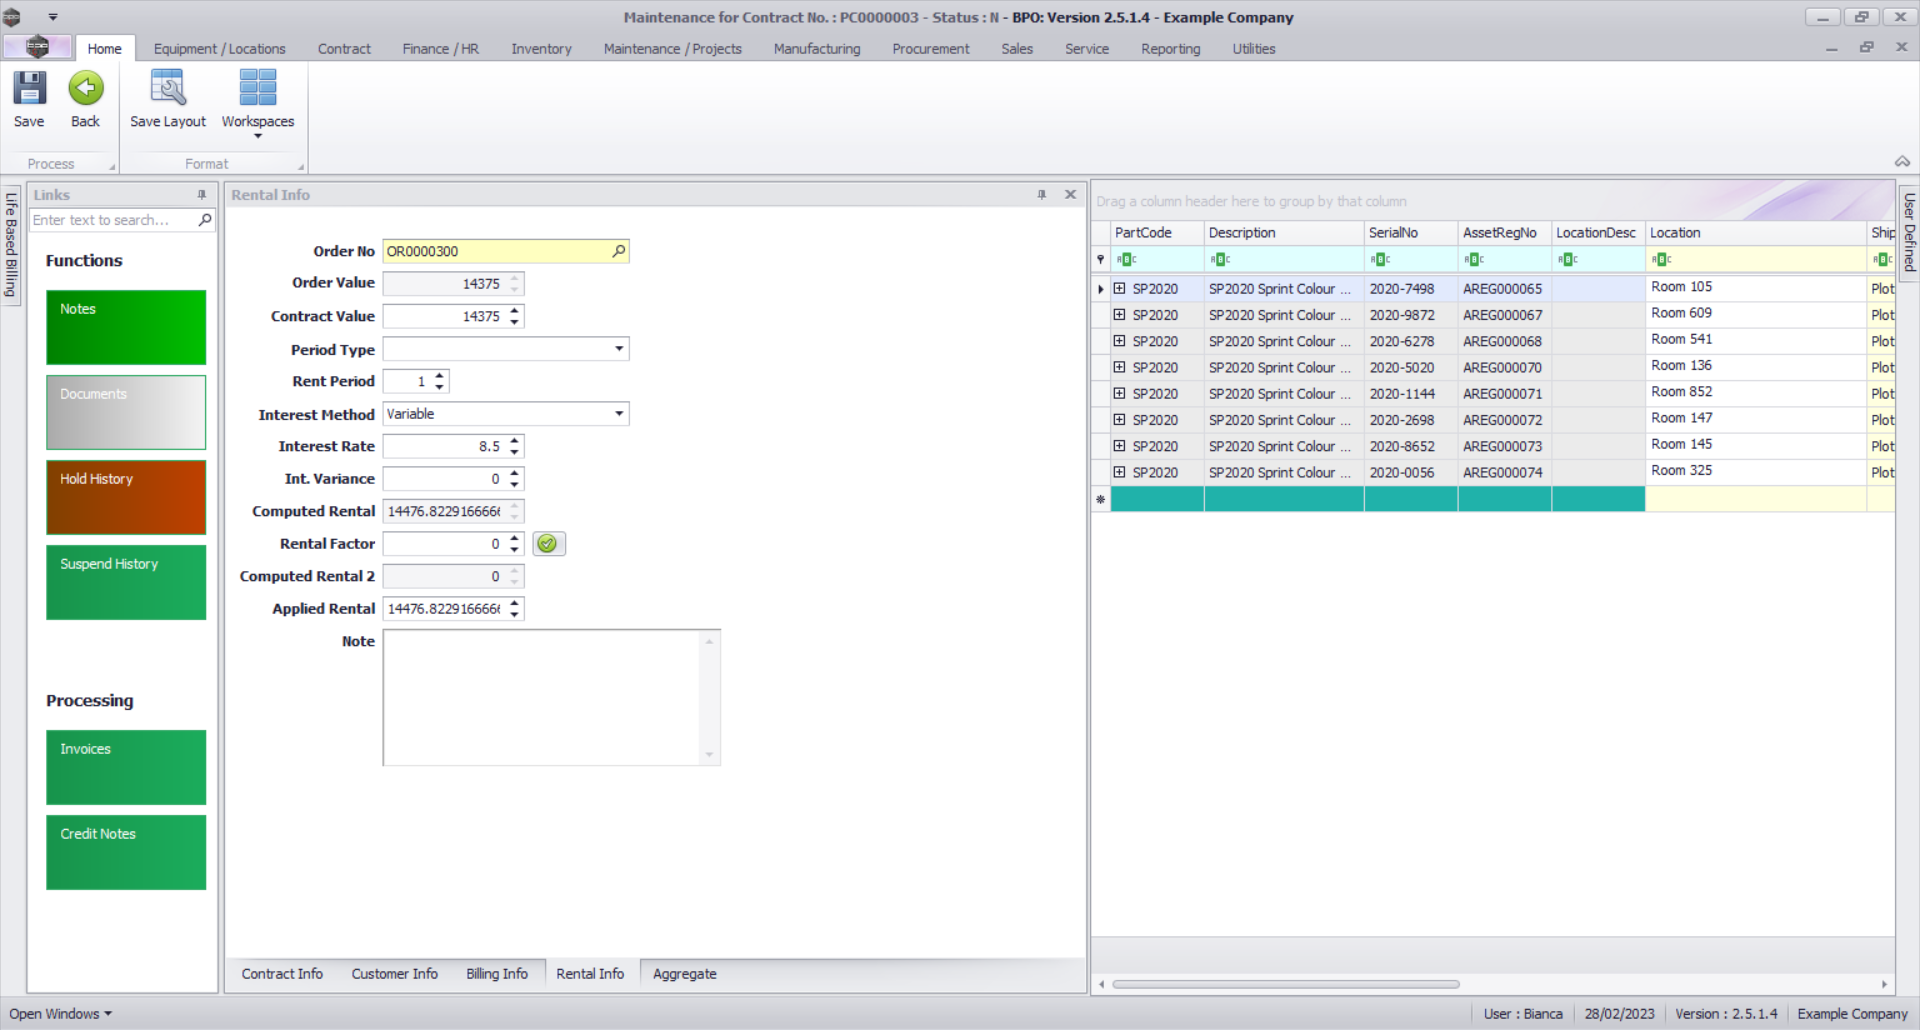
- Computed Rental: Upon selection of the Sales Order Number, this value will populate with the total from the Sales Order (including VAT). This field is read only and will only change upon calculation of the rental as noted further down.
At this point, you can calculate the Applied rental.
- Click on the Recalculate Rentals button.
- The Computed Rental and Applied Rental values will repopulate according to the details provided.
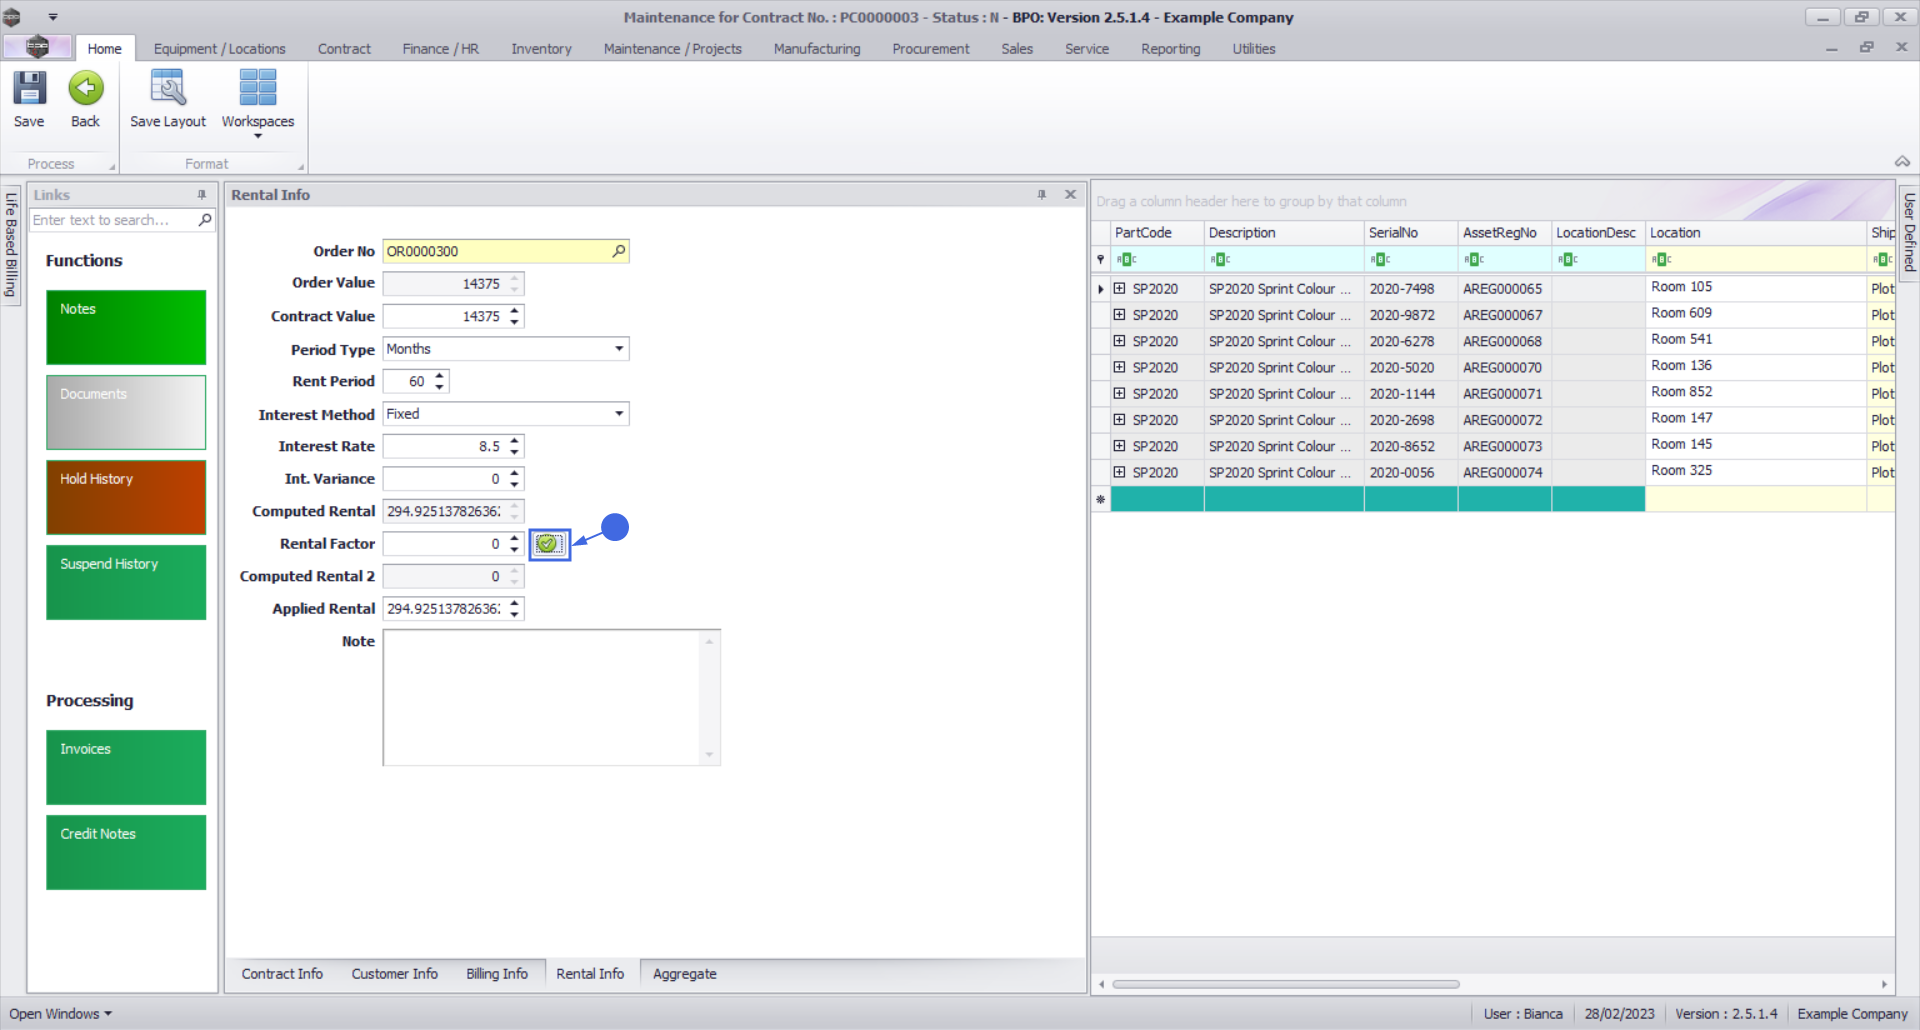
- Rental Factor: If you will be applying a rental factor, type in or use the spin edit to set the value.
- Click on the Recalculate Rentals button.
- The Applied Rental value will repopulate according to the details provided.

- Note: Type in any notes you have regarding this rental calculation.
- You can now update the rental fee on the relevant item(s) on the contract.
Next: Add the Contract Items
NUCL.CTRT.004.002