We are currently updating our site; thank you for your patience.
Contract
Add Contract Items
You will be following the process below to add each item to be linked to this contract.
Contract Items Frame
- Right click anywhere in the row of the Contract Items frame.
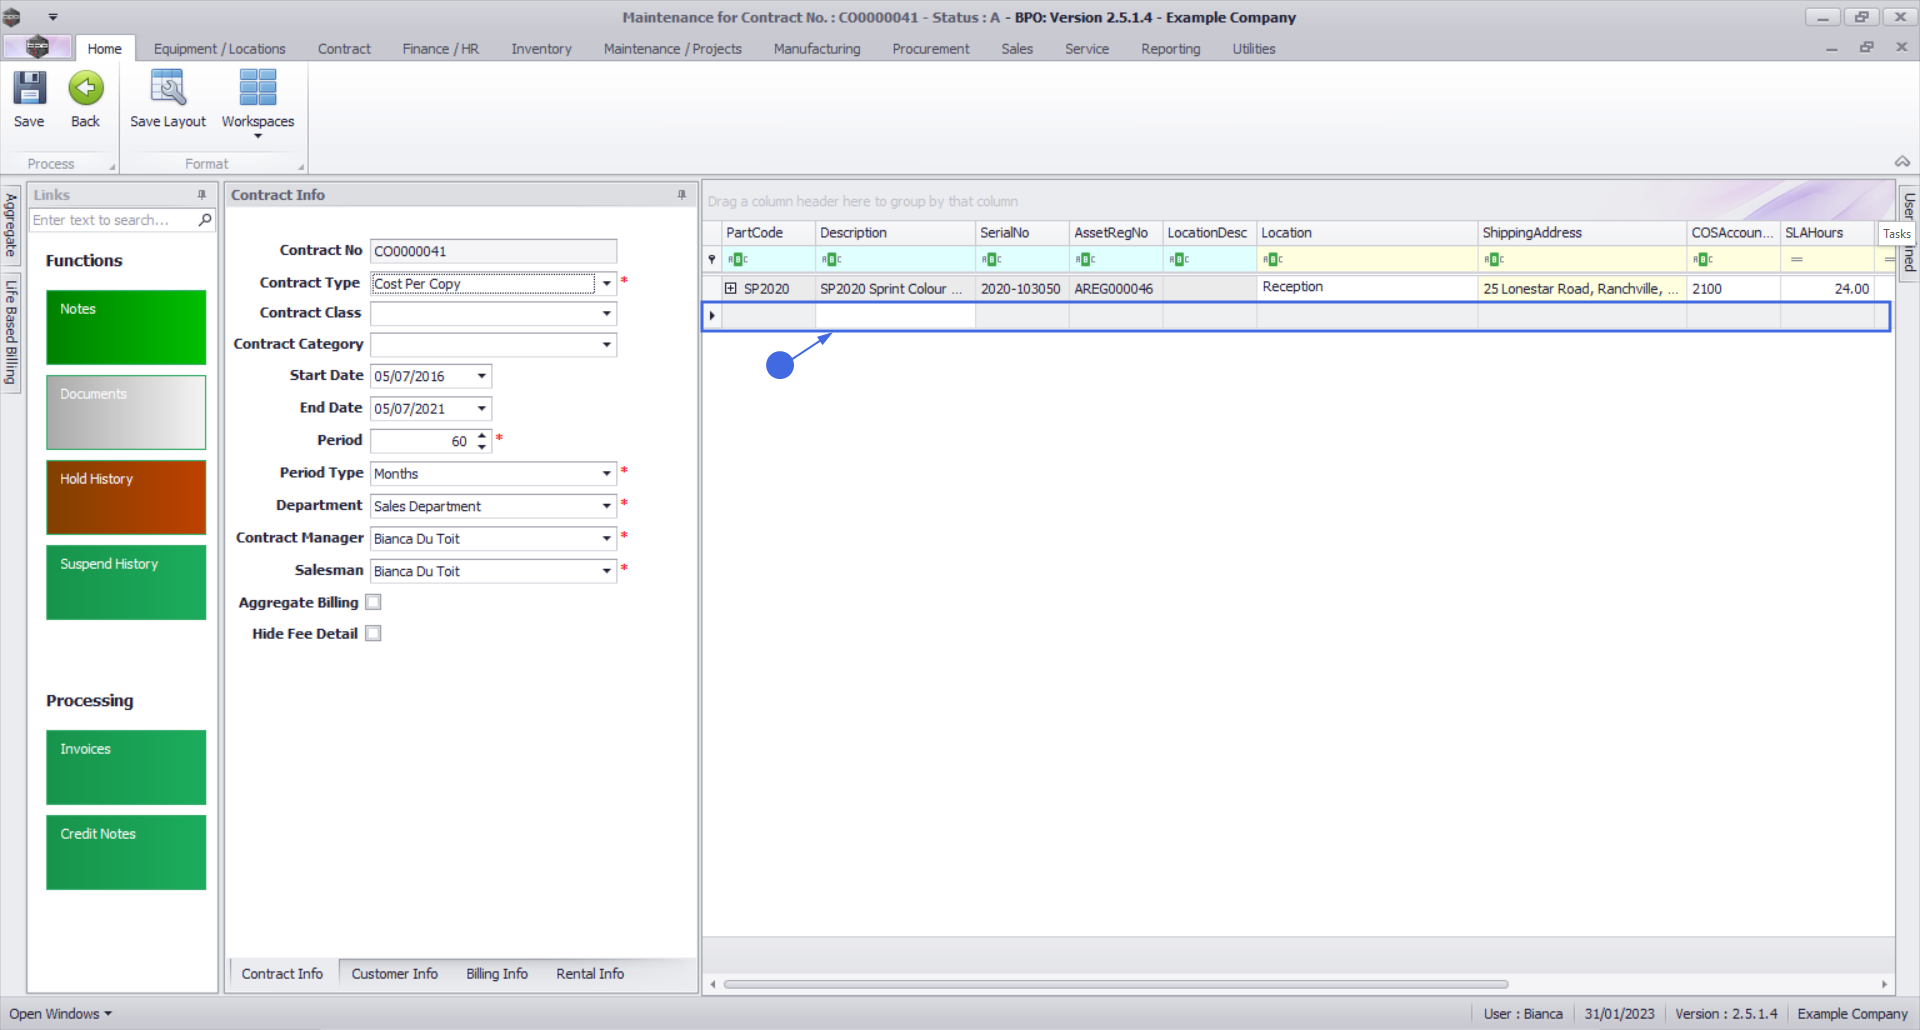
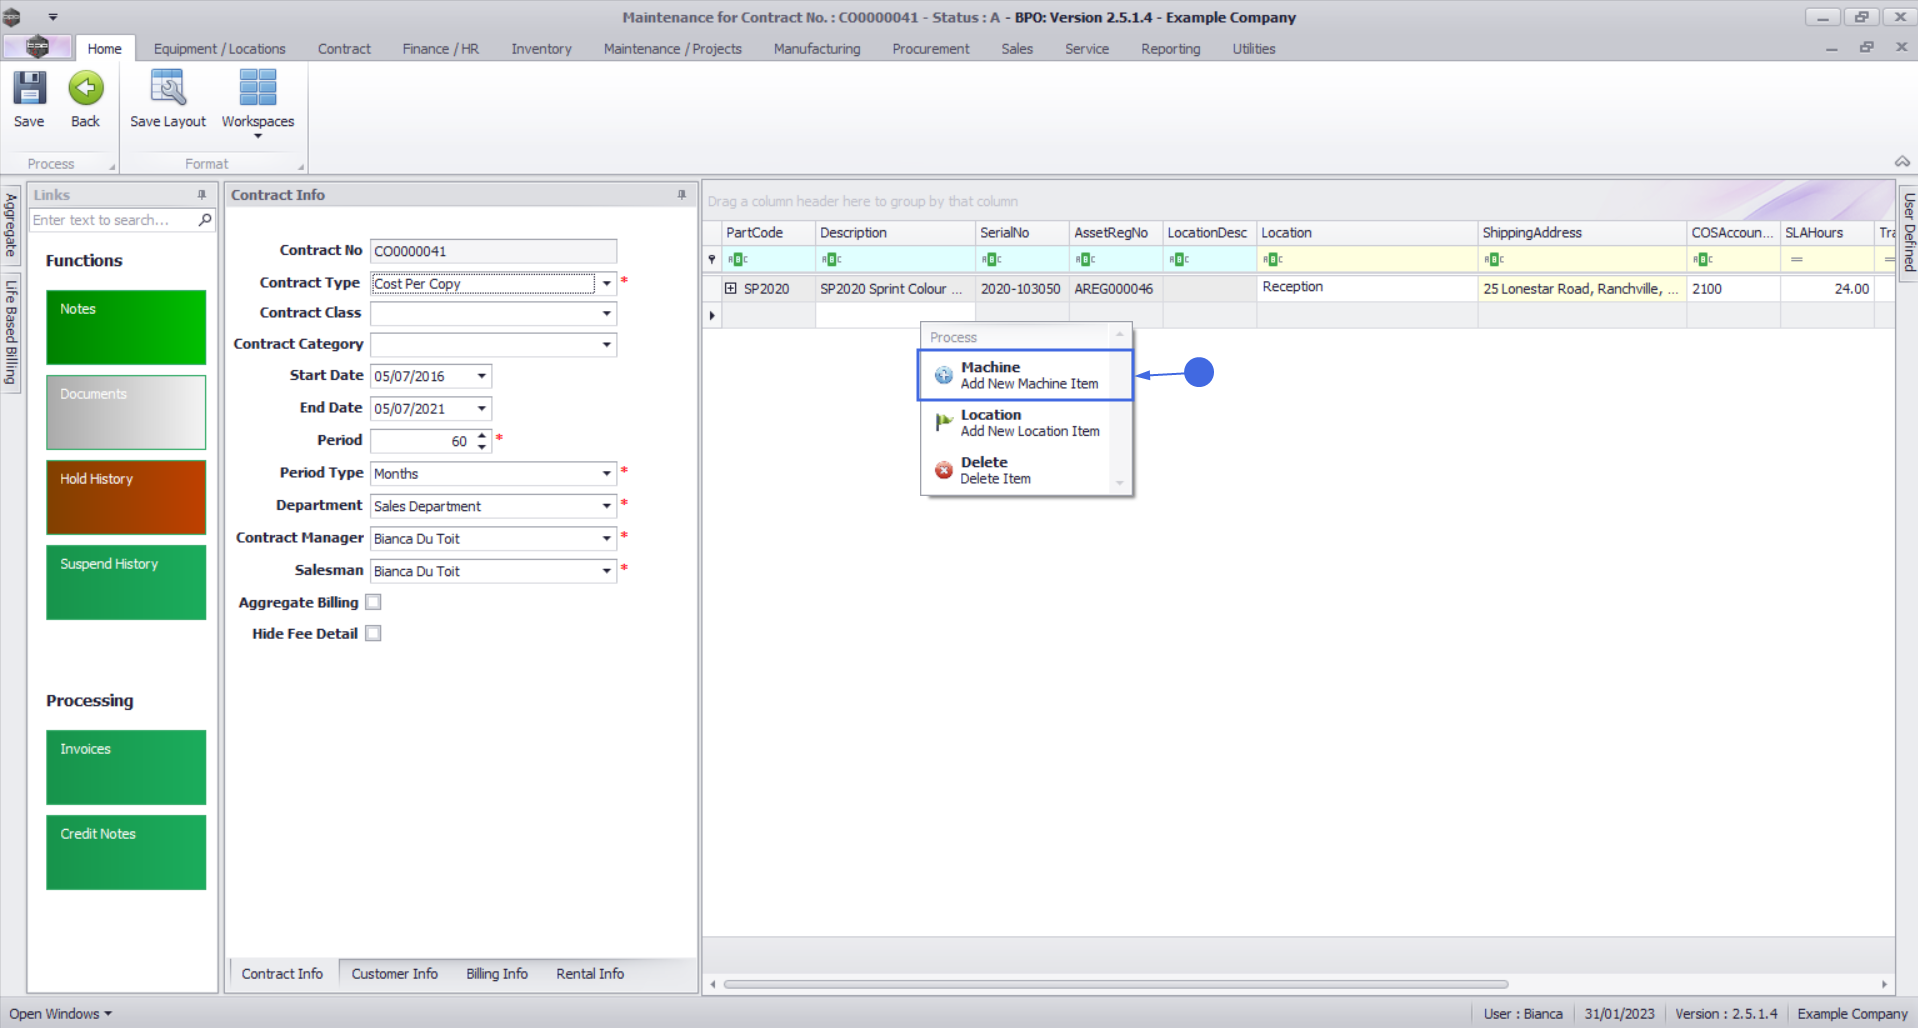
- A Process menu will pop up.
- From this menu, you can:
- Add a new machine item
- Add a new location item
- Delete a contract item

Add New Machine Item
Where you have a serialised item that requires maintenance or service, the item can be linked to the contract.
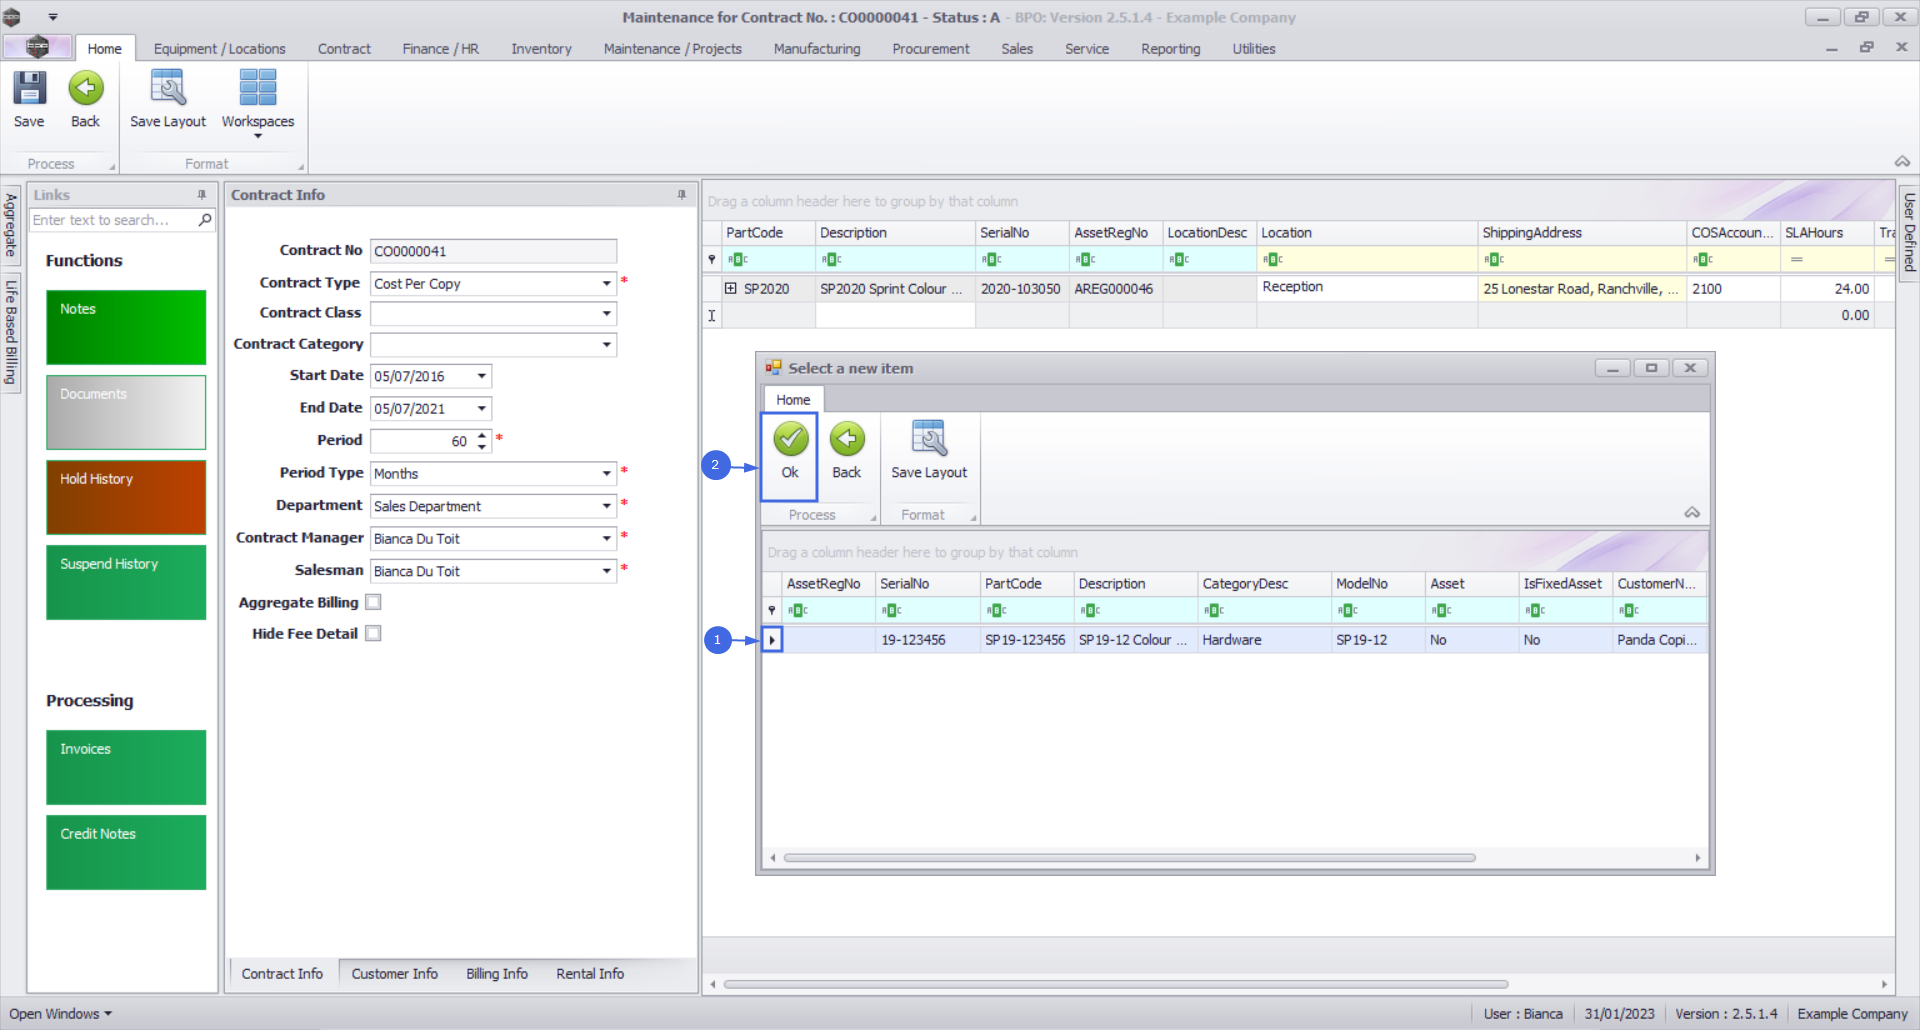
- Click on Machine - Add New Machine Item.
- The Select a new item pop up screen will appear, listing all customer assets sold to or created against this customer; or rental assets issued to this customer.
- Select the row of the item that you wish to link to this contract.
- Click on Ok.
- The following columns will auto populate according to your item selection:
- Part Code
- Description
- Category Description
- Model No if configured on the asset's part code
- Serial No
- Asset Register No if configured on the asset
Note: The LocationDesc column will not be populated as this is a Machine (asset) Contract item and not a Location Contract Item.

Add New Location Item
Instead of linking a serialised item, you have the ability to link a location to the contract. This can be used where a room or building requires maintenance or service.
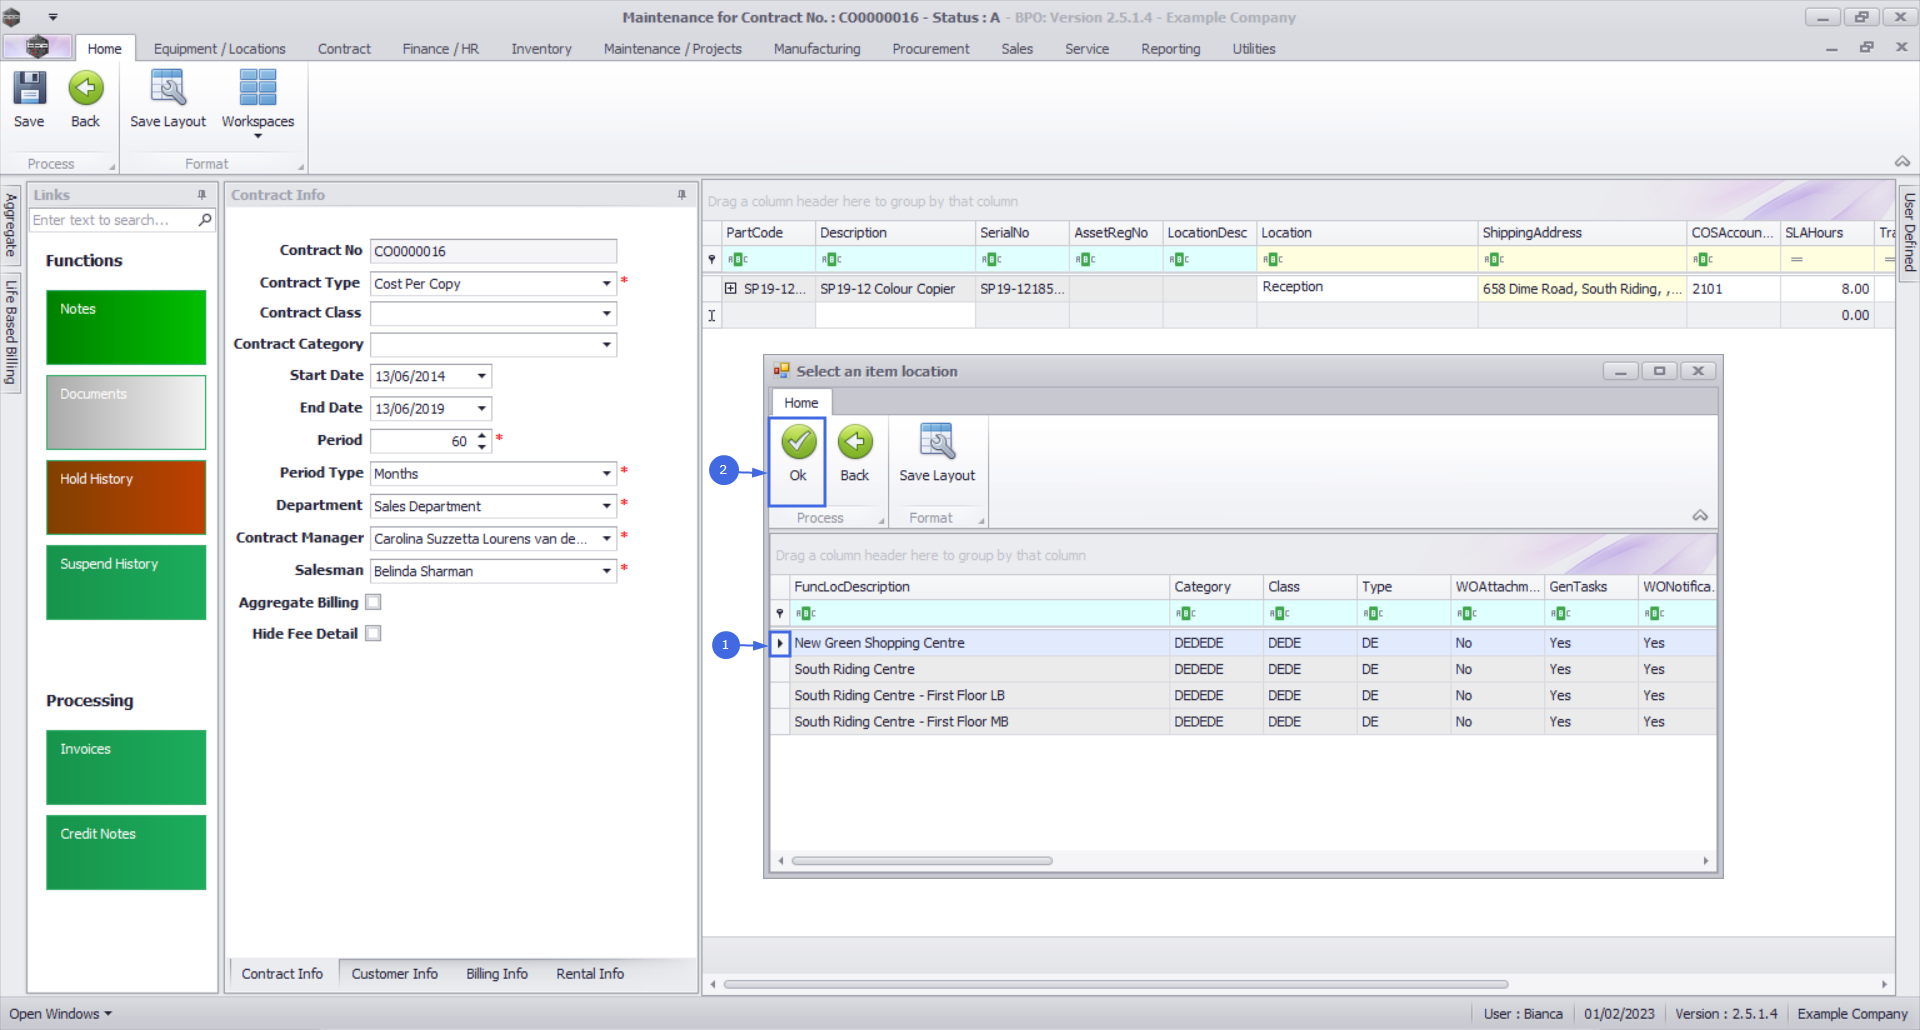
- Click on Location - Add New Location Item.

- The Select a new item pop up screen will appear, listing all customer locations.
- Select the row of the item that you wish to link to this contract.
- Click on Ok.
- The following columns will auto populate according to your item selection:
- LocationDesc
- Description
- Category Description
- Model No if configured on the asset's part code
- Serial No
- Asset Register No if configured on the asset
Note: The PartCode, Description, Category Description, Model No, Serial Number, and Asset Register No columns will not be populated as this is a Location Contract item and not a Machine (asset) Contract Item.
Contract Item Main Details
Whether you are linking a Machine or Location, the following item details should be configured.
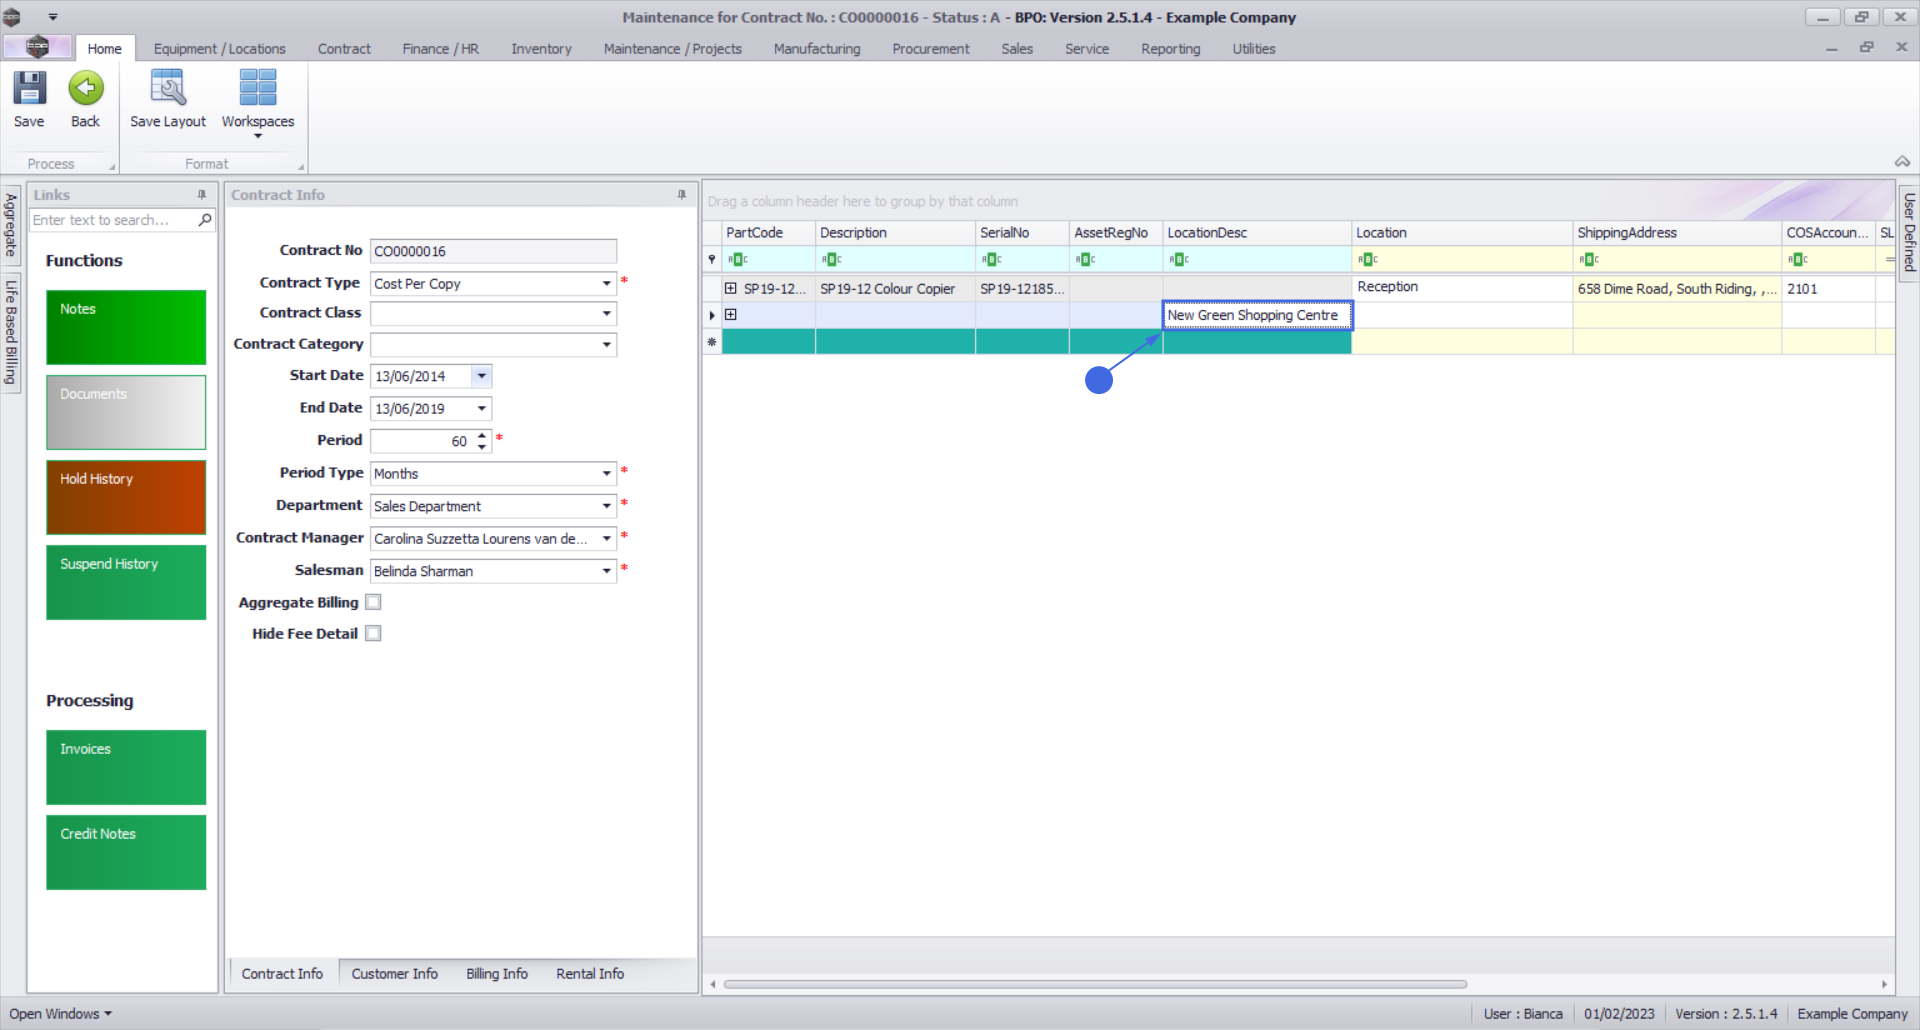
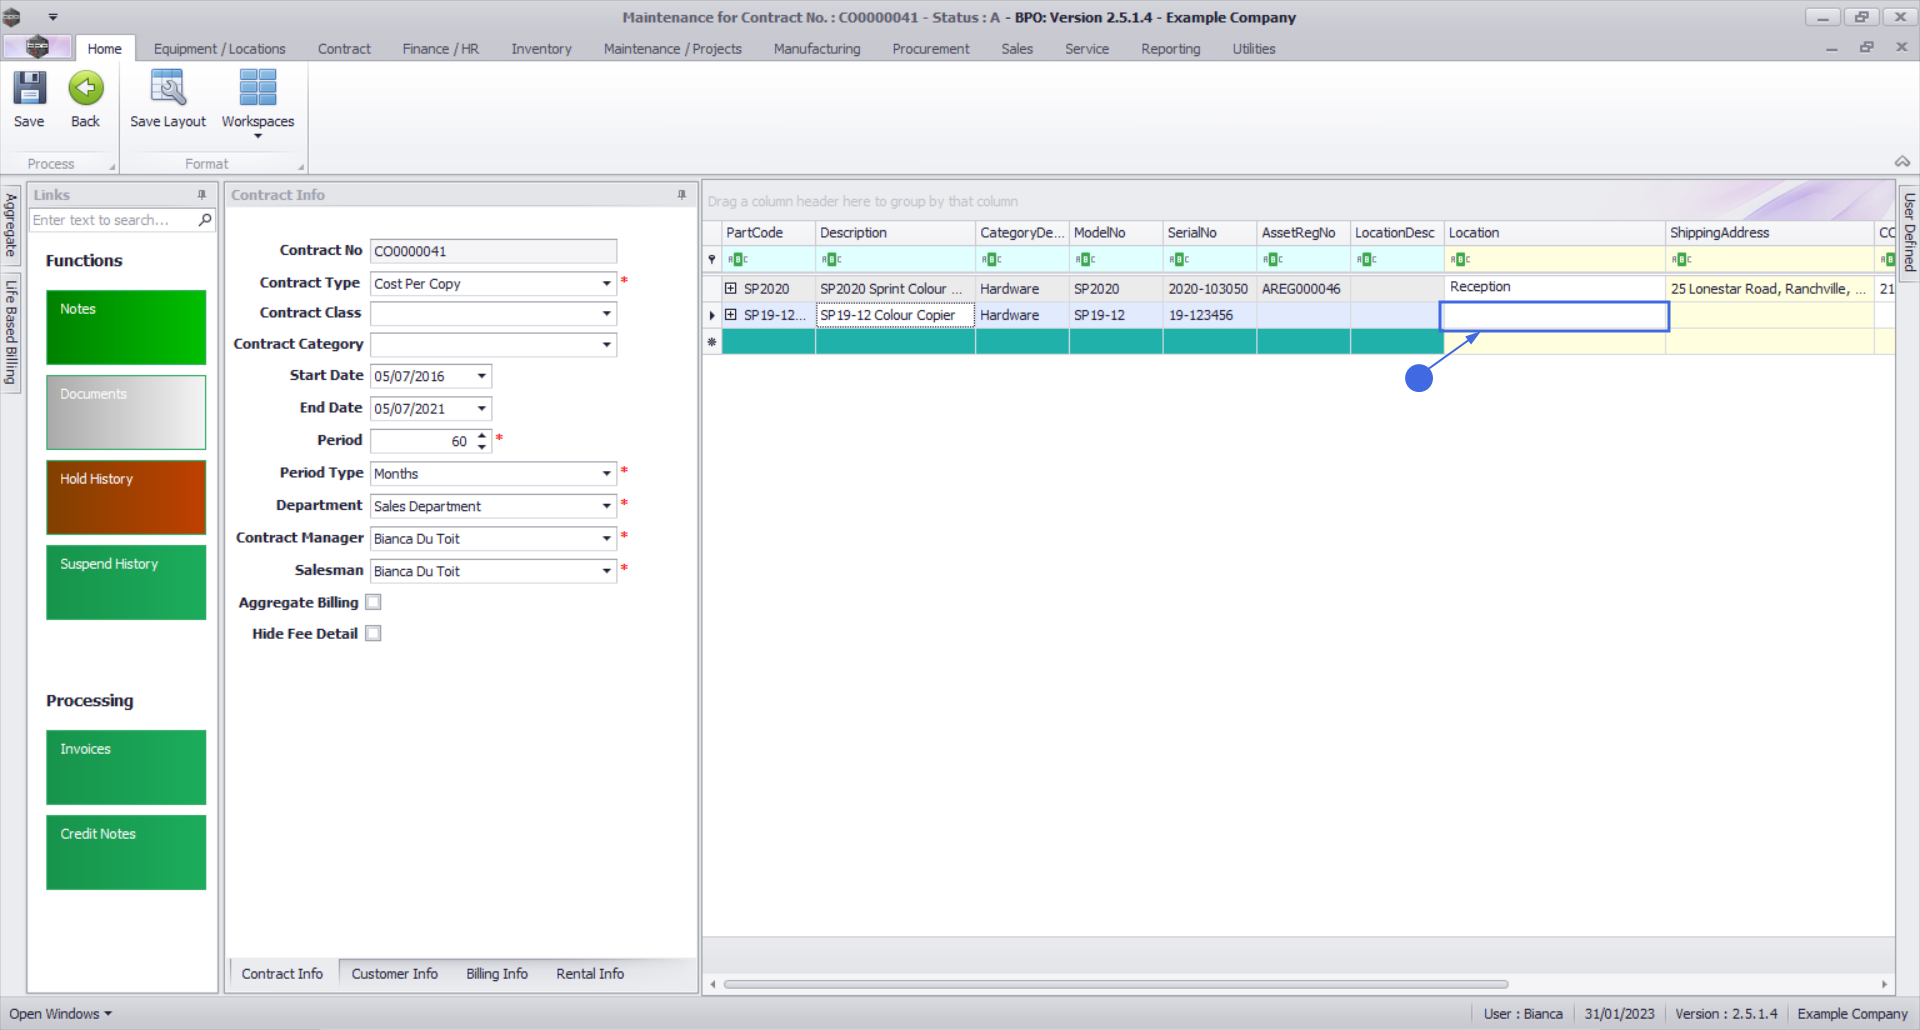
Link Location
This is the location of the contract item, e.g. Reception, used to assist the technician with finding the item on site.
- Click in the Location text box.
- Type in a Location for this item.
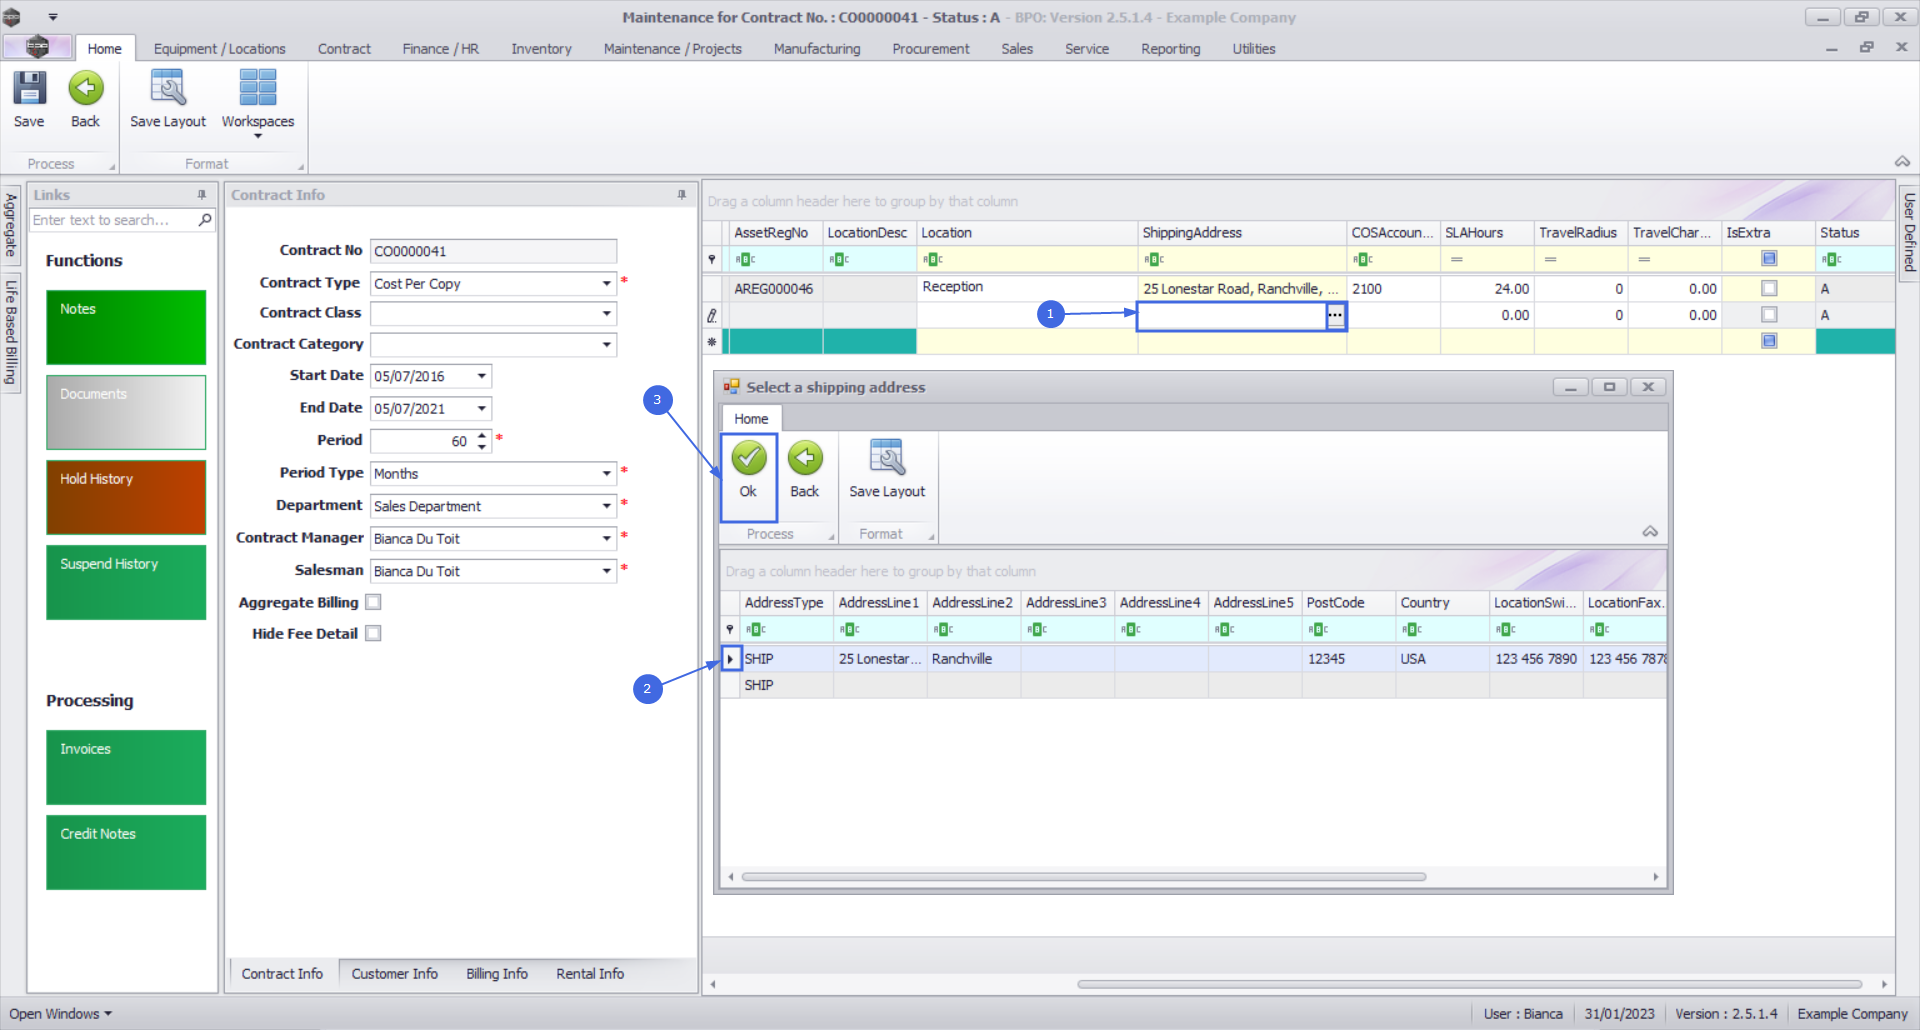
Link Shipping Address
This is the physical address where the contract item is.
A new company config flag (AutoUpdateShippingAddress) is available in BPO2 v2.5.0.8 (or higher) / Nucleus Service to control automated shipping address updates in the system between contract items and equipment shipping addresses/ functional location shipping address and ensures the shipping address correlates to contract items shipping address. When you update the shipping address on a contract the shipping address will reflect on the asset or functional location. If the user updates the asset or functional location’s shipping address, the shipping address will reflect on the contract item.
- Click in the Shipping Address text box.
- An ellipsis button will be revealed.
- Click on this button to display the Select a shipping address pop up screen.
- Select the rowof the shipping address that you wish to link to this item.
- Click on Ok.
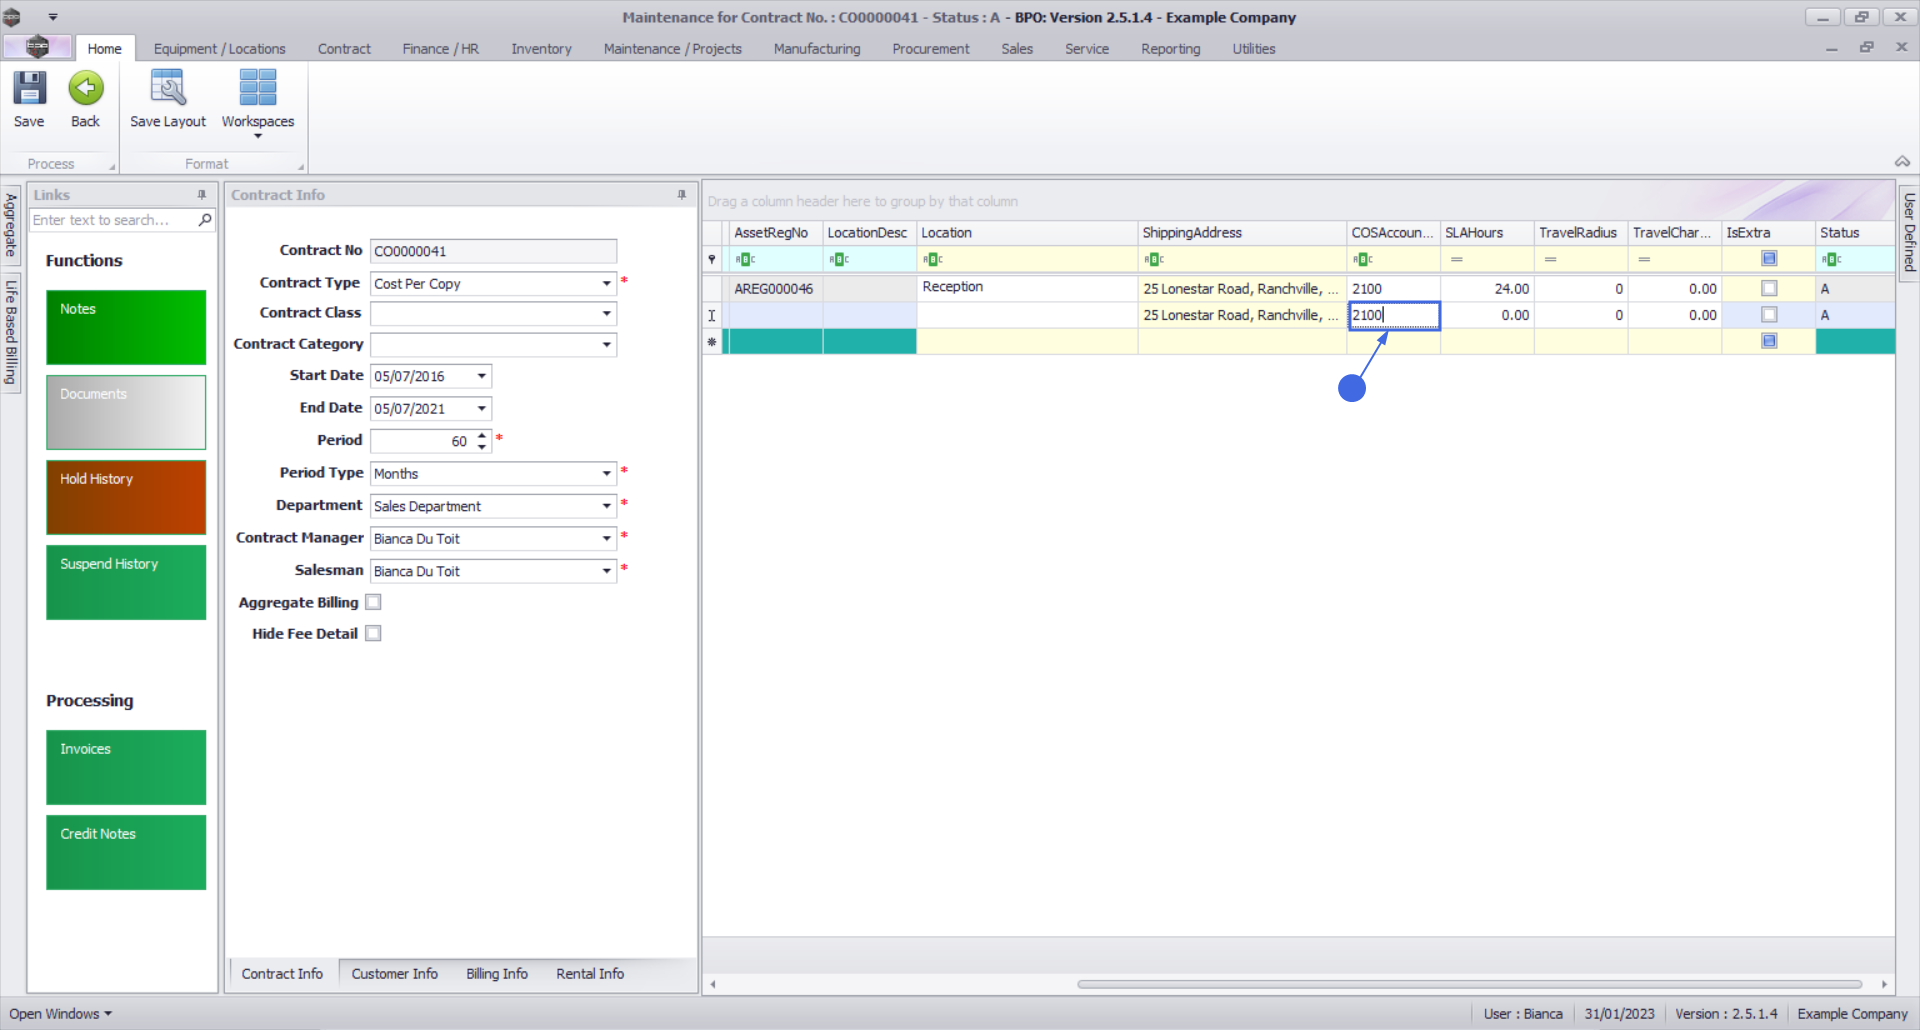
- Scroll right to view the remaining columns in the Items frame.
Link COS Account Code
- Click in the COS Account Code text box.
- Type in the Cost of Sales account code to be used for WIP (Work In Progress) transaction postings (non-billable toner and spare parts issued as contract included items).
Link SLA Hours
- Click in the SLA Hours text box.
- Type in or use the arrow indicators to select the required call response time (in hours) if applicable.
- Note 1: If this is set up, SLA will apply every time a call is logged against the contract / contract item. SLA will be calculated based on the shift pattern (customer's trading hours) e.g. if the trading hours are from 8am - 5pm and a call is logged at 4pm, SLA will start calculating at 4pm and stop at 5pm and resume the following day at 8am.
- Note 2: For SLA to work, the shift must be set up in BPO Configurator and linked to the customer.
- Note 3: The SLA Monitoring Service must be installed, configured and running to fully utilise this functionality.

Link Travel Radius and Travel Charge
If you need to ensure travel is charged each time a call is raised for the contract item, set up a Travel Radius (distance) and Travel Charge Rate (per km). Also see Travel Radii.
- Click in the Travel Radius text box.
- Type in or use the arrow indicators to select the distance in km to and from the client, if this travel is to be billed every time a call is logged. If travel is included, then set this to 0.
- Note: Travel can always be billed separately, if required.
- Click in the Travel Charge Rate text box.
- Type in or use the arrow indicators to select the travel charge rate (e.g. Rand per kilometre).
- Note: If you input a non-zero value, each time a call is logged against the contract item and the technician travels outside the specified Travel Radius, the Travel Charge Rate will be applied. You will not be able to close the call until the travel charges incurred are invoiced.
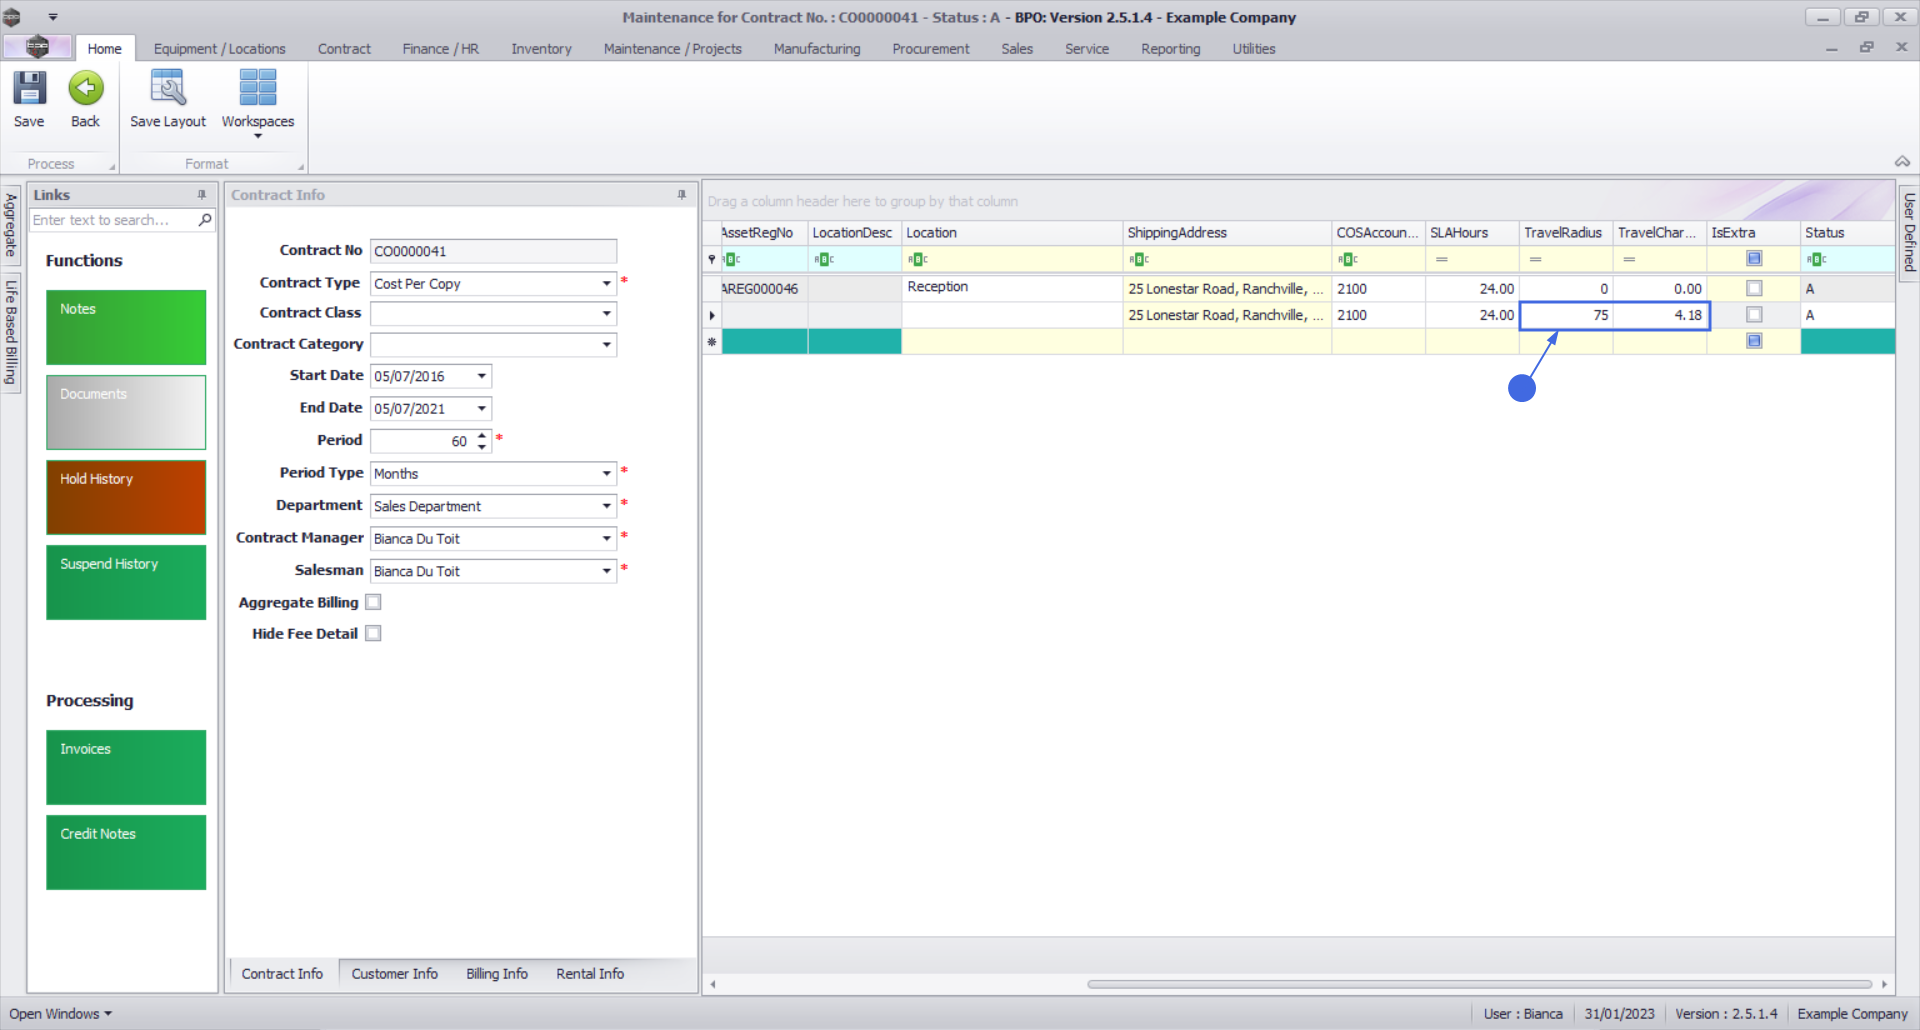
- The Is Extra flag is to indicate whether the item is an accessory to the main item on contract.
- The Status field is static and there to show you the that the item is active.
Contract Item Additional Details
Whether you are linking a Machine or Location, the following item details should be configured, where applicable.
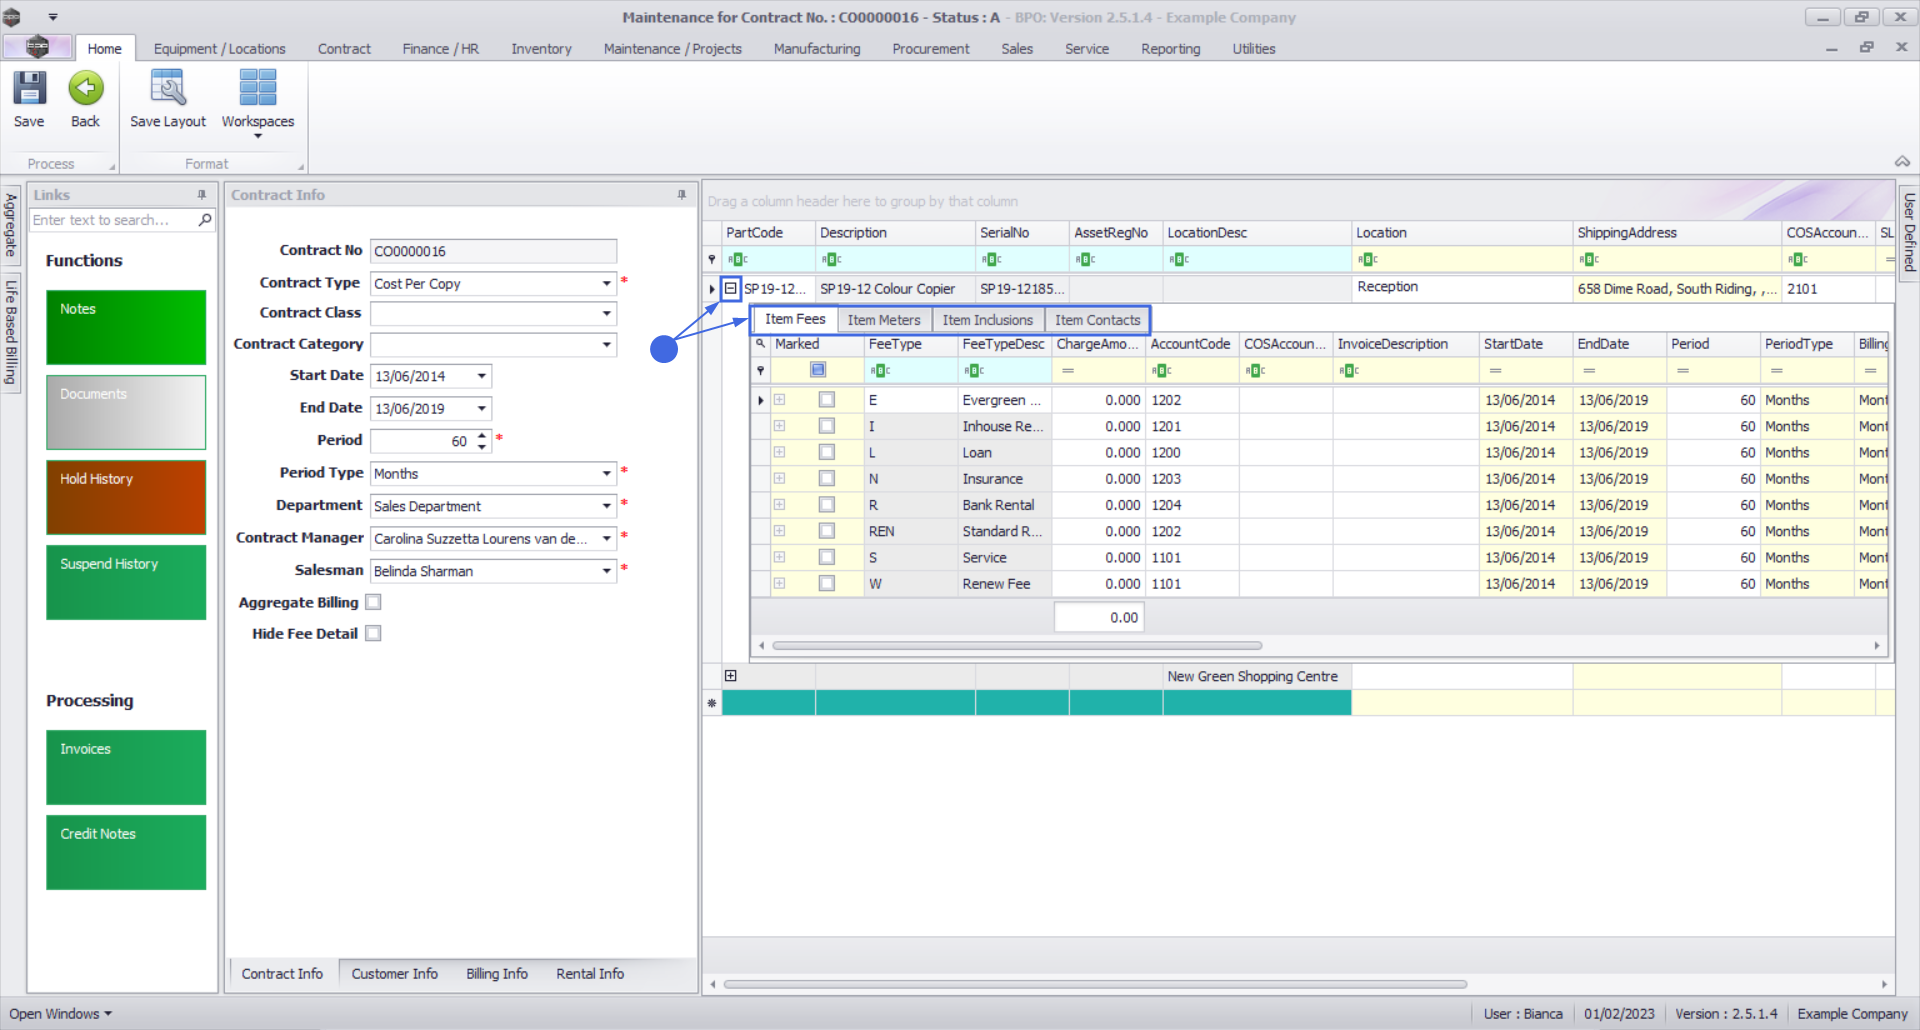
- Here you can click on four different tabs to add or edit:
- Item Fees: periodic charges e.g. monthly
- Item Meters: meter usage charges
- Item Inclusions: non billable items that are included in the contract
- Item Contacts: the contact person - per machine.
Next: Add the Contract Item Fees - Standard or Aggregate
NUCL.CTRT.004.003