We are currently updating our site; thank you for your patience.
Contract
Contract Credit Notes without Re-invoice
This process will not generate a contract invoice once the credit note has gone through approval.
| Ribbon Access: Contract > Contract Credit Notes |
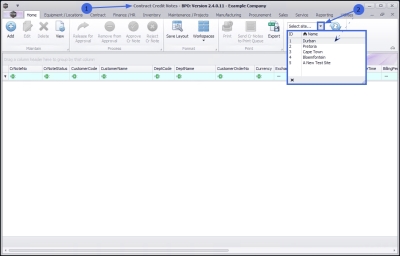
- The Contract Credit Notes screen will be displayed.
- Click on the drop-down arrow in the Site field and select from the list, the Site in which you wish to work.
- In this example, Durban is selected.
- This screen will open by default with the Status set to New. This does not need to be changed, in order to add a Contract Credit Note.
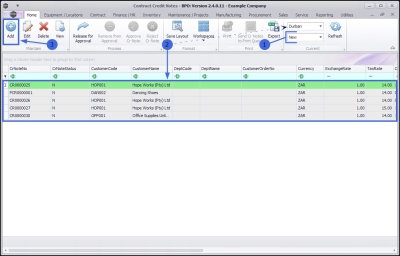
- Once the Site is selected, as explained above, the screen will populate with all of the New Contract Credit Notes linked to that specific Site.
Add Contract Credit Note
- Click on Add.
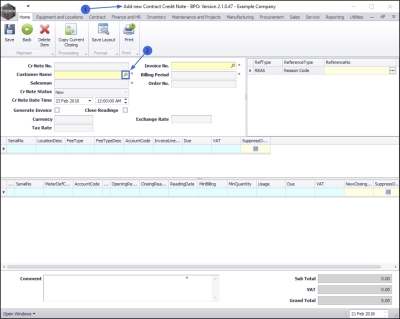
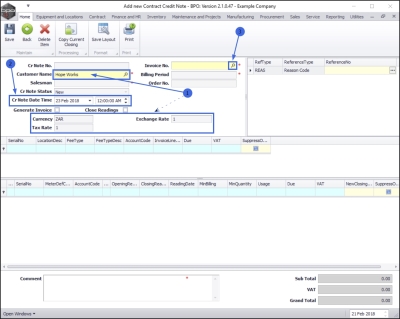
- The Add new Contract Credit Note screen will be displayed.
Search by Customer / Search by Invoice Number
There are 2 methods for bringing up the customer and invoice details:
- Either, You can search for and select the customer first and then search and select the correct invoice number linked to that customer.
- Or, you can search for and select the invoice number first, which will auto populate the customer details.
For the purpose of this manual, we will document the first process.
Customer Details
- Customer Name: Click on the search button in this field.
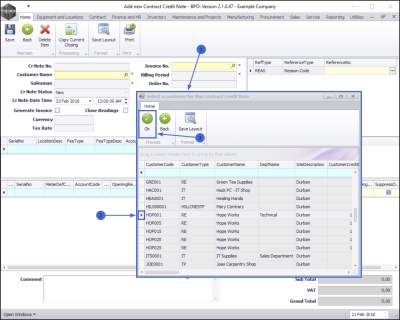
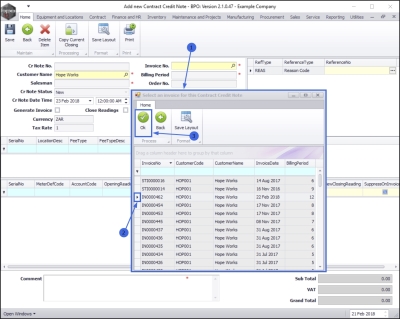
- The Select a customer for this Contract Credit Note pop up screen will appear.
- Select the row of the customer who you wish to raise a credit note for.
- Click on Ok.
Financial Details
- As you select the customer name , the Currency, Tax Rate and Exchange Rate fields will auto populate based on the contract billing information already set up on the customer when the contract was created.
- Credit Note Date Time: At this point in the process, these fields will auto populate with the current date and time.
Select Invoice No.
- Invoice No: Click on the search button in the Invoice No. field.
- The Select an invoice for this Contract Credit Note pop up screen appear.
- Select the row of the contract invoice where you wish to raise a credit note.
- Click on Ok.
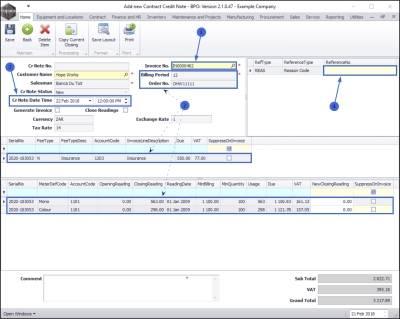
- As you select the Invoice No.,
- the Billing Period, Order No., Fee and Item fields will auto populate based on the details linked to this contract invoice.
- At this point, the credit note Date and Time will change to the original date of the contract invoice selected.
Select Reference No. (Reason Code)
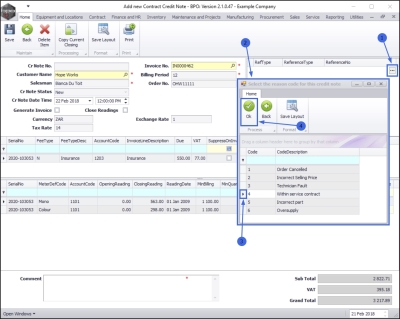
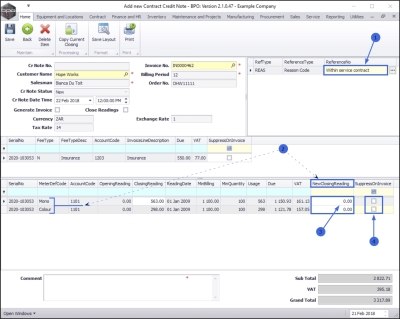
- Click in the Reference No field.
- An ellipsis button will be revealed.
- Click on this button to display the Select the reason code for this credit note pop up screen.
- Select the row of the reason code that you wish to allocate to this credit note.
- Click on Ok.
- The selected reason will populate the Reference No. field.
New Closing Reading
- If there are any meters linked to the selected invoice to be credited, then you can manually edit the closing reading. You may wish to do this if, for example, the closing reading on the original invoice was recorded incorrectly
- Click in the New Closing Reading field of the meter type that you wish to edit. Directional arrows will appear. Either type in, or use these arrows to select the correct current machine meter reading.
Suppress on Invoice Check Box
- You can click on the Suppress On Invoice check box at the end of any selected meter fee line.
- This will hide the meter fee line amount on the contract invoice although the total contract invoice amount will include this.
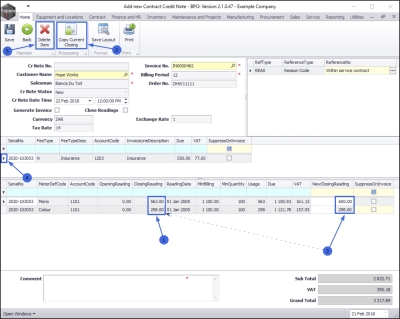
Copy Current Closing Button
- If the closing readings on the original invoice were recorded correctly,
- You can click on the Copy Current Closing button.
- This will cause the New Closing Reading fields to populate with the same figures as the Closing Reading fields.
- Note: This is useful, for example, if there are several lines of meter readings linked to the invoice and only one needs to be changed for the purpose of the credit note being created. The system will populate all the meter rows then you can search and edit manually, the one reading that was captured incorrectly.
Delete an Item Line
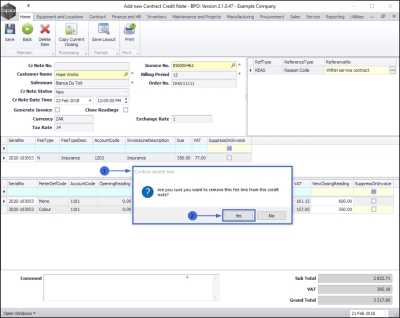
You can delete an item line on the credit note;
- Select the row of the item that you wish to delete.
- Click on Delete Item.
- A Confirm delete line message box will pop up asking;
- Are you sure you want to remove this fee line from the credit note?
- Click on Yes.
- The selected fee line has now been deleted from the Contract Credit Note screen.
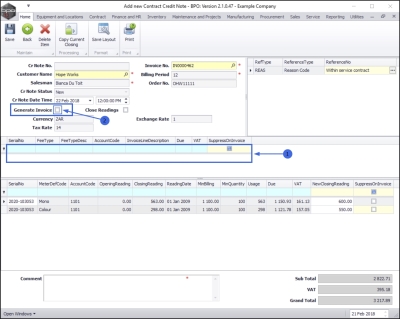
Generate Invoice check box - Unselected
- Make sure that the Generate Invoice option is unselected as this process is for raising a credit note without a re-invoice.
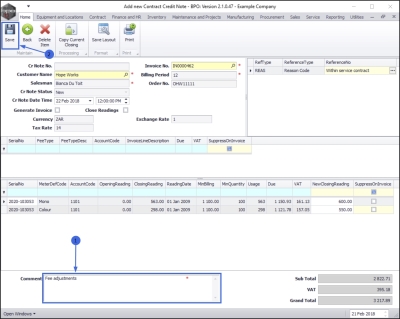
- In the Comments field, type in a reason for this contract credit note.
Save Contract Credit Note
- When you have finished editing the details in this screen, click on Save.
Close Readings Warning
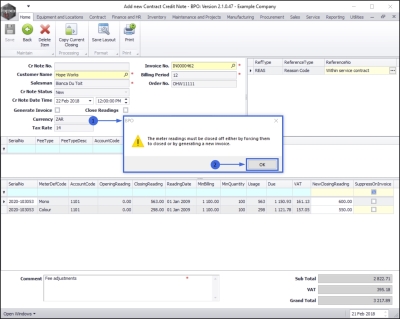
- If you haven't already done so, then a BPO message box will pop up informing you that;
- The meter readings must be closed off either by forcing them to close or by generating a new invoice.
- Click on Ok.
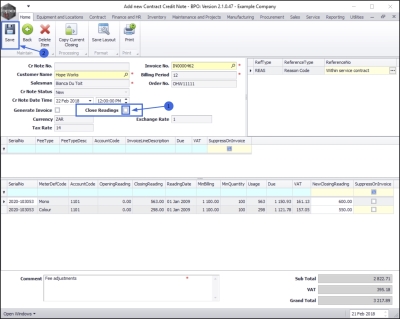
- Click on the Close Readings check box.
- Click on Save.
View Contract Credit Note
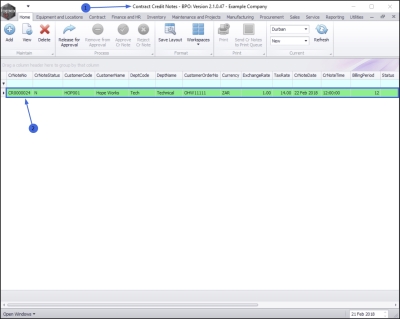
- You will return to the Contract Credit Notes listing screen.
- The newly raised credit note can be viewed in the data grid. You will note that a Credit Note No. has now been generated.
- Follow the Complete the Credit Note Approval manual to complete this credit note process.
MNU.119.001

