We are currently updating our site; thank you for your patience.
Contracts
Manual Contract Invoice - Consolidated Customer
Using a Manual Contract Invoice to bill any one machine on a contract for either fees or meters or both within the current billing period, will prevent a contract invoice from being raised at month end for that contract – for either fees, meters or both.
- If any one machine on a contract is billed for fees and meters, none of the machines on that contract will bill at month end.
- If any one fee is billed, none of the other machines fees will bill at month end (for that contract). Meters will still be billed.
- If any one meter is billed, none of the other machines' meter charges will bill at month end (for that contract). Fees will still be billed.
It is important to understand that Manual Contract Invoices should only be used to fix a problem as a last resort. i.e.:
- To re-invoice contract billing where a contract credit note was raised (without auto re-invoice option) for incorrect start reading / incorrect fee or meter charges.
- For incorrect prior period billing. Raise a contract credit note (without auto re-invoice) and create a manual contract invoice with the correct readings / fee or meter charges.
- To invoice the client where prior period billing was missed.
Do not use a Manual Contract Invoice to 'bill' a pro-rata amount at the start of a contract, if the manual contract invoice is being raised in the same billing period. This will mean your contract will not bill at the end of the month. Instead:
- Either bill the pro-rata amount in the current billing period and set the contract to start billing in the following billing period, or
- Create a Sales Invoice with an Internal Service configured to post to the same general ledger account codes as the contract fee /meter charges.
If you are using the Auto Debit Order Processing option on BPO, make sure that you print the Manual Contract Invoice(s) from the Print Queue.
The process is slightly different for Unconsolidated customers as compared to Consolidated customers. The process below documents Consolidated Customers.
| Ribbon Access: Contract > Manual Contract Invoice |
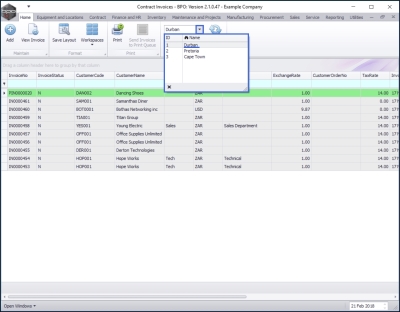
The Contract Invoices screen will be displayed.
Select the Site and Status
- Select the Site that you wish to work in.
- In this image Durban has been selected.
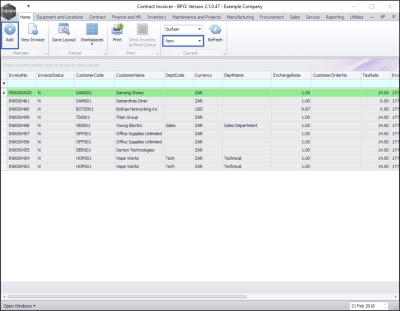
- By default, this screen will open in the New status. This does not need to be changed to add a new manual contract invoice.
- Click on Add.
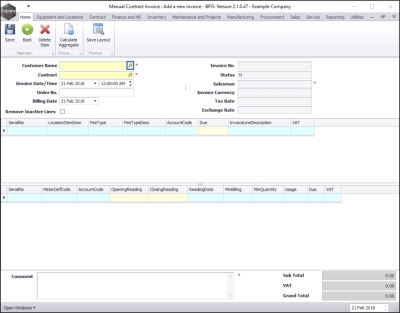
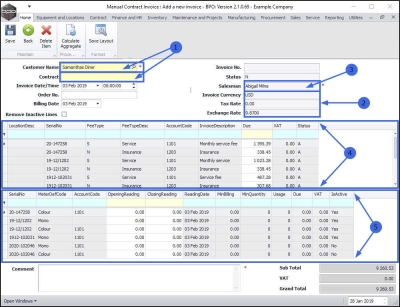
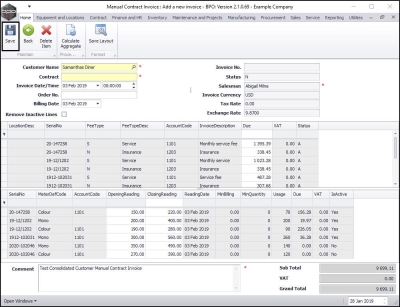
- The Manual Contract Invoice : Add a new invoice screen will be displayed.
Invoice Header Details
- Customer Name: Click on the search button in this field.
- The Select a customer for this Invoice screen will pop up.
- Select the row of the 'consolidated' customer that you wish to create a manual invoice for.
Check for Consolidated Customer
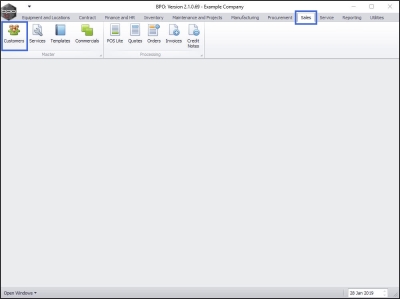
You can check if a customer is consolidated by viewing the Is Consolidated check box in the Customer Maintenance screen.
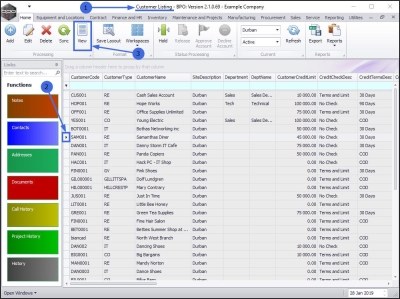
| Ribbon Access: Sales > Customers |
- The Customer Listing screen will be displayed.
- Click on the row selector in front of the customer you wish to view.
- Click on View.
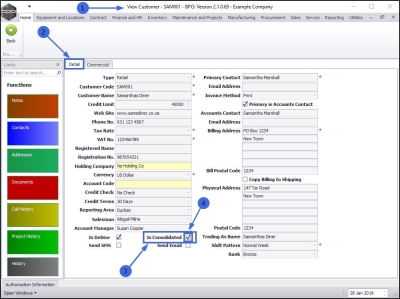
- The View Customer screen will be displayed.
- Ensure that the Detail tab is selected.
- Find the Is Consolidated check box in this screen.
- In this image, the check box is ticked, meaning this customer is consolidated.
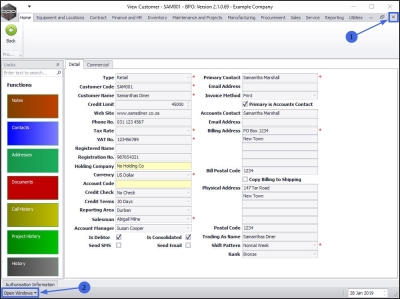
- Close the screen or use the
- Open Windows menu to return to the Manual Contract Invoice: Add a new invoice screen.
When you have navigated back to the Manual Contract Invoice: Add a new invoice screen, you will note that;
- The Customer Name field populates with the selected (consolidated) customer and the search button will disappear from the Contract field. This is because the invoice will incorporate all the Item Fees and Item Meters linked to this customer - you cannot select any one contract.
The following financial fields will now auto populate based on the customer contract details that have originally been set up:
- Invoice Currency , Tax Rate and Exchange Rate .
- If there is a Salesman already linked to this contract then that Salesman name will populate this field.
- The Items Fees data grid and
- Meters Fees data grid will populate with all of the Items Fees and Meters Fees linked to this consolidated customer.
Contract Item Fees and Meters
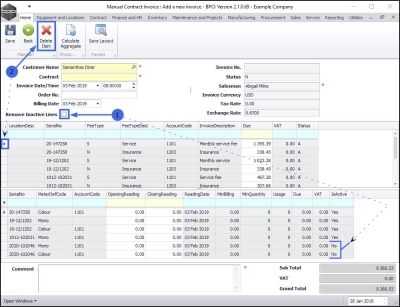
This screen lists both the Active and Inactive item or meter charges.
Remove Inactive Lines
- You can Remove Inactive Lines by selecting the check box
Remove Charges
- You can delete item lines not to be billed, by selecting the row of the item and clicking on Delete Item.
-
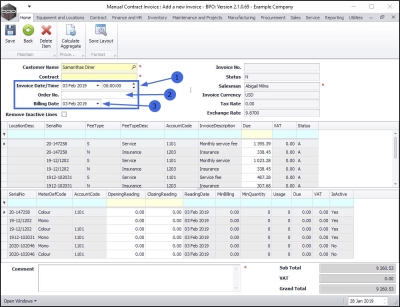
Invoice Date/Time:
These will be auto populated with the current date and time.
- Either type in or click on the drop-down arrow and use the calendar function to select an alternative date, if required.
- Either type in or use the directional arrows to select an alternative time, if required.
- Order No: Type in a customer order number if required.
- Billing Date: Ensure you have selected the correct billing date. This will adjust the meter reading date for the items on this invoice.
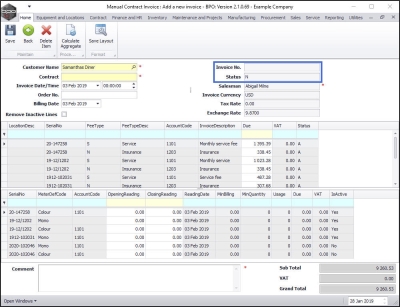
Invoice No.
- Invoice No: When you save the details in this screen, the system will calculate the invoice number based on the selected contract configuration details set up.
- Status: This field will auto populate with N - New.
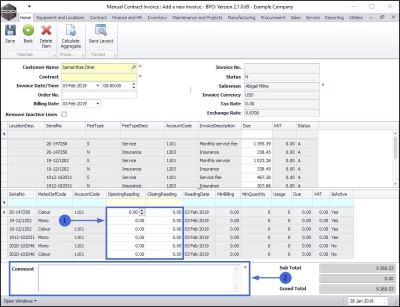
Meter Readings
- Opening Readings Type in or use the directional arrows to select the Opening Meter Readings for this manual contract invoice.
- Closing Readings Type in or use the directional arrows to select the Closing Meter Readings for this manual contract invoice.
Comments
- Comments: Type in a comment relating to this invoice.
- This field is mandatory.
Note on Aggregate Billing
- Contracts cannot be configured for aggregate billing where the customer is consolidated.
Save Manual Invoice
- When you have finished editing the Manual Contract Invoice screen, click on Save.
Invoice No. Allocation
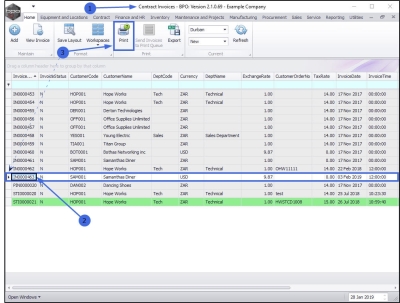
- The invoice will be saved and you will return to the Contract Invoices Listing screen.
- The newly created invoice will be selected in this screen and you will note that an Invoice No. has now been allocated.
Print Manual Invoice
- Keeping the invoice selected, click on Print.
- A Select the option as desired pop up screen will appear.
- Select the Print/Email method.
- In this image, Print Invoice has been selected.
- Click on Accept.
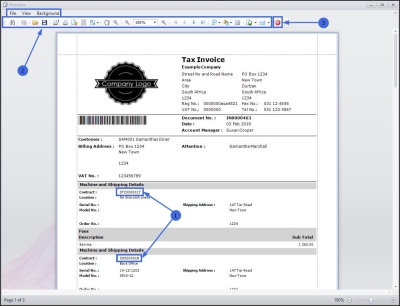
The Print Preview screen will open.
- Here you can see that all contracts linked to this customer have been invoiced as this is a consolidated customer.
- From here you can View, Print, Export or Email the invoice.
- Close the preview screen when you are done.
MNU.136.002

