Inventory
Deliveries - Receive - Goods into Store
A Goods Received Note (GRN) brings stock into store that was ordered from a supplier.
![]() Note: Saving the stock goods received note will trigger the Goods Received Note (PGRN)
account driver.
Note: Saving the stock goods received note will trigger the Goods Received Note (PGRN)
account driver.
- In order to receive goods (or stock) into store, a purchase order must exist and be in status Printed.
- When the number of serialised items to process is greater than the limit value set for the Company Configuration Flag, BulkGRNLimit
 The number of lines within a GRN that must be reached in order to generate a Bulk GRN in order to decrease time taken to process GRNs that have a large number of items., these items will be sent to the Unprocessed Bulk GRN queue to be processed by the Nucleus Service Bulk GRN Manager console application.
Notes
- If you are receiving serialised items (A or B-Class), make sure you type the Serial Number in the BatchSerialNo field.
- If you are using the Stock Batch Tracking option, make sure you type the Batch Number in the BatchSerialNo field for C-Class, (non-serialised), items when doing the GRN. For more details, refer to Inventory: Stock Batch Tracking.
- If you are receiving a high volume of serial numbers, you can import those serial numbers via CSV or Excel file.
- If the supplier did not send the Supplier Invoice at the time of delivery – then do the goods receiving without supplier invoice. The Supplier Invoice can then be raised once it is received from the supplier.
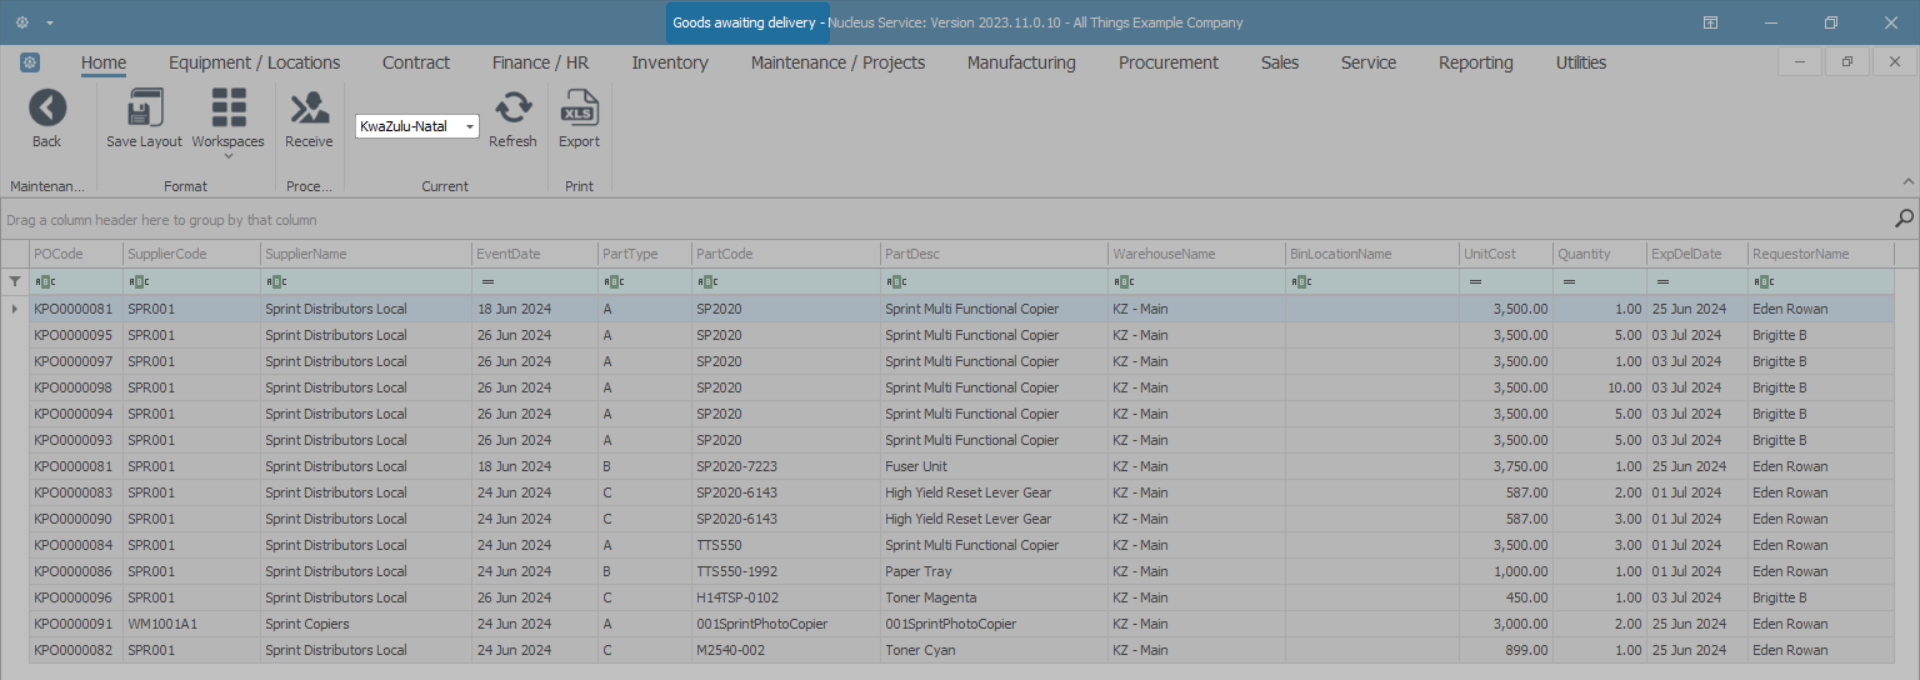
Ribbon Select Inventory > Deliveries

- The Goods awaiting delivery screen will be displayed.
Your employee user record should be linked to a default site. In this case, the site will auto populate with this default, otherwise the site must be manually selected.
Another site can be selected, if required, and if you have the security rights to access the site.
If All Sites displays here, then you do not have a default site configured on your user record, and need to select the required site.
- In this image KwaZulu-Natal has been selected.
Receive Goods
Select Purchase Order to be Received
- Select the row of the Purchase Order for the goods to receive into store. Note that if multiple lines exist on the Purchase Order, any line can be selected, as the choice of which items will be received will be done in the next screen.
-
- Method 1
- Right click in the row of the item that you wish to receive into store.
- A Process menu will pop up.
- Click on Receive - Receive Parts.
- Method 2
- Select the row of the item that you wish to receive into store, then click on Receive.
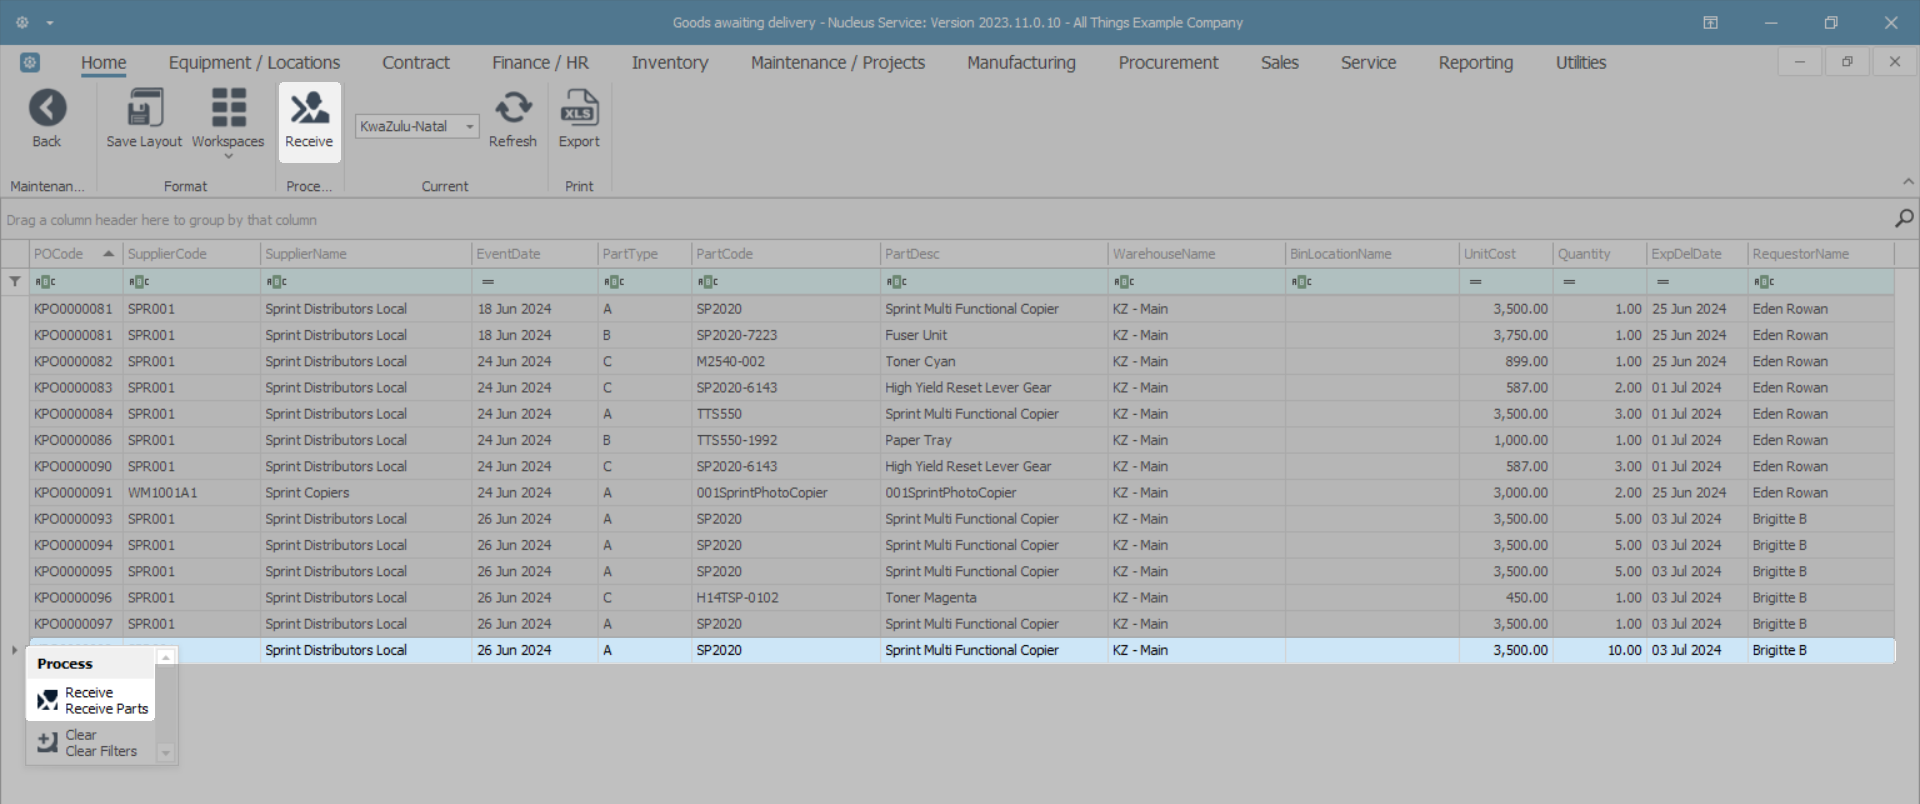
- An Inventory - GRN message box will pop up asking -
- Are you sure you want to receive the purchase order [ ]?
- Click on Yes.

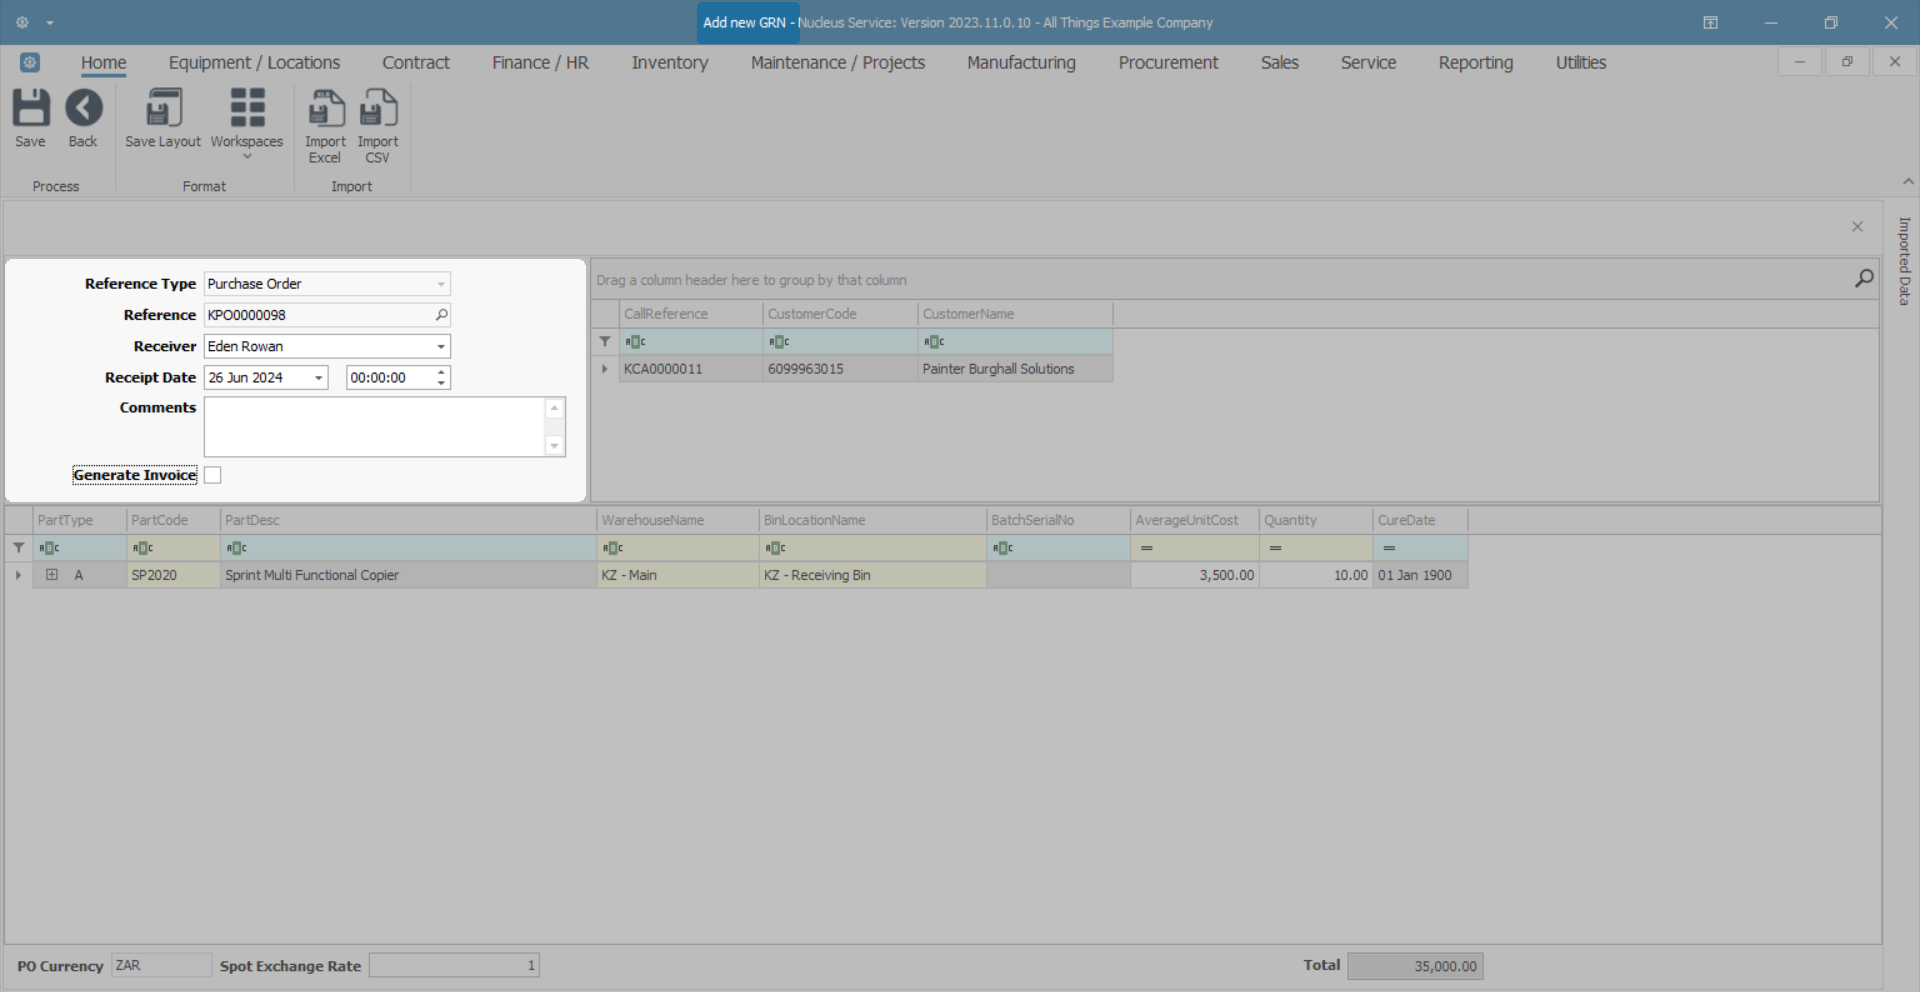
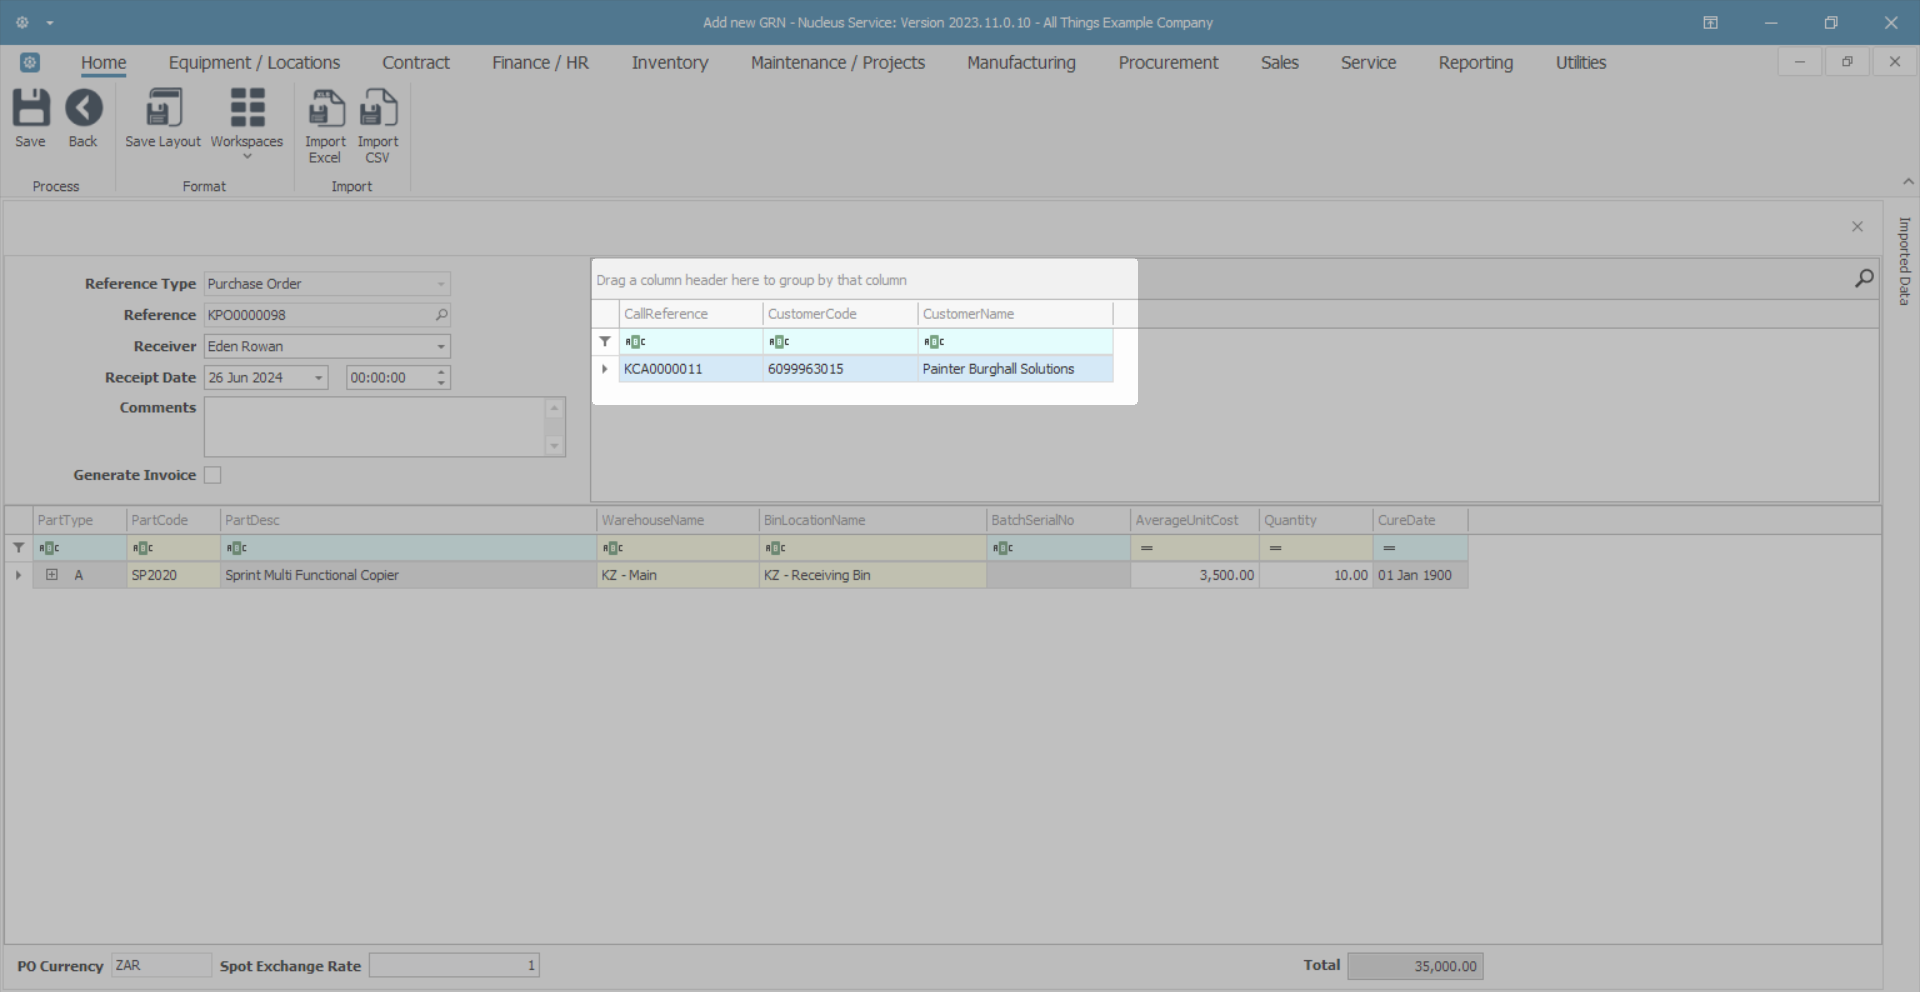
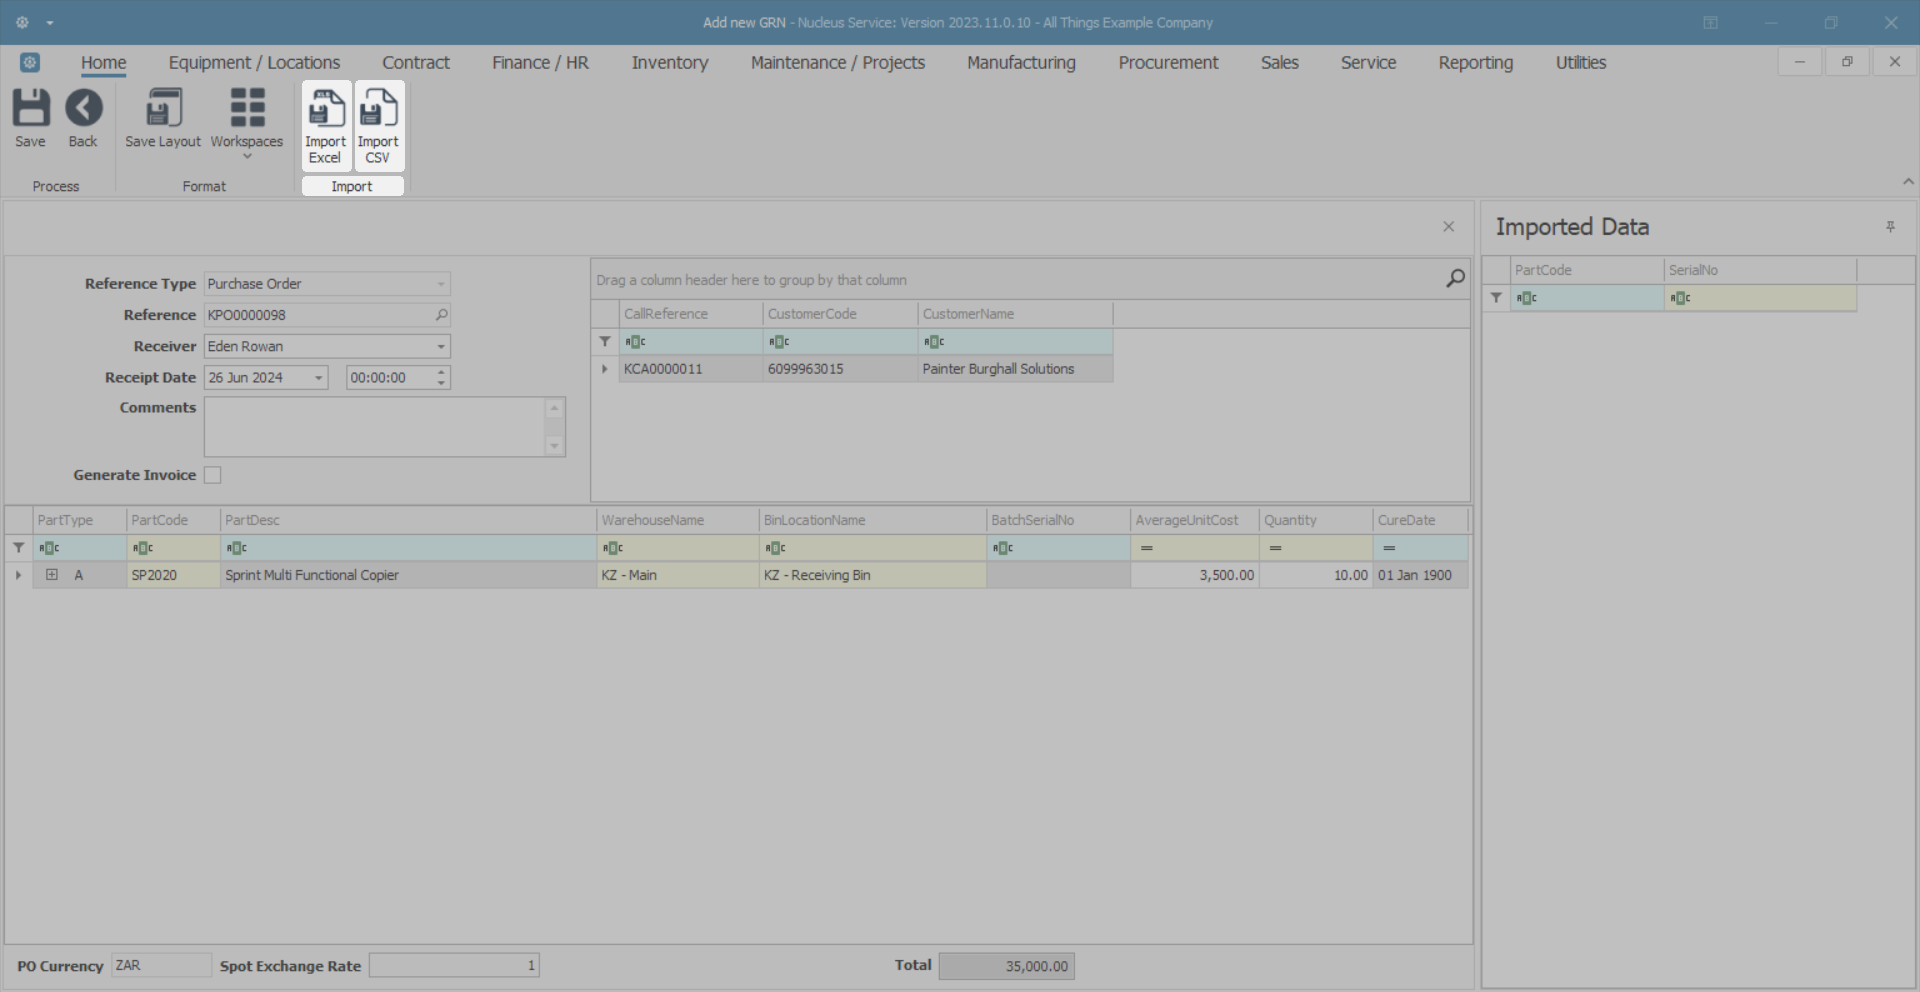
New GRN Details
The Add new GRN screen will be displayed with all relevant details filled in.
- Reference Type: This will auto populate with Purchase Order.
- Reference: This will auto populate with the original purchase order number.
- Receiver: This will auto populate with the person currently logged on to the system. You can click on the drop-down arrow and select from the list, an alternative person if required.
- Receipt Date and Time: This will auto populate with the current date and time.
- Date: You can either type in or click on the drop-down arrow and use the calendar function to select an alternative date, if required.
- Time: You can either type in or use the arrow indicators to select an alternative time, if required.
- Comments: Type a comment relevant to this new GRN, if required.
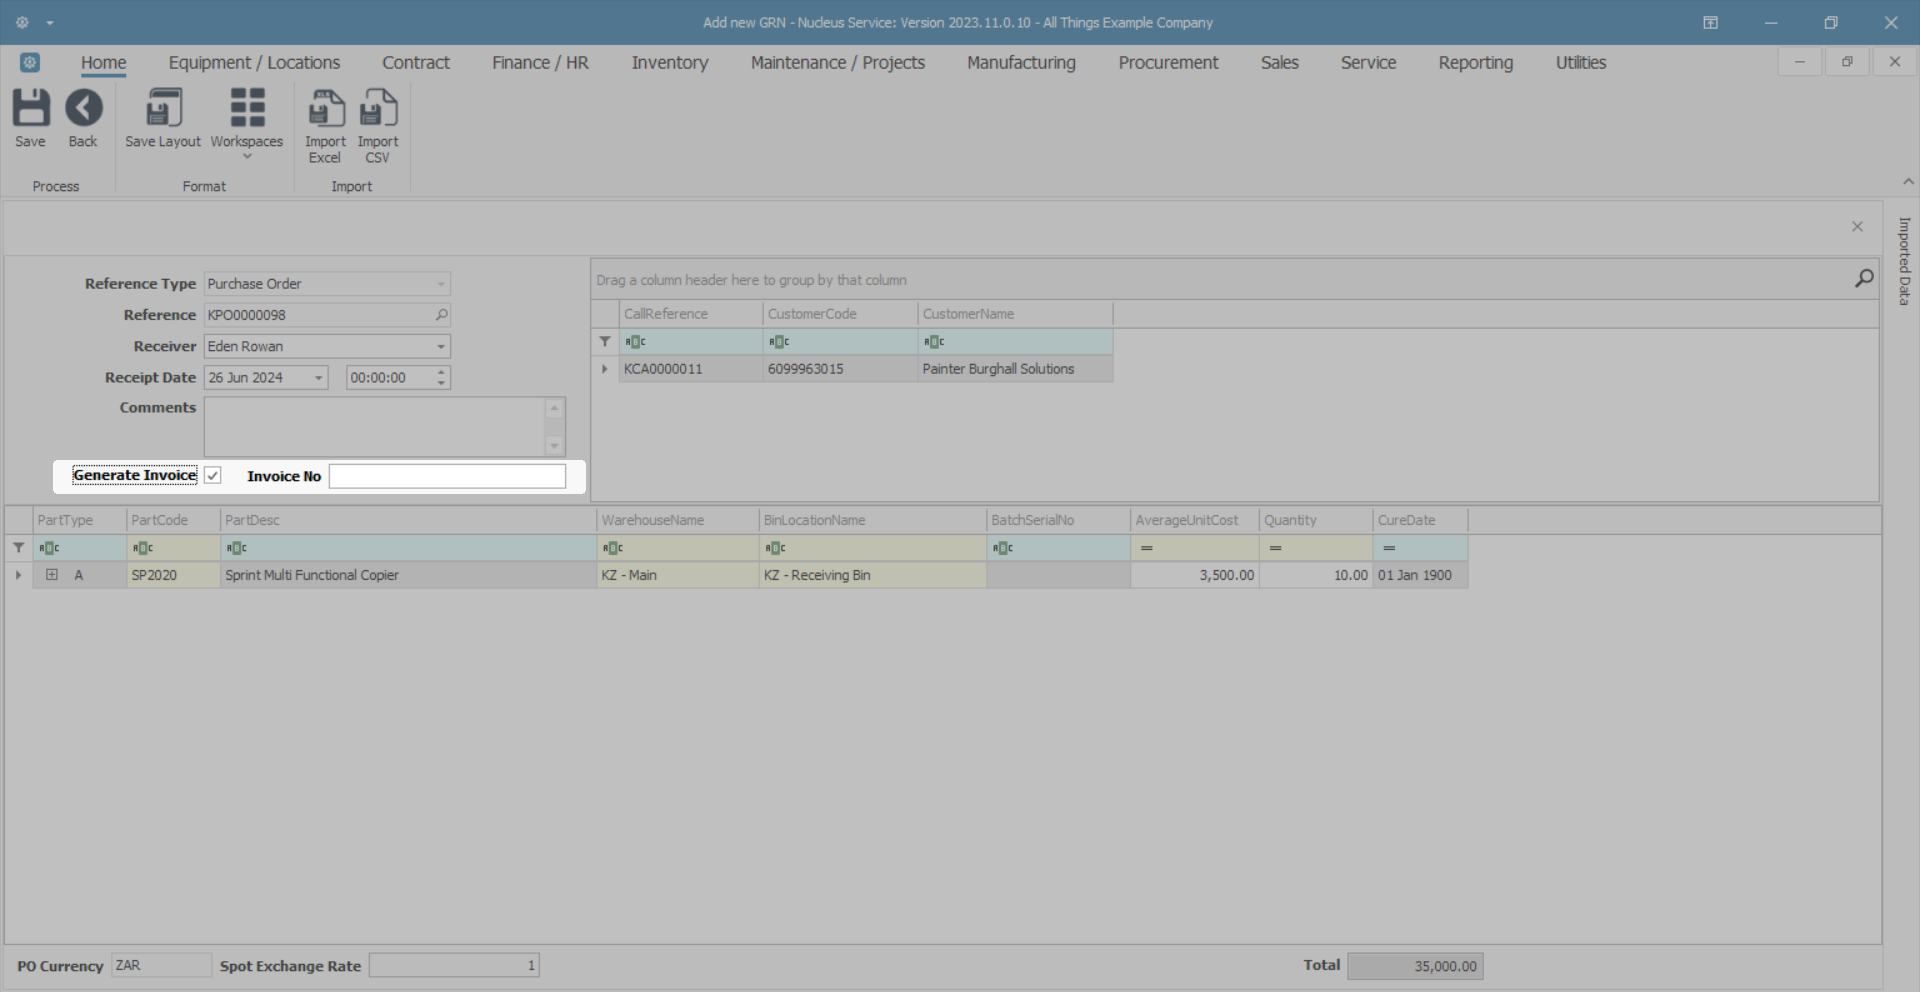
- Generate Invoice:
- If the supplier invoice was not sent with the goods, leave unchecked.
- Generate Invoice:
- If the supplier invoice was sent with the goods, check the Generate Invoice flag. This will display the supplier invoice number field - input the invoice number from the supplier.
- On saving the GRN, the Supplier Invoice will be created. This can then be checked and Approved.
The Cross Reference Grid
- The Cross Reference data grid will only populate with the related Call Reference, Customer Code and Customer Name, if the originating Purchase Requisition was created to fulfil client demand. This means that the Purchase Requisition was created from a part request originating from one of the following:
- A Project underlying Work Order, where the Project is linked to a customer.
- A Call.
- An OTC Invoice.
- A POS Lite Invoice.
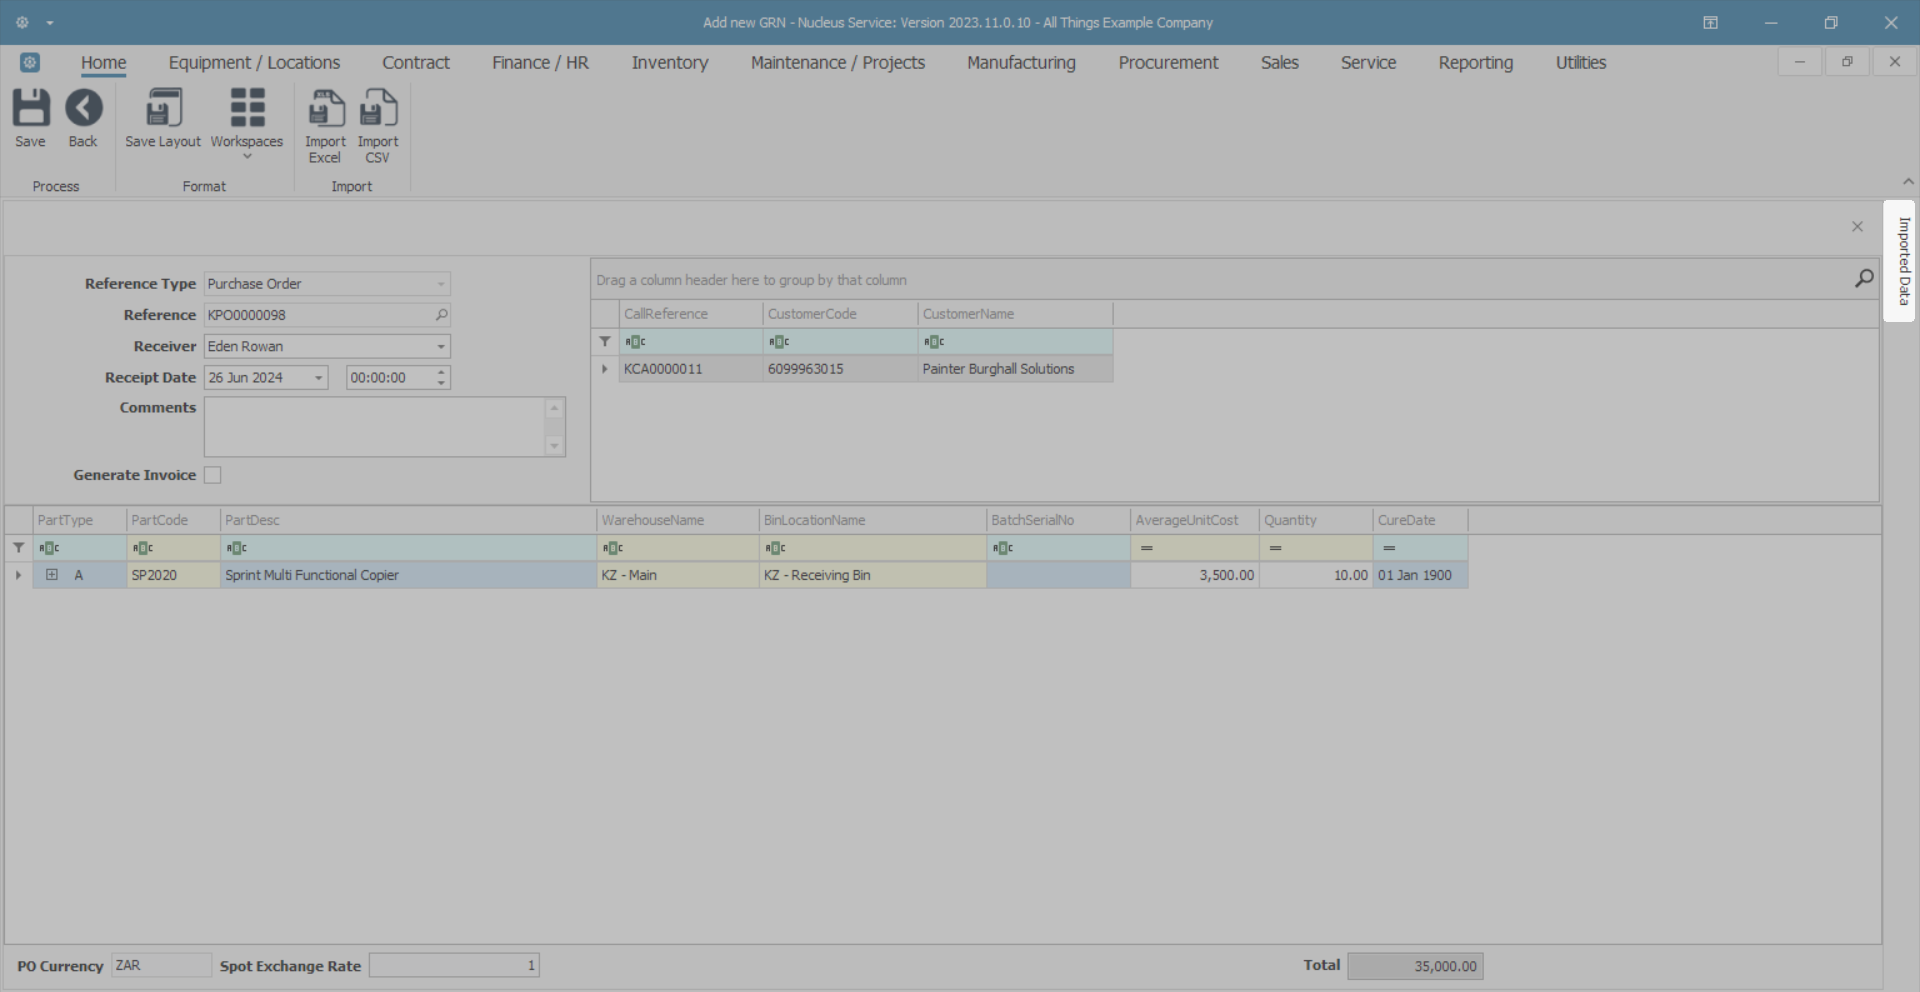
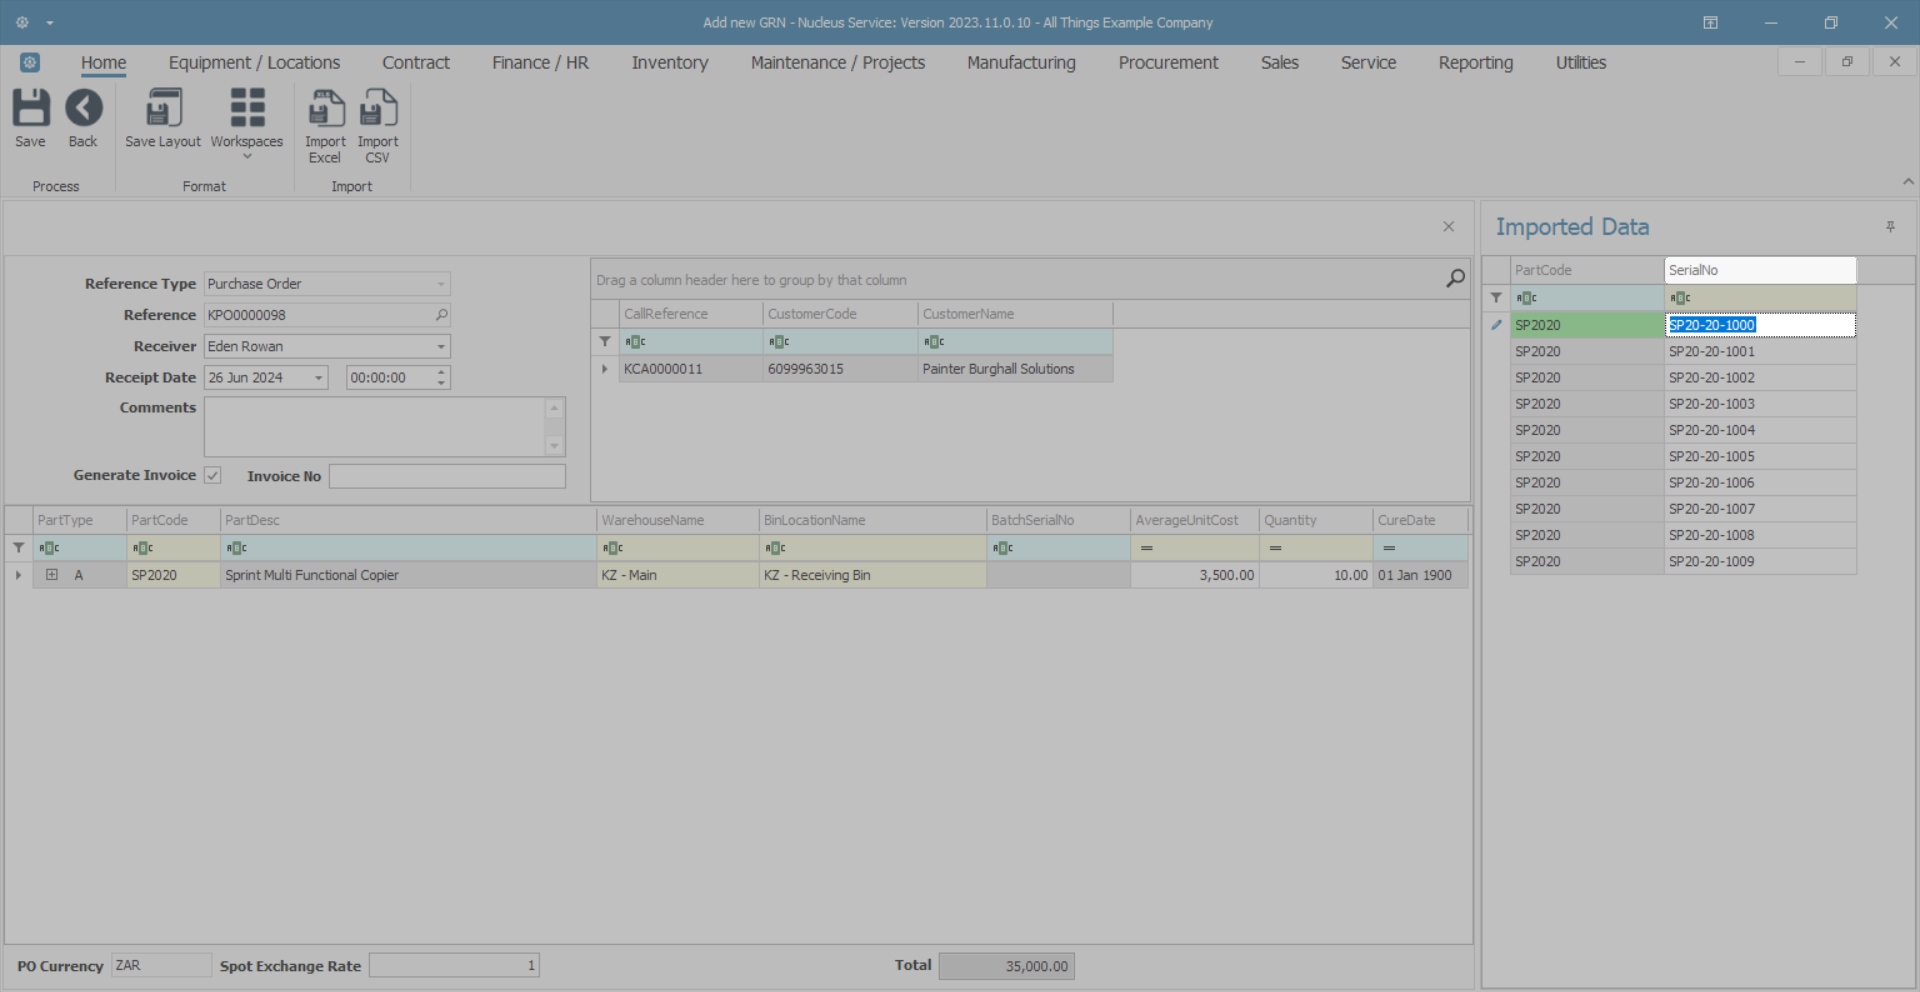
The Imported Data Grid
- The Imported Data grid is used to display and work with imported serial numbers for bulk GRN processing.
- If you are not importing serial numbers, skip ahead to The Parts Data Grid.
- Click on the Imported Data tab and dock the expanded grid.
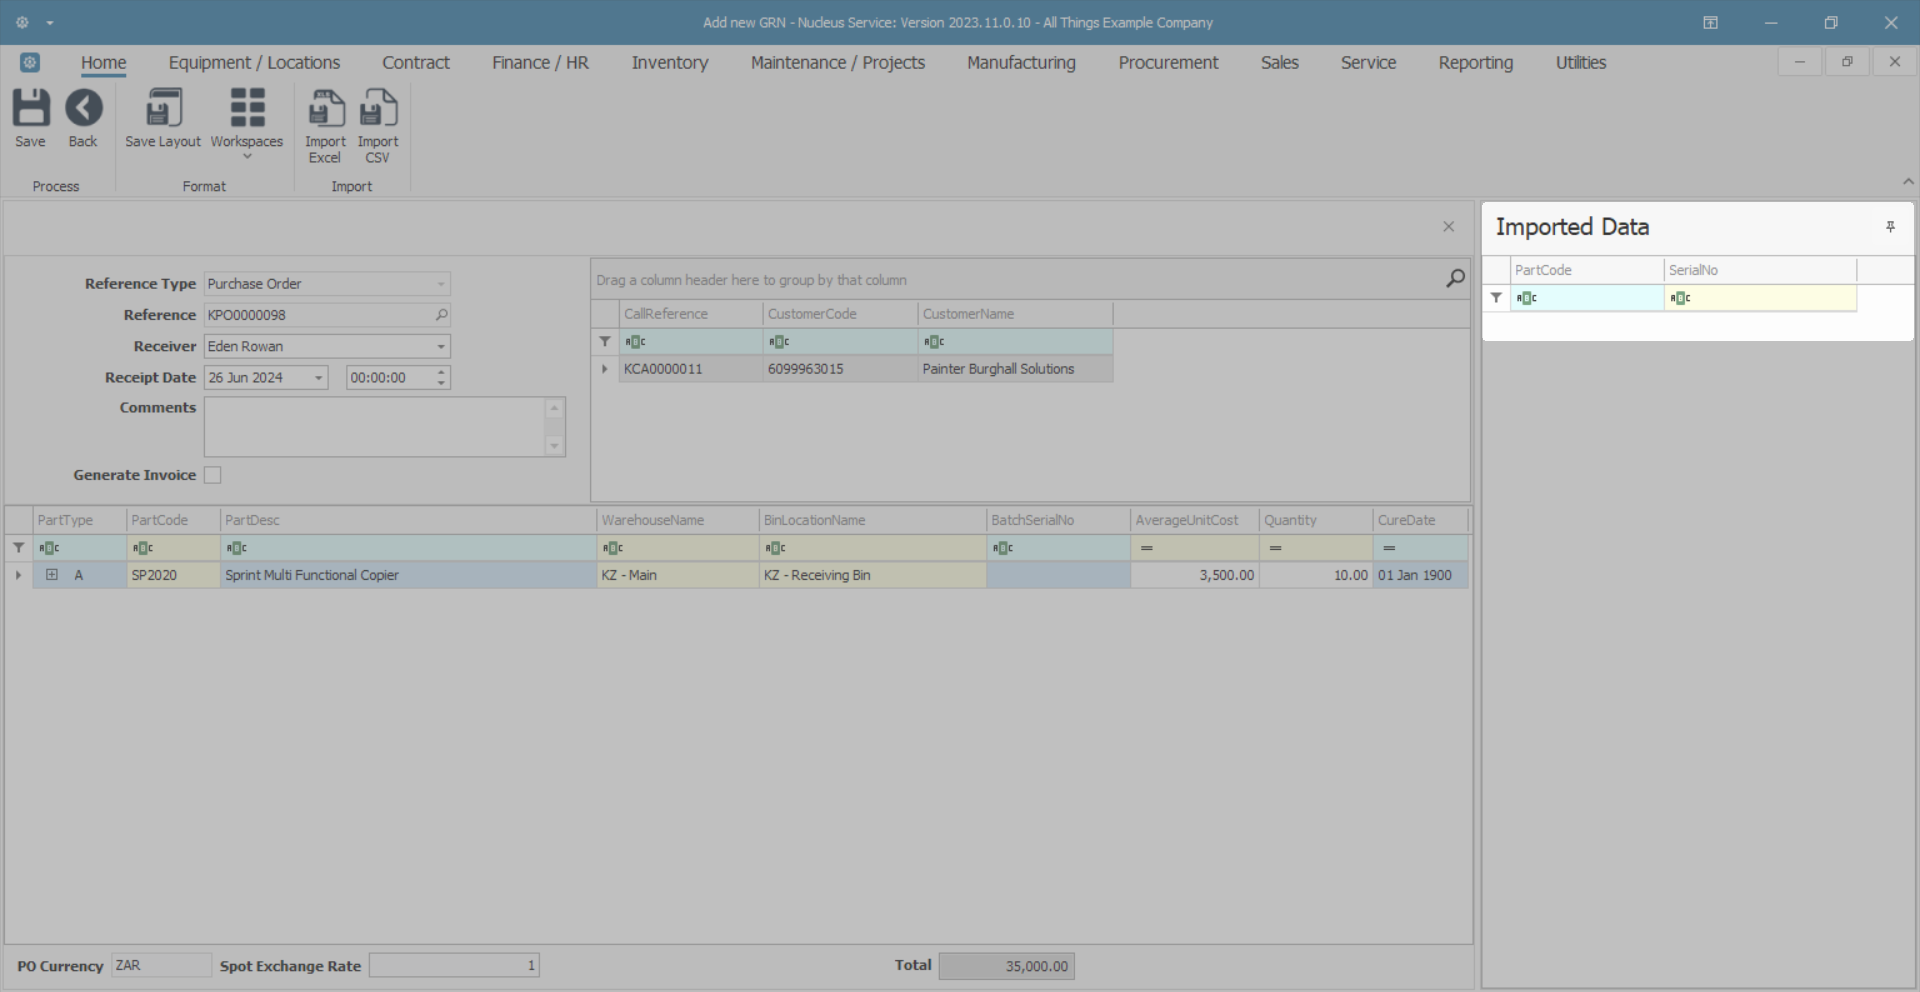
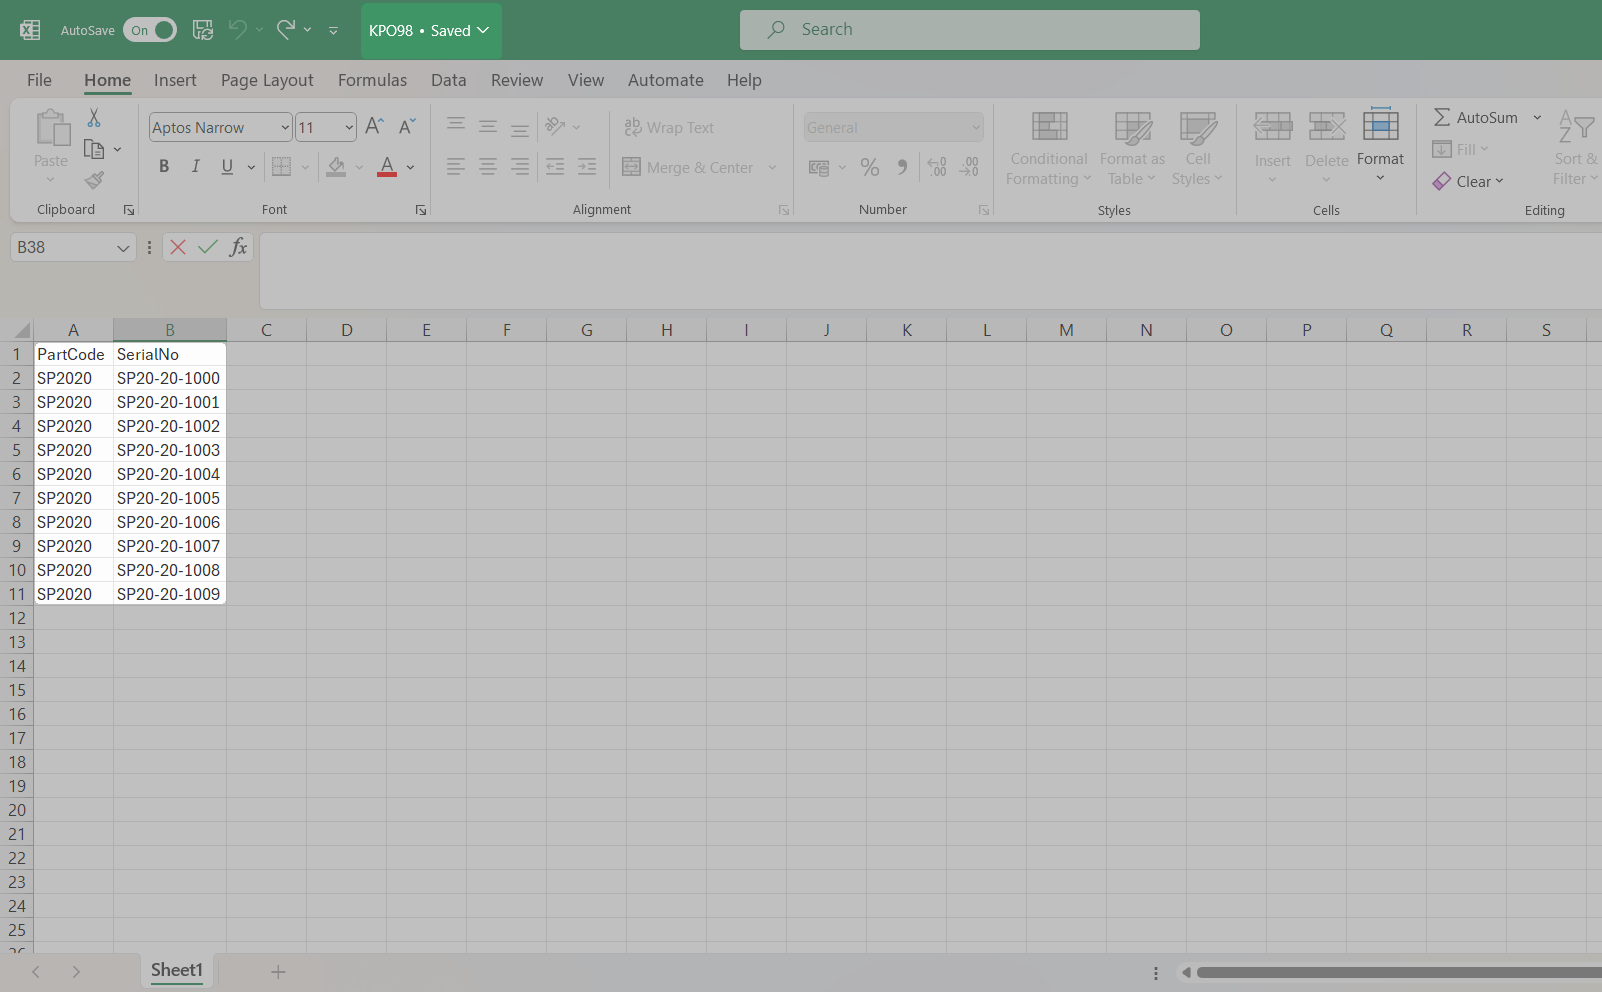
- Ensure you have your list of serial numbers listed in an Excel or CSV file, listing the PartCode and SerialNo.
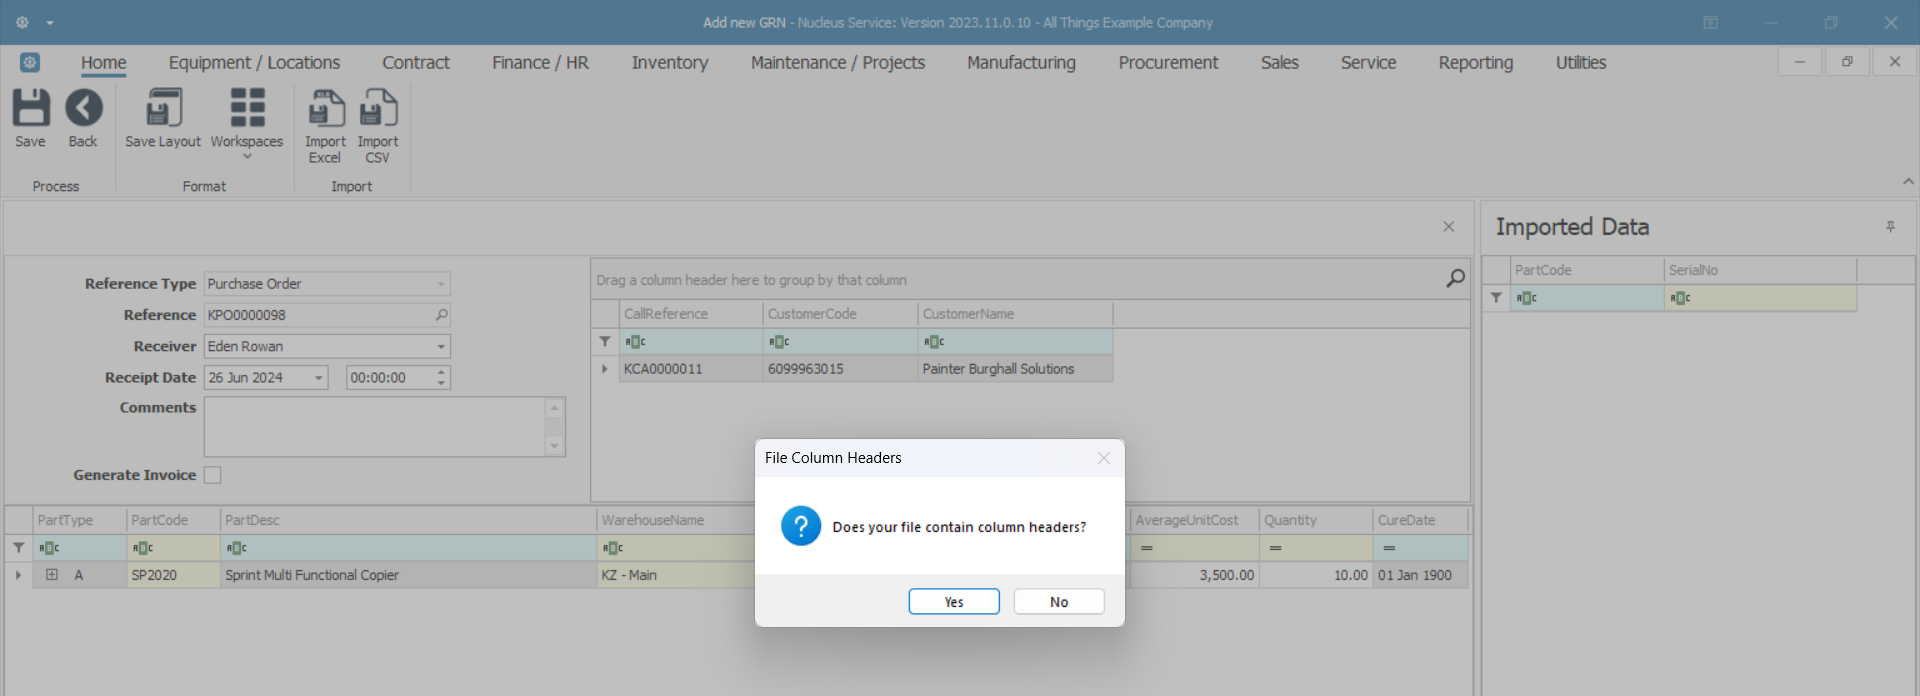
- Click on the Import Excel or Import CSV button, depending on the file type that has the list of serial numbers.
- A File Column Headers message box will pop up asking -
- Does your file contain column headers?
- Click on Yes or No, as required.
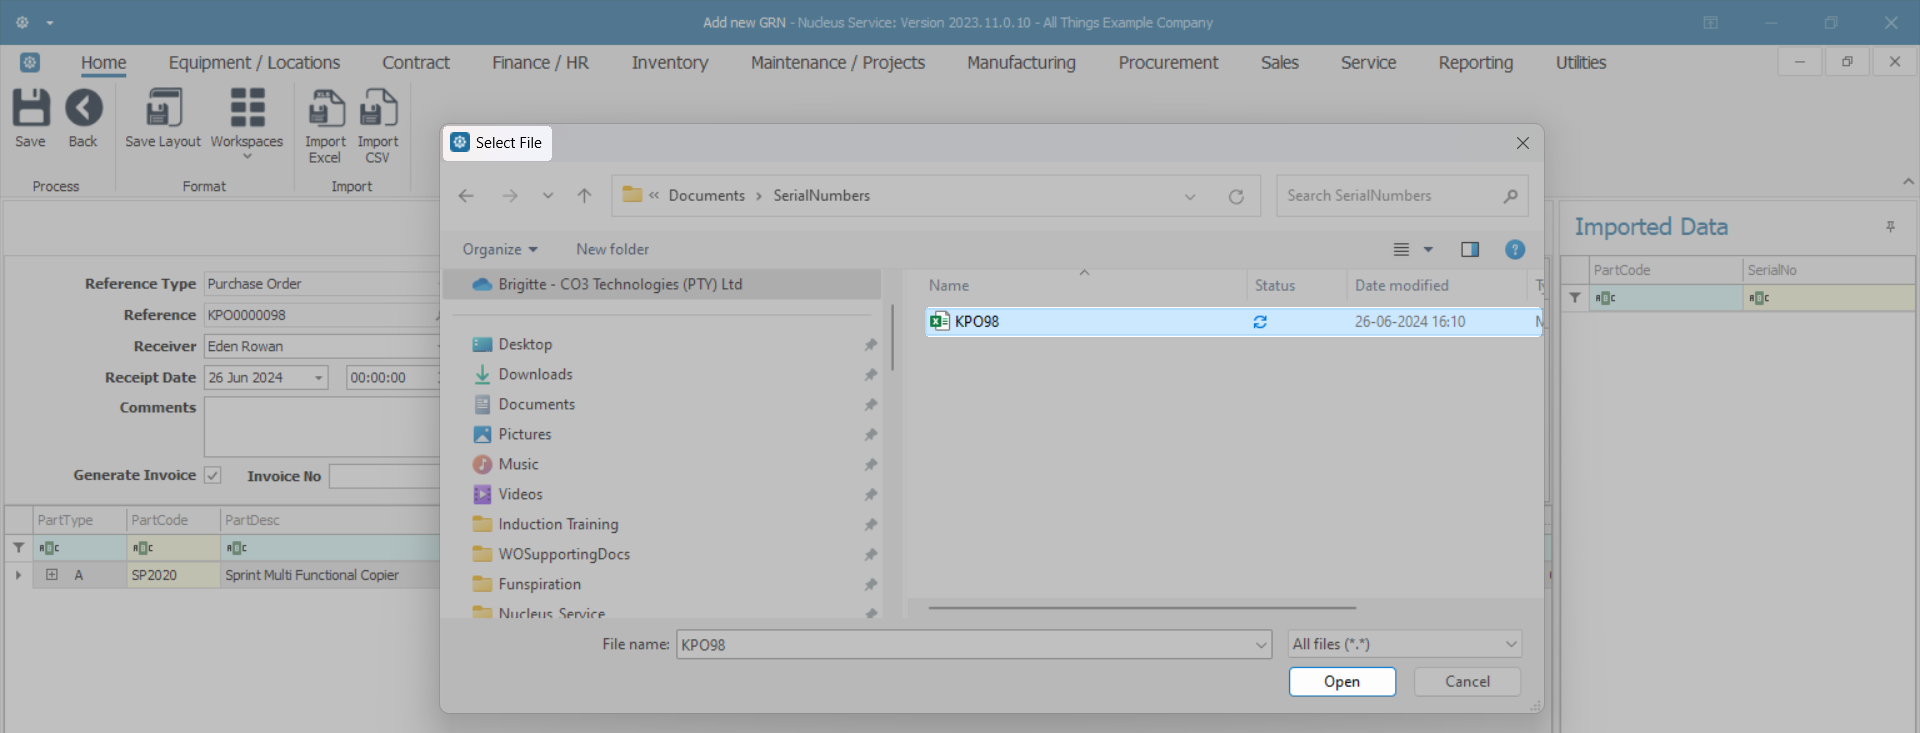
- Select source document and click Open.
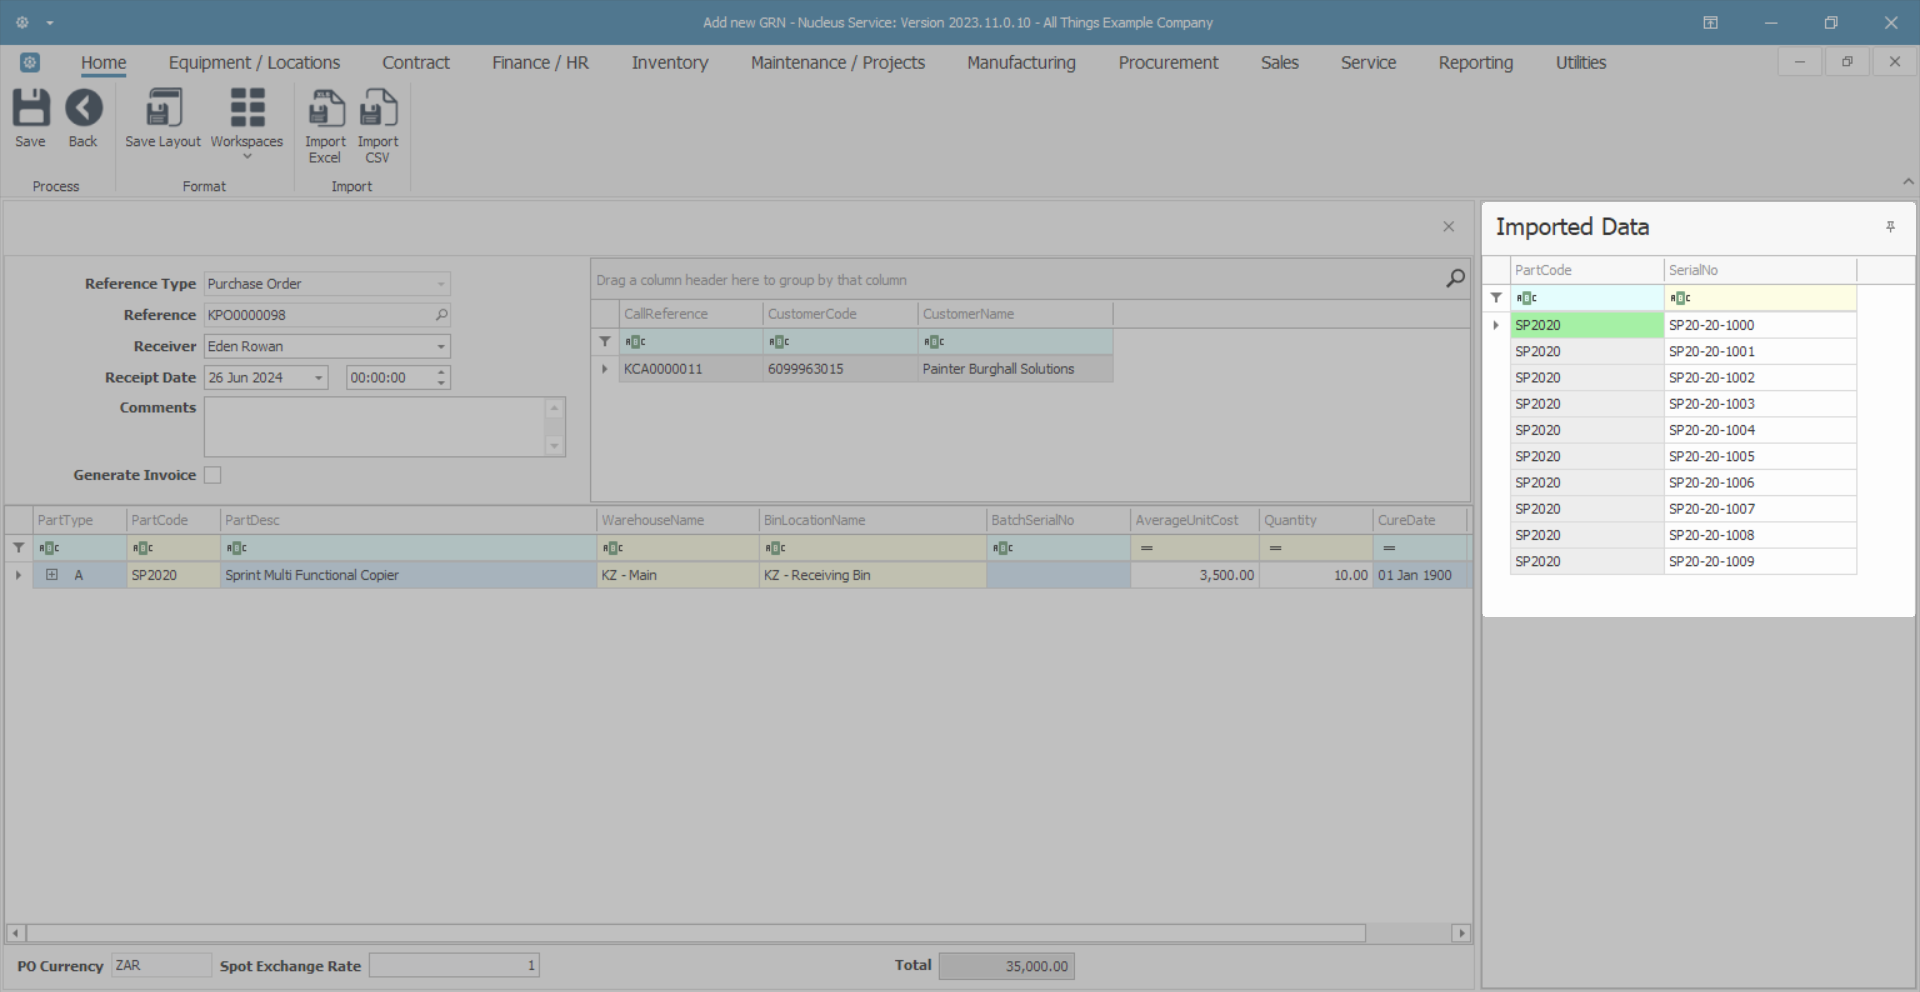
- Once imported, the serial numbers will display in the Imported Data grid.
- Multiple imports can be done.
Edit Imported Serial Number
- Imported serial numbers can be edited, in the case where an error is found.
- Click on the relevant serial number field and correct as required.
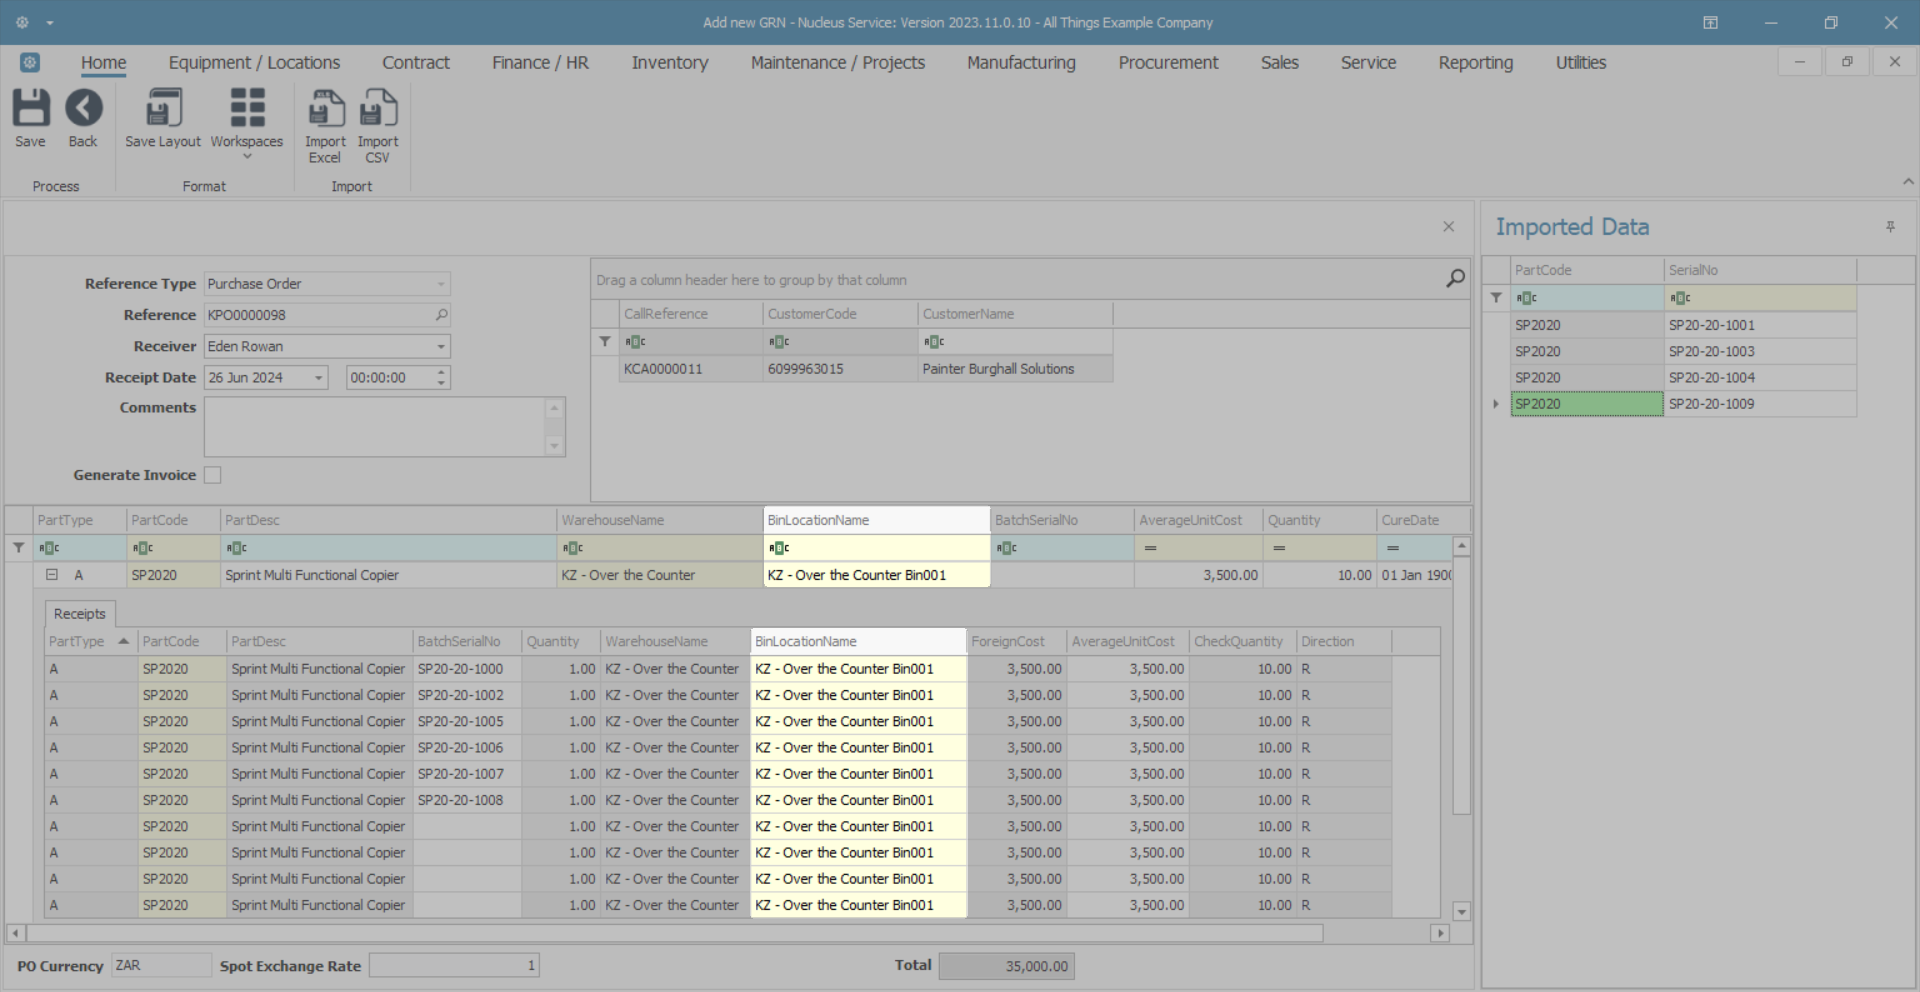
Drag Item(s) to the Parts Data grid
- Drag and drop the relevant serial numbers to the parts data grid.
- You may want to select specific items, especially when a partial GRN is done (i.e. not all serialised items were delivered).
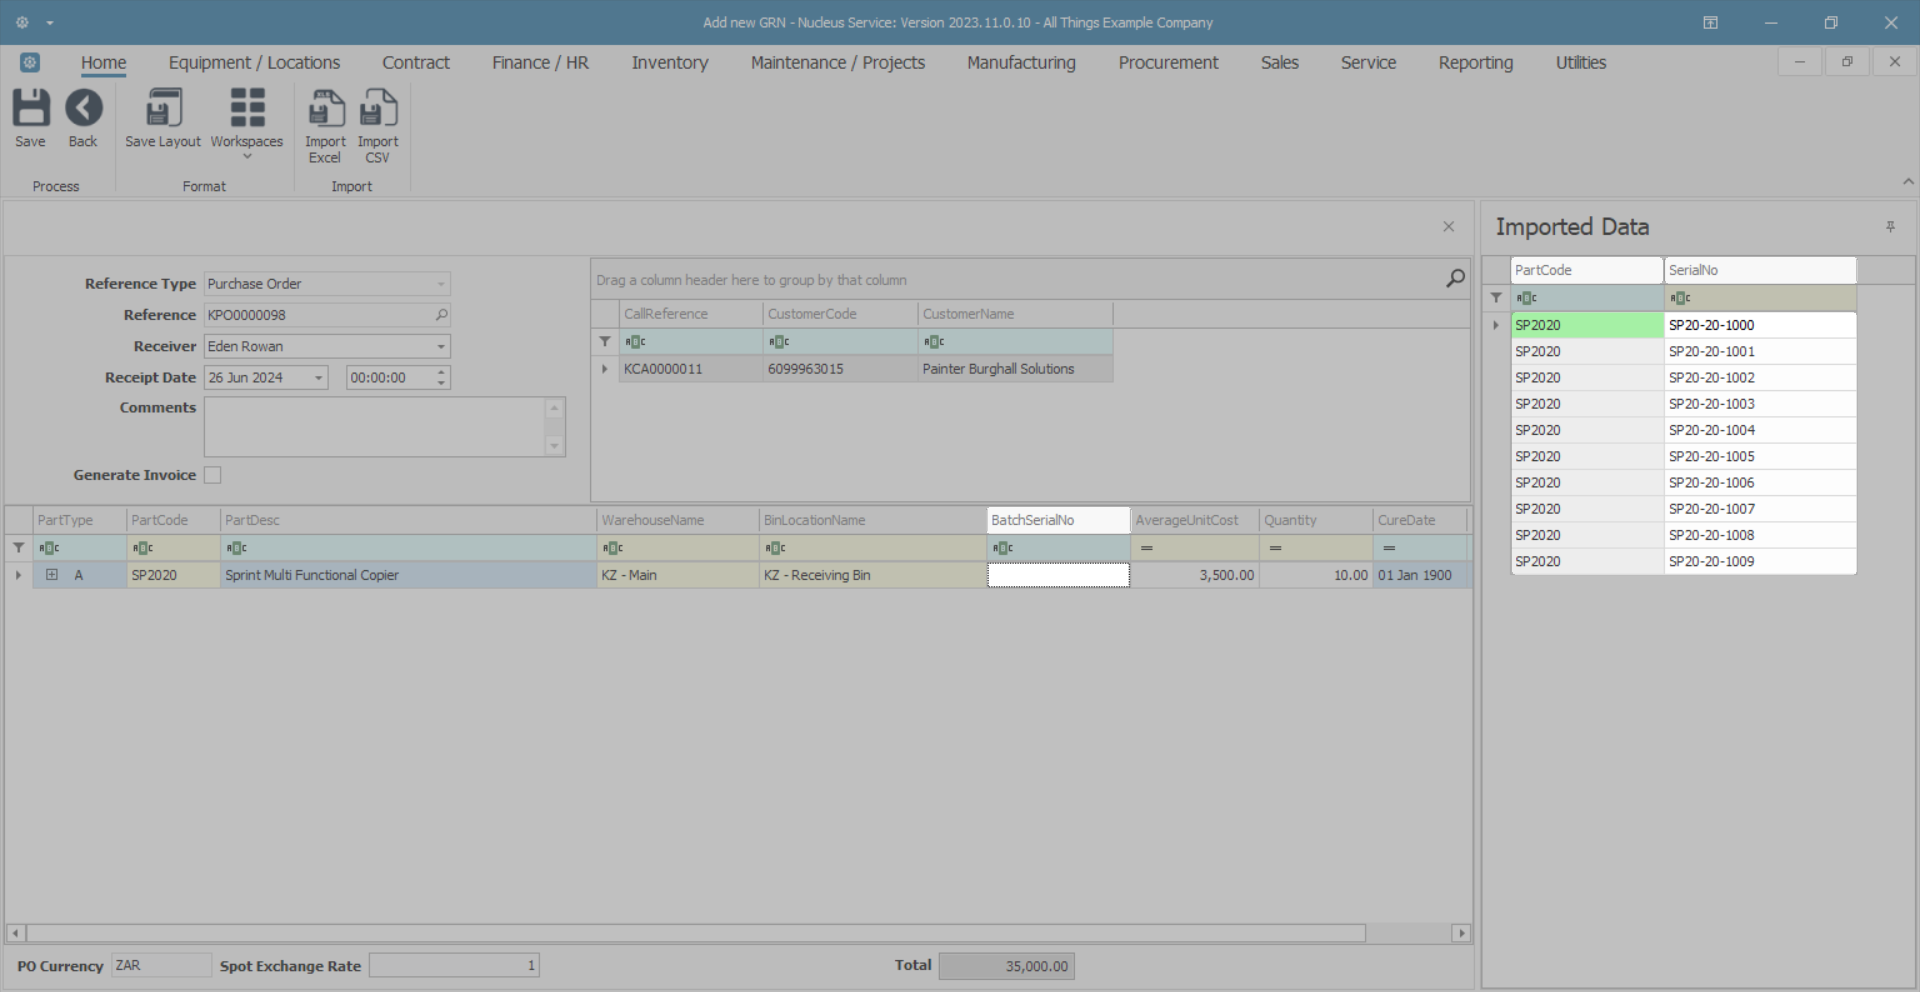
- You can either select all items in the Imported Data list, or specific items received:
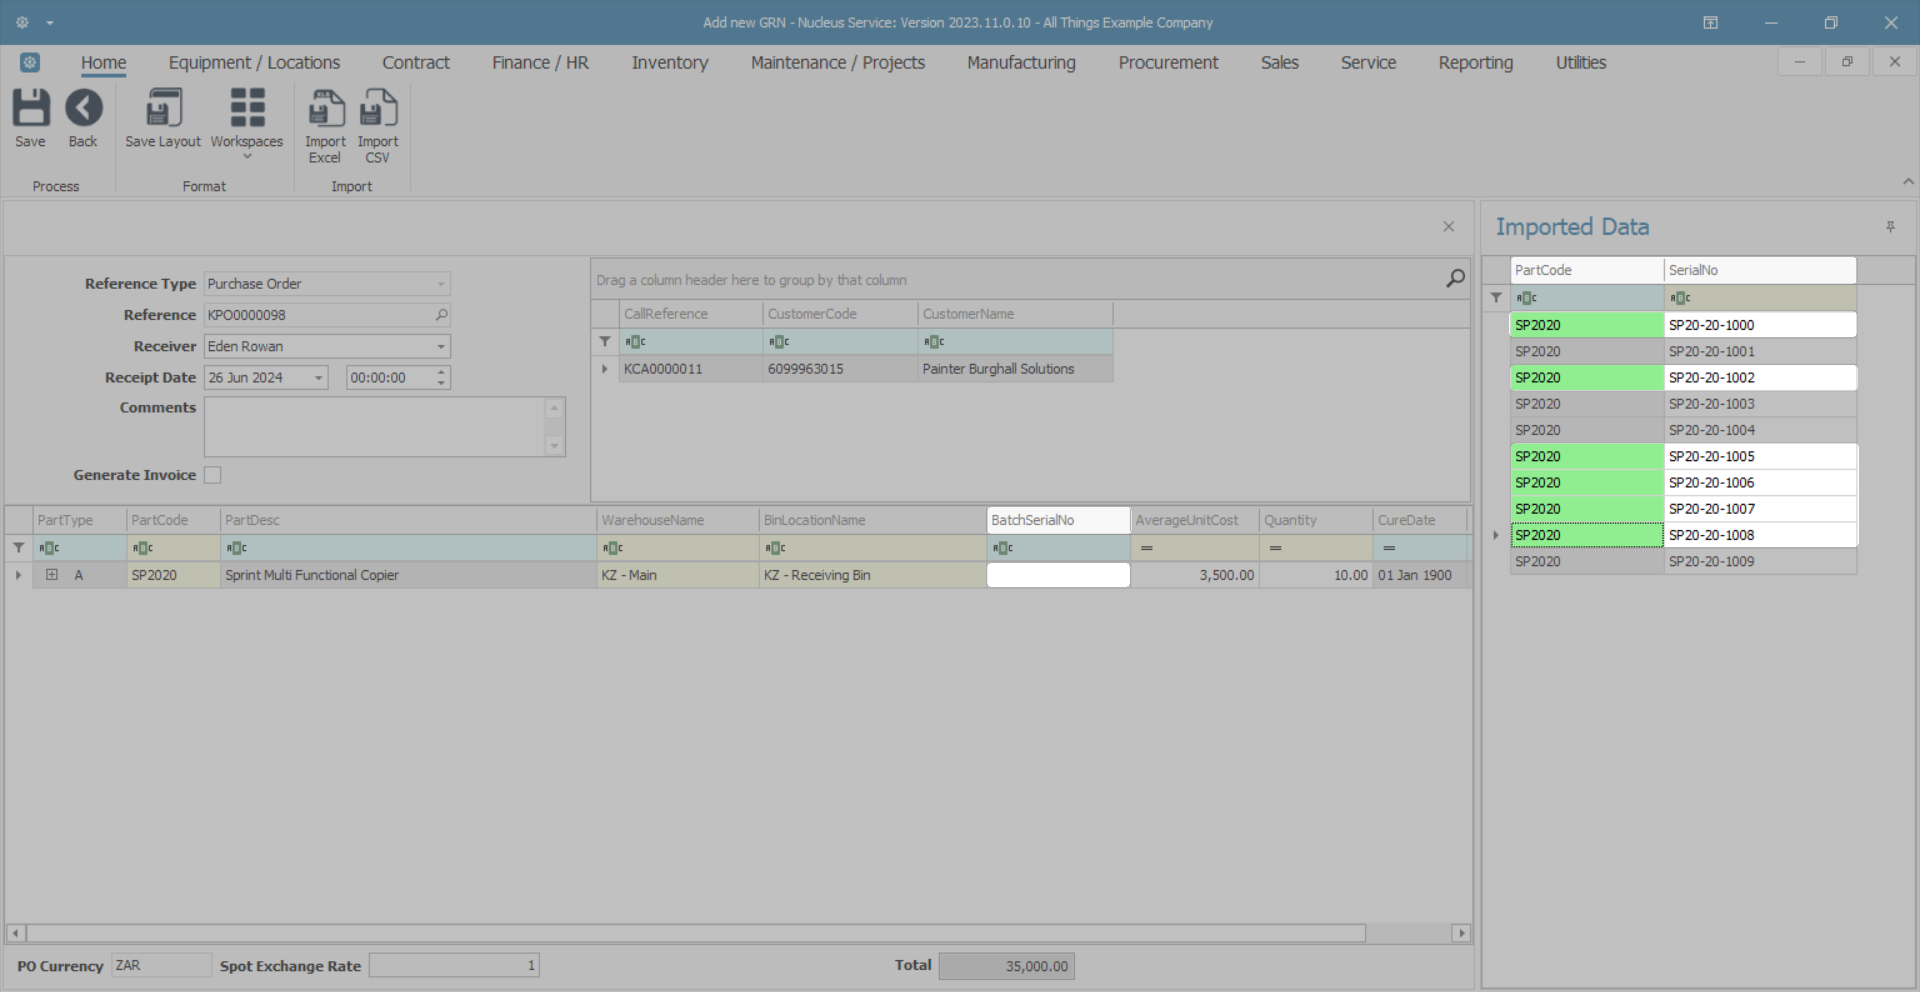
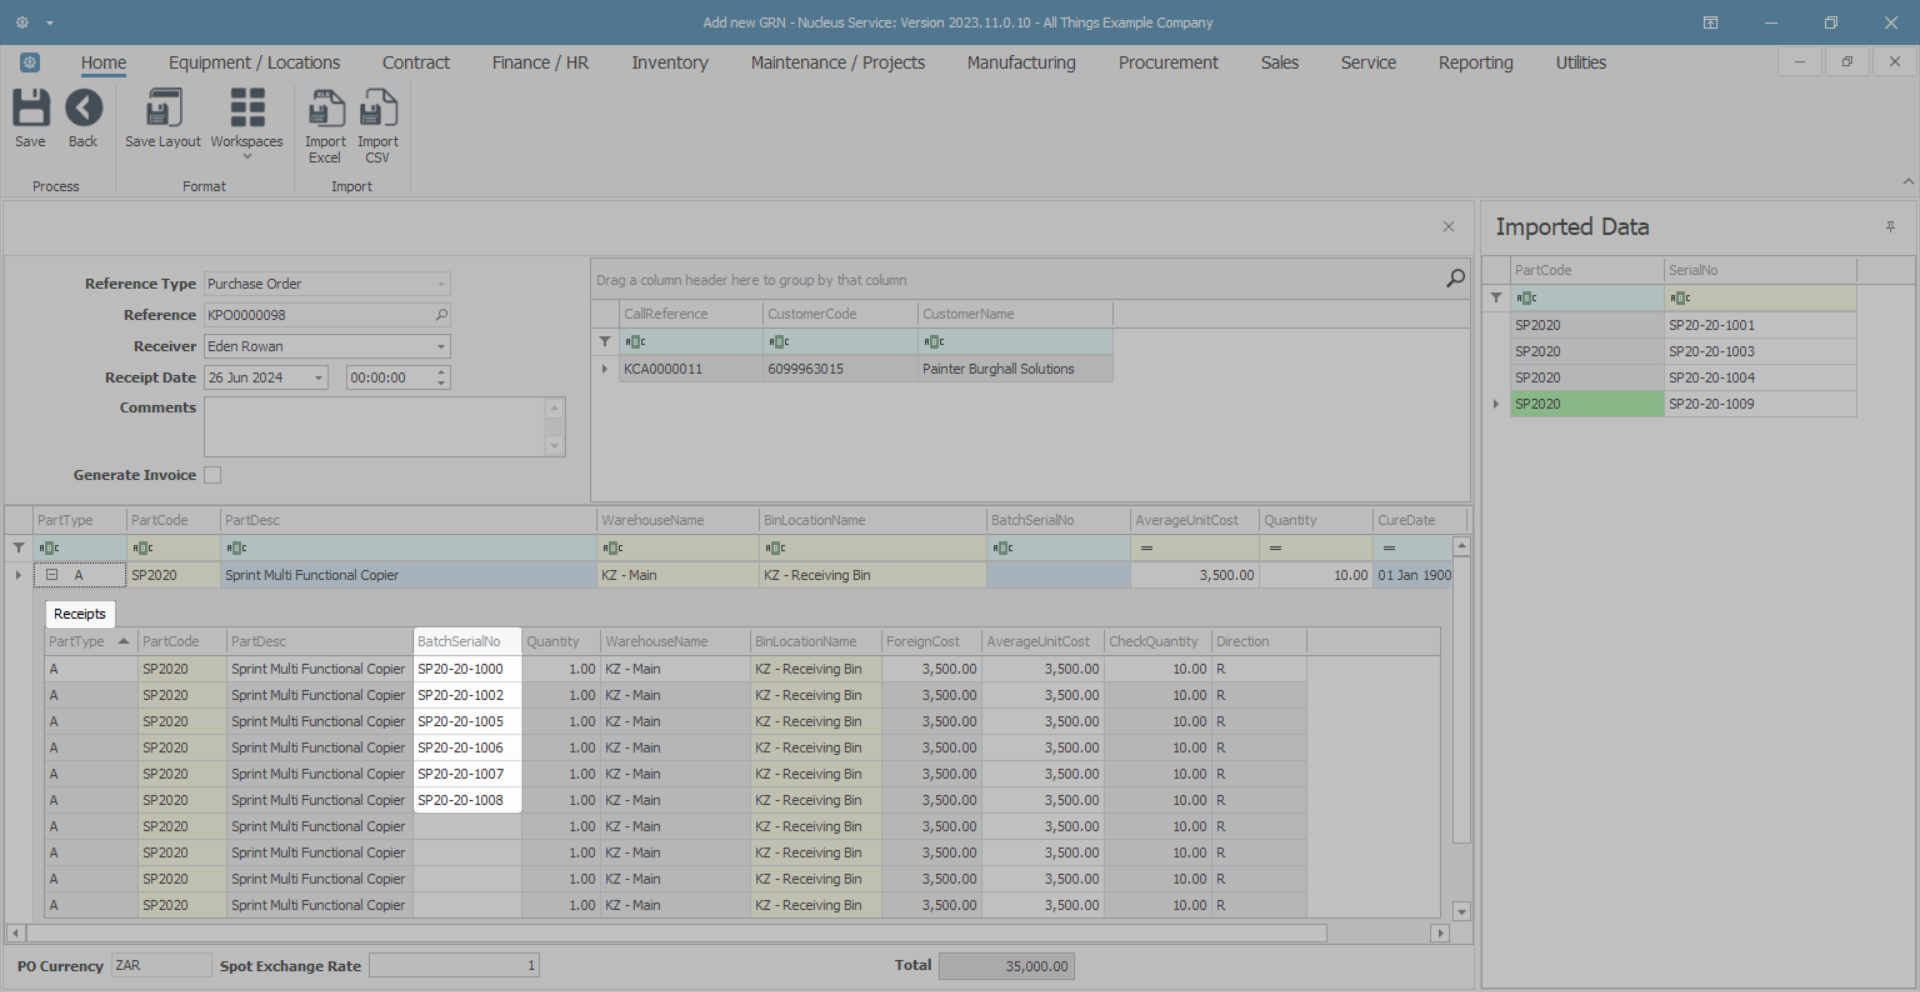
- The selected serial numbers will now show populated in the Receipts frame under the relevant part code. These items will be removed from the Imported Data grid.
- You can drag and drop from the imported data list multiple times, until all required serial numbers have been dragged across.
- You can further update the items on this list as noted in the The Parts Data Grid section.
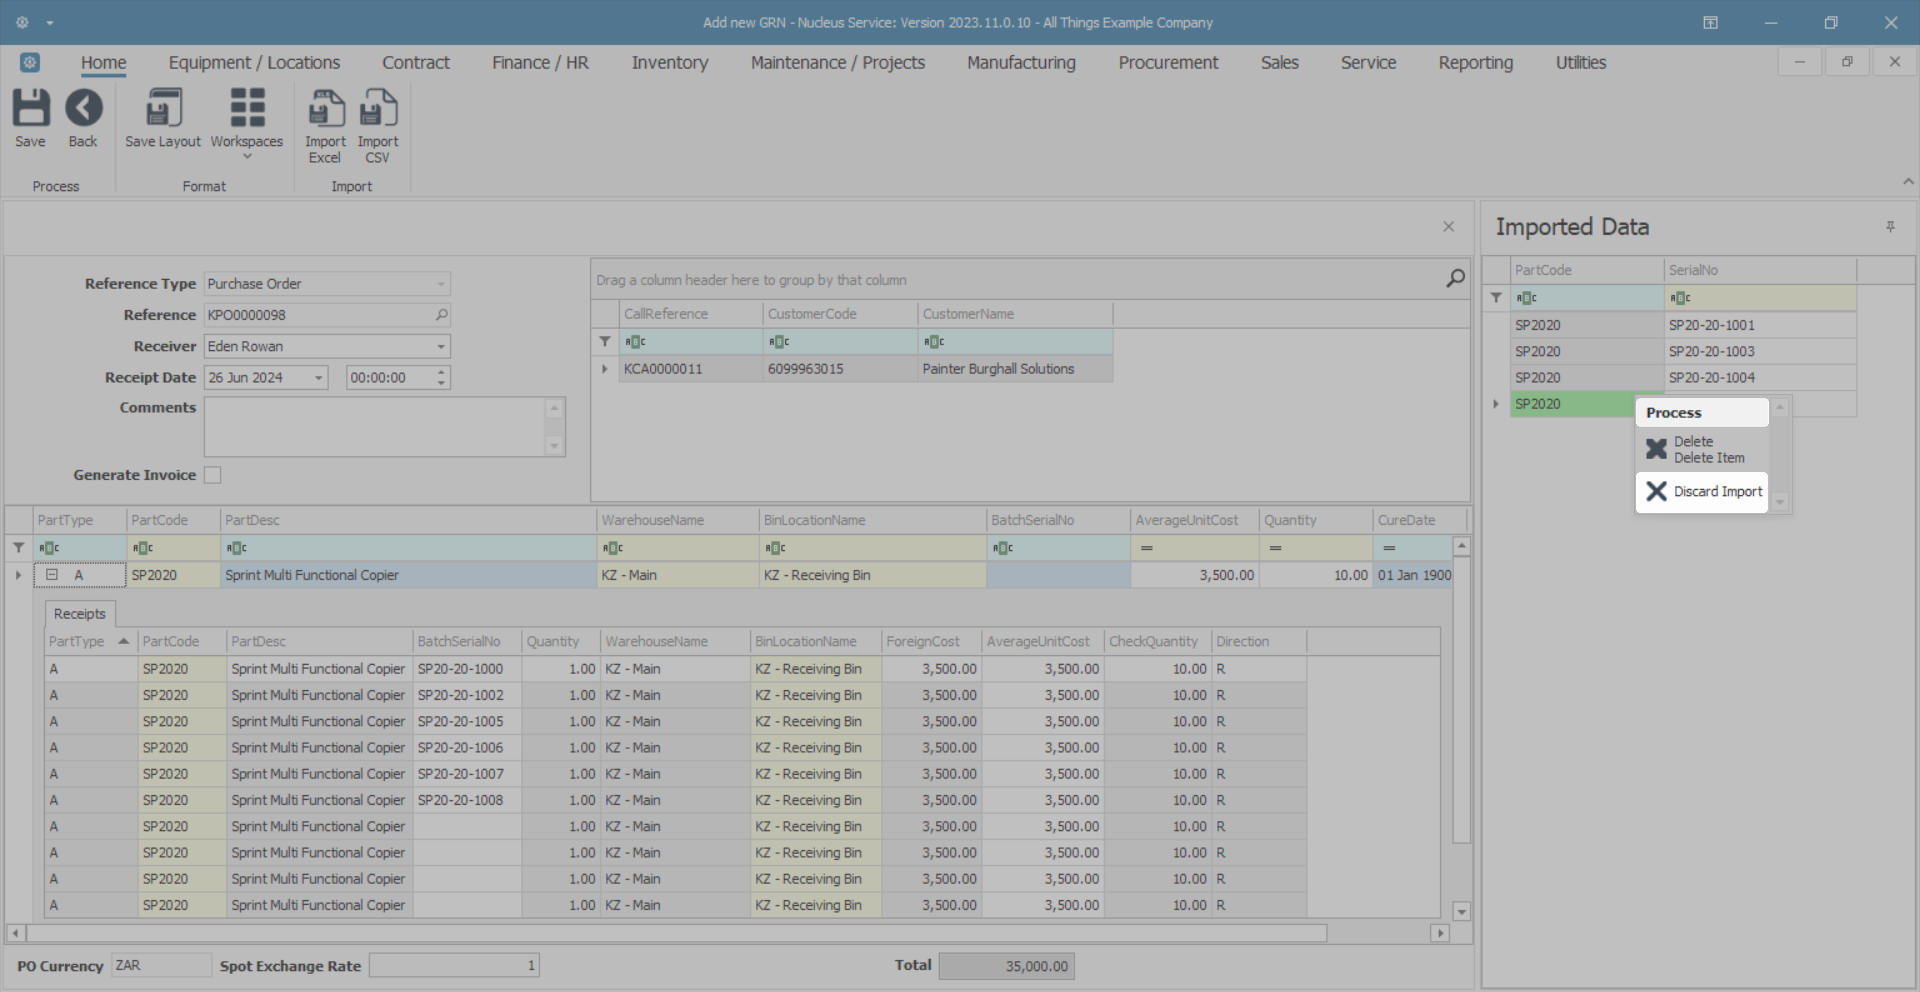
Delete Item
- If you need to remove an item from the Imported Data grid list, right click on the item and select Delete.
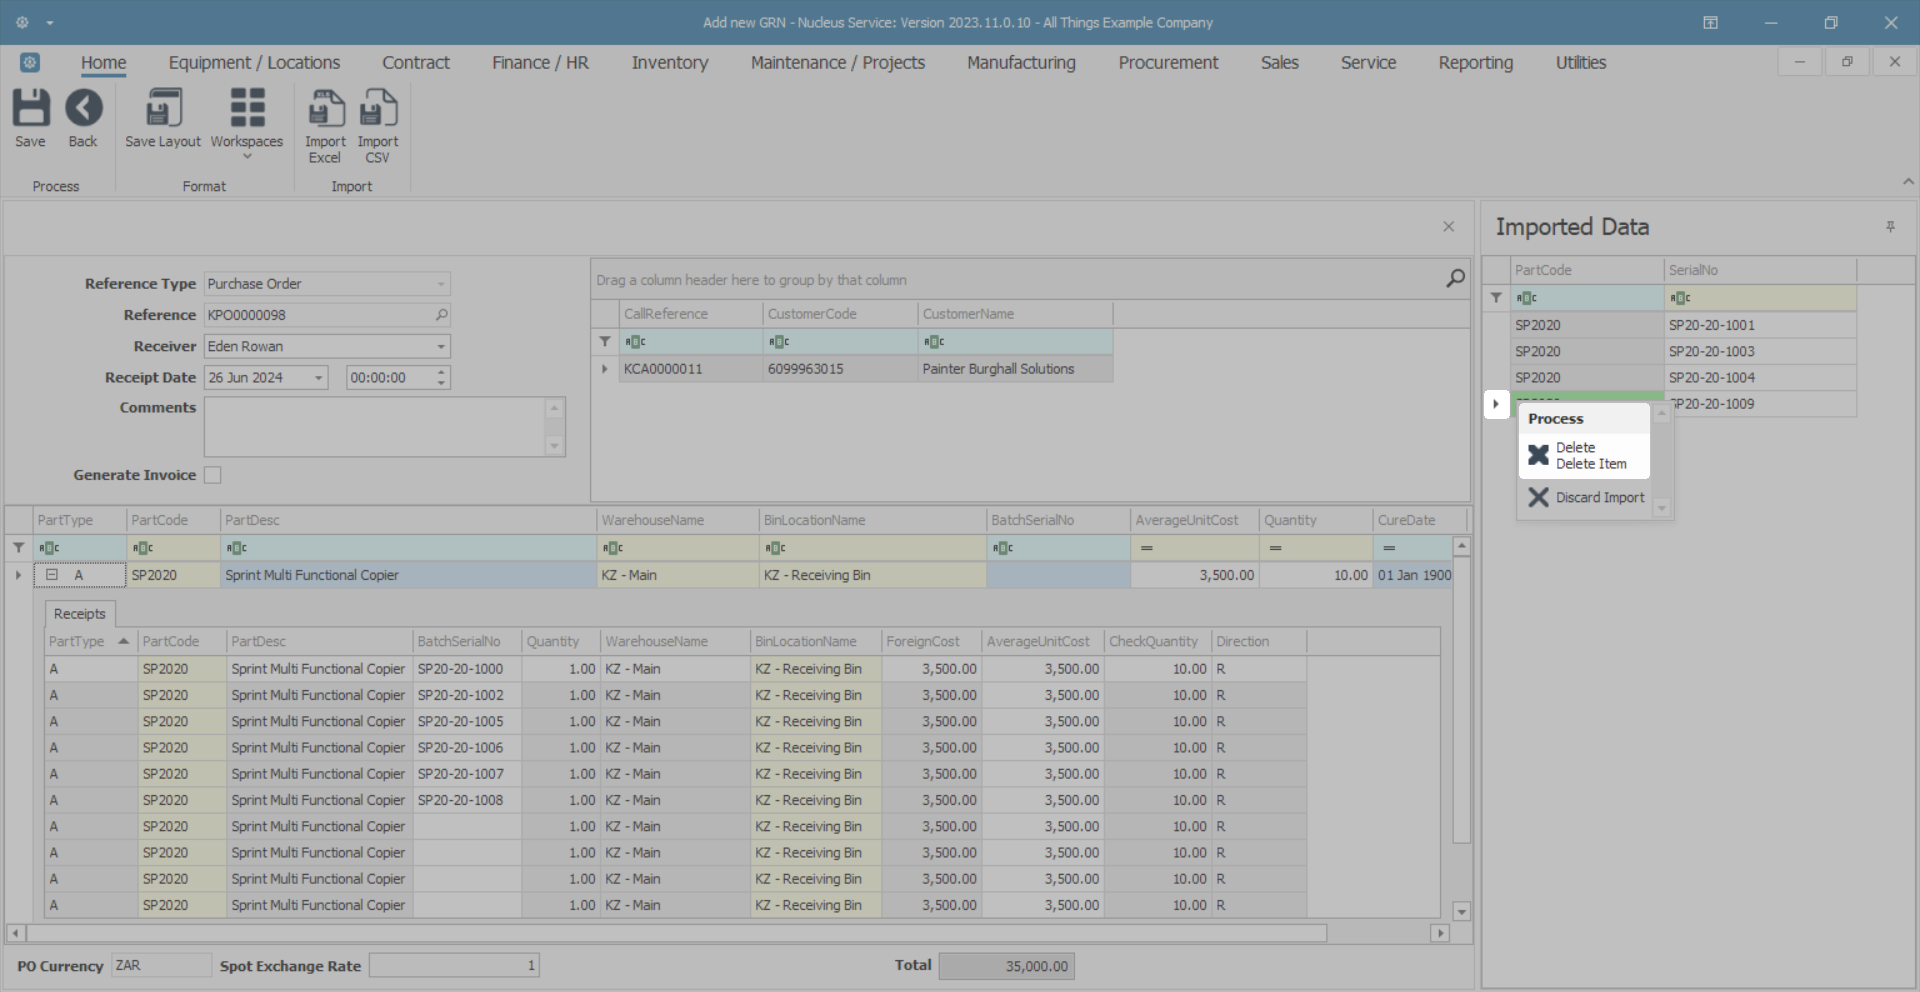
Discard Import
- If necessary, you can Discard the import and import again.
The Parts Data Grid
- The Parts data grid will auto populate with the details of the:
- Part Type
- Part Code
- Part Description
- Quantity initially, will be the quantity from the Purchase Order, unless already partially received, then the system will display the outstanding quantity to be received.
- Foreign Cost
- Average Unit Cost
- Check Quantity is a quick visual indicator to check number of items added versus the total quantity to be received.
Note: The Warehouse Name and Bin Location Name text boxes will auto populate with the default warehouse and bin set up in the system (if configured on the part site default), but this can be changed if you wish to receive the stock into a different warehouse / bin.
Change the Receiving Warehouse
- Click in the Warehouse field.
- An ellipsis button will be revealed, click on this button.
- The Select a warehouse for this part receipt screen will pop up.
- Click on the row selector in front of the warehouse that you wish to receive these items into.
- Click on Ok.
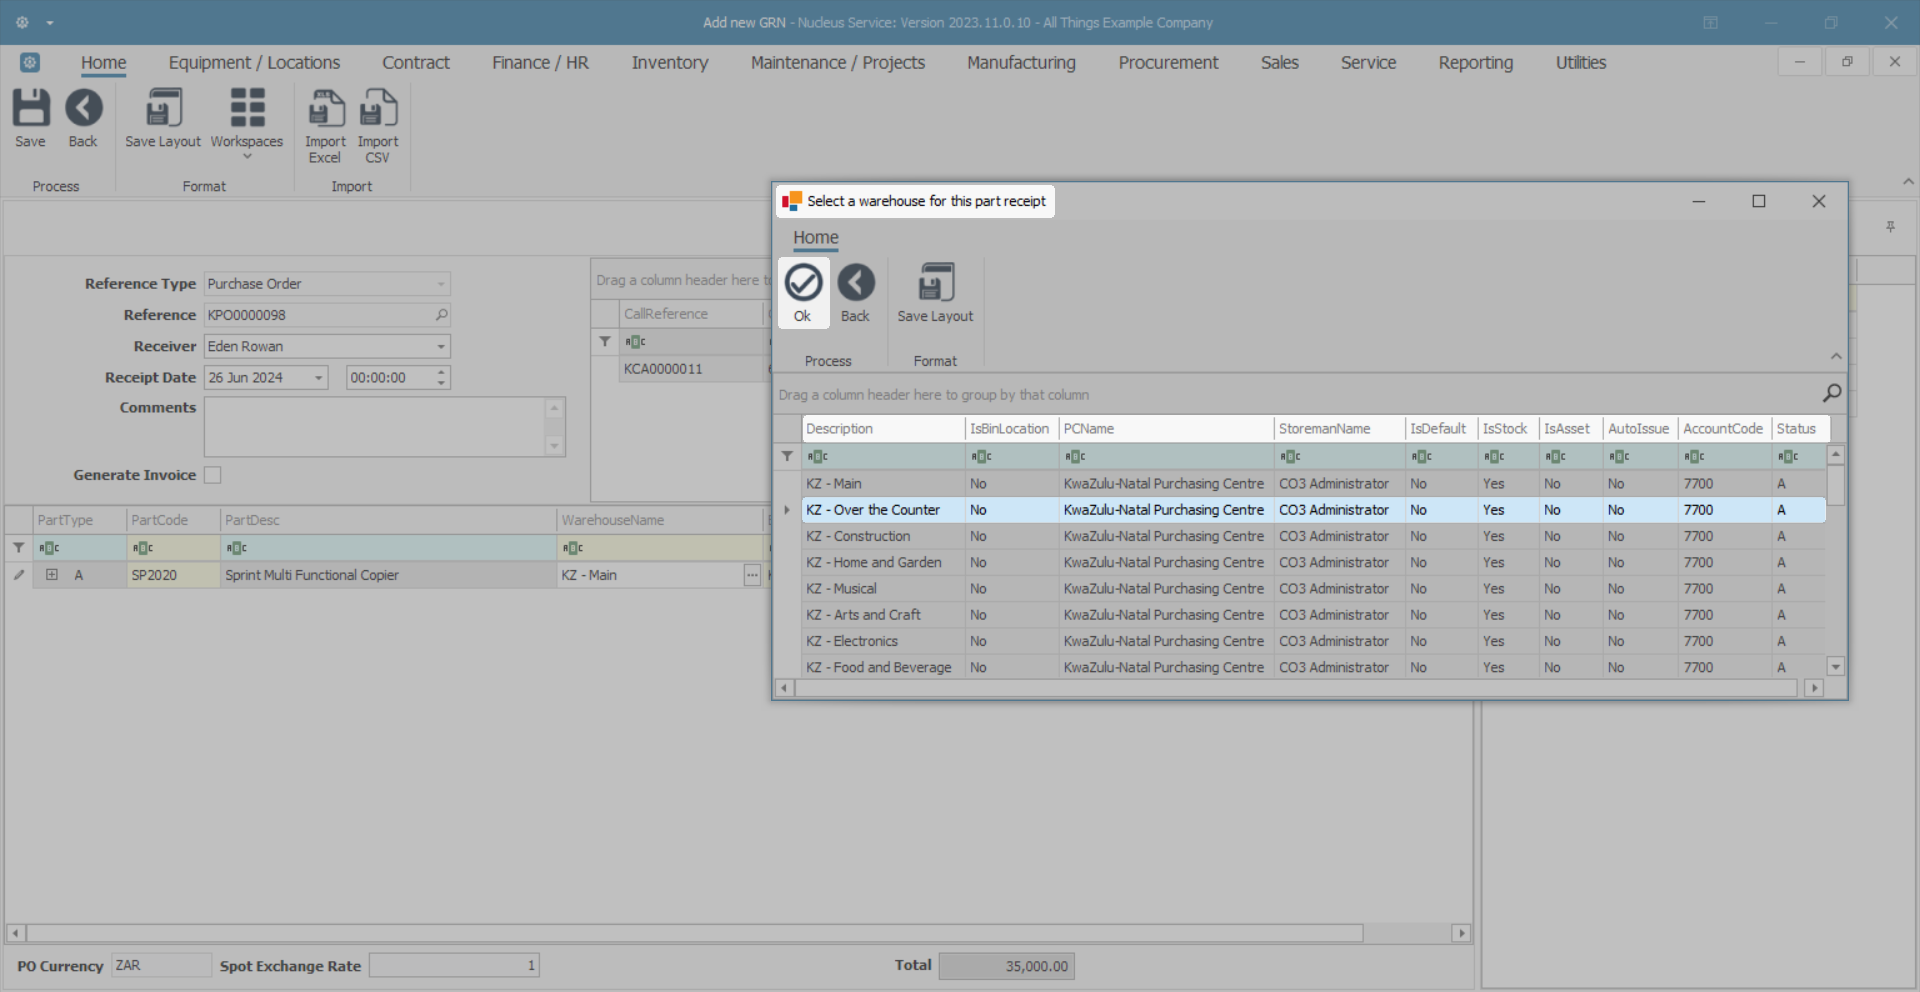
- The Warehouse Name field will populate with the selected warehouse.
- Click in the Bin Location name field.
- An ellipsis button will be revealed, click on this button.
- The Select a bin for this part receipt screen will pop up.
- Select the row of the bin you wish to receive these items into.
- Click on Ok.
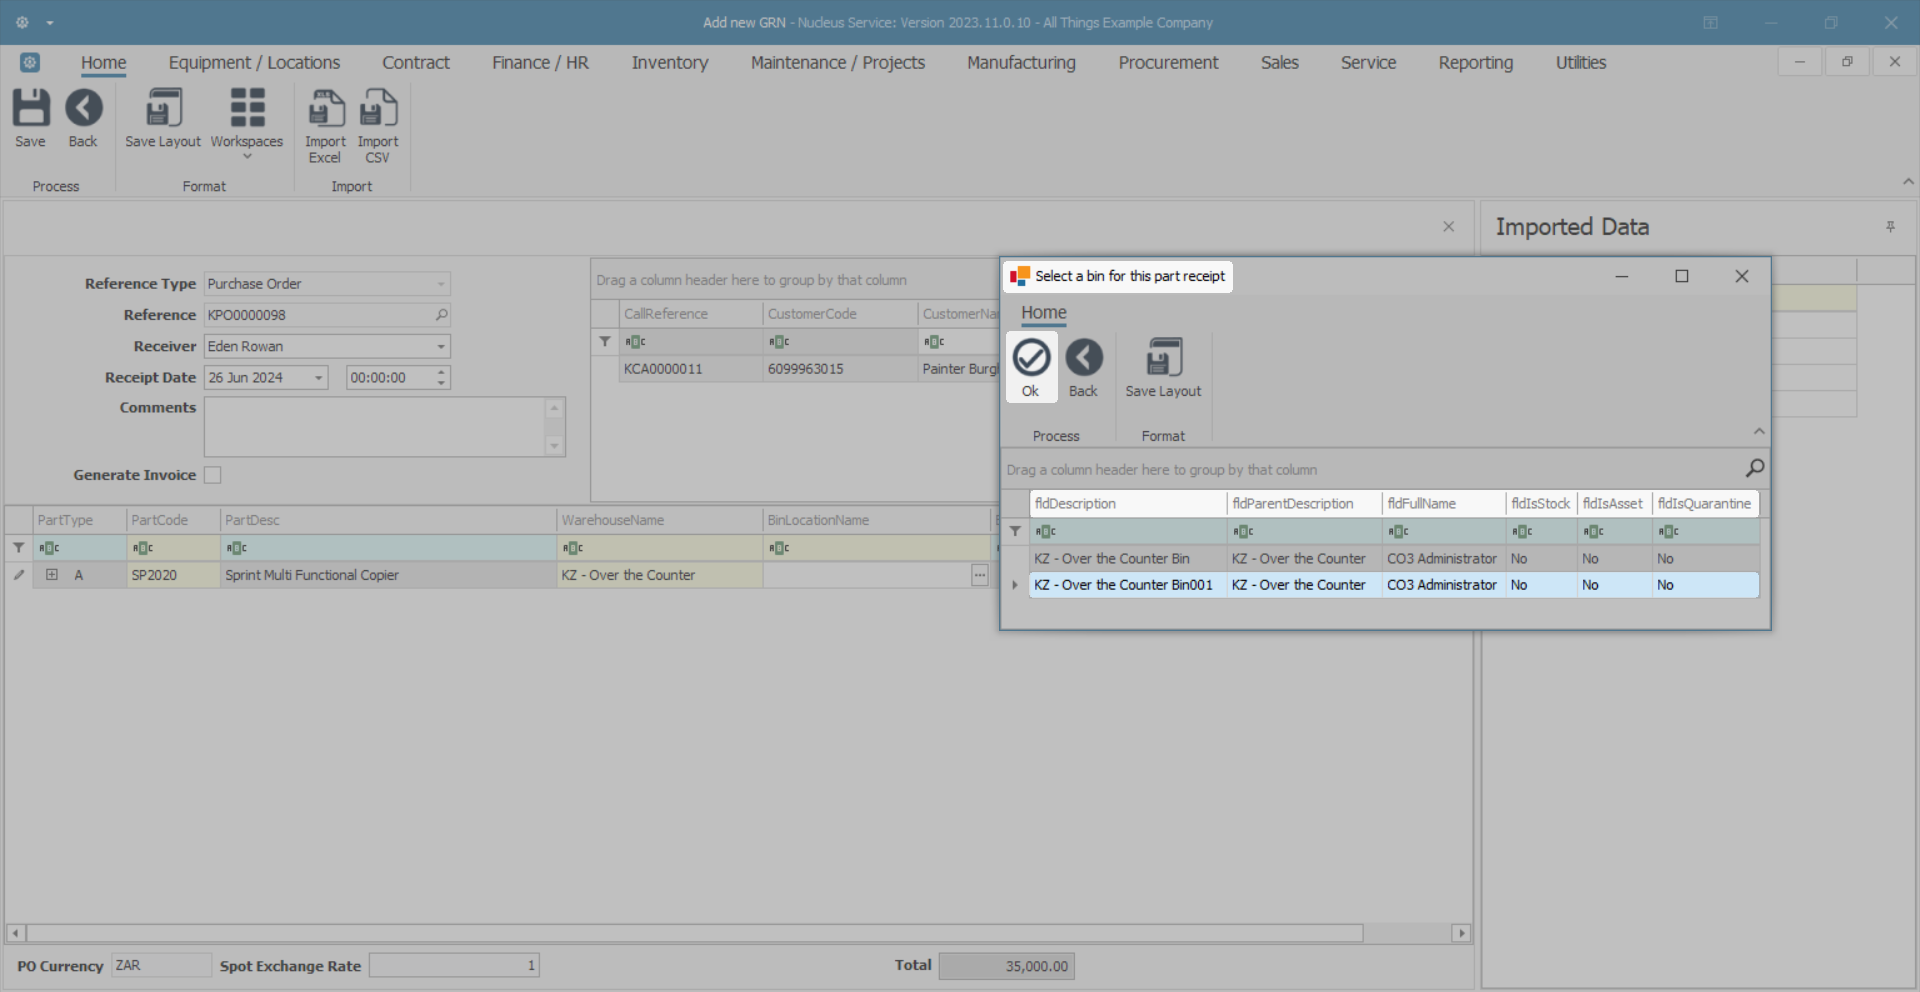
- The selected bin will populate the Bin Location Name fields in the Receipts frame.
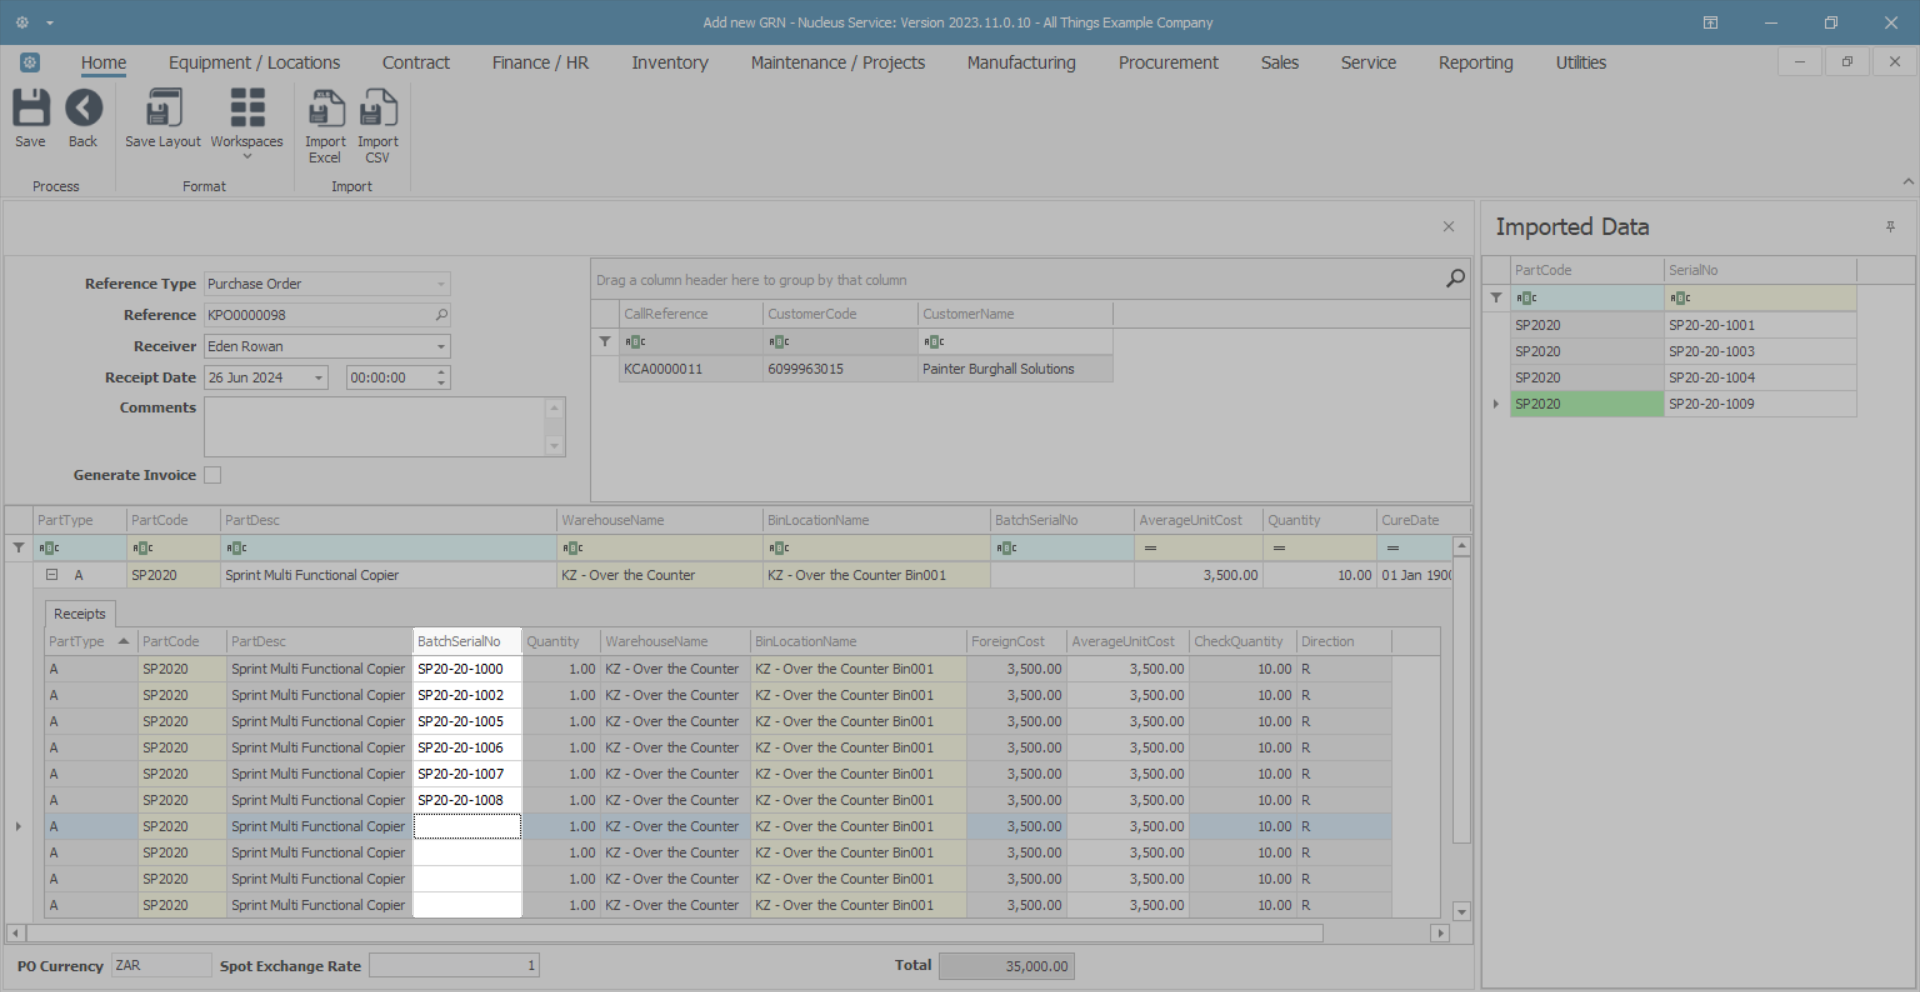
Serial / Batch No
- This field is used to either input the Serial Number for A-Class and B-Class items.
- For C-Class items, this field can be left blank, unless Batch Tracking is enabled. For more details, refer to Inventory: Stock Batches.
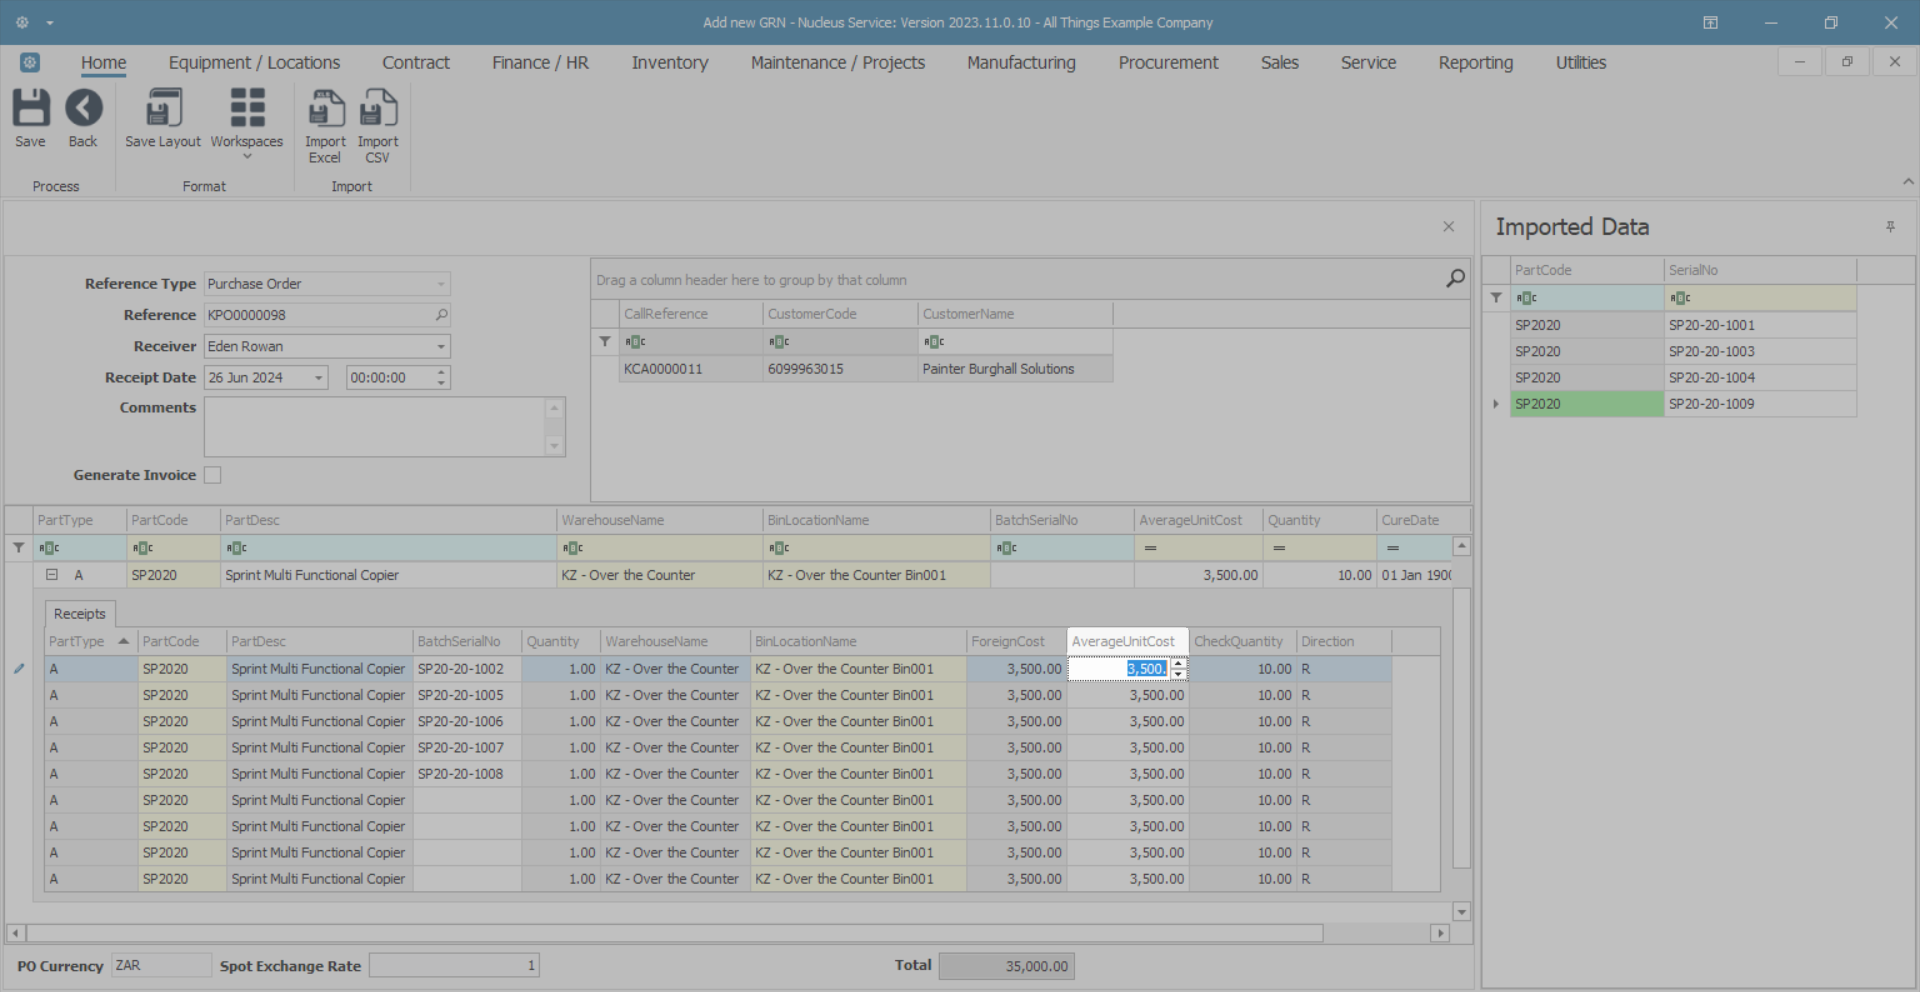
Check / Edit the Average Unit Cost
- Click in the Average Unit Cost field and either type in or use the direction arrows to edit the cost, if required.
- Note that for serialised items, (A-Class and B-Class items), you will need to input each serial number's unit cost.
Check/Edit the Quantity
If the number of items delivered differs from the quantity on the purchase order, then the total quantity in the Parts frame, (not the Receipts frame), must be changed.
- Click in the Quantity field in the Parts frame and either type in or use the direction arrows to edit this quantity, if required. (If, for example, the delivery contained less than the purchase order amount.)
- Note 1.0: You cannot receive more than the amount ordered on a GRN.
- Note 1.1: Over Supply - If you have received more items than expected, receive the whole original order quantity, and then create a new Purchase Requisition and Order - so as to be able to receive the remaining surplus quantity.
- Note 1.2: Only C-Class item quantities are edited in this way. A-Class and B-Class items are handled as single line items (one line per serial number).

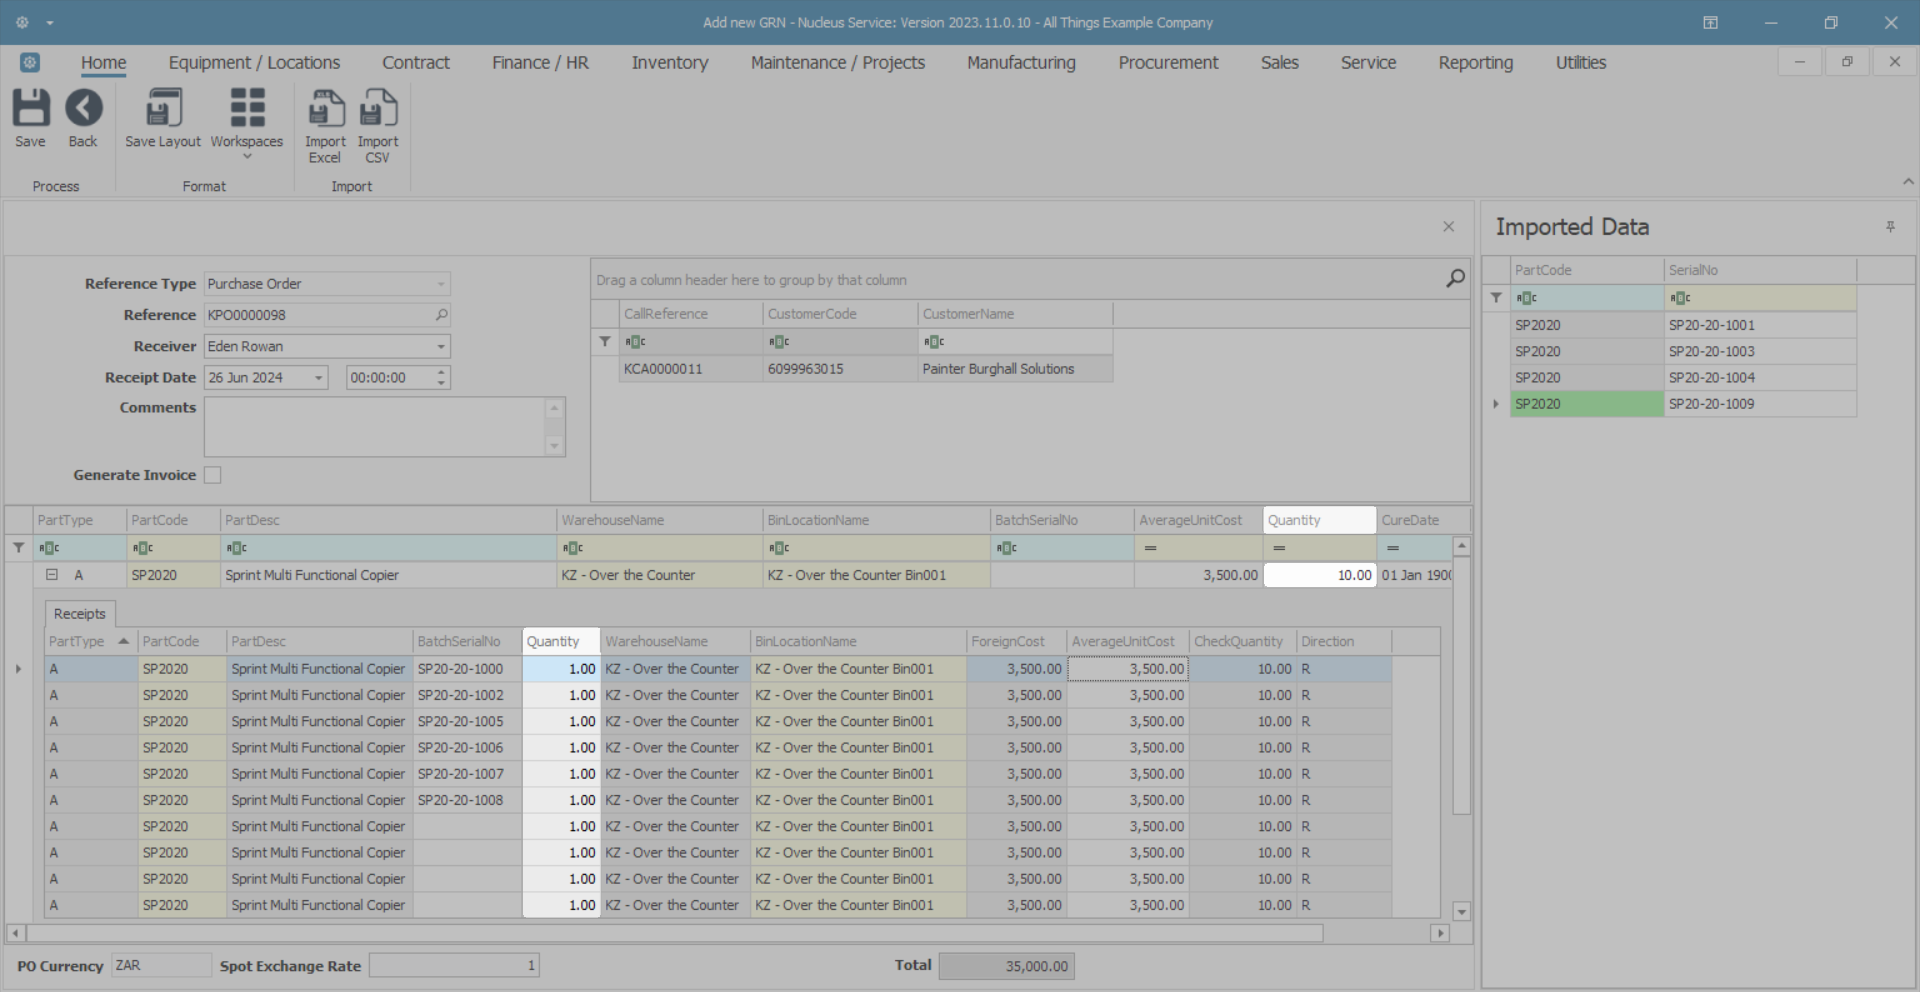
- If there is more than one A-Class part ordered then each item is placed on an individual line (row). This is because each A-Class item needs to have a unique serial number. There will only ever be one item per row.
- In this example, there is a Quantity of 10 items ordered so there are 10 corresponding receipt lines.
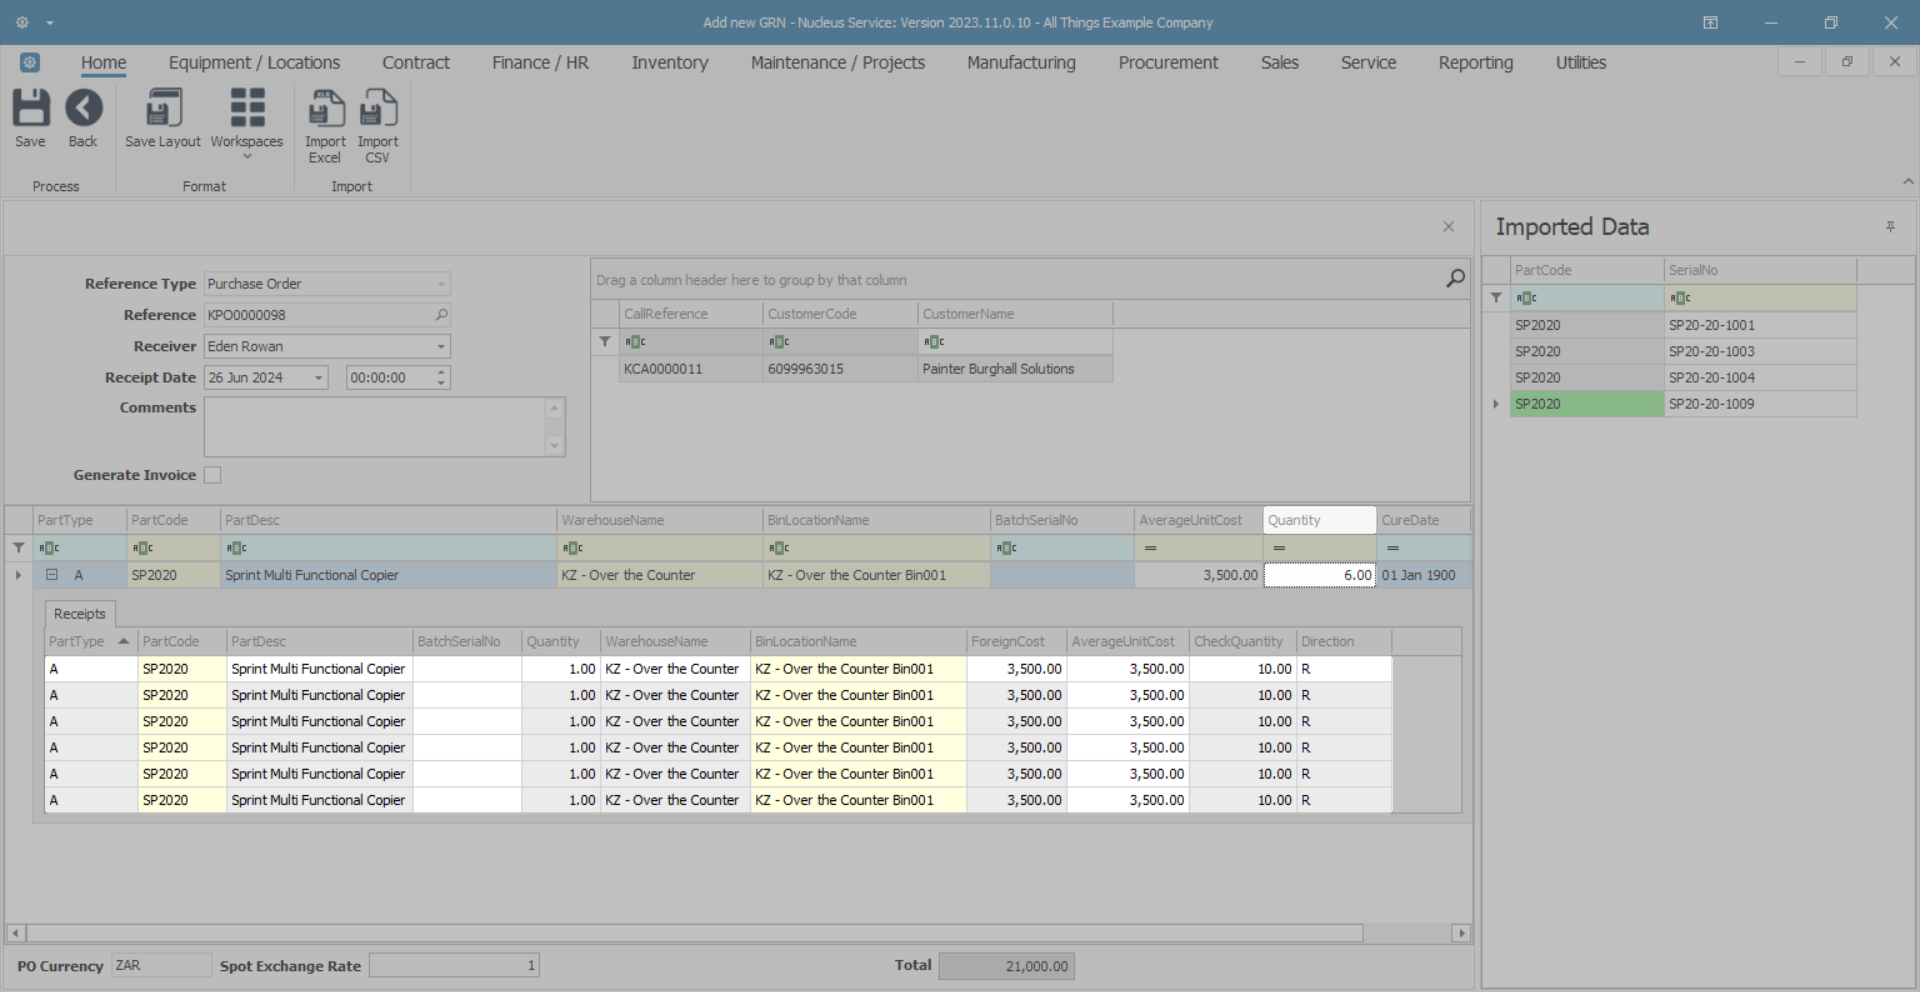
- If the number of items delivered, differs from the quantity on the purchase order, then the total quantity in the Parts frame (not the Receipts frame) must be changed.
- In the Parts frame, click in the Quantity field and either type in or use the directional arrows to select the actual quantity received.
- In this image, the quantity has been changed to 6.
- Either click outside of the Quantity field or press Enter on your keyboard.
- The Receipts frame will now only display a list of 6 items, which corresponds with the edited quantity.
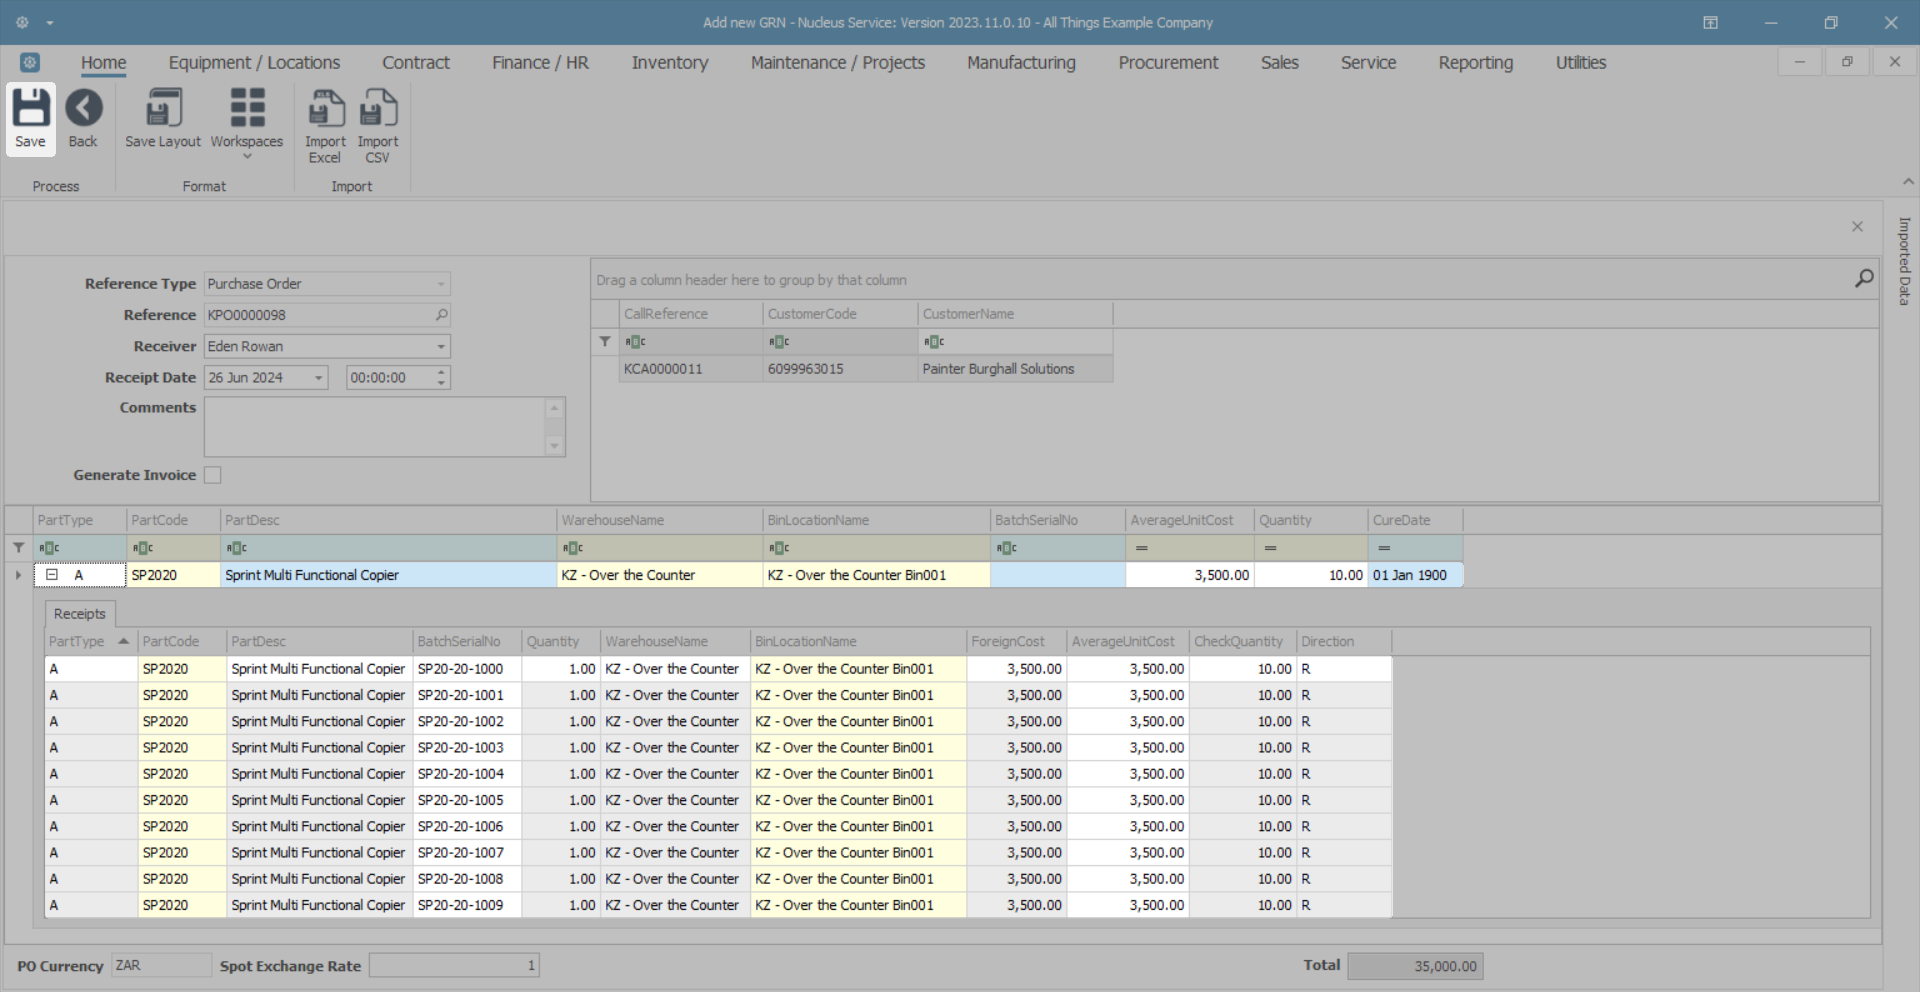
- To edit the quantity back to the original amount, type 10 back into the Quantity field in the Parts frame (not the Receipts frame). The frame will re-adjust and create 10 lines again.
- Follow the Import Serial Numbers process to reinstate the imported serial numbers for bulk GRN processing.
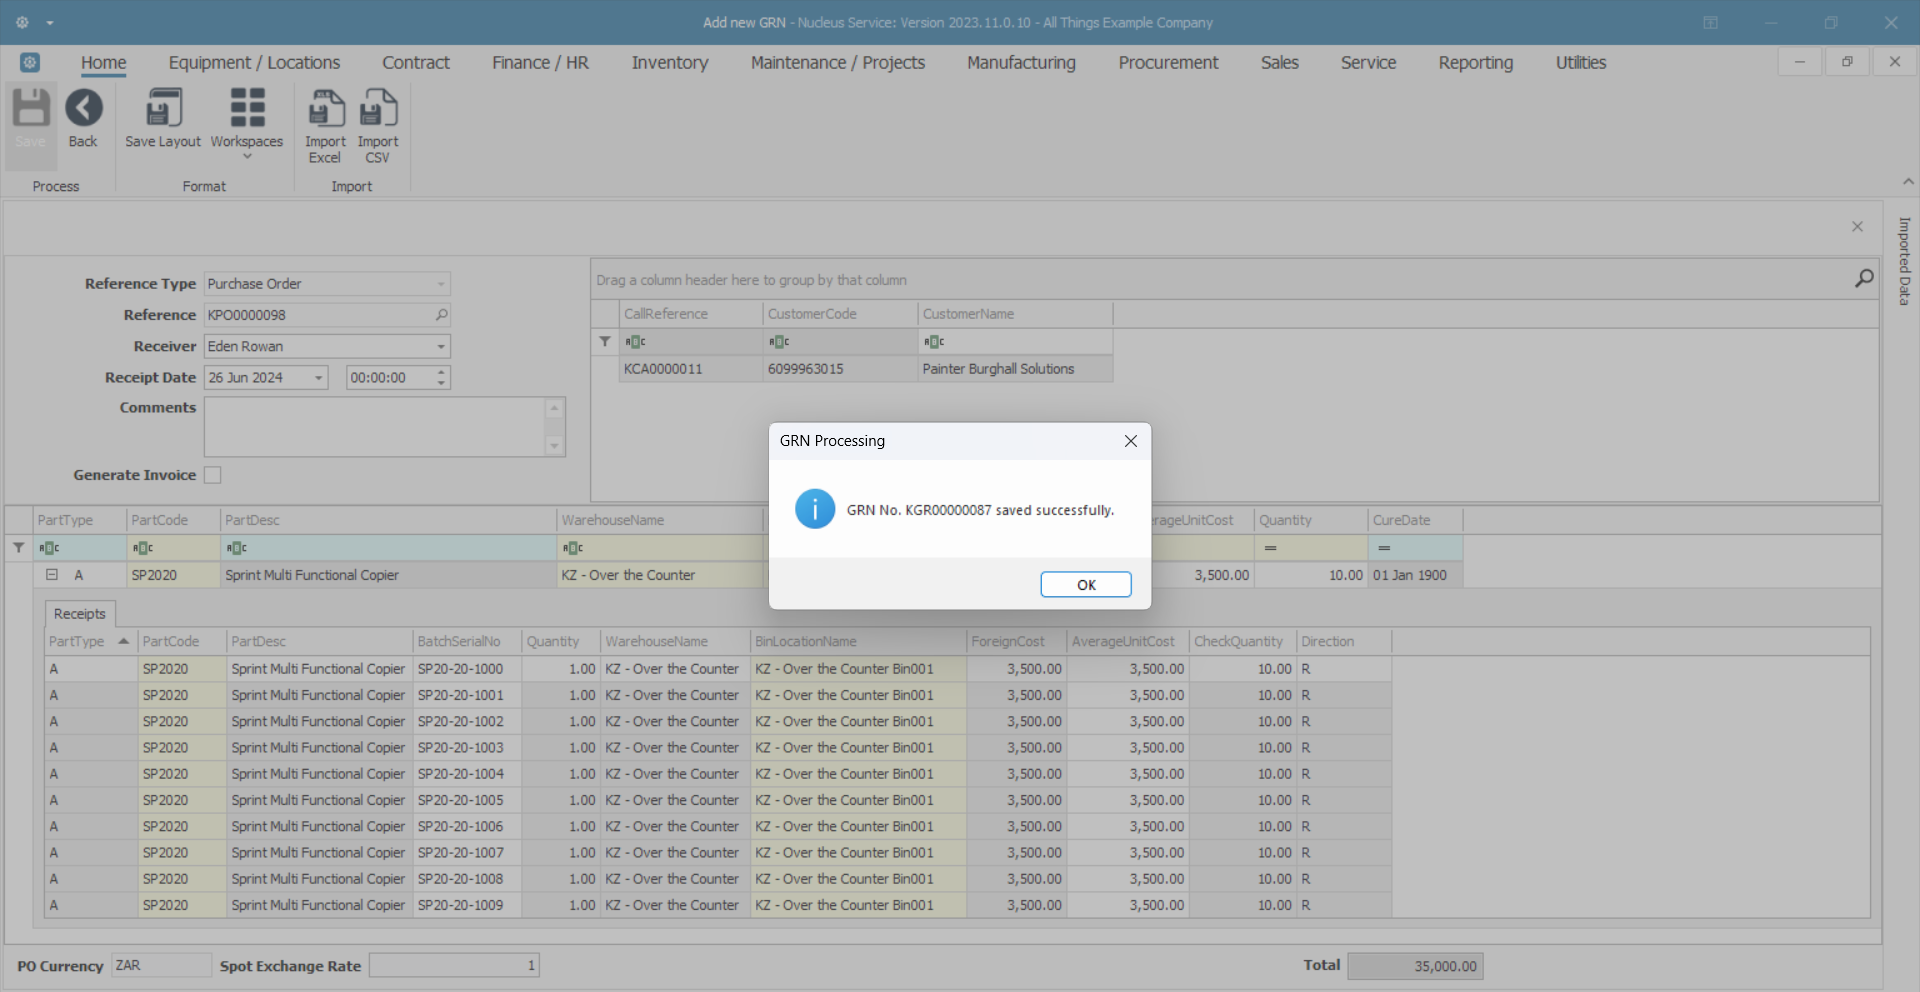
Save the GRN
- When you have finished editing the details in this screen, click on Save.
- A GRN Processing message box will pop up informing you that -
- GRN No. [ ] saved successfully.
- Click on OK.
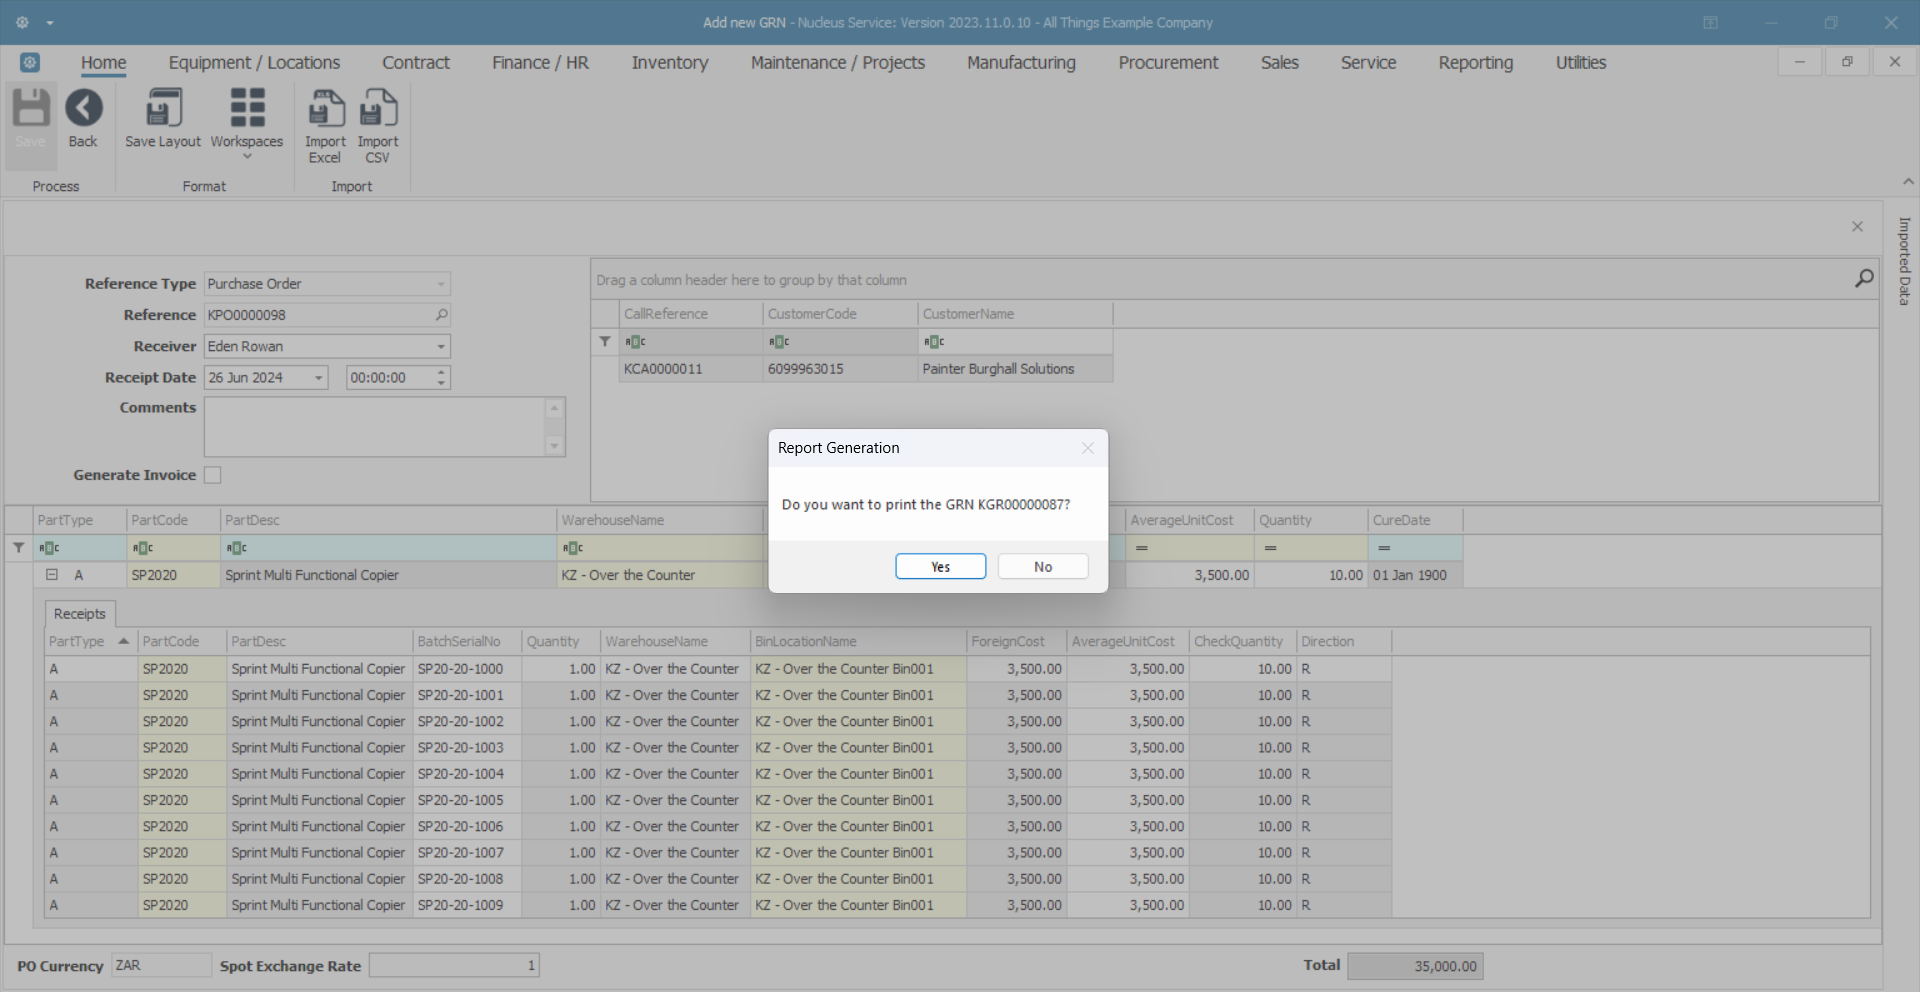
Print the GRN
- A Report Generation message box will pop up asking;
- Do you want to print the GRN [ ]?
- Click on Yes.
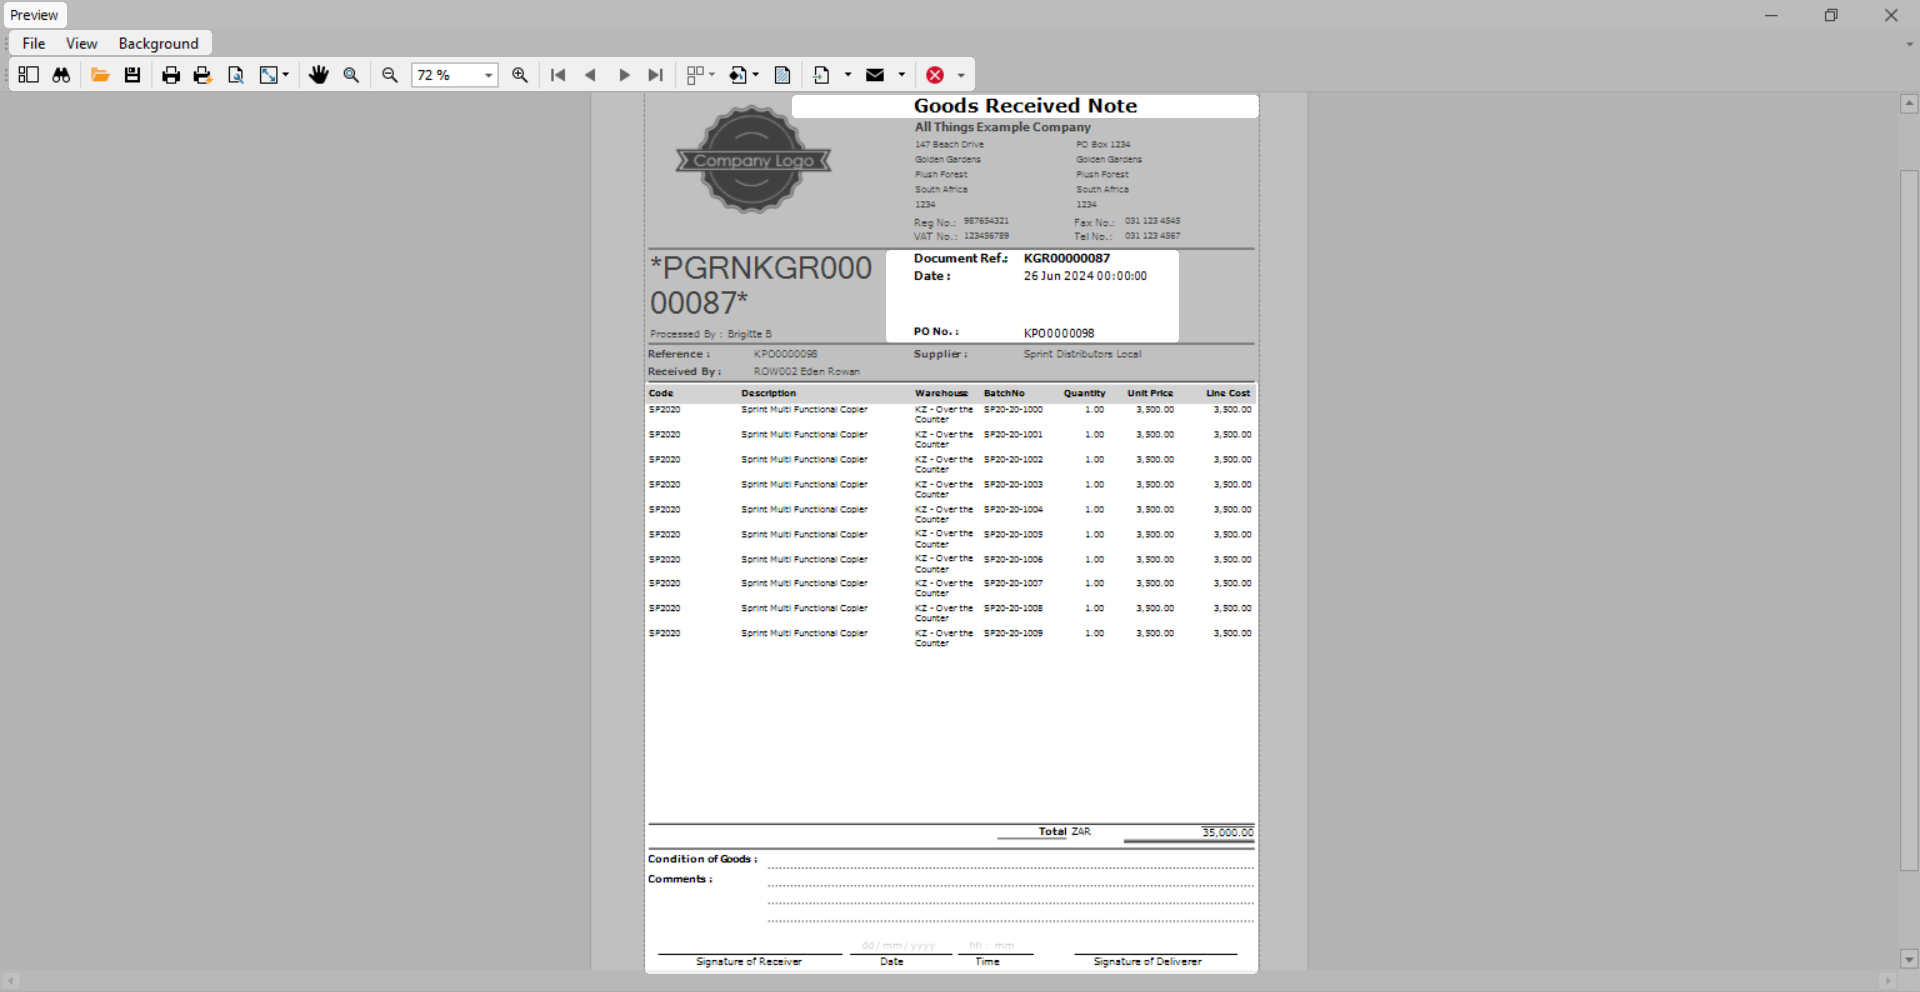
- The Report Preview screen will come up.
- From here you can View, Print, Export or Email the Goods Received Note.
- Close the Report Preview screen when done.
Note: If you receive the invoice from the Supplier at a later stage - remember to Add the Supplier Invoice, Print the Supplier Invoice, and Accept the Supplier Invoice.
MNU.030.002