We are currently updating our site; thank you for your patience.
Procurement
Return Stock to Supplier
A Supplier Return is raised against a Goods Received Note.
Stock must be in store in order to return it to the supplier.
A supplier return can be raised without creating a Supplier Invoice.
If a Supplier Invoice has been created, then a Supplier Debit Note must also be raised.
| Ribbon Access:Procurement Returns |
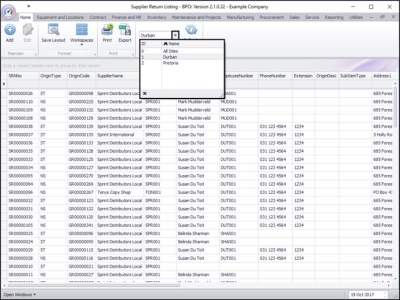
The Supplier Return Listing screen will be displayed.
Select the Site
- Select the Site.
- In this image Durban has been selected.
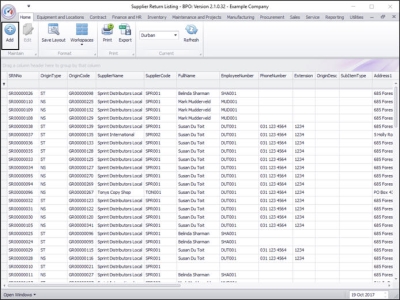
Add Supplier Return
- Click on Add.
Add Supplier Return Note Details
The Add new Supplier Return Note screen will be displayed.
- Return Note No: The system will populate a return note number as the return note is saved.
- Supplier: Search for and select the supplier.
- GRN No: Search for and select the goods received note that must be linked to the supplier return.
- Note: If you know the GRN number you can search for and select this number first. Then all the supplier details linked to the GRN, Billing address etc. will auto populate.
- Return Note Date: Ensure the date corresponds with the stock return.
- Reference: Type in a relevant reference for the supplier stock return.
- VAT No: This will auto populate when the supplier is selected.
- Comments: Type in a detailed comment with regards to this return.
- Billing Address: This will auto populate when the supplier is selected.
- Postal Code: This will auto populate when the supplier is selected.
- Phone: This will auto populate when the supplier is selected.
- Email: This will auto populate when the supplier is selected.
- Contact Name: This will auto populate when the supplier is selected.
Return Items (Items Linked to the GRN)
- The items as received on the GRN (goods received note) selected in the step above, will automatically populate the Parts data grid as you select the GRN No.
You can select to return the entire GRN or a partial GRN.
Return/Credit Entire GRN
- If the entire GRN is to be returned/credited, then at this point, you can click on Save (and skip the next 3 steps).
Return/Credit Partial GRN
- If you wish to partially return/credit the GRN, then follow the process in the next steps to remove the items that are not being
returned/credited.
Remove GRN Item(s)
- Click on the row selector in front of the particular item that you wish to remove from the Return Note.
- Click on Delete Item.
- A Confirm delete line message box will pop up, asking:
- Are you sure you want to remove this line from the return note?
- Click on Yes.
Continue removing items in this way, until you are left with only the stock that is being returned.
Save Return Note
- When you have finished removing items, click on Save.
Print Return Note
- A Report Generation message box will pop up asking;
- Do you want to print the supplier return note [ ]?
- Click on Yes.
The Report Preview screen will be displayed.
- From here you can View, Print, Export or Email.
- Close the Report Preview screen when done.
- A Return Note Processing message box will appear informing you that;
- Supplier Return Note No. [] saved successfully.
- Click on OK.
View New Return Note
- The newly created Supplier Return Note can now be viewed in the Supplier Return Listing screen.
BPO.MNU.034


