We are currently updating our site; thank you for your patience.
Projects
Projects - Time Review
Time review enables the Project Managers to allocate regular time logged by employees as SLA and / or non billable time. For example, if an employee books 4 hours against a work order and the manager knows that the task should only required 2 hours to complete, then the manager can allocate 2 hours as billable or SLA hours and the remaining 2 hours as non billable hours in the Time Review screen.
For this to work, the Time Review flag must be set to Yes in the Configurator.
| Ribbon Access: Maintenance / Projects > Projects |

- The Project Listing screen will be displayed.
- Select the Site where the project can be located.
- The example has Durban selected.
- Ensure that the Status has been set to Open.
- Select the row of the project you wish to review time for.
- Click on the Time Review tile.

Invoice Work Order
A work order can be invoiced from the Time Review screen.
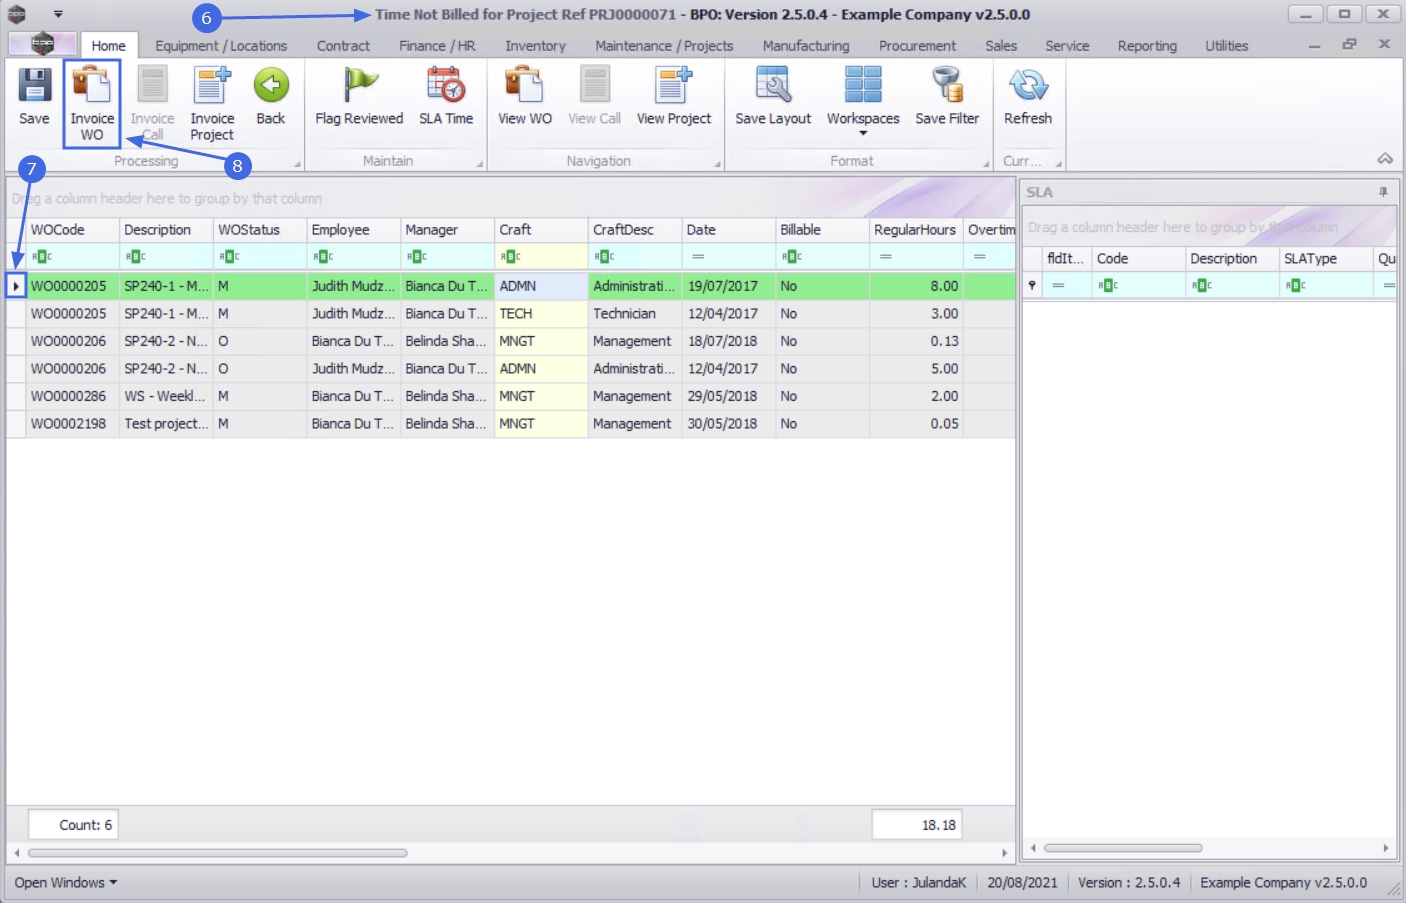
- From the Time Note Billed for Project Ref [project ref number]screen,
- Click on the row of the work order you wish to invoice.
- Click on Invoice WO.
![]() Short cut key: Right click to display the All groups menu list. Click on Invoice WO.
Short cut key: Right click to display the All groups menu list. Click on Invoice WO.
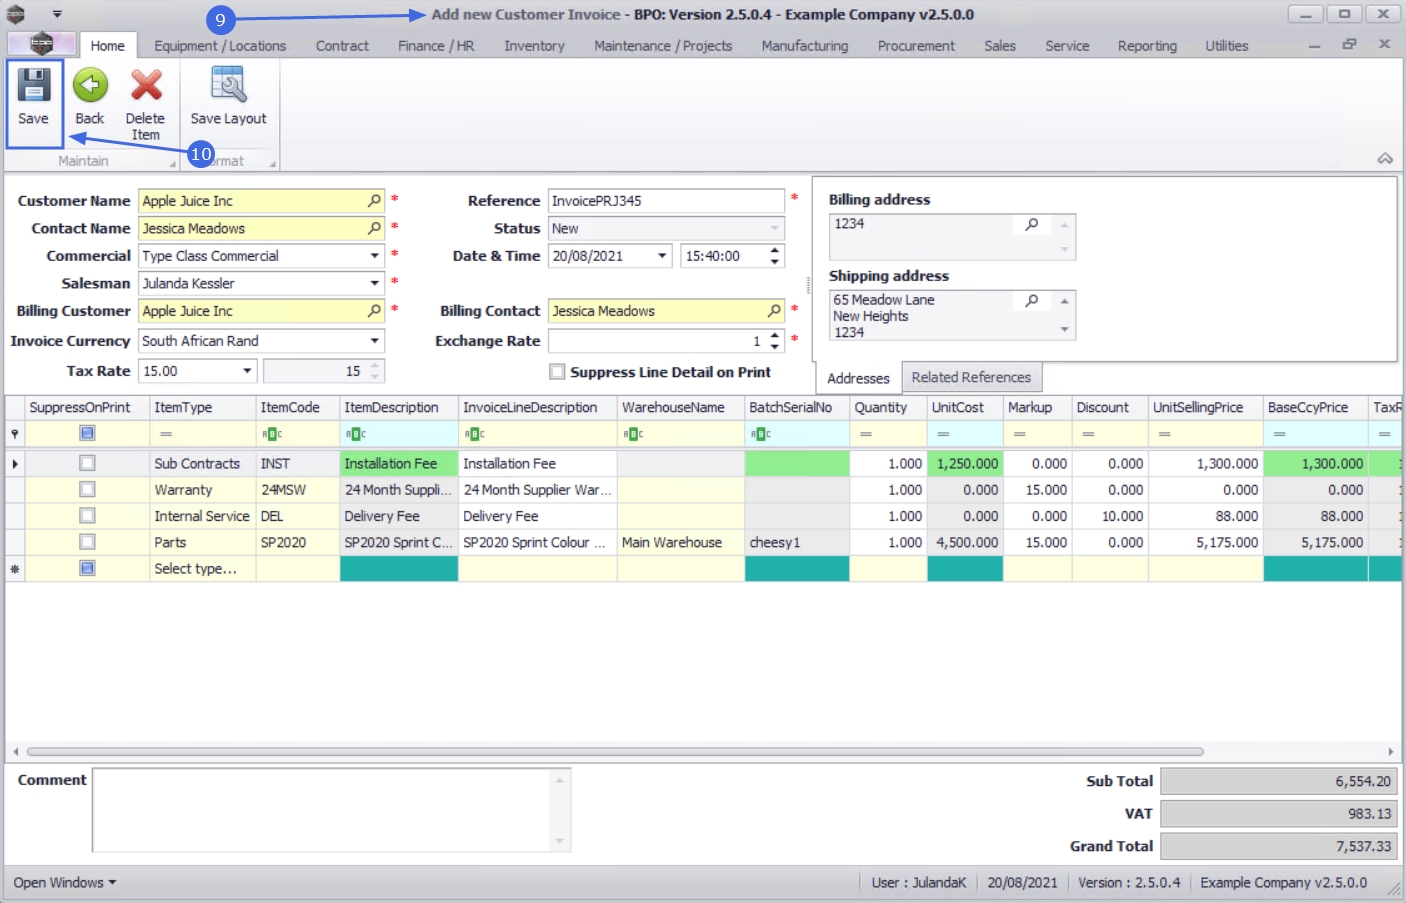
- The Add New Customer Invoice screen will be displayed.
- Complete the Customer Invoice then click on Save.
![]() For a detailed handling of this topic refer to Time Review - Invoice Work Order
For a detailed handling of this topic refer to Time Review - Invoice Work Order
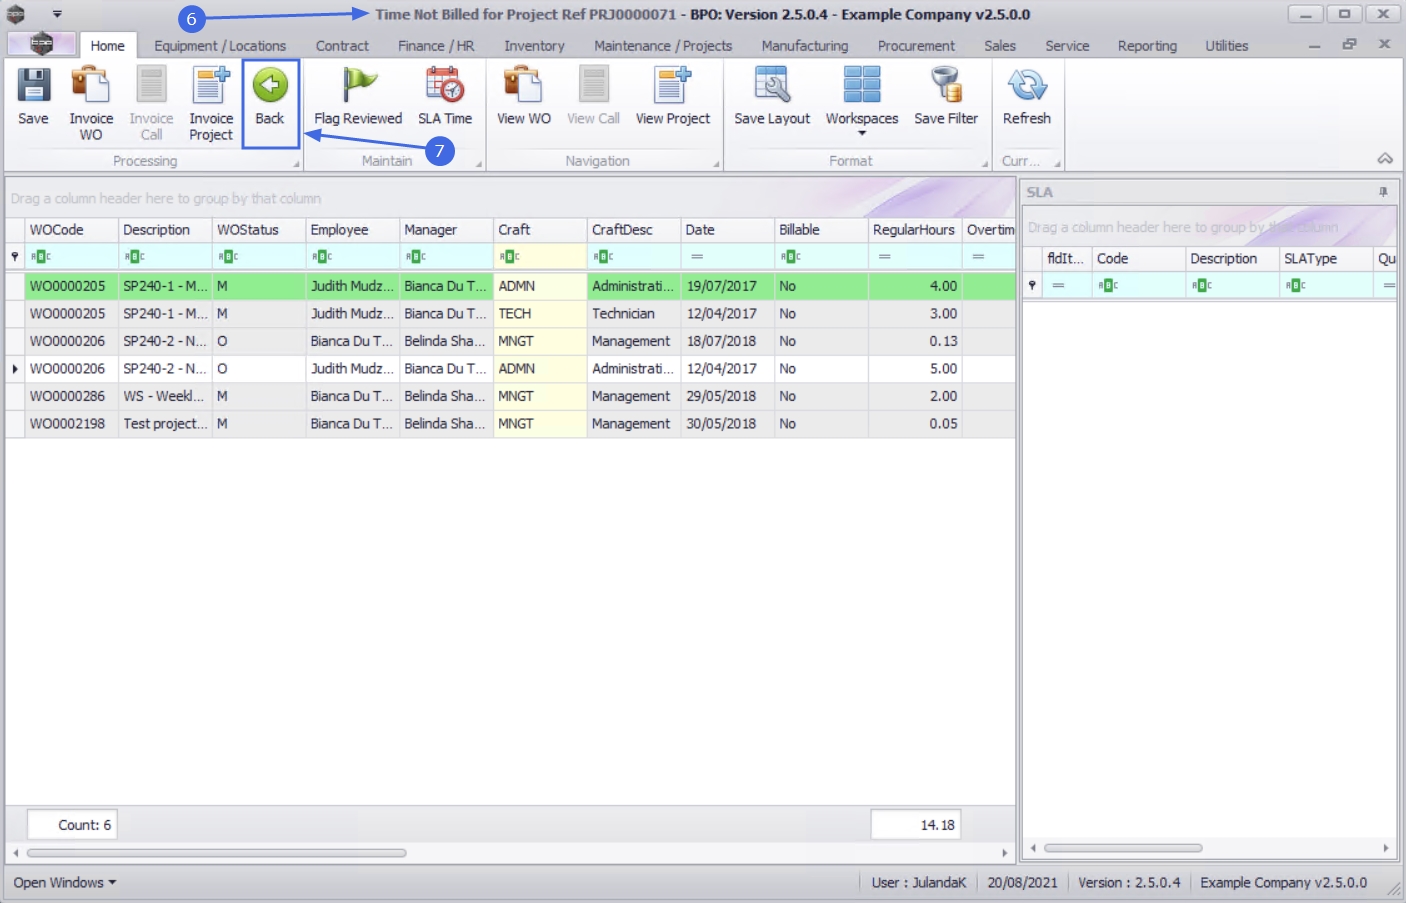
- You will return to the Time Not Billed for Project screen.
- Click on Back to return to the Project Listing screen.
For a detailed handling of this topic refer to Introduction to Invoices

Invoice Project
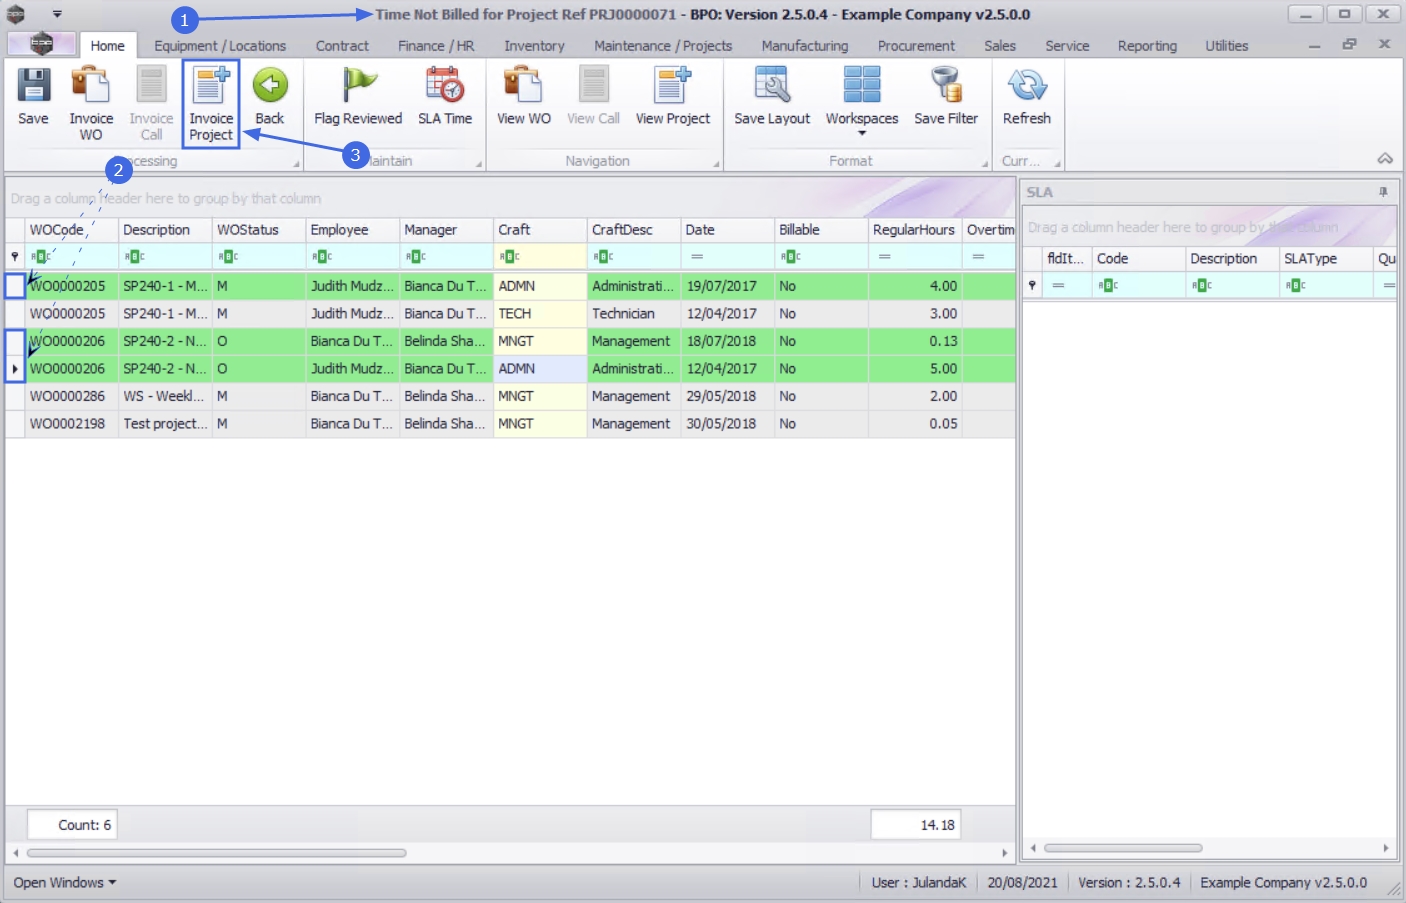
- From the Time Note Billed for Project Ref [project ref number]screen,
- Click on the row(s) of the work order(s) you wish to invoice.
- Click on Invoice Project.
![]() Short cut key: Right click to display the All groups menu list. Click on Invoice Project.
Short cut key: Right click to display the All groups menu list. Click on Invoice Project.
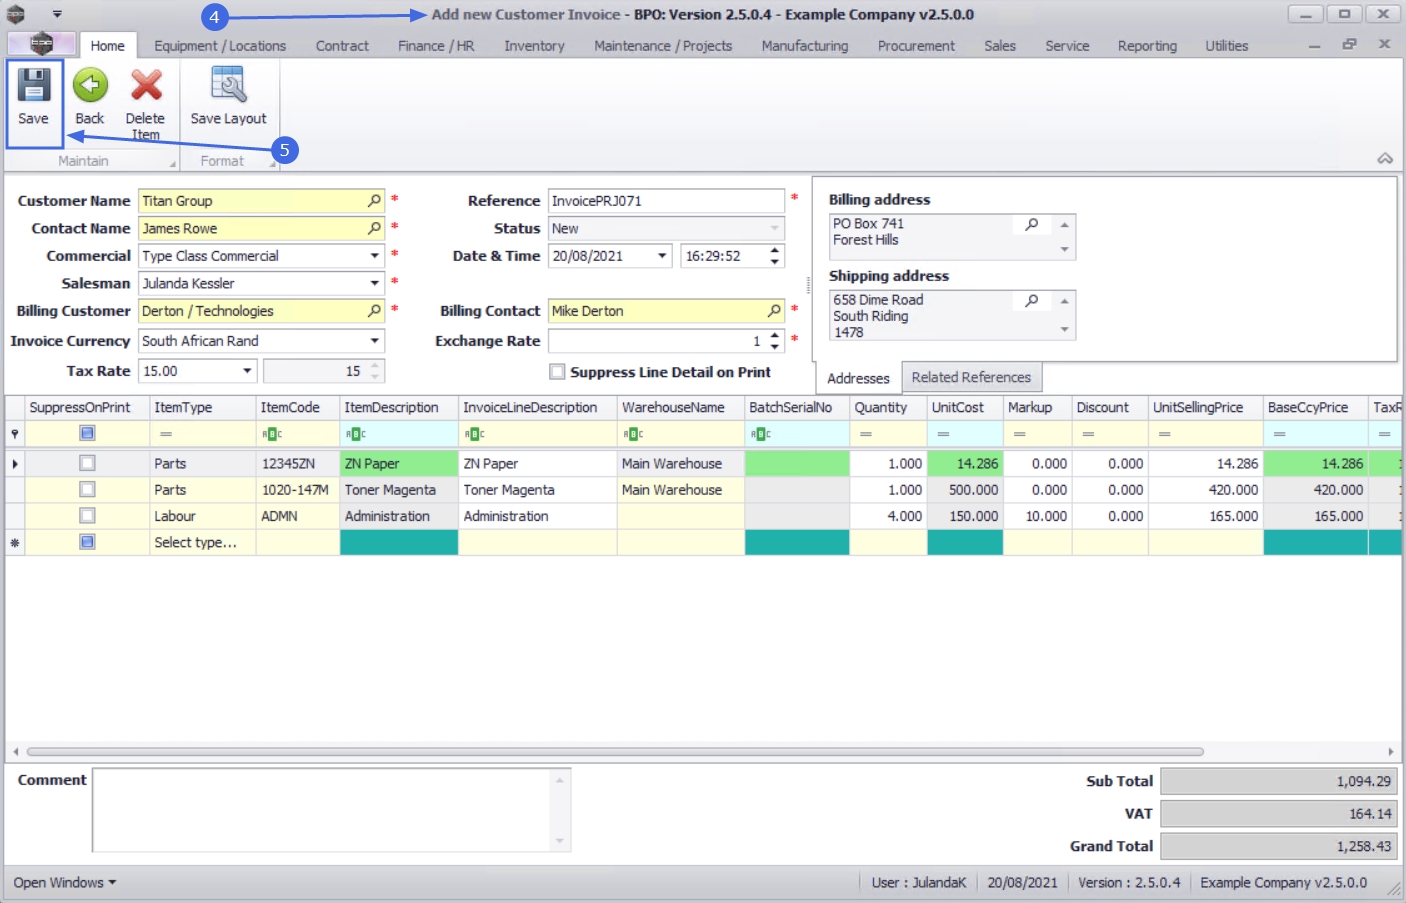
- The Add New Customer Invoice screen will be displayed.
- Complete the Customer Invoice then click on Save.
For a detailed handling of this topic refer to Time Review - Invoice Project
- You will return to the Time Not Billed for Project screen.
- Click on Back to return to the Project Listing screen.
![]() For a detailed handling of this topic refer to Introduction to Invoices
For a detailed handling of this topic refer to Introduction to Invoices
Flag Reviewed
Note on the Time Review flag: Work orders created after the Time Review flag has been set to 'Yes' in the Configurator, will by default display as 'No' in the Billable column, yet all Regular Hours will be billed.
- From the Time Not Billed for Project Ref [project ref number] screen,
- Click on the row of the Work Order you wish to review the time for.
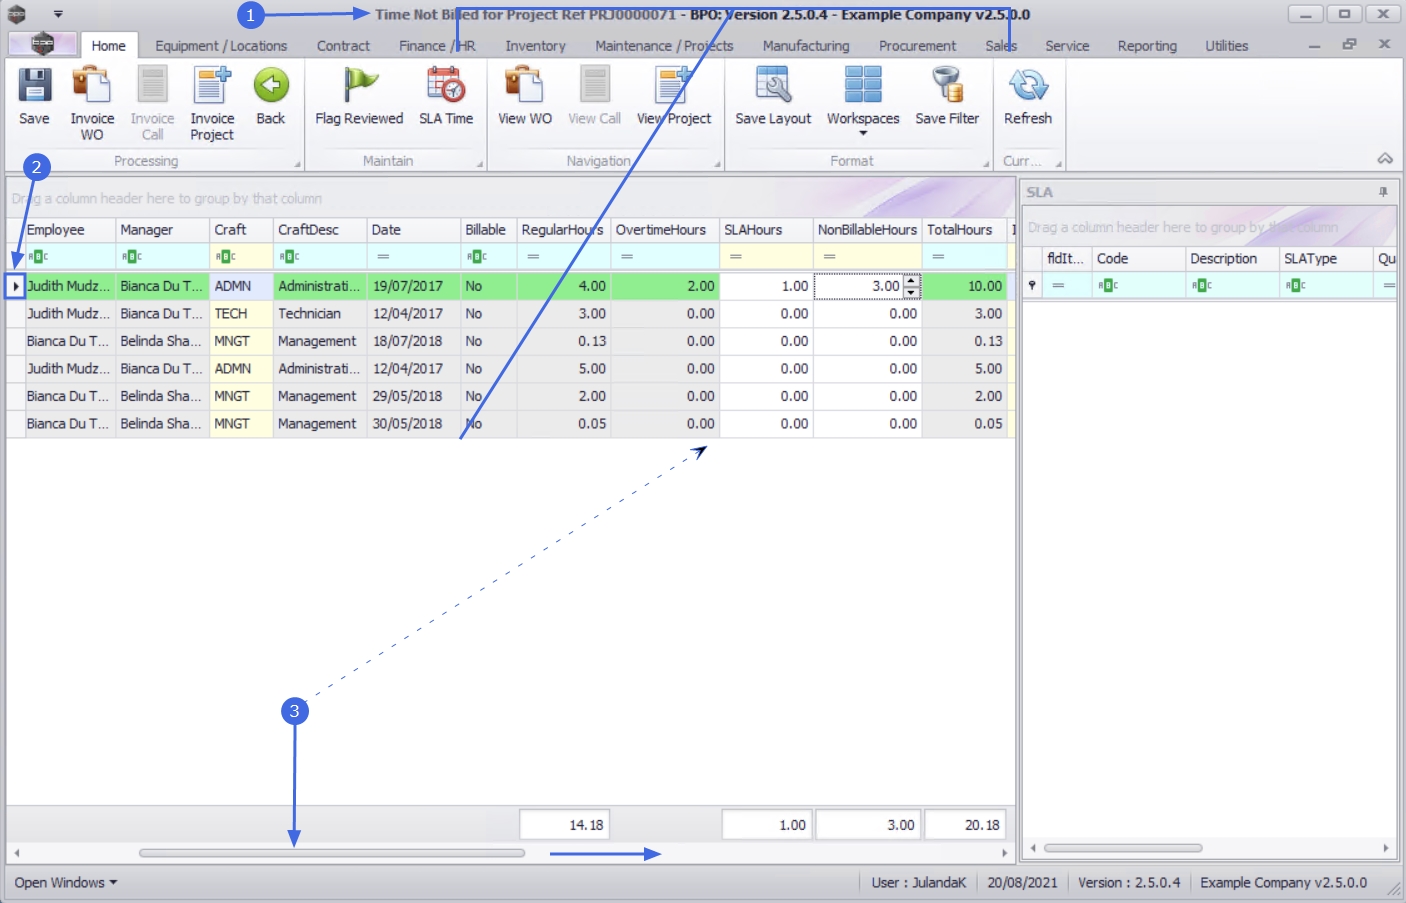
- Scroll until you can view all the Time columns.
- Billable: Labour time is displayed as billable or non-billable.
- Regular Hours: The time logged against the work order. (This field cannot be changed)
- Overtime Hours: Overtime hours logged against the work order. (This field cannot be changed)
- SLA Hours: Time allocated to this field will be deducted from the service / support time from a customer's contractual agreement.
- Non Billable Hours: Time allocated to this field will not be billed.
- Total Hours: = Regular Hours + Overtime Hours + SLA Hours+ Non Billable Hours. (This field cannot be changed)
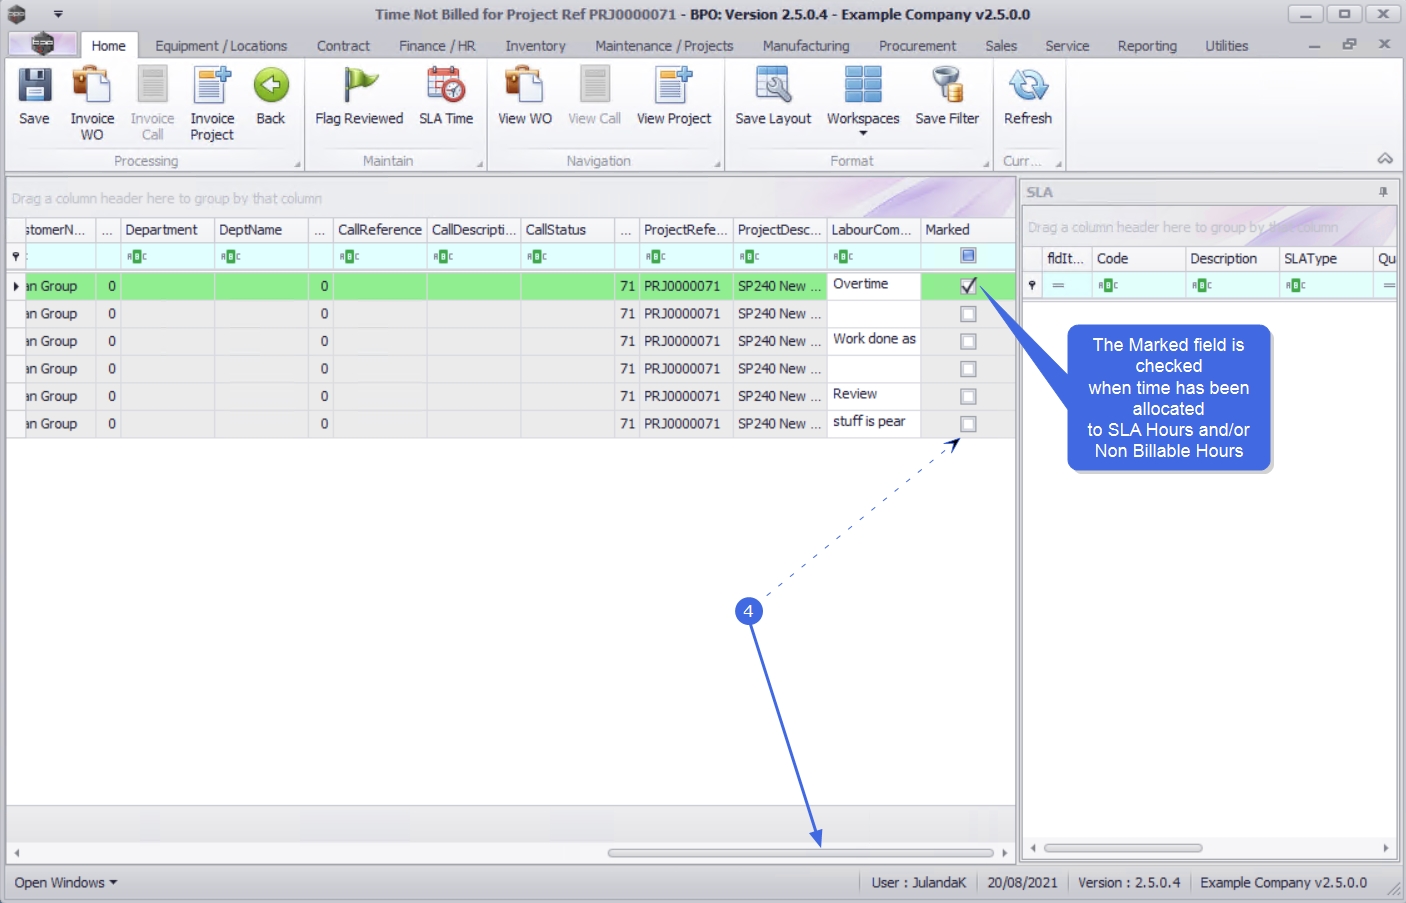
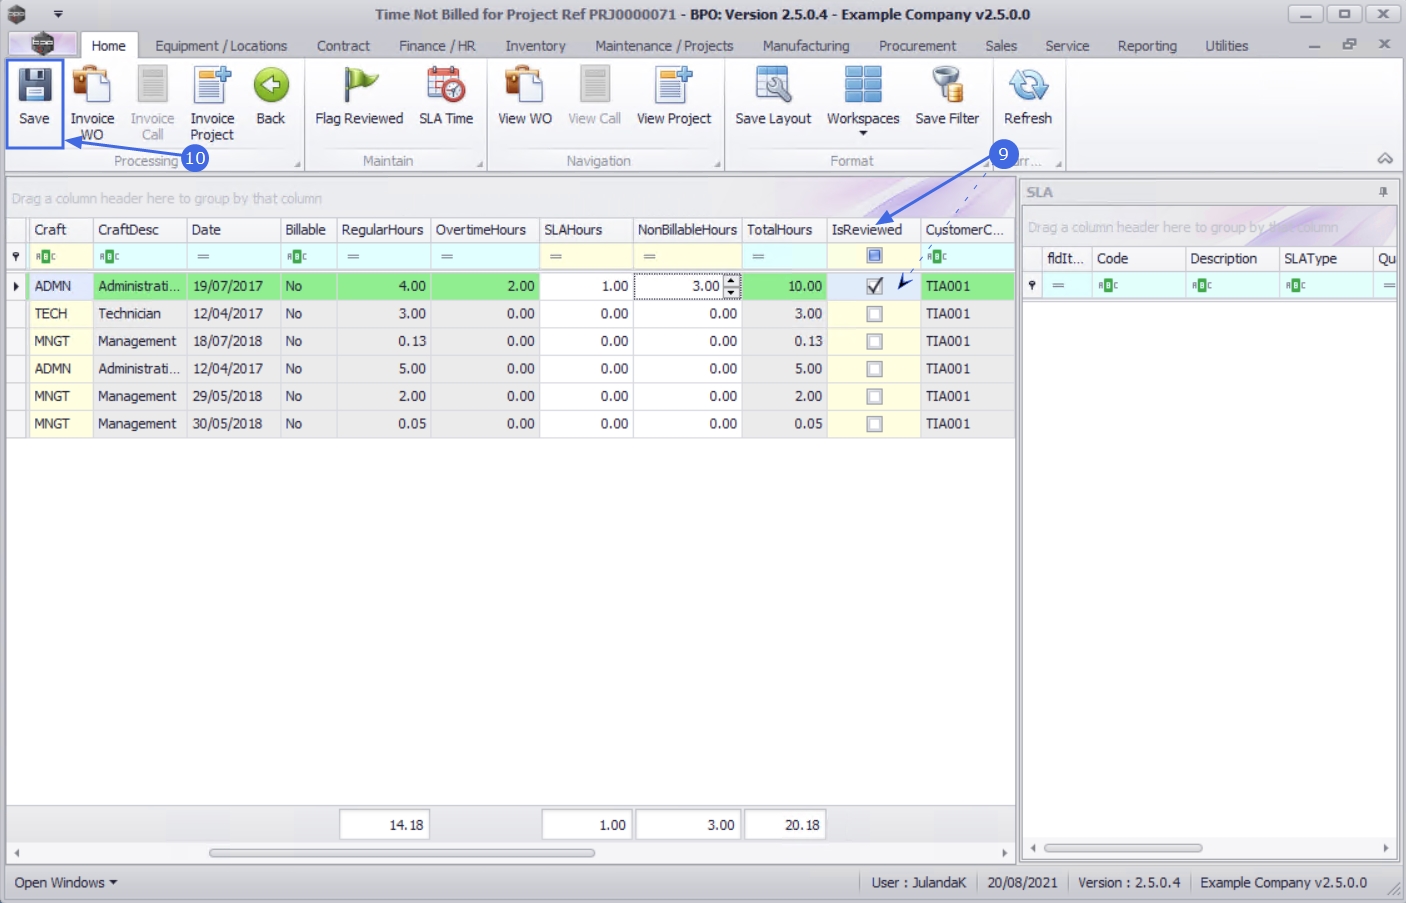
- Scroll right until you can view the Marked column.
- The Marked field for the work order will be checked when time is allocated to SLA and/or Non Billable Hours.
- Click on Flag Reviewed, when you have completed reviewing the time for the work order.
- When you receive the Input Validation message to confirm;
- Are you sure you want to flag the following items.
- Click on Yes.
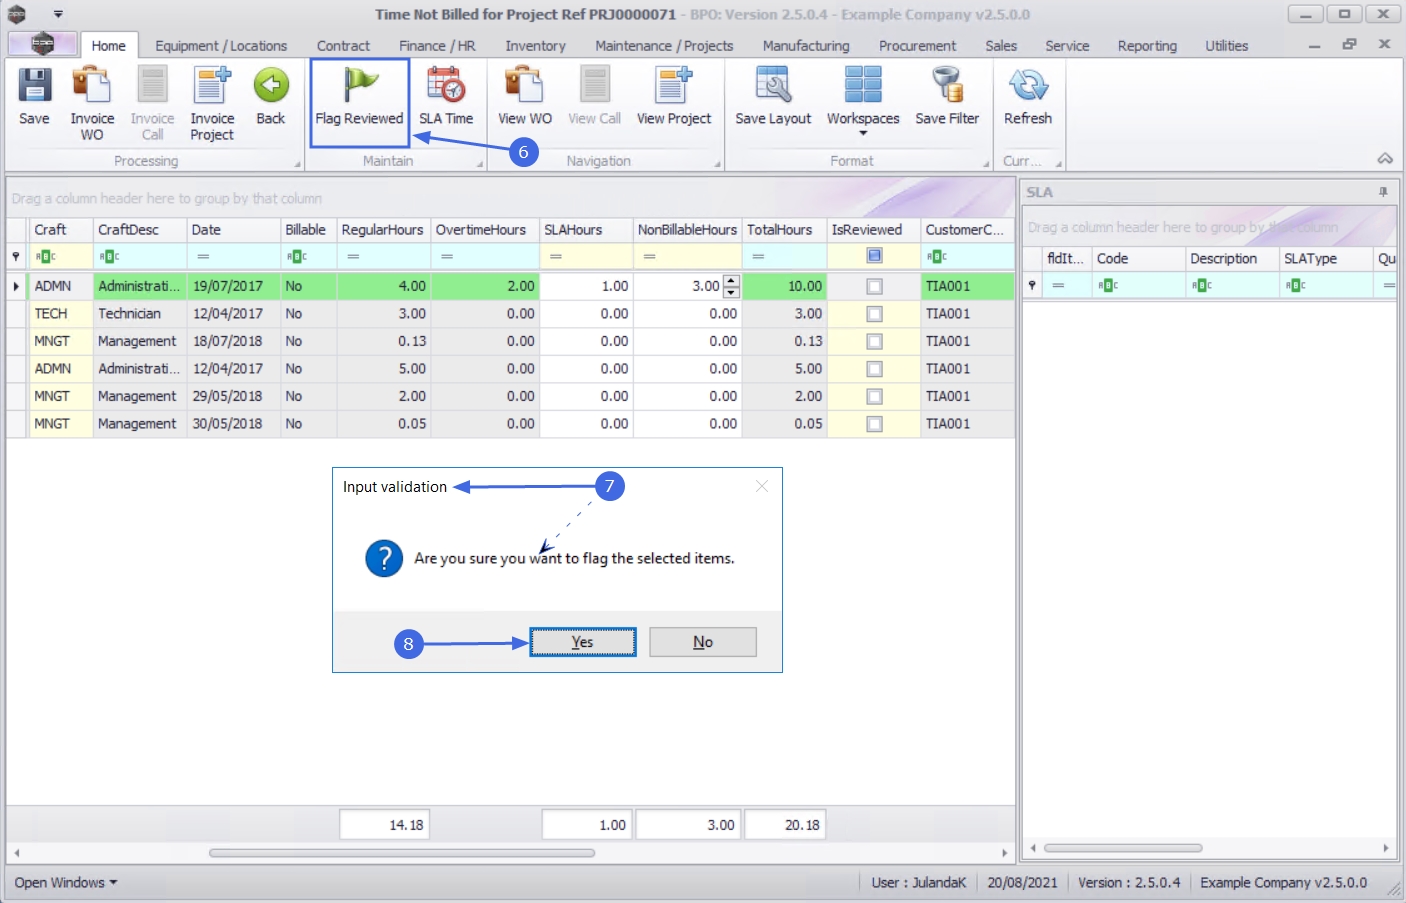
- The Is Reviewed field will now be checked.
- Click on Save.
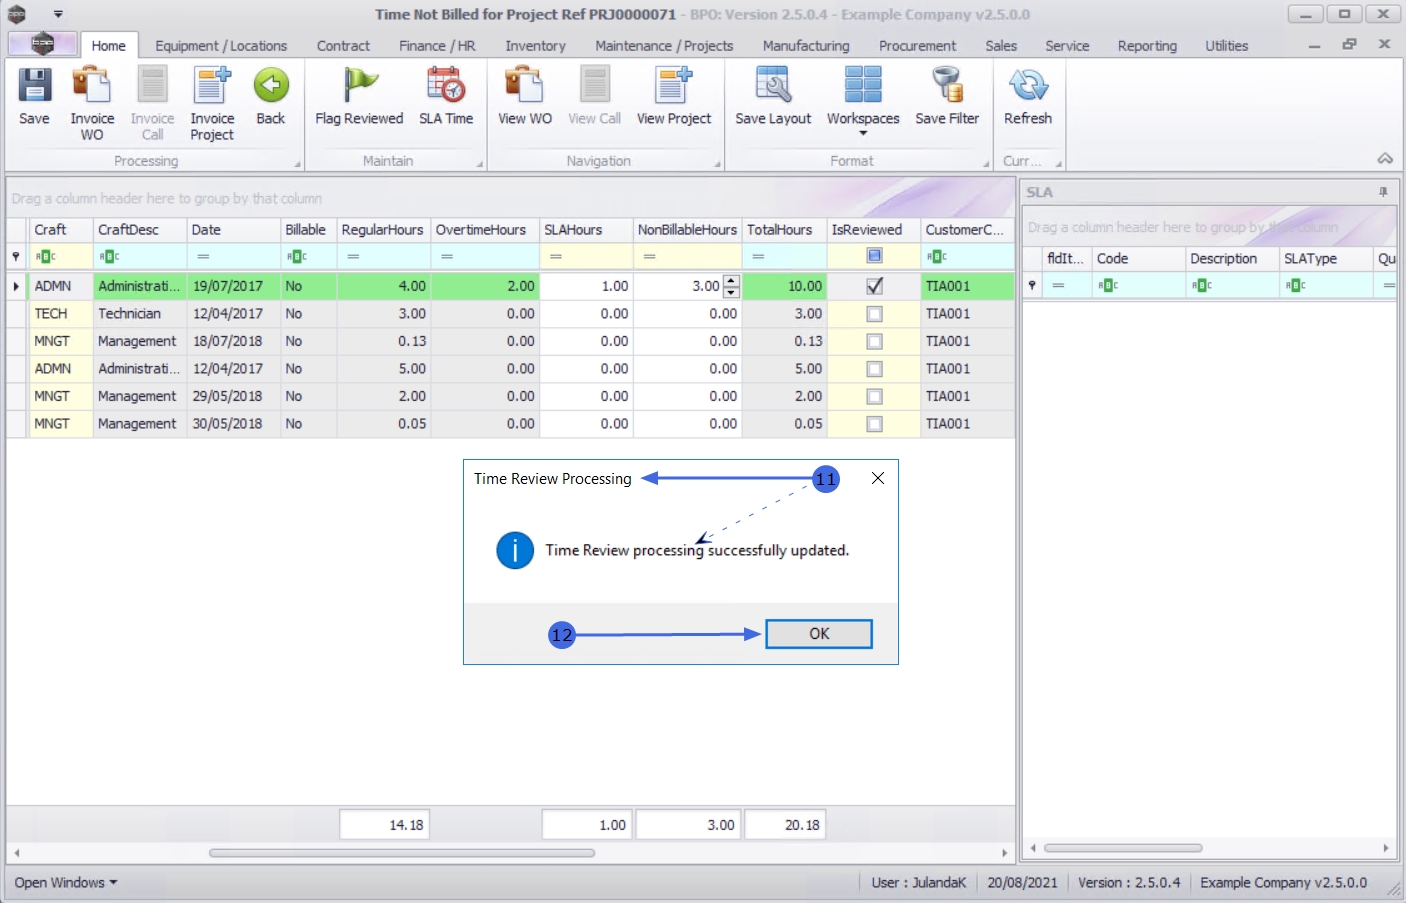
- When you receive the Time Review Processing message to confirm;
- Time Review processing successfully updated.
- Click on OK.
![]() Note that for a record to be removed from this screen, the Work Order has to be closed.
Note that for a record to be removed from this screen, the Work Order has to be closed.
SLA Time
SLA![]() This is the Service Level Agreement that you have signed with your customer. It is a contract of performance that you have agreed to. For example, if your customer calls with a requirement for a part or service request and your agreed response time to this customer (SLA) is 5 hours then you are required to have the part or technician on site within that time frame.
receive compensation of a pre-agreed type (usually also set up in the SLA). is the Service Level Agreement that you have signed with your customer.
It is a contract of performance that you have agreed to. For example,
if your customer calls with a requirement for a part or service request and your
agreed response time to this customer (SLA) is 5 hours then you are required to have the part or
technician on site within that time frame. Failing which, the client can
receive compensation of a pre-agreed type (usually also set up in the SLA).
This is the Service Level Agreement that you have signed with your customer. It is a contract of performance that you have agreed to. For example, if your customer calls with a requirement for a part or service request and your agreed response time to this customer (SLA) is 5 hours then you are required to have the part or technician on site within that time frame.
receive compensation of a pre-agreed type (usually also set up in the SLA). is the Service Level Agreement that you have signed with your customer.
It is a contract of performance that you have agreed to. For example,
if your customer calls with a requirement for a part or service request and your
agreed response time to this customer (SLA) is 5 hours then you are required to have the part or
technician on site within that time frame. Failing which, the client can
receive compensation of a pre-agreed type (usually also set up in the SLA).
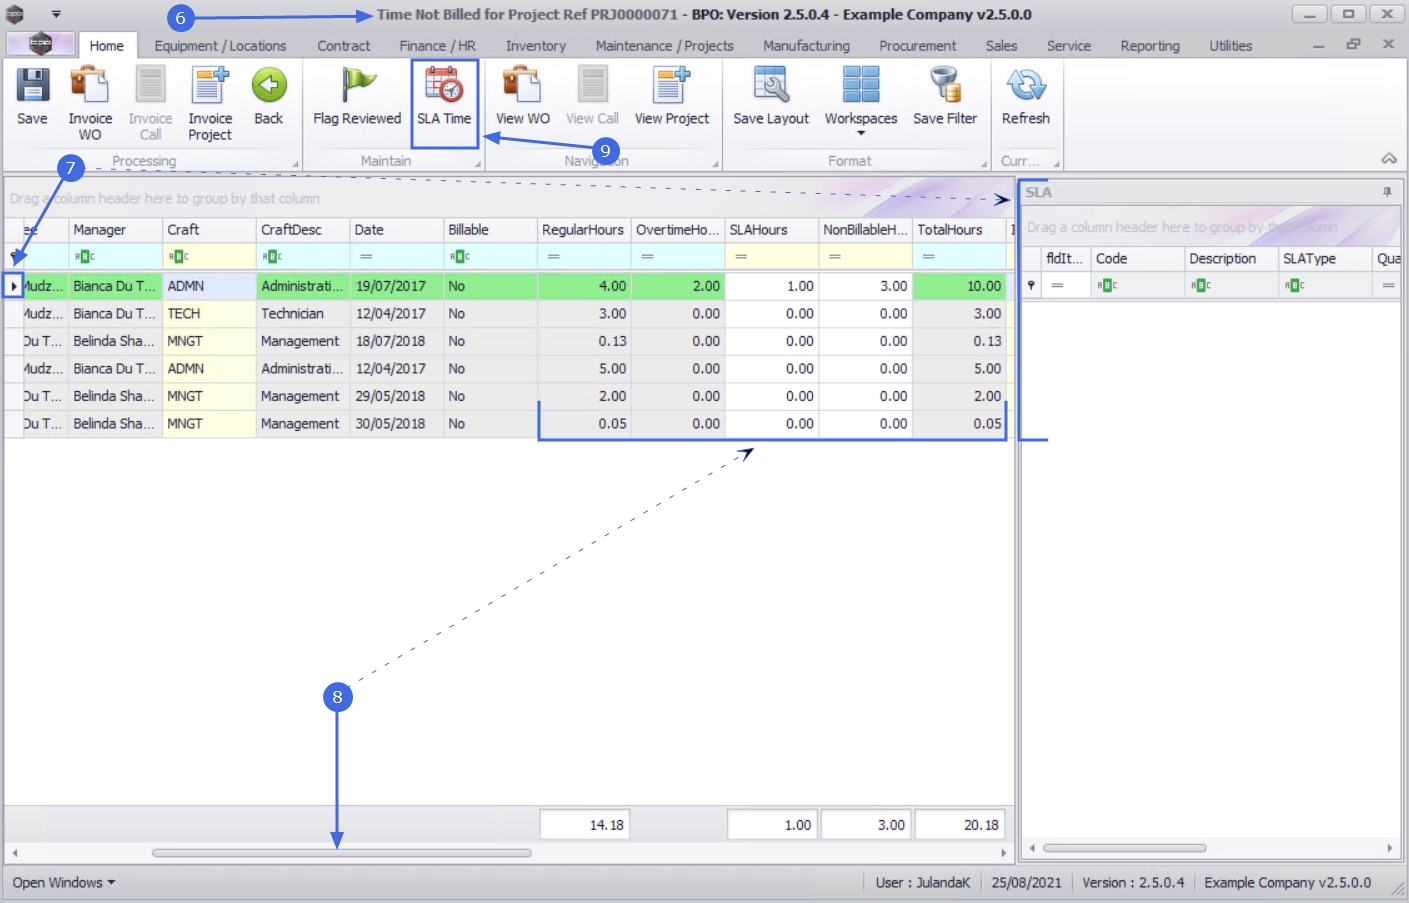
- From the Time Not Billed for Project Ref [project ref number] screen will be displayed.
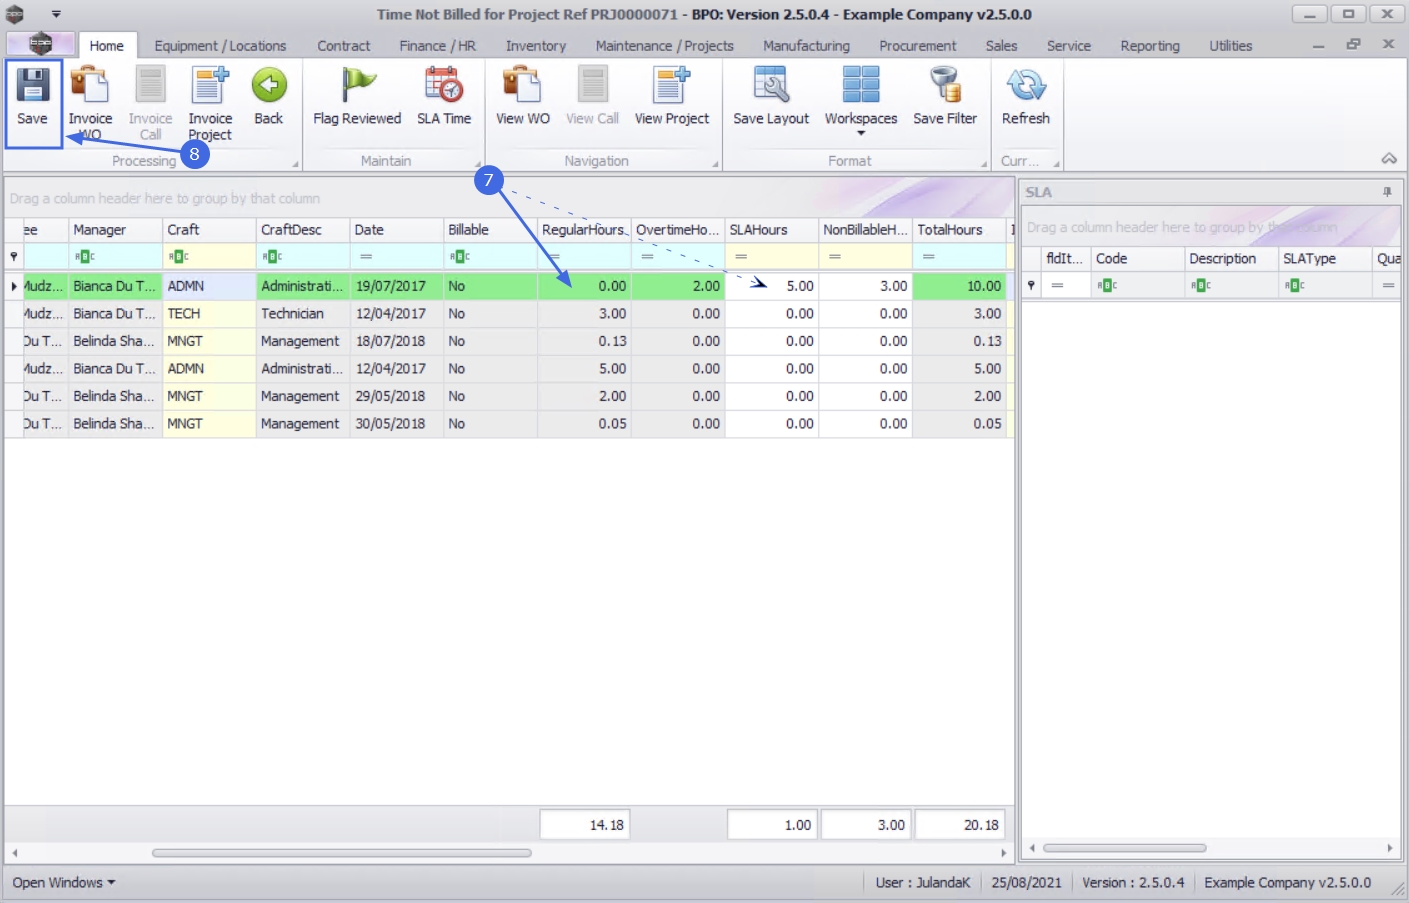
- Click on the row(s) to select the Work Order(s) you would like to adjust Regular Hours booked, to SLA Time.
- Any contract inclusions linked to an item on the selected work order will be displayed in the SLA section.
- Use the scroll bar to scroll until you are able to see the hours booked for the Work Order(s).
- Click on SLA Time to convert the Regular Hours to SLA Hours.
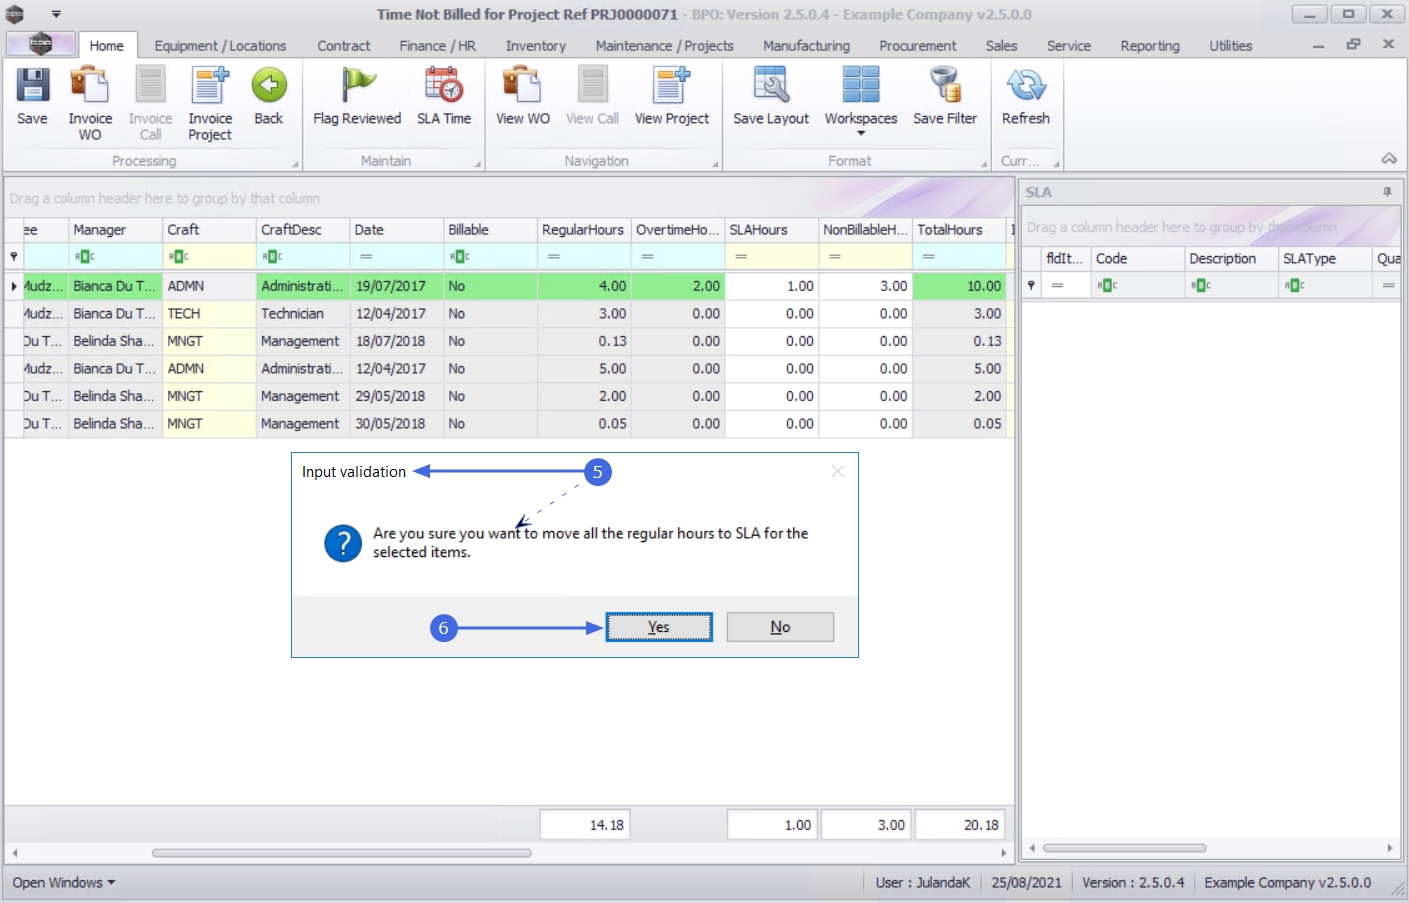
- When you receive the Input validation message to confirm;
- Are you sure you want to move all the regular hours to SLA for the selected items.
- Click on Yes.
- The selected work order(s) have been updated and the Regular Hours have been moved or added to the SLA Hours.
 Note that only Regular Hours have been moved. Overtime and Non-Billable Hours were not affected.
 - Click on Save to save the changes.
- When you receive the Time Review Processing message to confirm;
- Time Review processing successfully updated.
- Click on OK to confirm.
- Click on Back to return to the Project Listing screen.

View Work Order
- From the Time Not Billed for Project Ref [project ref number] screen,
- Click on the row of the Work Order you wish to view.
- Click on View WO.
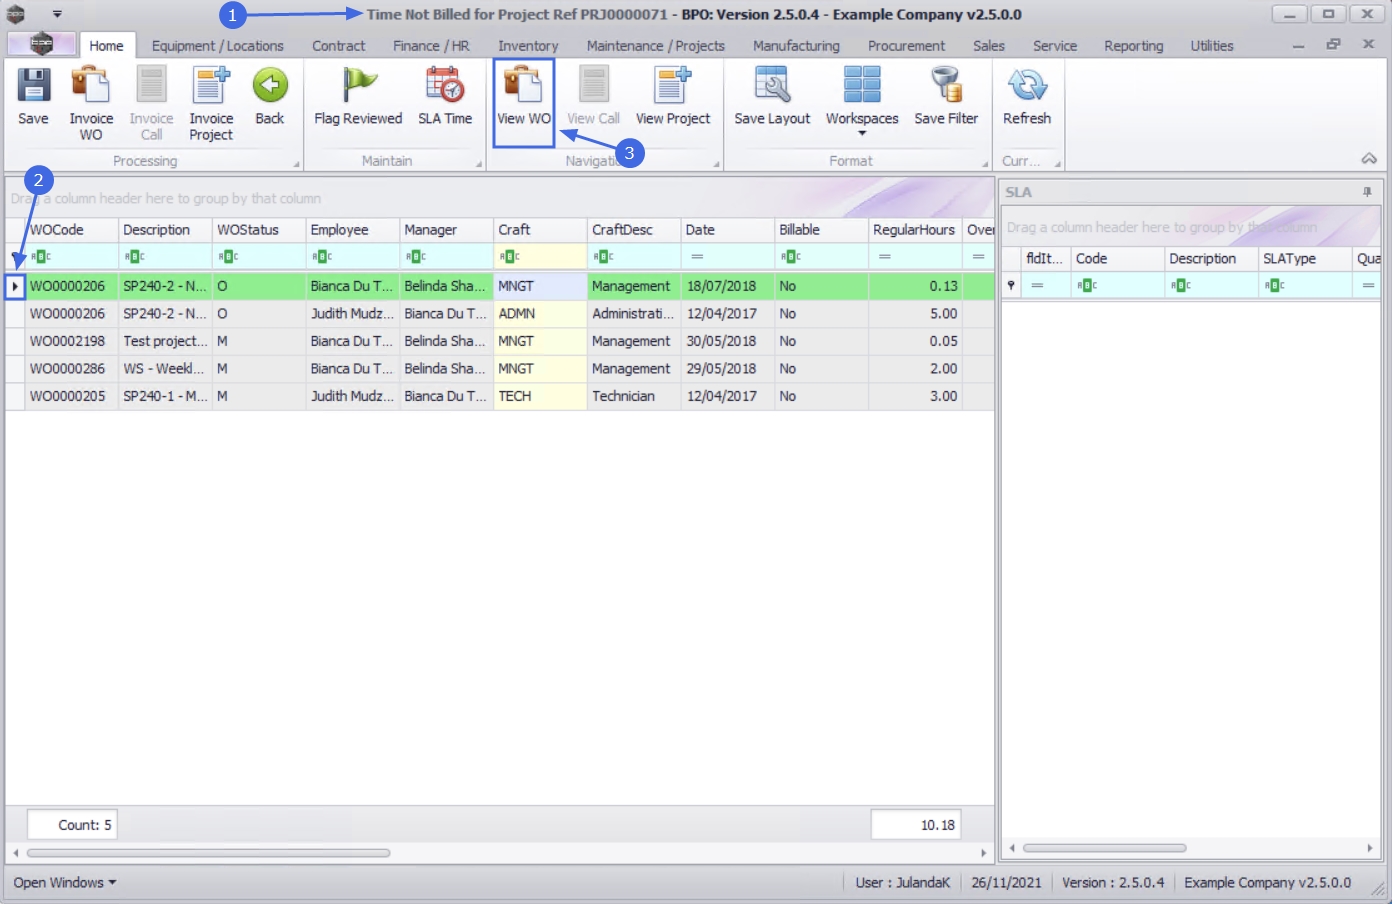
- The Work Order Maintenance screen will be displayed.
- From here you can add to or edit the Work Order details, Customer Info, the Required Crafts, Additional Data or the Equipment Info for the work order, or update the work order using the Function and Processing tiles.
- When you have completed making the changes to the maintenance screen, click on Save.

View Project
- From the Time Not Billed for Project Ref [project ref number] screen,
- Click on View Project.
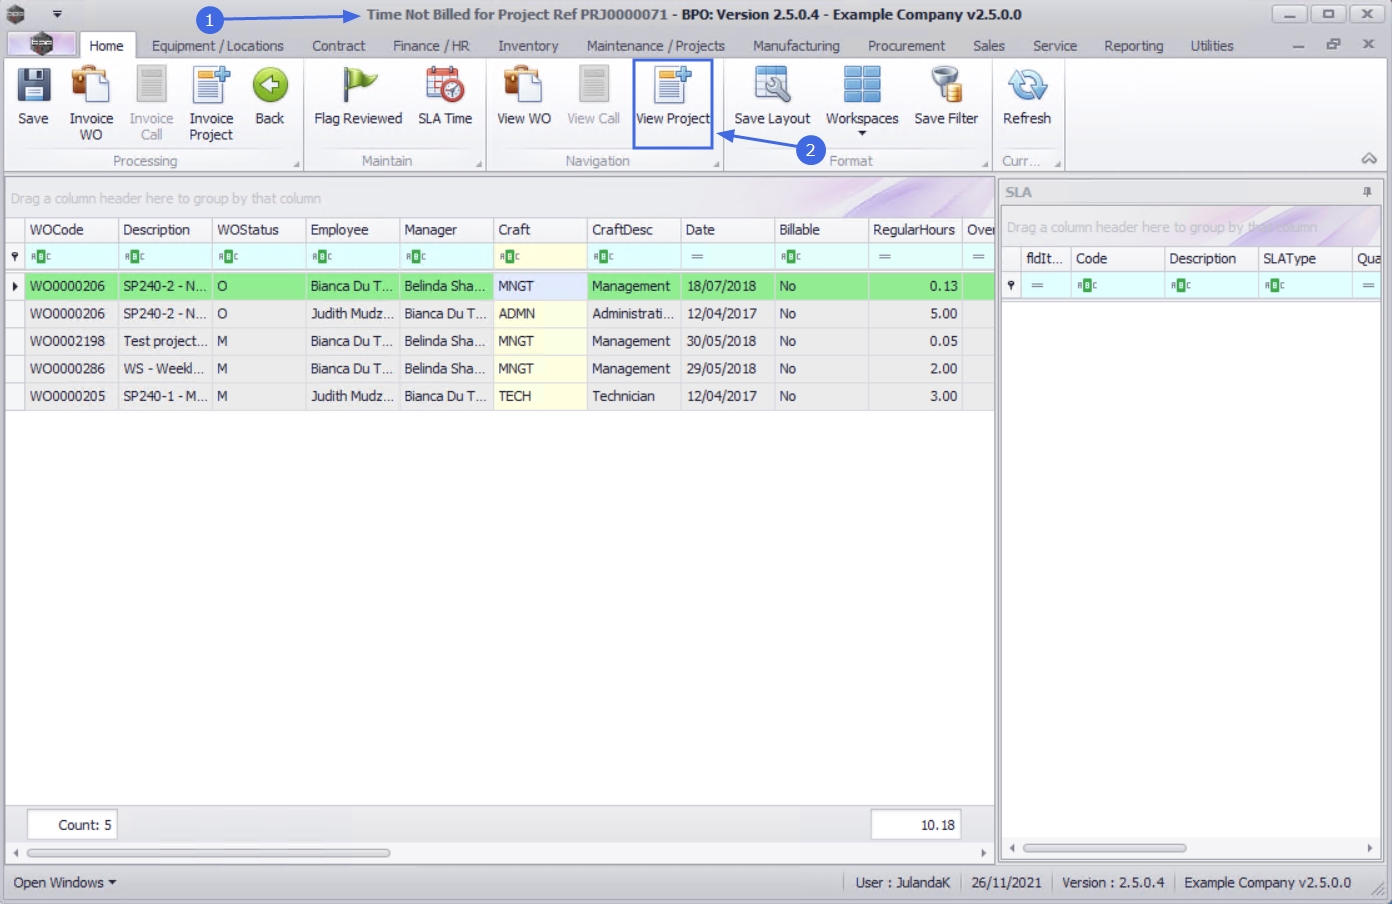
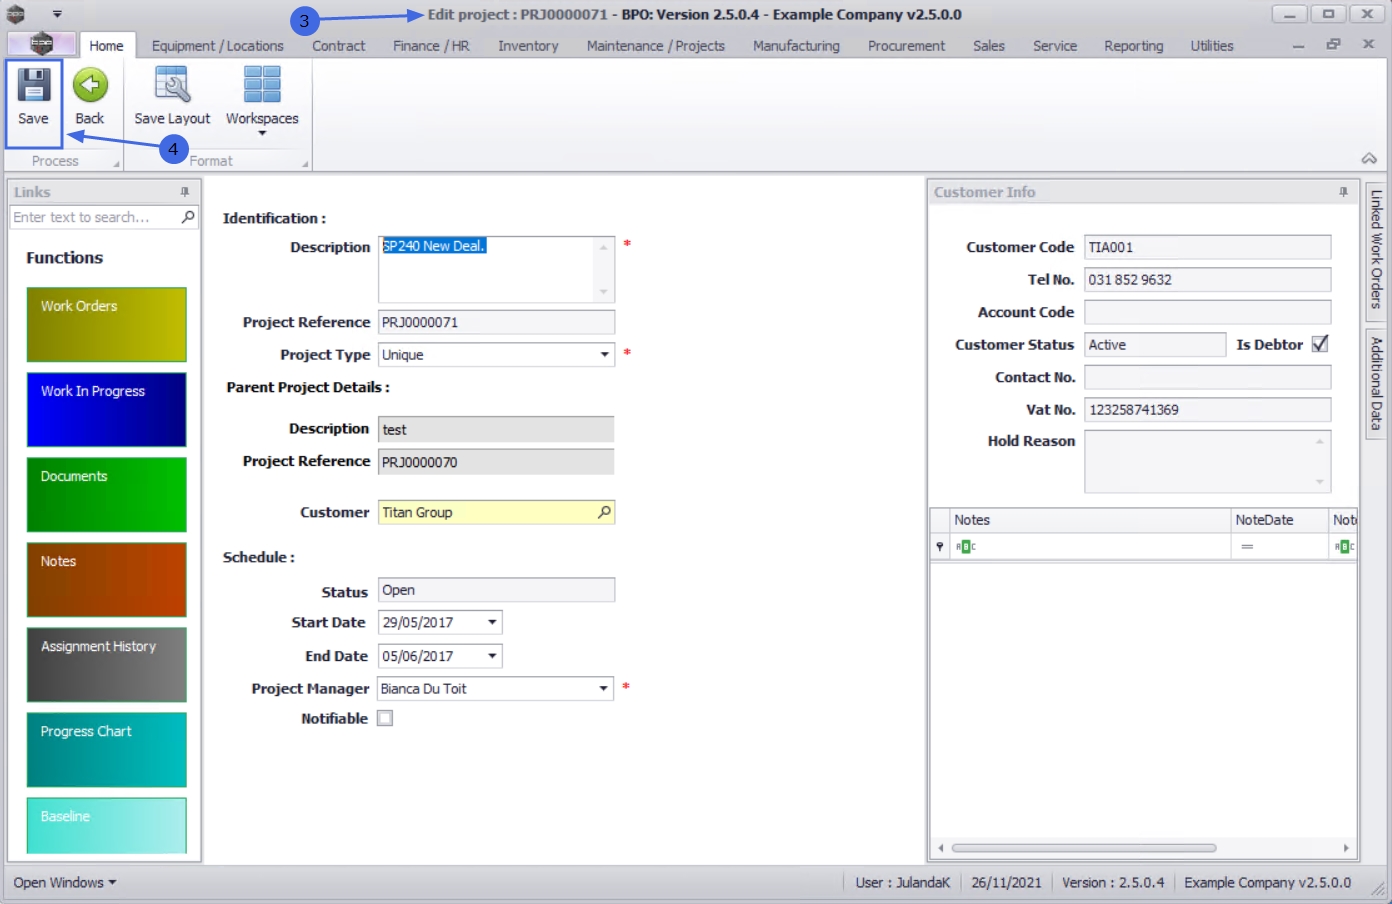
- The Edit project : [project ref number] screen will be displayed.
- Make the required changes to the project information and click on Save.
MNU.058.030