Security
User and Group Security - Group Security Settings
In User Group and Security, you can create new users, assign users to groups, and set user group security, i.e. what a user may or may not have access to in BPO.
A user must be created for each employee who is required to log on to BPO. Each user is placed in a security group and security rights are set for that group. Here we will outline how to set those group rights.
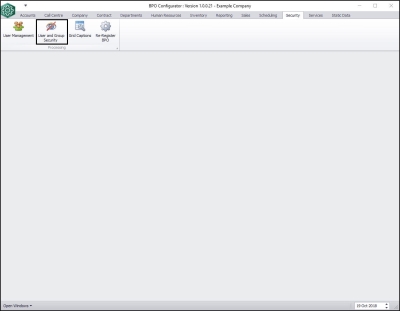
| Ribbon Access: Configurator > Security > User and Group Security |
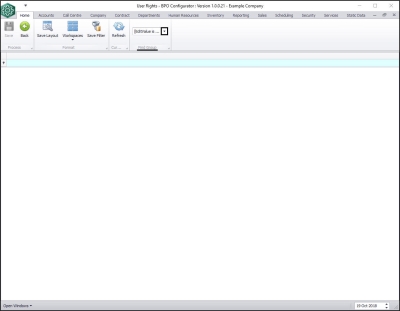
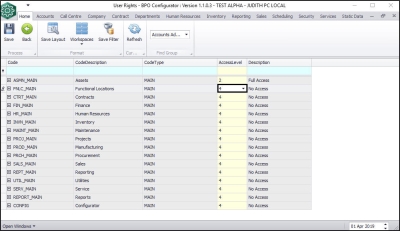
The User Rights screen will be displayed.
Select User Group
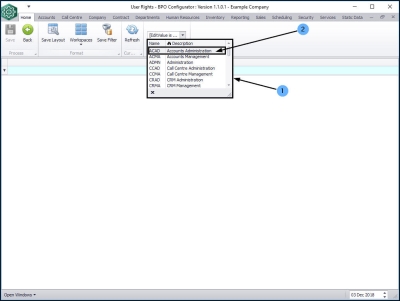
- Click on the drop-down arrow in the Find Group ribbon frame.
- The Group Name list will be displayed.
- Click on the particular group name that you wish to set the security settings for.
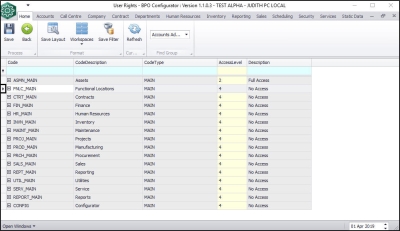
- The data grid will be populated with the relevant codes for the selected user group.
Access Types:
- System: This sets the system functionality security (whether the user is able to perform the function)
- Menu Access: This access type sets the security for the ability to select the item in the BPO menu.
- All Other Access Types: This sets the security for each individual screen , and items within that screen.
Access Levels:
- 1 - Unlimited Access: Access to all parts of the system.
- 2 - Full Access: Access to all parts of the system.
- 3 - Limited Access: Read Only.
- 4 - No Access: Not accessible in BPO.
Set Access Level
- Select the code you wish you set the Access Level for.
- In this image, FNLC_MAIN is selected.
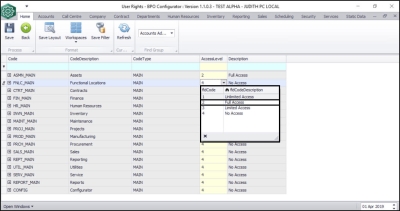
- Click in the Access Level field of the selected row.
- A drop-down arrow will appear.
- Click on this arrow to display the Access Level Code drop-down menu.
- Select the level that you wish to apply to the selected code.
- In this image, 2 - Full Access is selected.
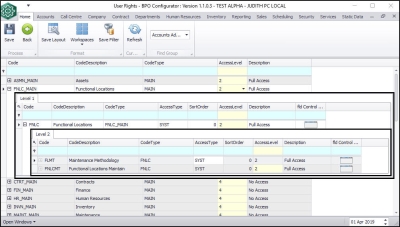
As you select the access level, Level 1 and Level 2 grids will expand.
- Level 1: This is the main data grid with the access level you have set above.
- Level 2: This is a sub grid that contains sub codes of Level 1.
- You can also set access levels on each of these sub codes.
Set Access Levels on Sub Codes
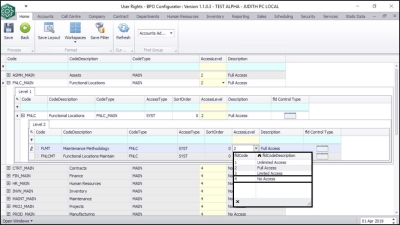
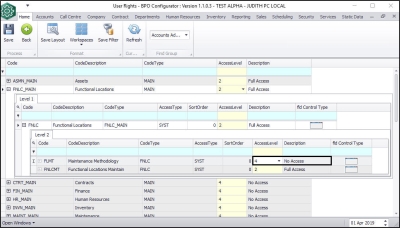
- In the Level 2 sub grid, in the row of the code you wish to set an access level for, click in the Access Level column.
- The Access Level Codes menu will drop-down.
- Click on the Access Level you require.
- In this image, access level 4 - No Access is selected for FLMT.
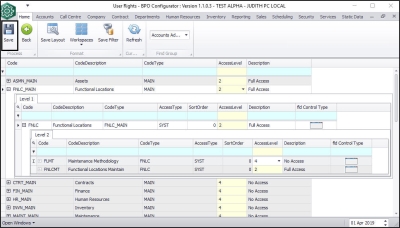
- The Access Level and Description will change to the one that was selected.
- In this image, the Access Level and Description has changed to 4 - No Access.
- Once all changes have been made, click on Save.
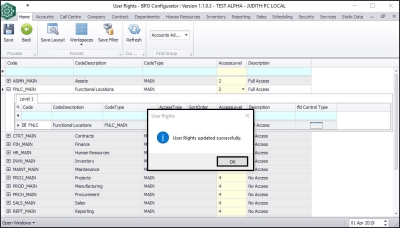
- Level 2 sub grid will close.
- A User Rights pop up message will be displayed telling you;
- User Rights updated successfully.
- Click on Ok.
- Note: Ask the users within that group to
log out of and
back into
BPO to ensure that they are
working within the updated group security right.
Important Notes:
- If you are setting up a new group from scratch, it is a good idea to set the 'Company Modules: Site' Access Type first, otherwise you cannot assign a user to this group you have created, and the user will not be able to log into BPO.
- Set the site (branch) security dependant on which sites the user may have access to.
MNU.085.004
