Sales
Customers - Project History
The Project History tile in the Customer Listing screen, allows you to view a list of all the Projects linked to a specific customer. You will be able to monitor a Project and you can invoice a Project from the Project History.
You will be able to view Closed Projects from the Project History screen. You cannot reopen a Project once it has been closed.
| Ribbon Access: Sales > Customers |
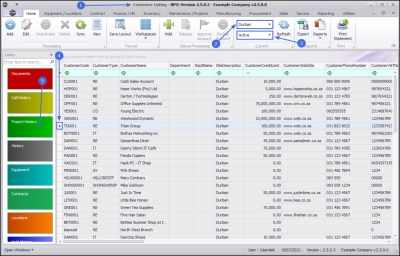
- The Customer Listing screen will be displayed.
- Select the Site where the customer can be located.
- The example has Durban selected.
- Select the Status for the customer
- The example has Active selected.
- Click in the row of the customer for whom you wish to view the Project History.
- Click on the Project History tile.
 Note: If the Project History tile is not visible from the list, move your mouse over the tiles in the Functions panel to display up and down arrows. Click on these arrows, or use the track ball / wheel on your mouse to scroll through the list.
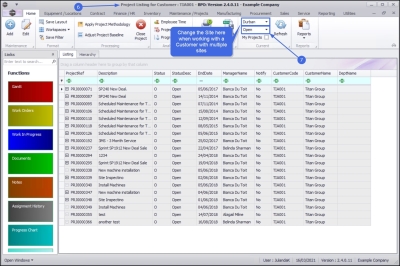
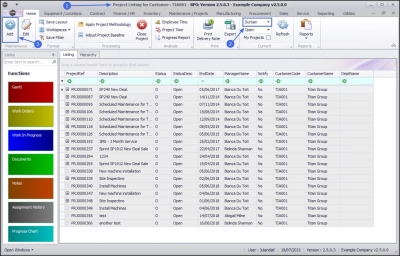
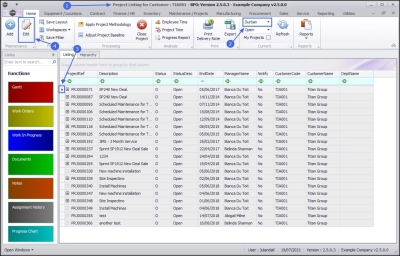
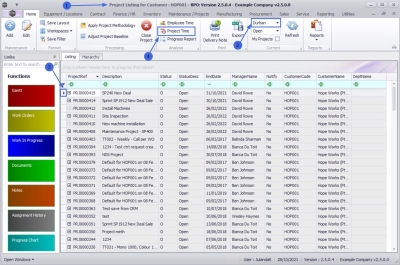
- The Project Listing for Customer: [customer code] screen will be displayed.
 Note that you can change the Site from this screen. This will allow you to choose a different site to work with where a customer has multiple sites.
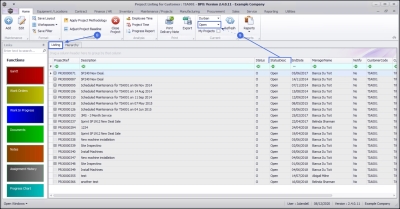
 - Select the Status of the Projects that you require.
- The example has Open selected.
You will be able to work with Projects in the Open Status. Projects that have been Closed, can only be monitored.
- The example has Open selected.
Project Listing Frame
- The Project Listing screen will display the Listing frame by default.
- The Projects listed on the screen will be filtered using the Status you have selected.
Project Hierarchy Frame
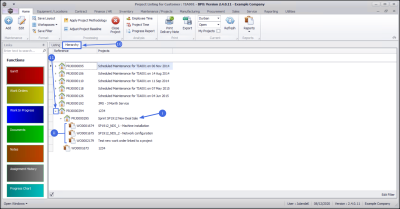
- Click on the Hierarchy tab to view the Projects in a tiered order.
- Click on the tree view chevron node in front of the Project to display:
- Nested sub-projects if there are any linked and
- any Work Orders linked to the Project.
Add Project
- From the Project Listing for Customer : [customer code] screen,
- Ensure that the correct customer Site has been selected for the project you wish to add.
- Click on Add.
![]() Short cut key: Right click to display the All groups menu list. Click on Add.
Short cut key: Right click to display the All groups menu list. Click on Add.
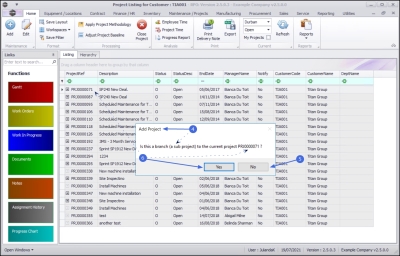
- When you receive the Add Project message to confirm;
- Is this a branch (a sub project) to the current project [project ref number]?
- Click on No if you are creating a Main Project.
- Click on Yes if you are creating a sub project for the selected project.
Main Project
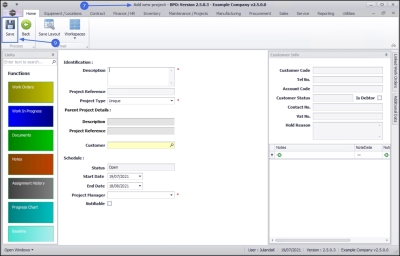
If your selection was No to create a Main Project then;
- The Add new project screen will be displayed.
- Complete the project information for the new main project you are creating.
 For a detailed handling of this topic refer to Projects - Add Main Project
 - Click on Save.
Sub-Project
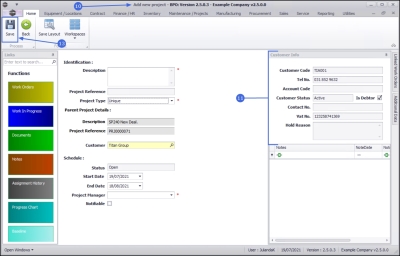
If your selection was Yes to create a sub-project then;
- The Add new project screen will be displayed.
- The Customer Info frame is populated with the Customer information you have selected.
- Complete the project information for the sub-project you are creating.
 For a detailed handling of this topic refer to Projects - Add Sub-Project
 - Click on Save.
Edit Project
- From the Project Listing for Customer [customer code] screen,
- Ensure that the correct Site has been selected.
- The example has Durban selected.
- Click on the row of the Project you wish to edit.
- Click on Edit.
 Short cut key: Right click to display the All groups menu list. Click on Edit.
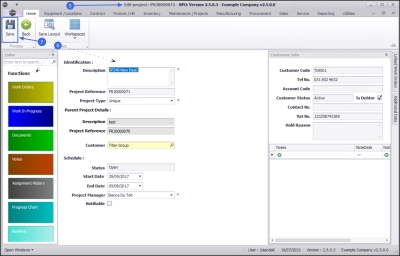
- The Edit project : [project ref number] screen will be displayed.
- Make the required changes to the project identification information or use the Functions tiles to link Work Order or Documents to the project.
For a detailed handling of this topic refer to Projects - Edit Project
- When you have made the required change(s), click on Save.
Apply Project Methodology
When a Project Methodology is applied to a project, the layers within the methodology will generate sub-projects and work orders as set up in the methodology.
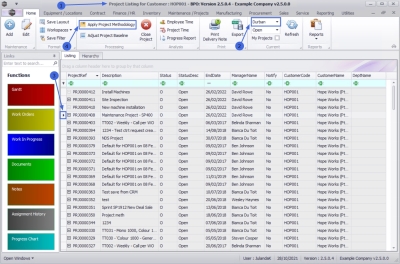
- From the Project Listing for Customer [customer code] screen,
- Ensure that the correct Site has been selected.
- The example has Durban selected.
- Click on the row of the Project you wish to apply a project methodology to.
- Click on Apply Project Methodology.
 Short cut key: Right click to display the All groups menu list. Click on Methodology.
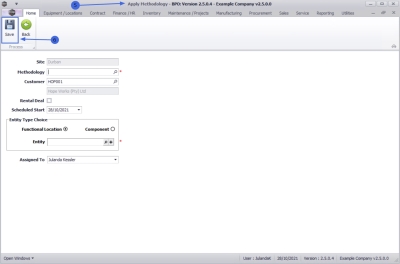
- The Apply Methodology screen will be displayed.
- After completing the Apply Methodology information, click on Save.
- You will return to the Project Listing for Customer screen.
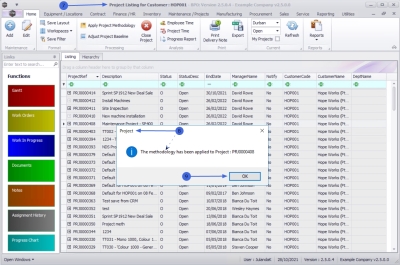
- When you receive the Project message informing you that;
- The methodology has been applied to Project : PRJ[project ref number]
- Click on OK.
Adjust Project Baseline
The baseline provides the reference points against which to compare the project progress. The baseline can be modified or reworked at any time during the project, when the scope needs to be reviewed or because the nature of the project has changed.
- From the Project Listing for Customer [customer code] screen,
- Ensure that the correct Site has been selected.
- The example has Durban selected.
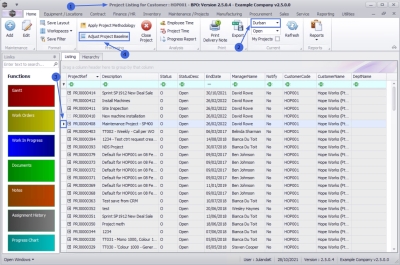
- Click on the row of the Project you wish to adjust the project baseline for.
- Click on Adjust Project Baseline.
 Short cut key: Right click to display the All groups menu list. Click on Baseline.
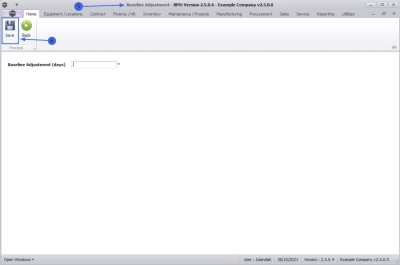
- The Baseline Adjustment screen will be displayed.
- Click on Save to save the baseline adjustment and return to the Project Listing screen.
Close Project
- - A project is ready to be closed when the project has been completed and no further items are outstanding on the project, or the project is no longer required. You will not however be able to close the project if outstanding billable items, loan machines, un-issued stock, etc. still reflect on the project.
- - Remember that once a project has been closed, it cannot be reopened. You can however still view the project information.
- From the Project Listing for Customer [customer code] screen,
- Ensure that the correct Site has been selected.
- The example has Durban selected.
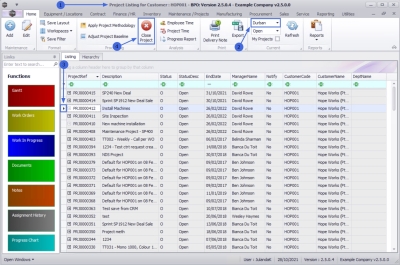
- Click on the row of the Project you wish to close.
- Click on Close Project.
 Short cut key: Right click to display the All groups menu list. Click on Close.
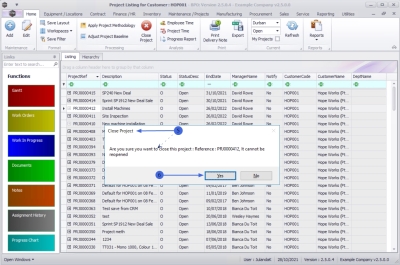
- When you receive the Project Module - Closure message informing you that;
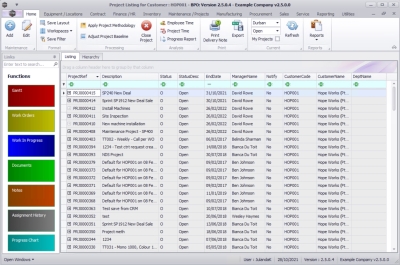
- The Project, Reference: PRJ[project number] has been closed.
- Click on OK.
Employee Time
- From the Project Listing for Customer [customer code] screen,
- Ensure that the correct Site has been selected.
- The example has Durban selected.
- Click on the row of the Project you wish to view an employee's time sheet.
- Click on Employee Time.
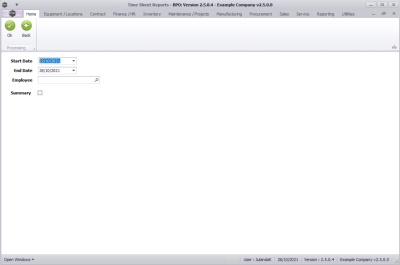
- The Time Sheet Reports screen will be displayed.
For a detailed handling of this topic refer to Projects - Employee Time Sheet
Project Time
This process allows the Project Leader or Manager the facility to generate a Project Time Report that will list time logged against the project for each employee and work order.
- From the Project Listing for Customer [customer code] screen,
- Ensure that the correct Site has been selected.
- The example has Durban selected.
- Click on the row of the Project you wish to view the project time for.
- Click on Project Time.
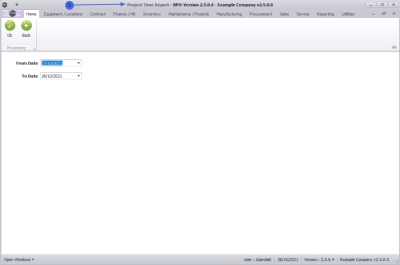
- The Project Time Report screen will be displayed.
 For a detailed handling of this topic refer to Projects - Project Time Report
Progress Report
In order to correctly track your progress via the Project Progress Report, ensure that the Work Order Assign Required Craft details have been configured on each work order within the project.
- From the Project Listing for Customer [customer code] screen,
- Ensure that the correct Site has been selected.
- The example has Durban selected.
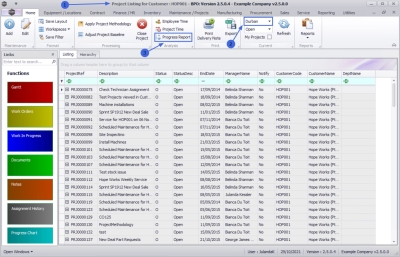
- The Progress Report can include all projects or Projects - My Projects only.
- Click on Progress Report.
Give the system a few minutes to generate and exported the Progress Report to Microsoft Excel.
![]() For a detailed handling of this topic refer to Projects - Progress Report
For a detailed handling of this topic refer to Projects - Progress Report
Print Delivery Note
If you have multiple items issued to the same project, printing the Project Delivery Note will allow you to view all the issues on a single document.
- From the Project Listing for Customer [customer code] screen,
- Ensure that the correct Site has been selected.
- The example has Durban selected.
- Click on the row of the project you wish to print a Net Delivery Report for.
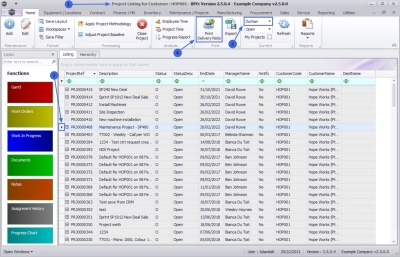
- Click on Print Delivery Note.
The Project Delivery Note will display in the Report Preview screen.
![]() For a detailed handling of this topic refer to Projects - Print Delivery Note
For a detailed handling of this topic refer to Projects - Print Delivery Note
My Projects
- From the Project Listing for Customer [customer code] screen,
- Ensure that the correct Site has been selected.
- The example has Durban selected.
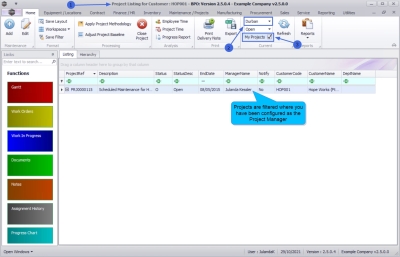
- Click on the My Projects check box.
- The projects will be filtered by the projects that have you assigned as the Project Manager (the person currently logged onto the system).
Functions Tiles
![]() Move your mouse over the tiles in the Functions panel to display up and down arrows. Click on these arrows, or use the track ball / wheel on your mouse to scroll further down the list to reveal the remaining tiles.
Move your mouse over the tiles in the Functions panel to display up and down arrows. Click on these arrows, or use the track ball / wheel on your mouse to scroll further down the list to reveal the remaining tiles.

|
The Gantt tile directs you to the Project Gantt Chart where the amount of work that has been done in certain periods of time in relation to what has been planned for the period, is displayed on a Gantt chart. |

|
|

|
|

|
From the Documents tile you can Project - Documents to the selected customer Project. |

|
From the Notes tile you can view a list of Project Notes and / or Comments linked to the Project. Refer to Projects - Notes |

|
From the Assignment History tile you can view to see the Projects - Assignment History |

|
The Progress Chart tile will direct you to the Progress Chart for Project screen where a chart overview of the project status will be displayed. You can view the start and end times and percentage of the work completed. You cannot edit the information in this screen, click on Back to return to the Project Listing screen. Refer to Projects - Progress Report |

|
From the Baseline tile you can view a list of Projects - Baseline adjustments (new project start and end dates) that have been applied to a Project. You can also Add an adjustment from this screen, if required. |

|
From the Contacts tile you can view a list of the Project Contacts for the Project. Refer to Projects - Contacts |

|
From the Parts tile you can view a list of Projects - Parts that have been requested for a Project. |

|
From the Time Bookings tile you can view a list of the time that has been booked against the Project for the Technician(s) working on the Project. Projects - Time Bookings |

|
From the Services tile you can view a list of all the internal Services that have been linked to the Project. Refer to Introduction to Projects |

|
From the Third Party Services tile you can view a list of the Projects - Third Party Services for the Project. |

|
From the Travel tile you can view a list of the Travel time and Technician information for the Project. Refer to Log Project Travel |

|
From the Expenses tile you can view a list of all the Expenses that have been logged against the Project. Refer to Projects - Expenses |

|
From the Finance tile you can view the Finance information for the Project originated from the Sales Order (New Deal Project). Refer to New Deal Budget vs Actual |

|
From the For Contract tile you can view a list of the Items awaiting a Contract for the Project. Refer to Projects - For Contract |

|
From the Time Review tile You can view how time has been allocated against each Work Order that has been linked to the project. Refer to Projects - Time Review |
Processing Tiles

|
From the Quotes tile you can view a list of all the Projects - Quotes linked to the project. |

|
From the Orders tile you can view a list of all the Projects - Sales Orders that are linked to the project. |

|
From the Invoices tile you can view a list of all the Invoices that have been added to the project. Refer to Projects - Invoices |

|
From the Credit Notes tile you can view a list of all the Credit Notes linked to the project. Refer to Projects - Raise Credit Note |
MNU.061.023

