Human Resources
Employees - Add an Employee
Each employee within the company is loaded onto the system as an Employee, with his/her details.
These details would relate to what the company needs to know about its employees, but can include the following: Personal Details, e.g. Phone Number and Email Address, Banking Details, Licenses and Training Details, Craft Details (skill or job title).
By loading your employees correctly, you will be able to keep track of employee shifts and manage your human resources more efficiently.
| Ribbon Access: Finance and HR > Employees |

- The Employees listing screen will be displayed.
- Click on Add.
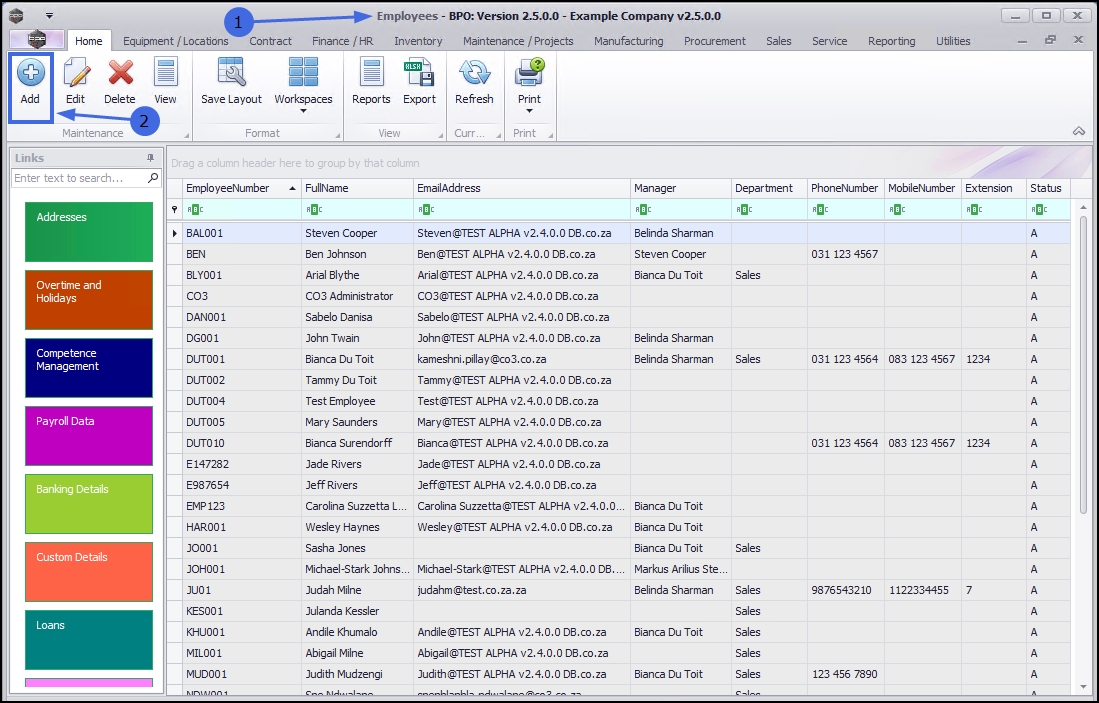
- The Add new Employee screen will open.
Add Employee Details
- Type the new employee details in the self-explanatory fields.
- Note: Ensure that all the mandatory [*] fields are filled in or the employee details will not save.
Explanations are provided for the following fields:
- Employee Number: This is the unique code given by the company to keep track of this employee. The standard convention is to use the first 3 letters of the employee's surname, followed by 3 digits. e.g. ROW001 for David Rowe. The digits will increase as employees with the same 3 letters in their surname are added to the company.
- The following fields are very important:
- Click on the search button and select the person who manages this employee. This is important for BPO CRM - as the manager will be able to see his teams sales progress.
Department
- Click on the search button and select the Department to which this employee is linked. It is important to select the correct department, especially where the department is used for posting financial transactions.
User ID
- Click on the search button and select the User ID. This is utilised when the employee is also going to be a user and will need to log in to BPO and use the system.
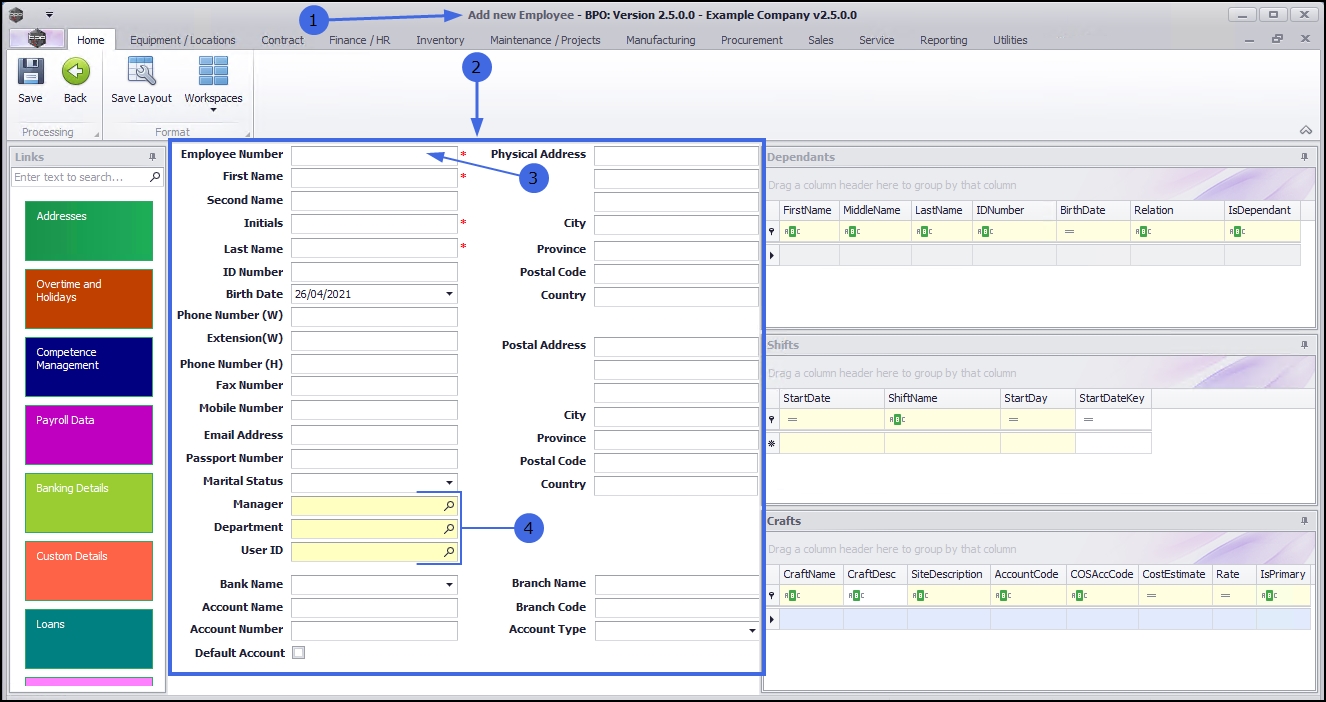
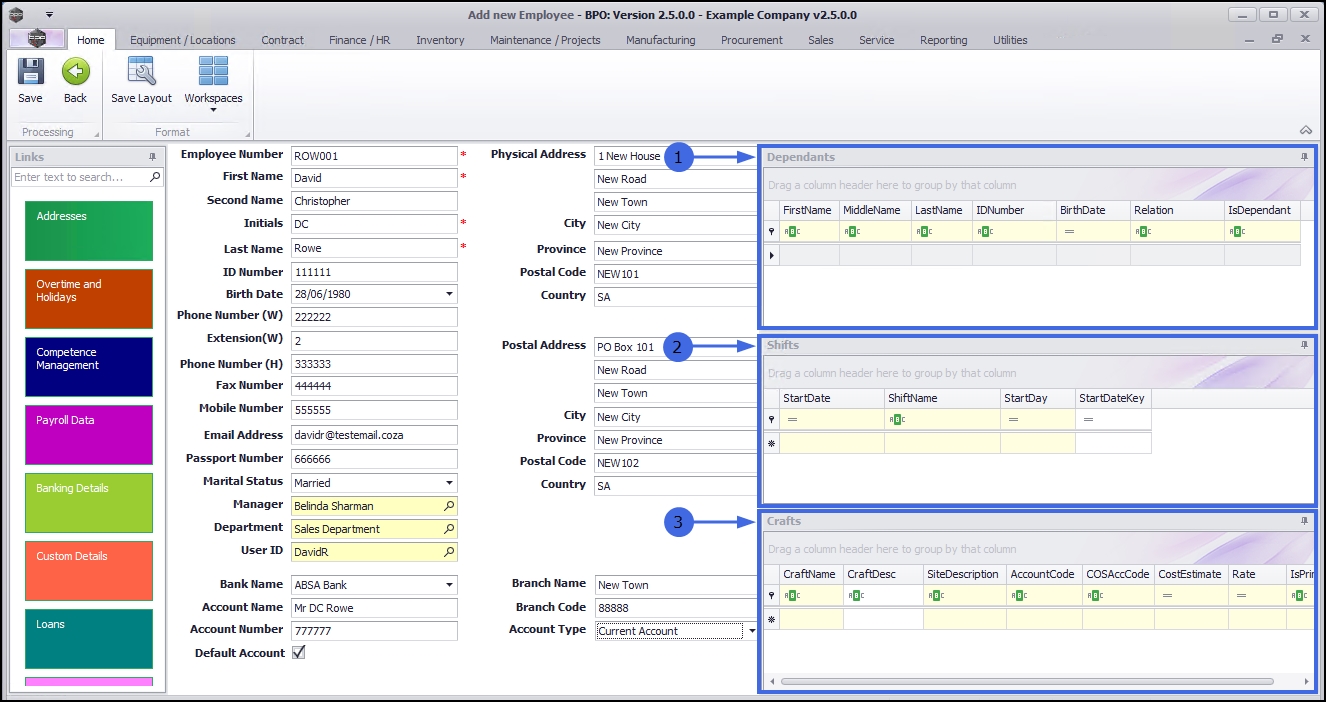
When you have added the employee's personal and banking details, move to the right of the screen to the additional information docking panels.
Click on the links to direct you to instructions on how to add information to these panels.
Add a Dependant
- If this employee has any dependants (any persons, child or adult, who rely on the employee for financial support) then the dependant details can be added, edited and deleted here.
Add a Shift
- If this employee is to be linked to a shifts (or work schedule) then the relevant details can be added, edited and deleted here.
Add a Craft
- Every employee must be linked to at least one craft to be able to save the new employee details. More than one craft can be linked. You can add, edit and delete crafts here.
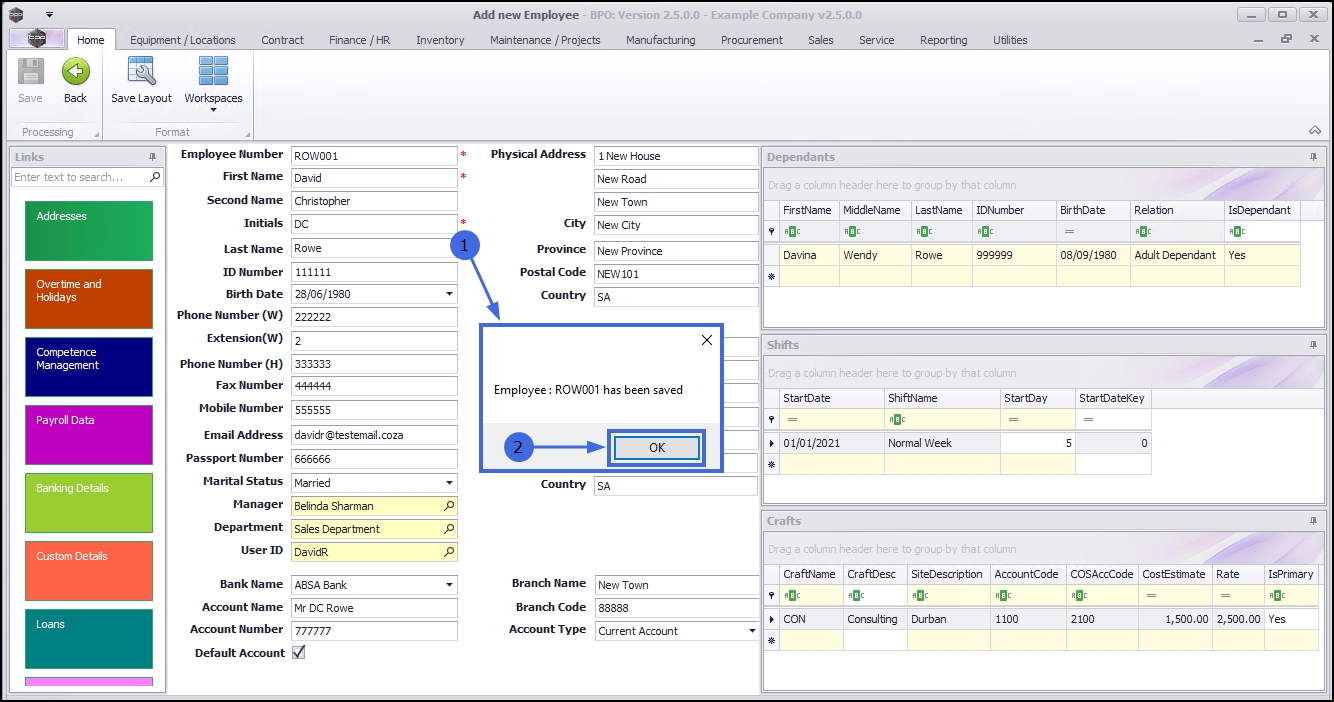
Save New Employee
- When you have finished adding the new employee details,
- Click on Save.
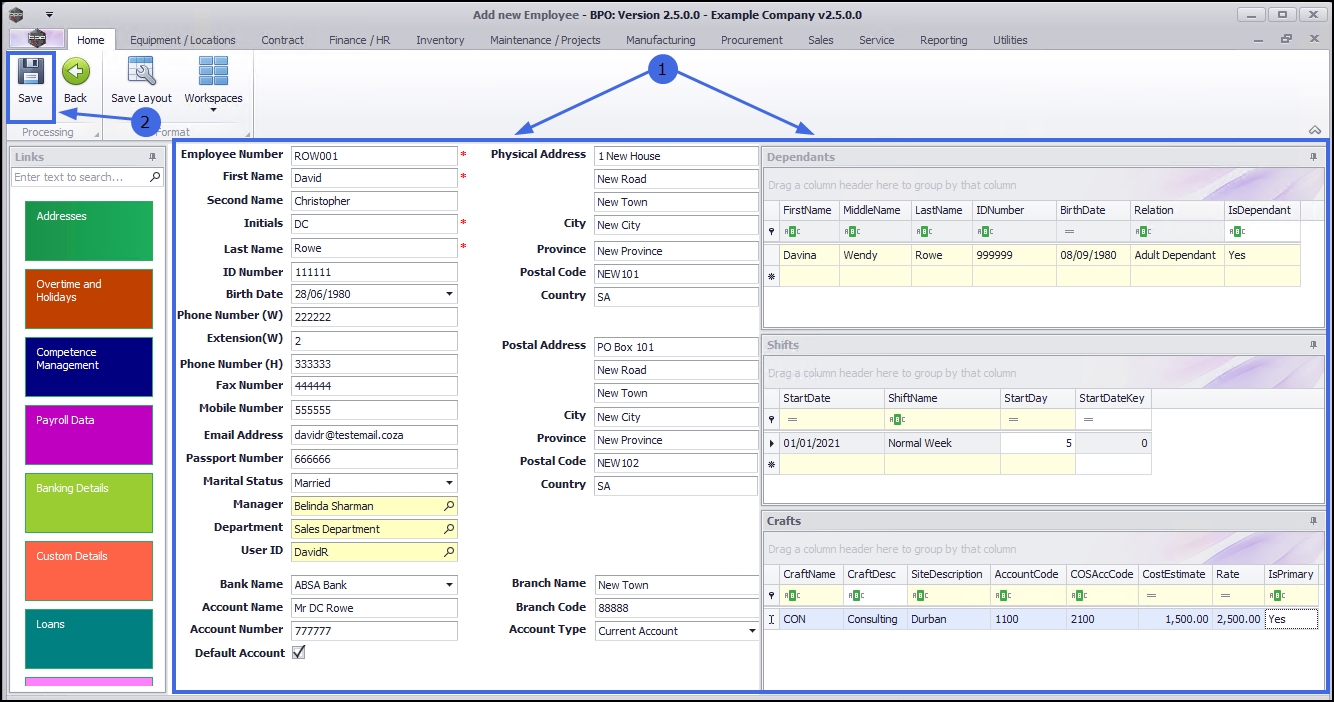
- A message box will pop up advising the following:
- Employee: [] has been saved.
- Click on Ok.
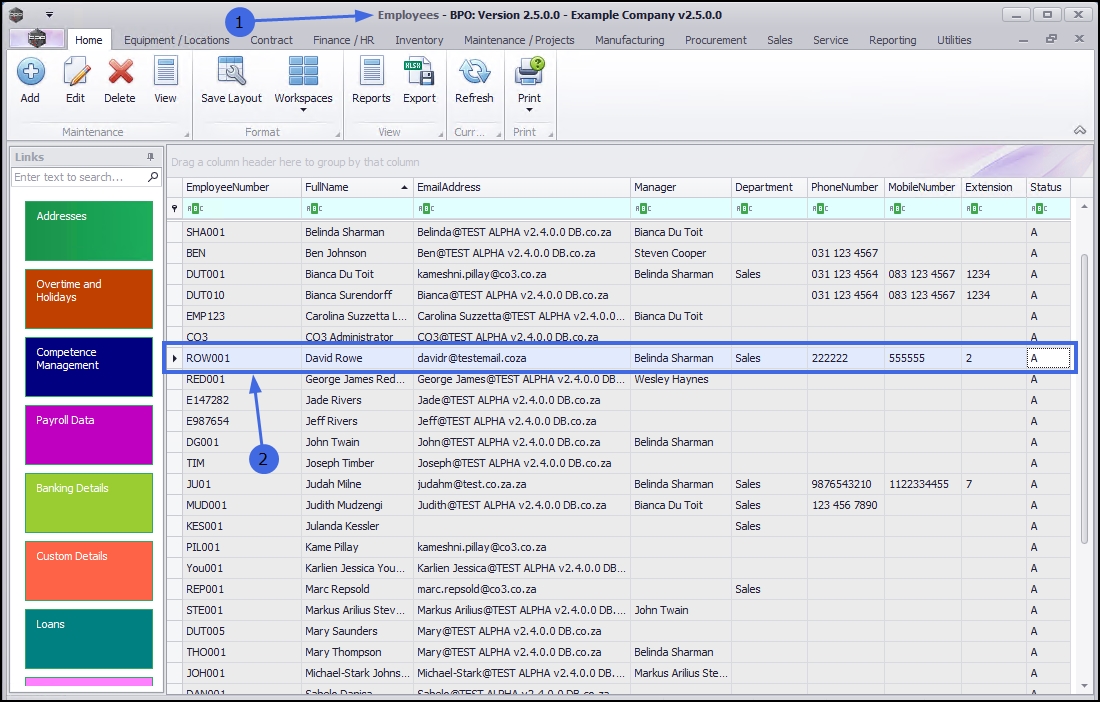
View New Employee
- You will return to the Employees listing screen.
- The new employee can now be viewed in the data grid.
MNU.021.001