We are currently updating our site; thank you for your patience.
CRM Basics
Activities
In CRM, an activity is any type of interaction that involves your customer:
- A Call
- An Email
- A Meeting
- An On-Site Inspection
Client specific activities can be accessed from Customer Homepage.
A full list of all customers activities can be accessed from the Homepage as set out below.
| Access: Webpage > http://[servername]:[portno]/BPOCRM/User.aspx |
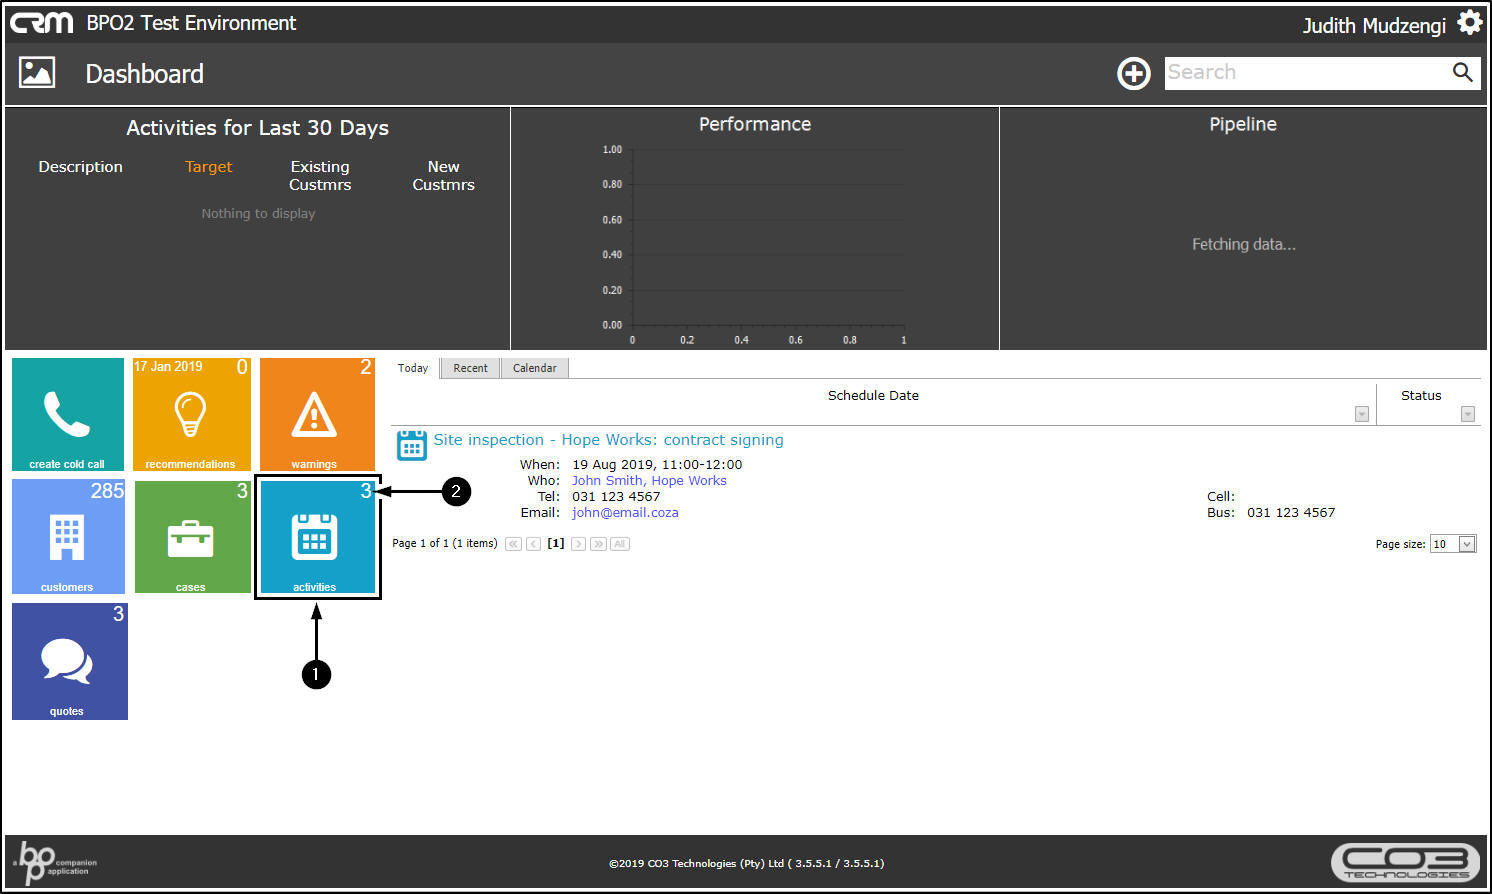
Customers Activities from the Homepage
- Click on the Activities tile in the Homepage.
- The number in the top right of this tile shows you the amount of open activities.
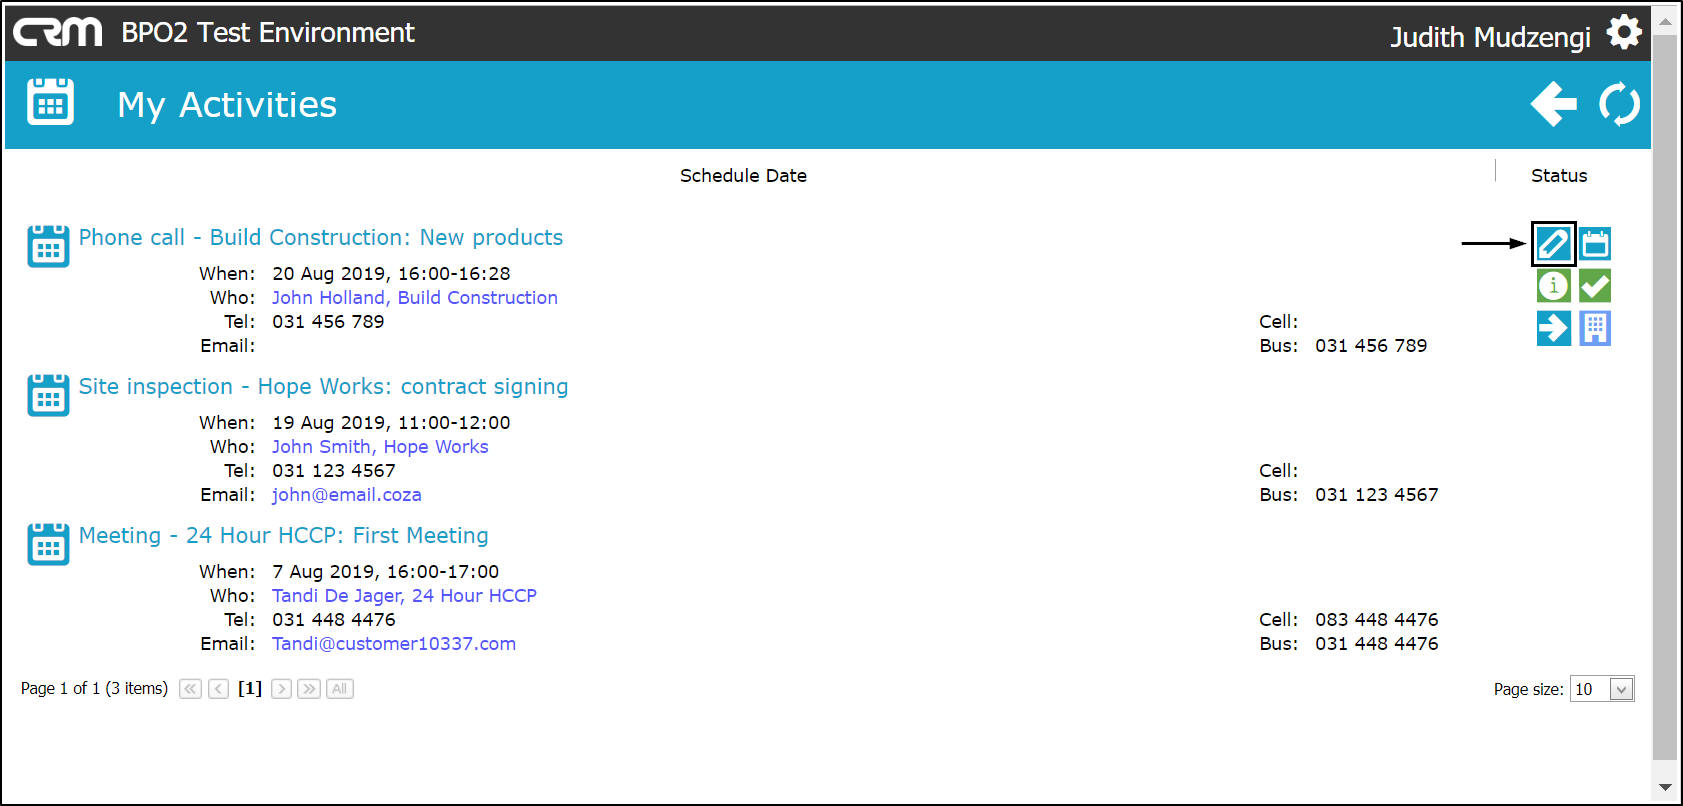
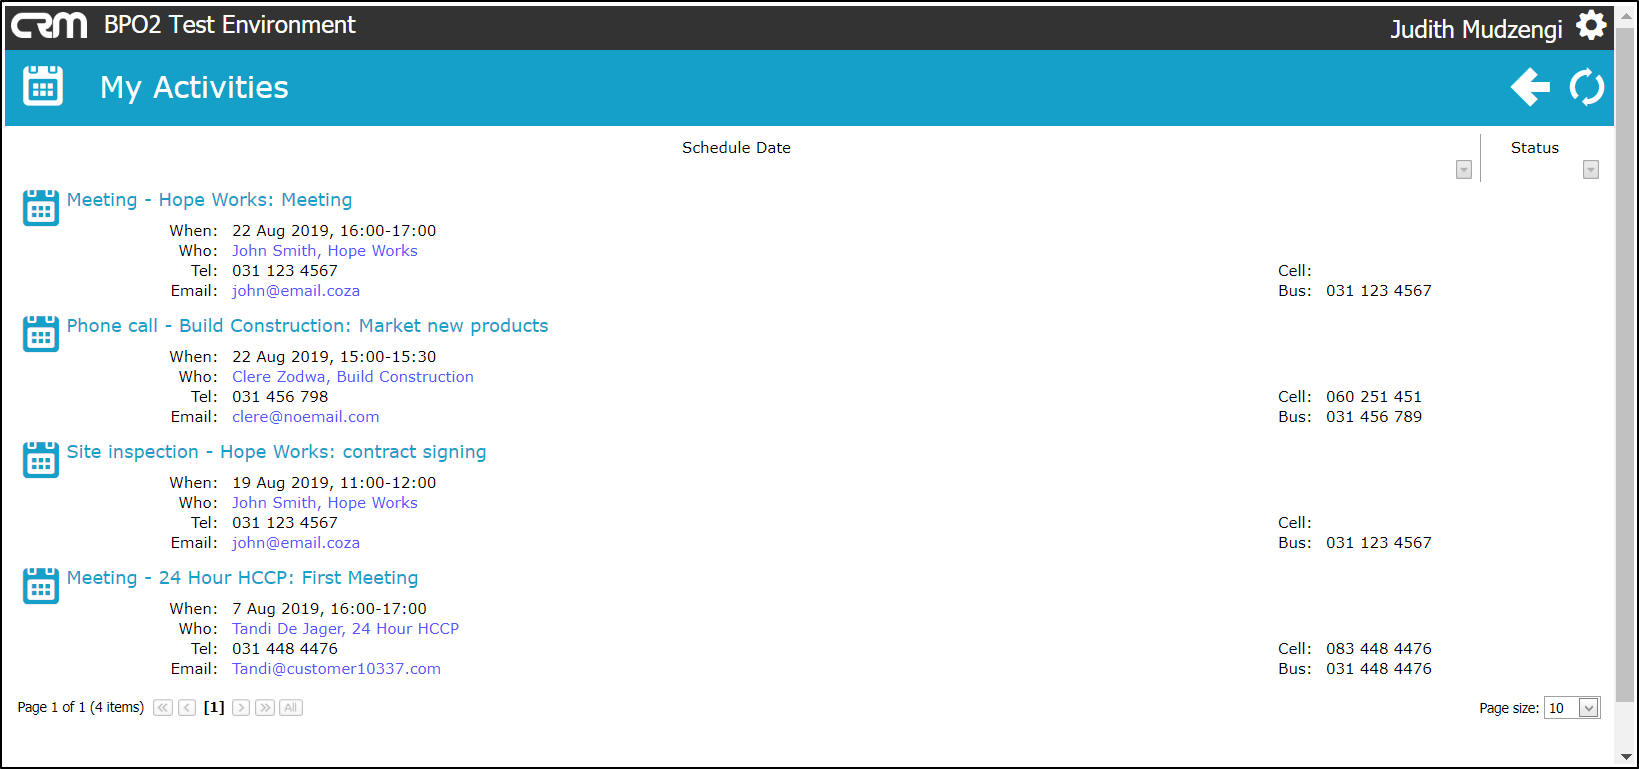
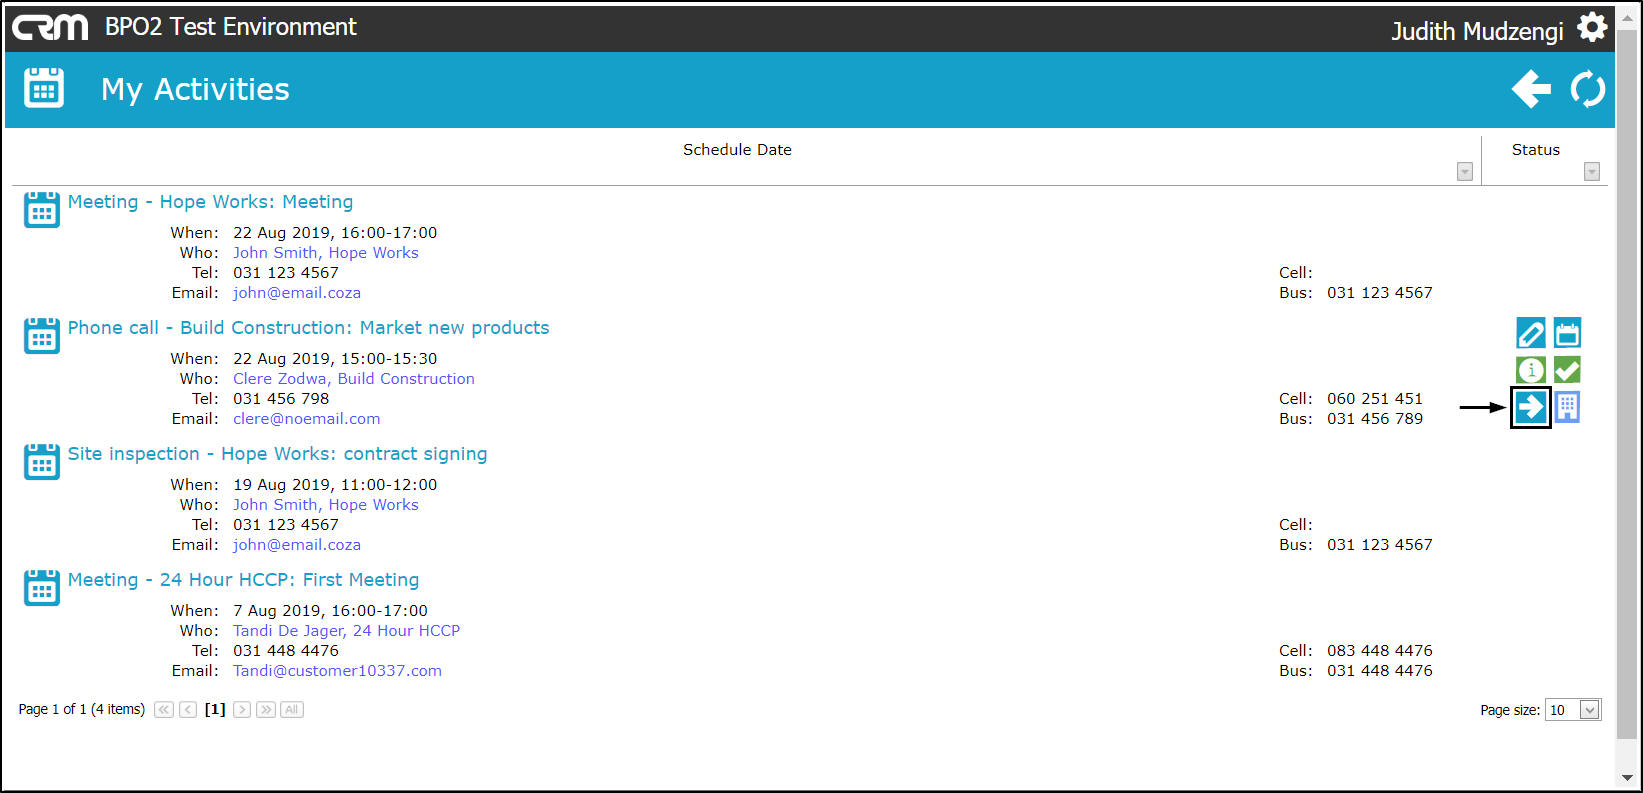
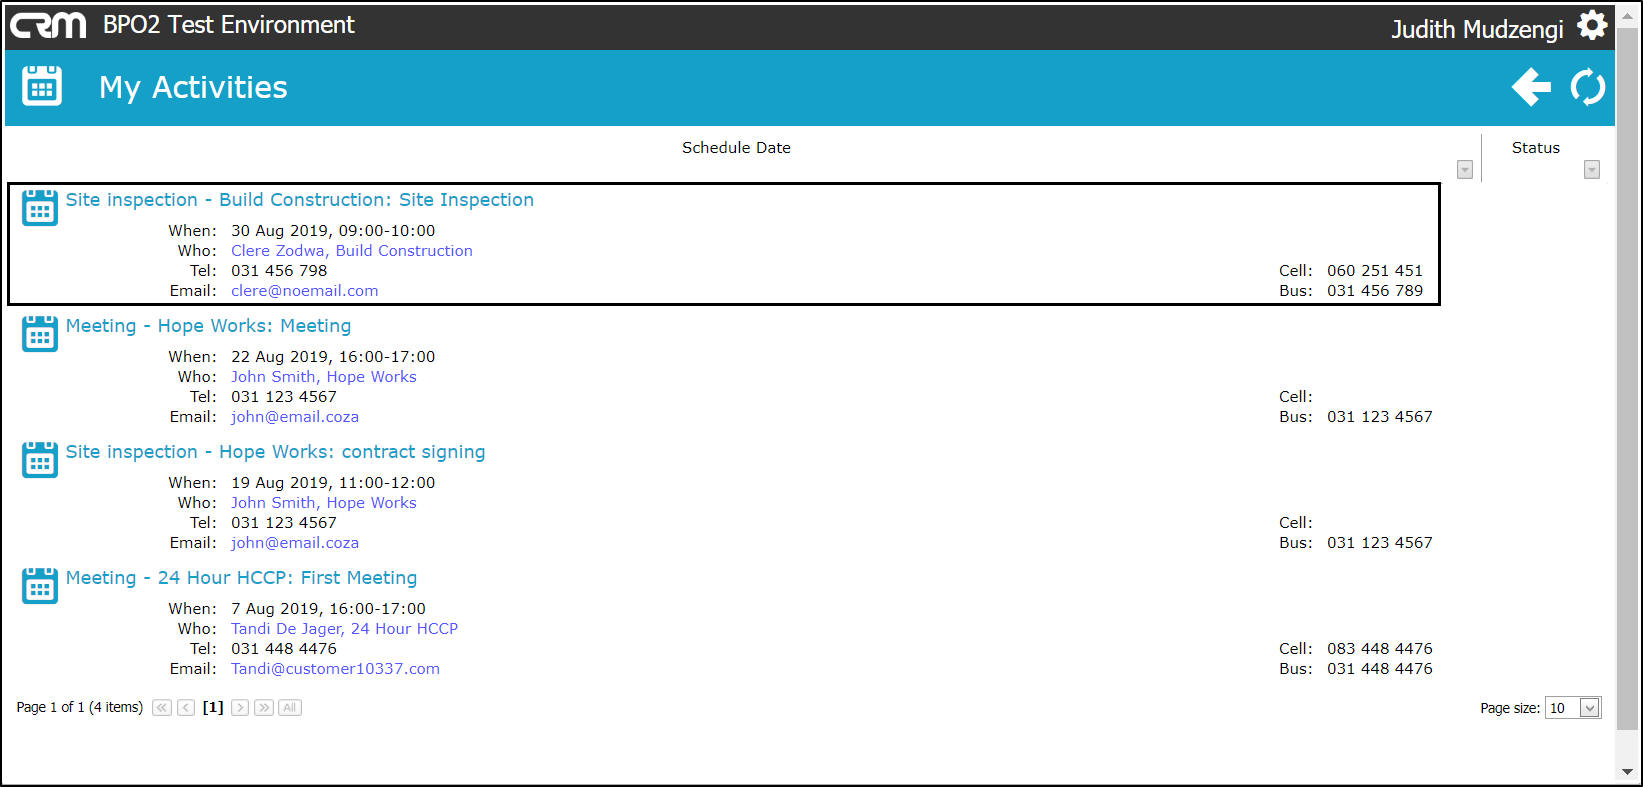
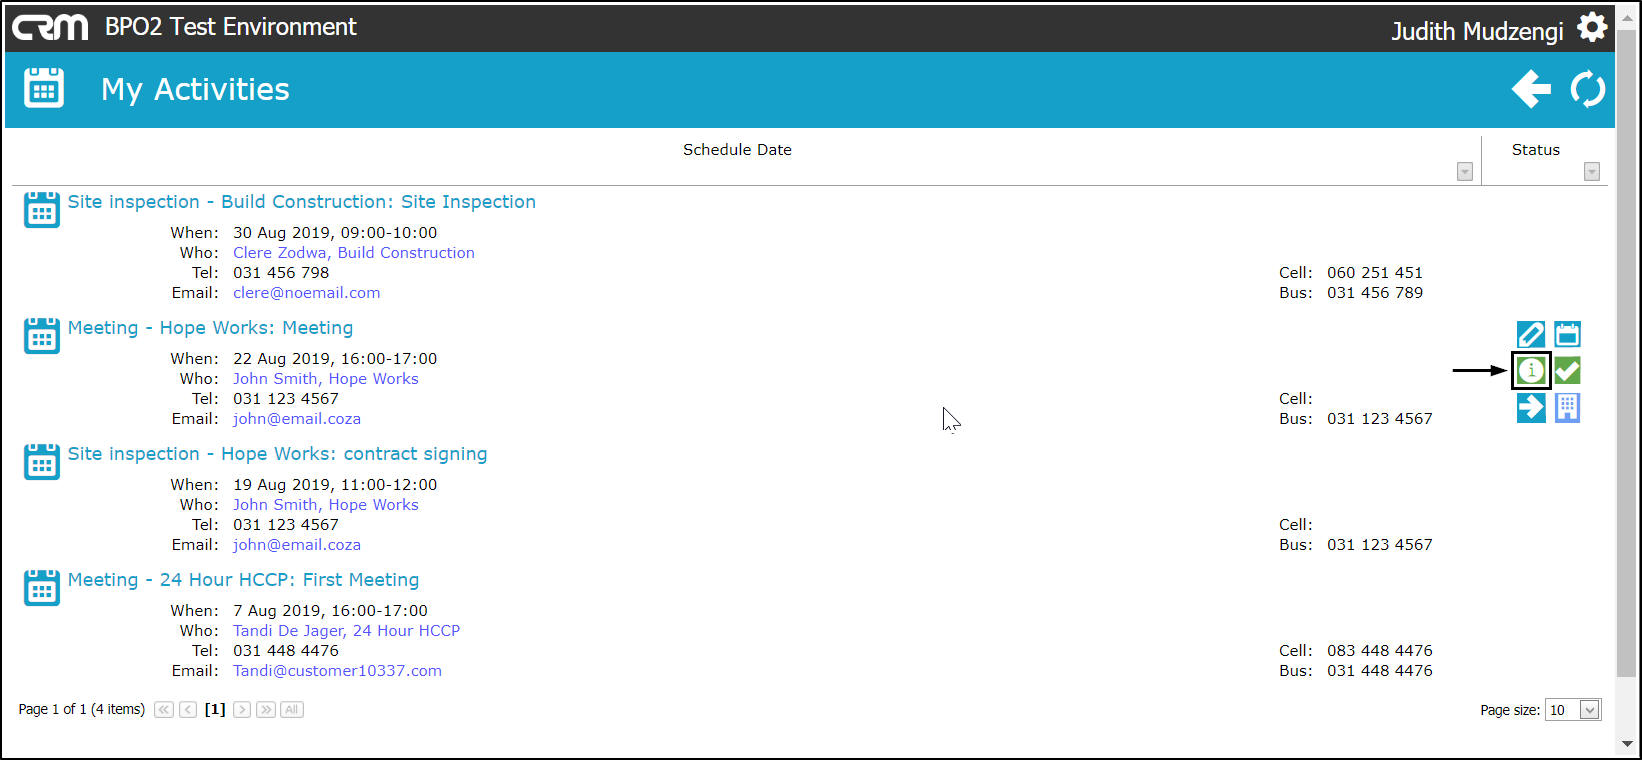
My Activities Page
- My Activities page will be open.
- A list of activities will be displayed (where you have open activities).

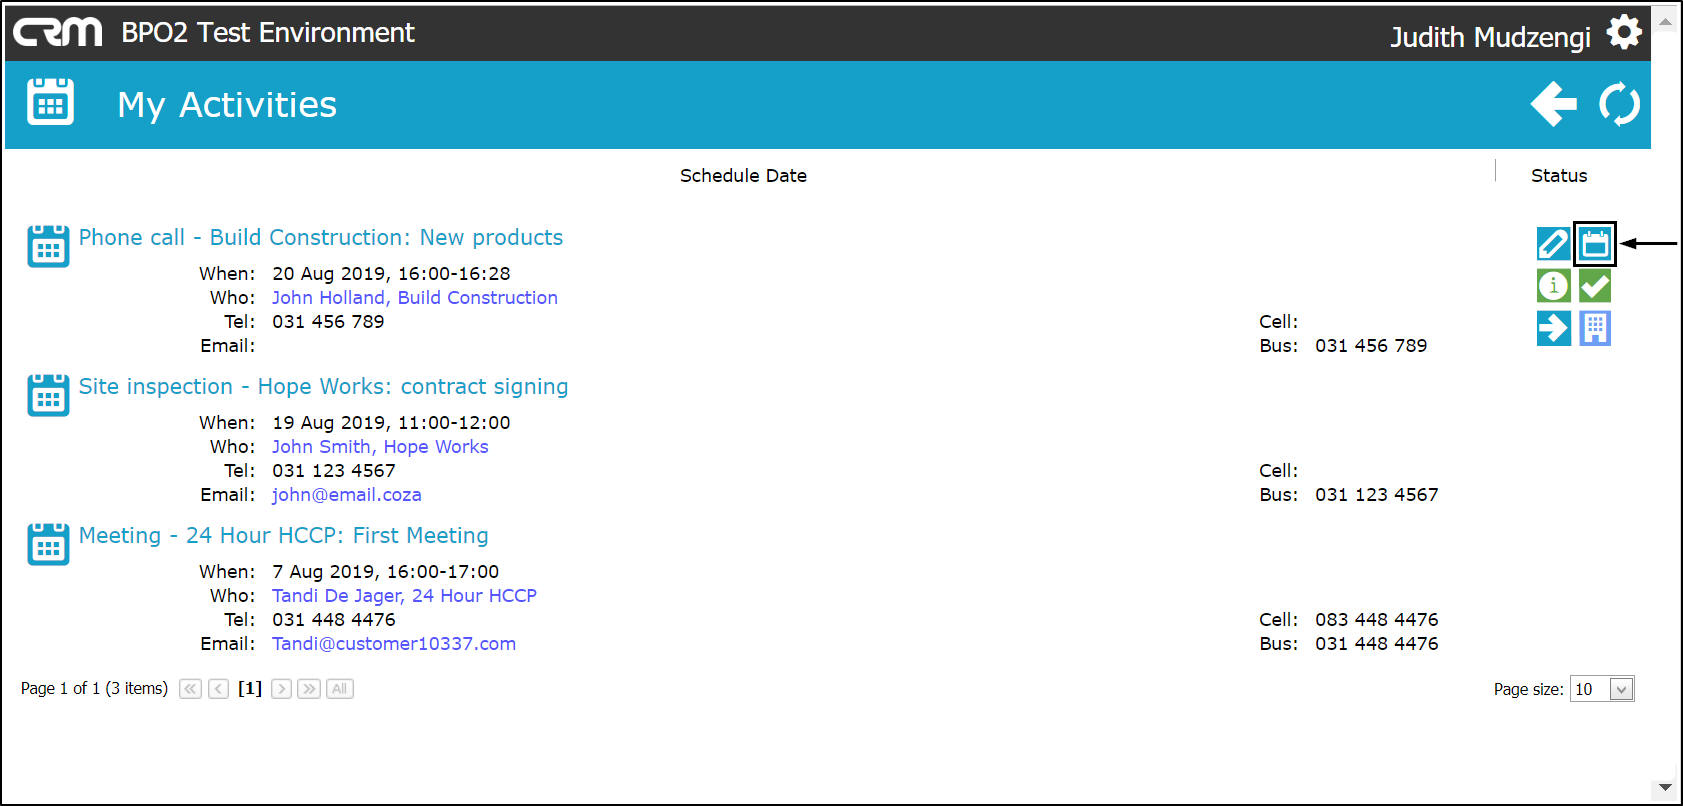
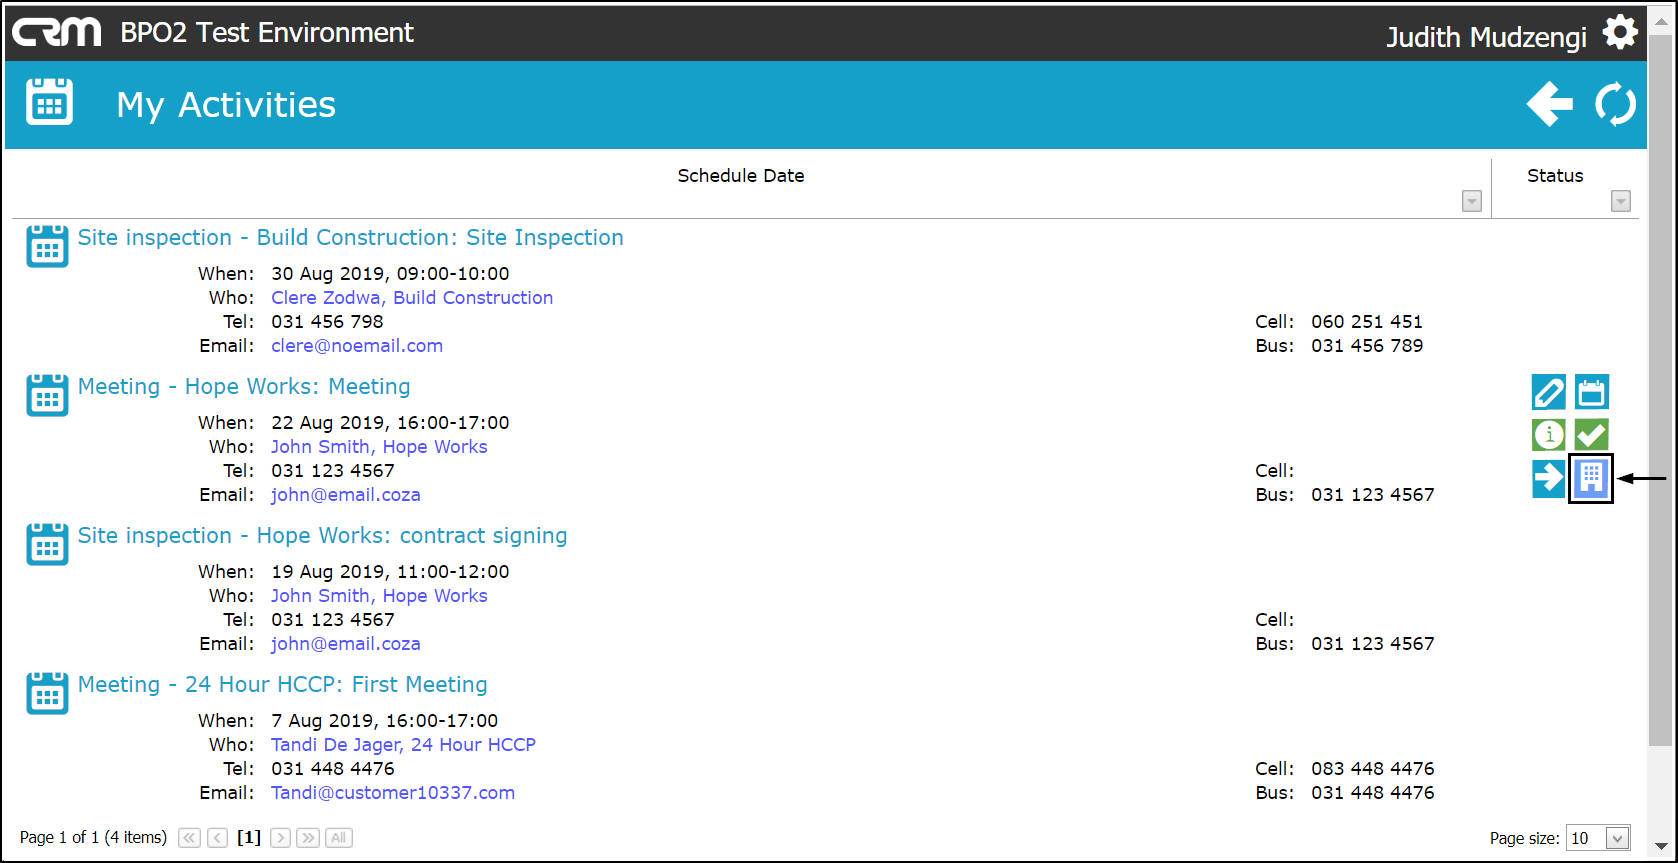
- Action buttons are available by hovering over an Activity , and the options are:
- Reschedule this Activity
- View / Edit Activity
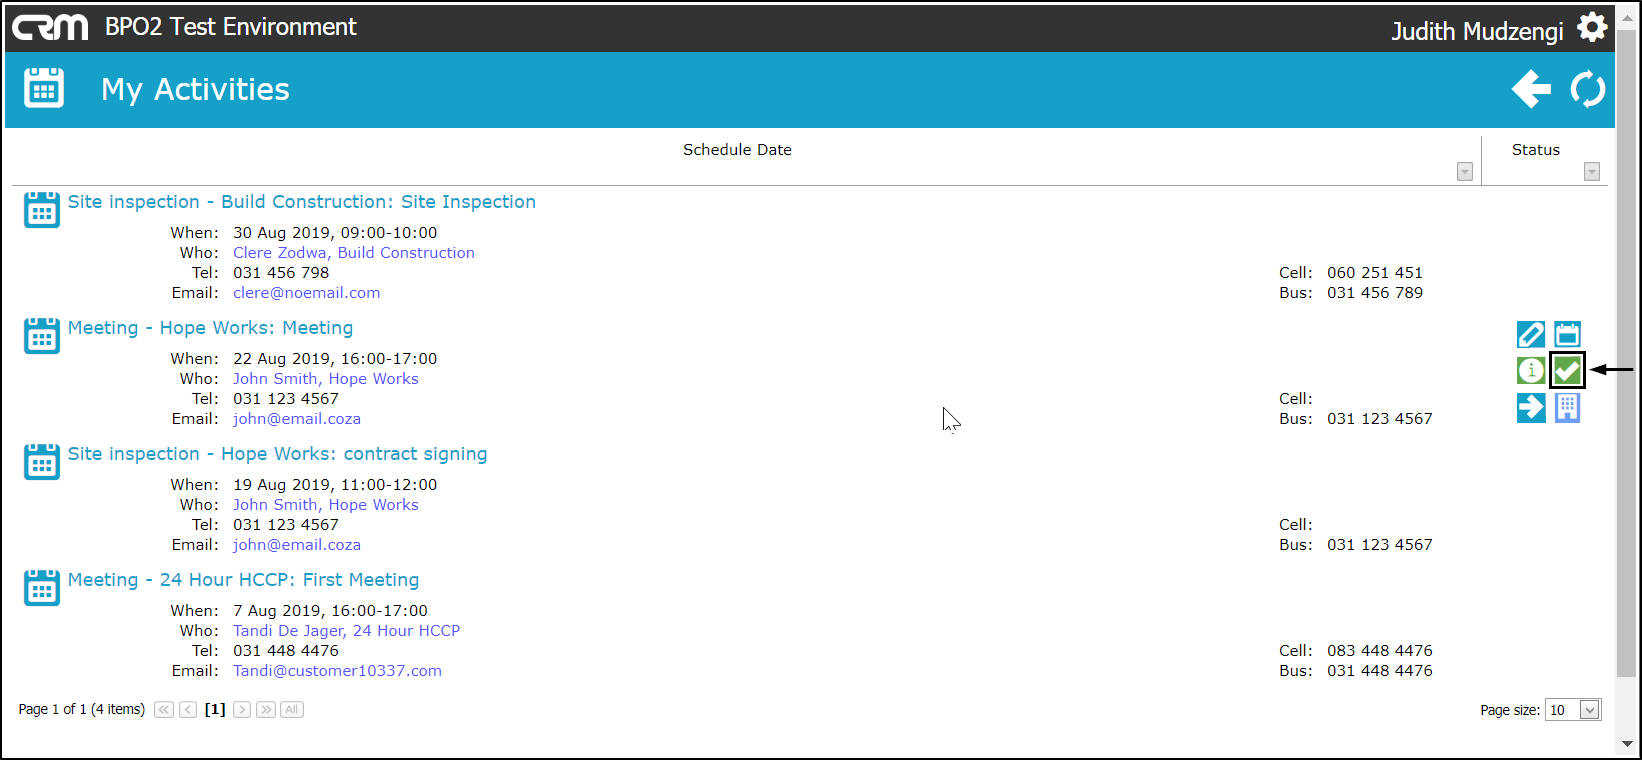
- Close this Case
- View Case Info and History
- View Customer
- Next Action (close current activity and create new activity)
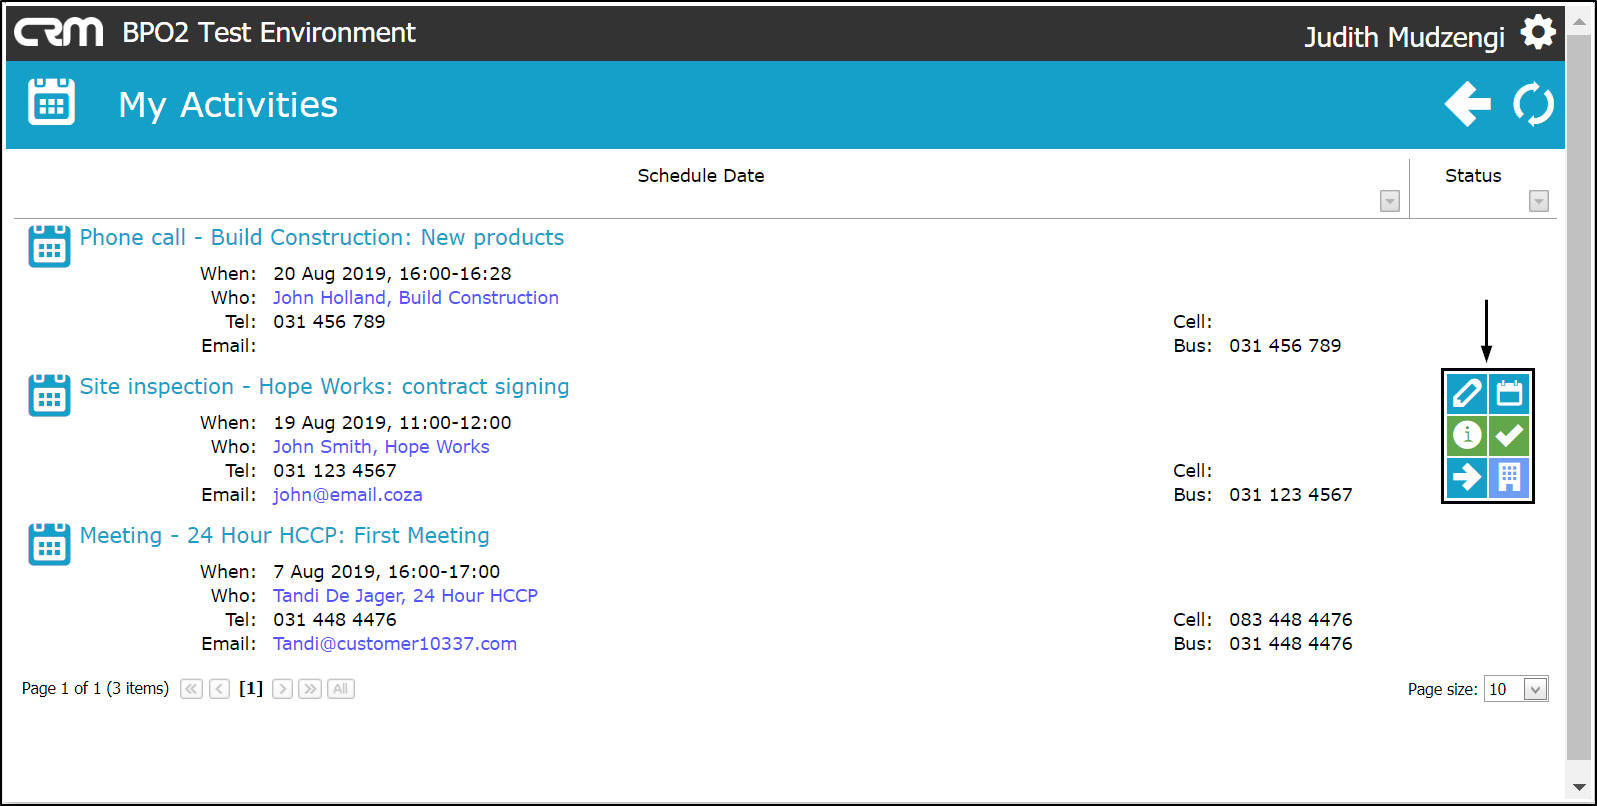
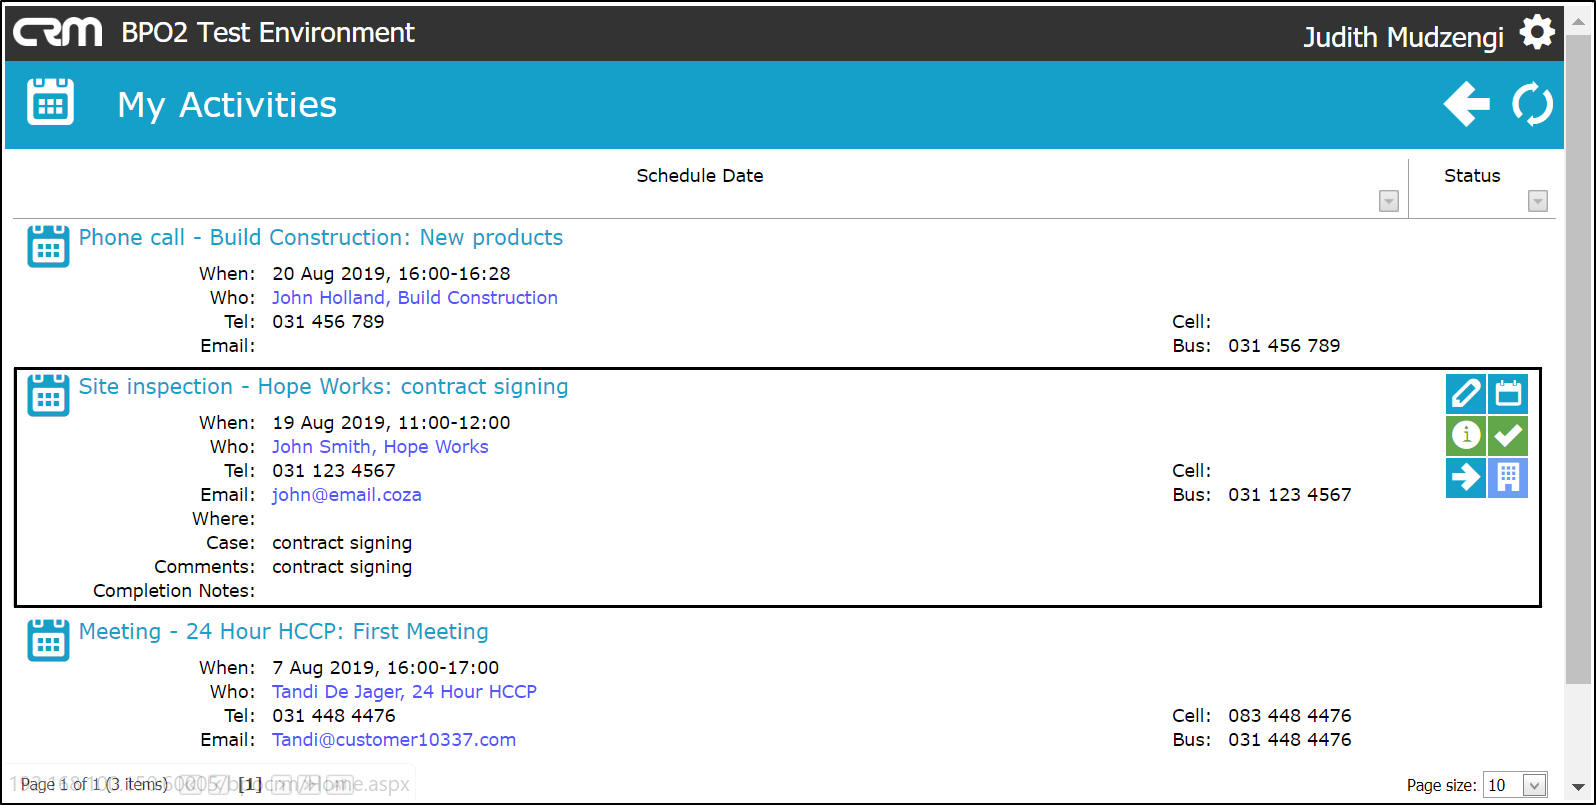
- Click on an Activity to access a quick view summary of the activity information.
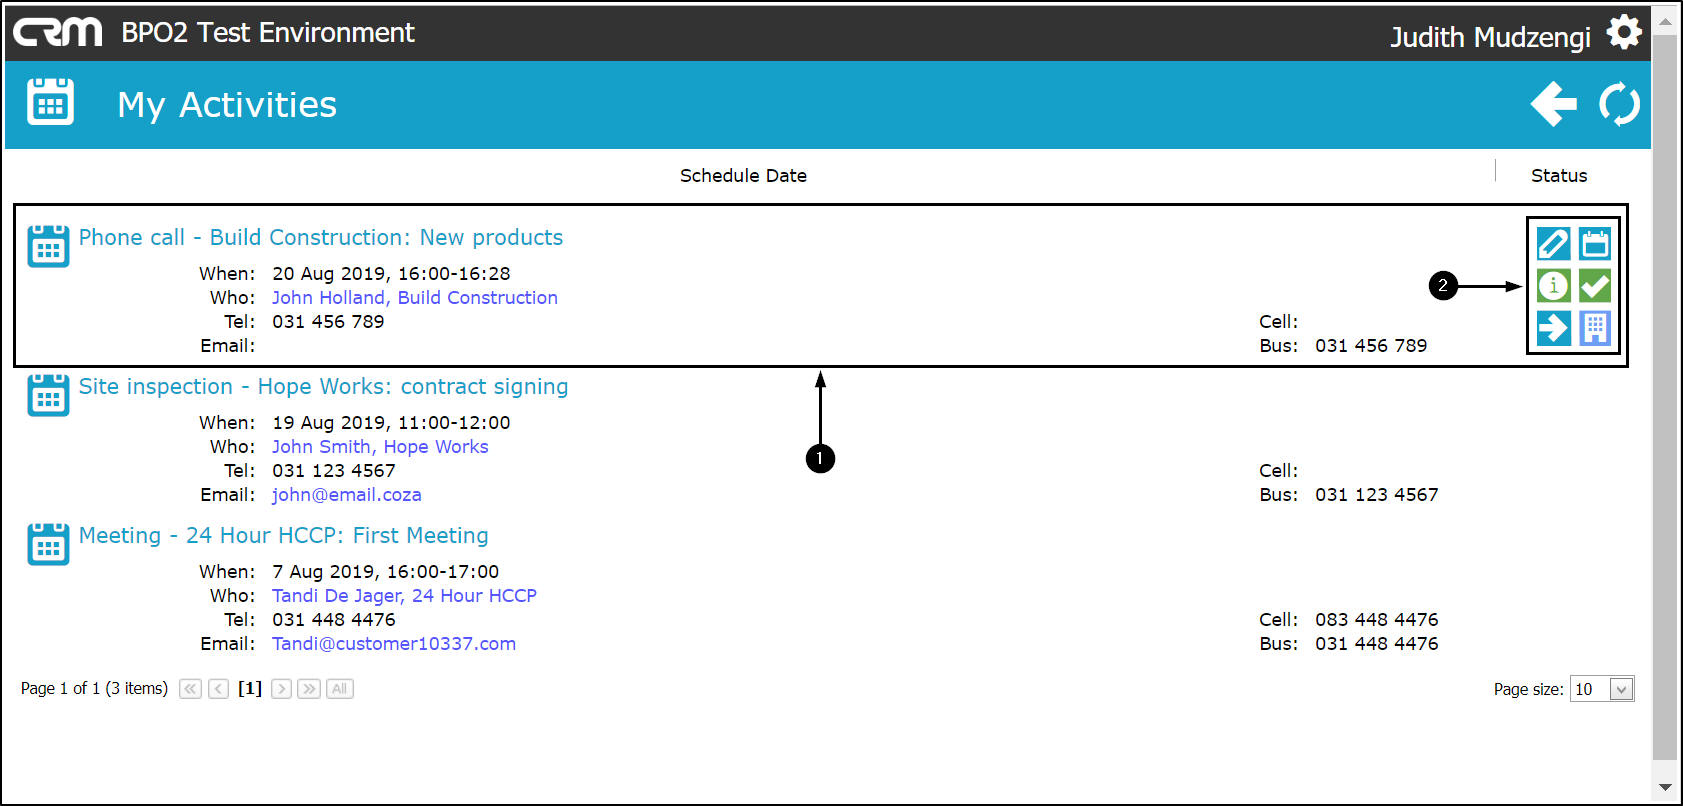
Action Buttons
- Hover over an activity.
- Action buttons will be displayed.
View / Edit Activity
- Click on the View / Edit this Activity icon.
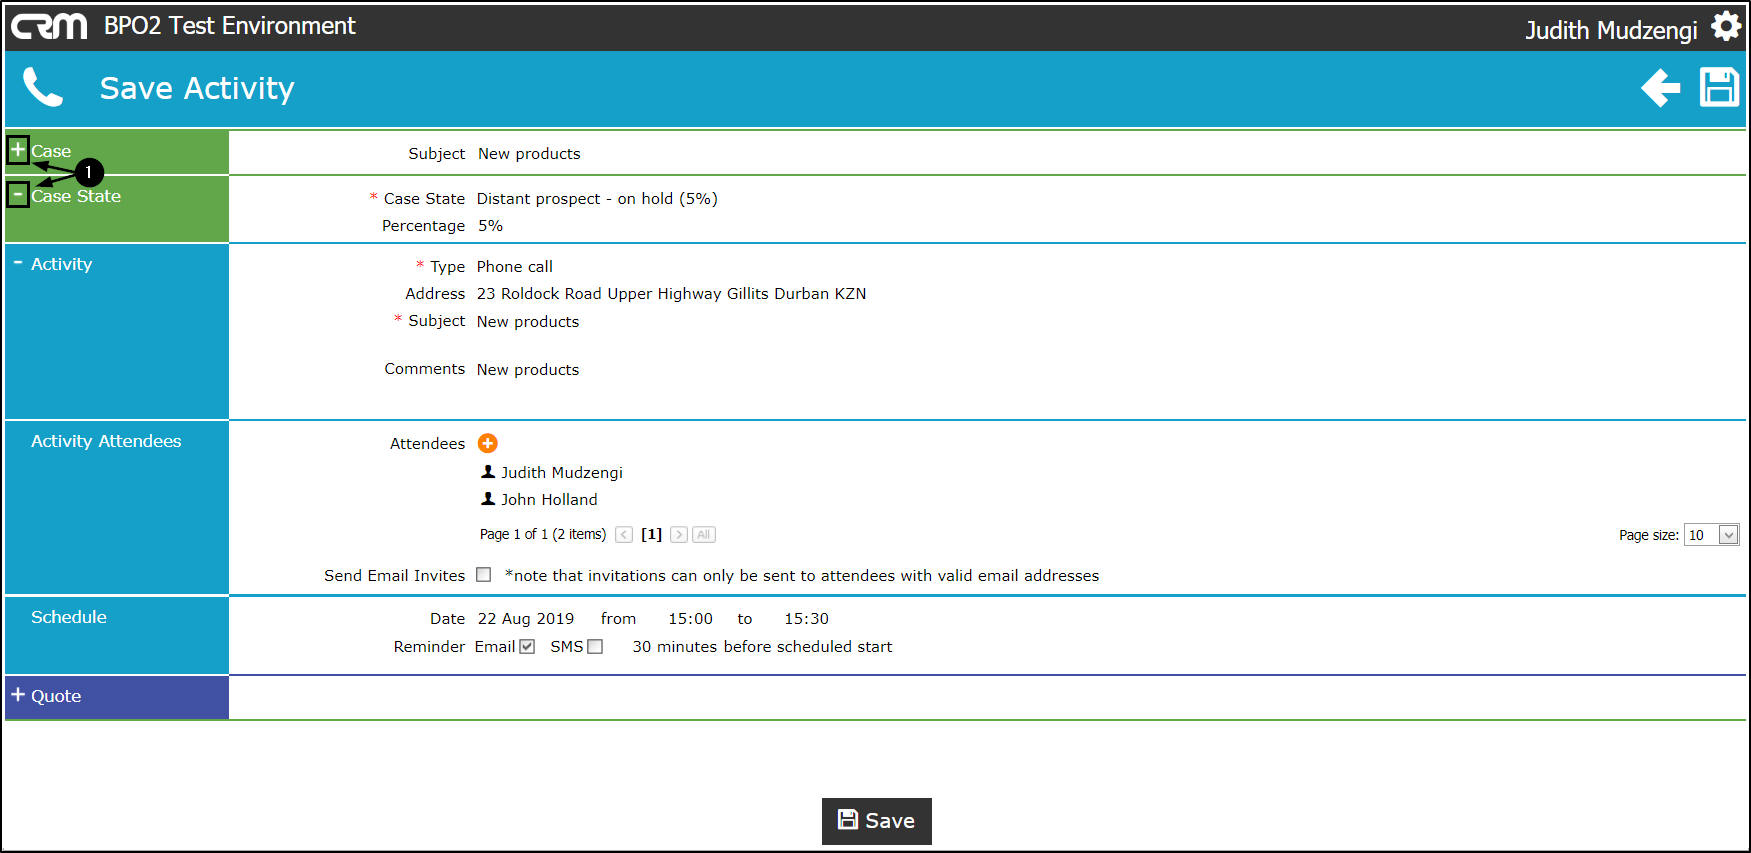
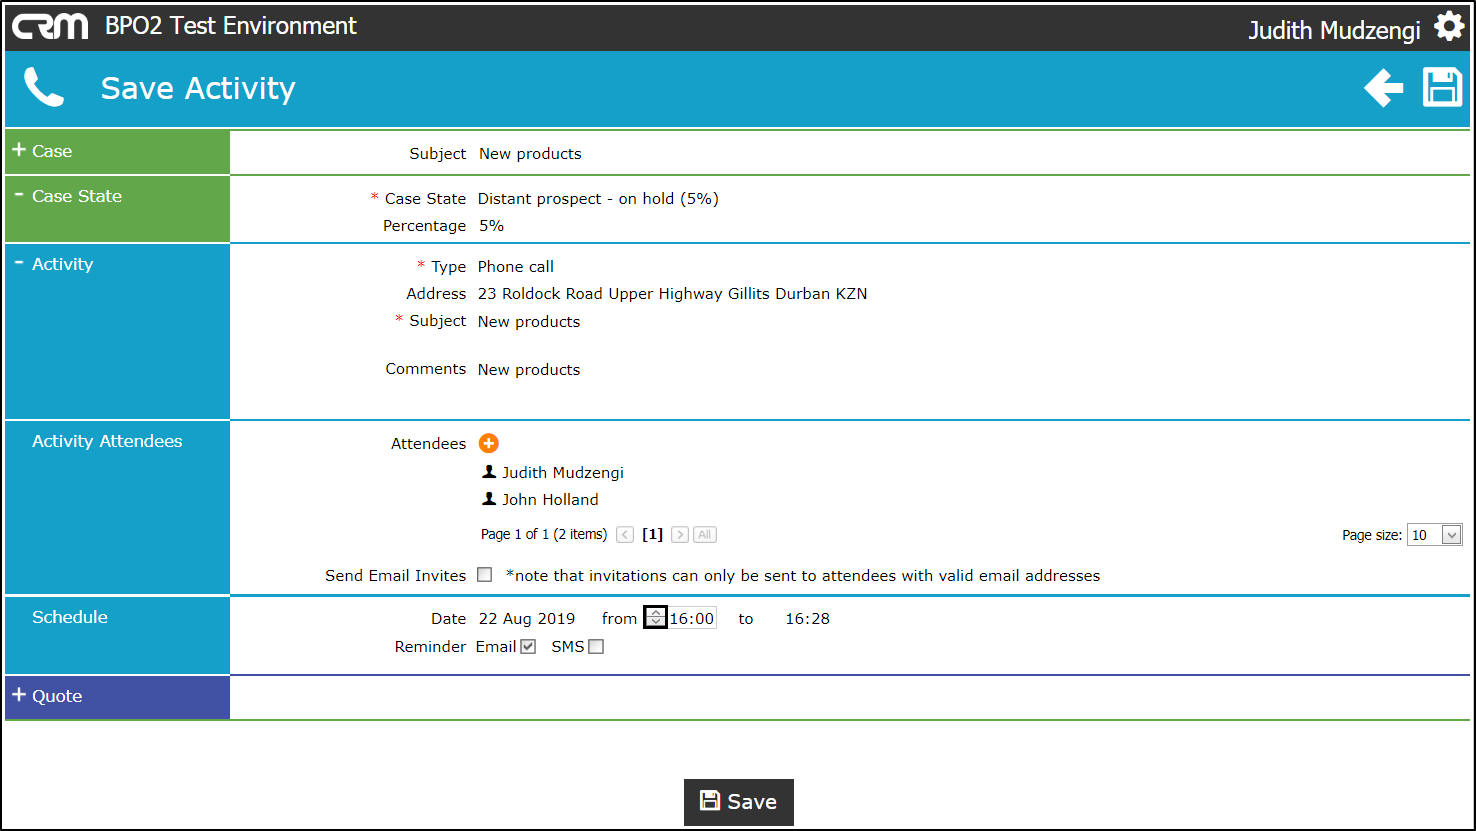
Save Activity
- The Save Activity screen will be displayed.
- Click on the ' + ' sign to view more details or the - ' sign to view less details.
-
Case Details
- Customer : The customer will auto populate. This field cannot be edited.
- Contact : The contact will auto populate. Click in this field to display a list of all the contacts linked to the selected customer. Select the relevant contact if applicable.
- Salesman : The salesman will auto populate. This field cannot be edited.
- Subject : Delete and type in the relevant subject if applicable.
- Information : Delete and type in the relevant information if applicable.
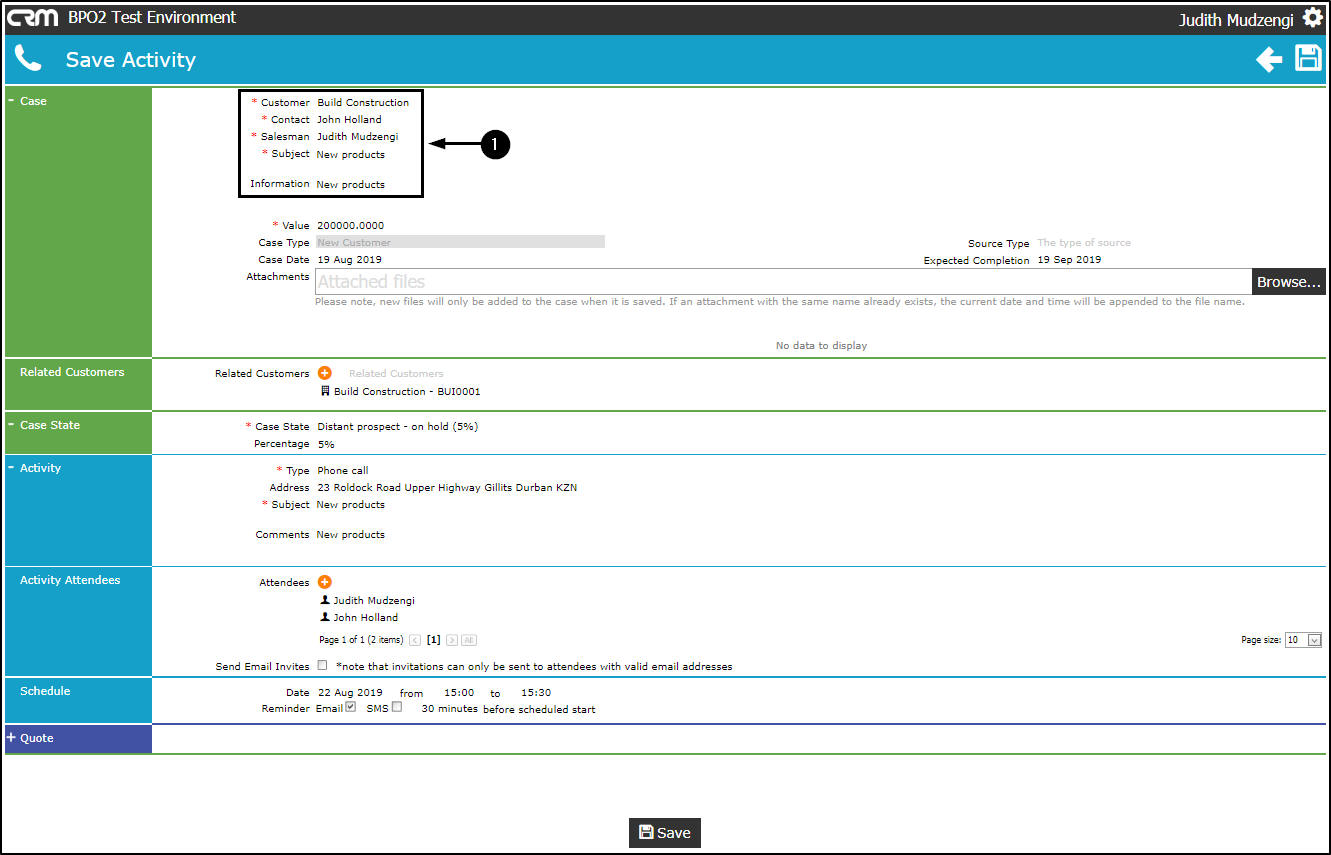
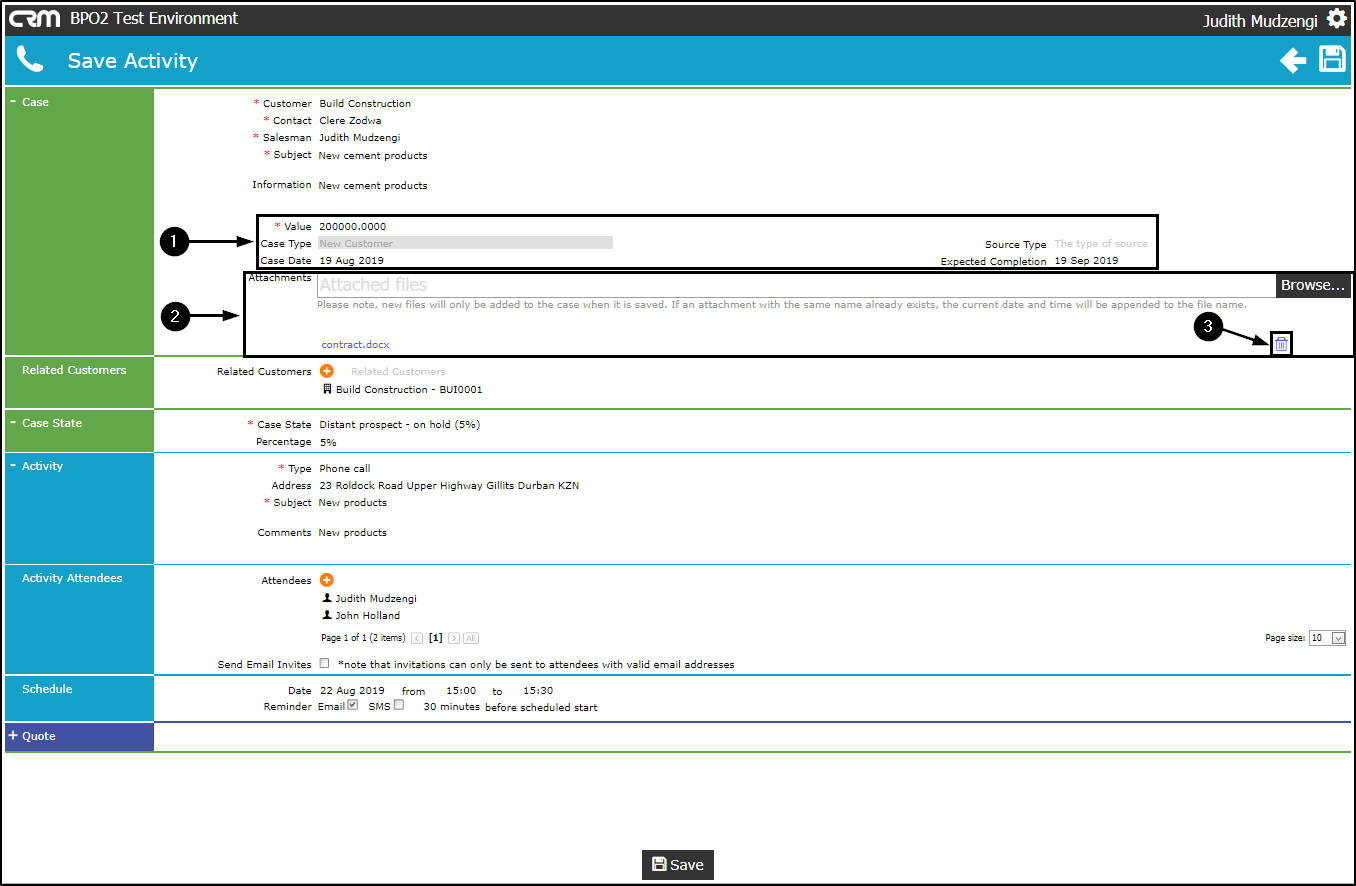
- Case Details Continue
- Value : Type in or edit the estimated value if required.
- Case Type : The case type will auto populate. This field cannot be edited.
- Case Date : Click on the drop-down arrow and select the required date from the calender if applicable.
- Source Type : Click in this field to display a list of all source types and select the required source type if applicable.
- Expected Completion : Click on the drop-down arrow and select the required date if applicable.
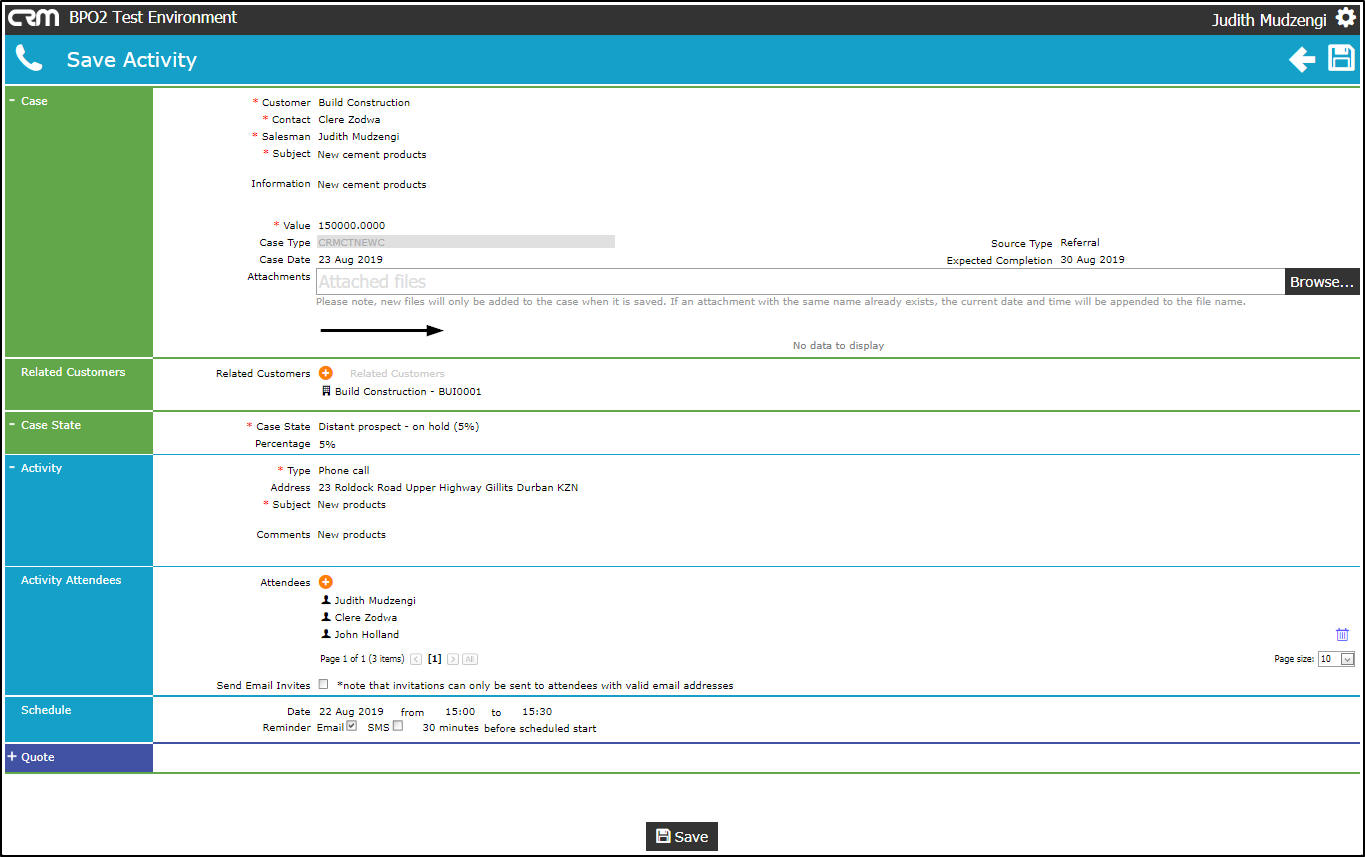
- Attachments : You can add (hyperlink needed 000.014) an attachment if applicable.0
- Attachments : You can also delete an attachment by clicking on the Delete icon if applicable.
- A message box will pop up asking you;
- Are you sure you want to remove the attachment from the case? You cannot undo this action.
- Click on Ok .
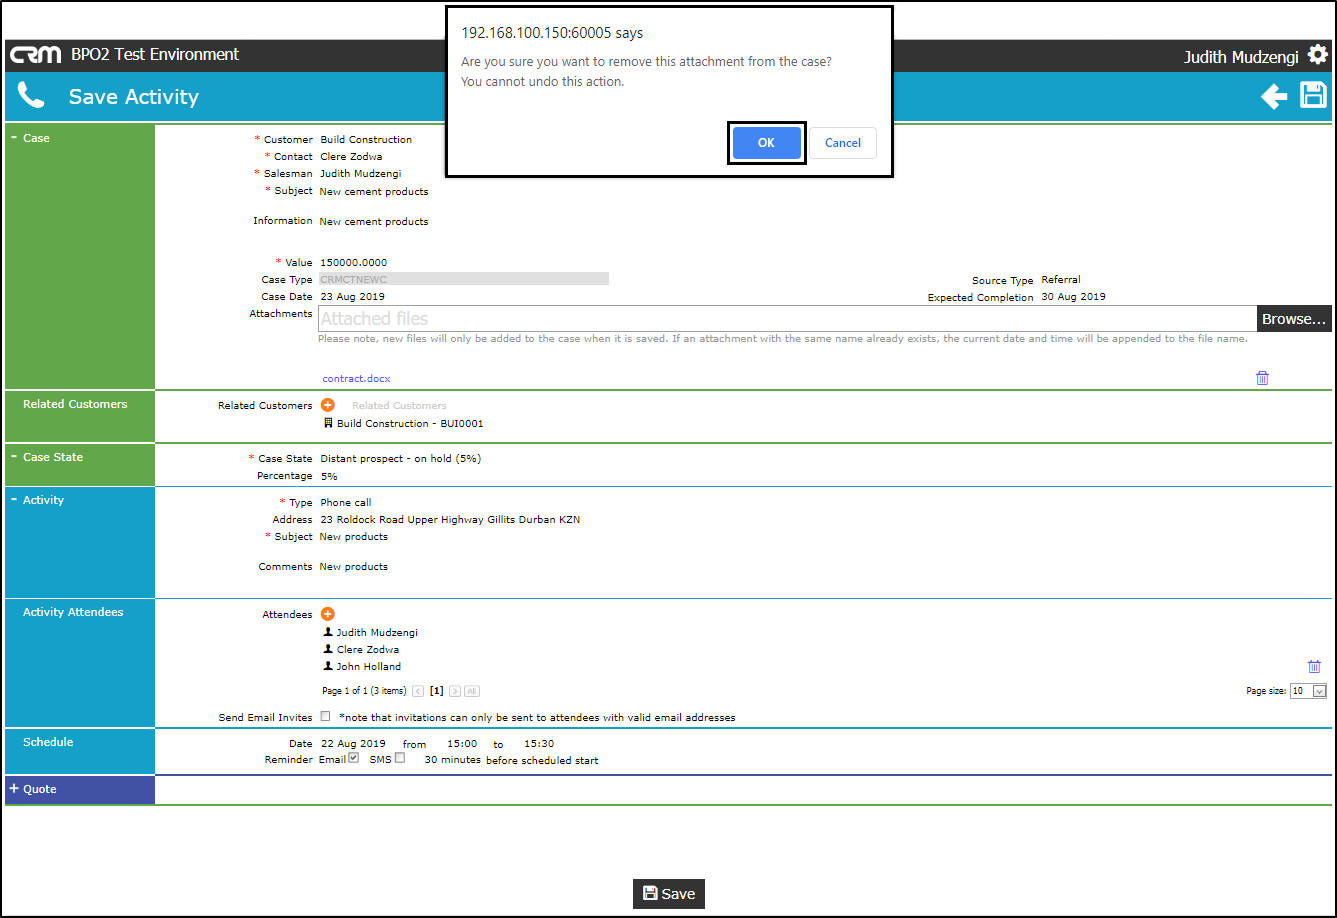
- The attachment will be removed from the Case section.
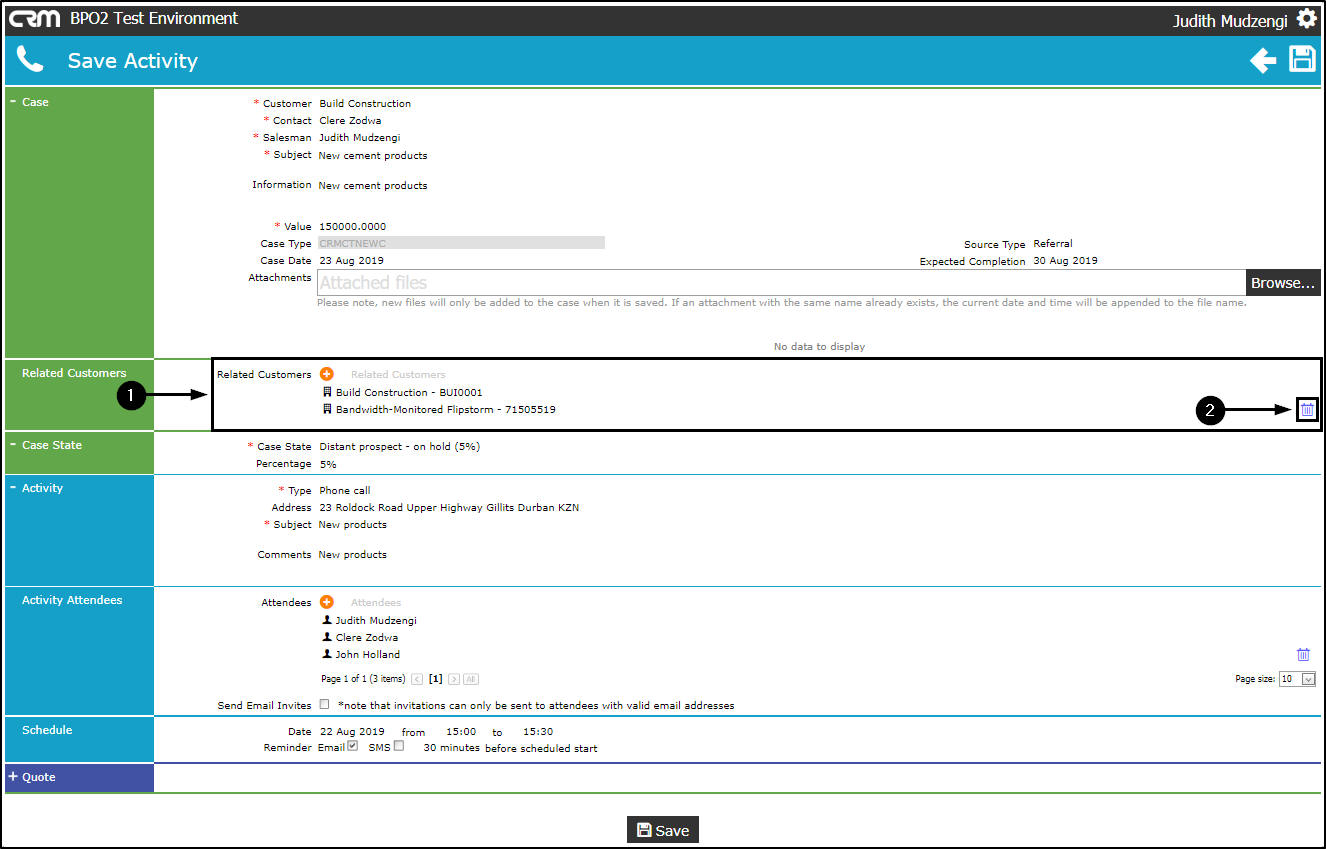
- Related Customers : You can add related customers if applicable. (hyperlink needed 000.014)
- Related Customers : You can delete a related customer if applicable by clicking on the Delete icon.
- A message box will pop up asking you;
- Are you sure you want to remove this customer from the case? All this customer's contacts will also be removed from activity attendees.
- Click on Ok .
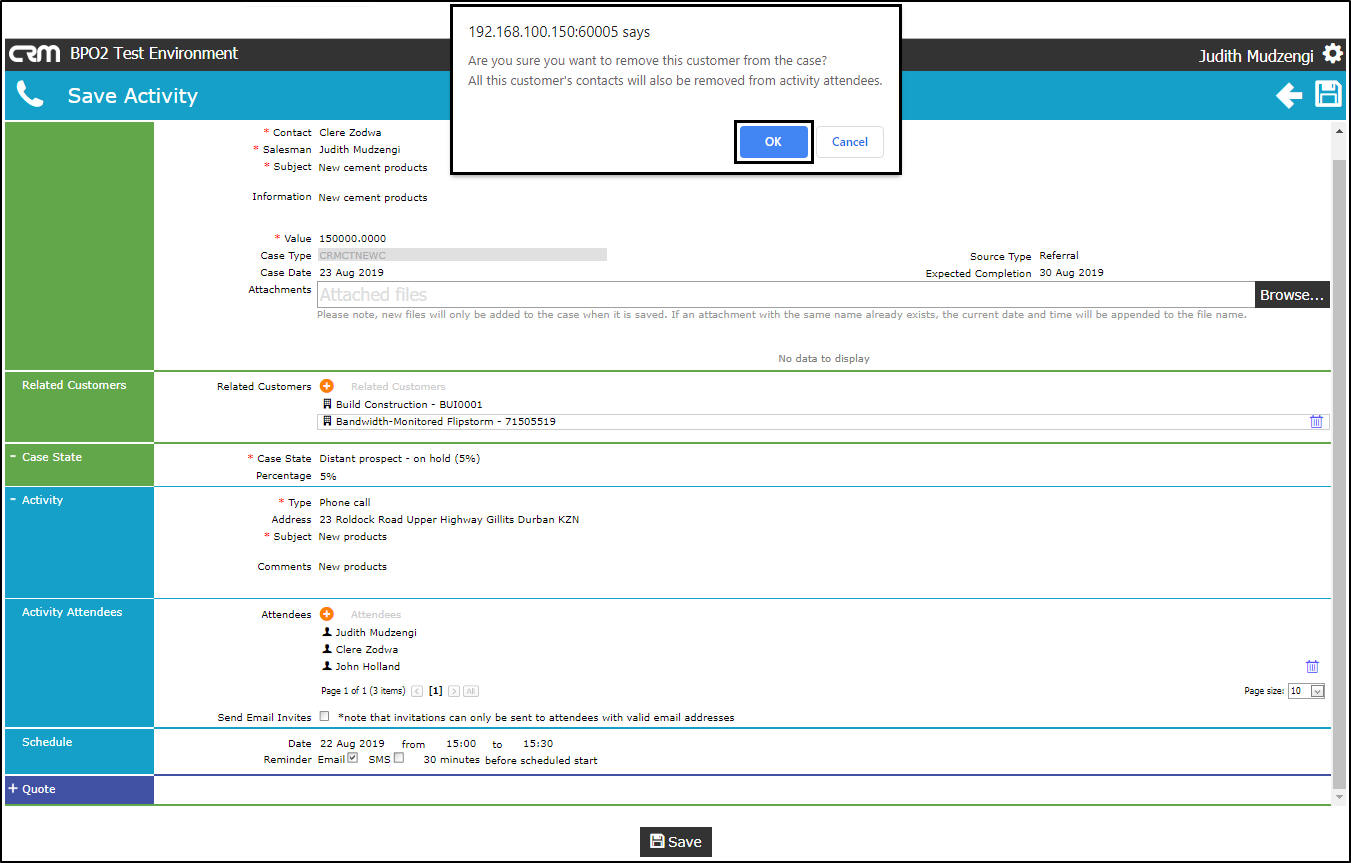
- The customer will be removed from the Related Customers section.

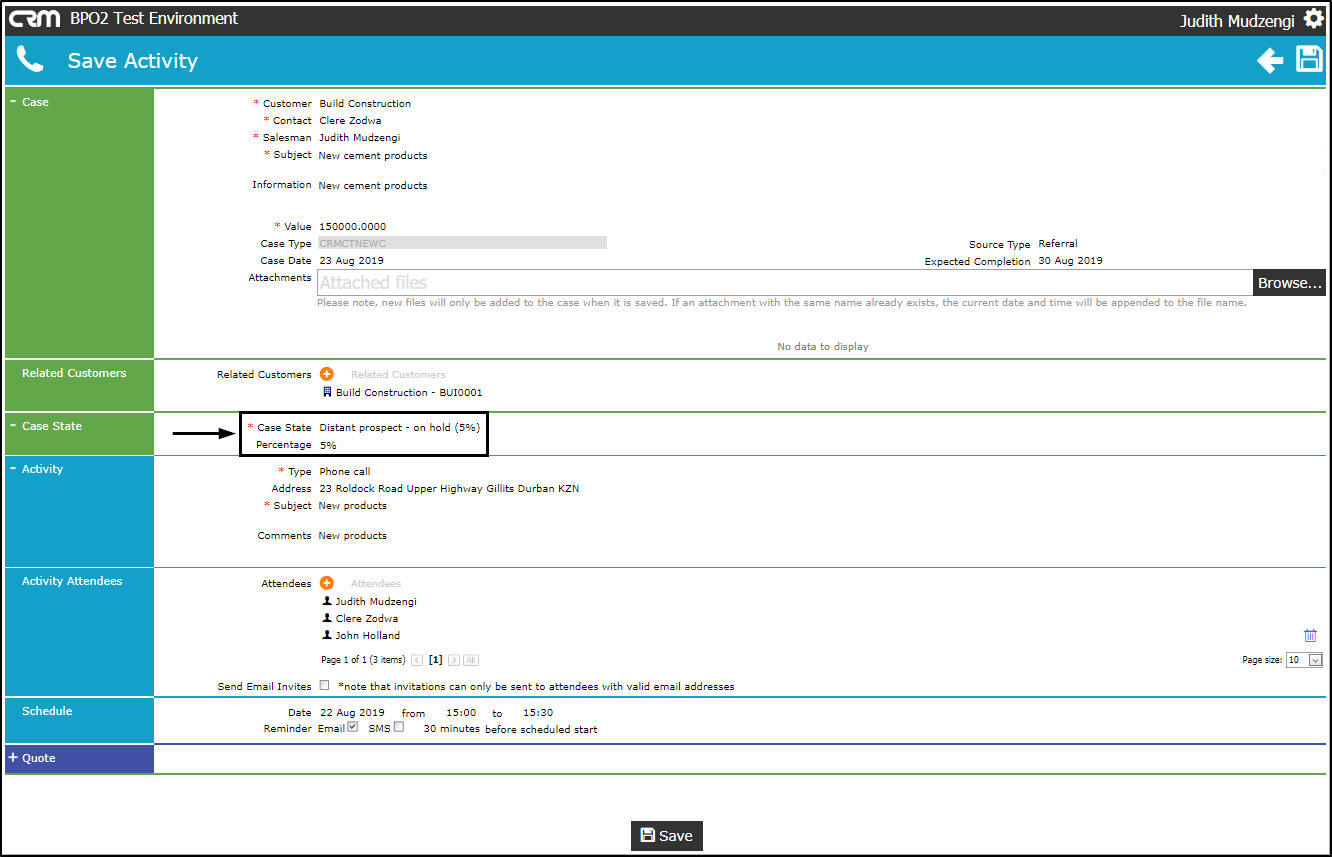
Case State Details
- Case State : Click in this field to display a list of all the Case States Descriptions and their Percentages on the system. Select the relevant description if applicable.
- Percentage : This field will populate according to the Case State selected.
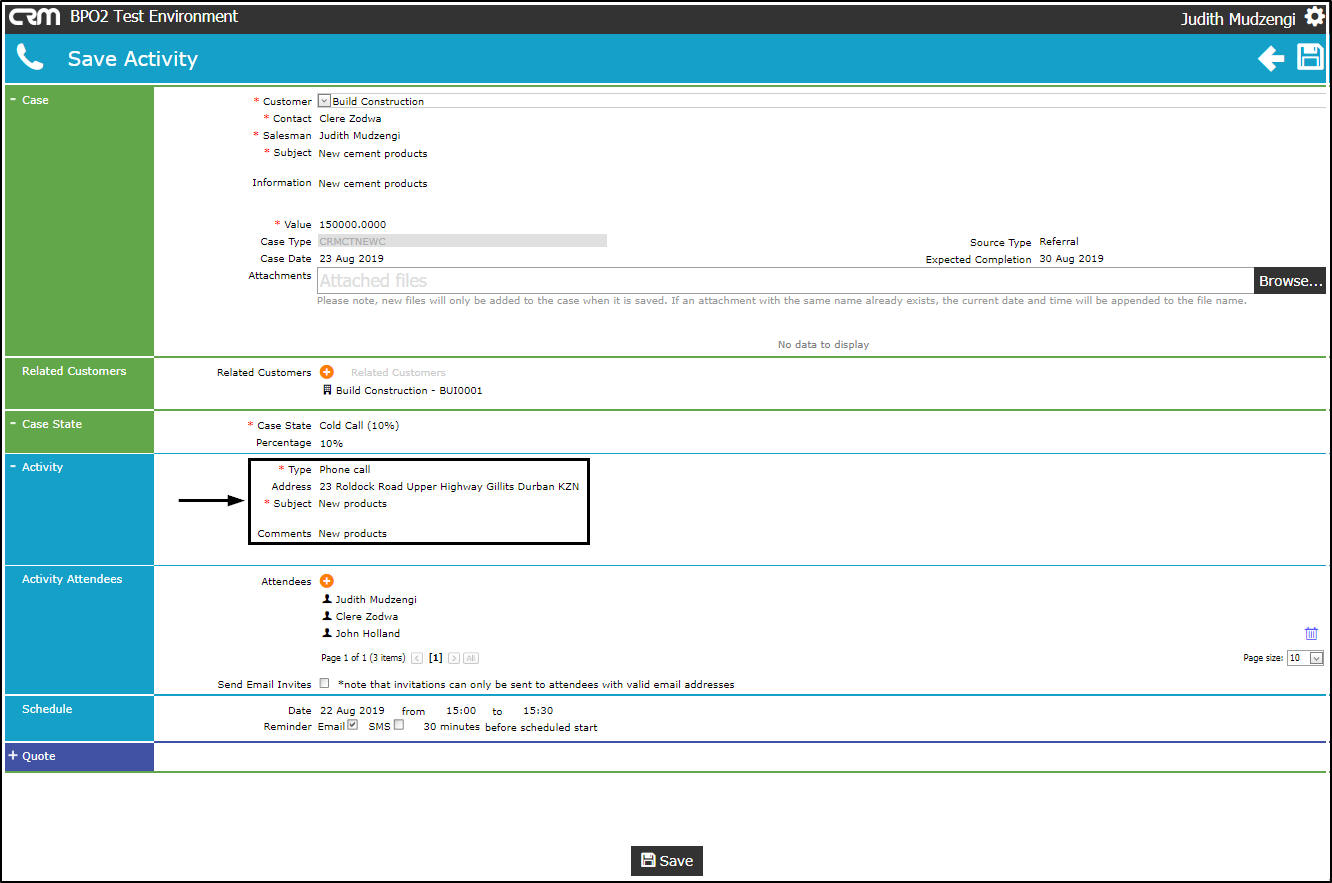
Activity Details
- Type : The type will auto populate. This field cannot be edited.
- Address : Click in the Address field, a list of all addresses linked to the customer will be displayed. Select the relevant address from this list if applicable.
- Subject : Edit the subject if applicable.
- Comments : Edit the comments if applicable.
Activity Attendees
- Attendees : You can link additional attendees if applicable. (hyperlink needed 000.014)
- Send Email Invites : Tick the checkbox if you wish to send email invites. Untick the checkbox if you do not wish to send email invites.
- Attendees : You can delete an additional attendee (one who is not the case salesman or case customer contact) if applicable by clicking on the Delete icon.

- A message box will pop up asking you;
- Are you sure you want to remove this attendee from the activity?
- Click on Ok .
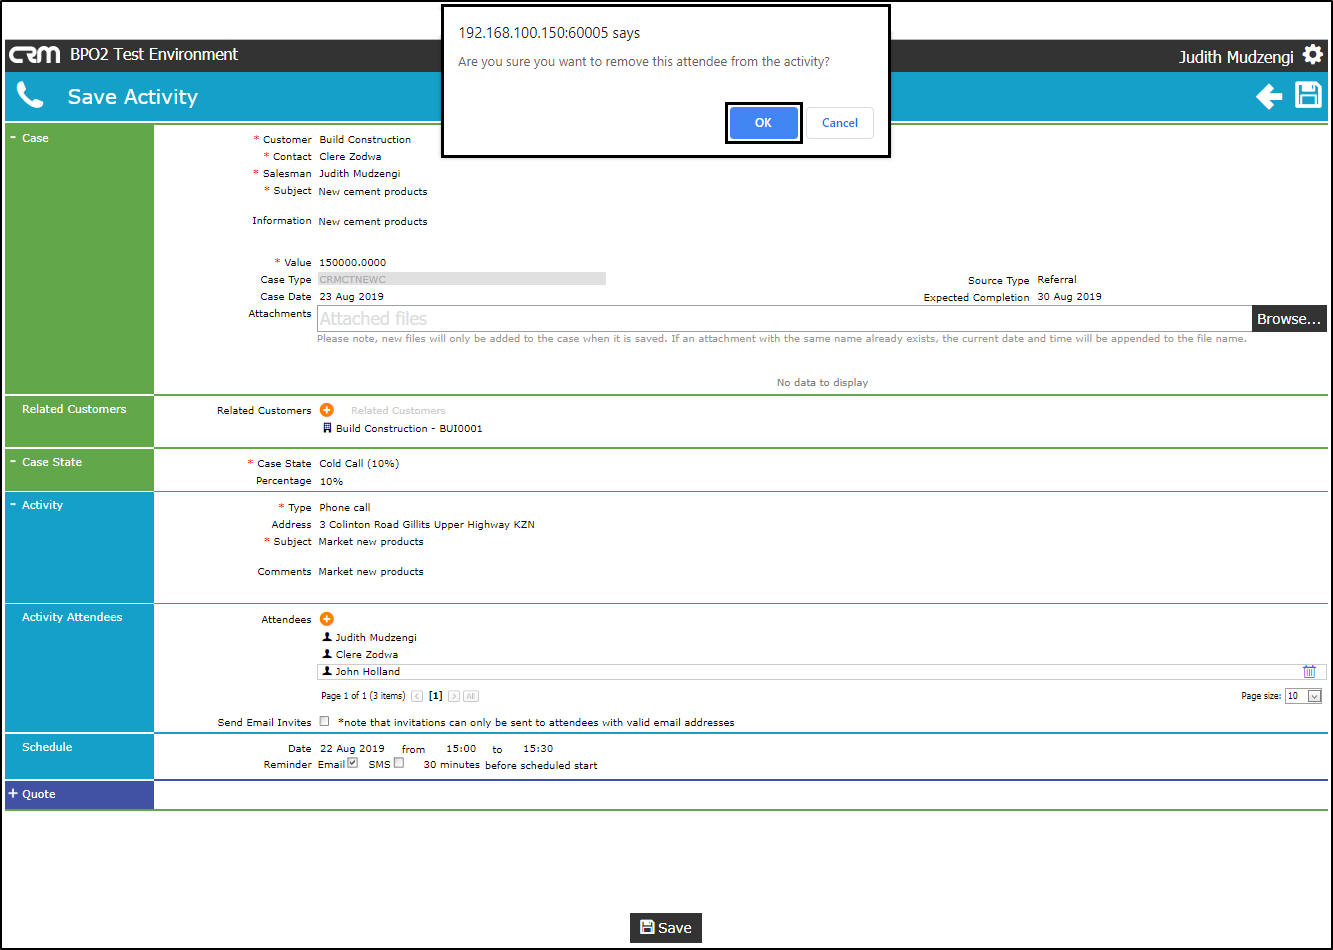
- The attendee will be removed from the Activity Attendee section.

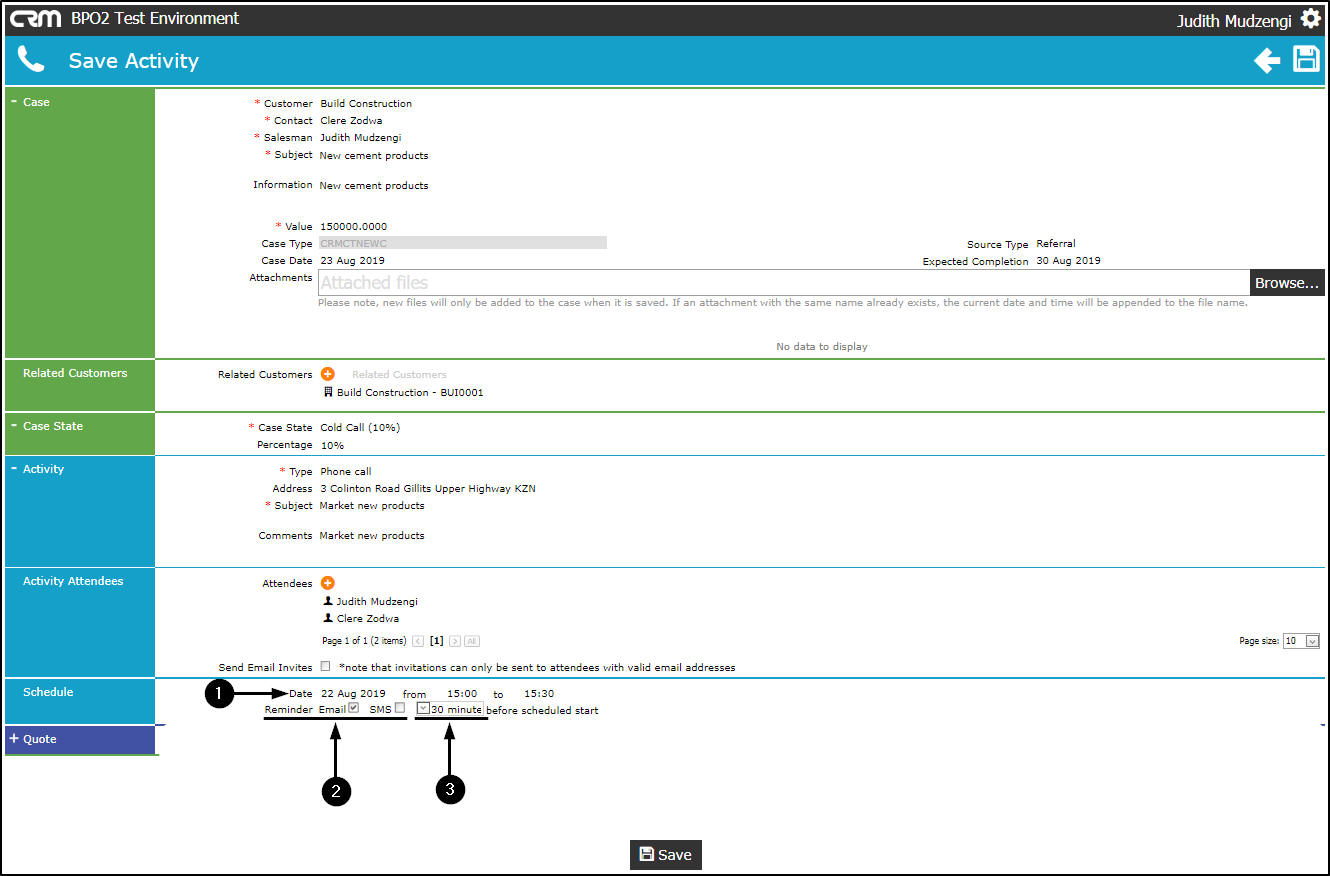
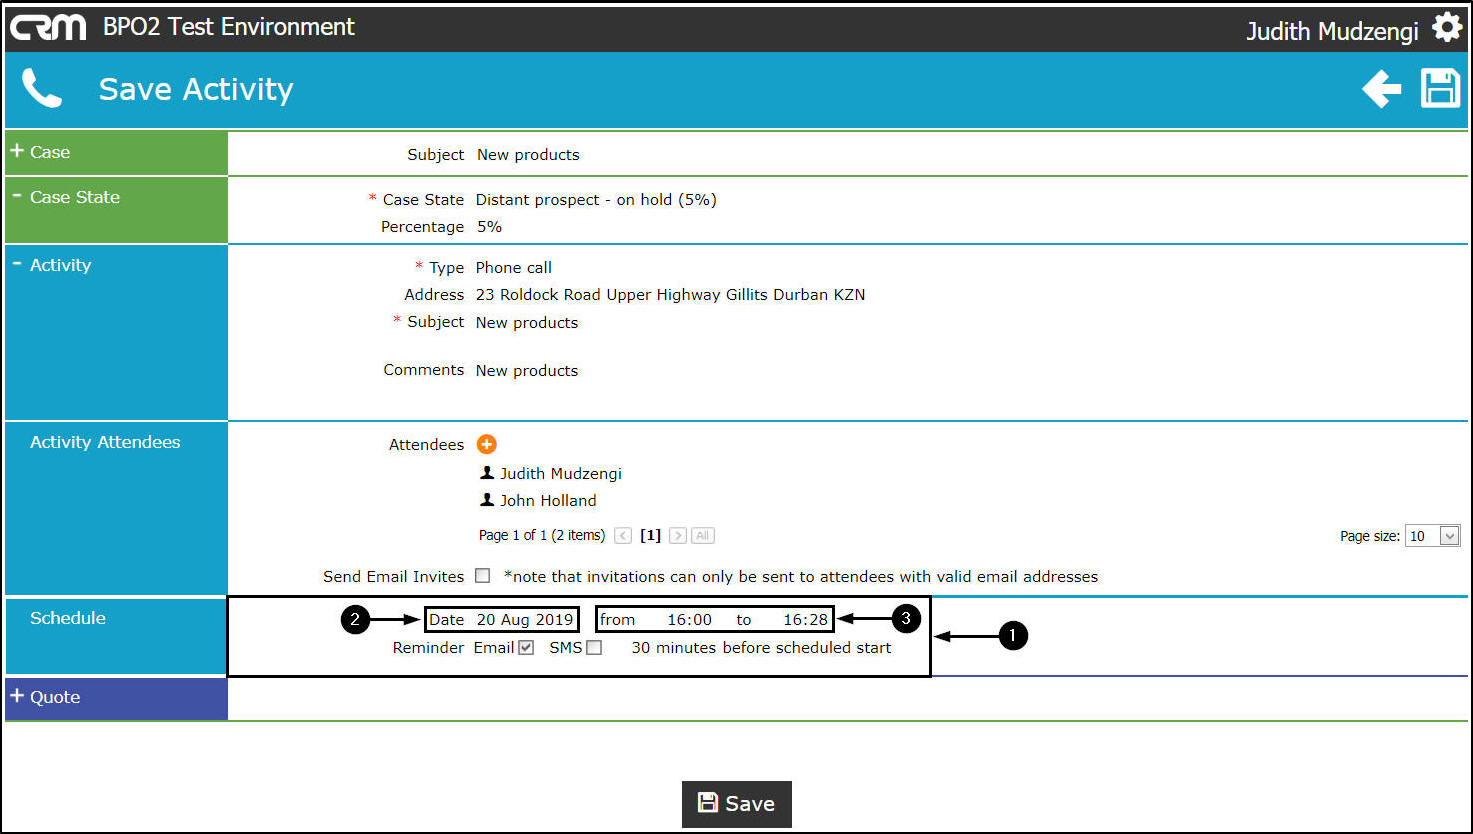
Scheduling
- Date : You can change the scheduled date and or the time if applicable.
- Reminder : Select either Email or SMS by ticking the relevant check box if applicable.
- Reminder (Time Period) : Hover over the field, a down arrow will be displayed. Click on the down arrow and select the relevant time period from the drop-down menu if applicable.
Quote Details
- You can edit quote details if applicable.
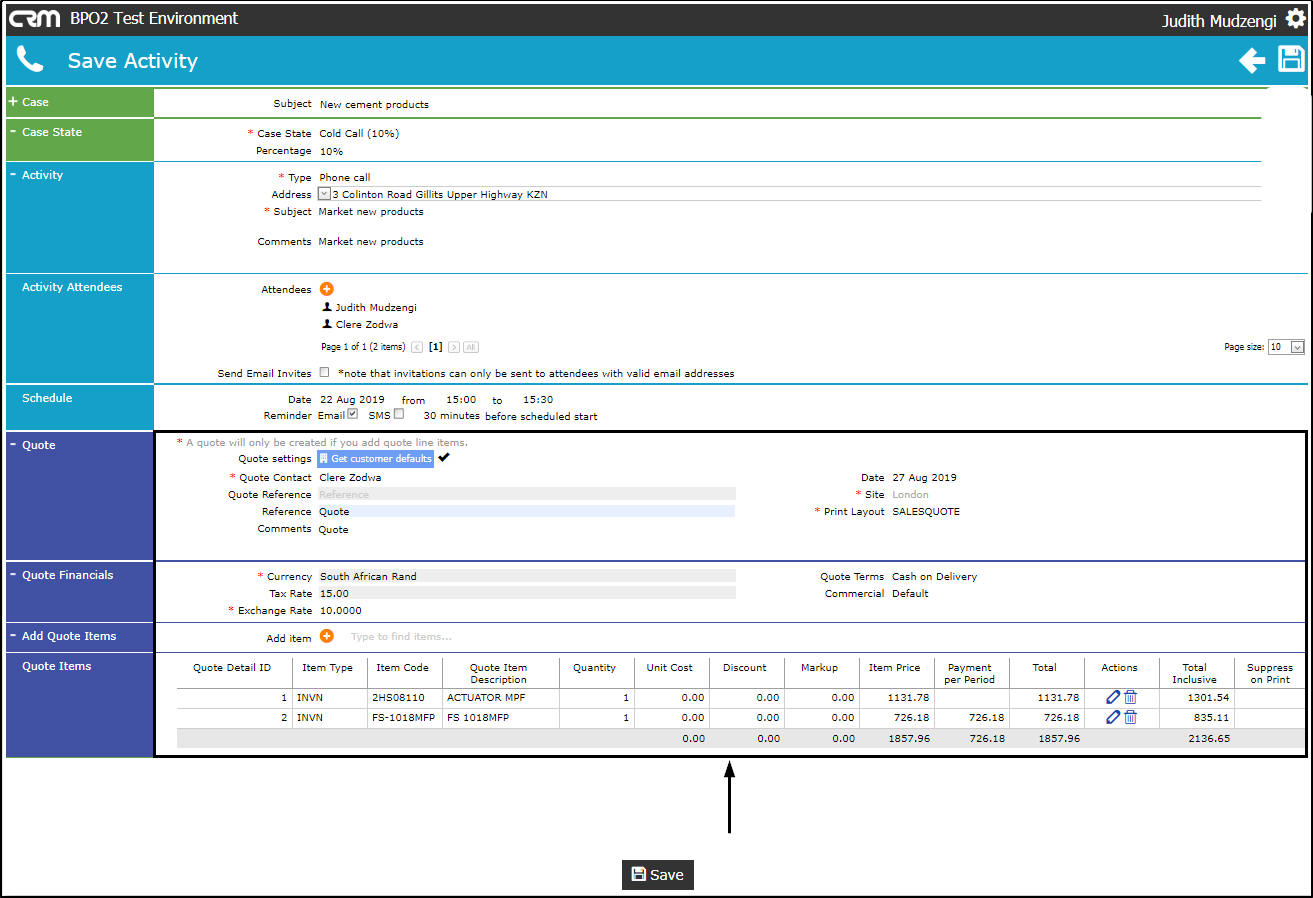
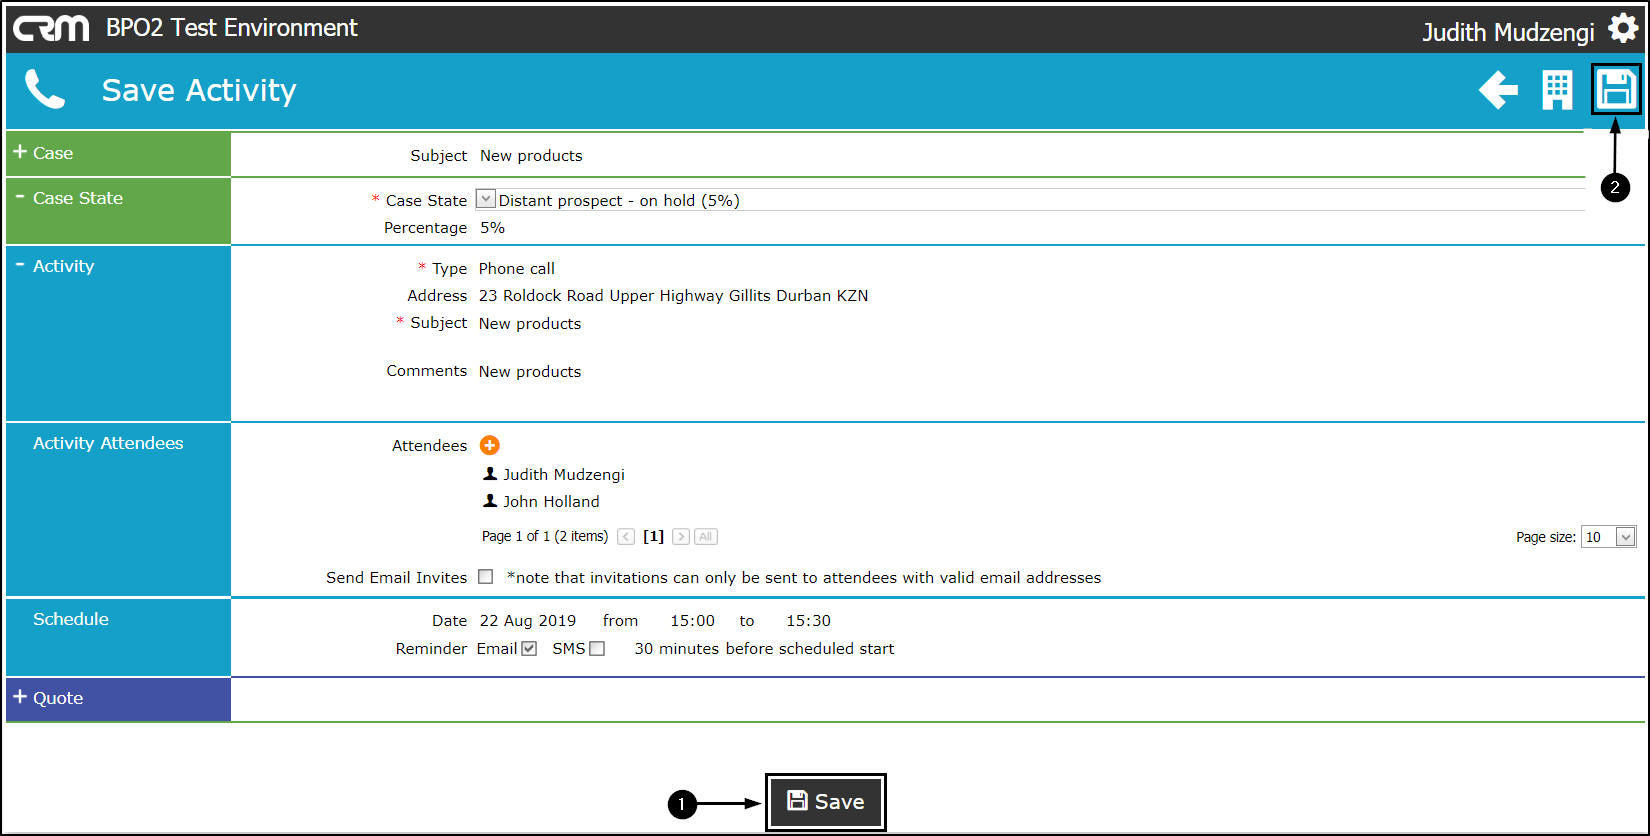
Save Changes
- Click on either the Save button or
- Save icon.
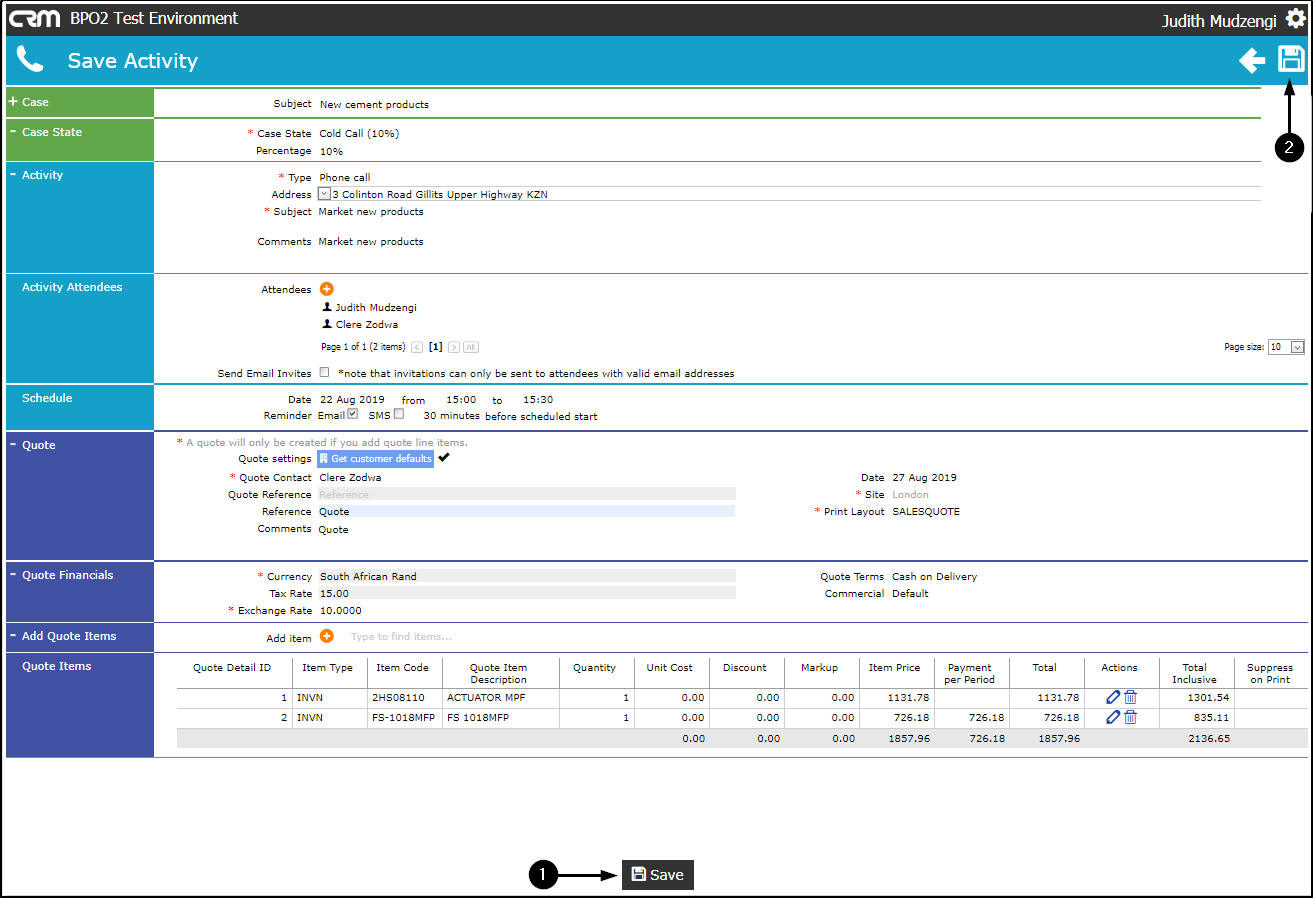
- You will return to the My Activities screen.
Reschedule An Activity
- Click on the Reschedule this Activity icon.
- The Save Activity screen will be displayed.

Adjust the Date
- Hover over the Date field, a down arrow will be displayed. Click on this arrow.
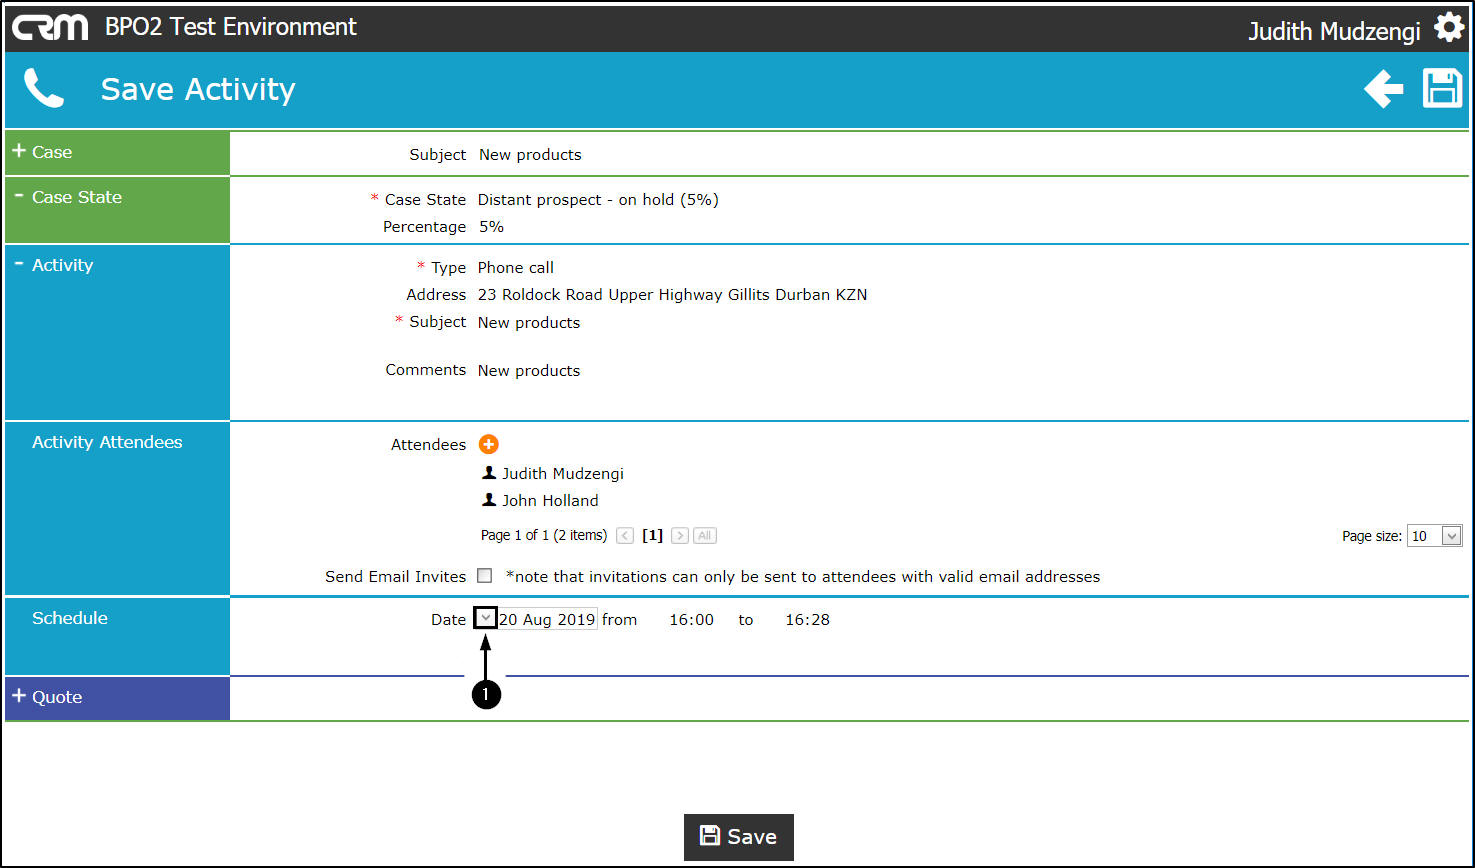
- A calendar will pop up.
- Select the relevant date.
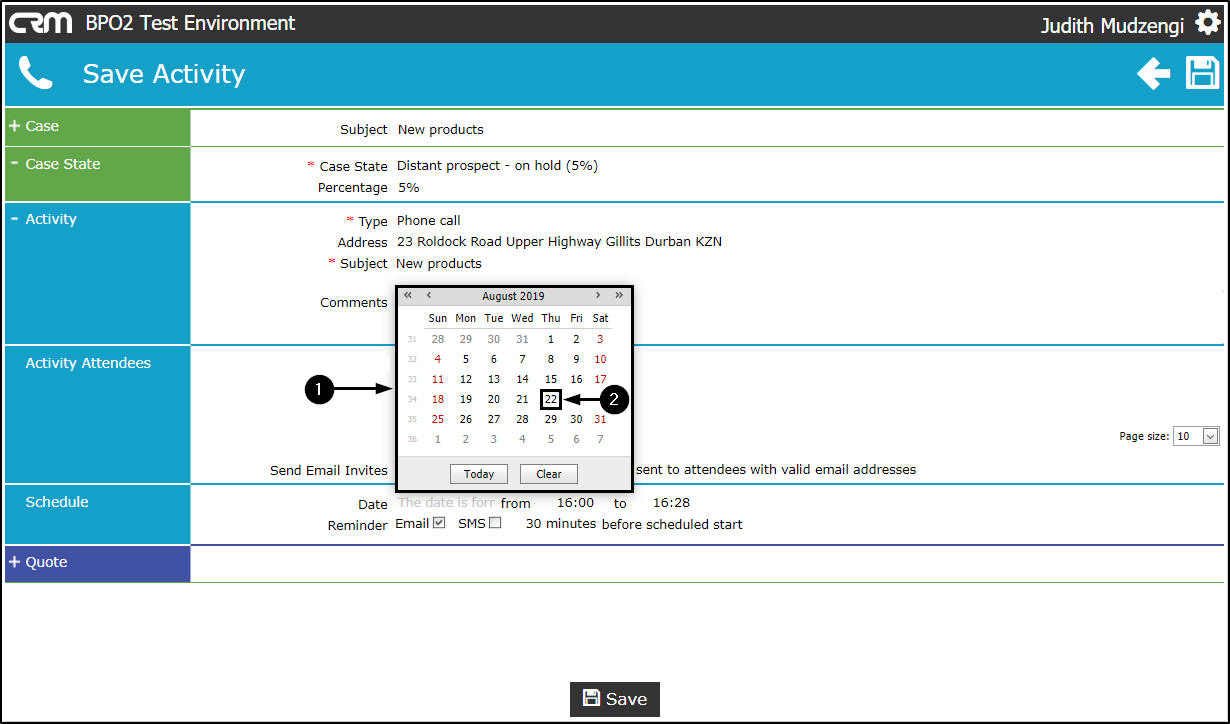
- The Date field will now be populated with the selected date.
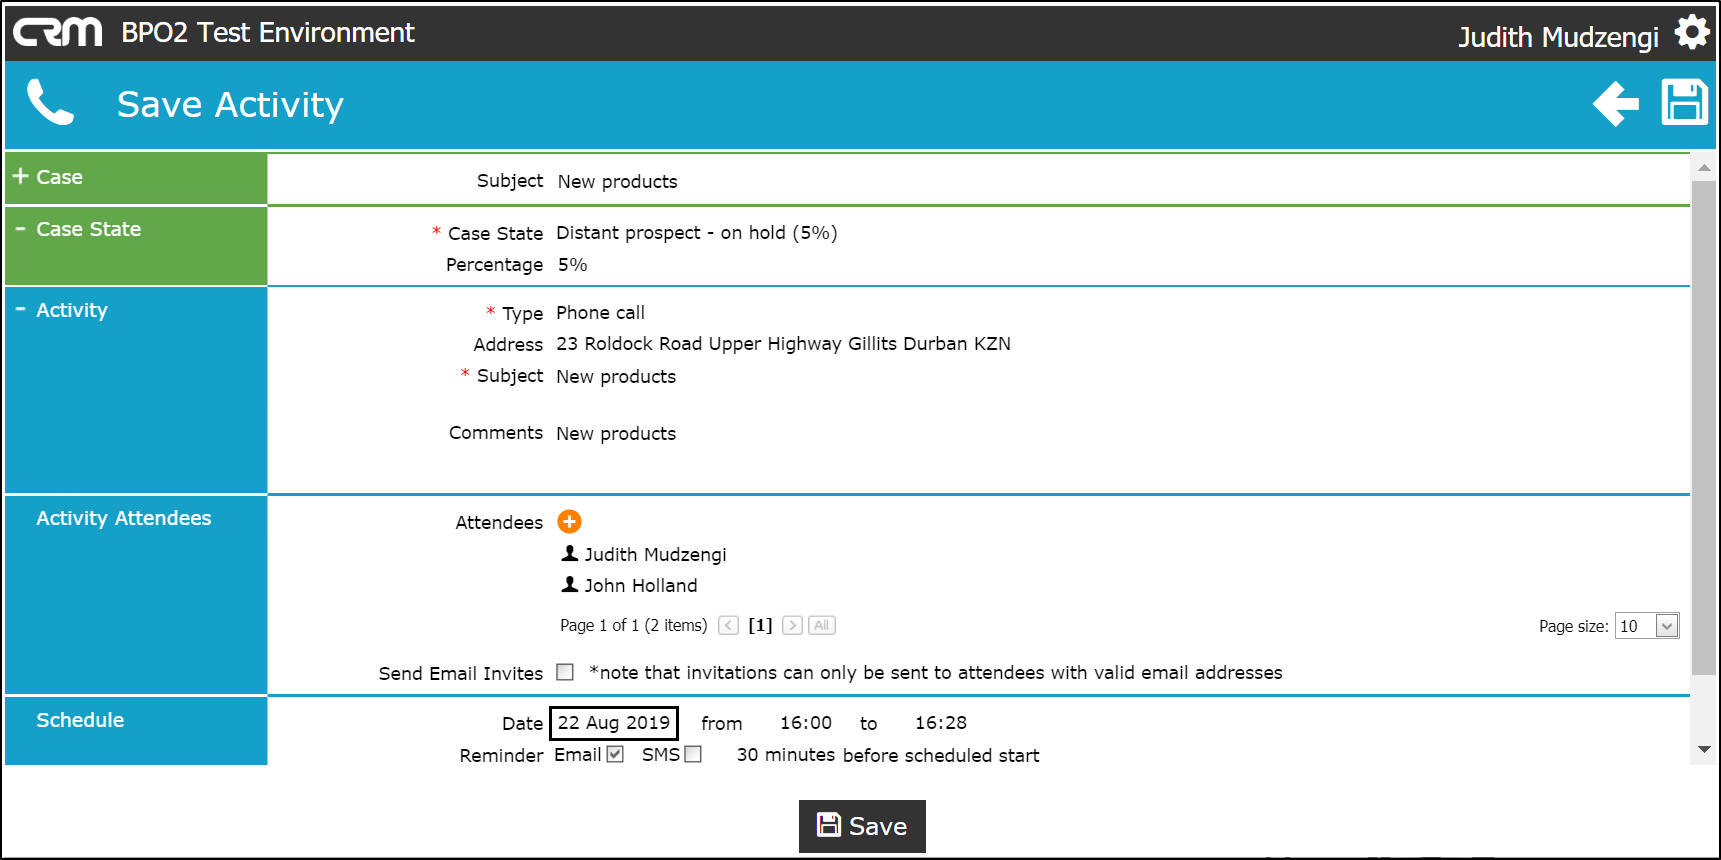
Adjust the Time
- From: Either hover over the field and click on the directional arrows to adjust the time or
- type in the relevant time.
- To : Either hover over the field and click on the up and down arrows to adjust the time or
- type in the relevant time.

- Click on either the Save button or
- Save icon.
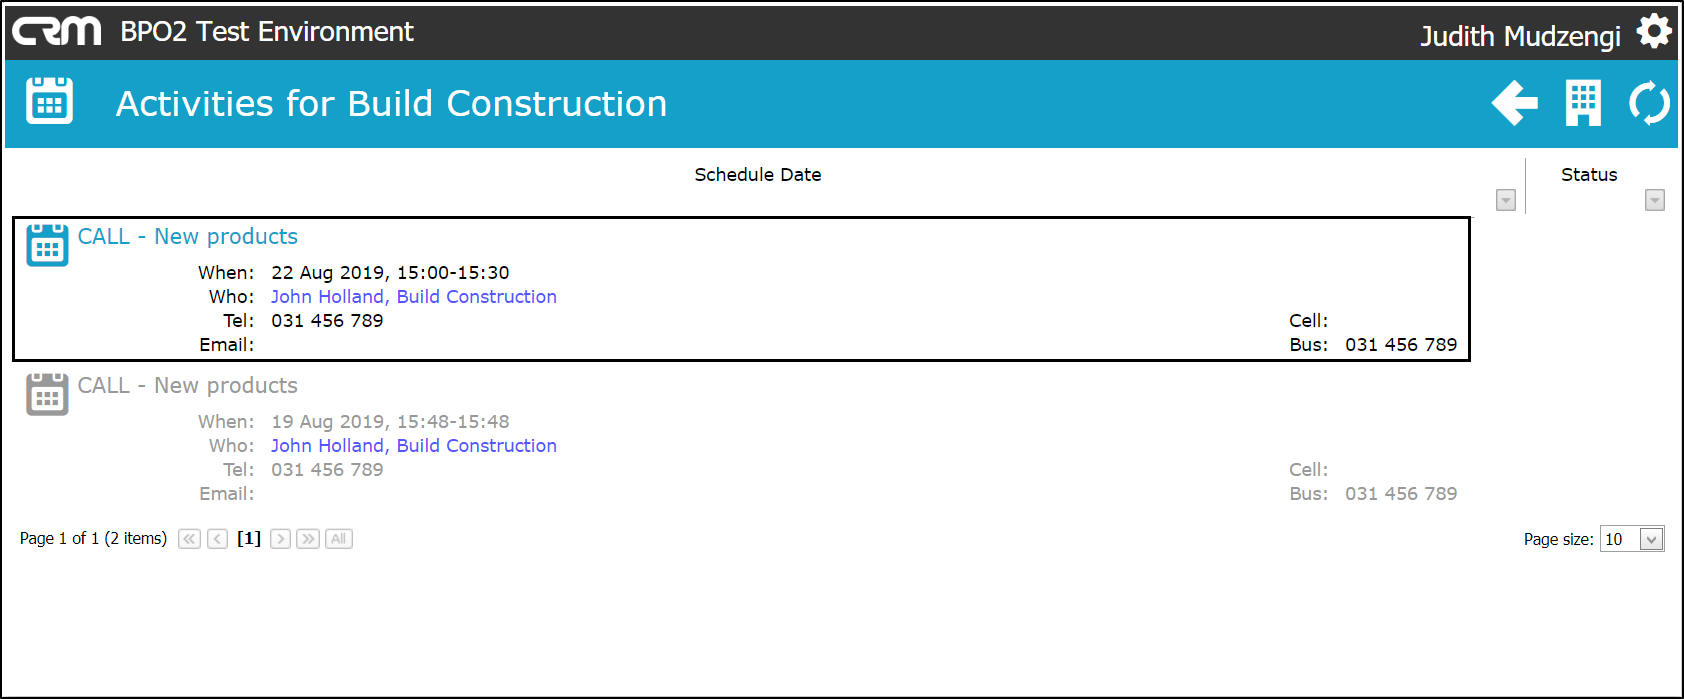
- The Activities for [ ] screen will be displayed.
- The rescheduled activity will be displayed in this screen.
Next Action
This allows you to close a current activity and create a new activity.
- Click on the Next Action icon.
- The Next Activity screen will be displayed.
- Click on the ' + ' sign to view more details or click on the ' - ' sign to view less details.
- The current case / activity details will auto populate but you can edit the details if you wish to.
- Type in the relevant completion notes of the current activity.
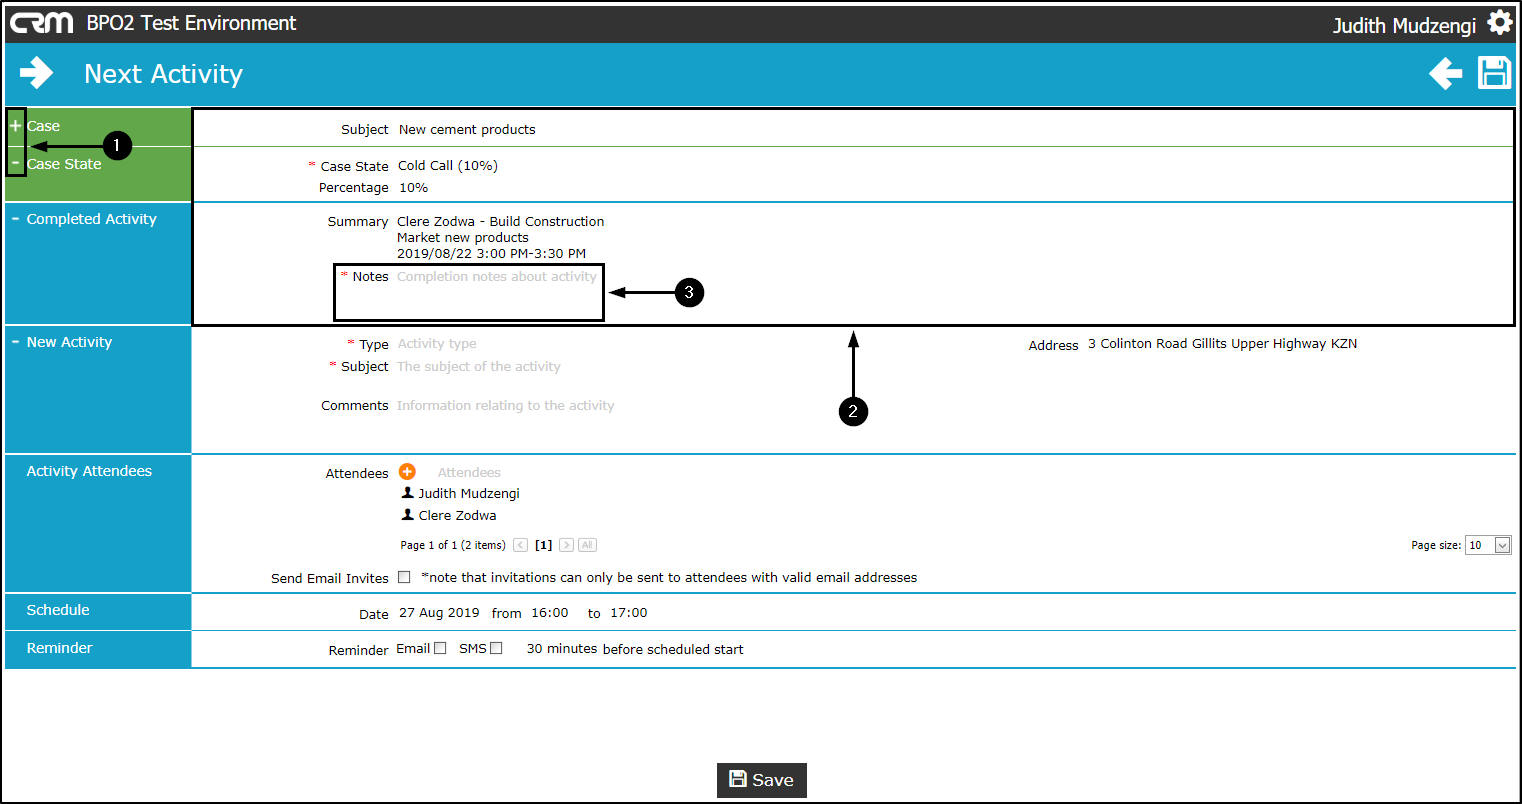
- Update the new activity information.
- Click on either the Save button or
- Save icon.
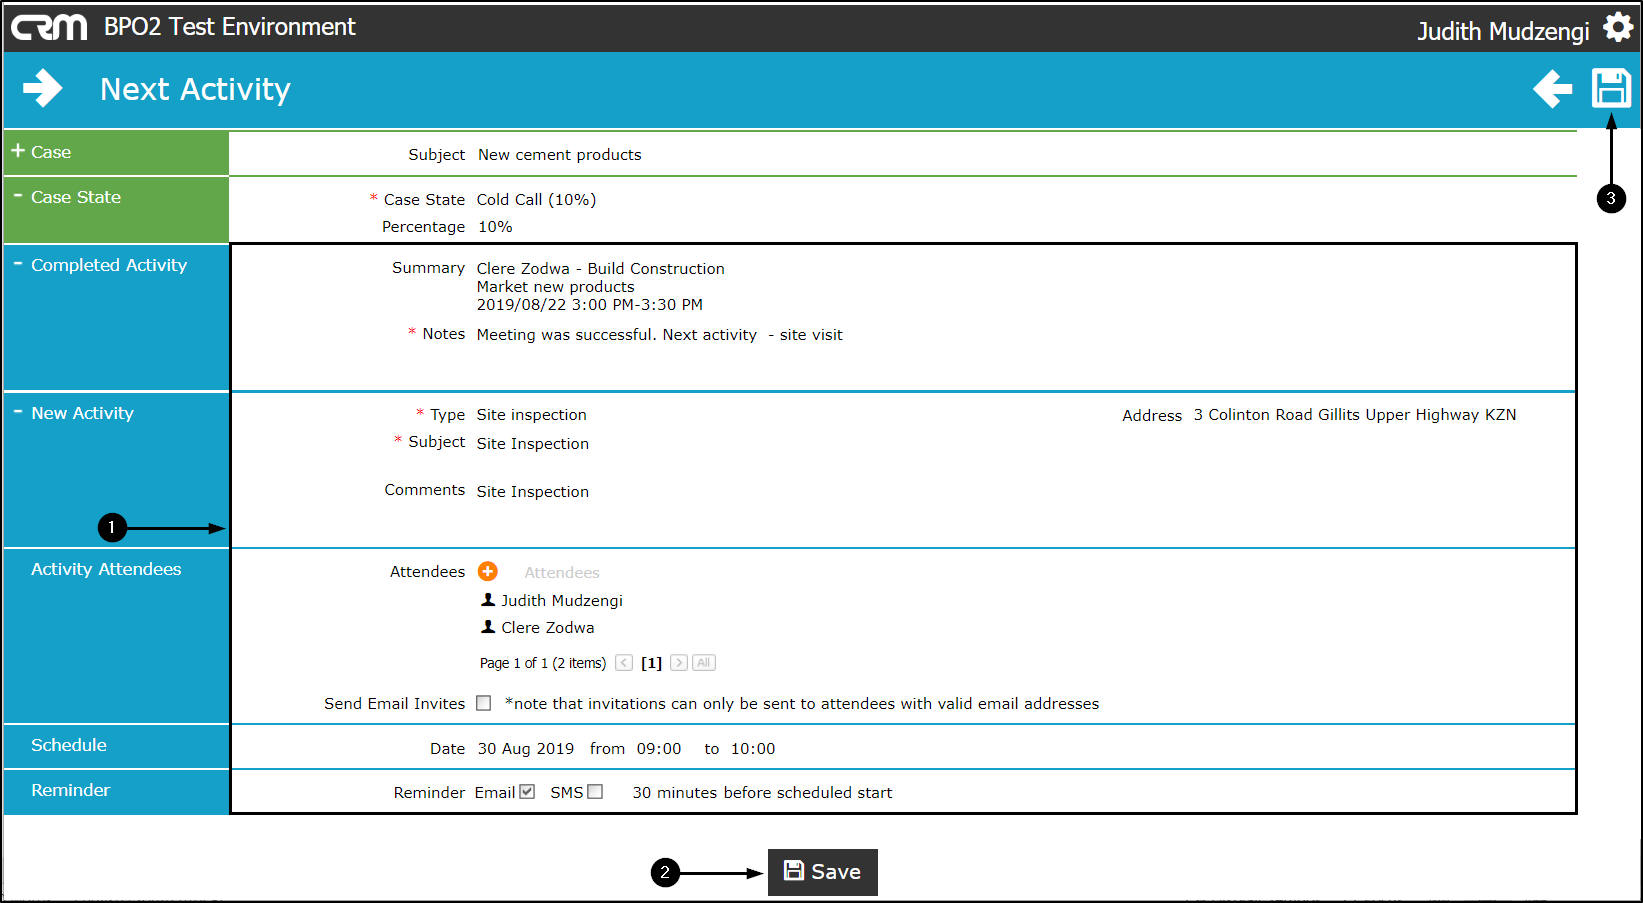
- The My Activities screen will be displayed.
- The completed activity will be removed from this screen.
- The new activity will be displayed in this screen.
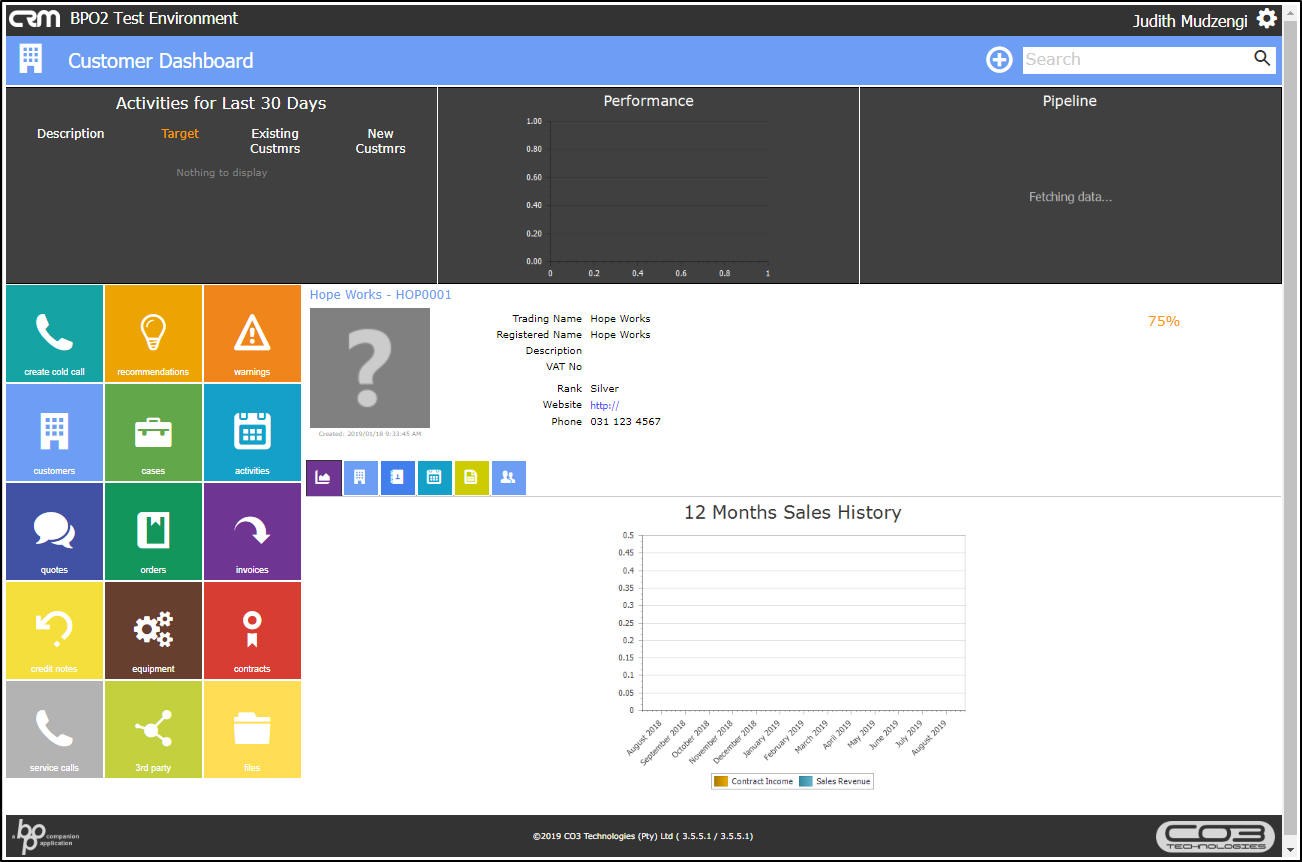
View Customer
- Click on the View Customer icon.
- The Customer Dashboard will be displayed.
- You can now view the selected customer's details.
Other Action Items
-
You can also
-
and
CRM.000.014