We are currently updating our site; thank you for your patience.
CRM Basics
Data Field Captions / Drop-Down Options
For Additional Data that you wish to store against your customers, you can use Custom CRM Data and Additional Data. You can rename the captions for these fields, depending on the information you need to store.
- These captions are configured by User Group.
- In Custom CRM Data there are 10 drop-down fields.
- In Additional Data there are 10 free text fields.
- Information can be added to these fields when you are creating a new customer or editing a customer.
- View the details below to configure the captions for these additional fields:
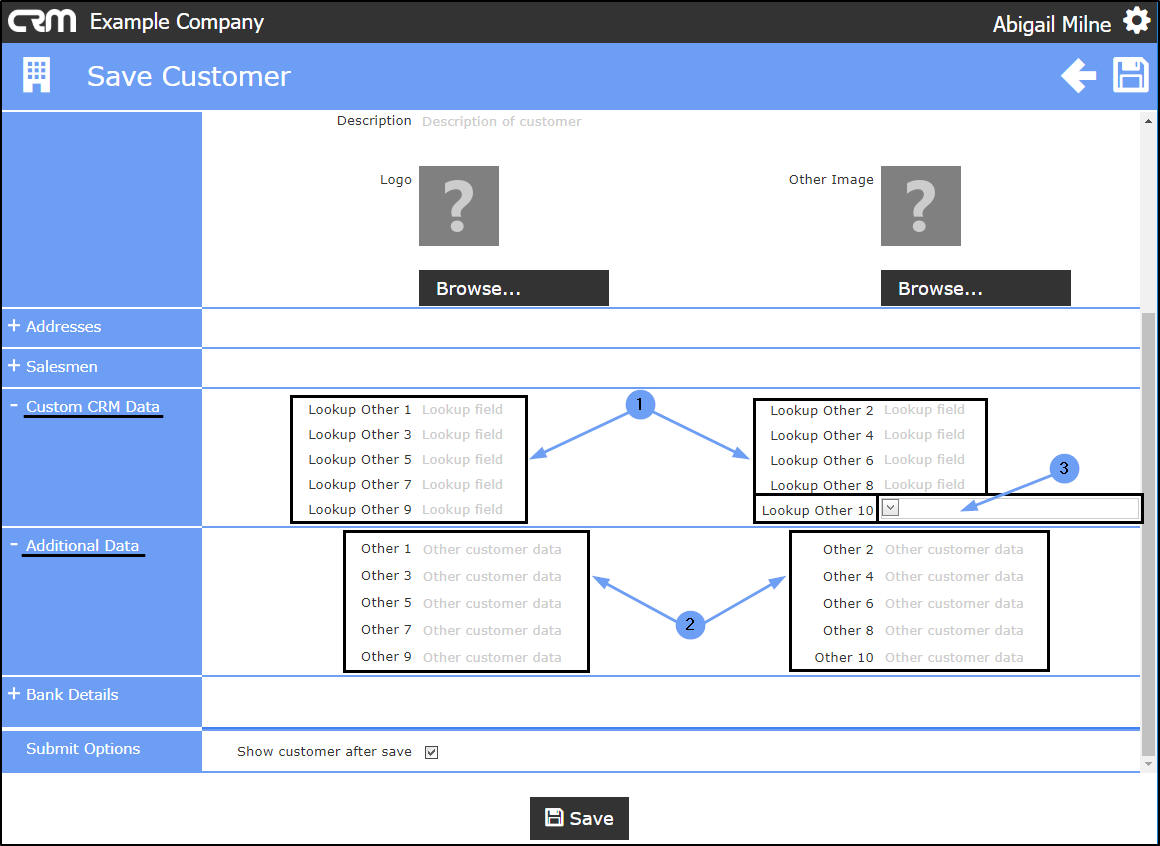
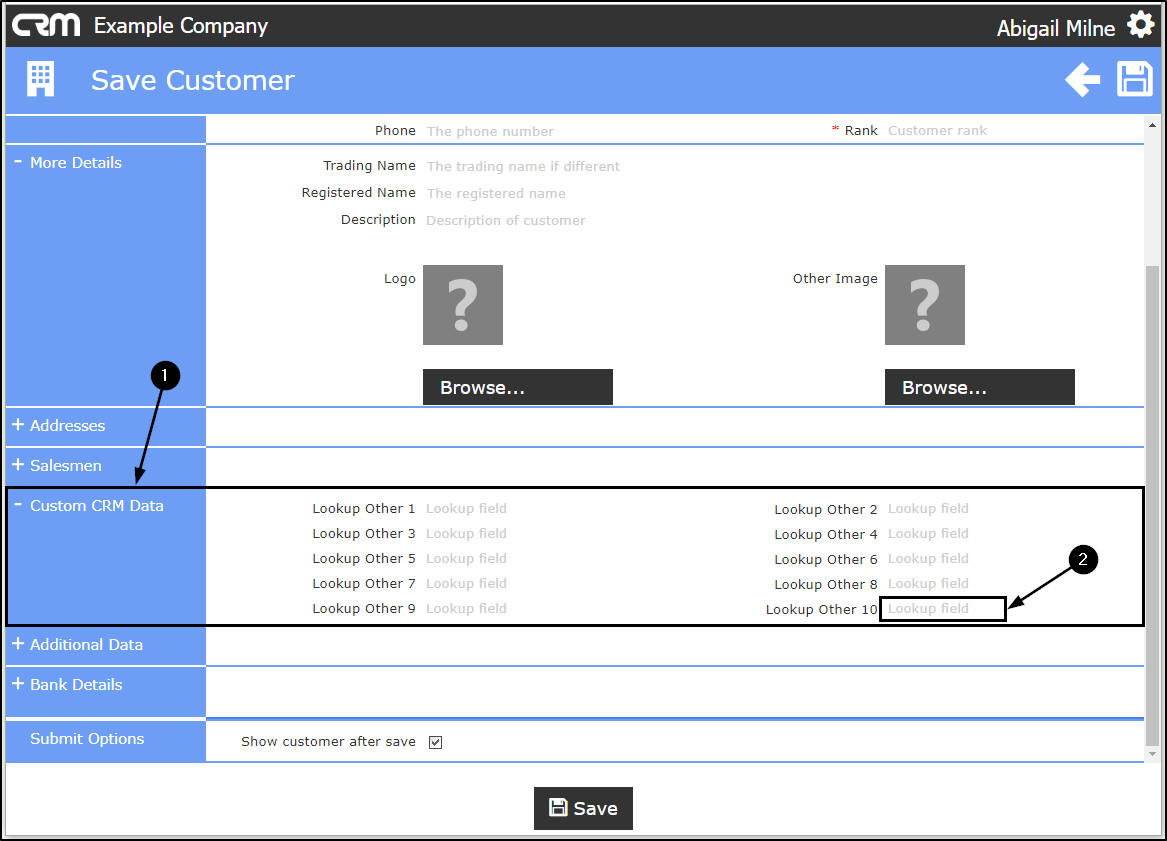
These custom fields are all found in the Save Customer screen:
| Ribbon Access: CRM Dashboard > Add New Items > Customer tile > Save Customer screen > More Details frame > Custom CRM Data and Additional Data frames |
Here you can view:
- Custom CRM Data captions and drop-down options.
- Additional Data captions and drop-down options.
- In this example, note that the Lookup Other 10 field in Custom CRM Data is currently blank.
Set Custom CRM Data Field Captions
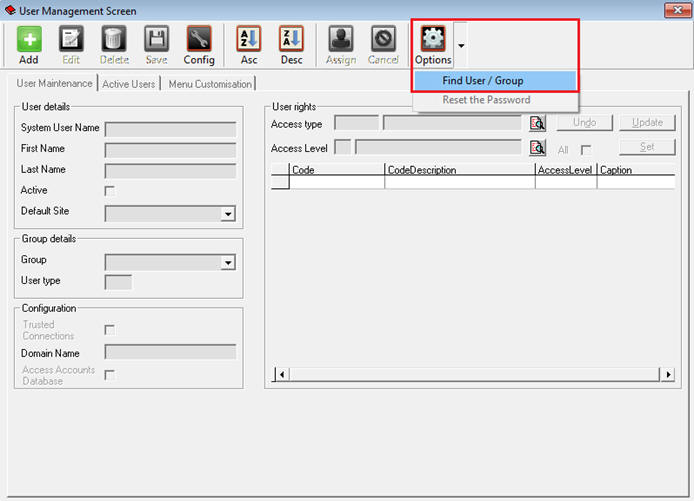
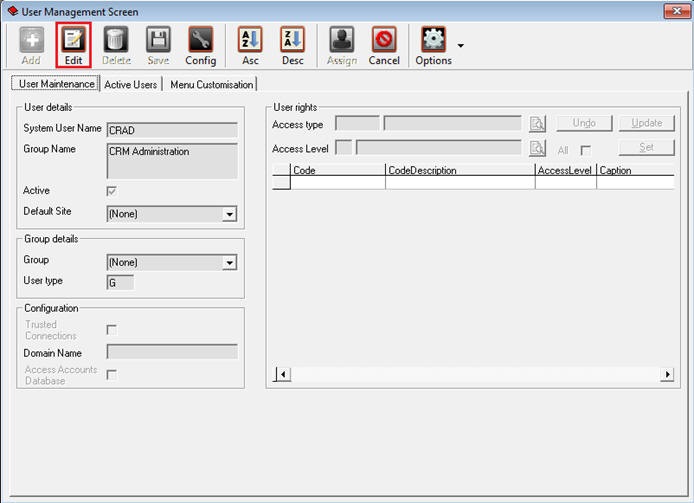
| Ribbon Access: BPO: Administration > Security > User Group and Security |
- Click on the Options menu and select 'Find User/Group'
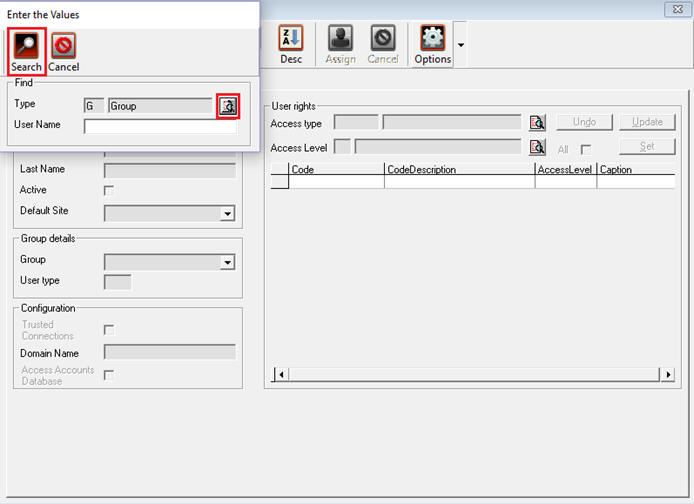
- Click on the 'Type' search box and select 'Group'
- Click on the form main 'Search' button
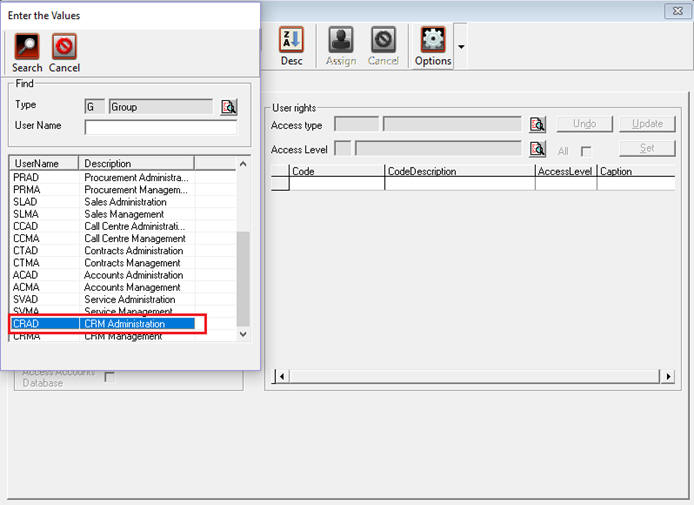
- Scroll down in the list of User Groups to find the Group you need to edit
- Double click on the UserGroup line
- Click on the 'Edit' button.
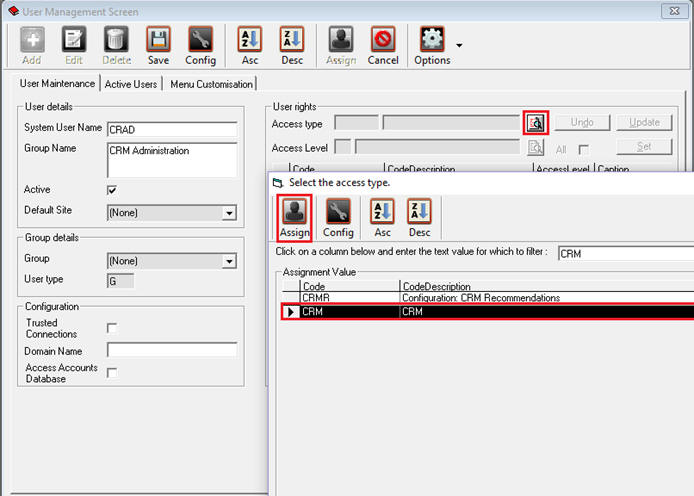
- Access Type: Click on the 'Search' button.
- Search for 'CRM' in the Code Description.
- Select the row and click on the 'Assign' button.
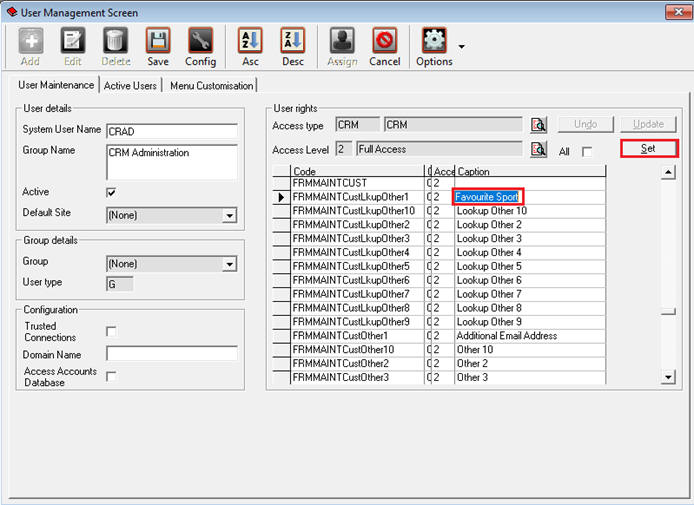
- Code: FRMMAINTCustLkupOther1 thru FRMMAINTCustLkupOther10
- Type the new caption in the 'Caption' column.
- Click on the 'Set' button. Note: If the Set button is not available, then reselect that line's access level.
Set Additional Data Field Captions
| Ribbon Access: BPO: Administration > Security > User Group and Security |
- Follow the same process as for Set Custom CRM Data Field Captions
- But for the last step, set the following codes instead:
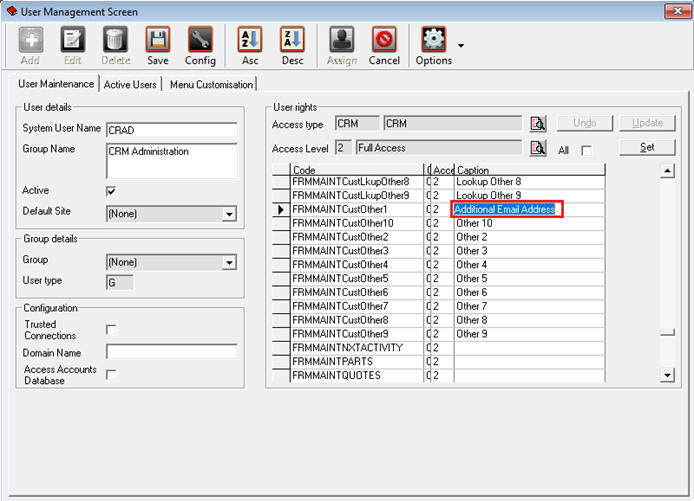
- Code: FRMMAINTCustOther1 thru FRMMAINTCustOther10
- Type the new caption in the 'Caption' column.
- Click on the 'Set' button. Note: If the Set button is not available, then reselect that line's access level.
Set Custom CRM Data Drop-Down field Items
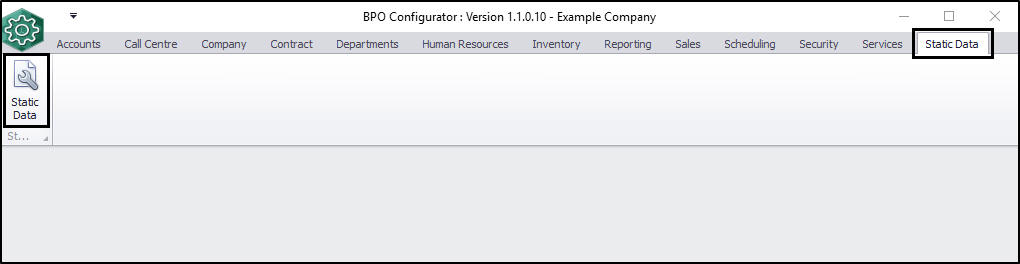
| Ribbon Access: Configurator > Static Data > Static Data |
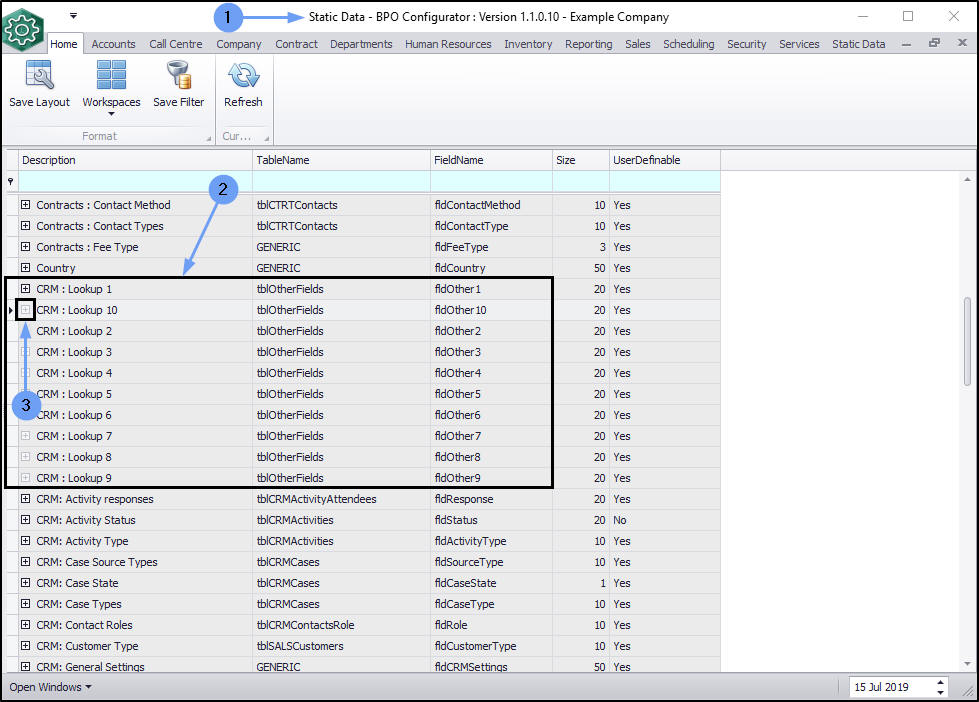
- The Static Data screen will be displayed.
- Scroll down the list or use the filter row to find the CRM: Lookup fields.
- Click on the expand button in front of the particular field that you wish to add field items to.
- As noted above, the Lookup Other 10 field in Custom CRM Data is currently blank, therefore, the corresponding CRM: Lookup 10 row is selected.
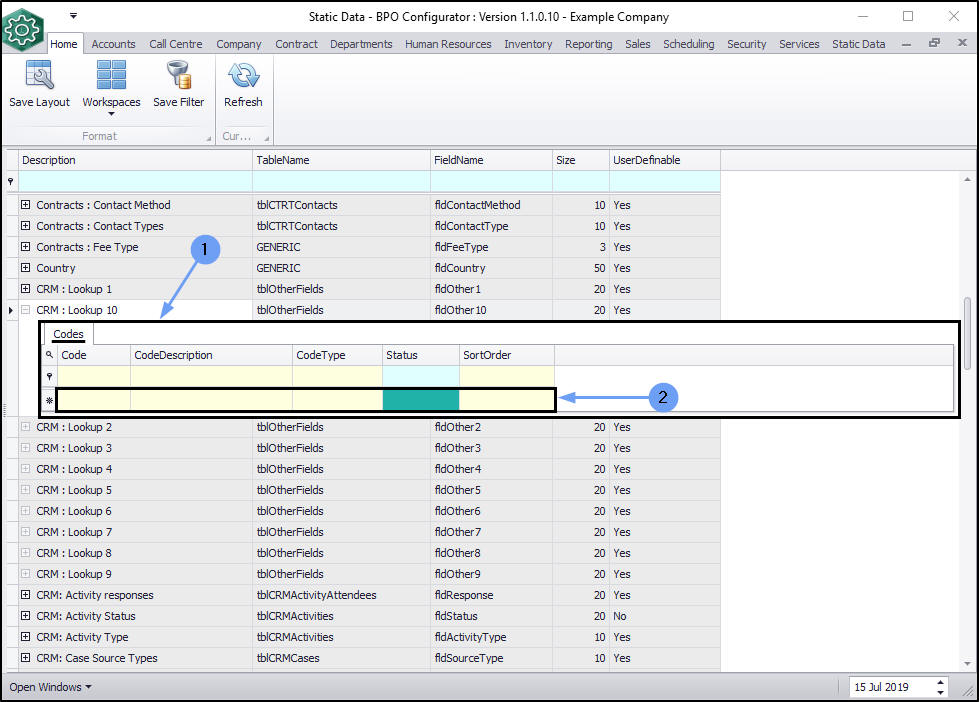
- The Codes frame will be expanded.
- This data grid does not currently contain any information as nothing has been set up yet.
- Right click anywhere in the blank row (not the filter row) of this Codes data grid.
- A Process menu will pop up.
- Click on Add - Add New Code.
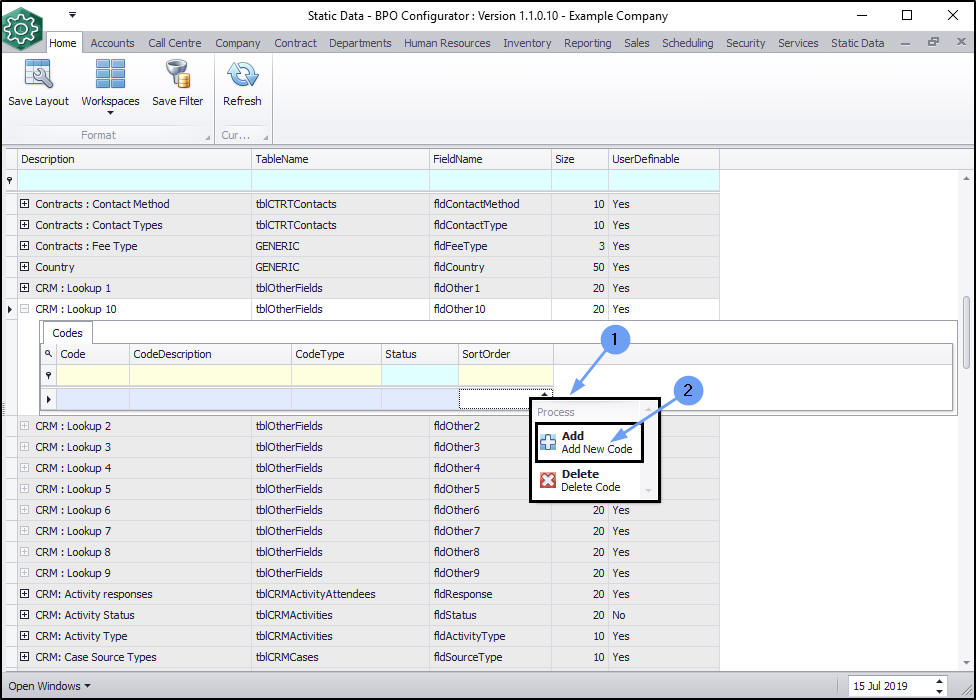
- The blank row in the Codes data grid will now be activated - the Code Type, Status and Sort Order columns will now be populated.
- Code: Click in this text box and type in a code specific for this CRM Lookup field.
- Code Description: Click in this text box and type in a description for this CRM Lookup field code.
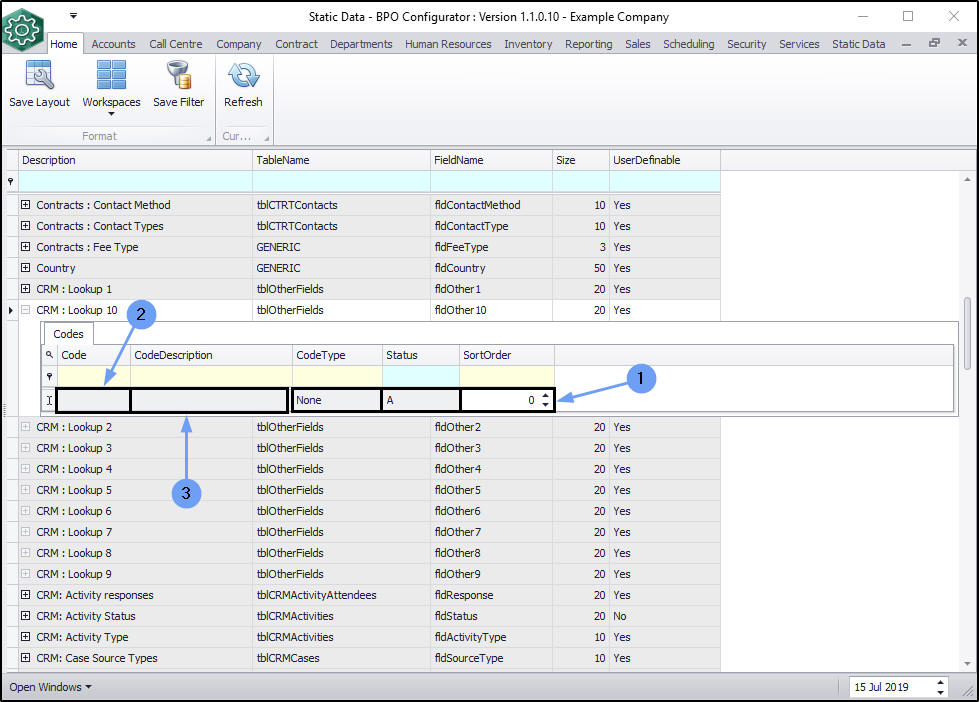
- Once you have entered the Code and Code Description, move across to the remaining columns.
- Code Type: This can remain as None.
- Status: This will auto populate with A - Active.
- Sort Order: Click in this text box and either type in or use the arrow indicators to select the sort order for this new CRM Lookup field.
- Note: The sort order is the order in which this will appear in the call error code drop-down list in Nucleus Service. If each call error code has the same number e.g. 0 or 1, then the drop-down list will usually default to an alphabetical order in Nucleus Service. However, if, for example, it is numbered 5 in an ordered list of 1-10, then it will appear 5th in the drop-down list in Nucleus Service.
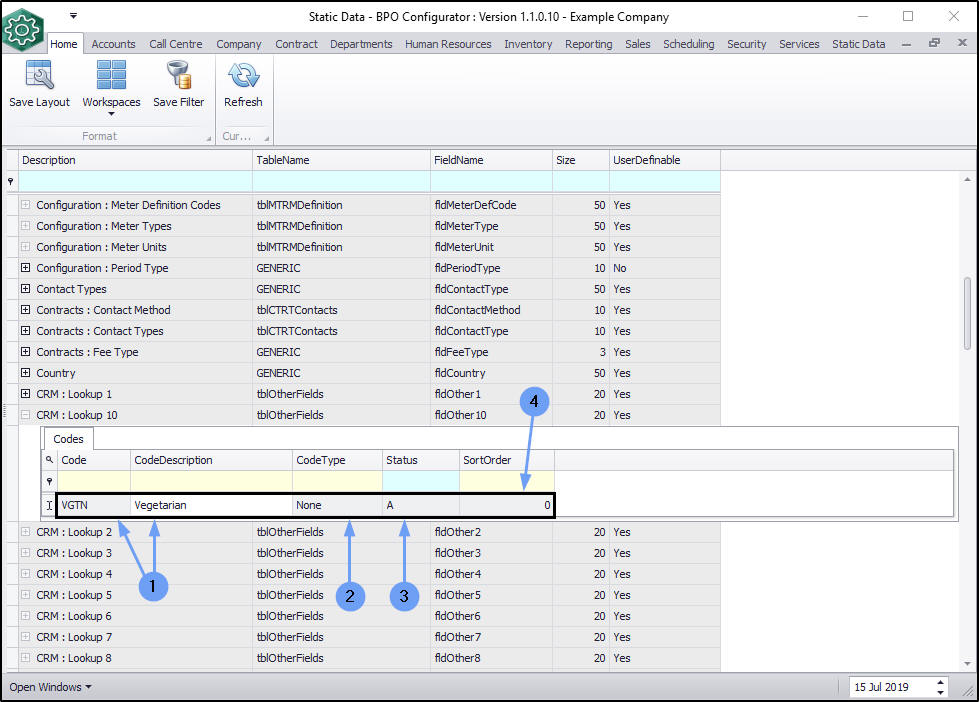
- When you have finished adding the new call error code details, either click outside of the Codes data grid or press Enter on your keyboard.
- An Update message box will pop up, asking;
- Are you sure you want to save changes to this code?
- Click on Yes.
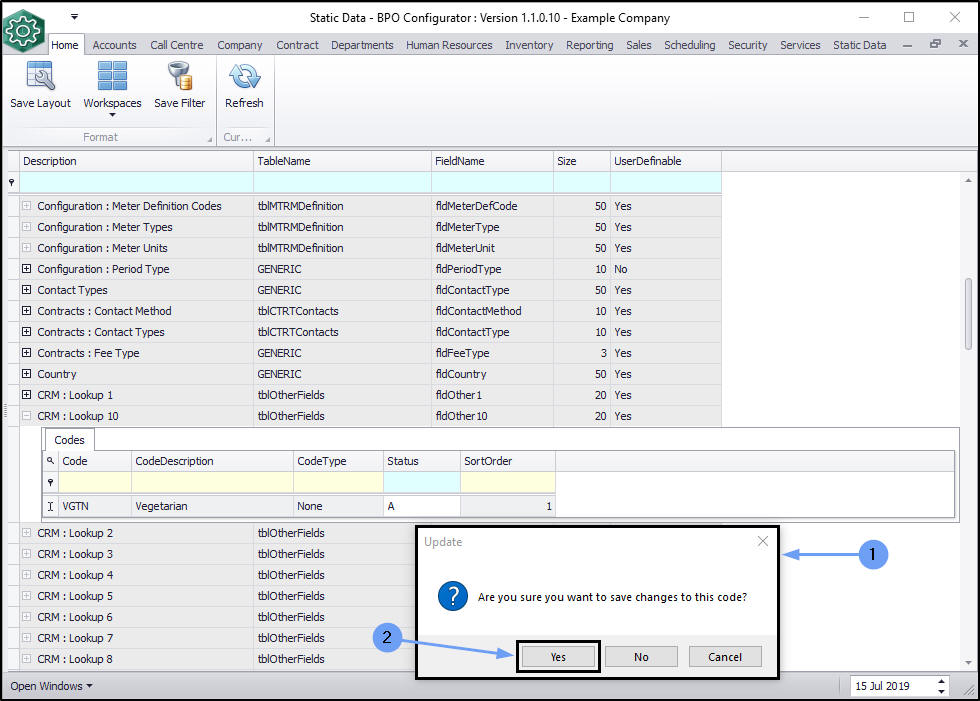
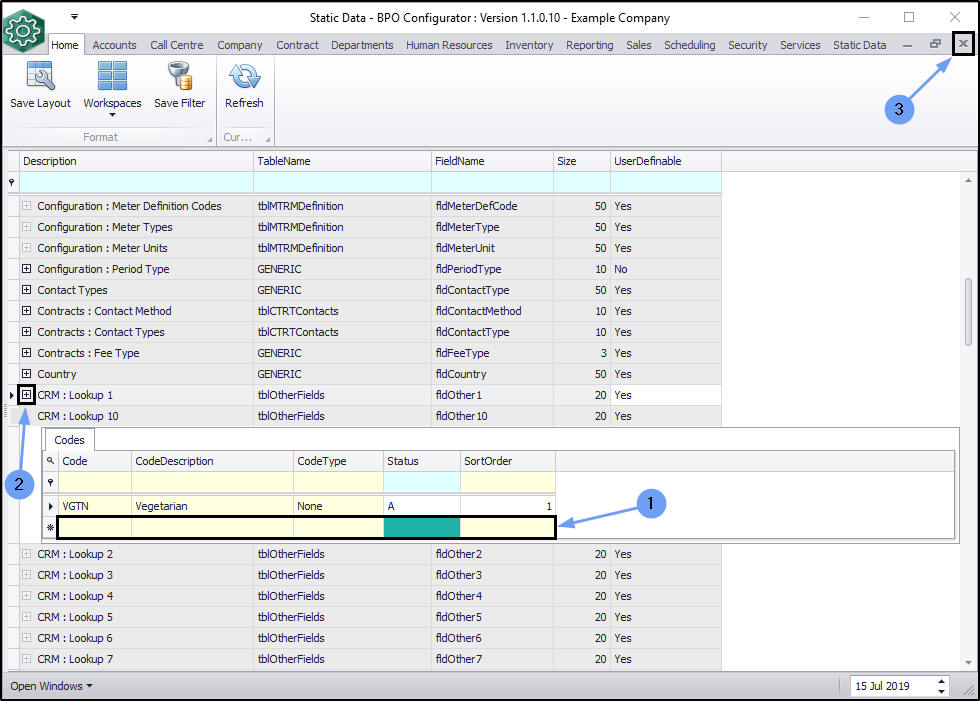
- The new CRM Lookup field code will be saved and a new row will be added to the Codes data grid.
- Collapse the Codes frame and
- Exit this screen when you are done.
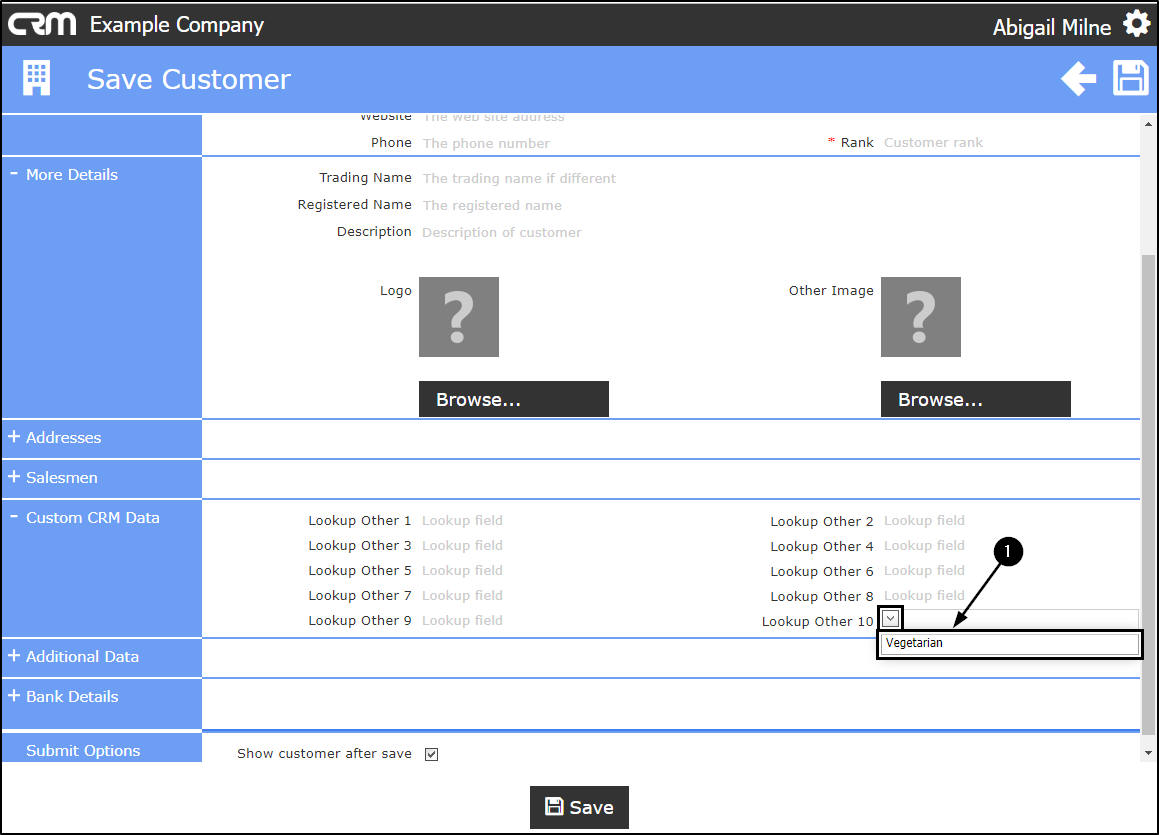
View the new Custom Data field in CRM
| Ribbon Access: Dashboard > Add New Items > Customer tile > Save Customer screen > More Details frame > Custom CRM Data frame |
To view the new Custom Data field, navigate to the Save Customer screen in CRM.
- In the Custom CRM Data frame,
- Click in the Lookup Other 10 field.
- The code description that was created and saved in the above process (Vegetarian) is now available for selection in this field.
CRM.000.021