We are currently updating our site; thank you for your patience.
Contract
Contracts - Item Contact
Ribbon Select Contract > Contracts

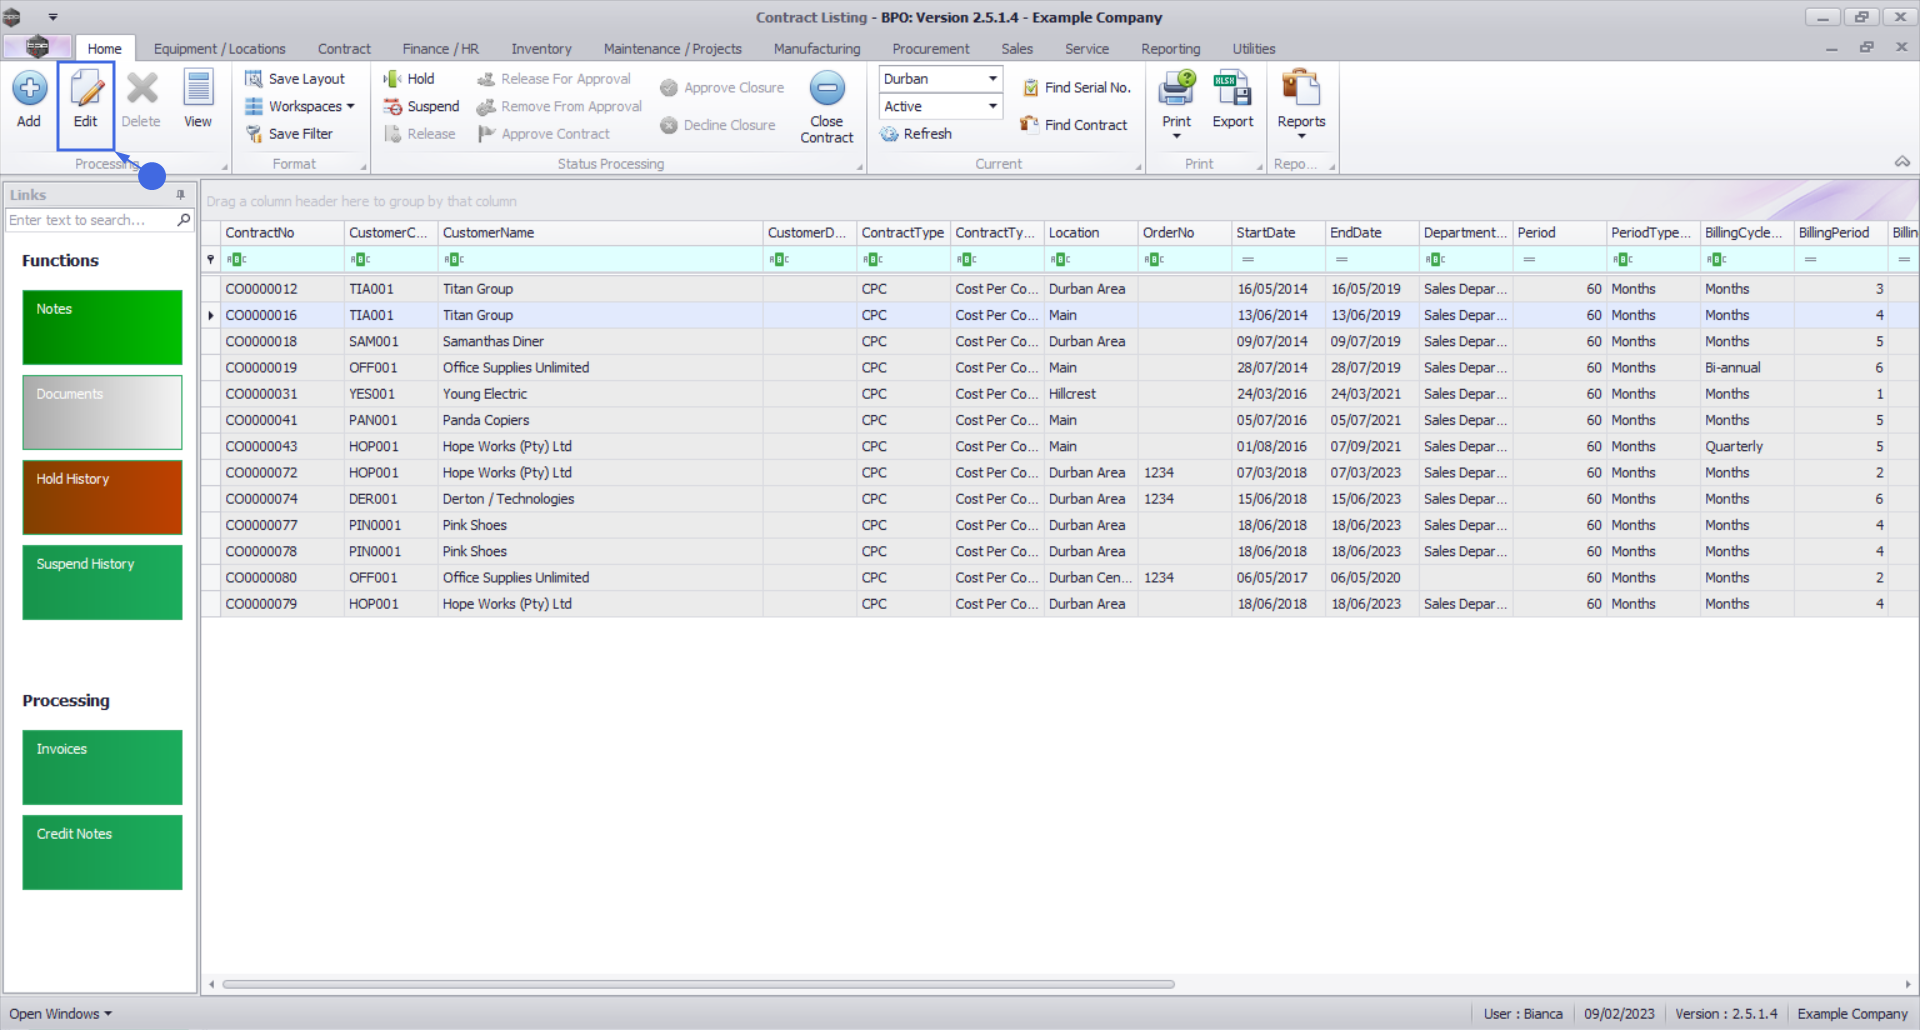
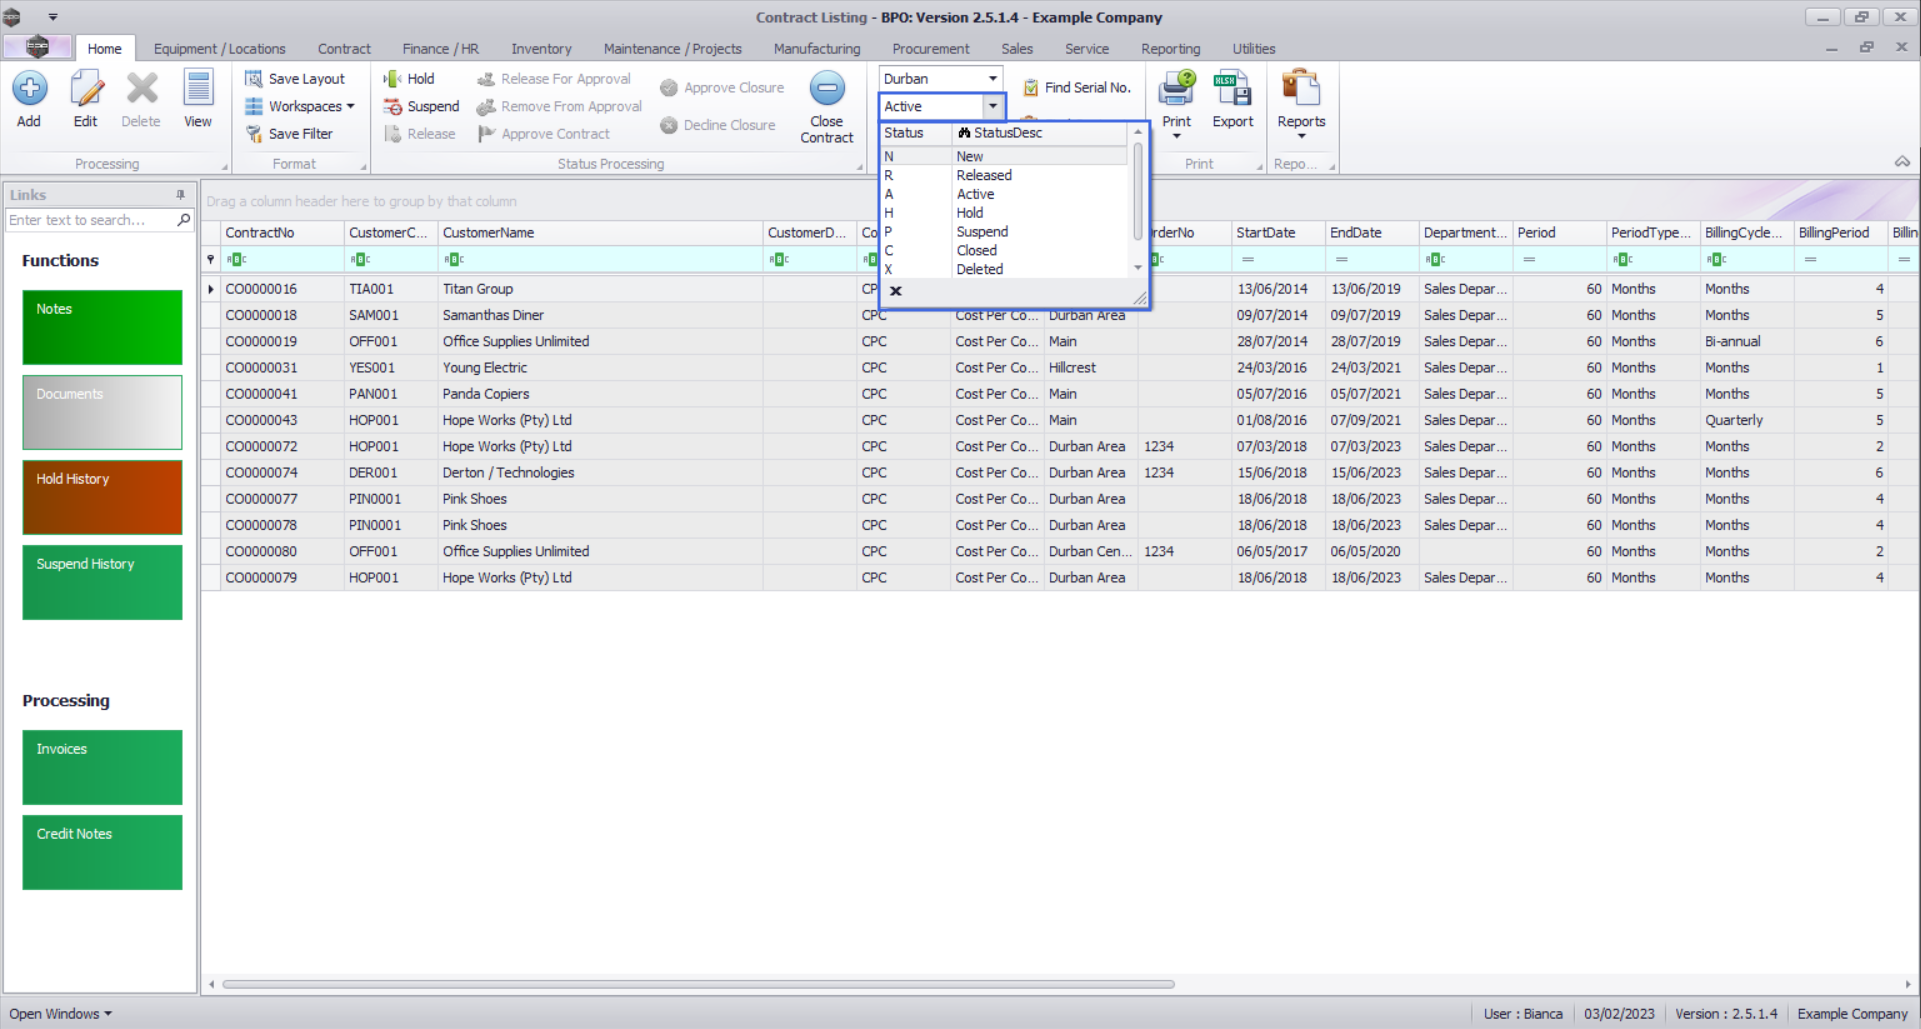
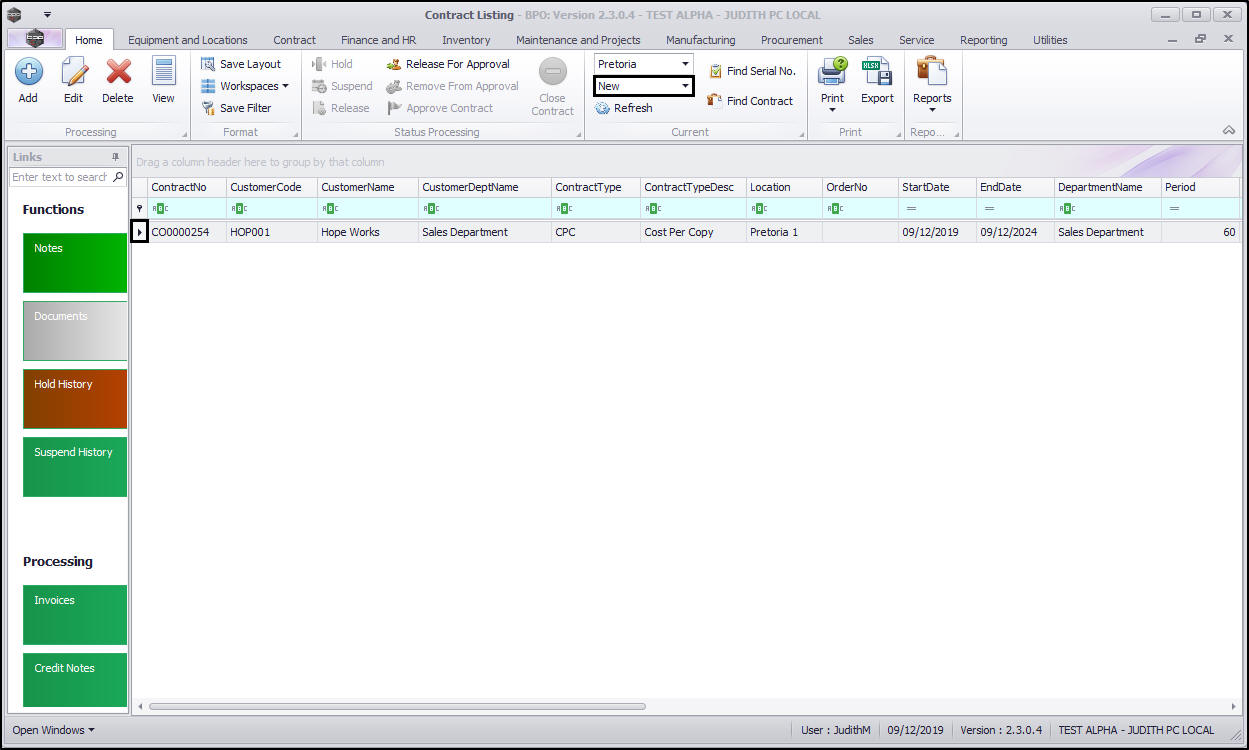
The Contract Listing screen will be displayed.
Your employee user record should be linked to a default site. In this case, the site will auto populate with this default, otherwise the site must be manually selected.
Another site can be selected, if required, and if you have the security rights to access the site.
If All Sites displays here, then you do not have a default site configured on your user record, and need to select the required site.
Upon opening, this screen will default to the Active status, listing all the Active contracts for the selected site.

- Select the row of the contract that you wish to process.

- Click on the Edit button.
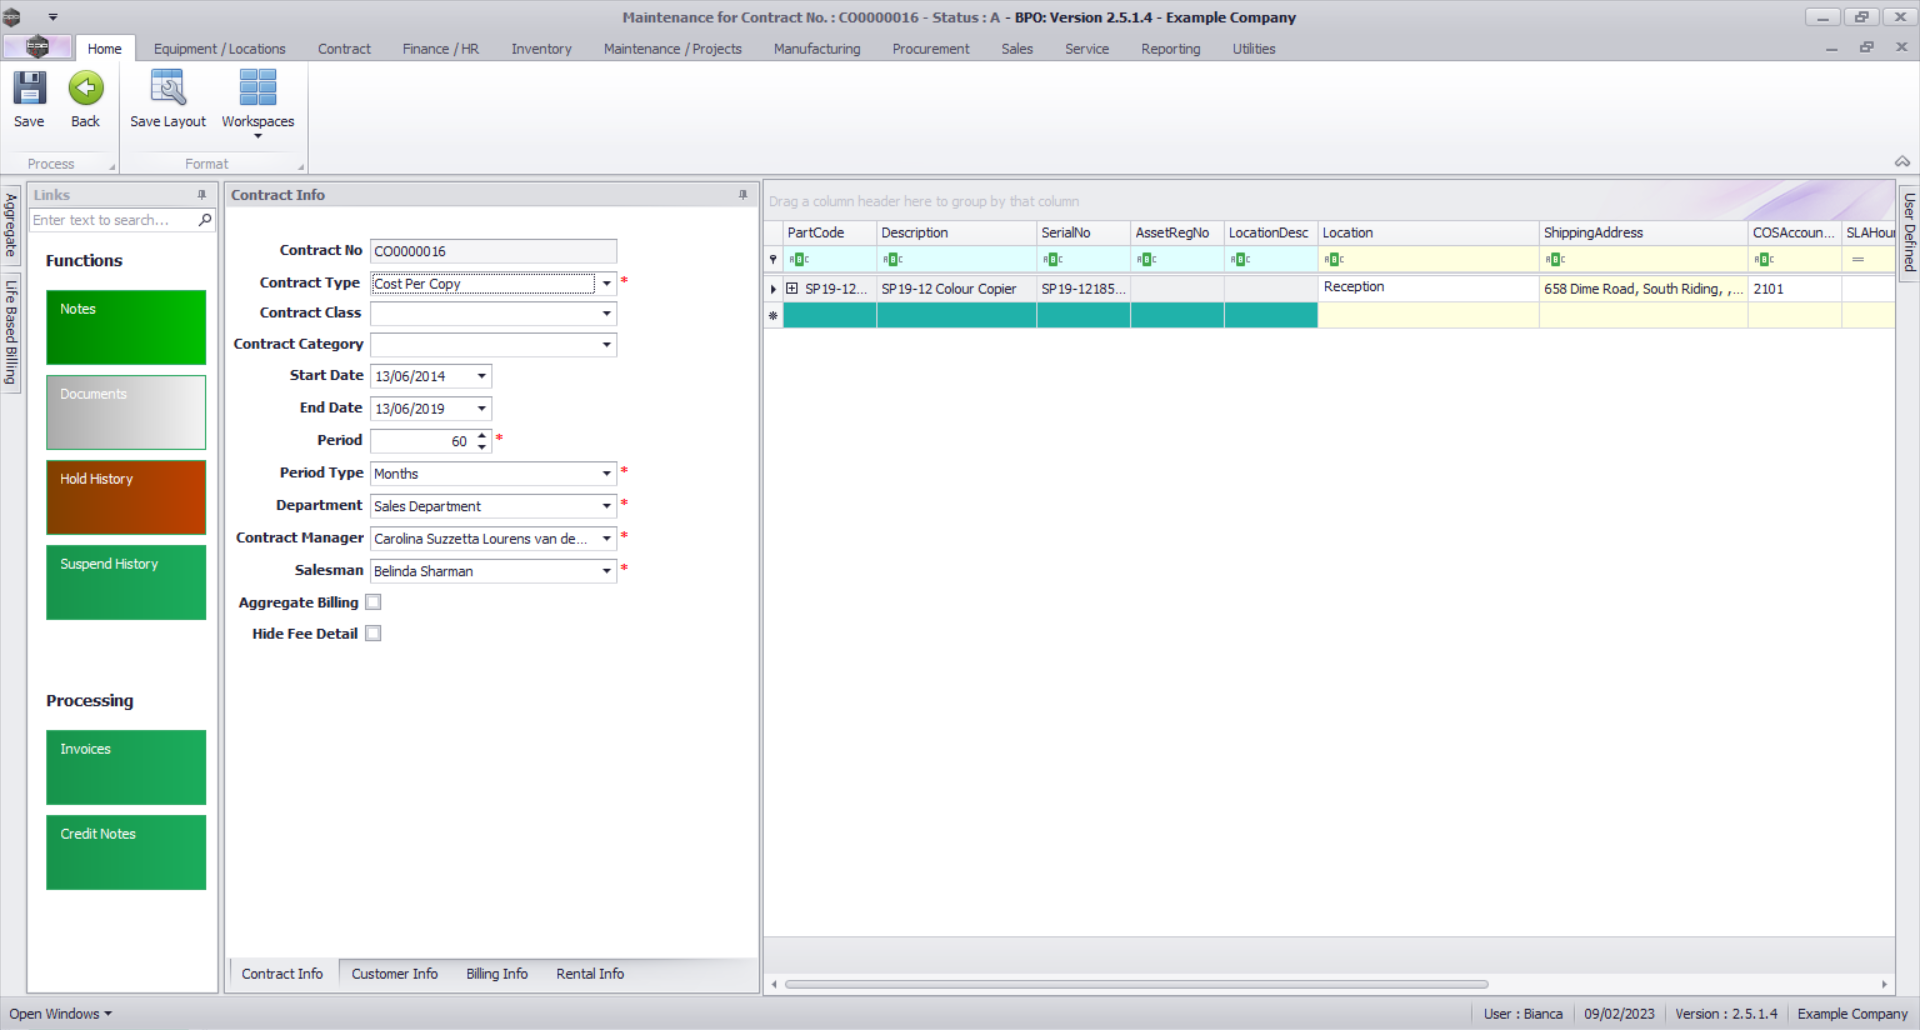
The Contract Maintenance screen will be displayed.
Item Contacts
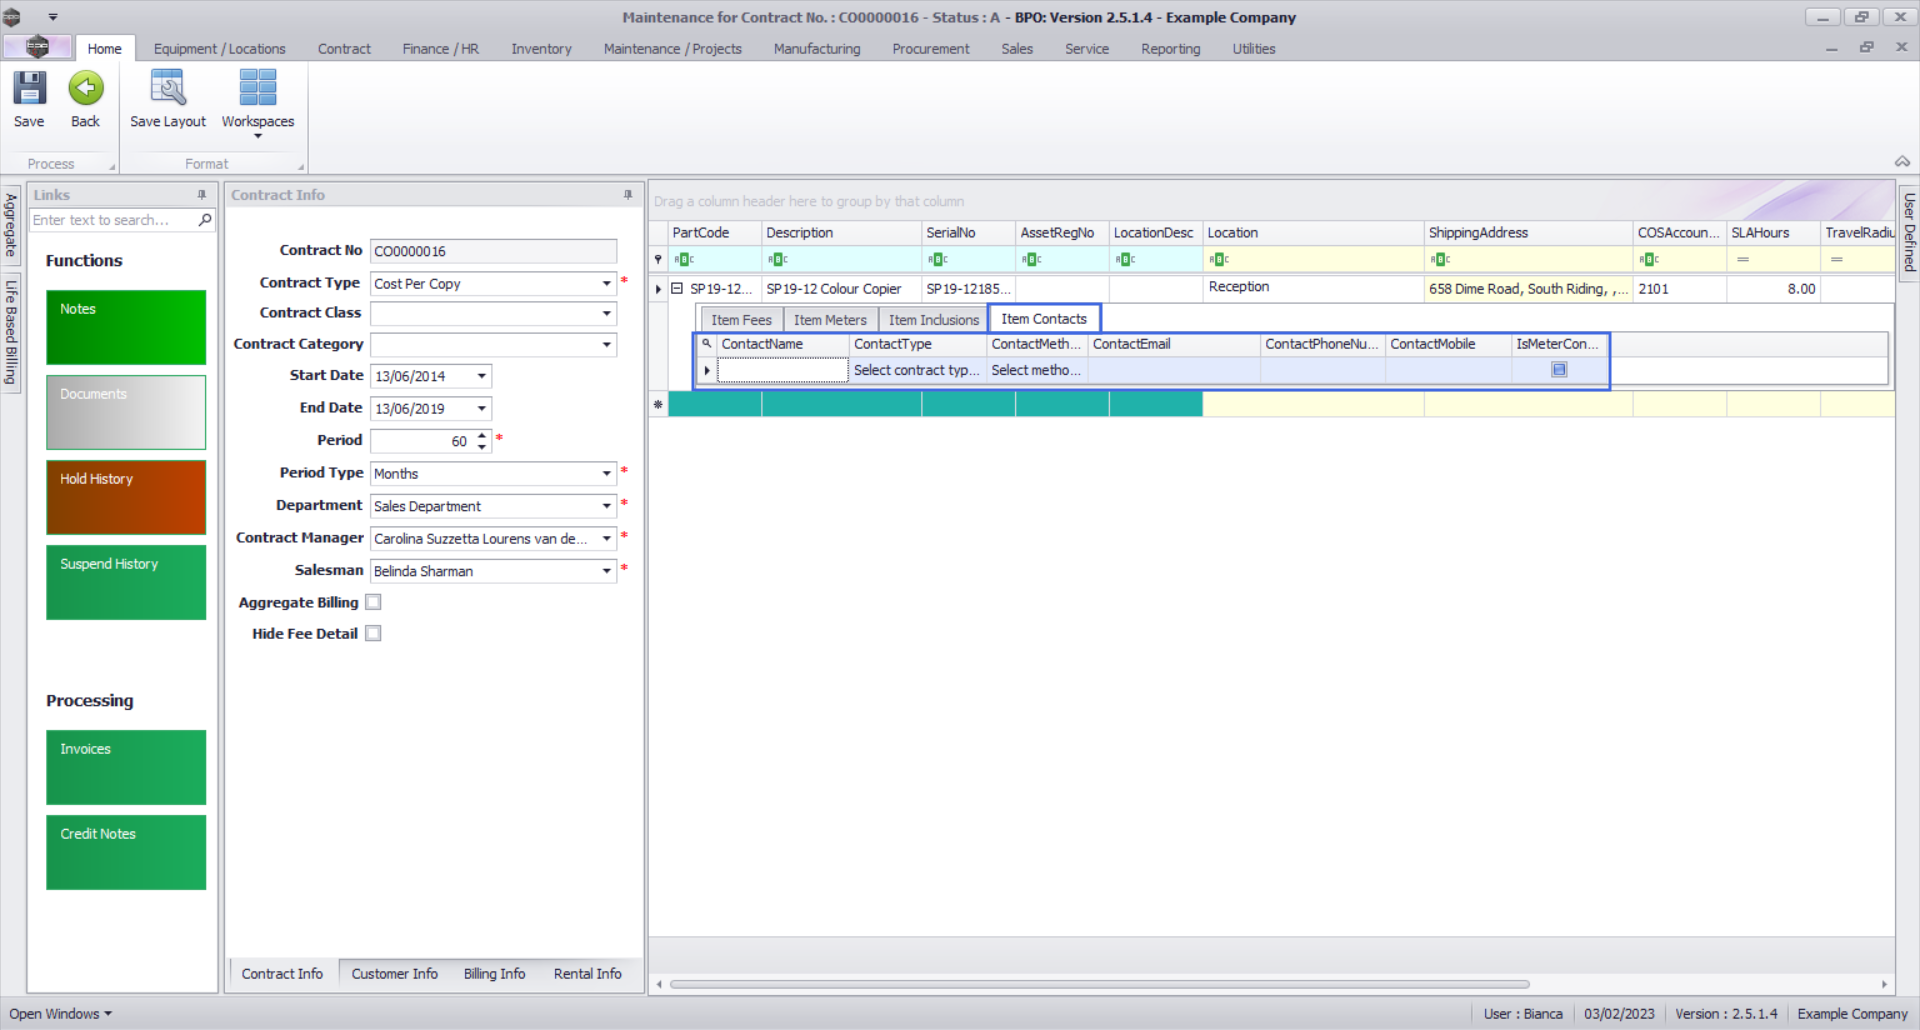
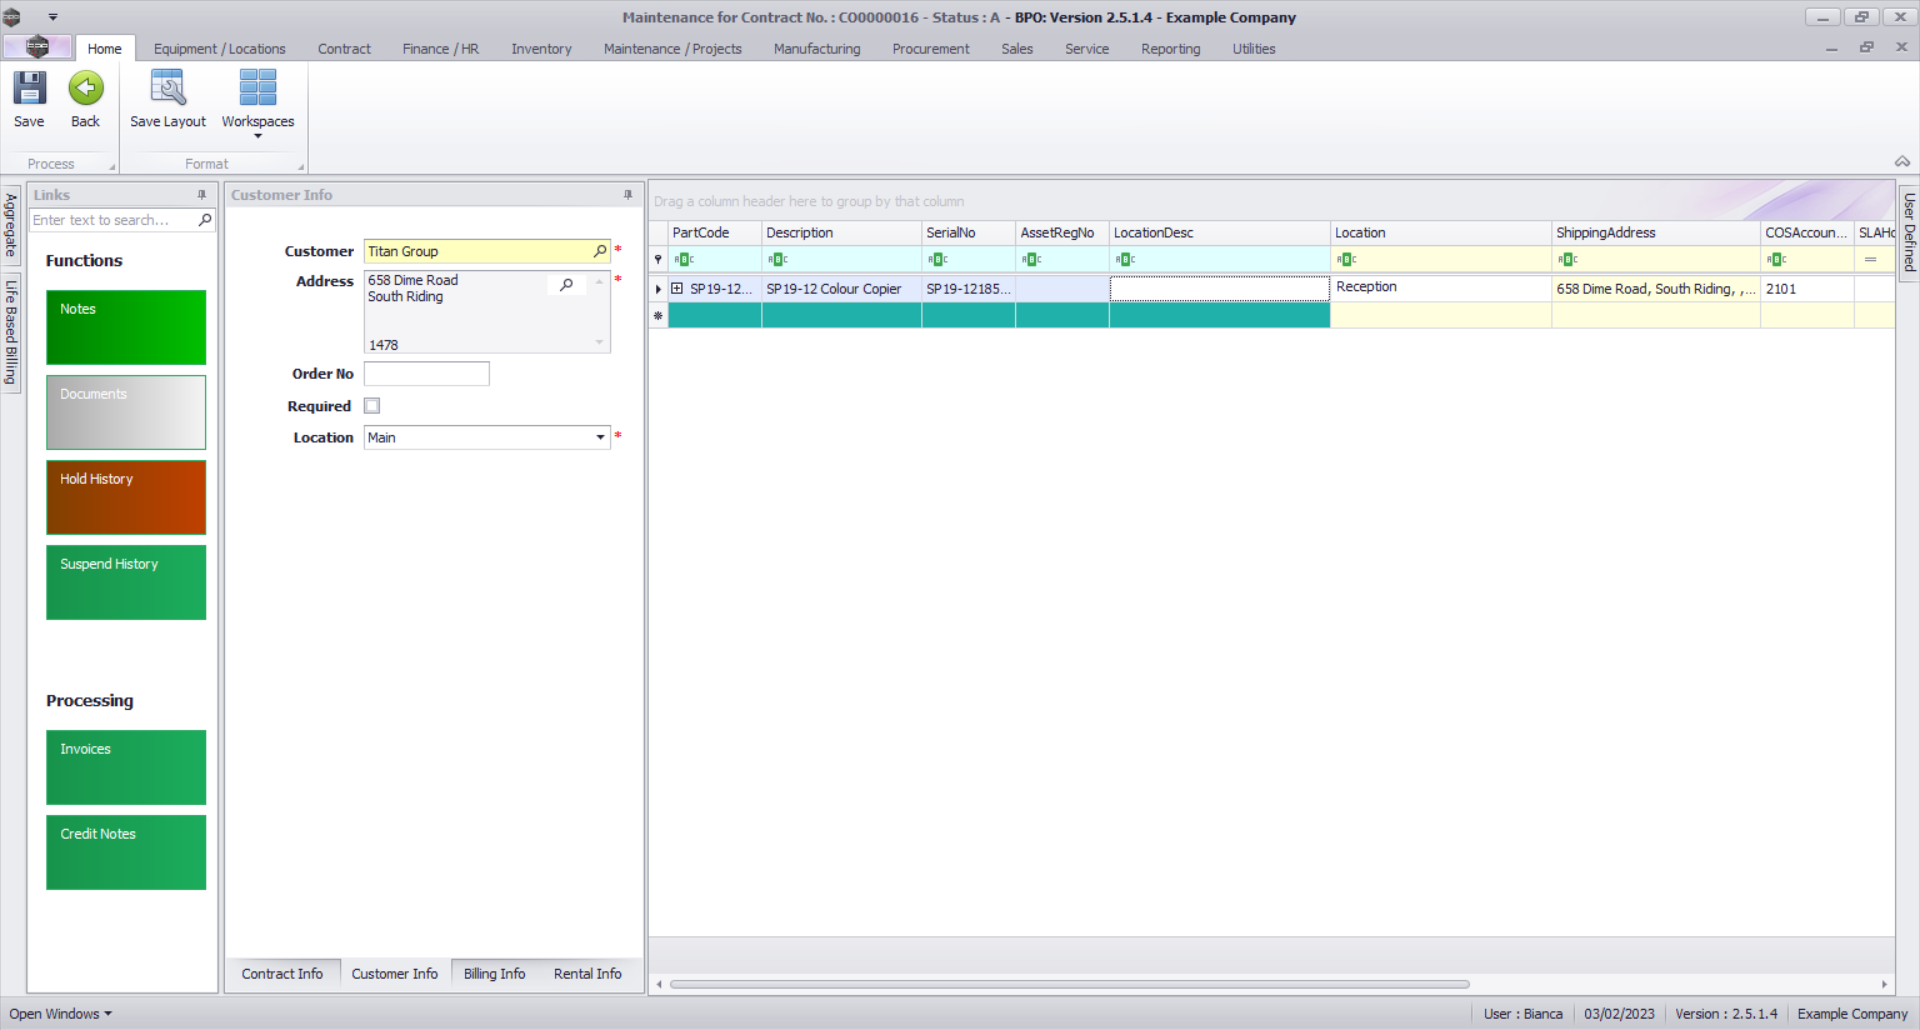
- Ensure you have the contract item selected and then click on the Item Contacts tab.
- The Item Contacts frame will be expanded.
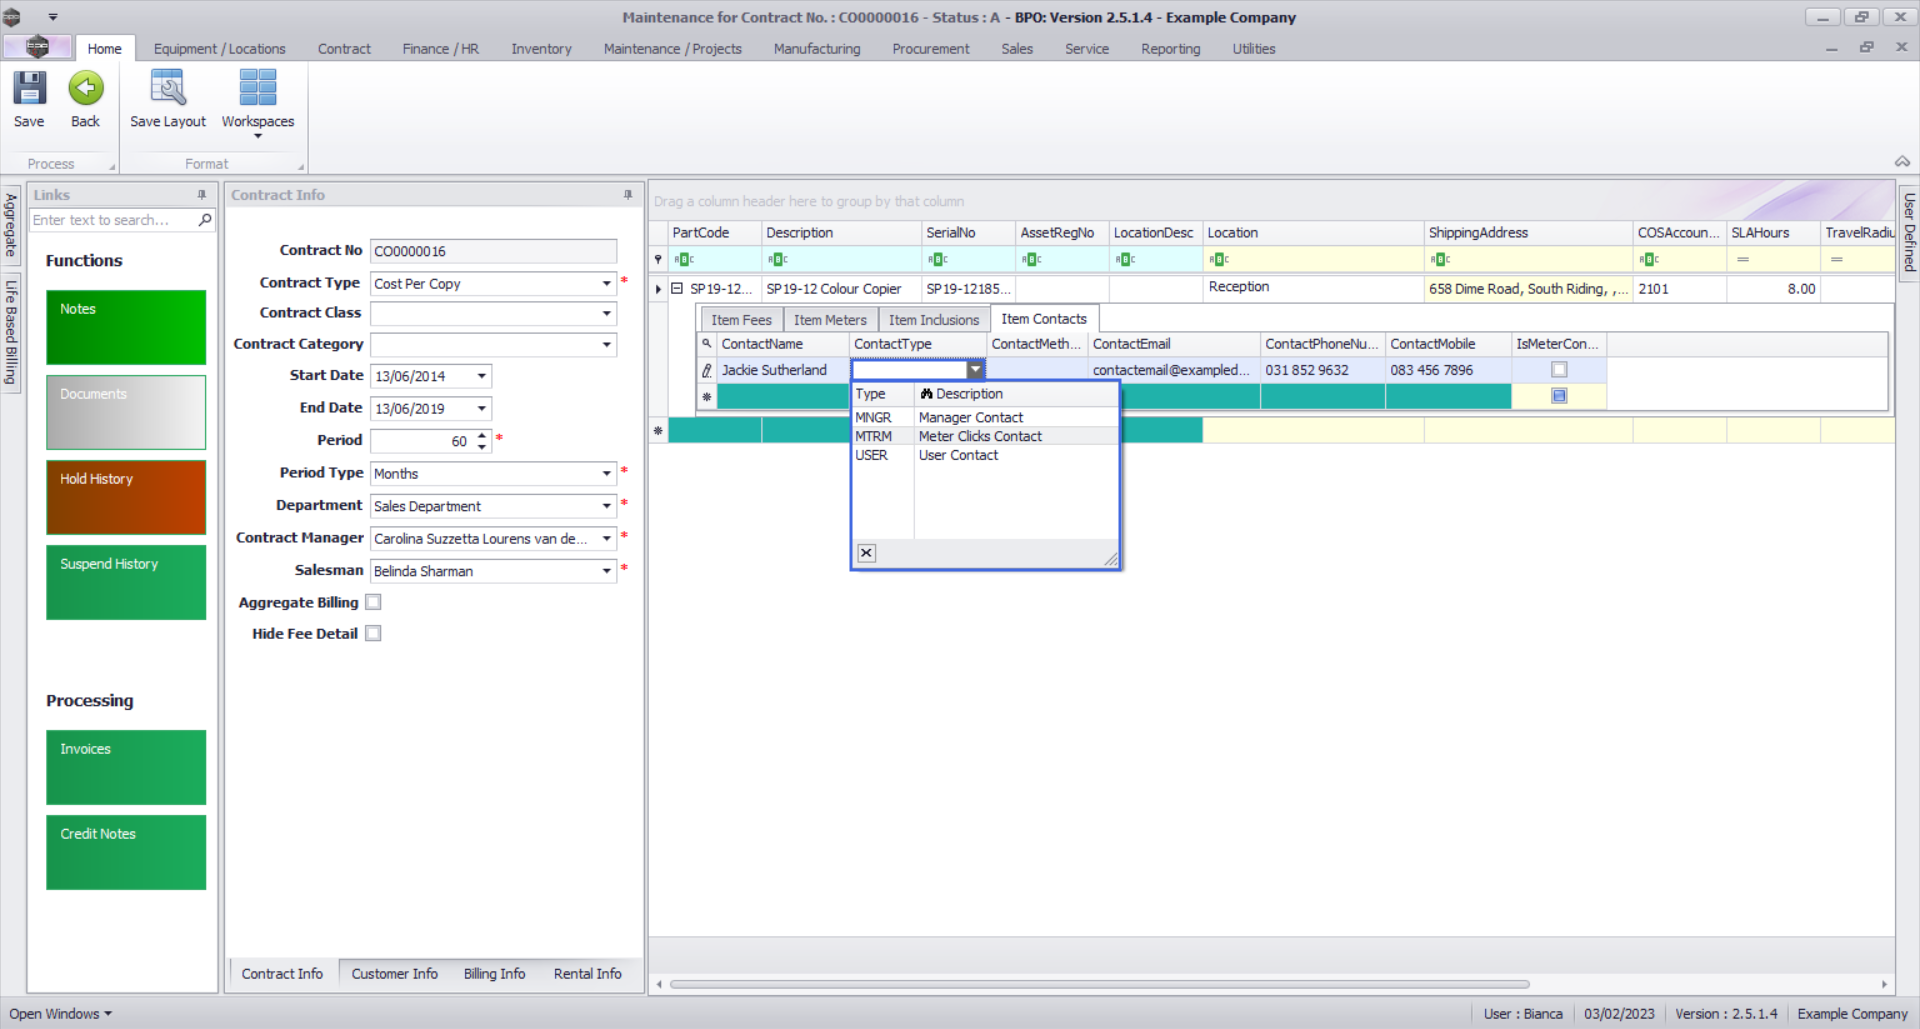
You can add up to 3 types of contacts, depending on your requirements:
- Manager Contact: the client contact who manages the contract or relevant contract item
- Meter Clicks Contact: the client contact who will provide meter readings.
- User Contact: the client contact who can be called with regards to user queries.
Add a Contact
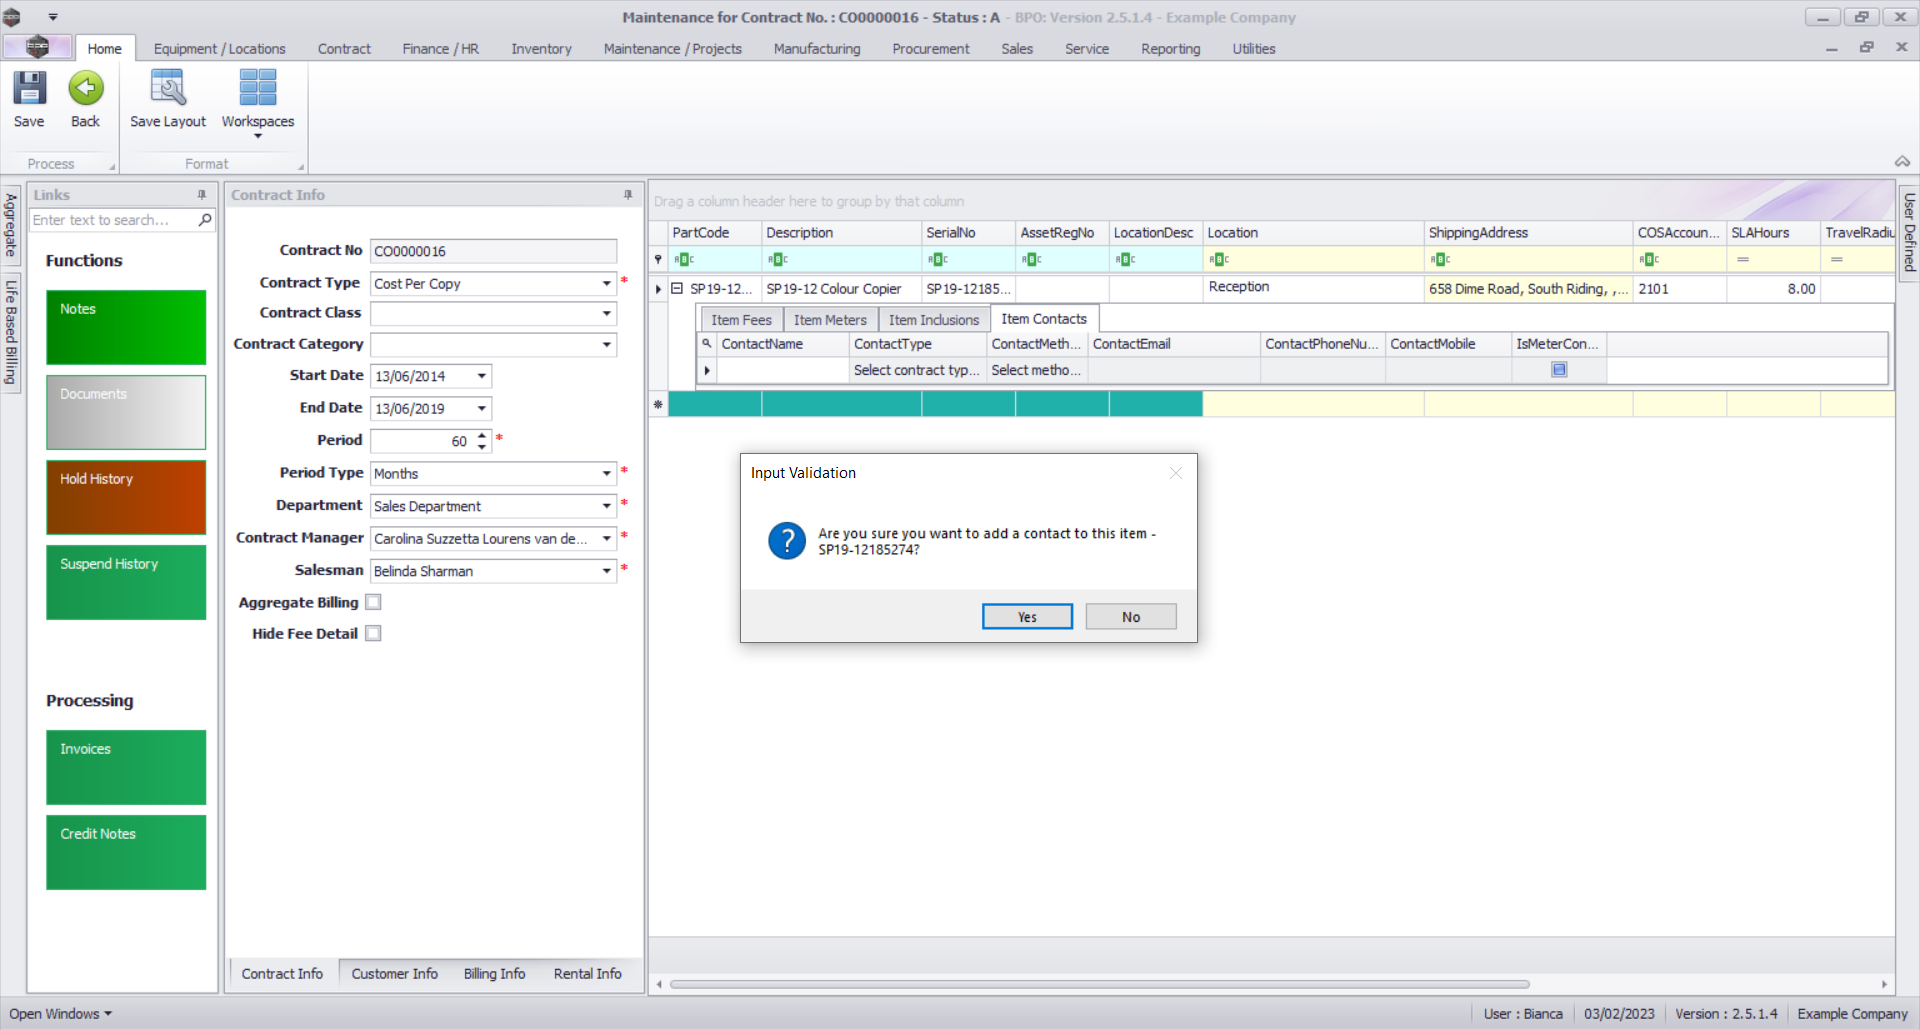
- Right click anywhere in the first row of the Item Contacts frame.
- A Process menu will pop up.
- Click on Contact - Add a contact.
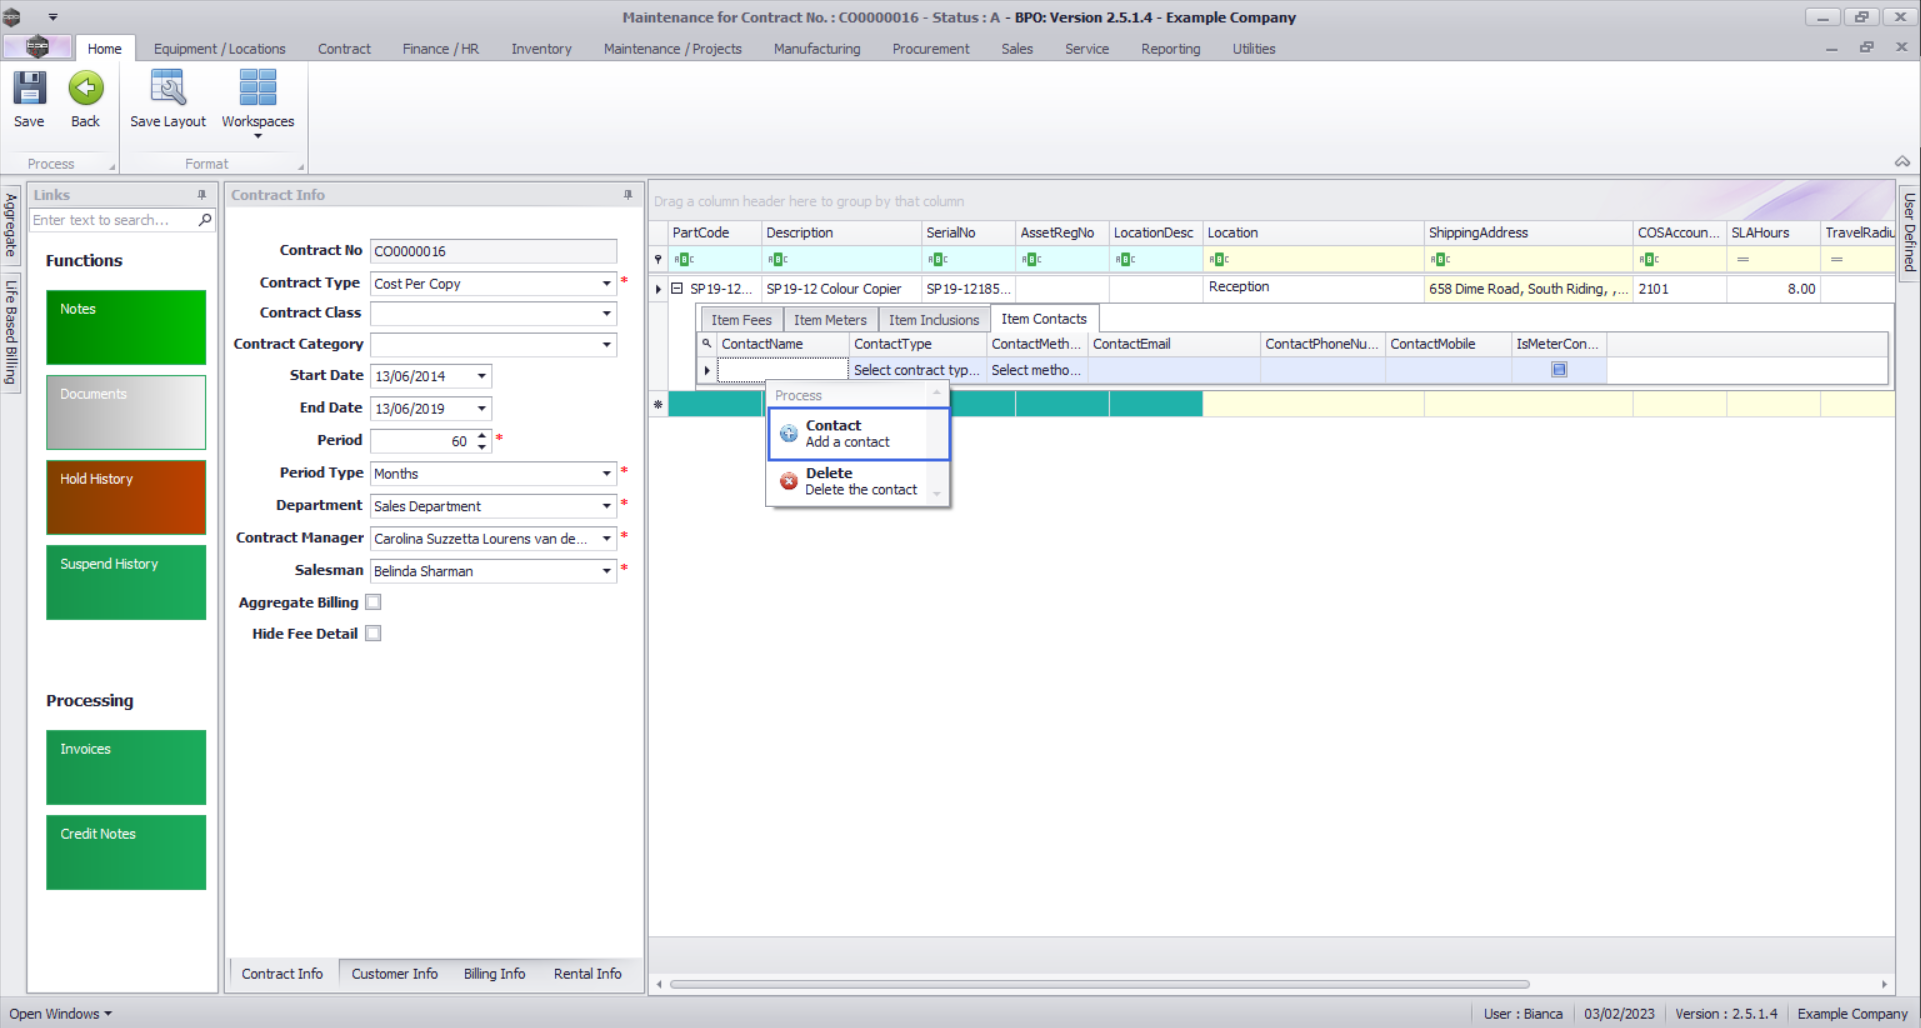
- A Process Validation message box will pop up asking:
- Are you sure you want to add a contact to this item - [Serial Number or Location Description]?
- Click on Yes.
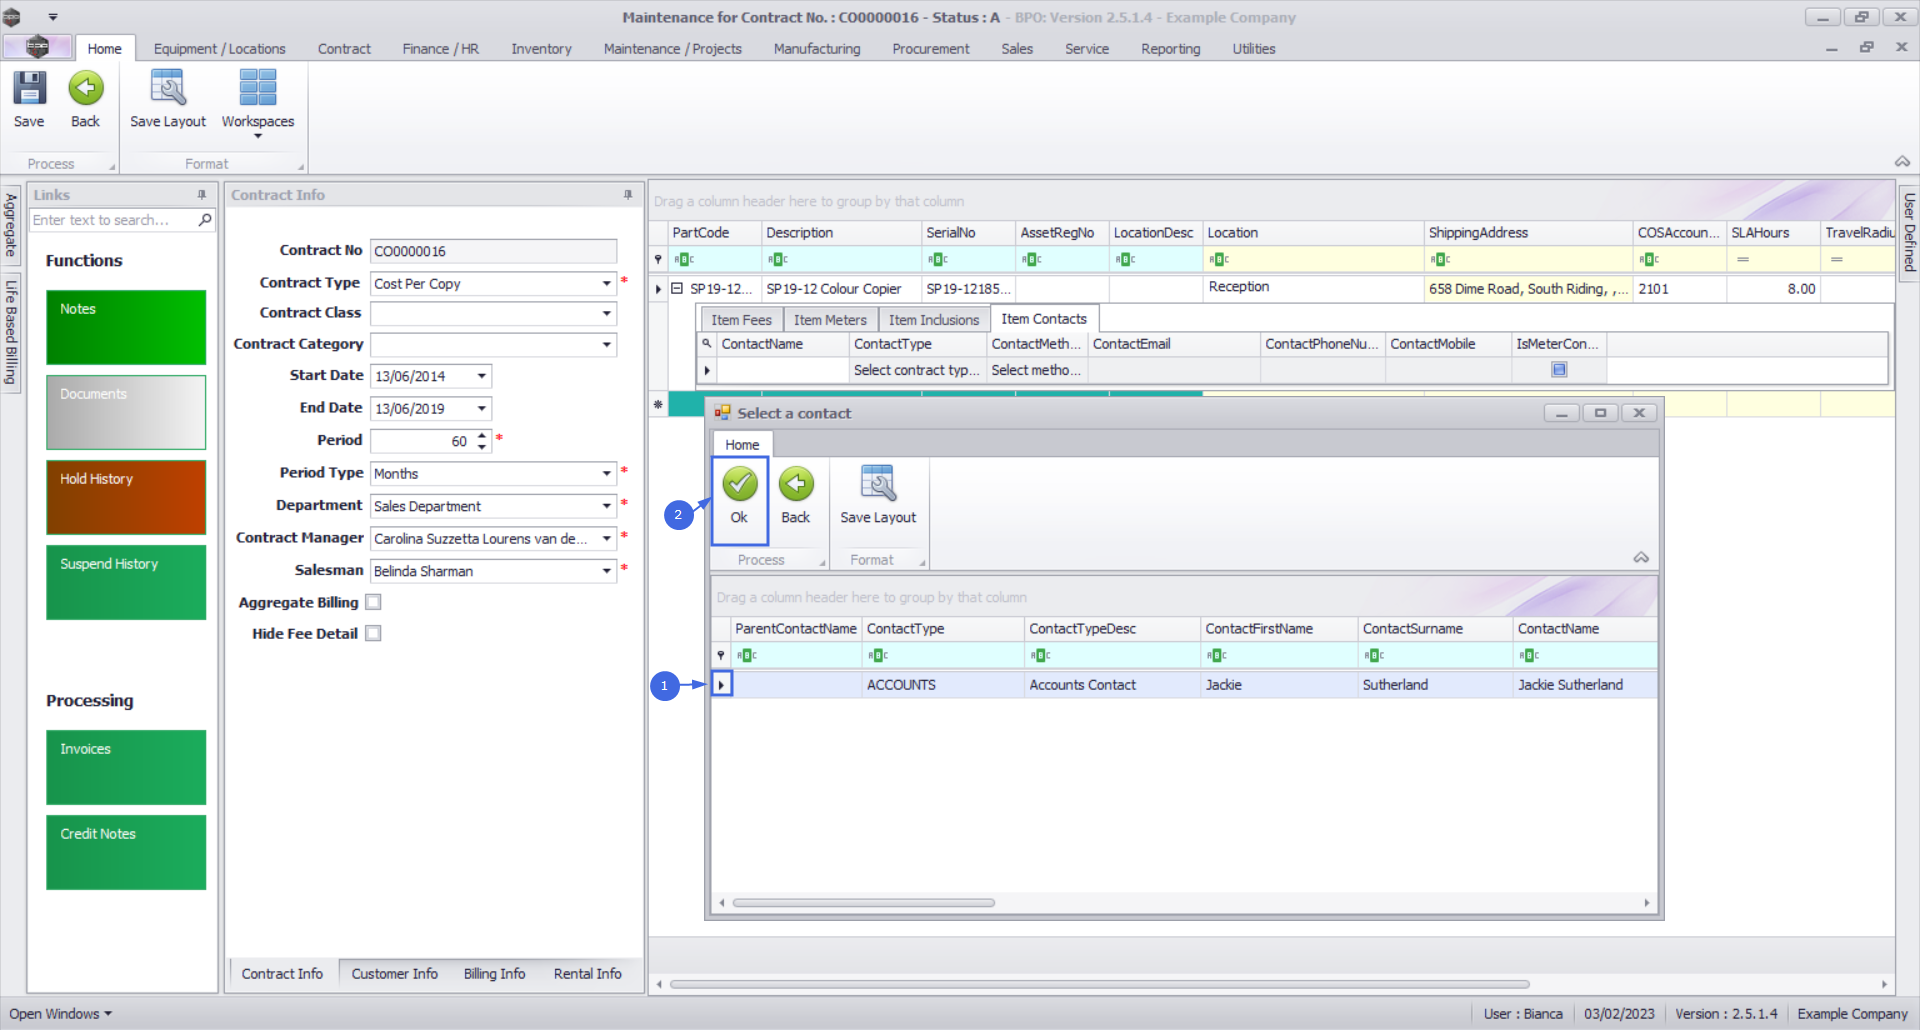
- A Select a contact pop up screen will appear.
- Click on the row selector in front of the contact you wish to add.
- Click on Ok.
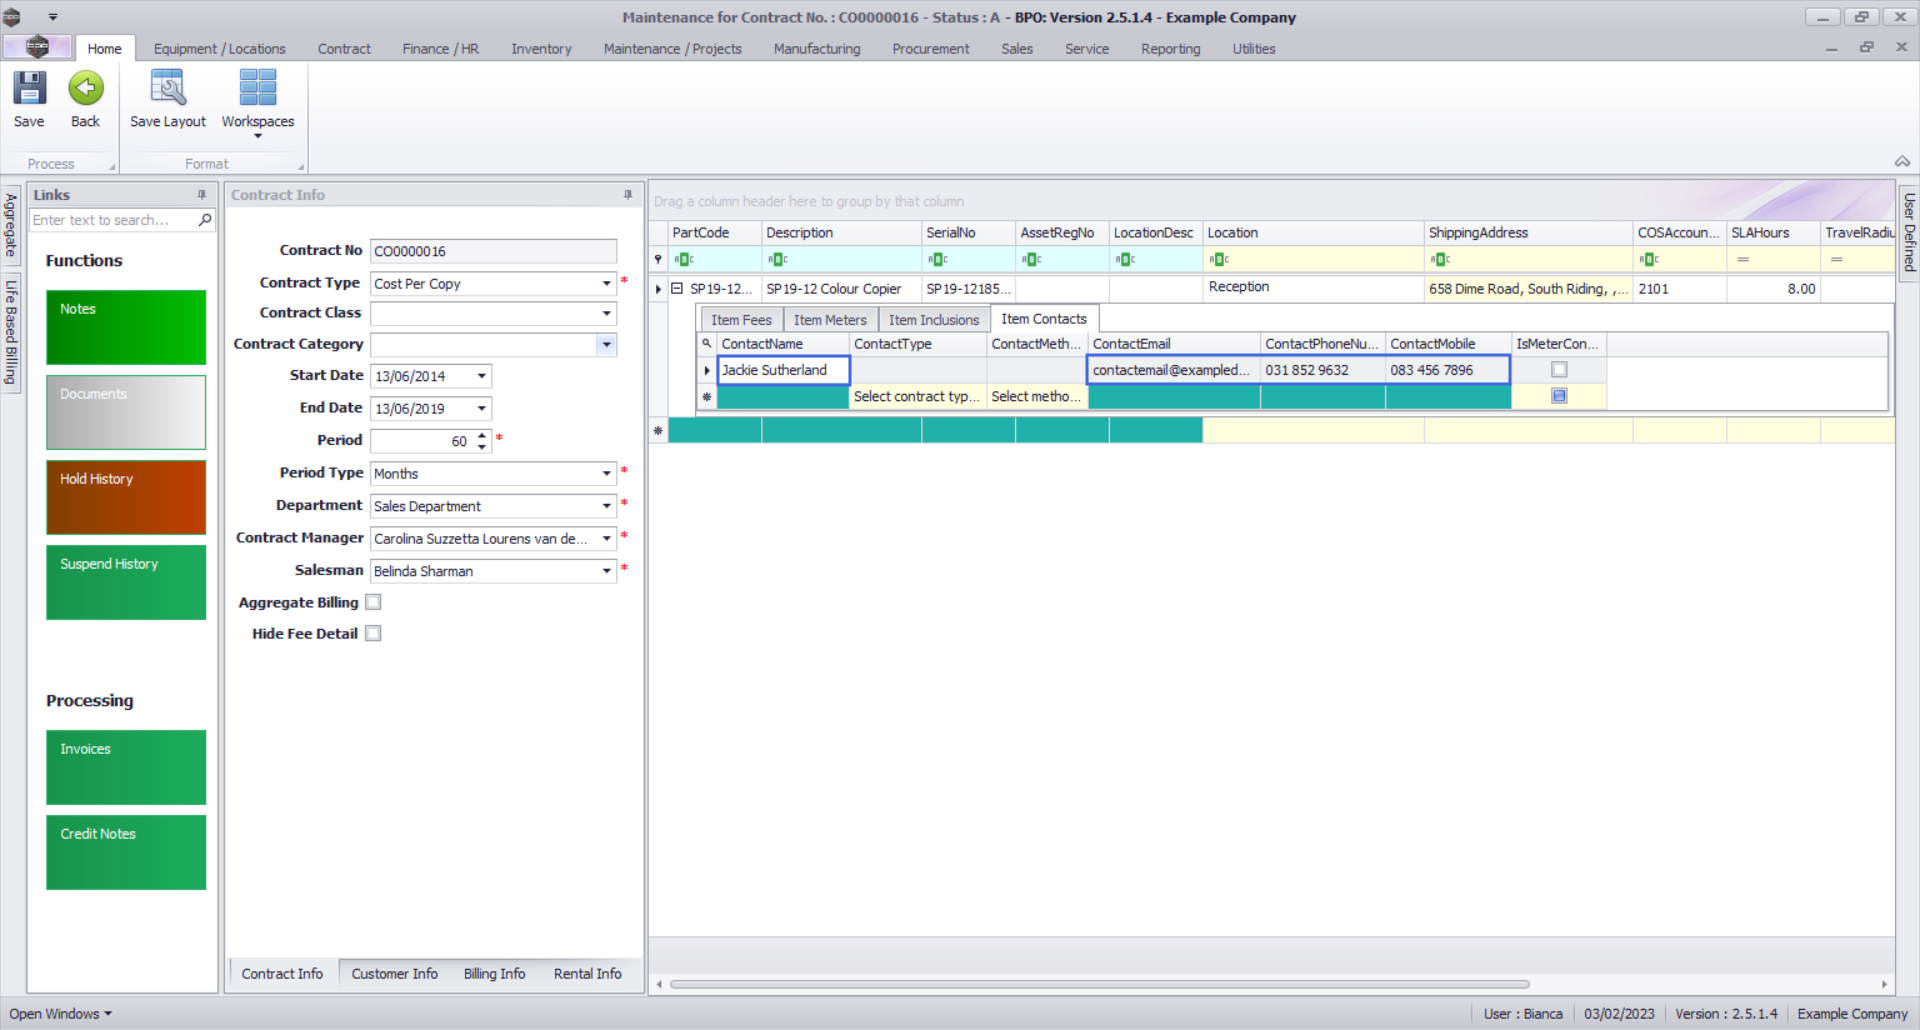
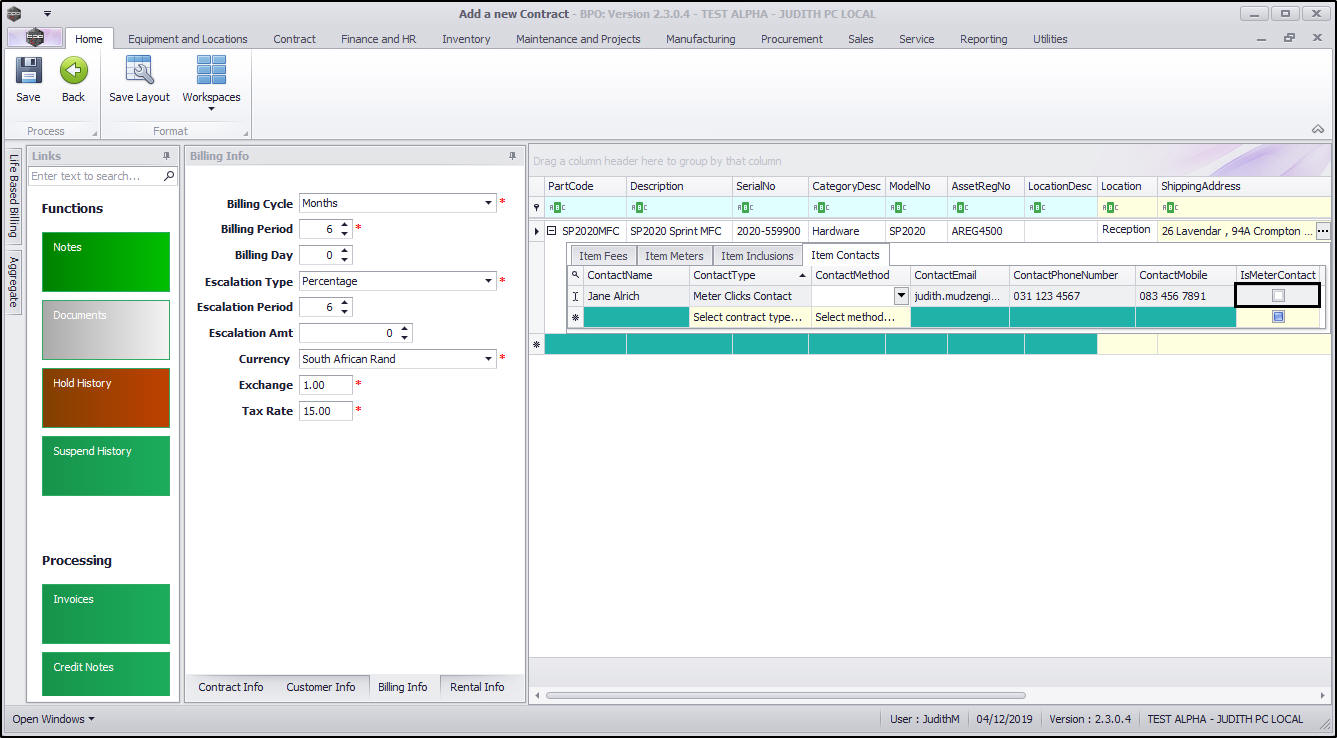
- Contact Name: This will now be populated with the selected contact's name.
- Contact Email: This will auto populate with the email address already set up on the selected contact.
- Contact Phone Number:This will auto populate with the phone number already set up on the selected contact.
- Contact Mobile: This will auto populate with the mobile number already set up on the selected contact.
- Click in the Contact Type text box to reveal a drop-down arrow.
- Click on this arrow to display a Contact Type drop-down menu.
- Click on the contact type you wish to assign to this Item.
- Click in the Contact Method text box to reveal a drop-down arrow.
- Click on this arrow to display a Contact Method drop-down menu.
- Click on the preferred contact method you wish to use.
- In this image Email has been selected.
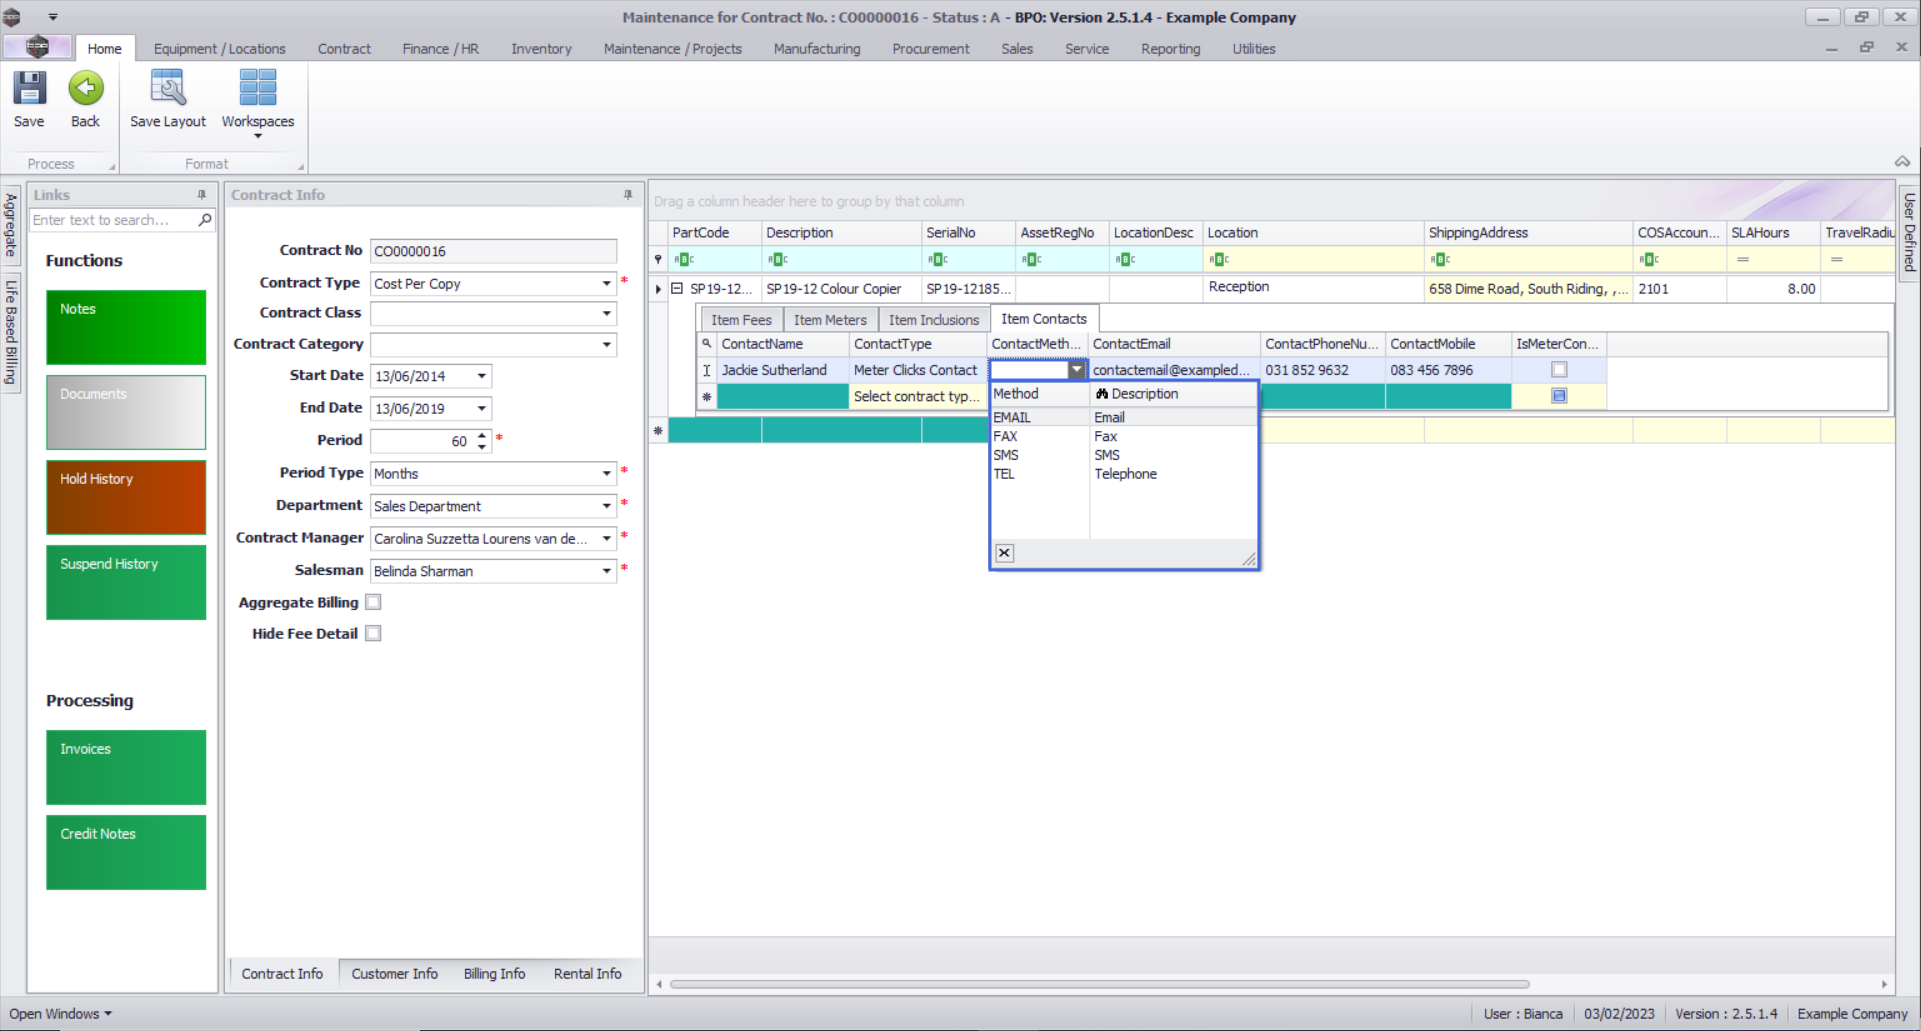
- Is Meter Contact: Select this check box for the main meter contact - this is important where meter charges have been linked to the contract item, as this contact will display in the Meter Capture screens (Unprocessed Meters and Meter Usage) and will be used when sending Meter Reading Email Requests.
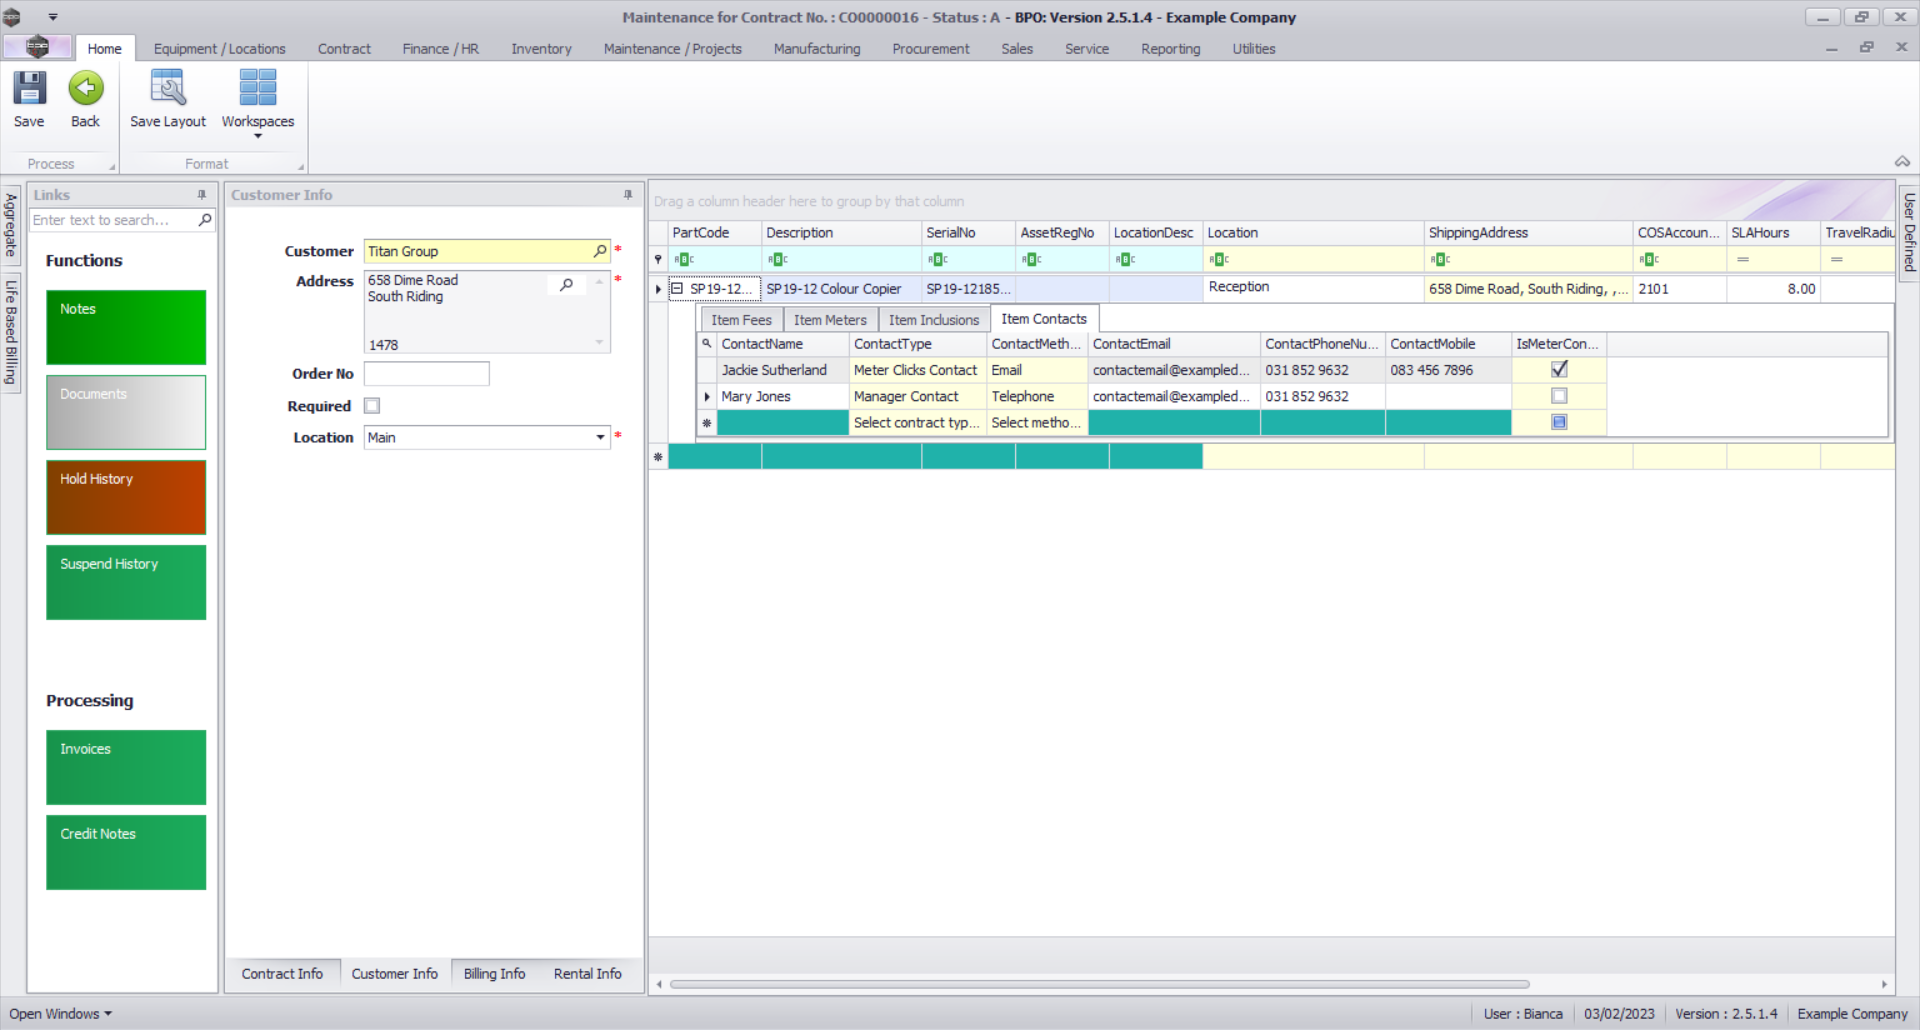
- You can add further contacts to this frame by right clicking anywhere in a row of the Item Contacts frame and following the same process as above.
- In this image a second contact has been added.
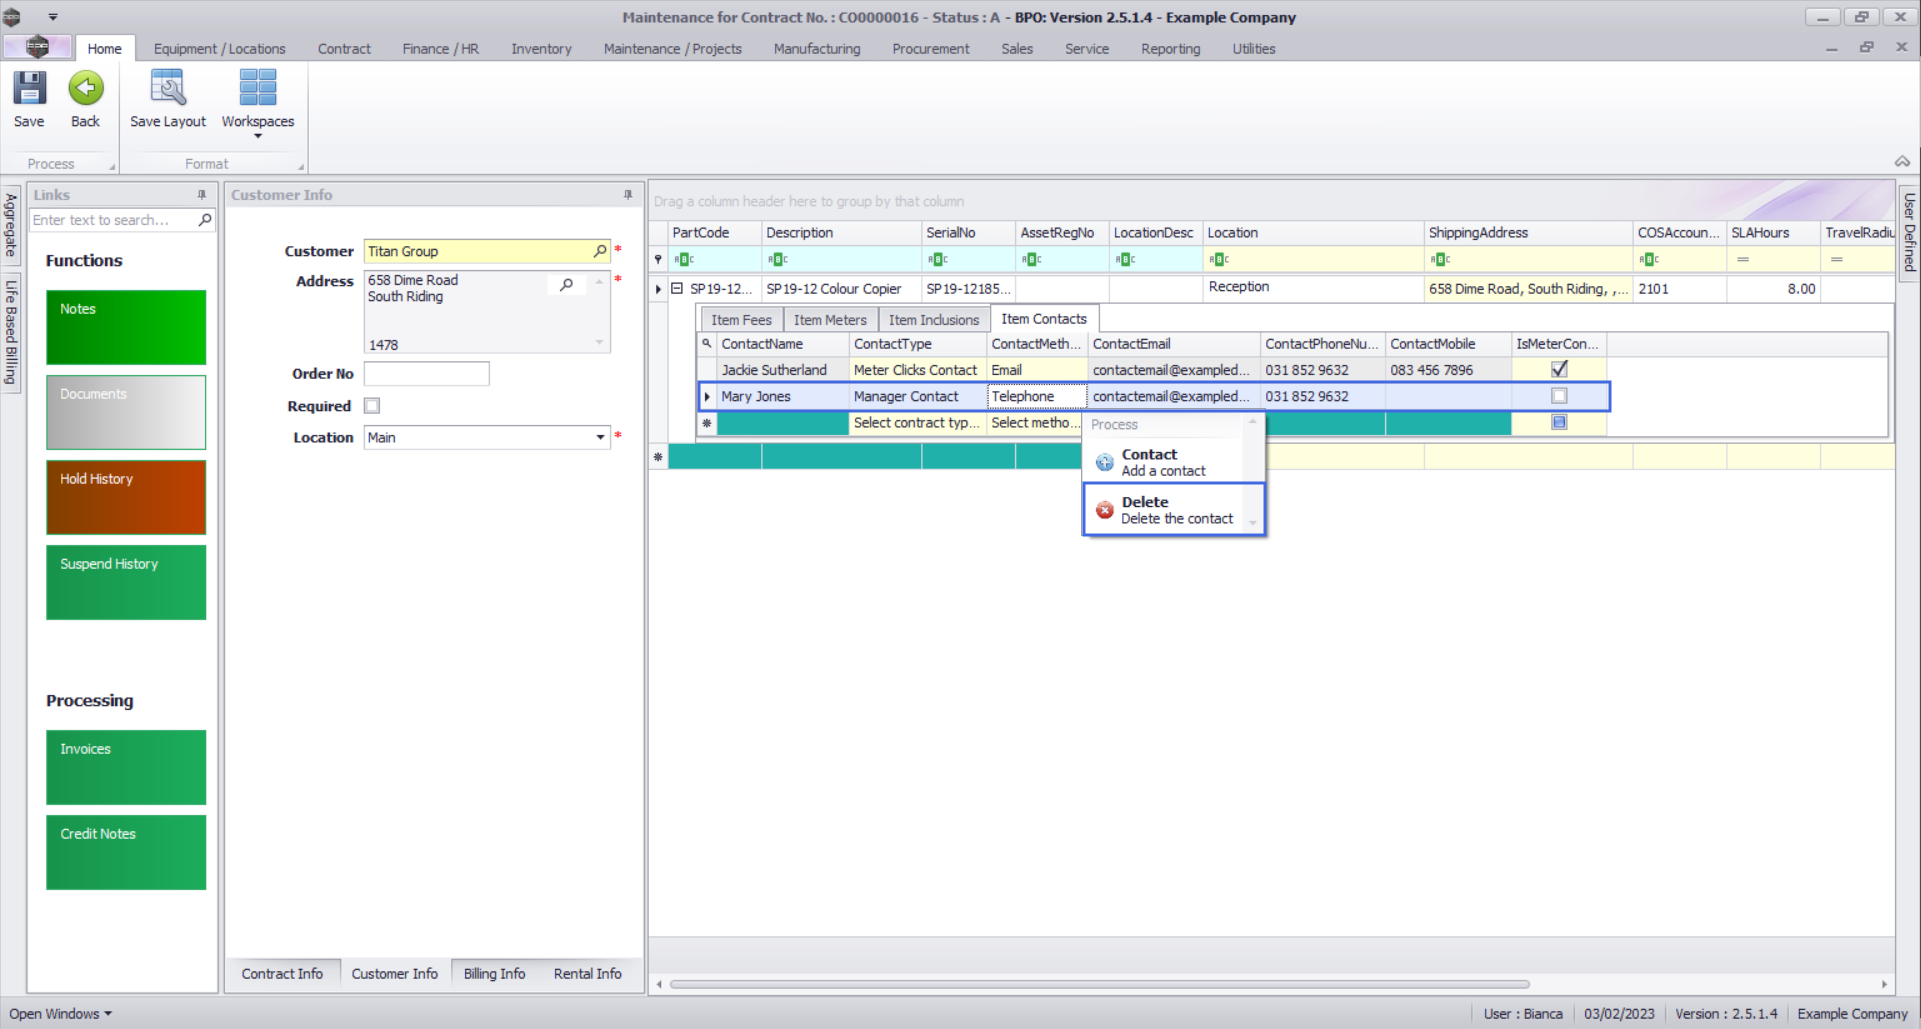
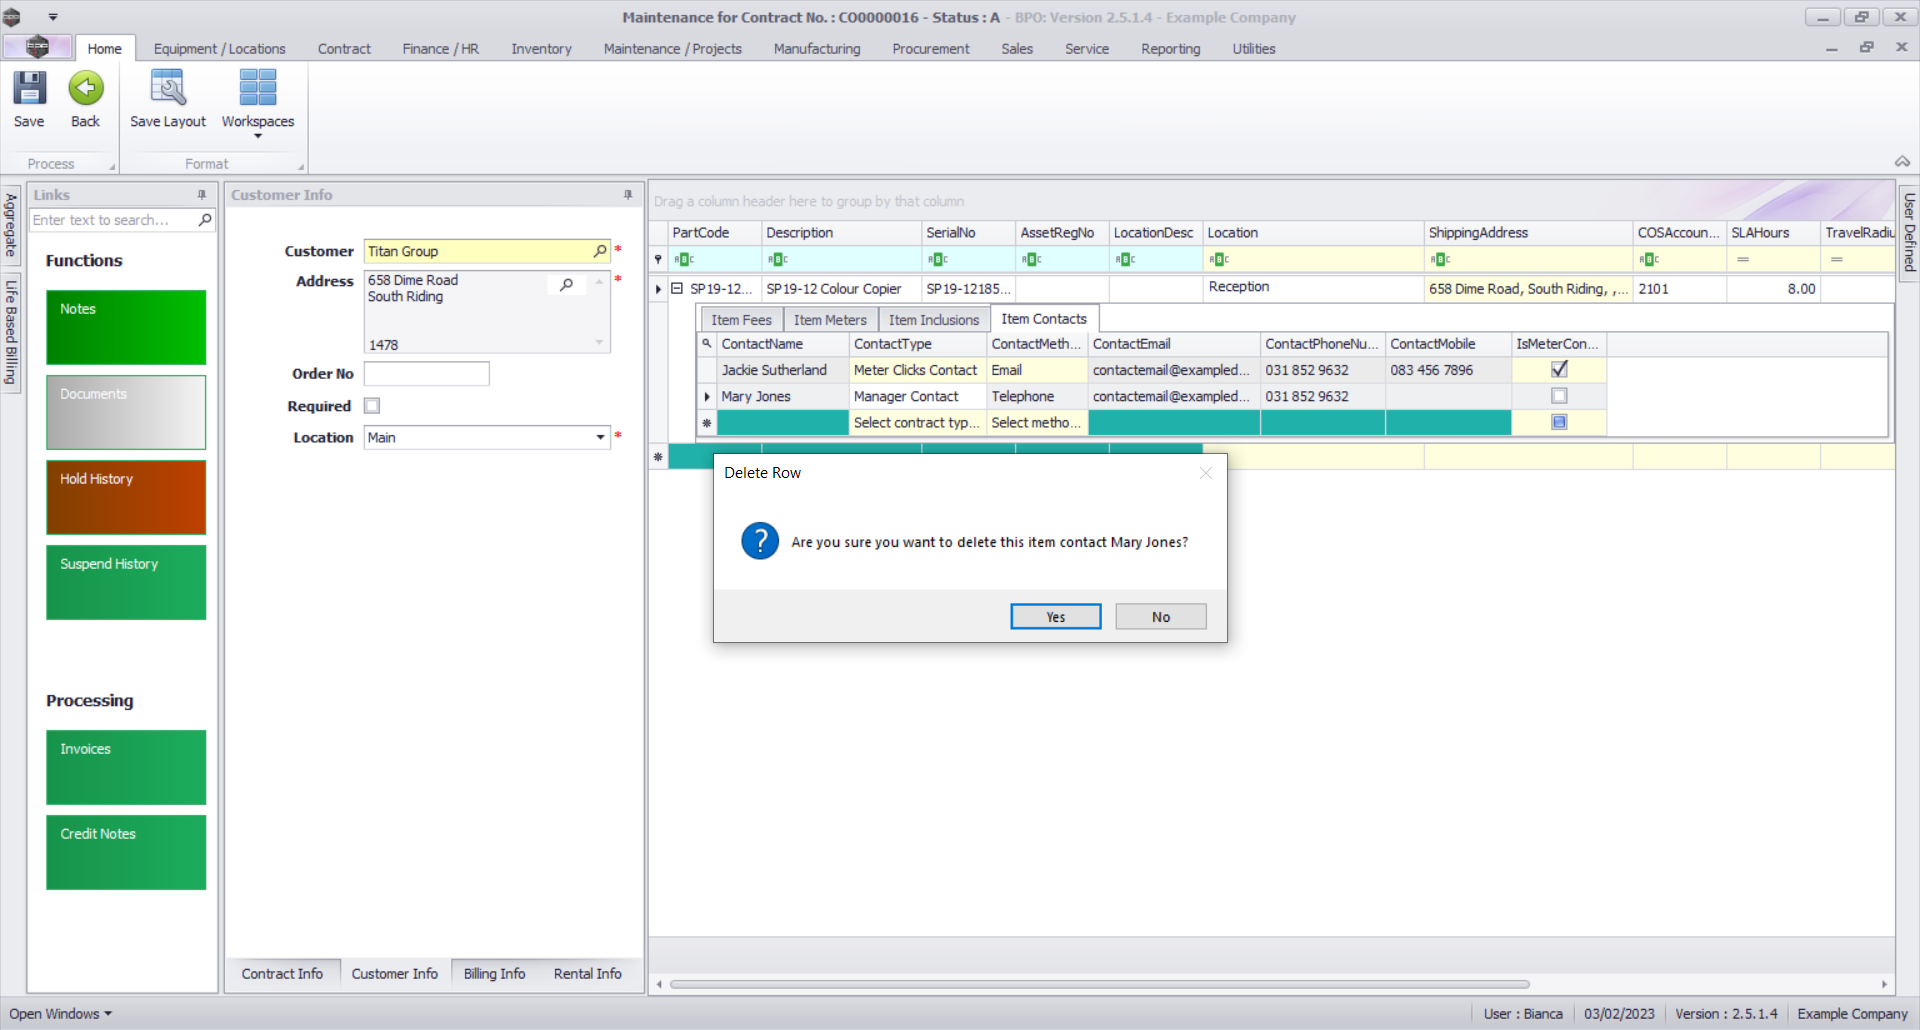
Delete a Contact
- You can also delete a contact if required.
- Right click in the row of the contact you wish to delete.
- The Process menu will pop up.
- Click on Delete - Delete the contact.
- A Delete Row message box will pop up asking:
- Are you sure you want to delete this item contact [Serial Number or Location Description]?
- Click on Yes.
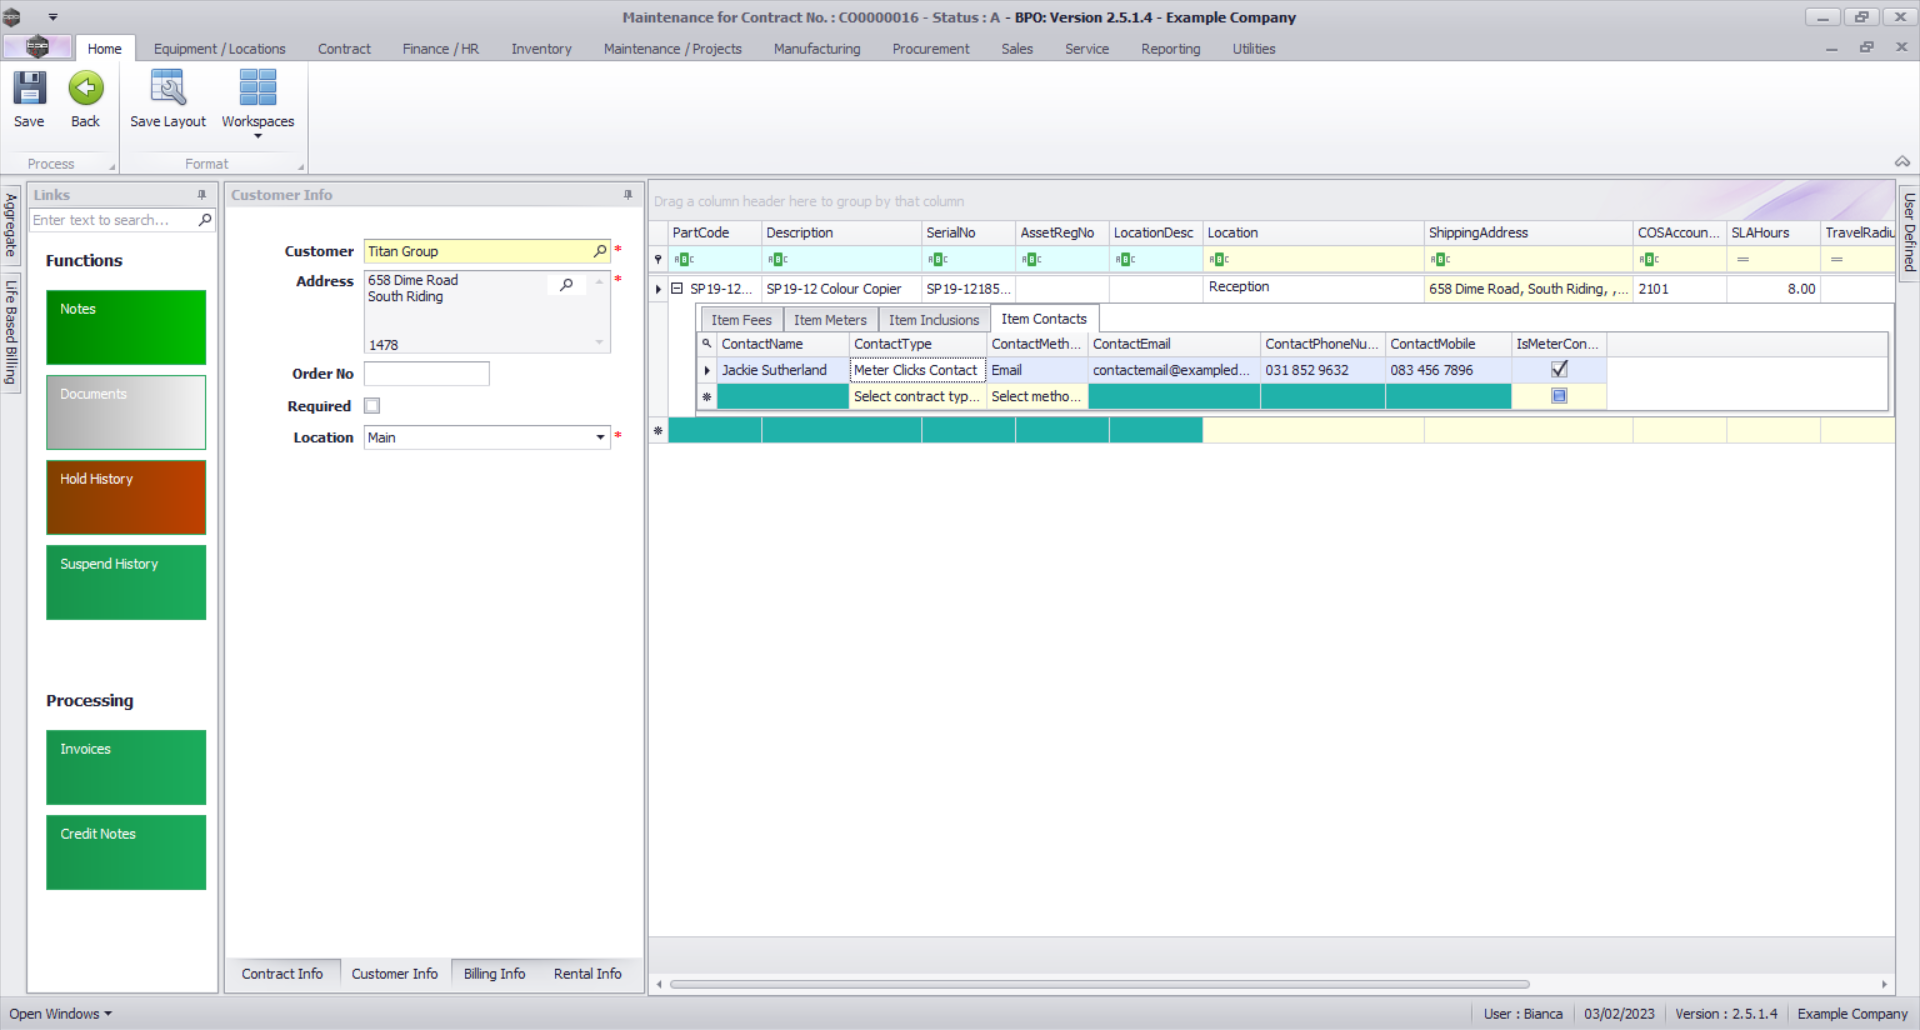
- The contact has now been deleted from the Items Contacts frame.
Save the Contract
- When you are done, click on Save.
- The contract will be saved and you will return to the Contract Listing screen where the status defaults to Active, or will be set to the Status you last selected.
- Click on the drop-down arrow in the Status field and select the relevant status.
- New contracts can be found within the New contract status listing screen.
- From here, the contract will need to be Released and then Approved before it becomes active.
- Edited contracts may either remain in Active status or move to Released status in order for changes to be reviewed before Approval depending on the change made.
MNU.112.003