We are currently updating our site; thank you for your patience.
Contract
Link Item Fees
There are 2 types of fees that can be linked to a contract:
- Standard Item Fees
- These are set fee charges that will be billed to the customer at the billing interval for the length of the fee date range e.g., an Insurance Fee.
- Reset Fees
- These are fees that change from month to month. When closing the Billing Period - all fee charges linked to this fee type will be set to R0, and these fees must be updated before the next billing run e.g., an Electricity Fee.
This process will show you how to link these item fees to a contract.
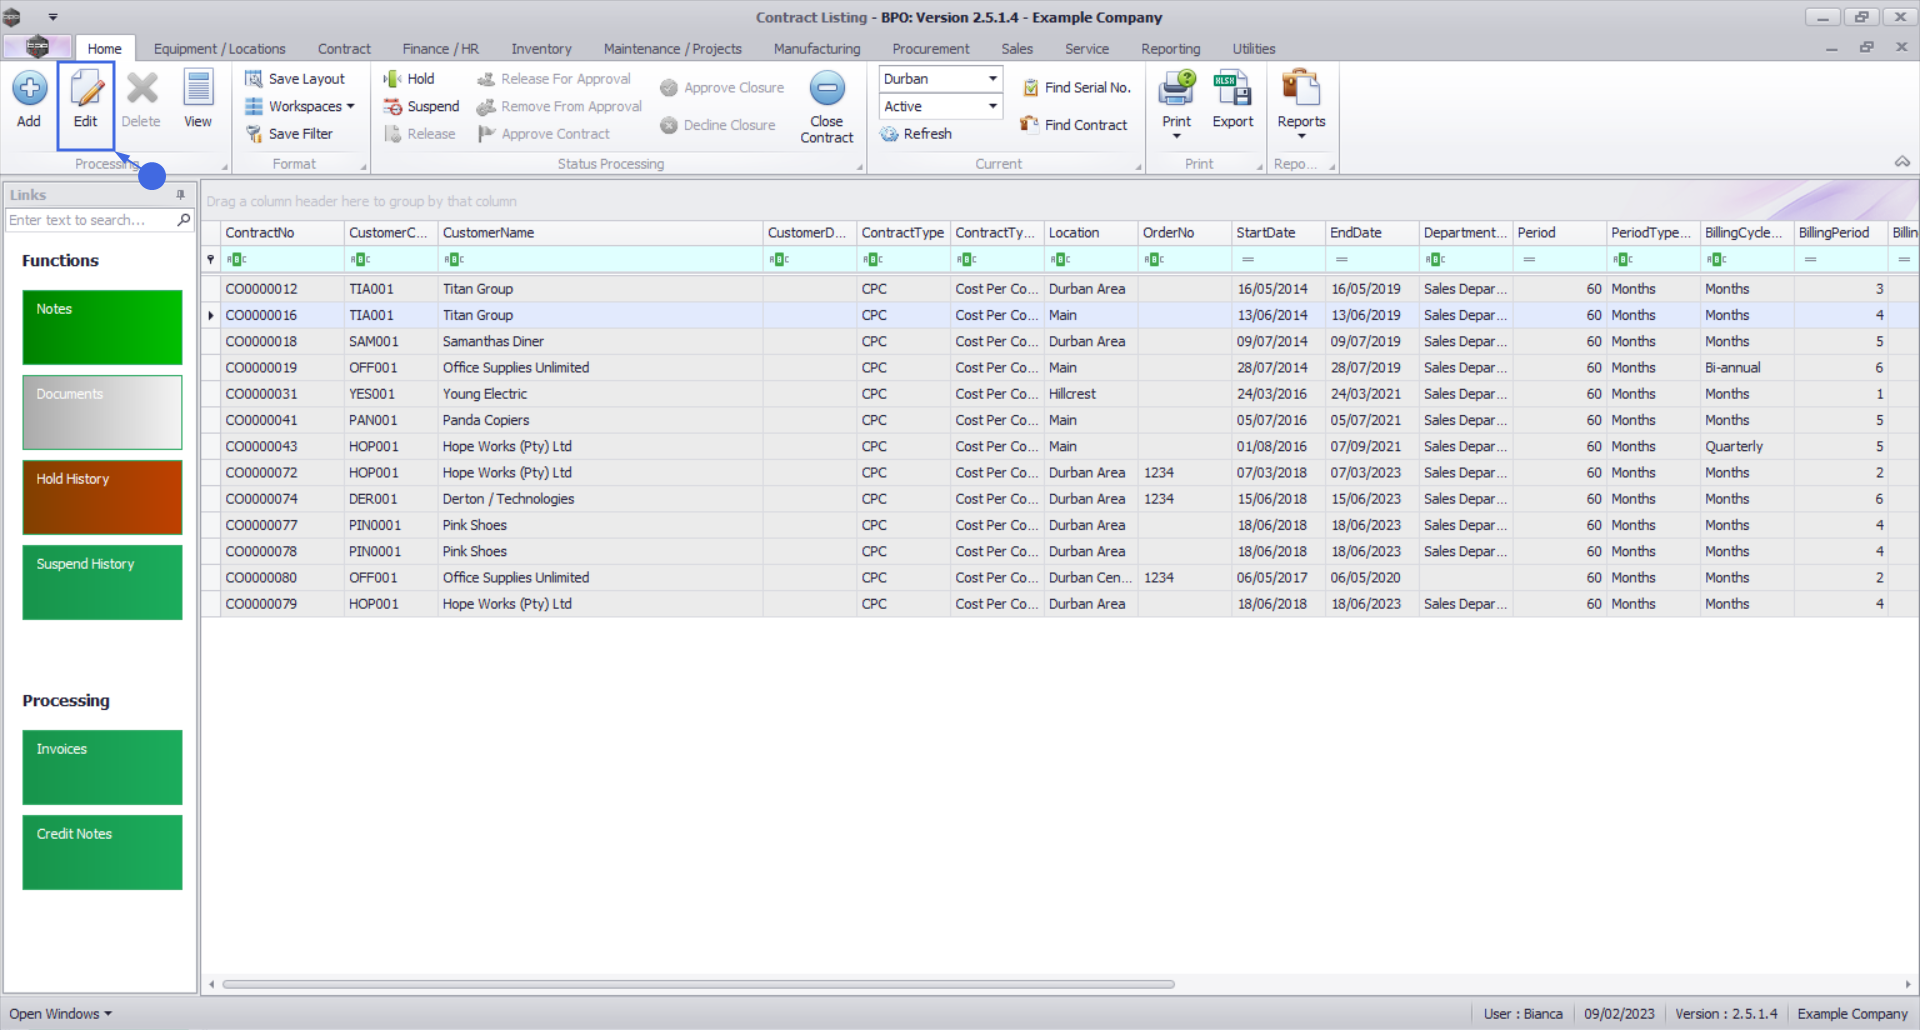
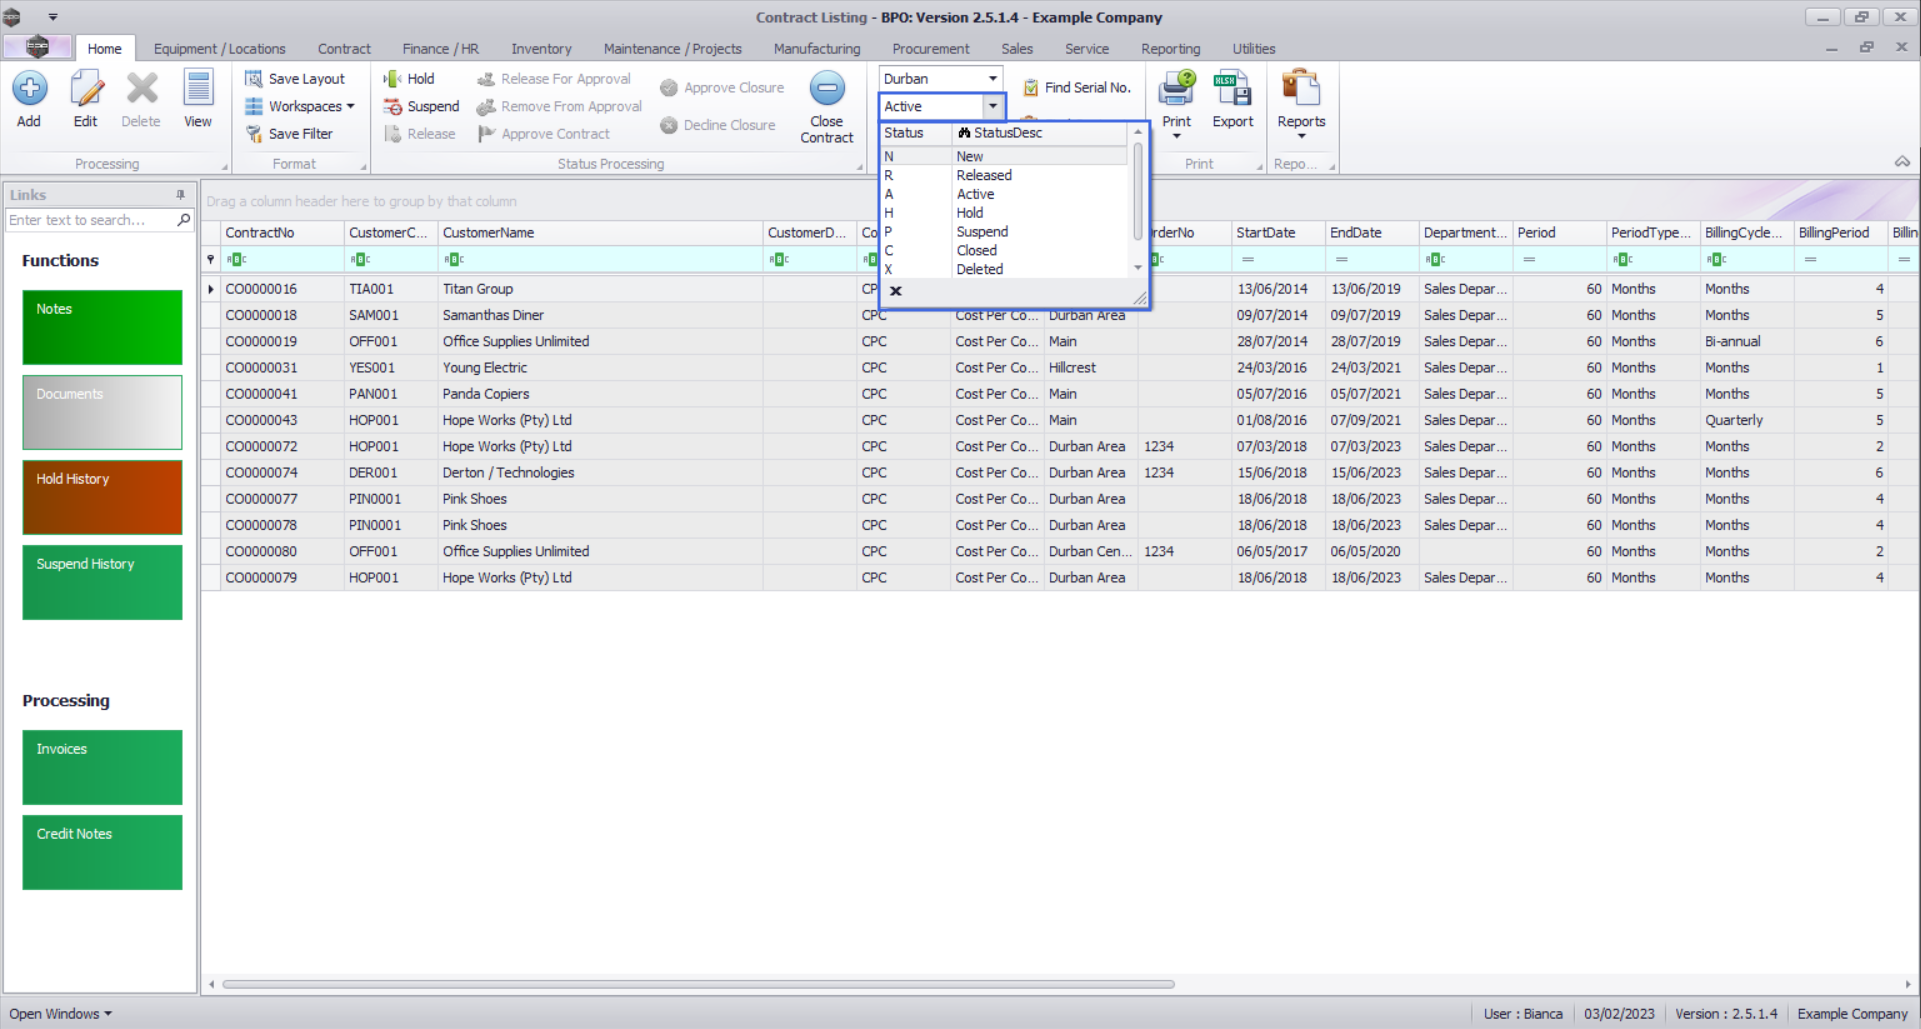
Ribbon Select Contract > Contracts

The Contract Listing screen will be displayed.
Your employee user record should be linked to a default site. In this case, the site will auto populate with this default, otherwise the site must be manually selected.
Another site can be selected, if required, and if you have the security rights to access the site.
If All Sites displays here, then you do not have a default site configured on your user record, and need to select the required site.
Upon opening, this screen will default to the Active status, listing all the Active contracts for the selected site.

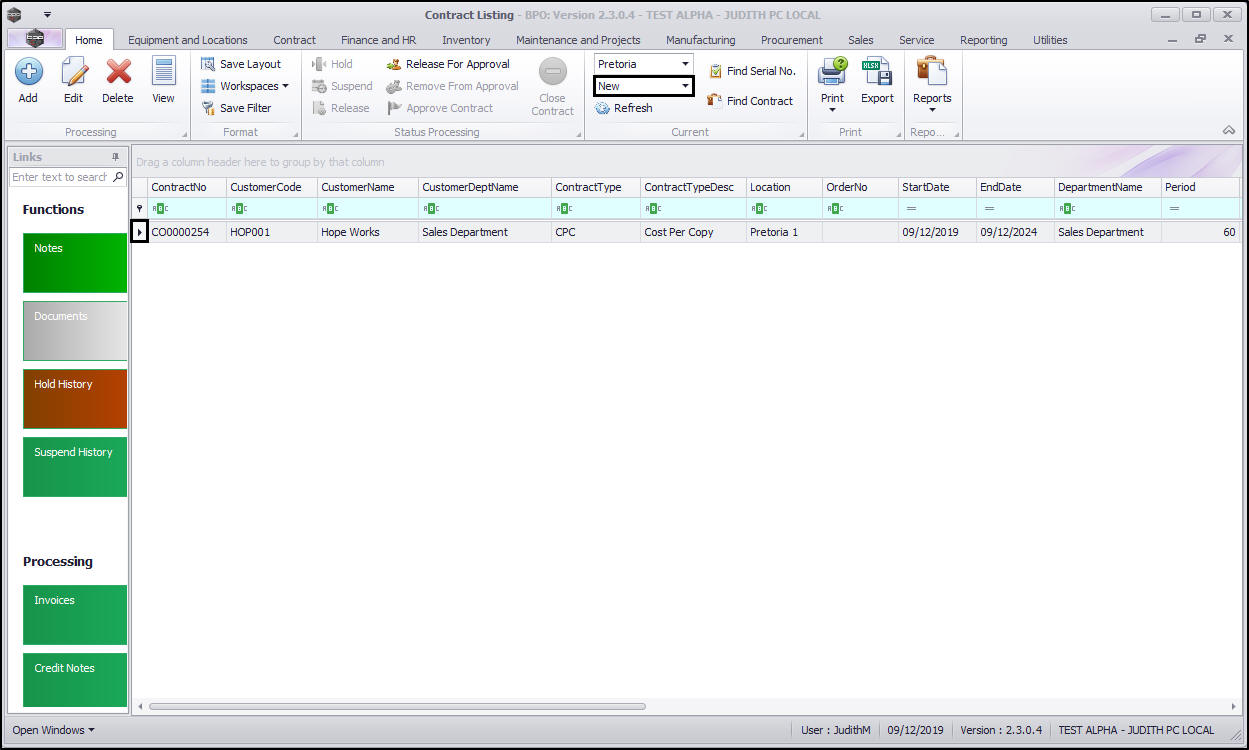
Select the Contract
- Select the row of the contract that you wish to process.

- Click on the Edit button.
The Contract Maintenance screen will be displayed.
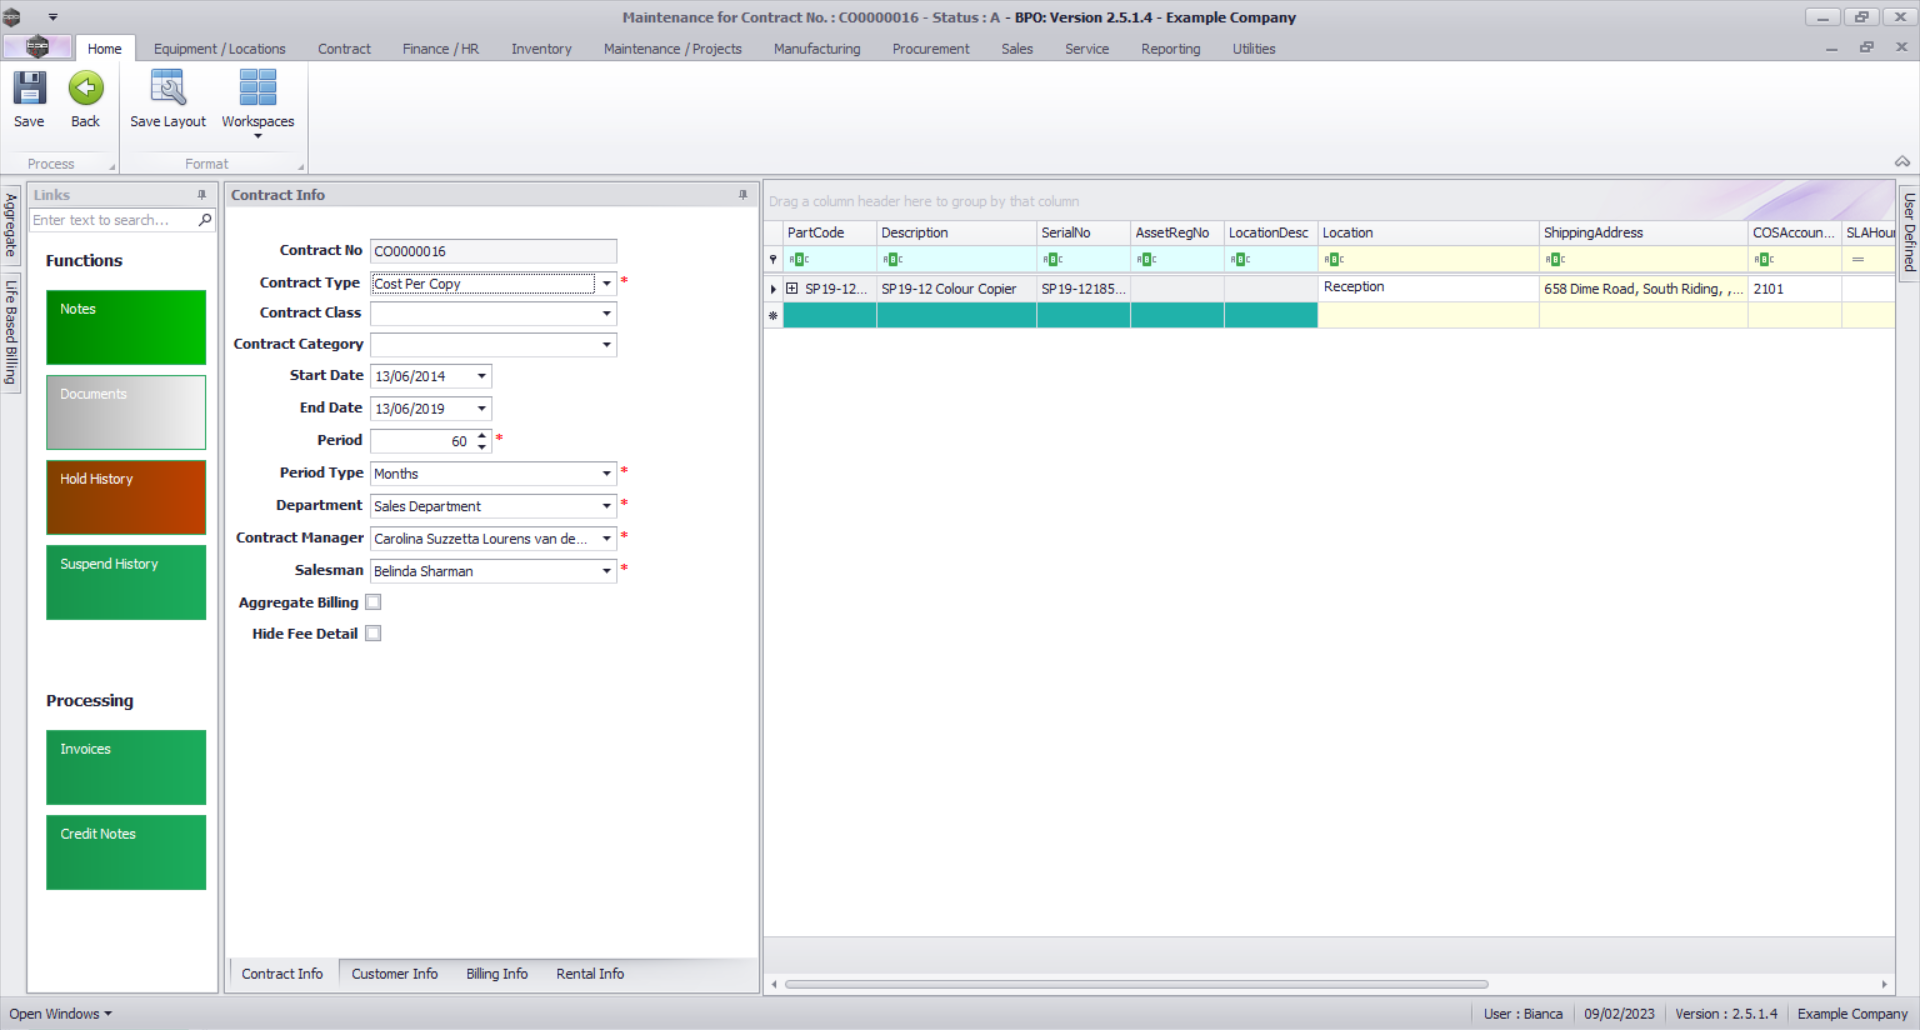
Select the Item
- Click on the row of the contract item you wish to work with.

Select Item Fee
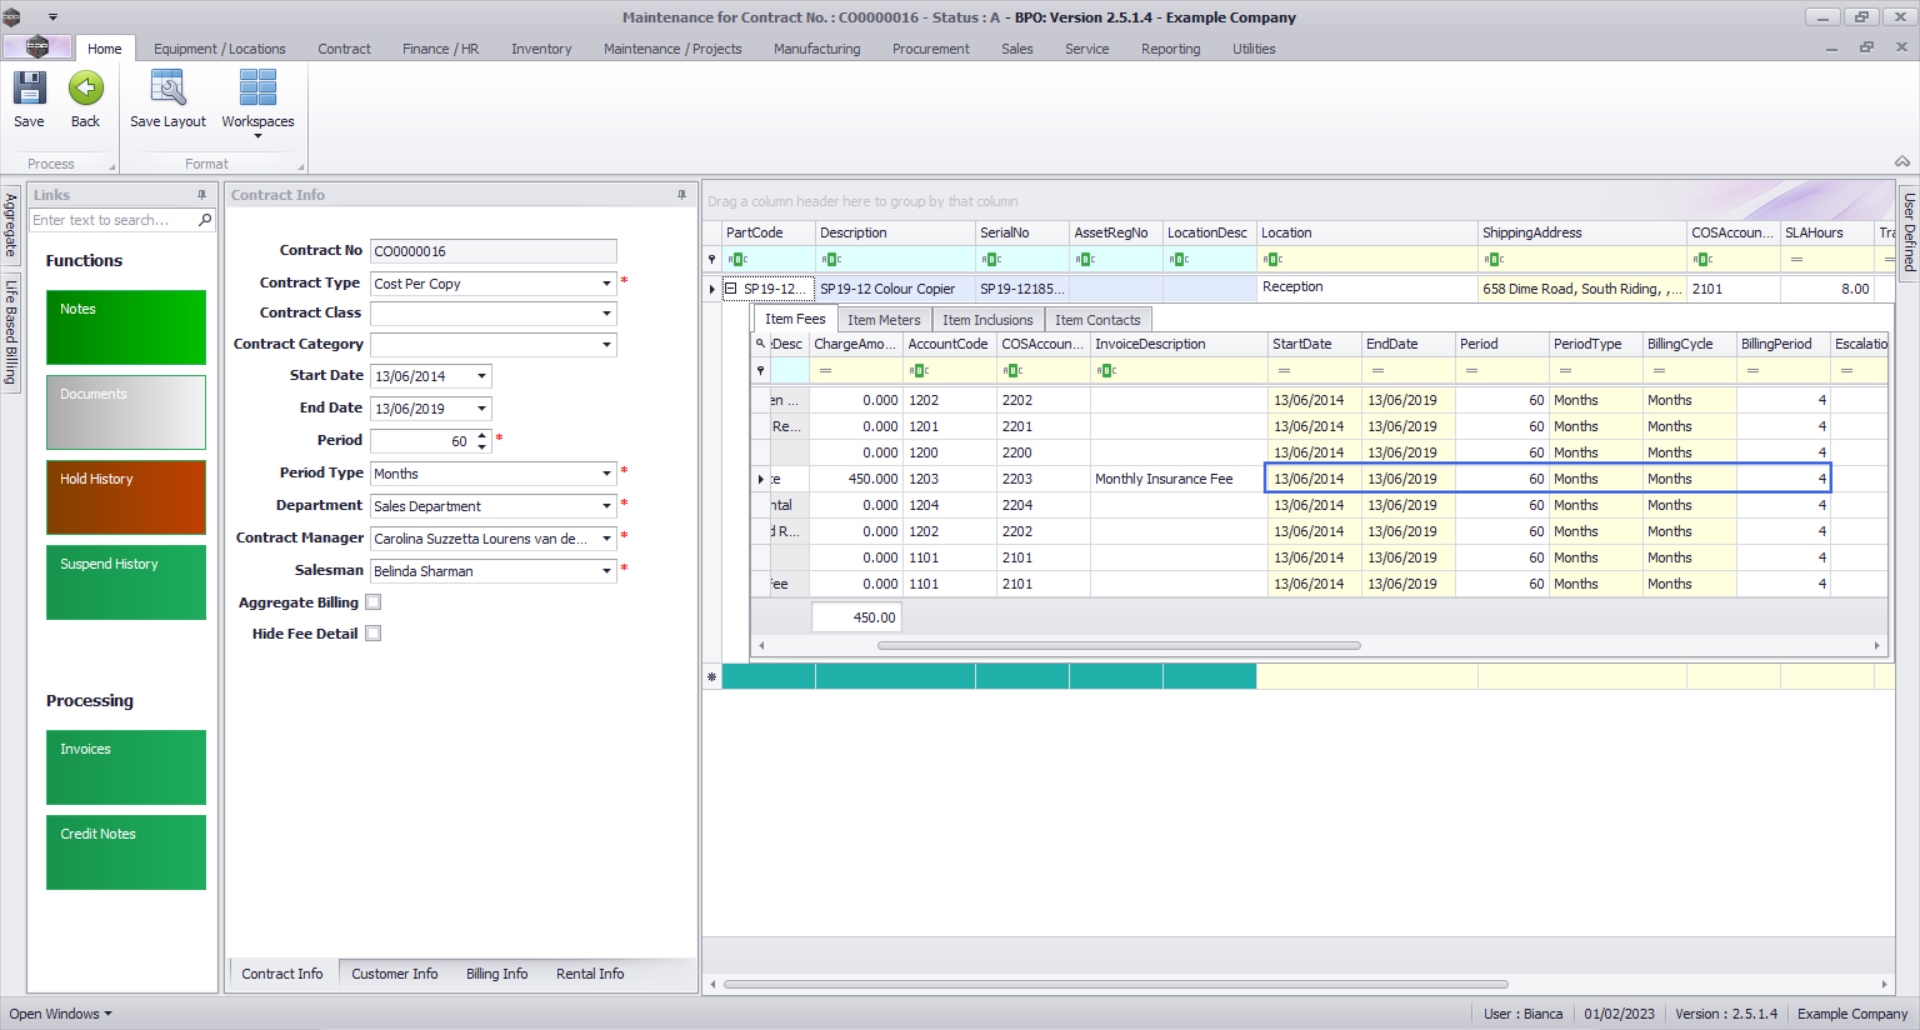
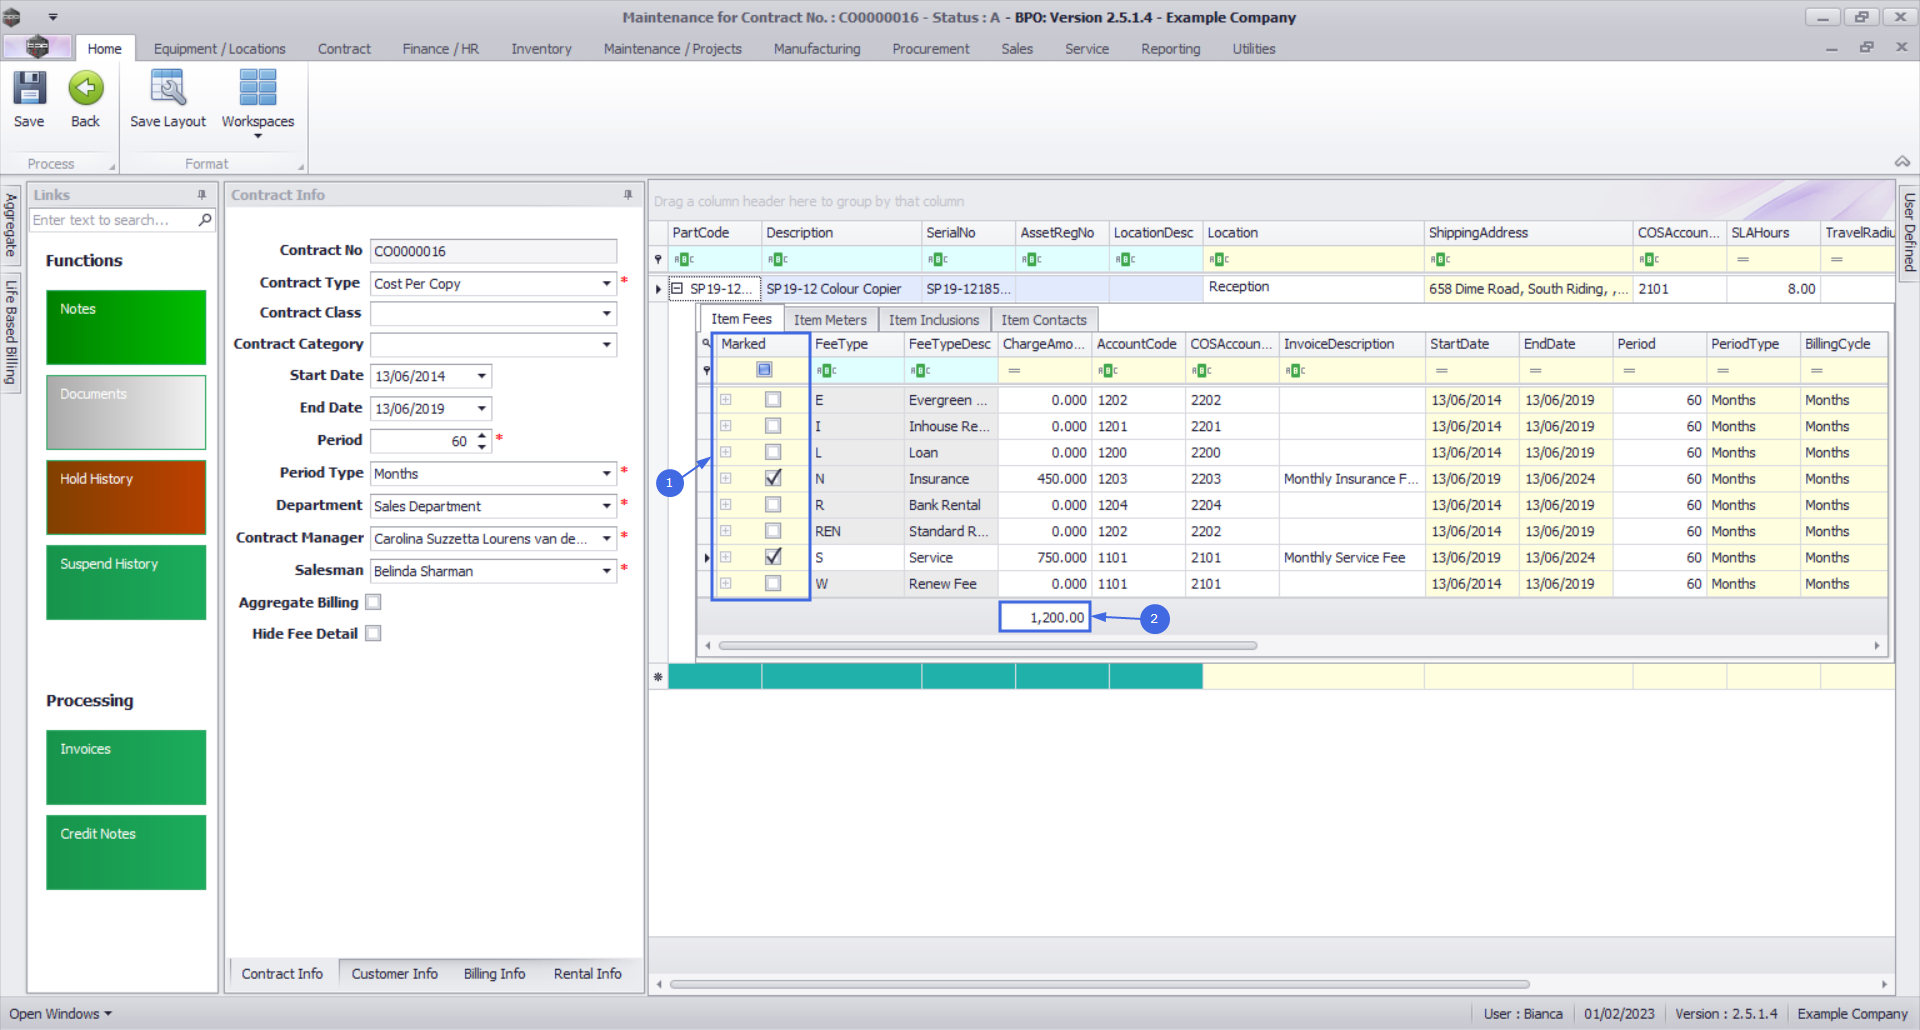
Item Fees
- The Item Fees frame displays Contract Item Fees that can be linked or are linked to a contract item. Note that the fee types available for selection are dependant on the fees configured for the selected Contract type.
- Linked Item Fees will be included on the Contract invoice during Contract billing, where within the period defined.
Add Item Fee
-
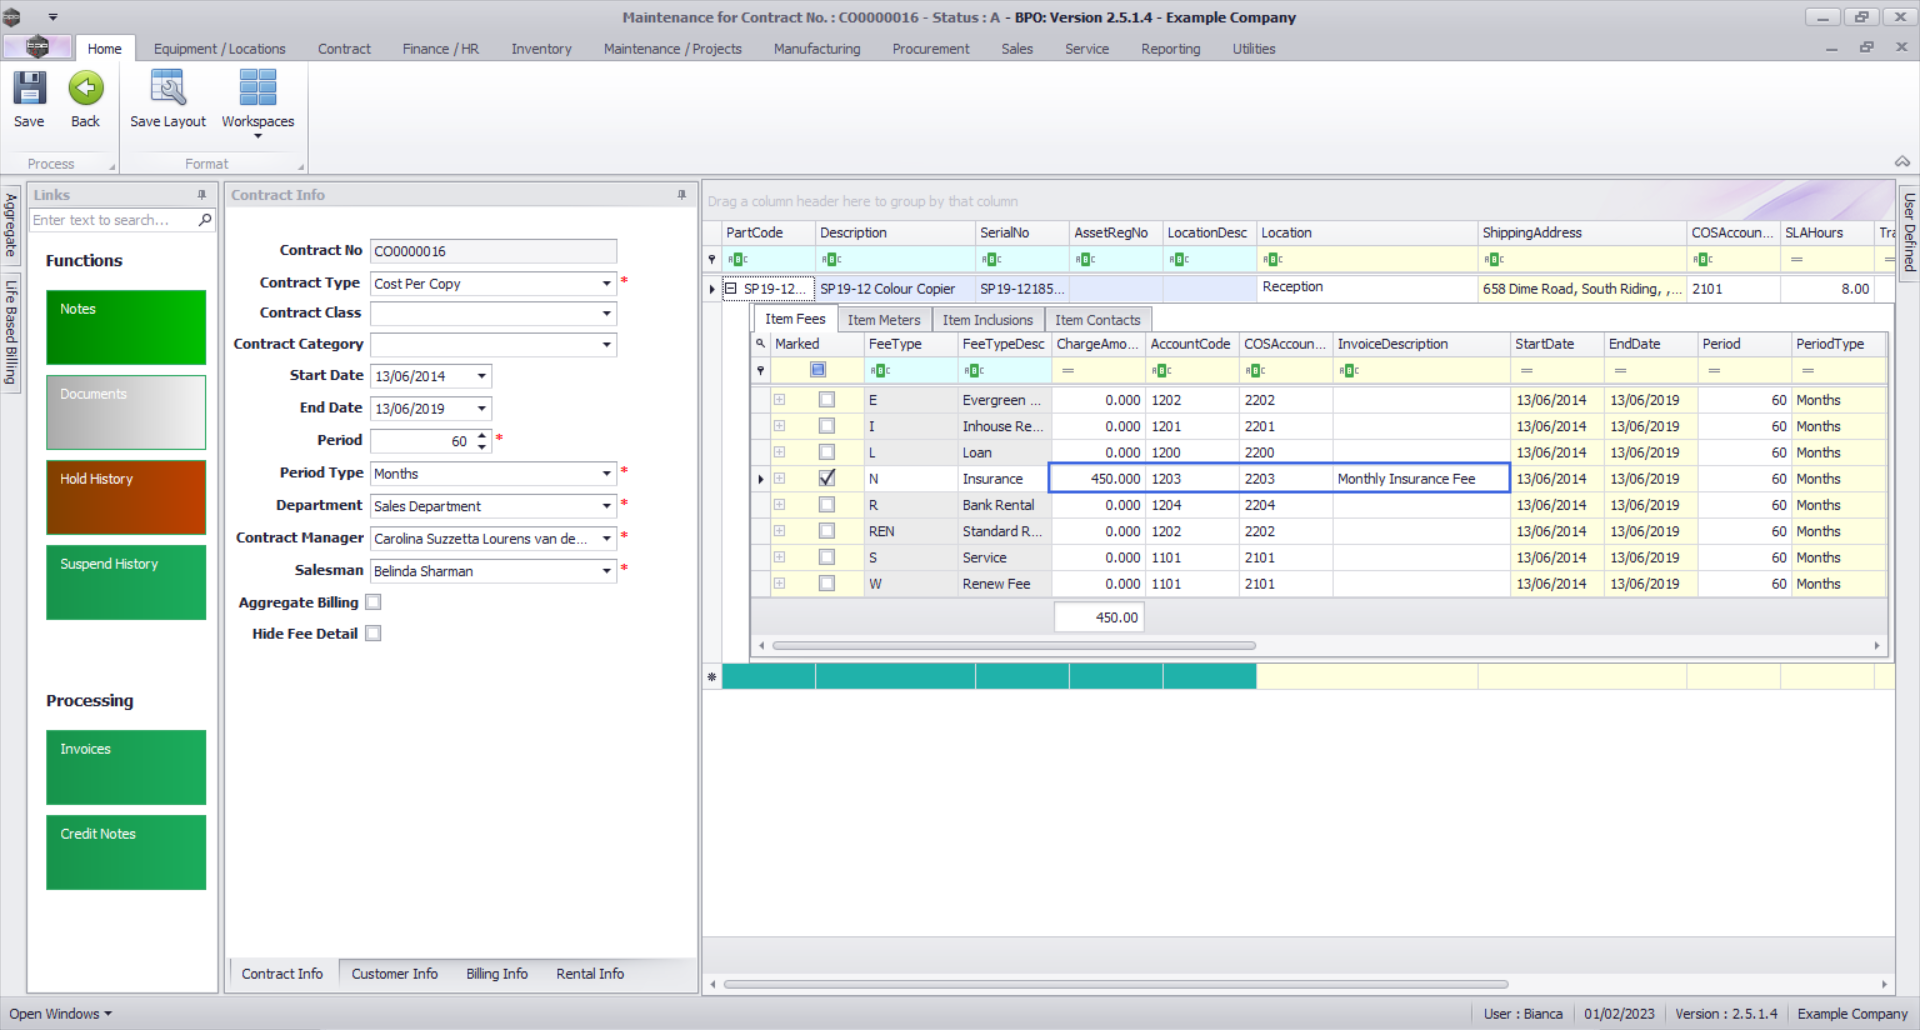
Marked: Click on the check box in front of the Item Fee Type to be charged on the contract item.
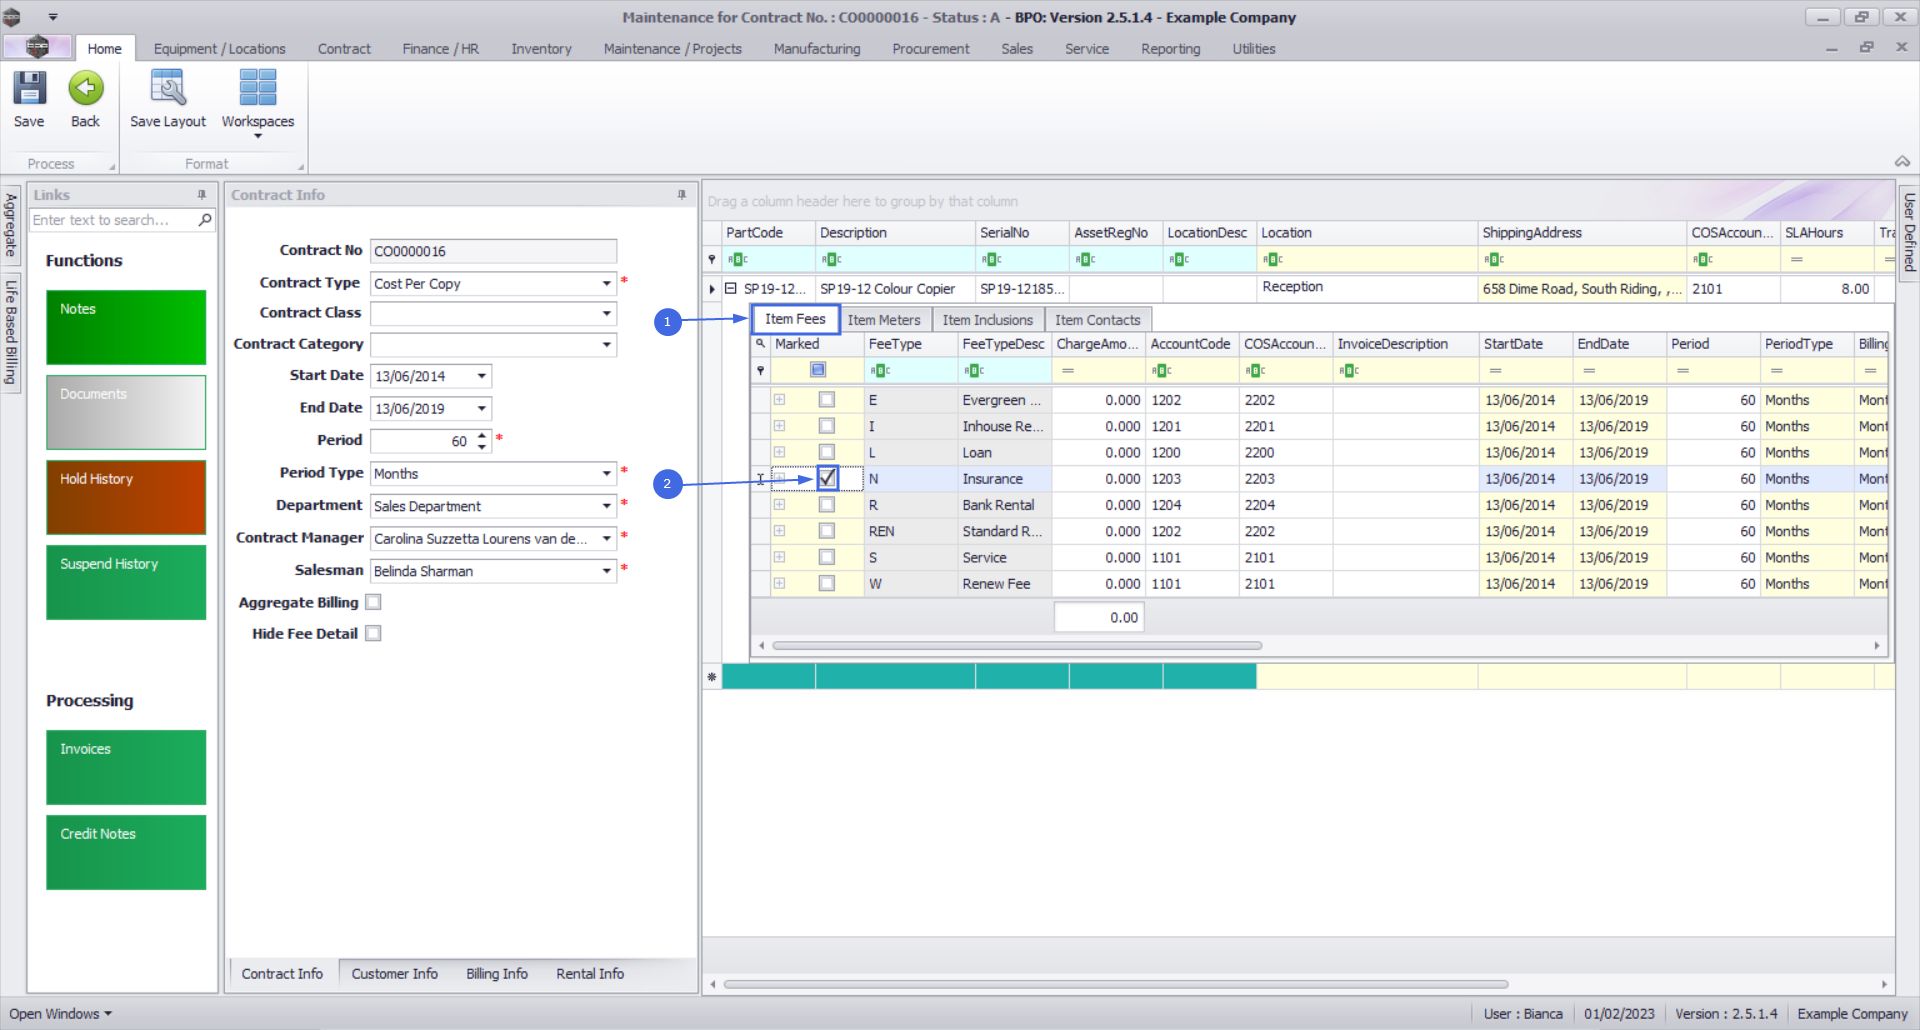
Billing Details
- Charge Amount: Type in or use the arrow indicators to select the fee amount to be charged.
- Account Code: This will auto populate with the Sales GL Account code set on the fee as configured for the contract type. This code can be changed if required, but ensure a valid general ledger code is used.
- COS Account Code: This will auto populate with the Sales GL Account code set on the fee as configured for the contract type. This code can be changed if required, but ensure a valid general ledger code is used.
- Invoice Description: Type in the description to be used for this fee on the invoice. The description will reflect on the contract invoice.
- Scroll right to view the remaining columns in this frame.
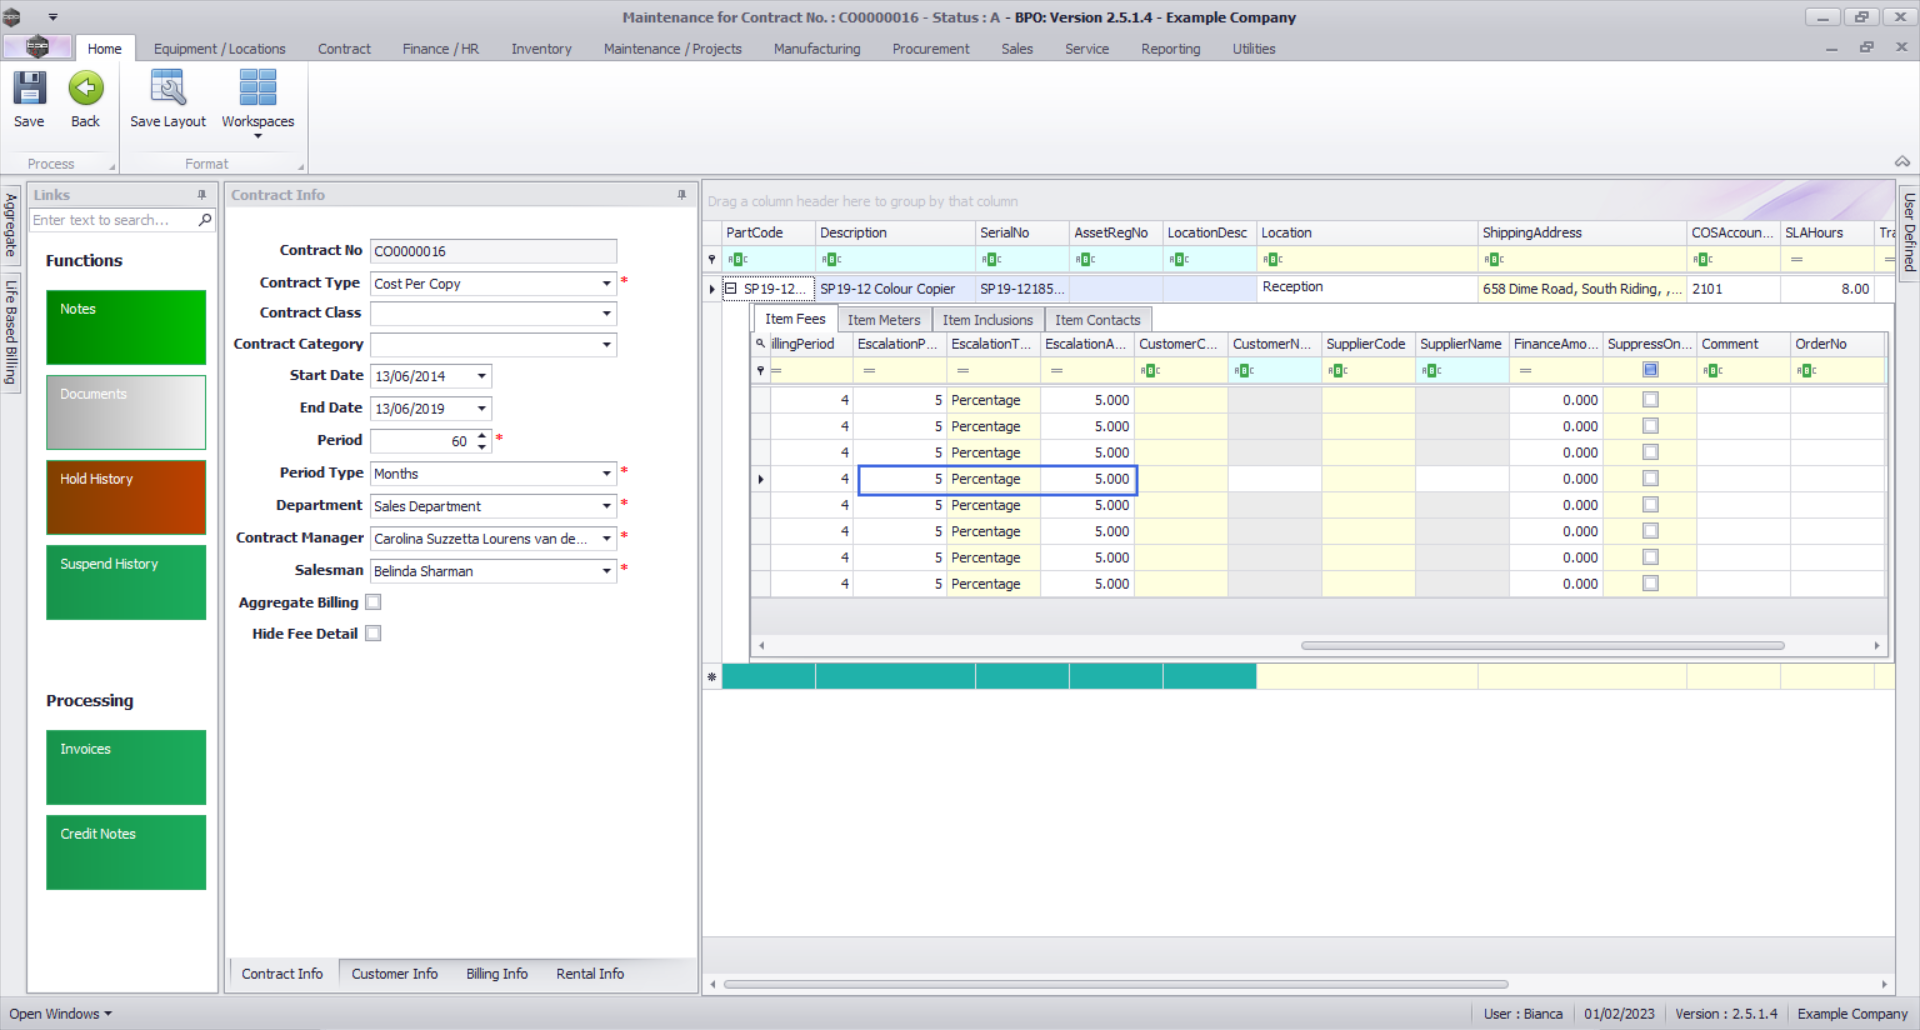
Billing Period Details
- Start Date and End Date: These will auto populate according to the contract start date and end date selected in the Contract Info panel. You can click on the drop-down arrow and use the calendar function to select an alternative start and end date if required.
- Note: Take note that the contract fee will only bill from the start date, and will stop billing at the end date.
- Period & Period Type: These fields will auto populate according to the contract start and end date recorded in the Contract Info panel. You can click on the text boxes and either type in or use the drop-down arrows to select an alternative period and period type if required.
- Billing Cycle: This will auto populate according to the contract billing cycle recorded in the Billing Info panel. You can click on the text boxes and either type in or use the drop-down arrow to select an alternative billing cycle if required.
- Billing Period: This will auto populate according to the contract billing period recorded in the Billing Info panel. You can click on the text boxes and either type in or use the drop-down arrow to select an alternative billing period if required.
- Scroll right to view the remaining columns in this frame.
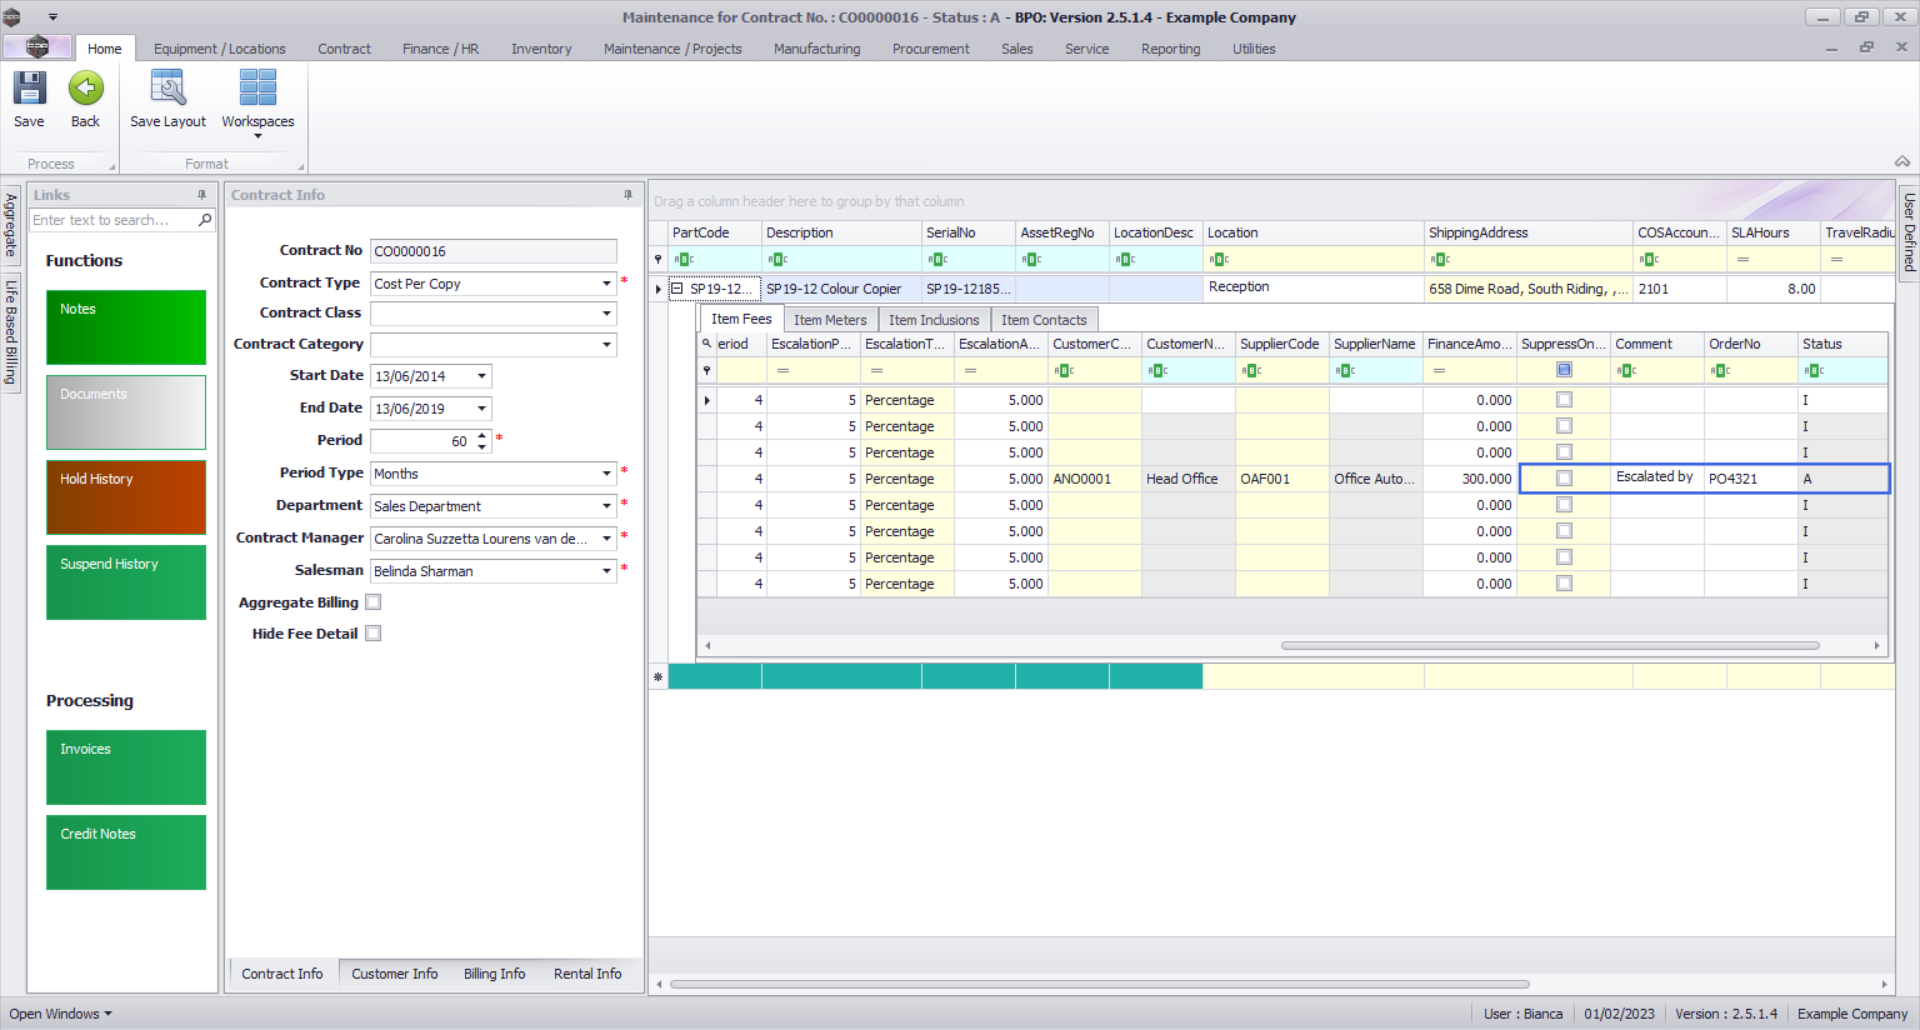
Escalation Details
- Escalation Period: This will auto populate according to the escalation period recorded in the Billing Info panel. You can click on the text boxes and either type in or use the drop-down arrow to select an alternative escalation period if required.
- Escalation Type: This will auto populate according to the escalation type recorded in the Billing Info panel. You can click on the drop-down arrow in the text box to select an alternative escalation type if required.
- Escalation Amount: This will auto populate according to the escalation amount recorded in the Billing Info panel. You can click on the text box and either type in or use the arrow indicators to select an alternative escalation amount if required.
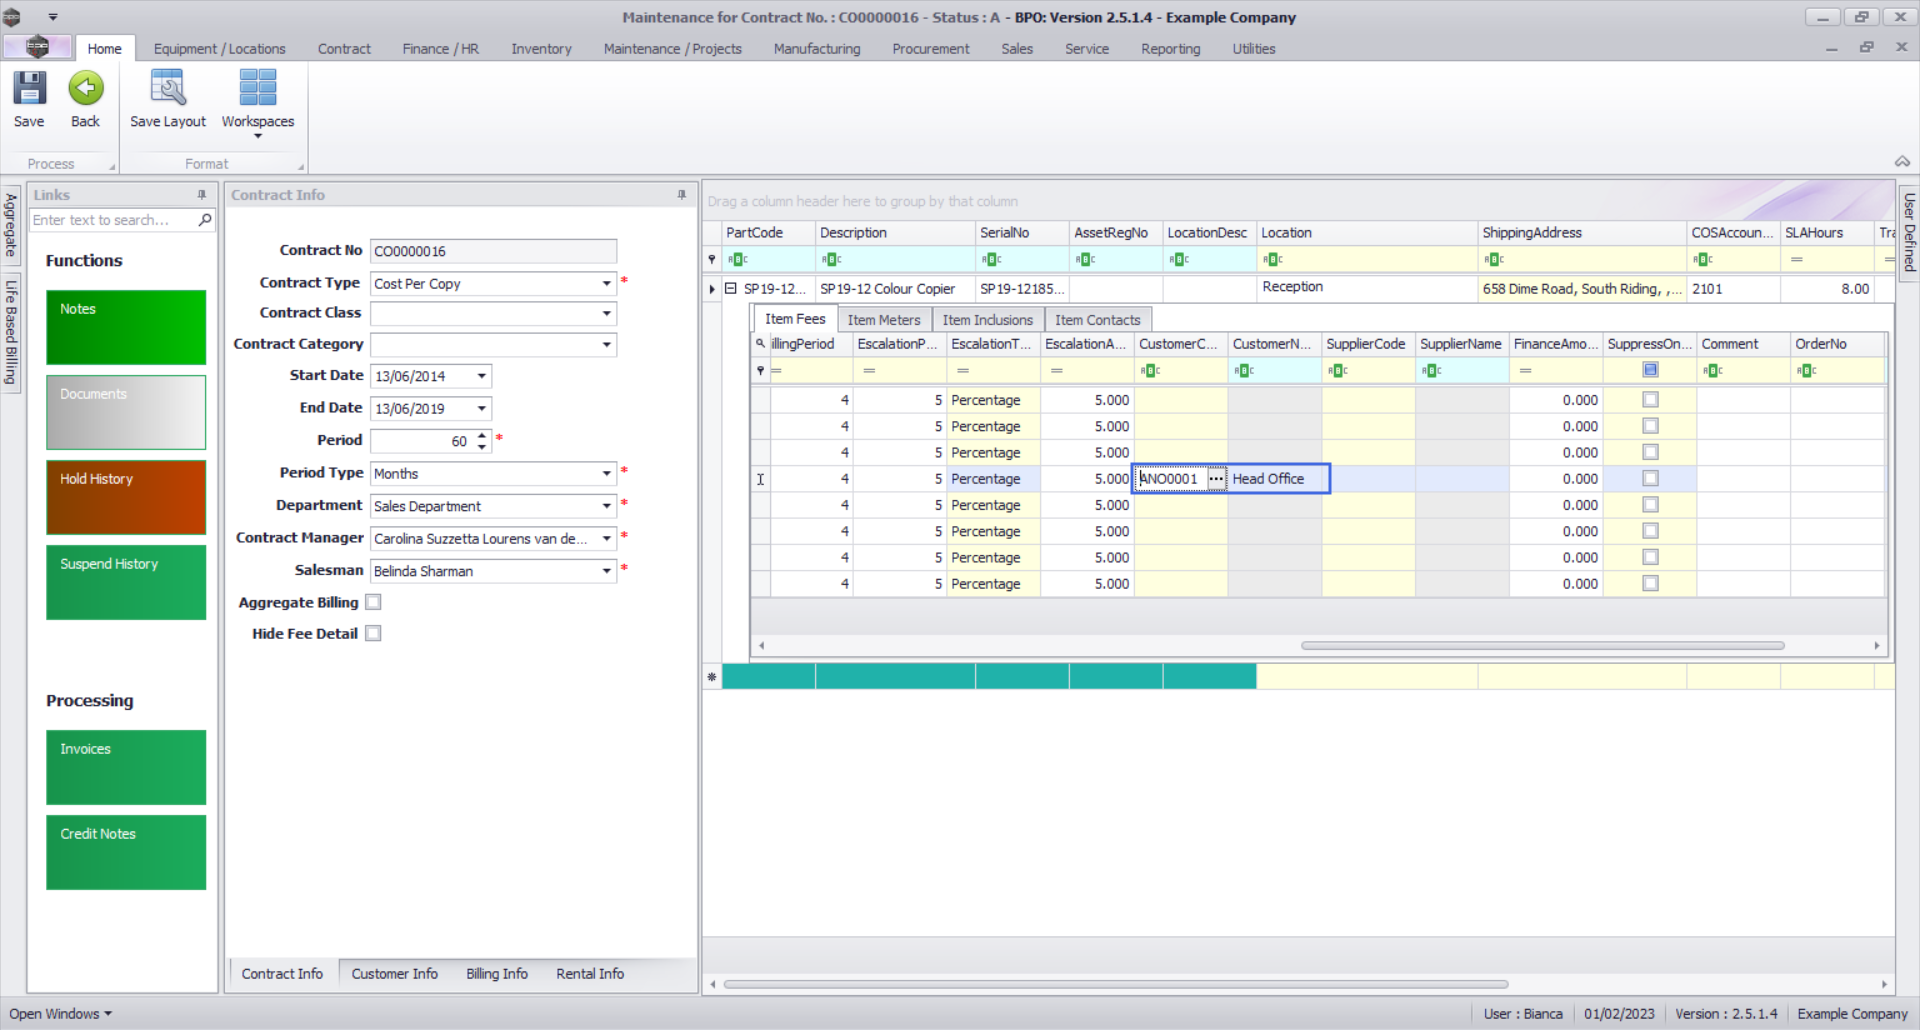
Billing Customer
- Only populate these 2 fields if another party (a separate billing customer) is going to pay the Item Fees on behalf of the customer.
- If these fields are left blank, BPO will bill the customer linked to the contract.
- Note 1: BPO only supports different billing customers on an aggregate contract from BPO v2.3.0.4.
- Note 2: Follow the next 2 steps only if you wish to link another customer as the billing customer.

- Click in the Customer Code text box.
- An Ellipsis button will be revealed.
- Click on this button to display the Select a billing customer pop up screen.
- Click on the row selector in front of the Billing customer that you wish to link to this contract
- Click on Ok.

- Customer Name: Once you have selected the customer code, the customer name will auto populate with the customer name linked to that code on the system.
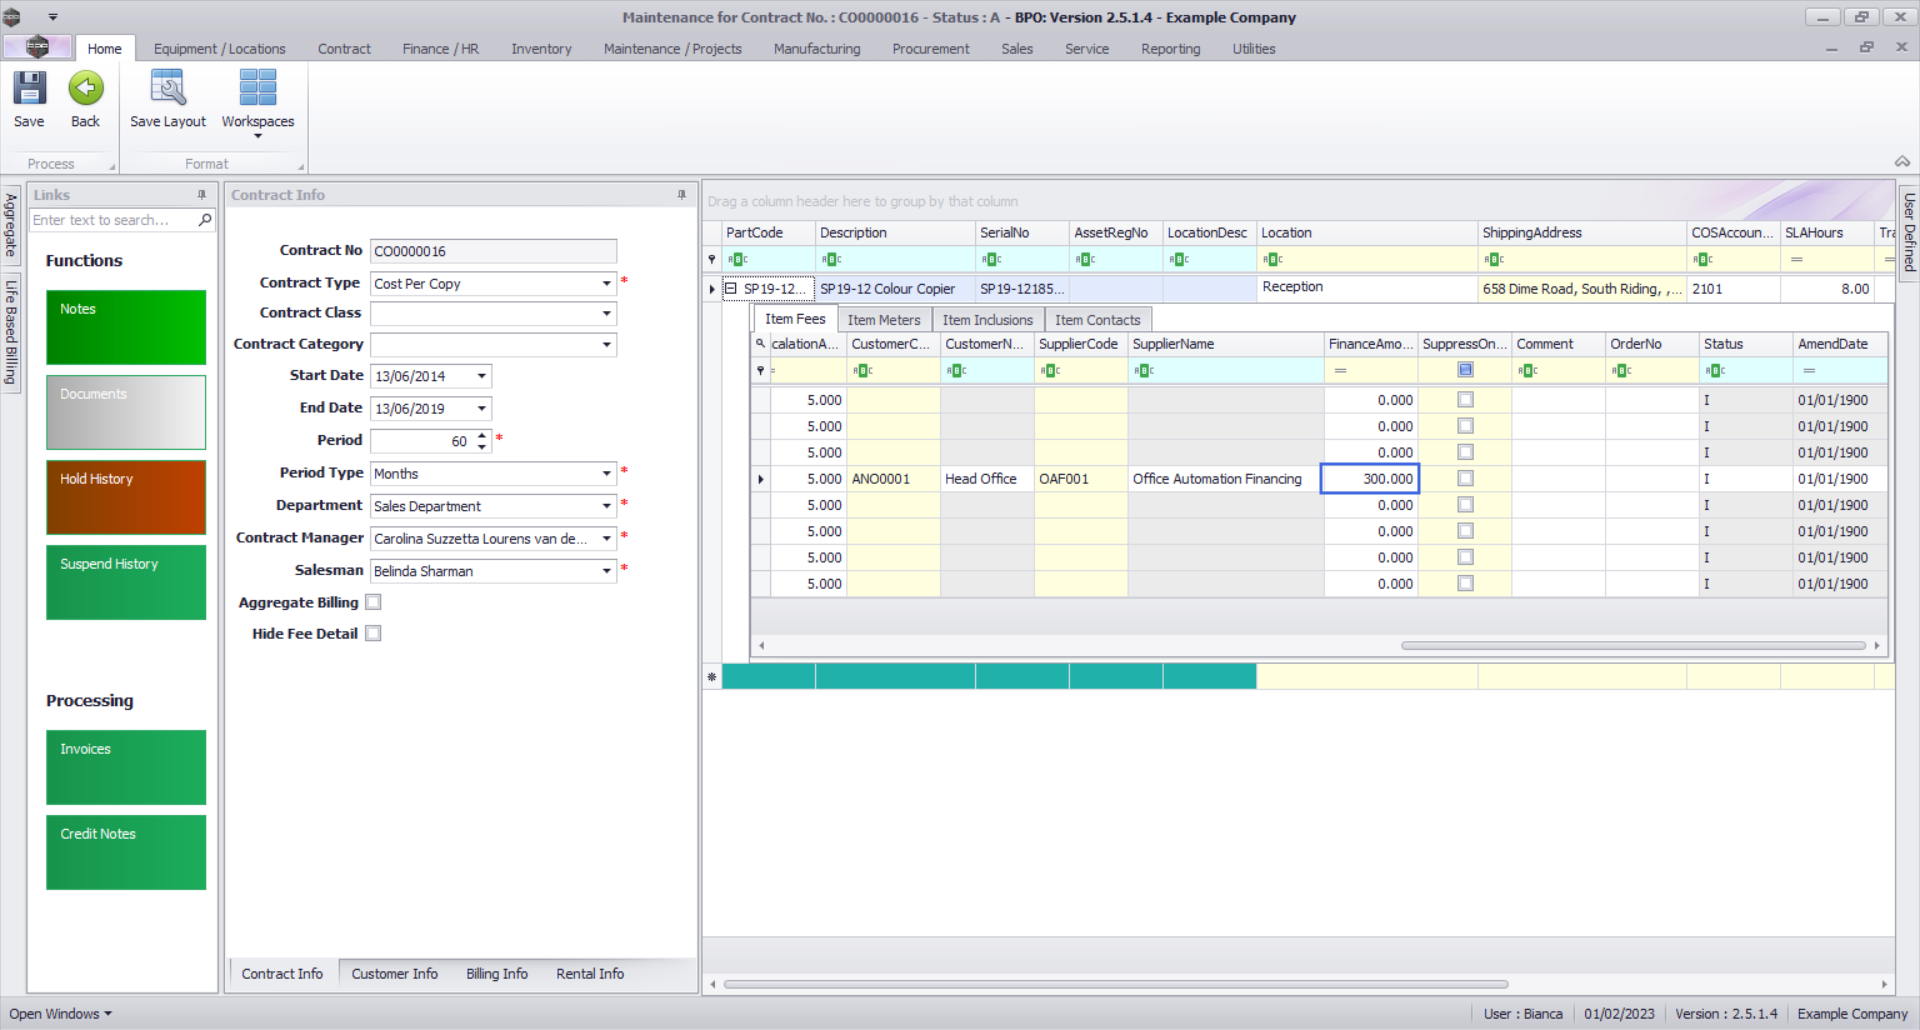
Back to Back / Finance Details
- These fields should only be populated if there is a Back to Back Deal with a third party who is set up on BPO as a Supplier.
- Follow the next 2 images only if you wish to link a supplier for rental back-to-backs (finance house bills company & company bills client).

- Click on the Supplier Code text box to reveal an Ellipsis button.
- Click on this button to display the Select a finance party pop up screen.
- Click on the row selector in front of the Supplier that you wish to link to this item.
- Click on Ok.
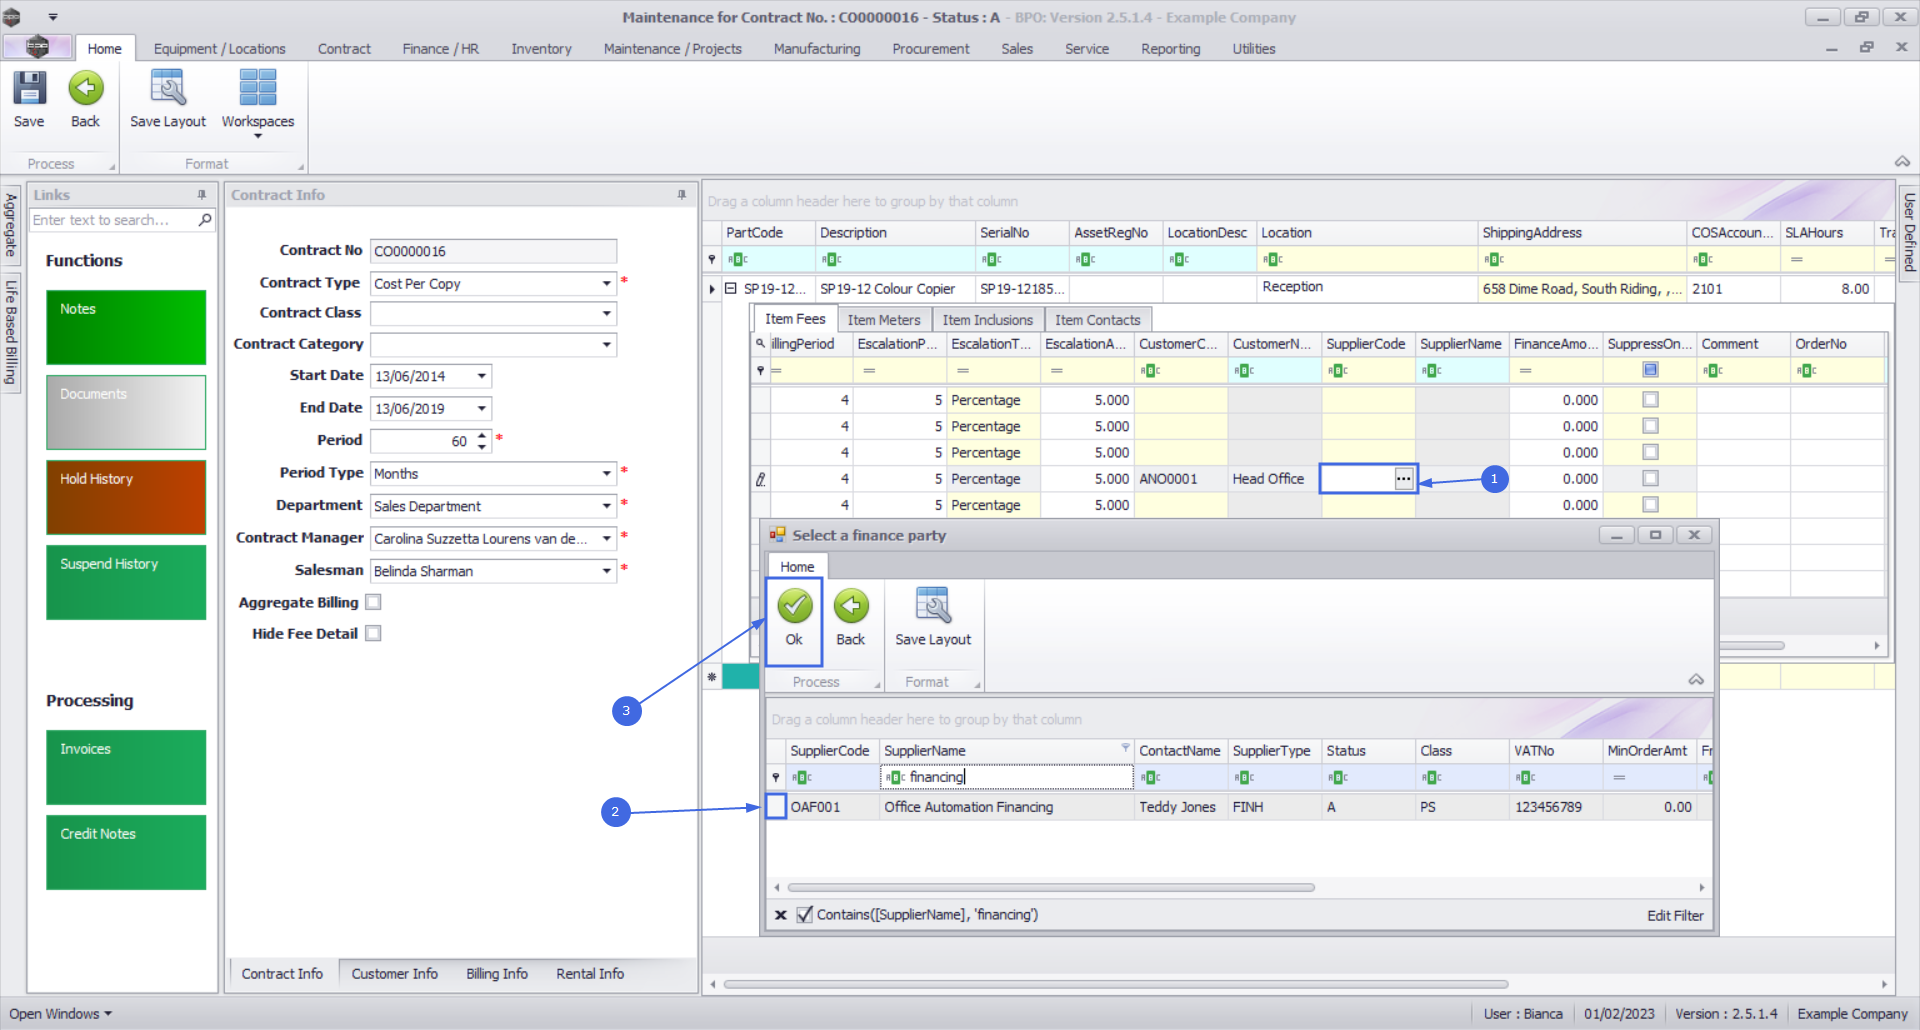
- Supplier Name: This will auto populate once the supplier code has been selected.

- Finance Amount: Click in this text box and either type in or use the arrow indicators to select the finance amount.
Additional Details
- Suppress on Invoice: Only select this if you wish to hide the item fee information on the invoice.
- Comment: Click in this text box and type in a comment regarding this contract fee, if required.
- Order No: Type in a customer order number relevant to this item, if required. This will be displayed on the contract invoice.
- Status: This field will be set to A (Active) once the fee has been saved, and is static.
- Amend Date: This shows the date the item was last modified and the field is static.
- The 'Add an Item Fee' process is now complete.
Additional Item Fees
- Scroll back to the Marked column.
- You can now set up additional fees by following the above process, if required, before moving on to the next frame.
- This shows the total amount of all Item Fees charged on the contract item.
Save the Contract
- When you are done, click on Save.
- The contract will be saved and you will return to the Contract Listing screen where the status defaults to Active, or will be set to the Status you last selected.
- Click on the drop-down arrow in the Status field and select the relevant status.
- New contracts can be found within the New contract status listing screen.
- From here, the contract will need to be Released and then Approved before it becomes active.
- Edited contracts may either remain in Active status or move to Released status in order for changes to be reviewed before Approval depending on the change made.
MNU.112.026