We are currently updating our site; thank you for your patience.
Contract
Add New Location Contract (pre v2.3.0.0)
A Customer Location is required for a Customer Location Contract.
The 'location item' that is being added to the contract is a defined customer location.
| Ribbon Access: Contract > Contracts |

The Contract Listing screen will be displayed.
- Select the site that you wish to work in.
- In this example, Durban has been selected.
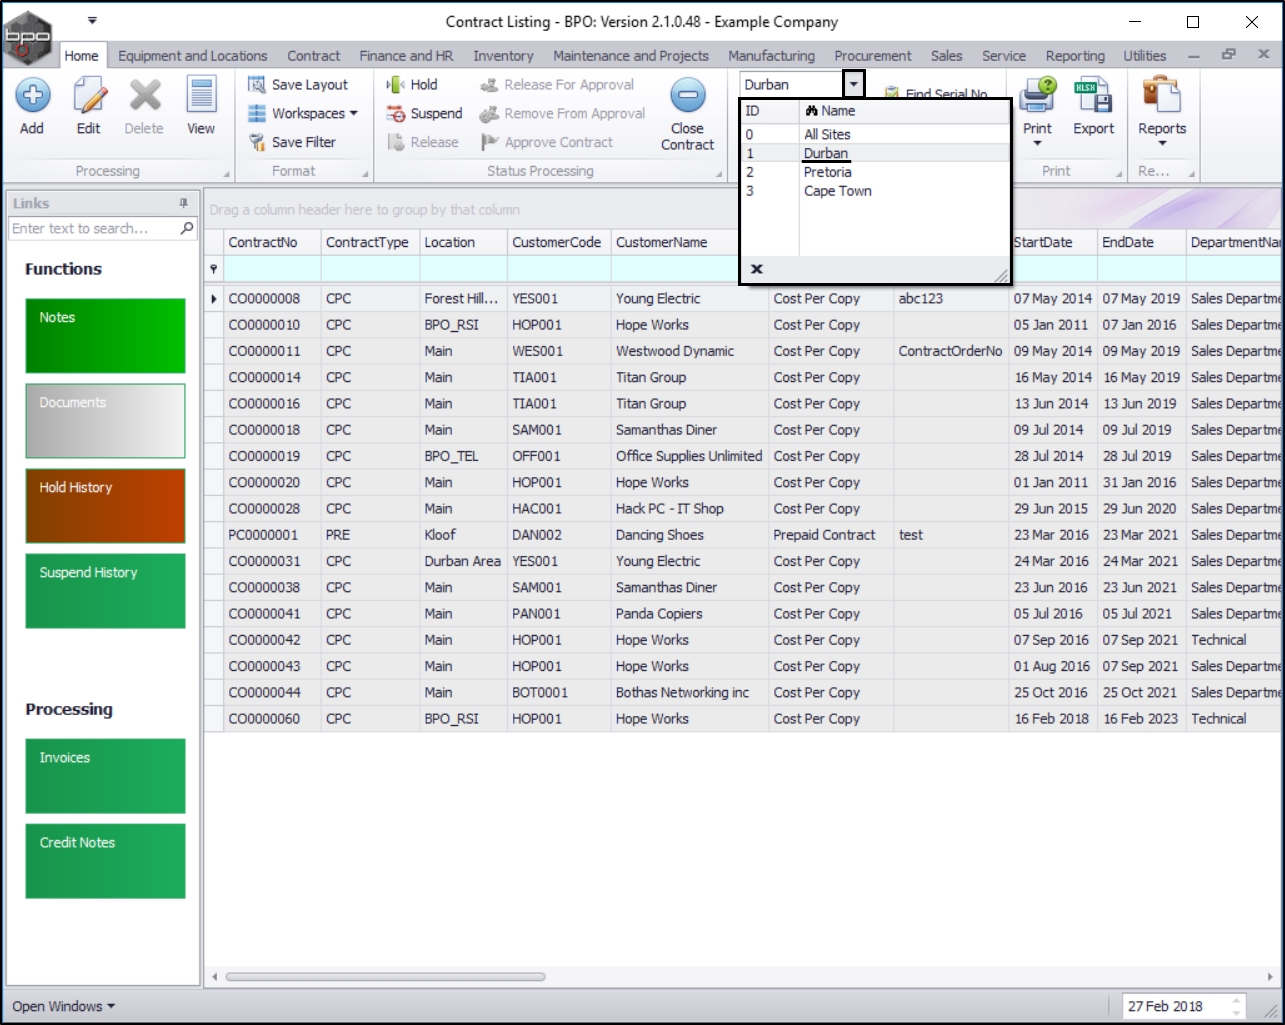
- By default, this screen will list all the Active contracts for the selected site.
- You do not need to change this status to create a new location contract.

Add New Contract
- Click on Add.
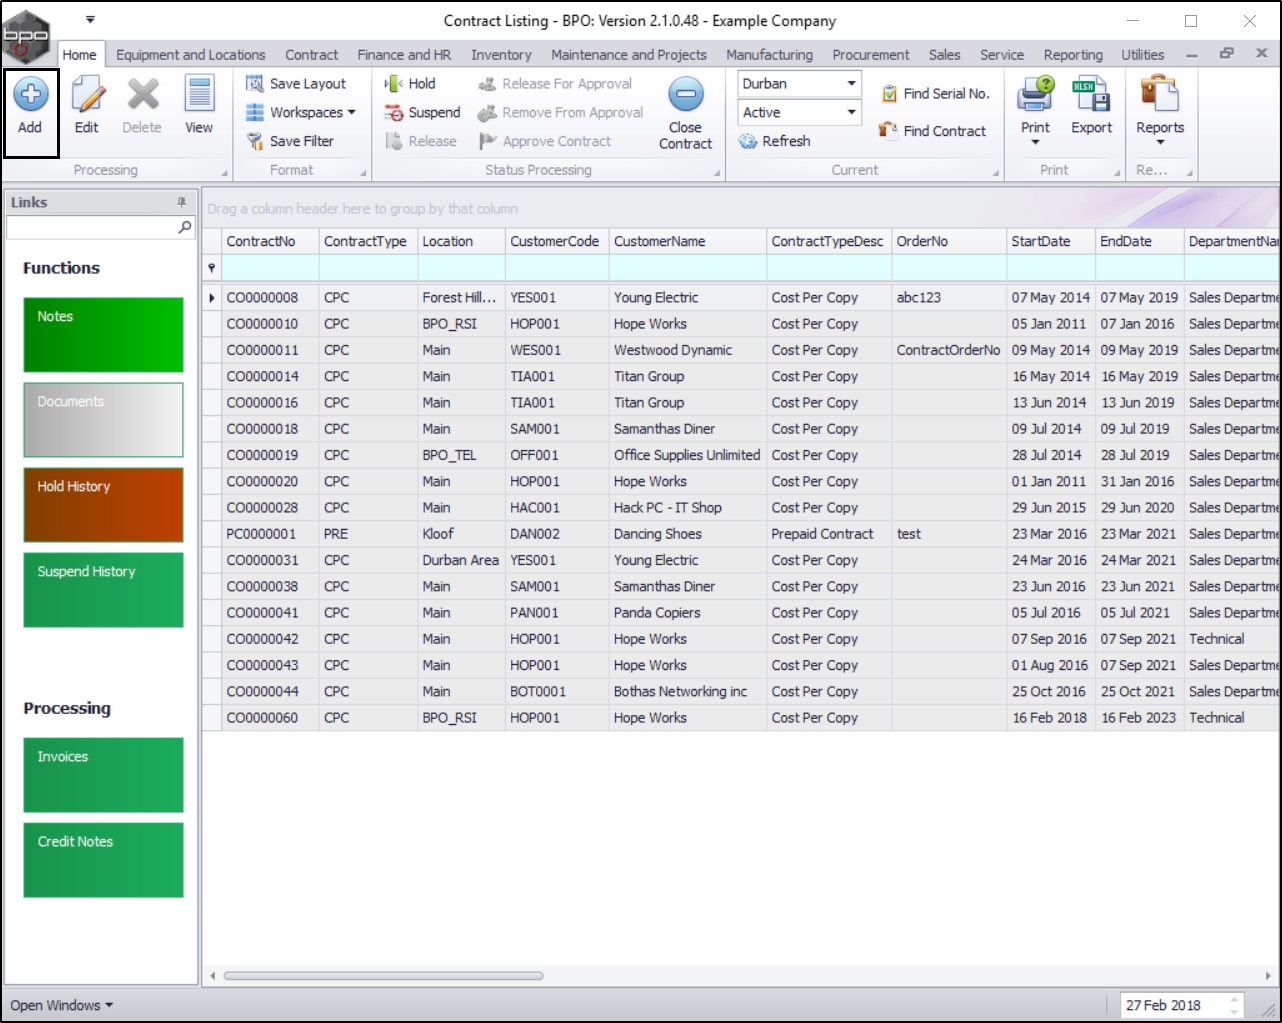
- The Add a new Contract screen will be displayed.
- If the Information panels on the left of the screen are not already open and docked, click on the required tab to bring it to the fore and dock the panel.
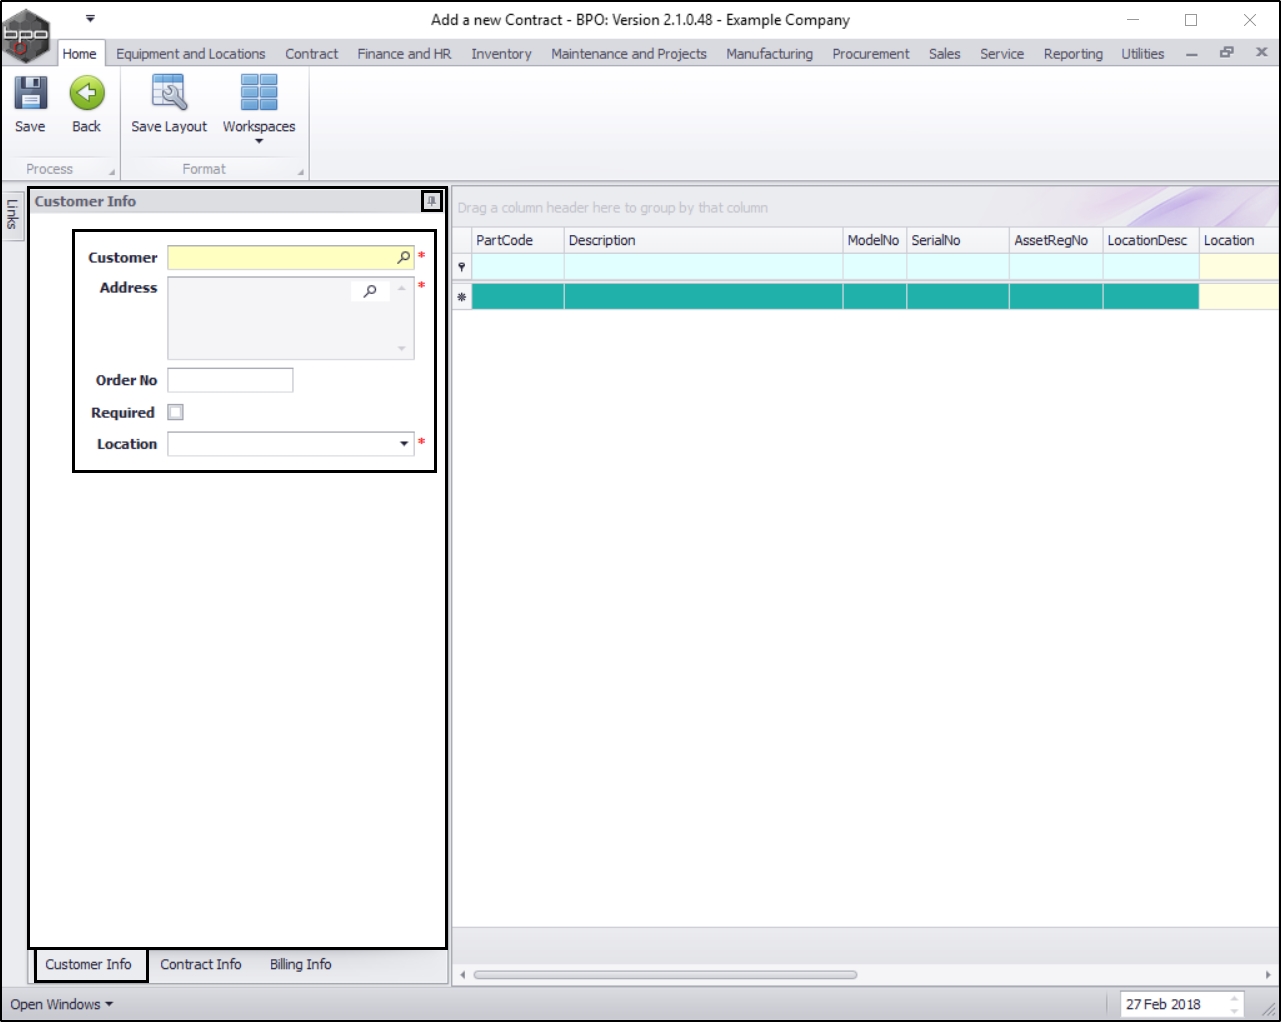
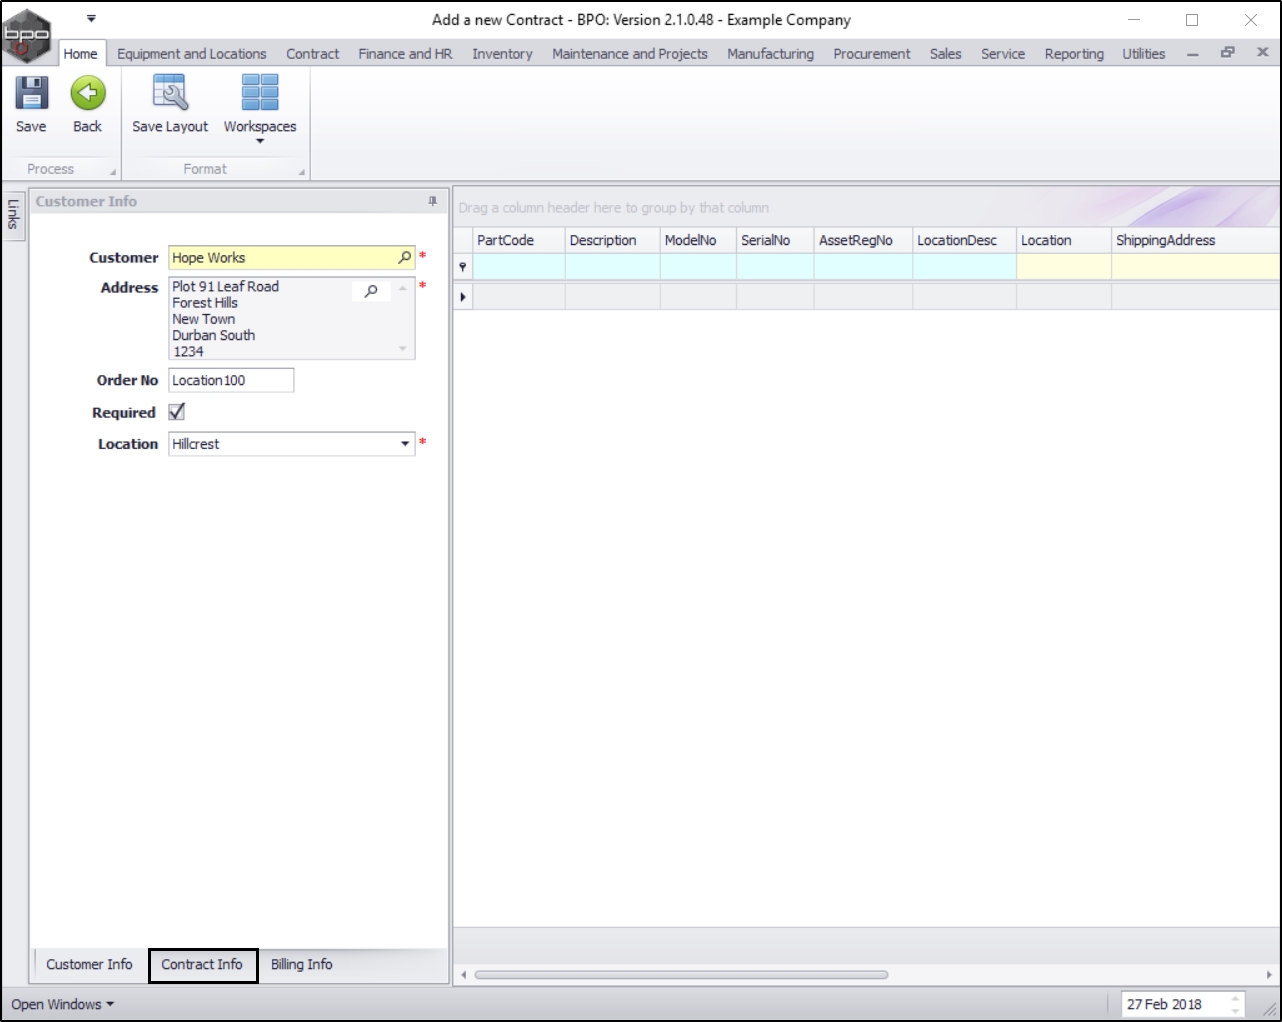
Add Customer Info
- Click on the Customer Info tab.
The Customer Info panel will be expanded.
- Note: Dock this panel to make it easier to work in.
Add the Customer information, ensure that all the required fields [*]are filled in.
- Customer: Click on the search button and select the customer from the Select a customer for this contract pop up screen.
- Address: Click on the search button and select the address from the Select an address for this contract pop up screen.
- Order No: Type in the customer order number, if required.
- Required: Only select this check box if the client must supply an order number before a technician is sent on site.
- Location: Click on the drop-down arrow and select the customer location from the menu.
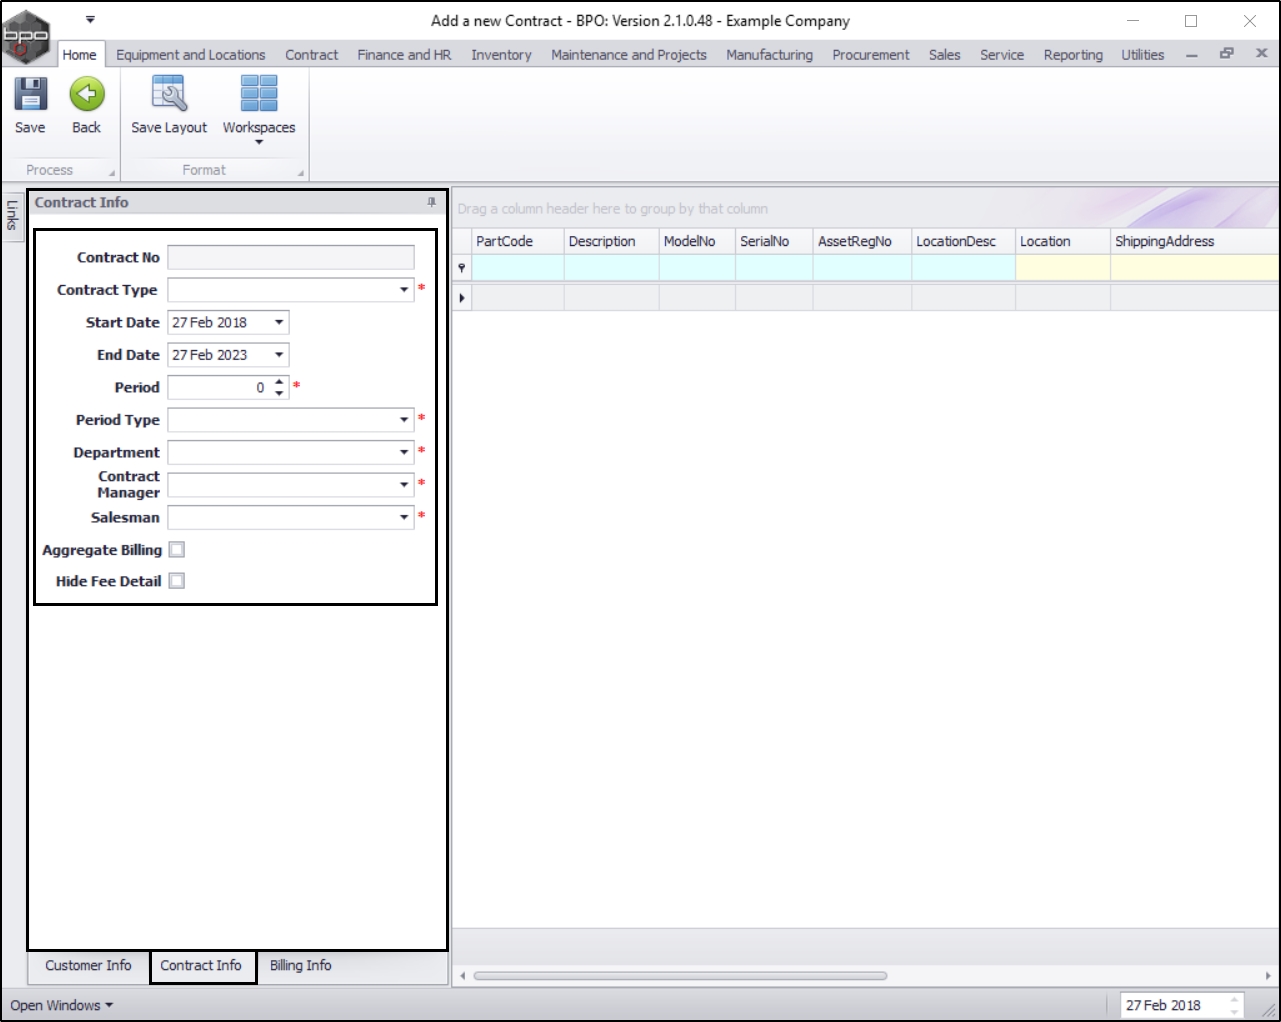
Add Contract Info
- When you have finished editing the customer info details, click on the Contract Info tab.
The Contract Info panel will be expanded.
- Contract No: The contract number is generated by the system (where configured in the Contract Type setup).
- Contract Type: Click on the drop-down arrow and select the contract type e.g., Prepaid Contract.
- Start Date: This will auto populate with the current date but you can click on the drop-down arrow and use the calendar function to select an alternative date.
- End Date: This will auto populate 5 years from the start date but you can click on the drop-down arrow and use the calendar function to select an alternative end date if required.
- Period: Either type in or use the arrow indicators to select the period of the contract (life span of the contract).
- Period Type: Select the period type (measure relating to the lifespan), e.g., 60 months.
- Department: Click on the drop-down arrow and select the department.
- Contract Manager: Click on the drop-down arrow and select the contract manager.
- Salesman: Click on the drop-down arrow and select the salesman.
- Aggregate Billing: Click on this check box if the customer will receive aggregate billing.
- Hide Fee Detail: Select this option if you don't want to show individual contract invoice fee amounts.
- Note: If this is an Evergreen contract, set your end date to 31/12/2999.
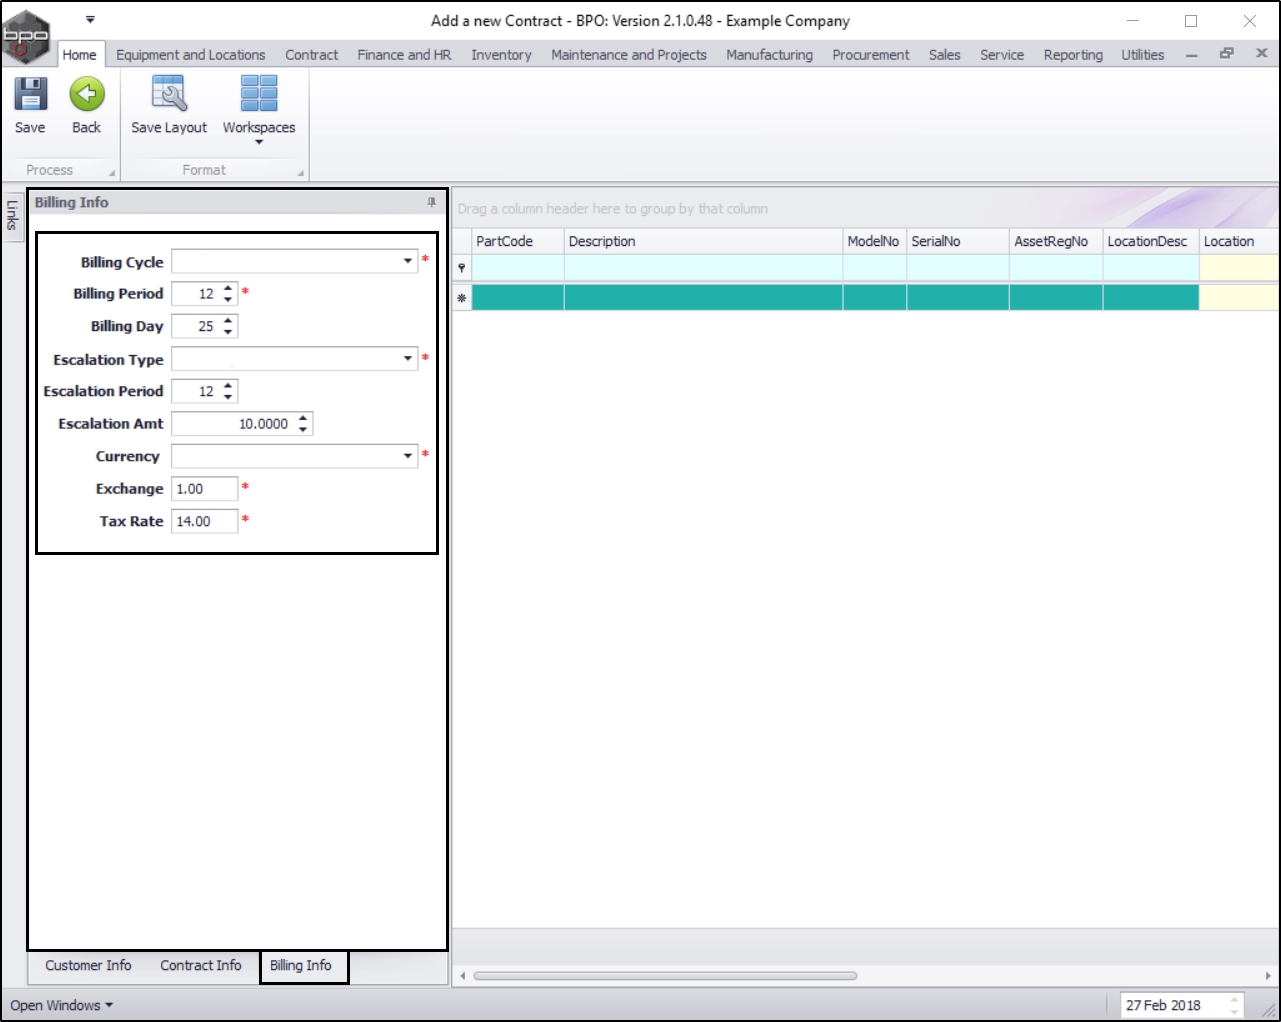
Billing Info
- When you have finished editing the contract info details, click on the Billing Info tab.

The Billing Info panel will be expanded.
Some of these details will auto populate but they can be changed as explained below:
- Billing Cycle: Click on the drop-down arrow and select the billing cycle (billing frequency, e.g., monthly).
- Billing Period: This is the financial period in which billing will first begin. Type in or use the arrow indicators to select the period number (e.g., January = 11).
- Billing Day: Type in the day that the customer will be billed (e.g., on the 25th of each billing cycle).
- The Billing Day can be used if you are billing different contracts on different days or can be used as a filter in the Contract Billing screen. The Billing Day is limited to 31. You can type in the day that the customer will be billed (e.g., on the 25th of each billing cycle) else leave as 0.
- Escalation Type: Search for and Select an escalation type (usually percentage is used).
- Escalation Amount: Type in the escalation amount, depending on the escalation type selected (e.g., 10 if the escalation should be 10%).
- Escalation Period: Type in the financial month at which the system should escalate the contract.
- Note: If this escalates on the anniversary of the contract, then use the same financial period as the billing period.
- Currency: The system will auto populate with the currency already set up on the customer but you can click on the drop-down arrow and select an alternative currency if required.
- Note: For foreign currency contracts, all fee and meters charges must be set up in the currency selected e.g., type in the dollar amount if the currency is USD.
- Exchange: Type in the exchange rate.
- Tax Rate: Type in the tax rate.
- When you have finished editing the Billing Info panel, you can hide (dock) the panel to make it easier to work in the Items frame.
- Click on the docking icon in the billing panel.
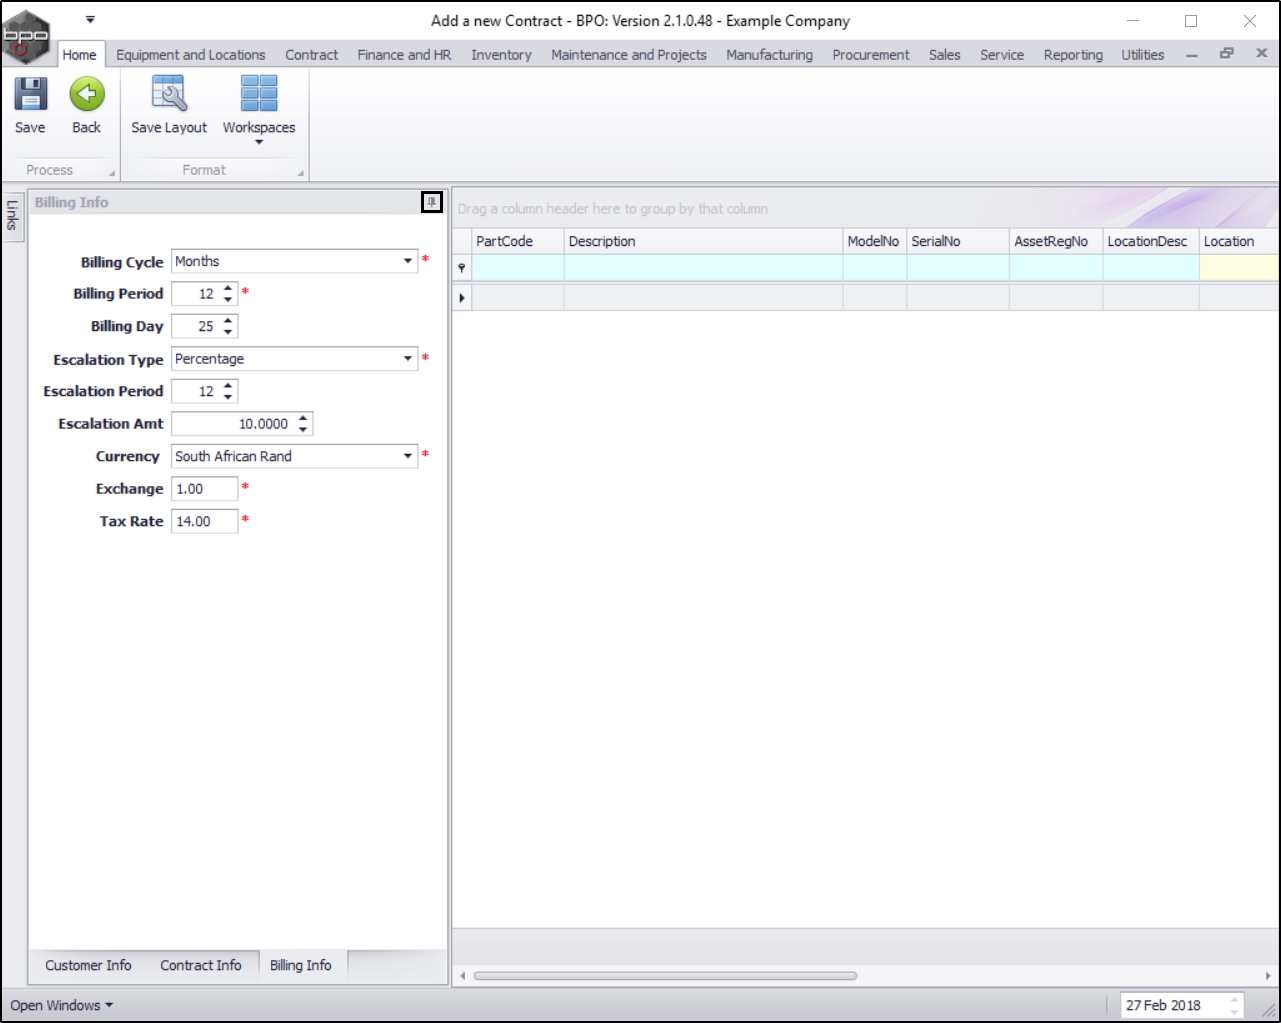
- The Customer Info, Contract Info and Billing Info panels will now be reduced to tabs at the side of the screen.
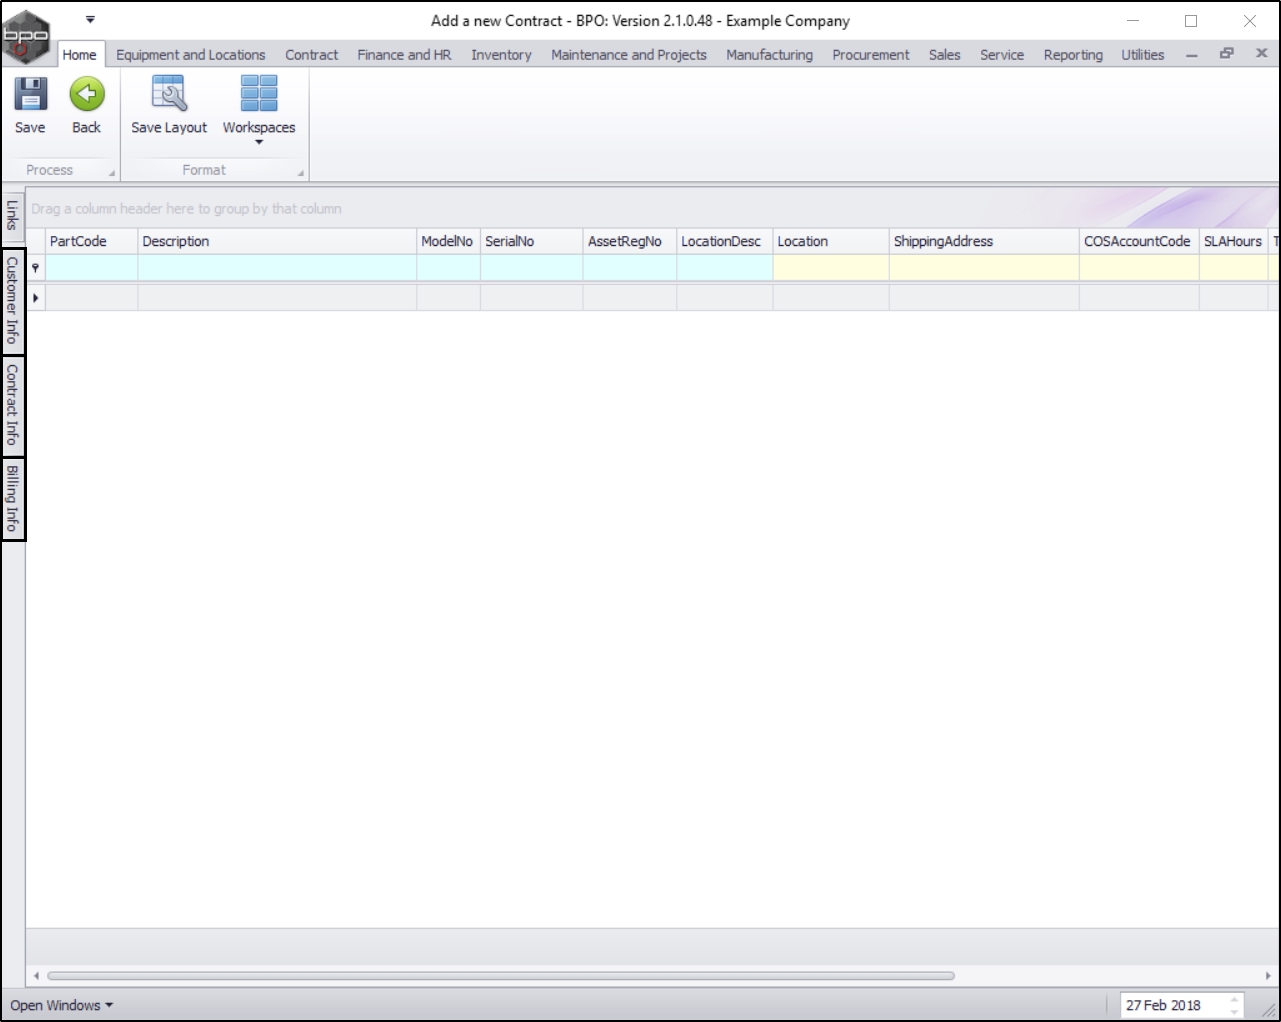
Add Location
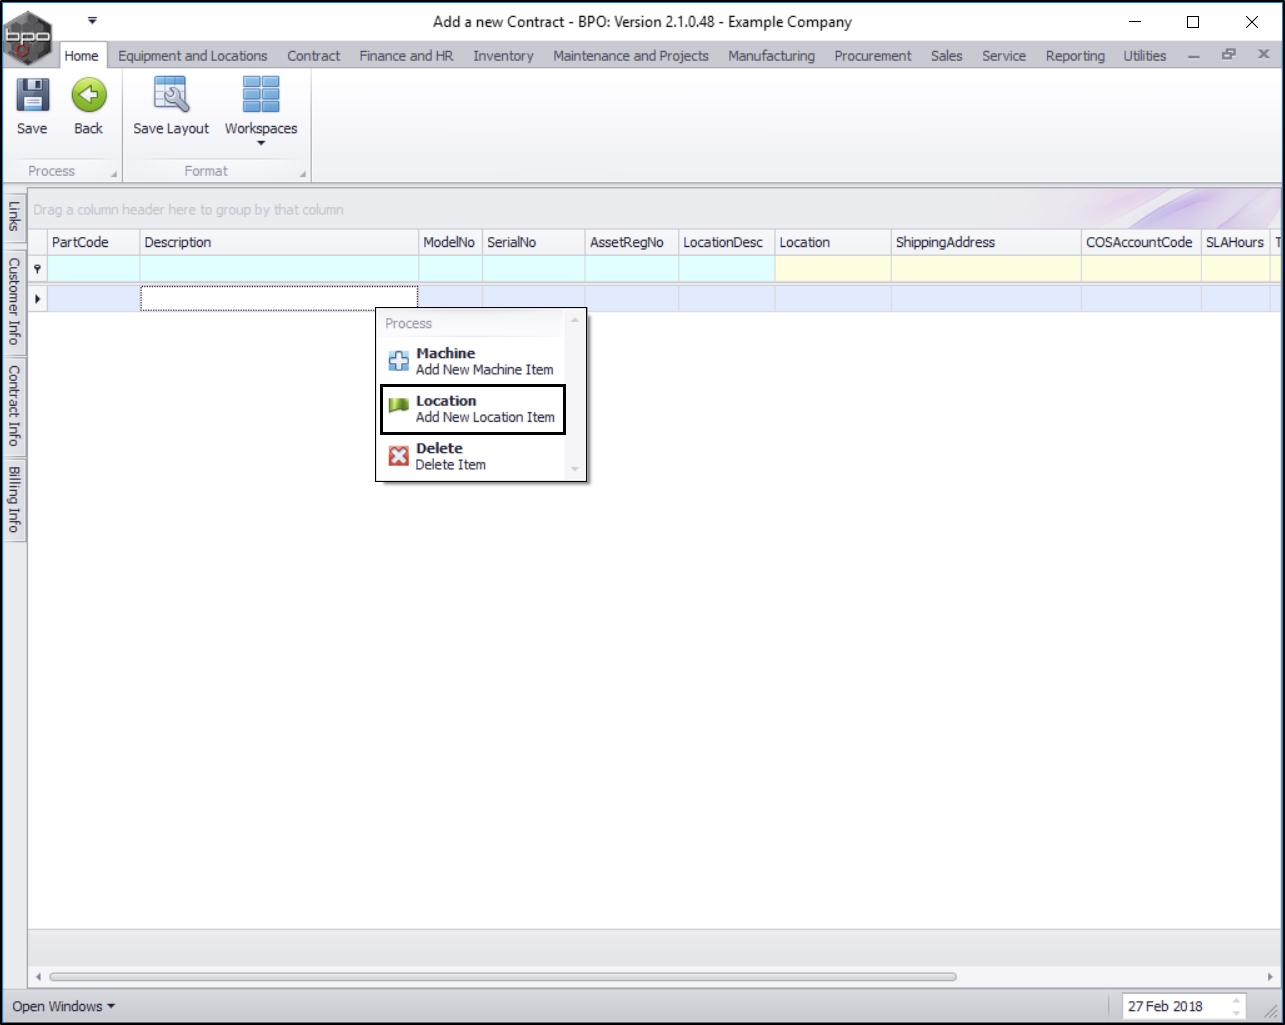
- Right click anywhere in the row of the Parts frame.
- A Process menu will pop up.
- Click on Location - Add New Location Item.
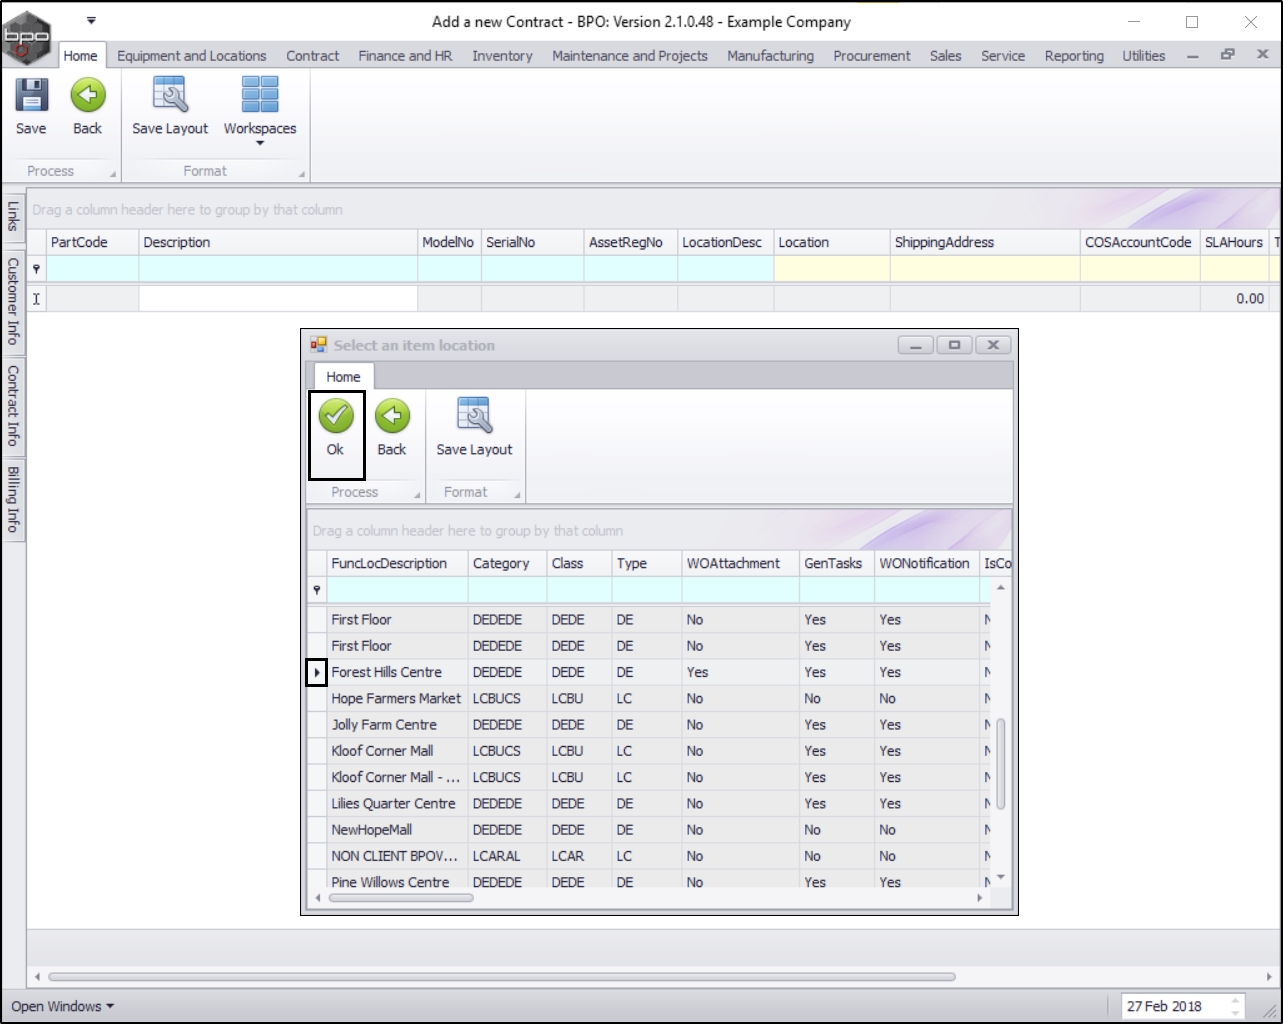
- The Select an item location pop up screen will appear.
- Select the row of the item location description that you wish to add.
- Click on Ok.
- The selected item location description will now populate the Location Description text box.
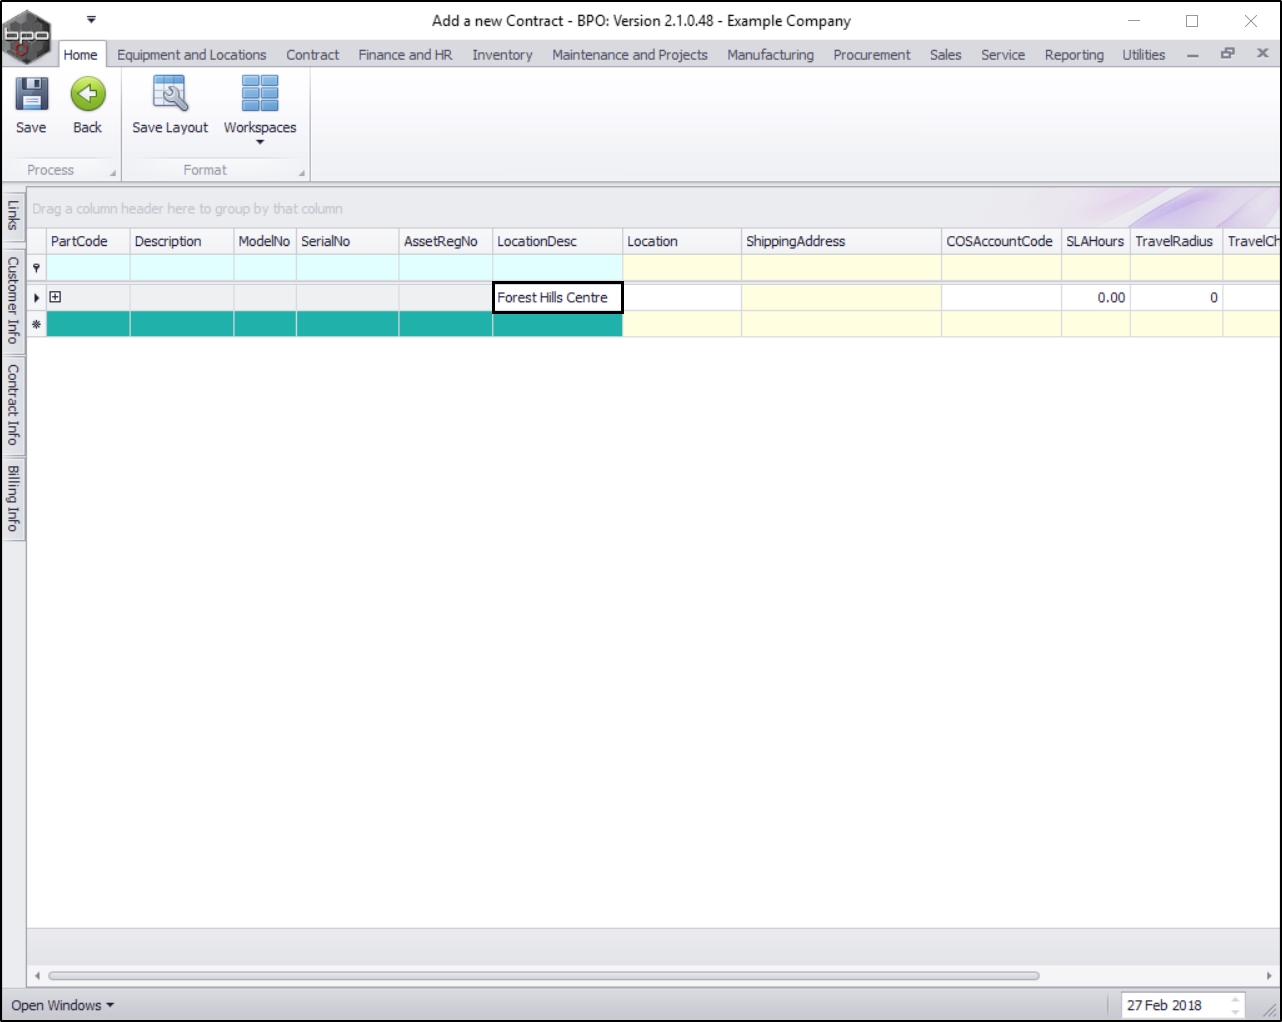
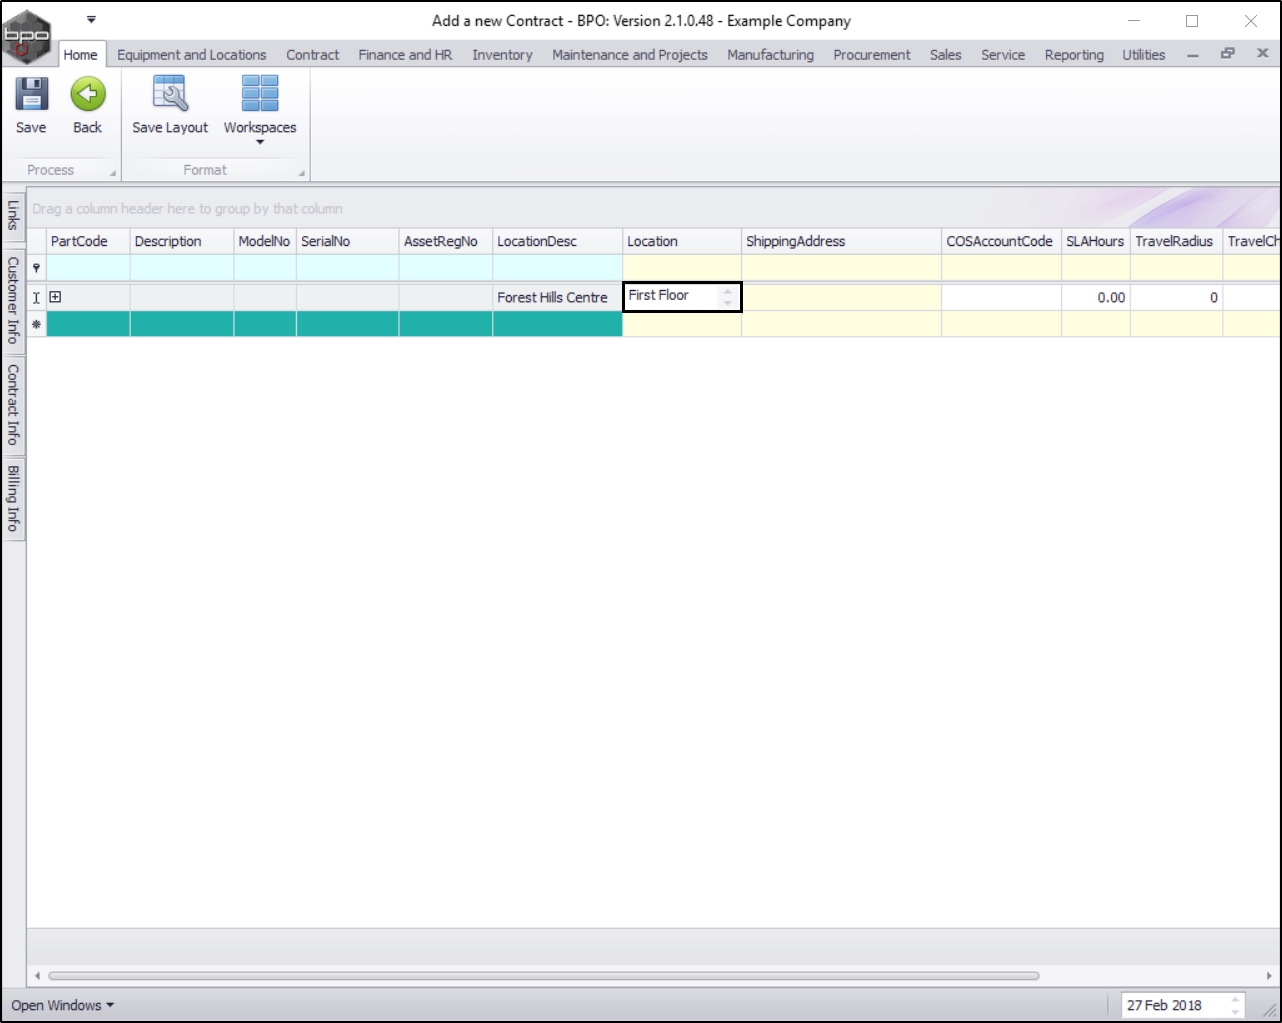
- Click in the Location text box.
- Type in a location for this item.
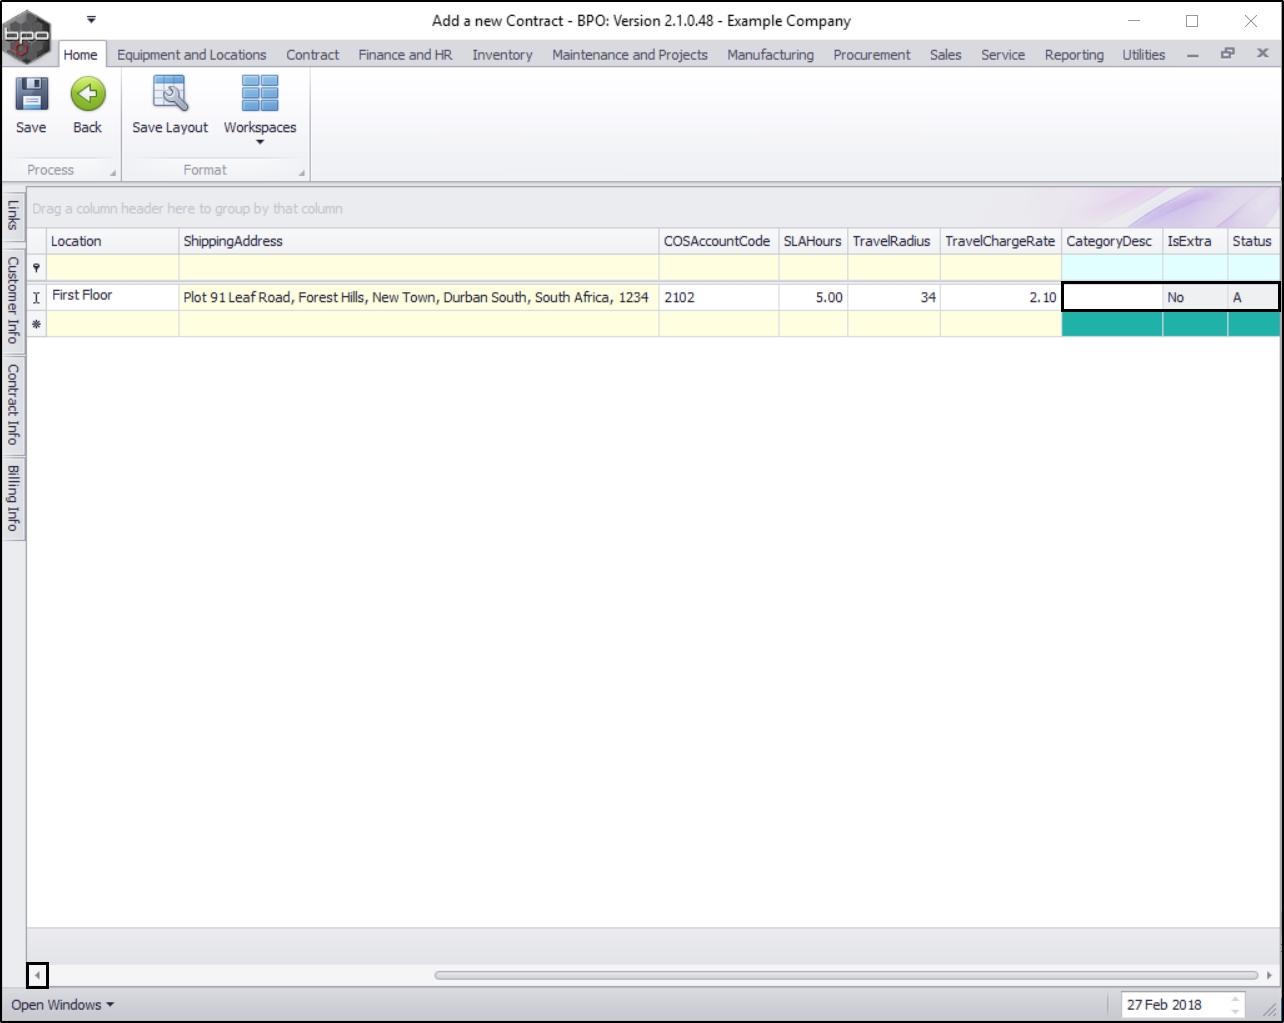
Shipping Address
- Click in the Shipping Address text box.
- An ellipsis button will be revealed.
- Click on this button to display the Select a shipping address pop up screen.
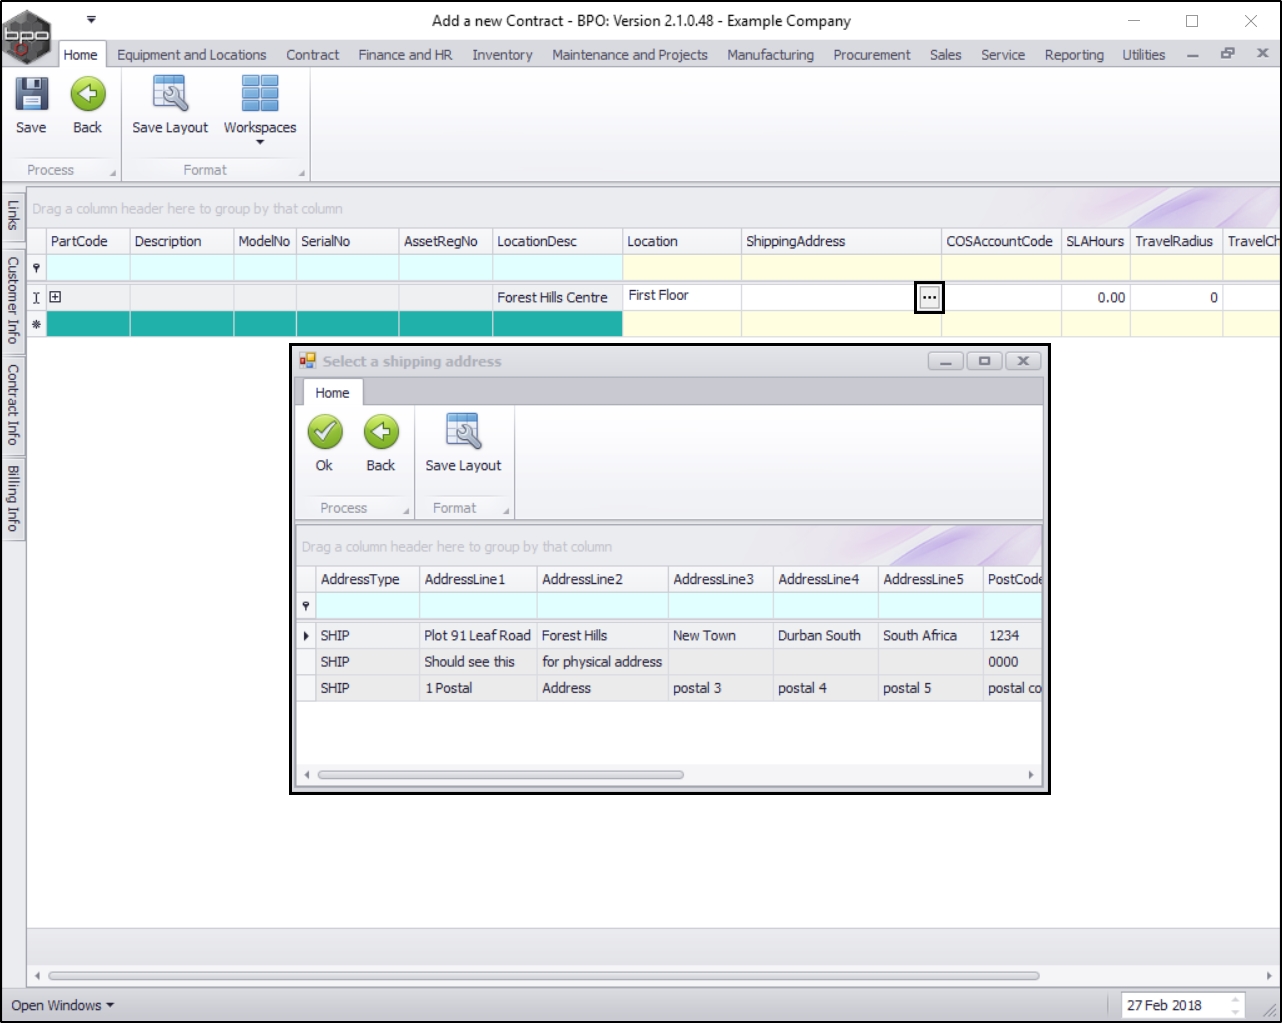
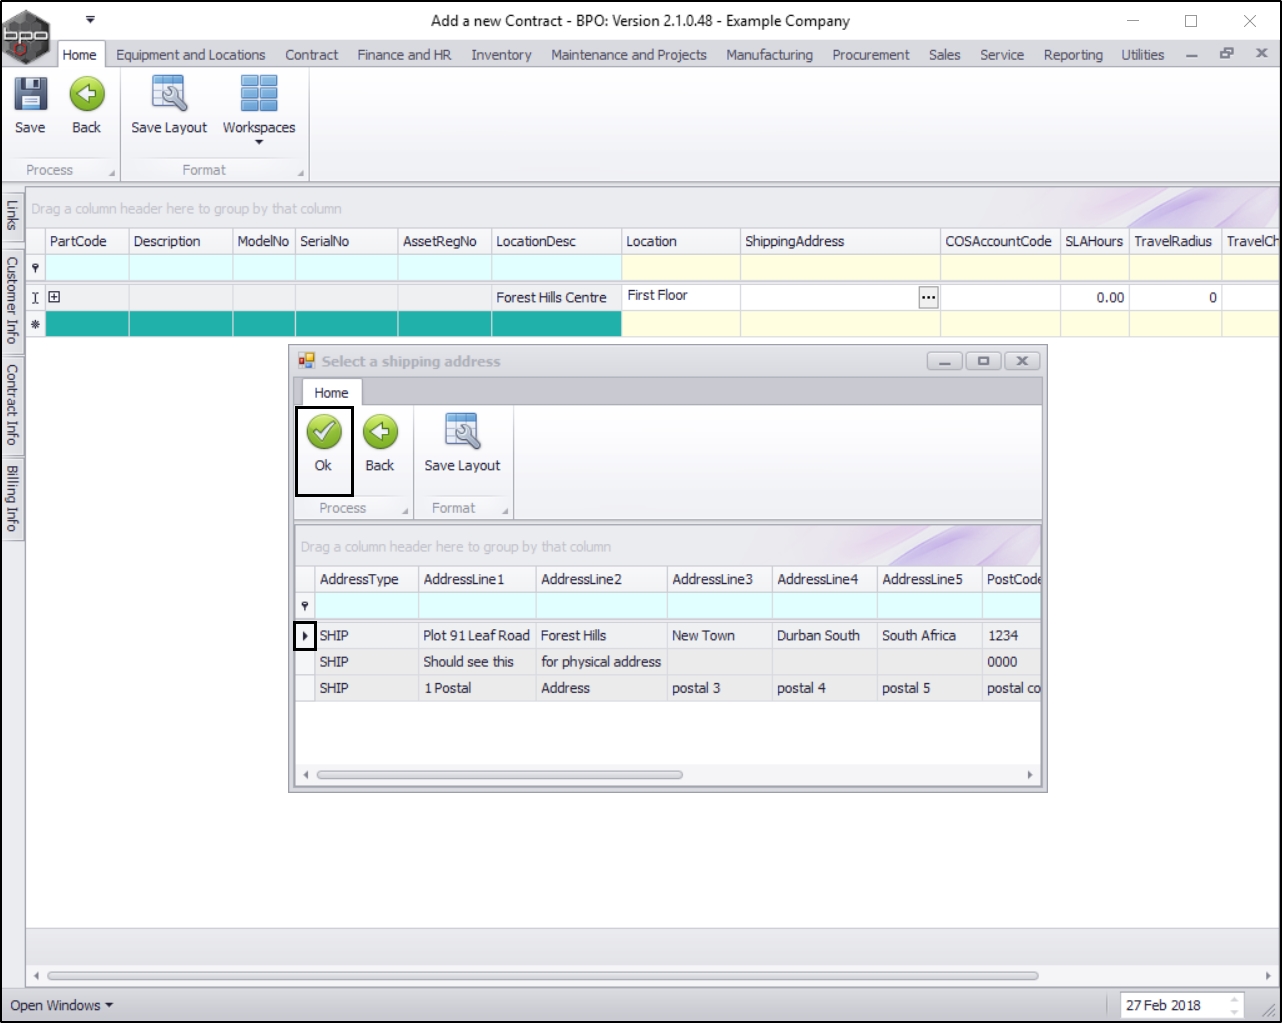
- Select the row of the shipping address that you wish to link to this location item.
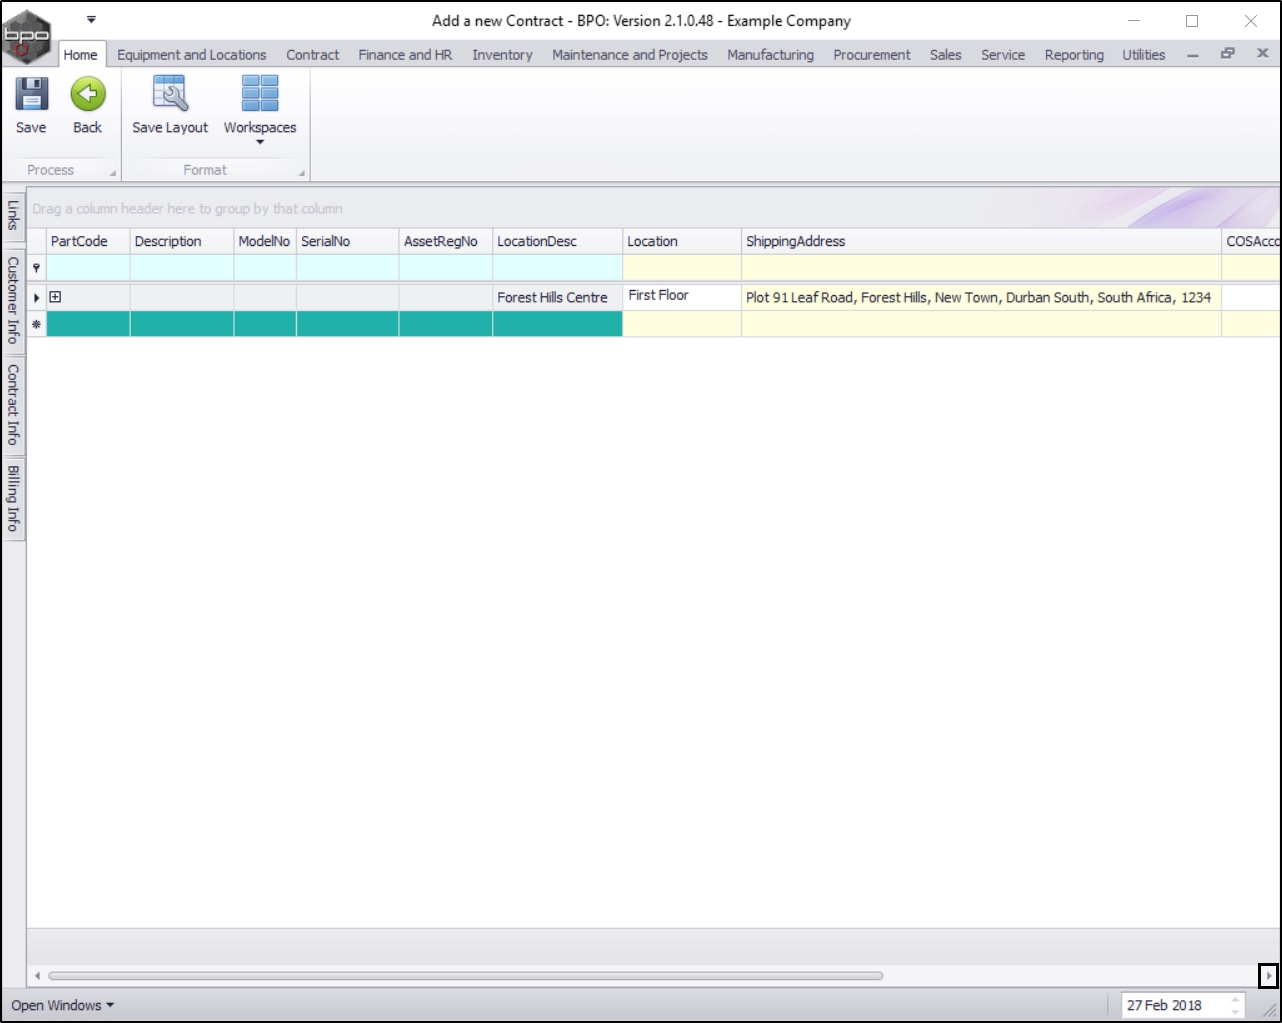
- Click on Ok.
- Scroll right to view the remaining columns in the Items frame.
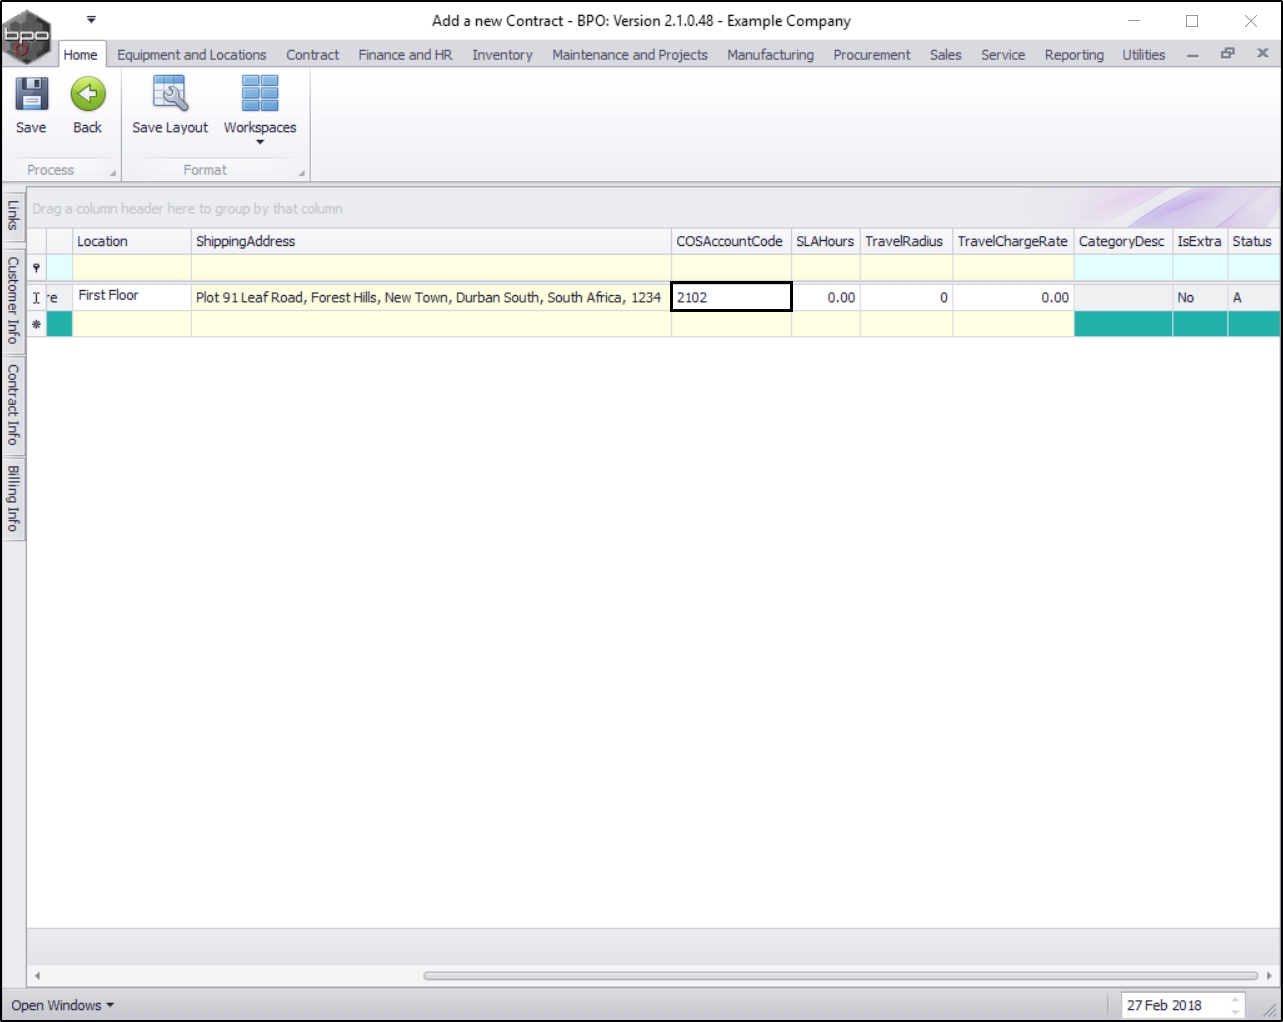
COS Account Code
- Click in the COS Account Code text box.
- Type in the Cost of Sales account code to be used for WIP (Work In Progress) transaction postings (non-billable toner and spare parts issued as contract included items).
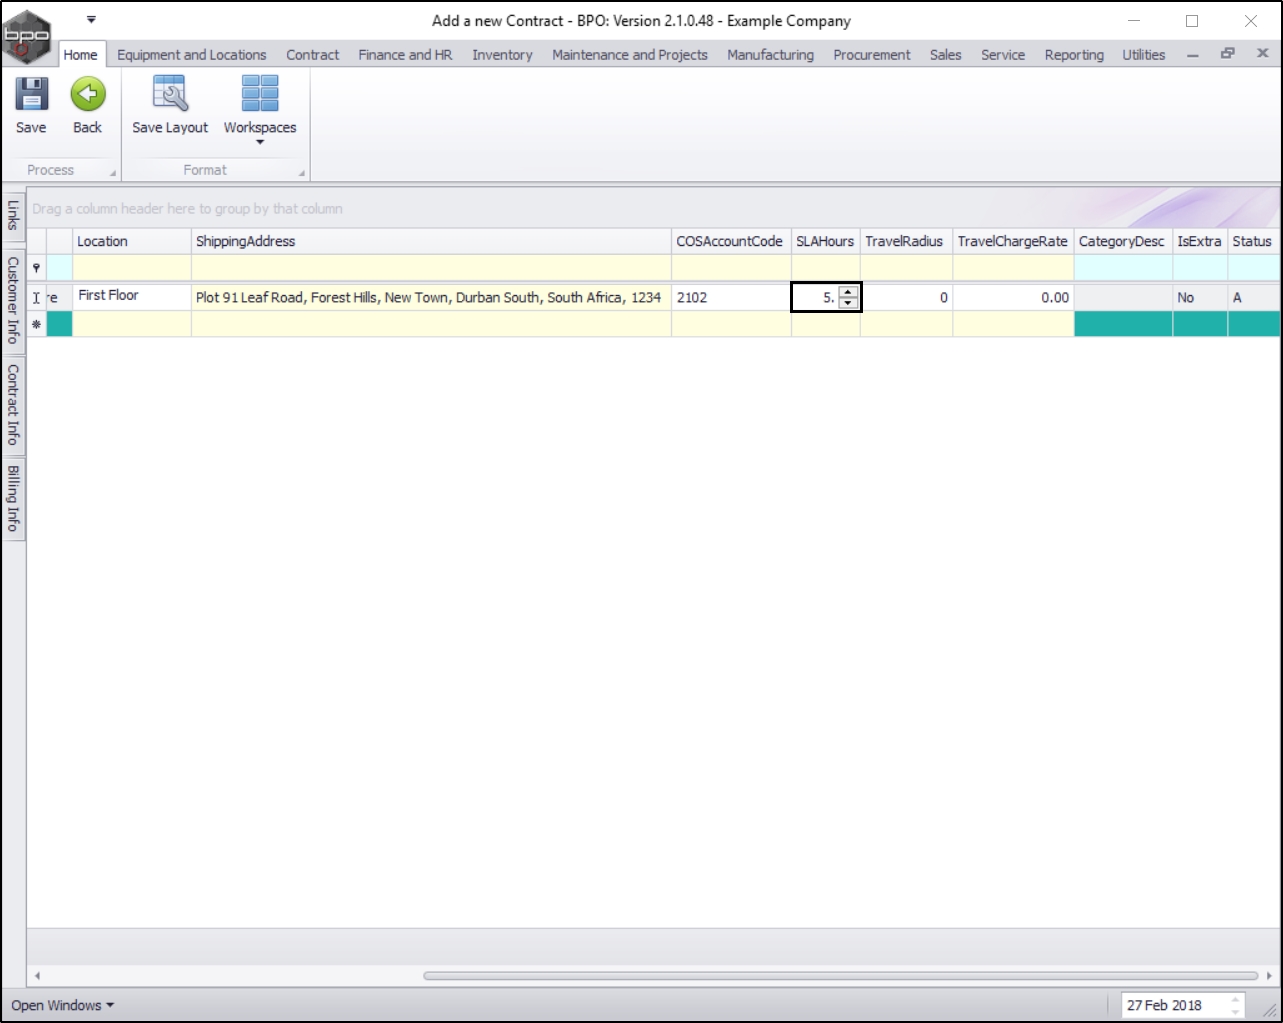
SLA Hours
- Click in the SLA Hours text box.
- Type in or use the arrow indicators to select the required Call response time (in hours).
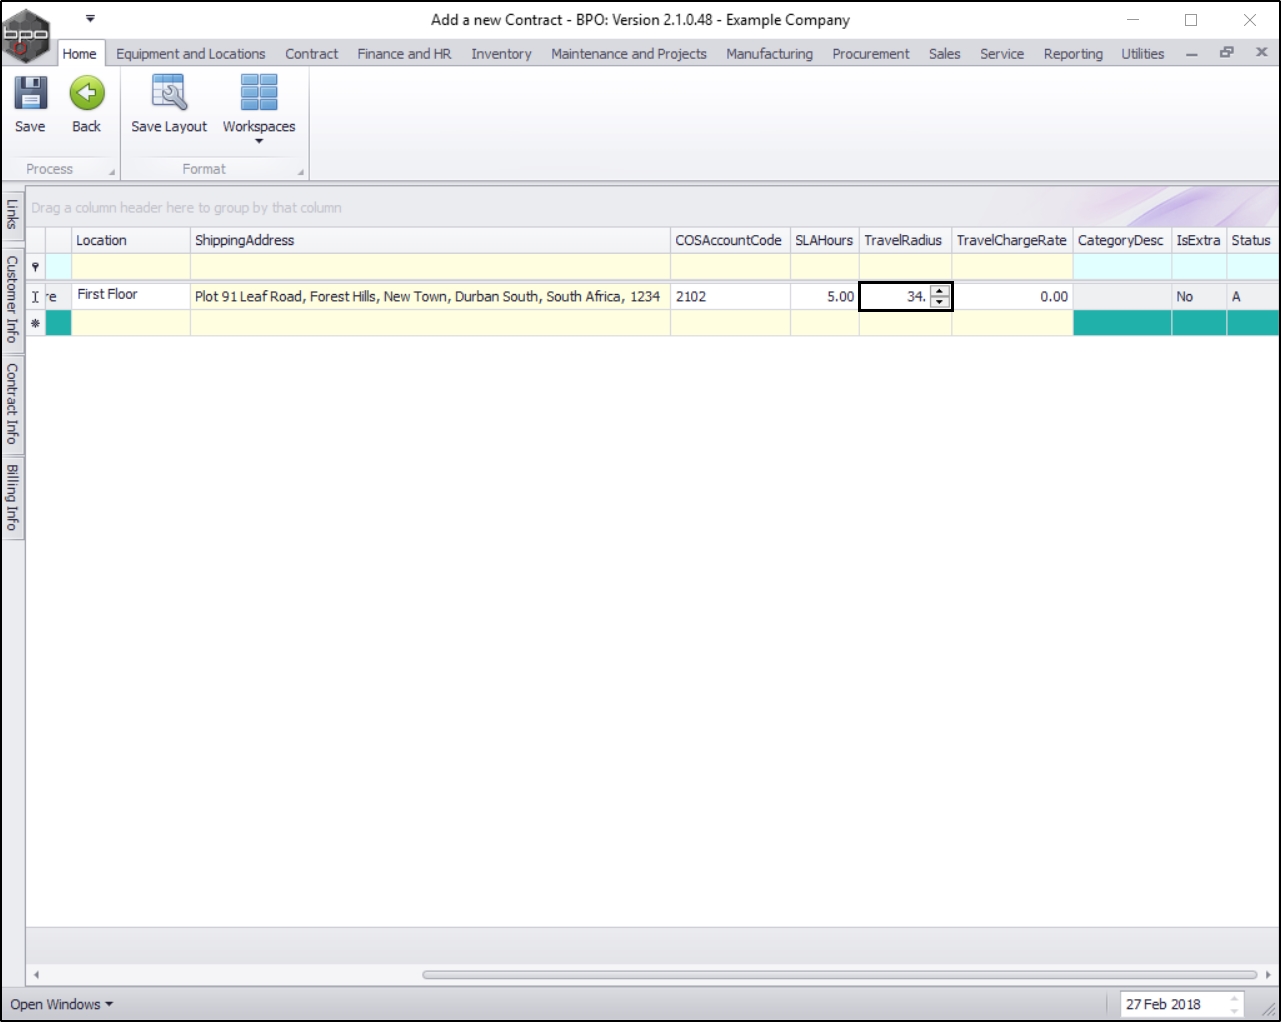
Travel Radius
- Click in the Travel Radius text box.
- Type in or use the arrow indicators to select the distance (in kilometres) to and from the client, if this travel is to be billed every time a Call is logged. If travel is included, then set this to 0.
- Note: Travel can always be billed separately, if required.
Travel Charge
- Click in the Travel Charge Rate text box.
- Type in or use the arrow indicators to select the travel charge rate (e.g., Rands per kilometre).
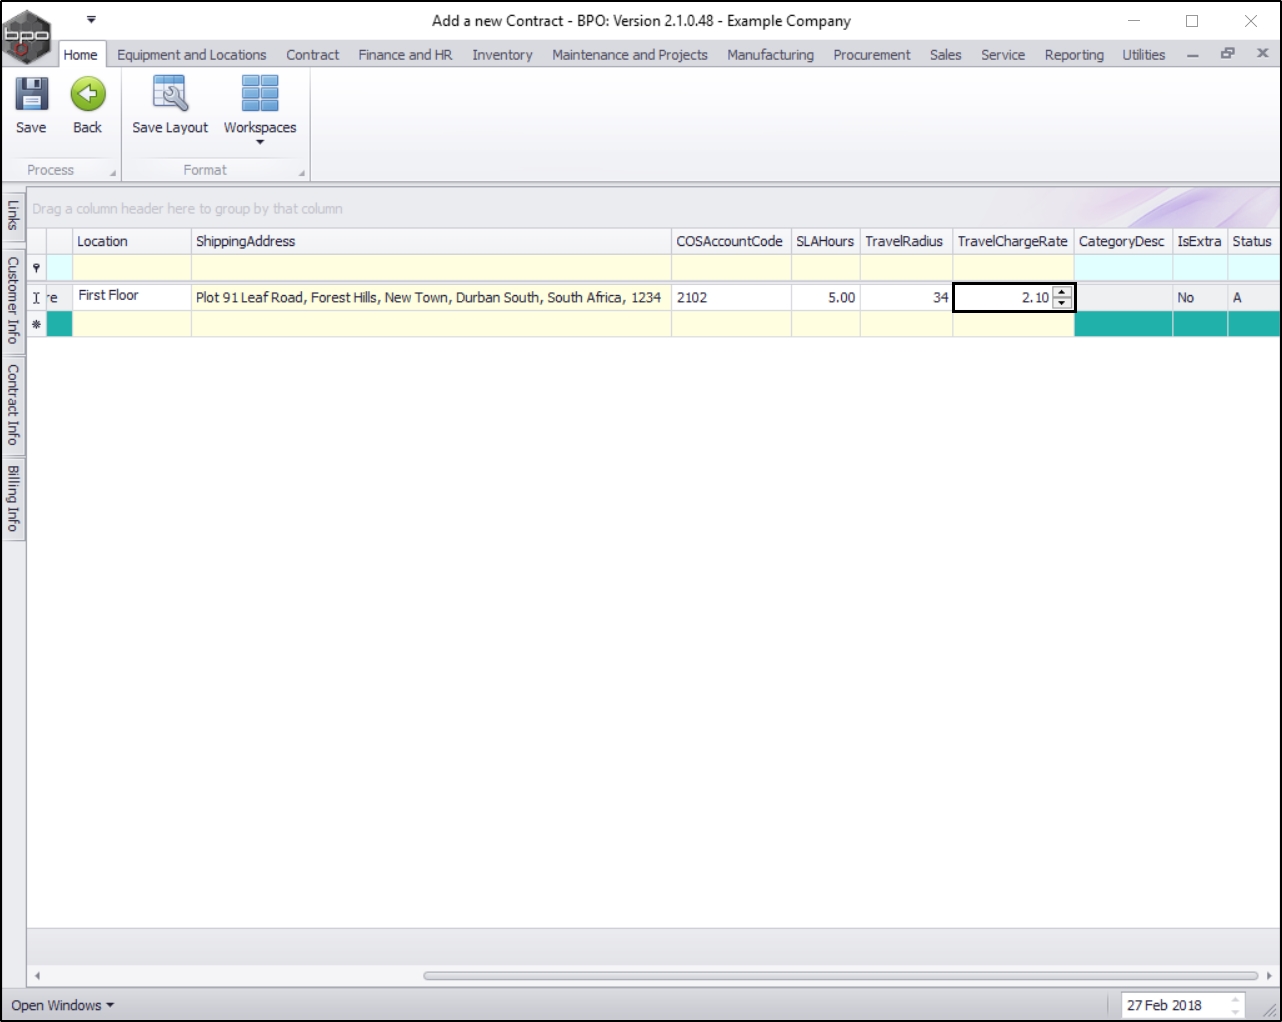
- The Category Description, Is Extra and Status fields are static.
Add Items
- Scroll left, so that you can view the Part Code column again.
- Click on the expand button in the Part Code text box.
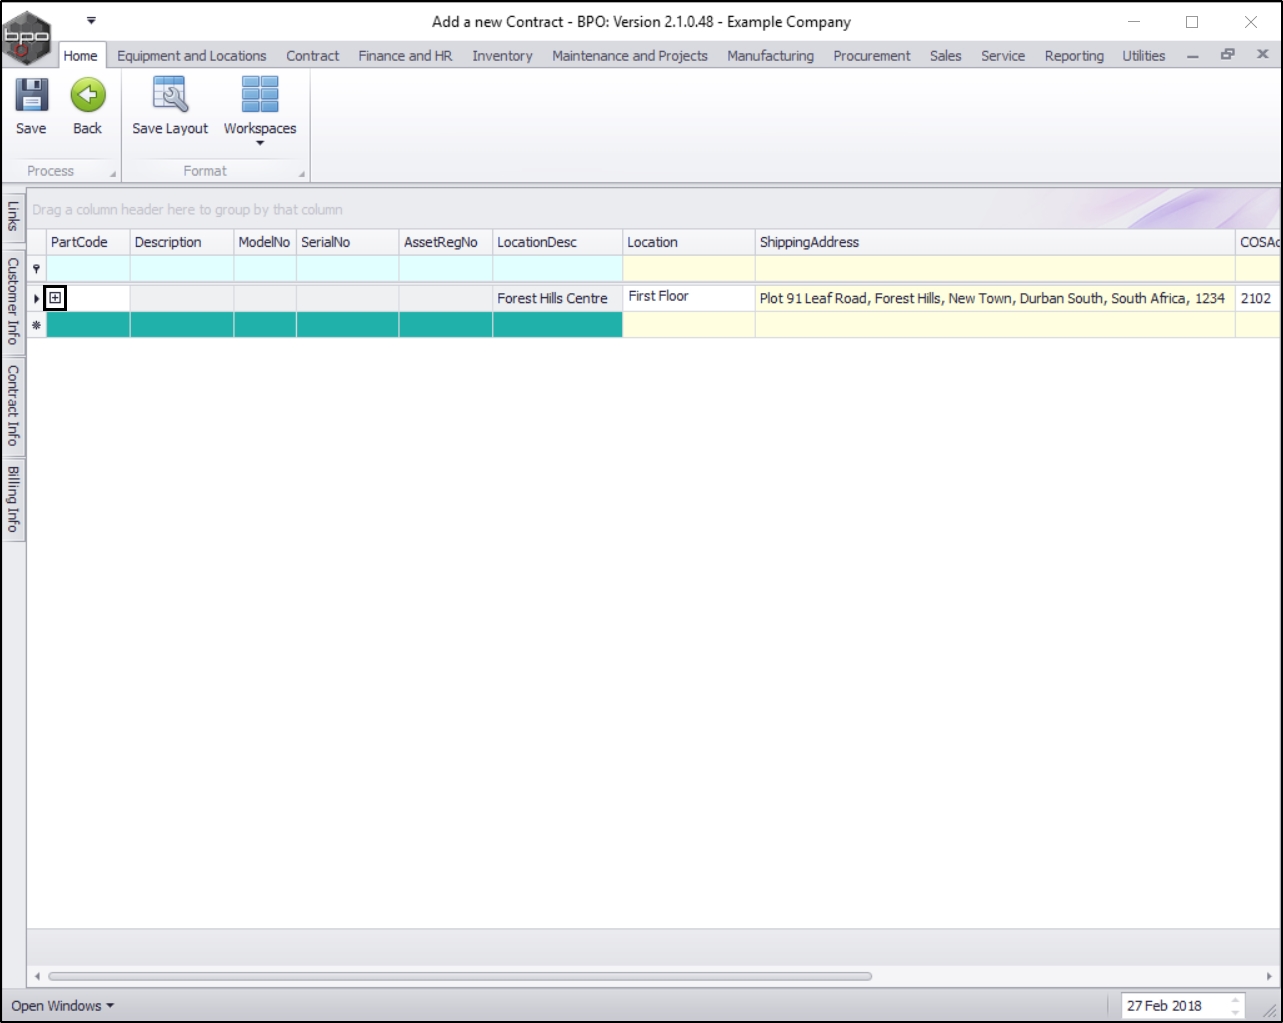
- The selected location Item frame will be expanded.
- In this frame are 4 different tabs:
- Item Fees: monthly charges
- Item Meters: meter usage charges
- Item Inclusions: items not to bill
- Item Contacts: the contact person - per location item

- Note: In the Items Frame, you will not be able to add Item Meters as this is a Location Contract not a Machine Contract and you cannot link meters to a location.
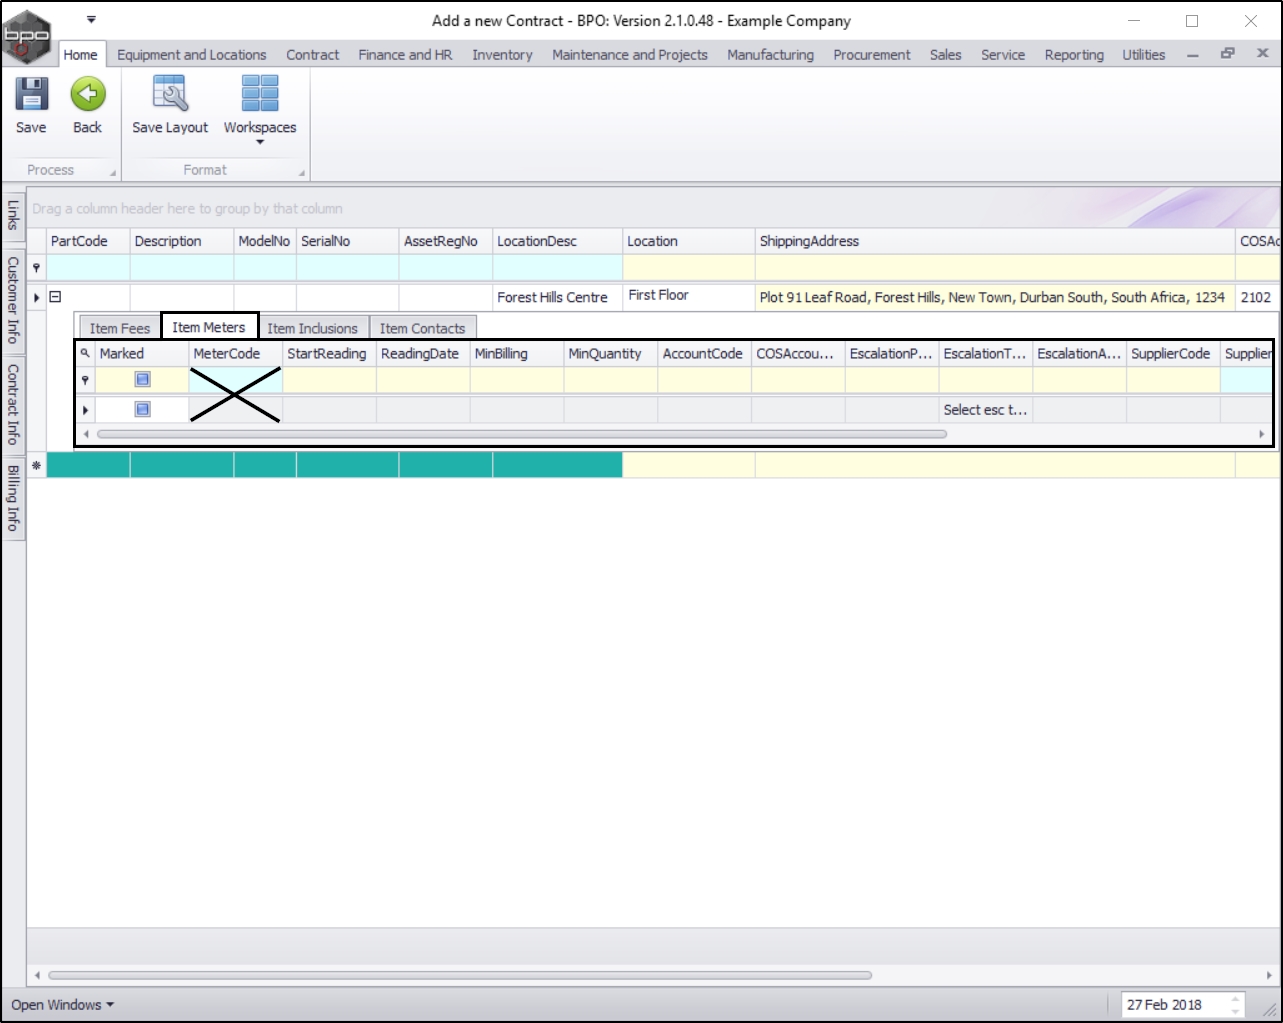
- To add Location Item Fees, Location Item Inclusions and Location Item Contacts, click on the following link and follow the processes as set out in the Contracts - Create A New Contract manual.
- You can continue to add contract location items as required, however additional items can also be added later.
Save Location Contract
When you are finished, click on Save.

- The new contract can be found within the New contract status.
- From here the contract will need to be Released and Approved before it becomes active.
MNU.112.041