We are currently updating our site; thank you for your patience.
Contract
Auto Bill flag Selected
Contract billing has 2 steps:
- Creating the billing batch
- Running the billing (which will generate the contract invoices), if the Auto Bill flag is selected in the Contract Configuration).
Important Note: The Auto Bill flag
- If the Auto Bill flag is unselected in the Configurator, when the contract billing batch is created and saved, the contract invoices will be not be created by the system. Refer to Contract Billing -Auto Bill flag unselected.
The process set out below depends on the Auto Bill flag being selected in the Configurator. The contract invoices will be auto-created on running the billing batch. The Invoices action button will be inactive in the Contract Billing screen throughout this whole process.
If you run your Contract Fees and Contract Meters billing separately (e.g., Rental at the beginning of the month, and Meter Charges at the end of the month), ensure that you select the correct fee type when you create the billing batch.
| Ribbon Access: Contract > Billing |

- The Contract Billing screen will be displayed.
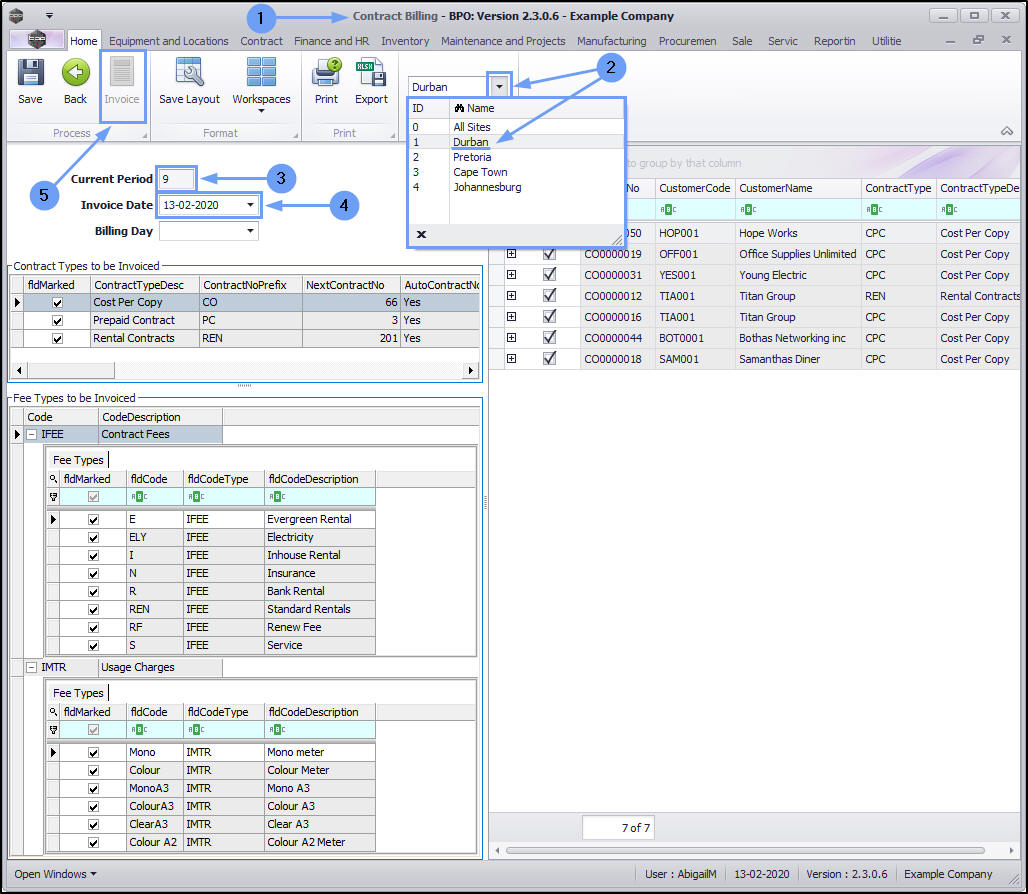
- Select the site.
- In this image Durban has been selected.
Current Period & Invoice Date
- Current Period This will reflect the current billing period (not financial period).
- Invoice Date: Ensure you select the correct invoice date - this is the date that will reflect on the contract invoices.
- Note: The Invoice action button is currently 'inactive' (greyed out).
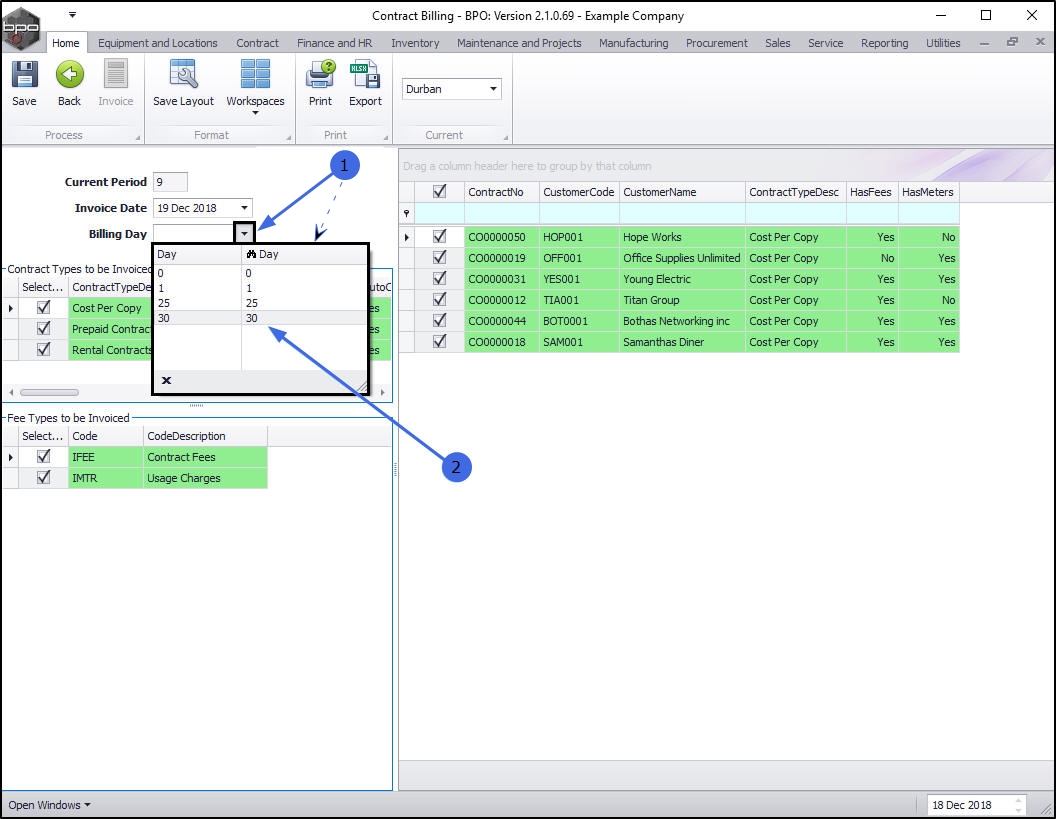
Billing Day
This is an optional selection - and will give you the ability to select contracts by the Billing Day configured on the contract. It can be used as a filter in this screen.
- Click on the drop-down arrow in the Billing Day text box to display the Day selection list.
- You may have contracts configured to bill on the 1st , 25th and 30th , as in this example. This will give you the option to multi-select on the contract that you wish to bill currently.
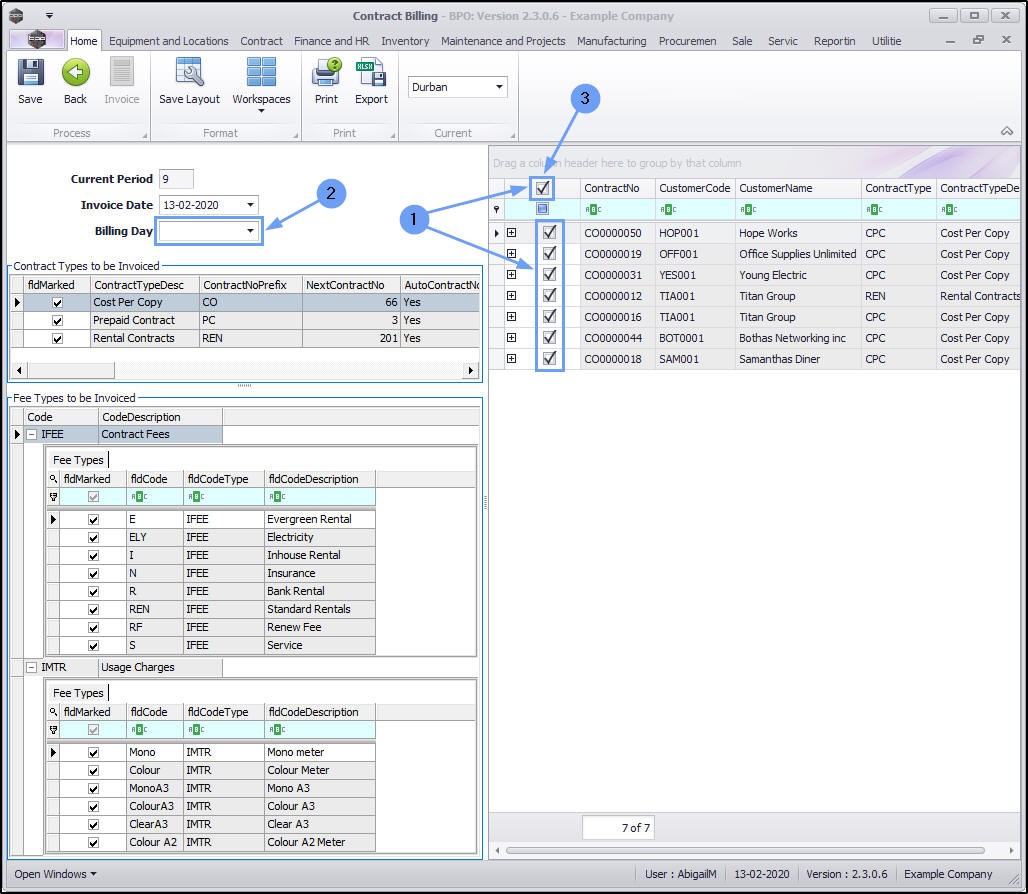
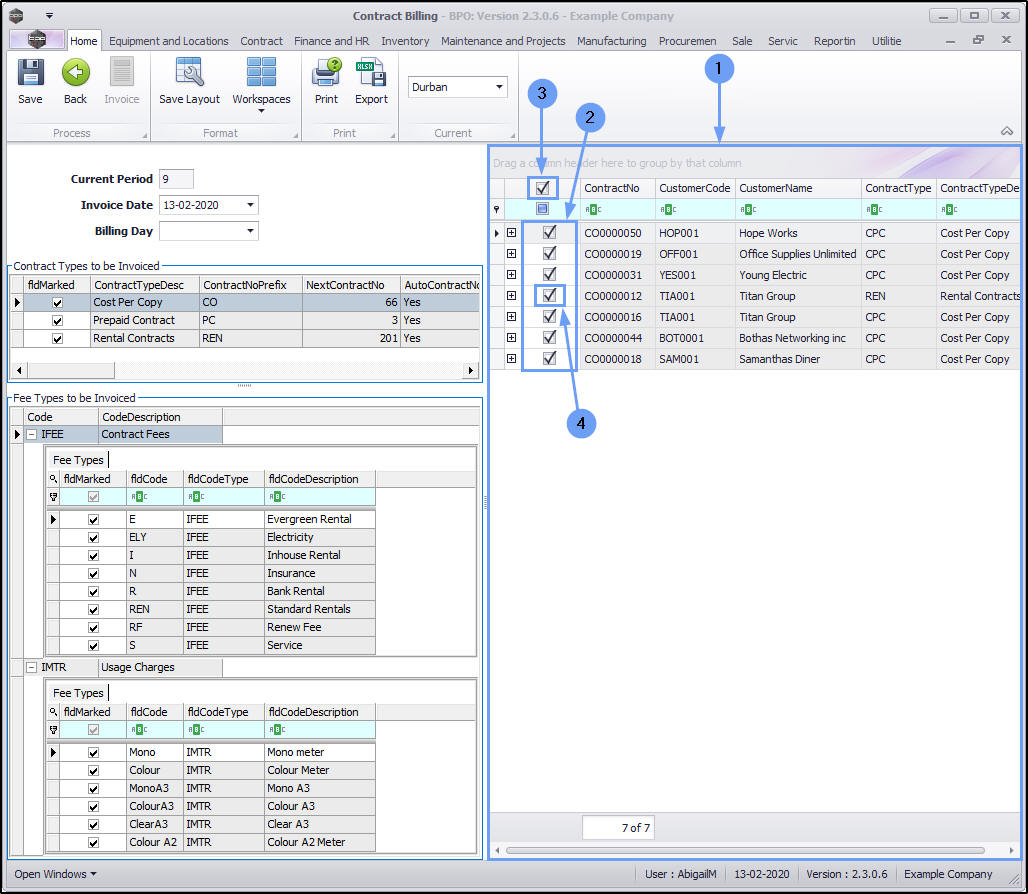
All Contracts Check Box
- All contracts are initially selected by default,
- unless the Billing Day is selected.
- Use the select All Contracts check box to quick select or deselect all contracts as required.
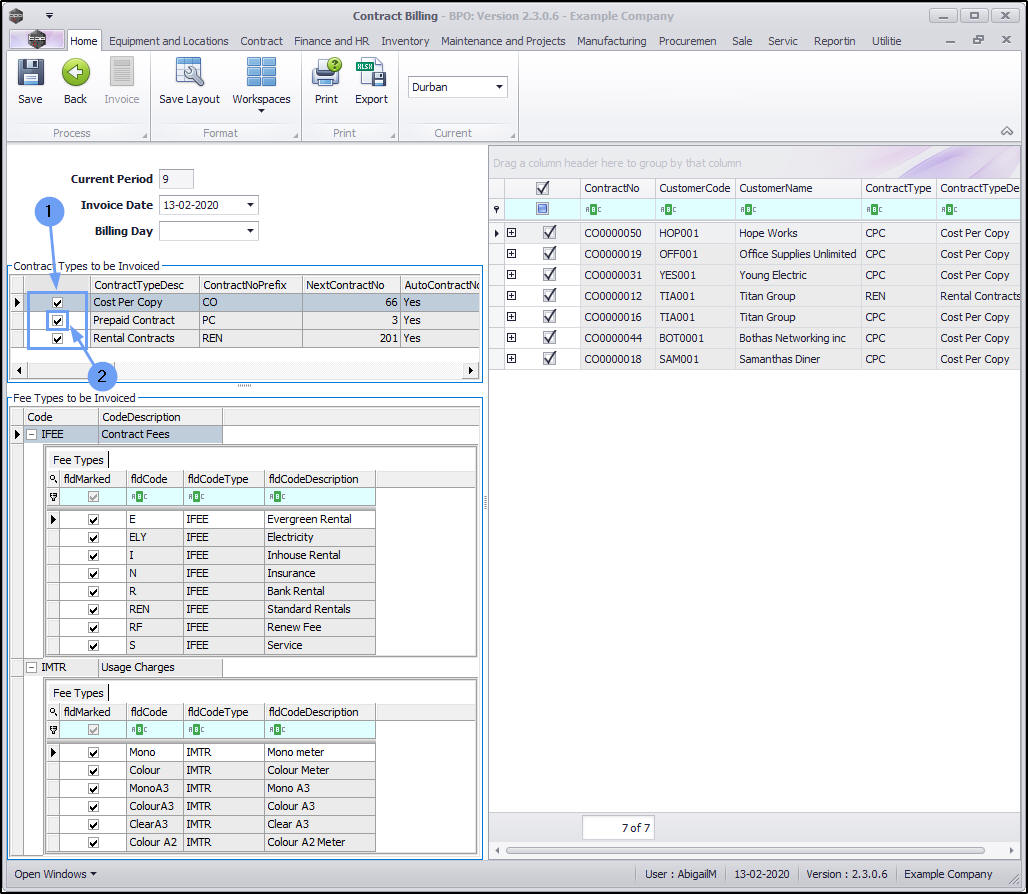
Contract Types
- Select the Contract Types to be billed.
- All Contract Types are initially selected by default. Deselect individual Contract Types that you do not wish to bill at this time.
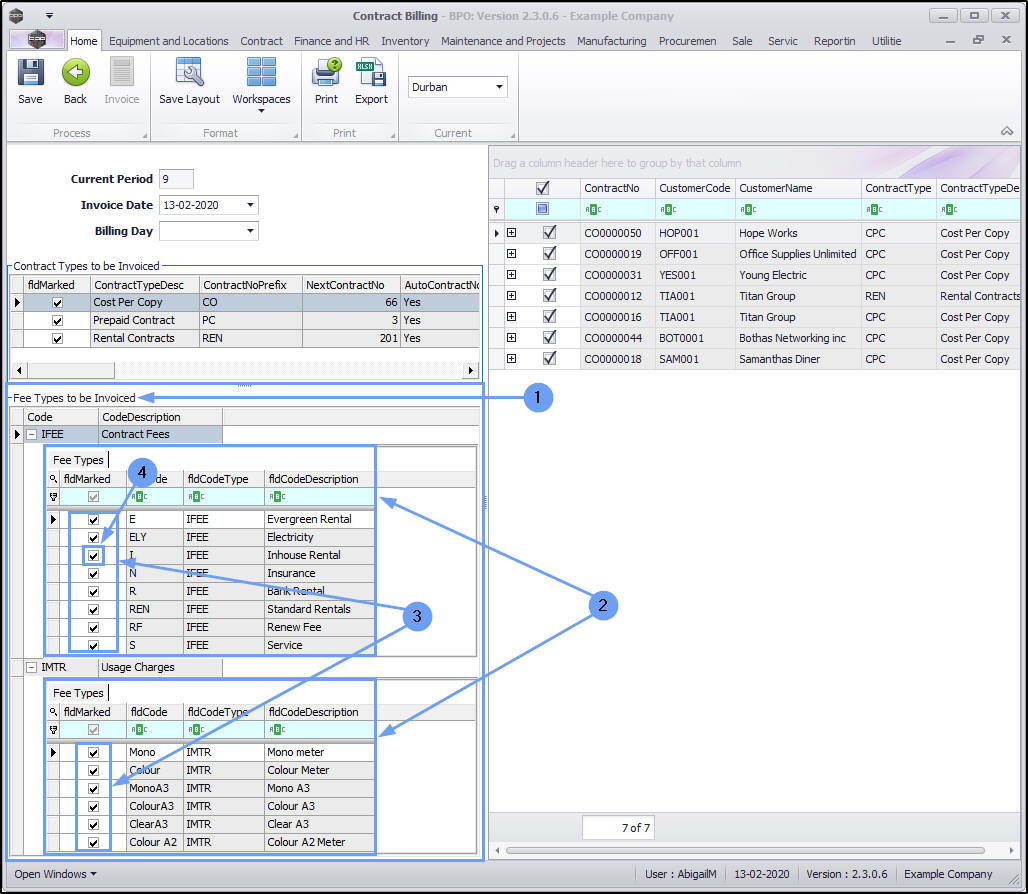
Fee Types
- Select the contract Fee Types to be billed.
- You will note that upon opening the Contract Billing screen, that both Fee Types sub grids; (FEE: Contract Fees and MTR: Usage Charges) are auto expanded.
- All Fee Types are initially selected by default.
- Deselect any Fee Type(s) that you do not wish to bill at this time.
The Contracts Frame
- This frame lists all Contracts that are available for billing.
- Note: All Contracts are initially selected by default.
- You can use the All Contracts checkbox to 'quick' deselect all Contract(s)
- or deselect check boxes individually for the contracts that you do not wish to bill at this time.
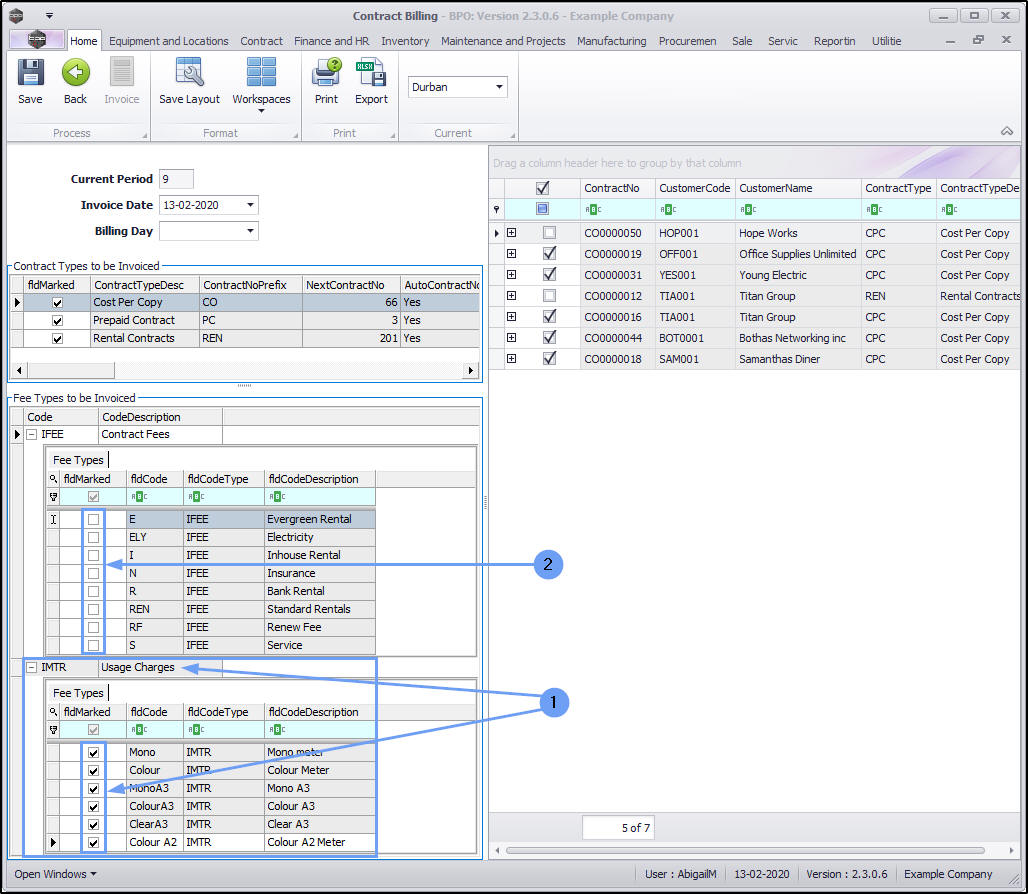
Rental / Service Charge Billing
(if running separately)
- Under Fee Types, make sure only IFEE (Contract Fees) are selected.
- IMTR Usage Charges must be deselected.
- Note: This will only generate billing for contracts which have Rental or Service charges set up.

Cost Per Copy Billing
(if running separately)
- Under 'Fee Types', make sure only IMTR (Usage Charges) are selected.
- IFEE Contract Fees must be deselected.
- Note: This will only generate billing for contracts which have cost per copy charges set up.
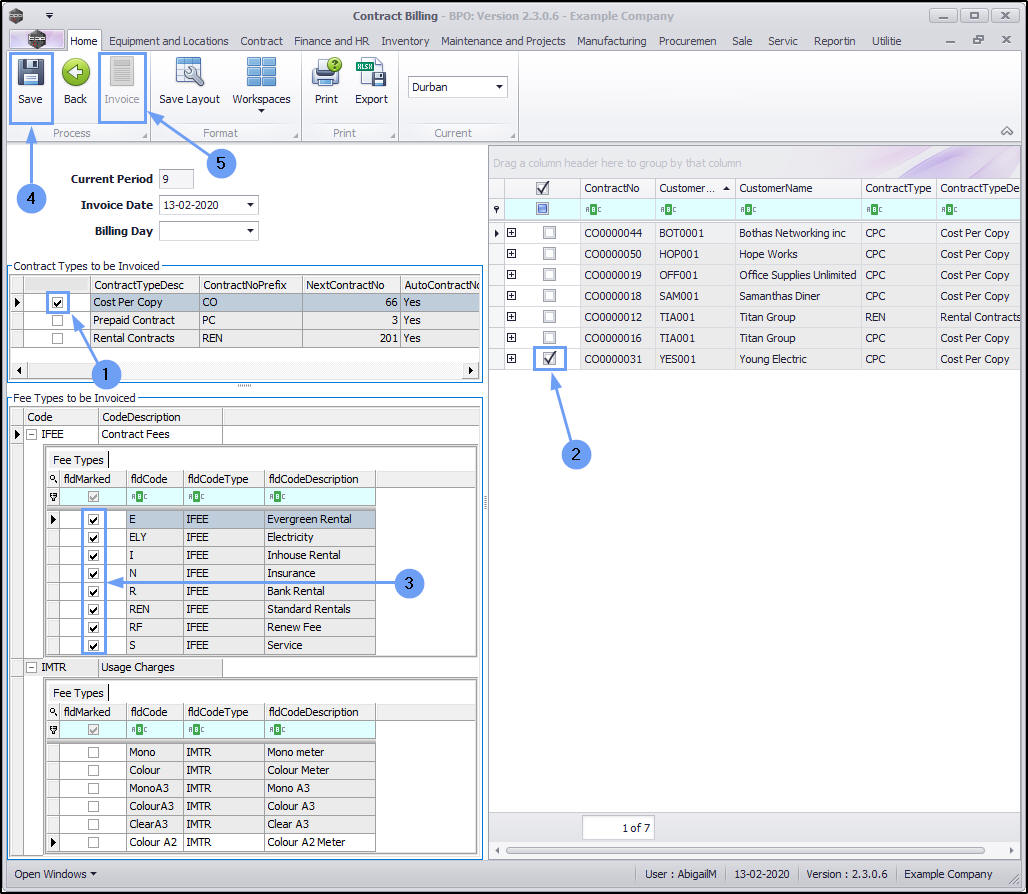
Save Billing Batch and Create Invoices
Once you have selected the:
- Contract Types,
- Contracts and
- Fee Types that you wish to bill,
- Click on Save.
- Note: At this point, the Invoice action button is still inactive (greyed out).
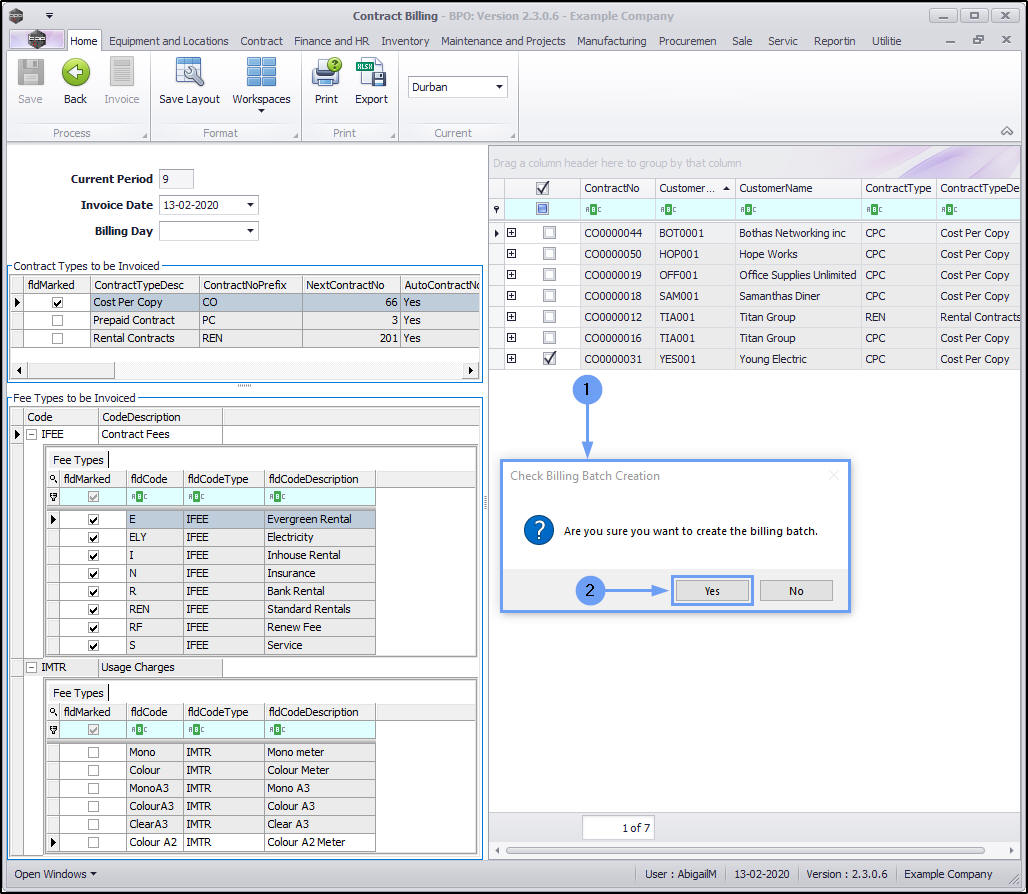
- A Check Billing Batch Creation message box will pop up, asking;
- Are you sure you want to create the billing batch?
- Click on Yes.
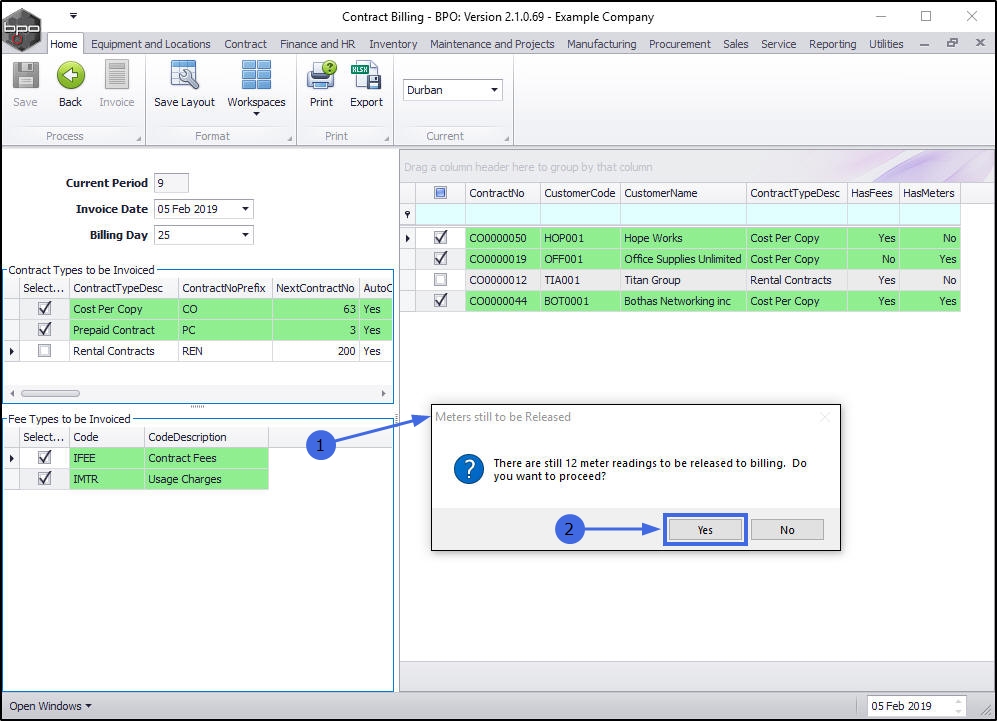
- If all meters have not been released to billing - a Meters still to be Released message box will pop up asking:
- There are still [ ] meters to be released to billing. Do you want to proceed?
- Click on Yes.
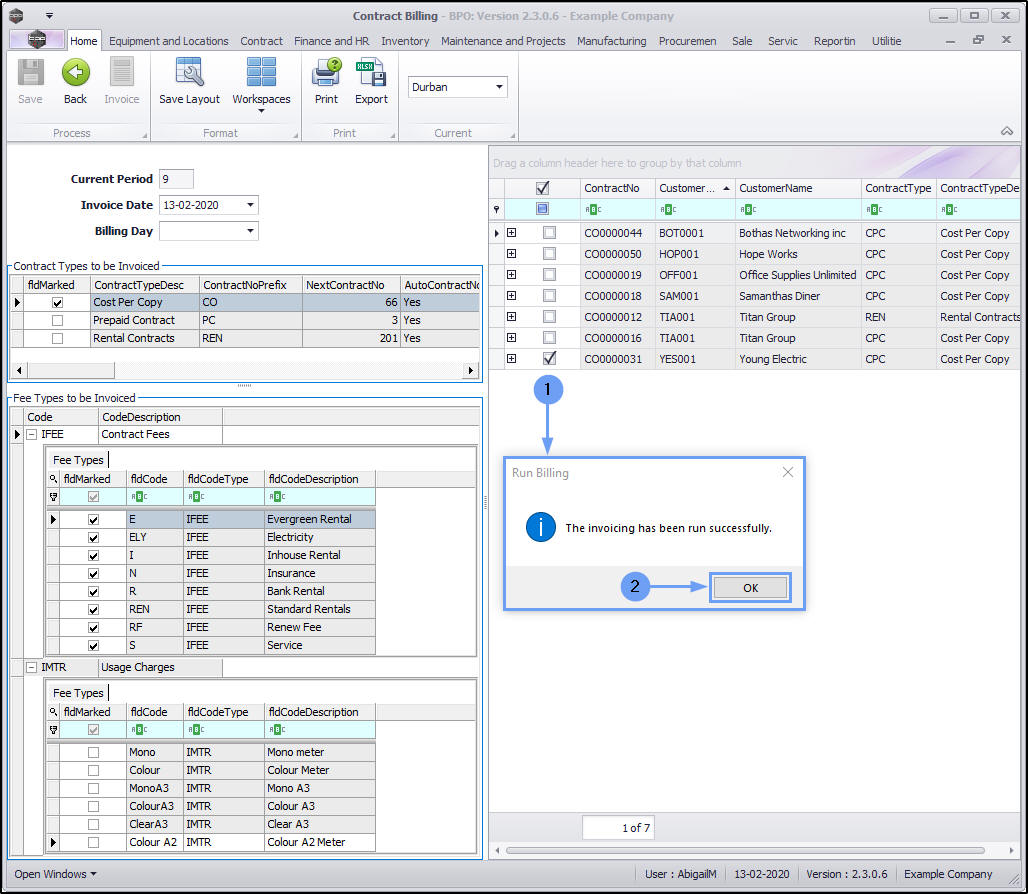
- A Run Billing message box will pop up informing you that:
- The invoicing has been run successfully.
- Click on OK.
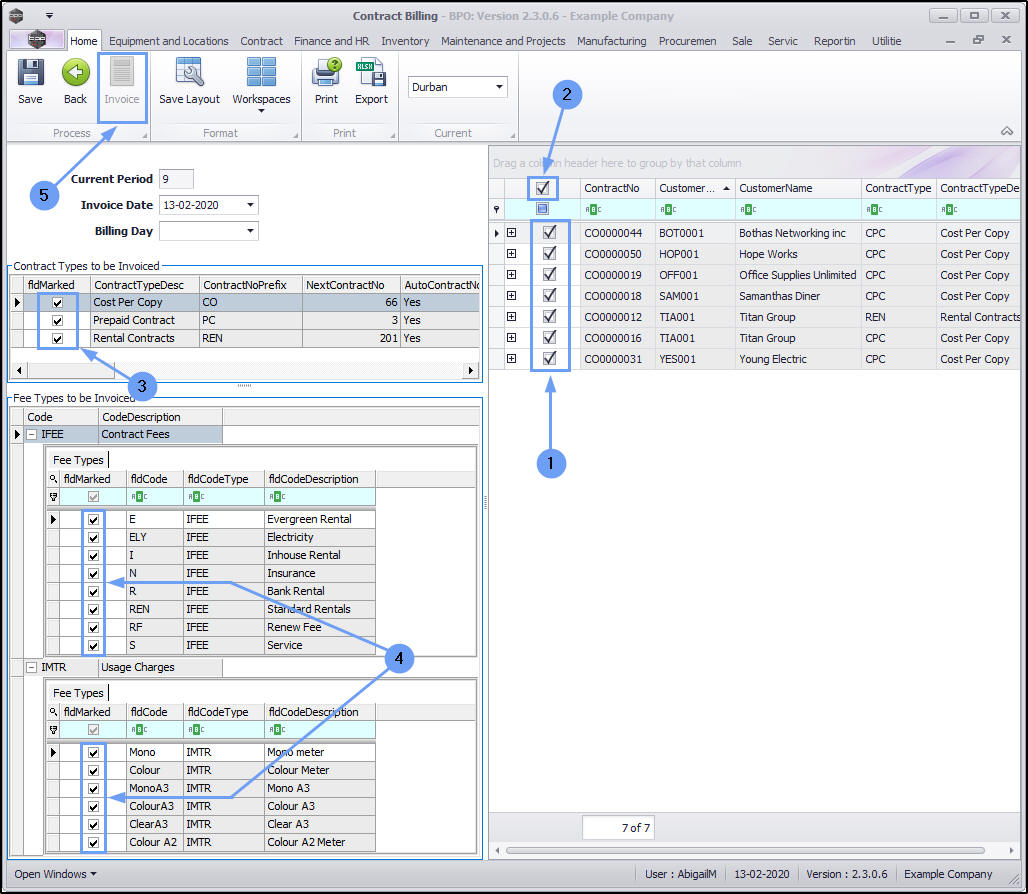
The screen will refresh:
- The list of contracts will be auto selected.
- The Select All Contracts check box will be auto selected.
- All of the Contract Types will be auto selected.
- All of the Fee Types will be auto selected.
Invoice Button Remains Inactive
- Note:The Invoice action button remains inactive (greyed out) as the contract invoices have been auto-created by the system as a result of the Auto Bill flag in the Configurator being ticked.
View Auto-Created Invoices in Print Queue
- To view the auto-created invoices select the Utilities tab.
- In the Utilities toolbar, select Print Queue.
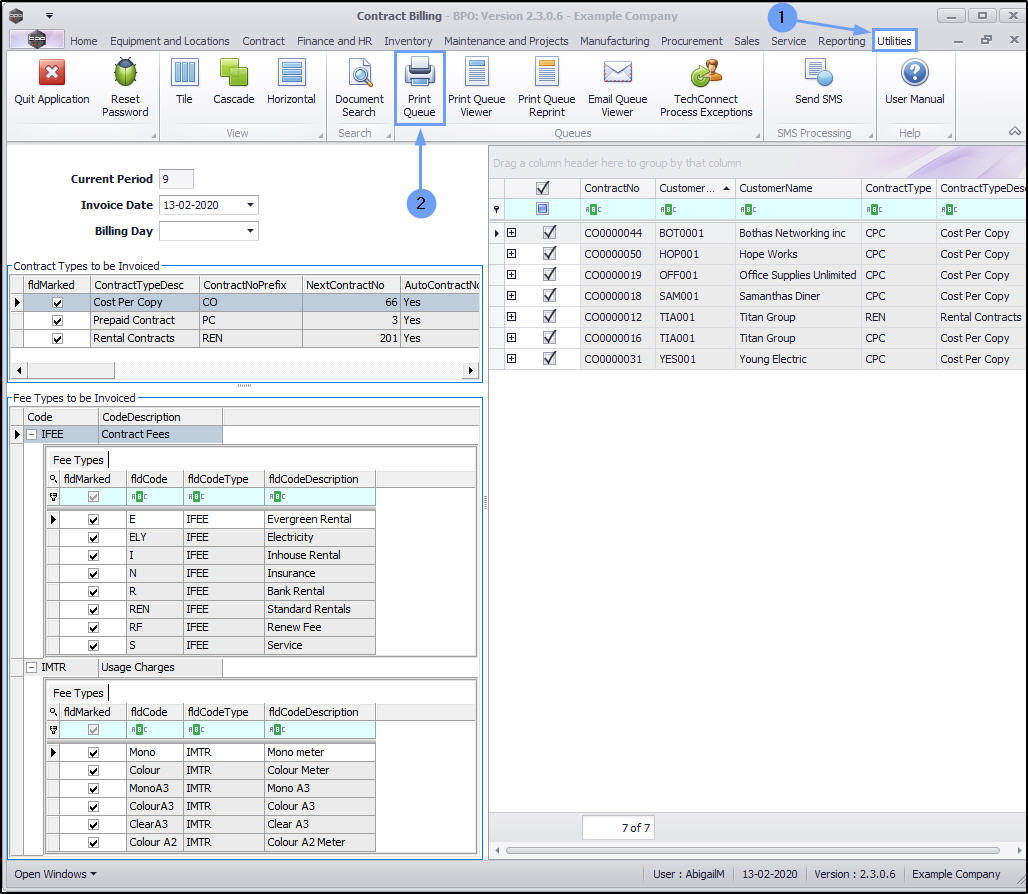
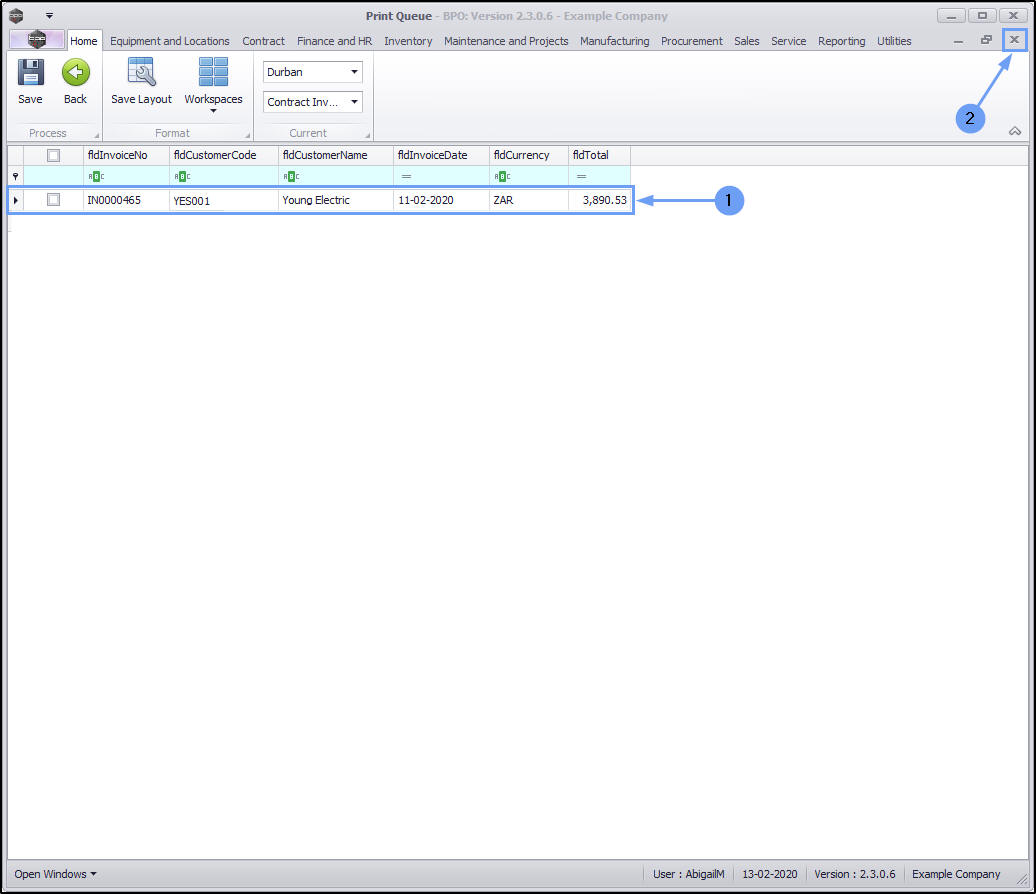
- The Print Queue screen will open.
- Select the Site that you initiated the contract billing from.
- Set the Type to Contract Invoices.

- The data grid will refresh to display the Contract Invoice(s) that were auto-raised when you created the billing batch in the Contract Billing screen.
- Close the screen when you are done.
For more information regarding the functionality of this screen, refer to Print Queue.
MNU.117.001