We are currently updating our site; thank you for your patience.
Contract
Contract Credit Notes With Auto Re-Invoice
This process will generate a contract invoice once the credit note has gone through Approval.
Important: Credit notes (and invoices) must be processed within the current financial period
| Ribbon Access: Contract > Contract Credit Notes |
-
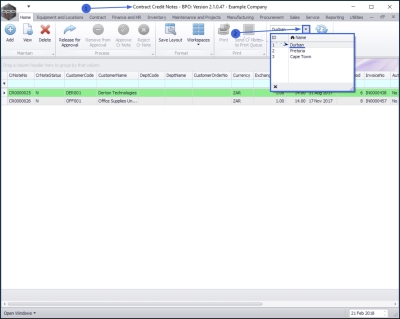
The Contract Credit Notes screen will be displayed.
Select the Site and Status
- Click on the drop-down arrow in the Site field and select from the list, the Site in which you wish to work.
- In this example, Durban is selected.
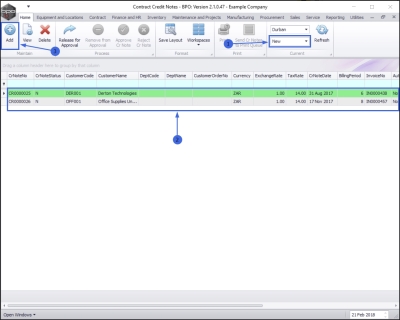
- This screen will open by default with the Status set to New. This does not need to be changed, in order to add a Contract Credit Note.
- Once the Site is selected, as explained above, the screen will populate with all of the New Contract Credit Notes linked to that specific Site.
Add Contract Credit Note
- Click on Add.
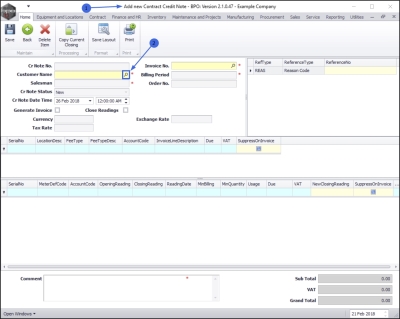
- The Add new Contract Credit Note screen will be displayed.
Search by Customer / Search by Invoice Number
There are 2 methods for bringing up the customer and invoice details:
- Either, You can search for and select the customer first and then search and select the correct invoice number linked to that customer.
- Or, you can search for and select the invoice number first, which will auto populate the customer details.
For the purpose of this manual, we will document the first process.
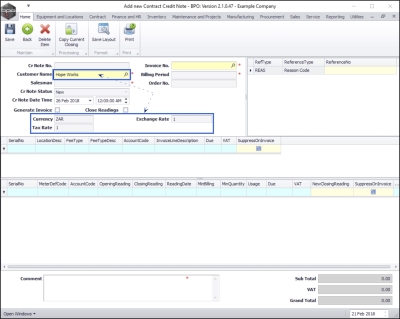
- Customer Name: Click on the search button in this field.
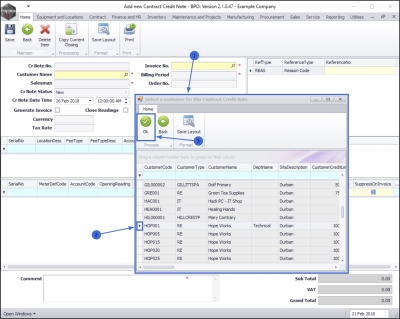
- The Select a customer for this Contract Credit Note screen will pop up.
- Select the row of the customer that you wish to raise a credit note for.
- Click on Ok.
Financial Details
- As you select the customer name , the Currency, Tax Rate and Exchange Rate fields will auto populate based on the contract billing information already set up on the customer.
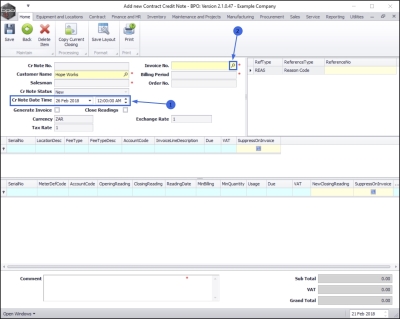
- Credit Note Date Time: At this point in the process, these fields will auto populate with the current date and time.
Select Invoice No.
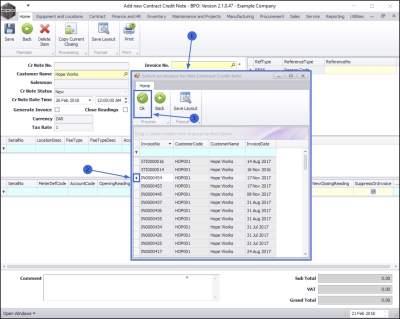
- Invoice No: Click on the search button.
- The Select an invoice for this Contract Credit Note screen will pop up.
- Select the row of the contract invoice that you wish to raise a credit note for.
- Click on Ok.
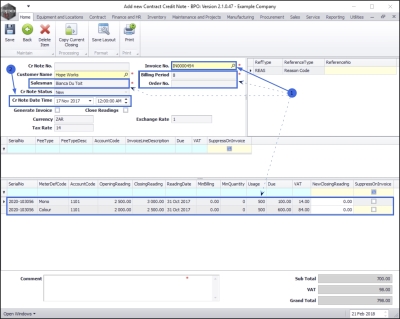
- As you select the Invoice No., the Salesman, Billing Period, Order No. and the Item data grid fields will auto populate based on the details already linked to the selected contract invoice.
- At this point, the credit note Date and Time will change to the original date of the contract invoice selected.
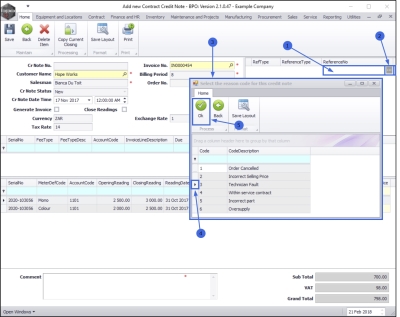
Select Reference No. (Reason Code)
- Click in the Reference No field.
- An ellipsis button will be revealed.
- Click on this button to display the Select the reason code for this credit note pop up screen.
- Select the row of the reason code that you wish to allocate to this credit note.
- Click on Ok.
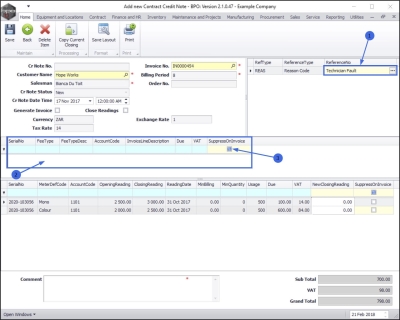
- The selected reason will populate the Reference No. field.
Fees
- There may be fees linked to this invoice but you cannot edit the fee details in this screen.
Suppress On Invoice Check Box
- You can click on the Suppress On Invoice check box at the end of any selected fee line.
- This will hide the fee line amount on the contract invoice, although the total contract invoice amount will include this.
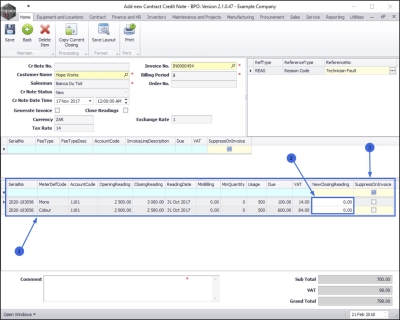
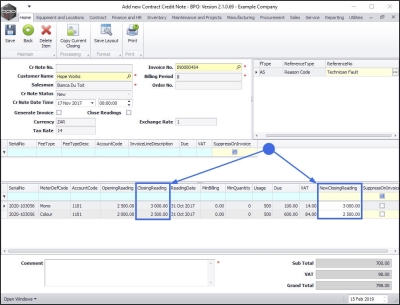
Meter Fees
- Most of the fields in the Meter Fees frame are uneditable.
New Closing Reading
- If the closing readings on the original invoice were recorded incorrectly, you can type in the correct current machine meter reading(s) in this column.
Suppress on Invoice Check Box
- You can click on the Suppress On Invoice check box at the end of any selected meter fee line.
- This will hide the meter fee line amount on the contract invoice although the total contract invoice amount will include this.
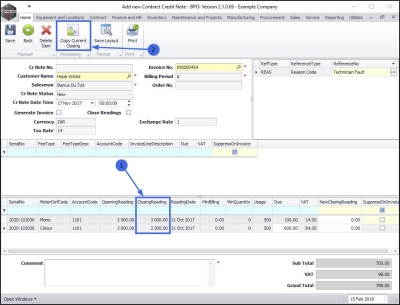
Copy Current Closing Button
- If the closing readings on the original invoice were recorded correctly,
- You can click on the Copy Current Closing button.
- The New Closing Reading fields will populate with the same figures as the Closing Reading fields.
- Note: This is useful, for example, if there are several lines of meter readings linked to the invoice and only one needs to be changed for the purpose of the credit note being created. The system will populate all the meter rows then you can search and edit manually, the one reading that was captured incorrectly.
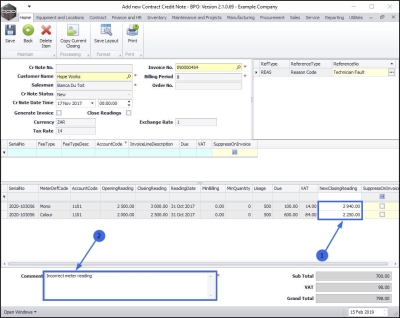
- In this example, the New Closing Readings have been adjusted.
Comment
- Type in a relevant comment / reason for this contract credit note.
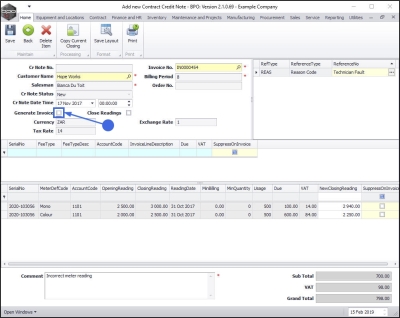
Generate Invoice Check Box
- When you have finished editing the required details in this screen, click on the Generate Invoice check box.
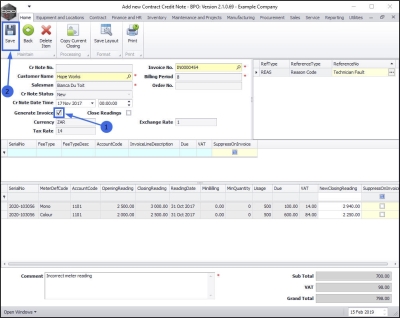
Save Contract Credit Note
- The Generate Invoice check box will be selected.
- Click on Save.
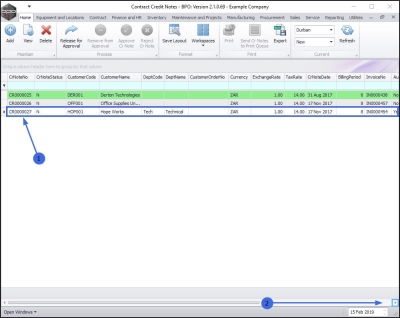
The contract credit note will be saved and you will return to the Contract Credit Notes listing screen.
- Here you can view the newly created credit note which has now been allocated a Credit Note No.
- If necessary, scroll right to view the remaining columns in this screen.
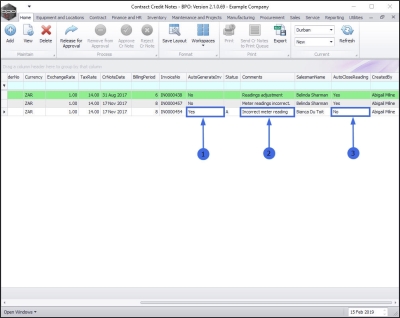
Here you can see the specific details of the contract credit note:
- The Auto Generate Invoice column is set to Yes.
- The Comments column contains the reason for the contract credit note.
- The system has noted that there are no Auto Close Readings linked to this contract credit note.
Release and Approve Contract Credit Note
- You will now need to Release and Approve the contract credit note.
Print Auto Generated Invoice
- On approval the system will auto generate a new invoice.
- You can then print the auto generated contract invoice.
MNU.119.003

