We are currently updating our site; thank you for your patience.
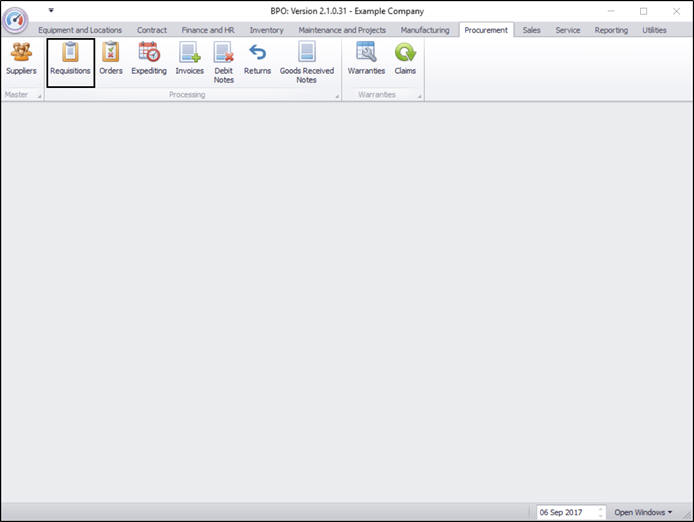
Procurement
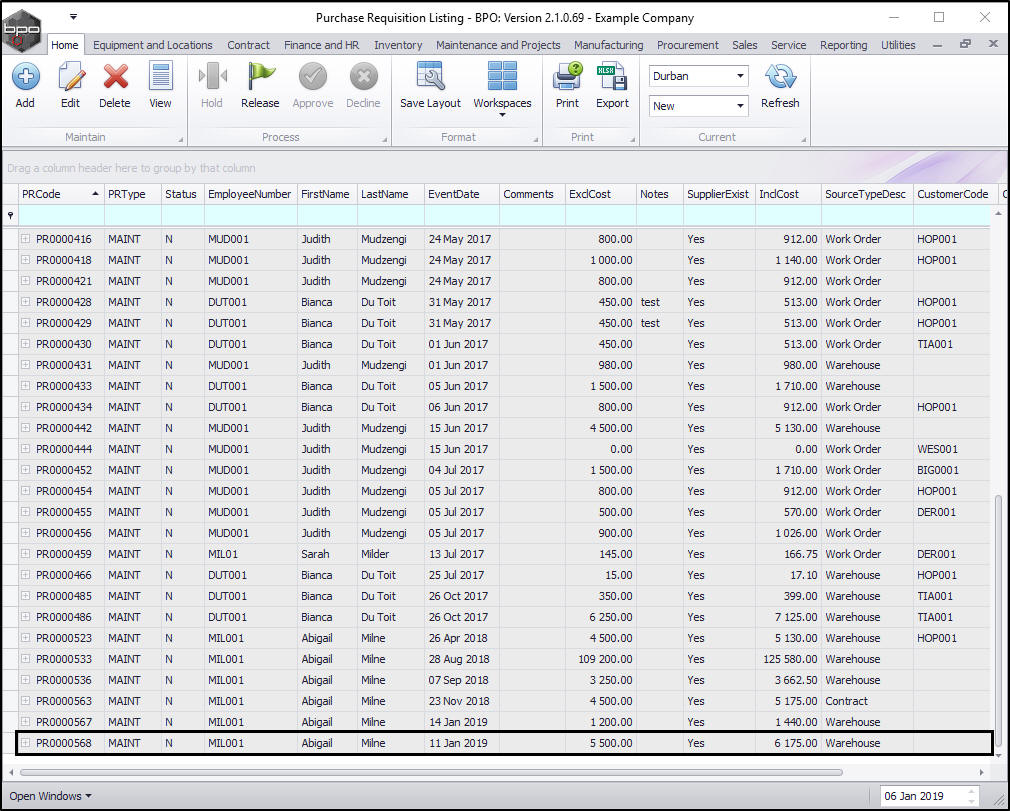
Add / Print / Delete a Requisition
Creating a Purchase Requisition can be done in several ways:
- From the Stock Status screen - to Replenish Stock Levels
- From the Part Request screen - to Fulfill a Part Request
- From the Service request screen- to Fulfill a Service Request
- From the Purchase Requisition screen which we will address here.
Once you have created your Purchase Requisition, you may be required to add /remove items, or make changes to these items. However, there is certain data that you will not be able to change, and if necessary you may need to delete the requisition.
| Ribbon Access: Procurement > Requisitions |
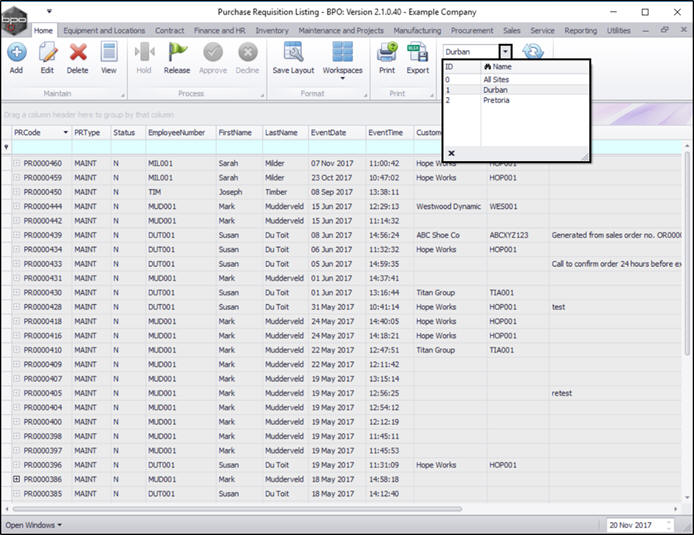
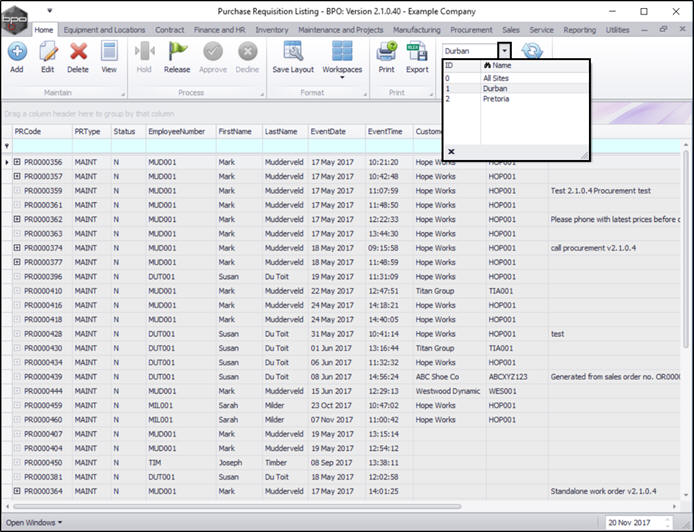
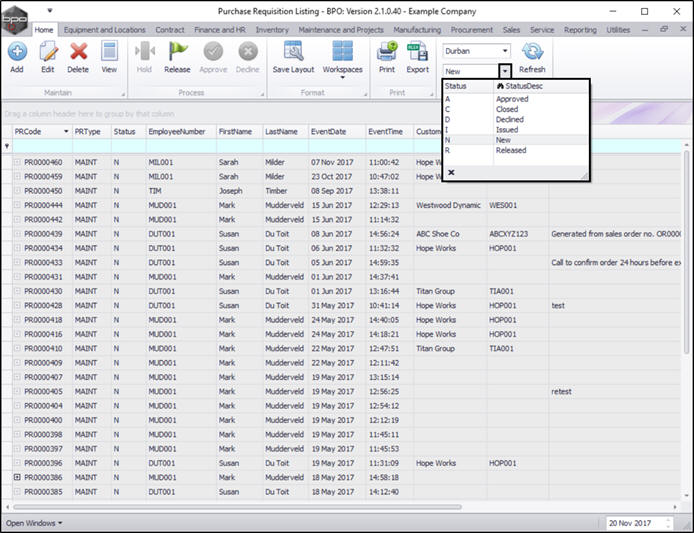
Select the Site and Status
- Select the Site .
- In this image Durban has been selected.
-
Select the Status.
- This must be set to New.

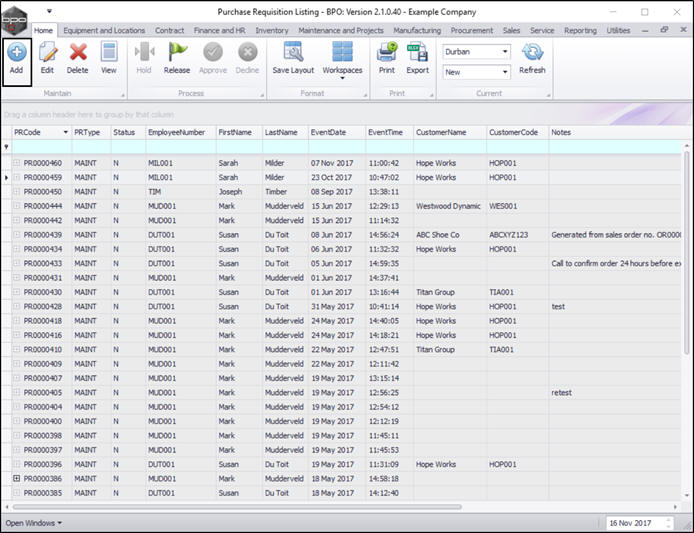
Add Purchase Requisition
- Click on Add.
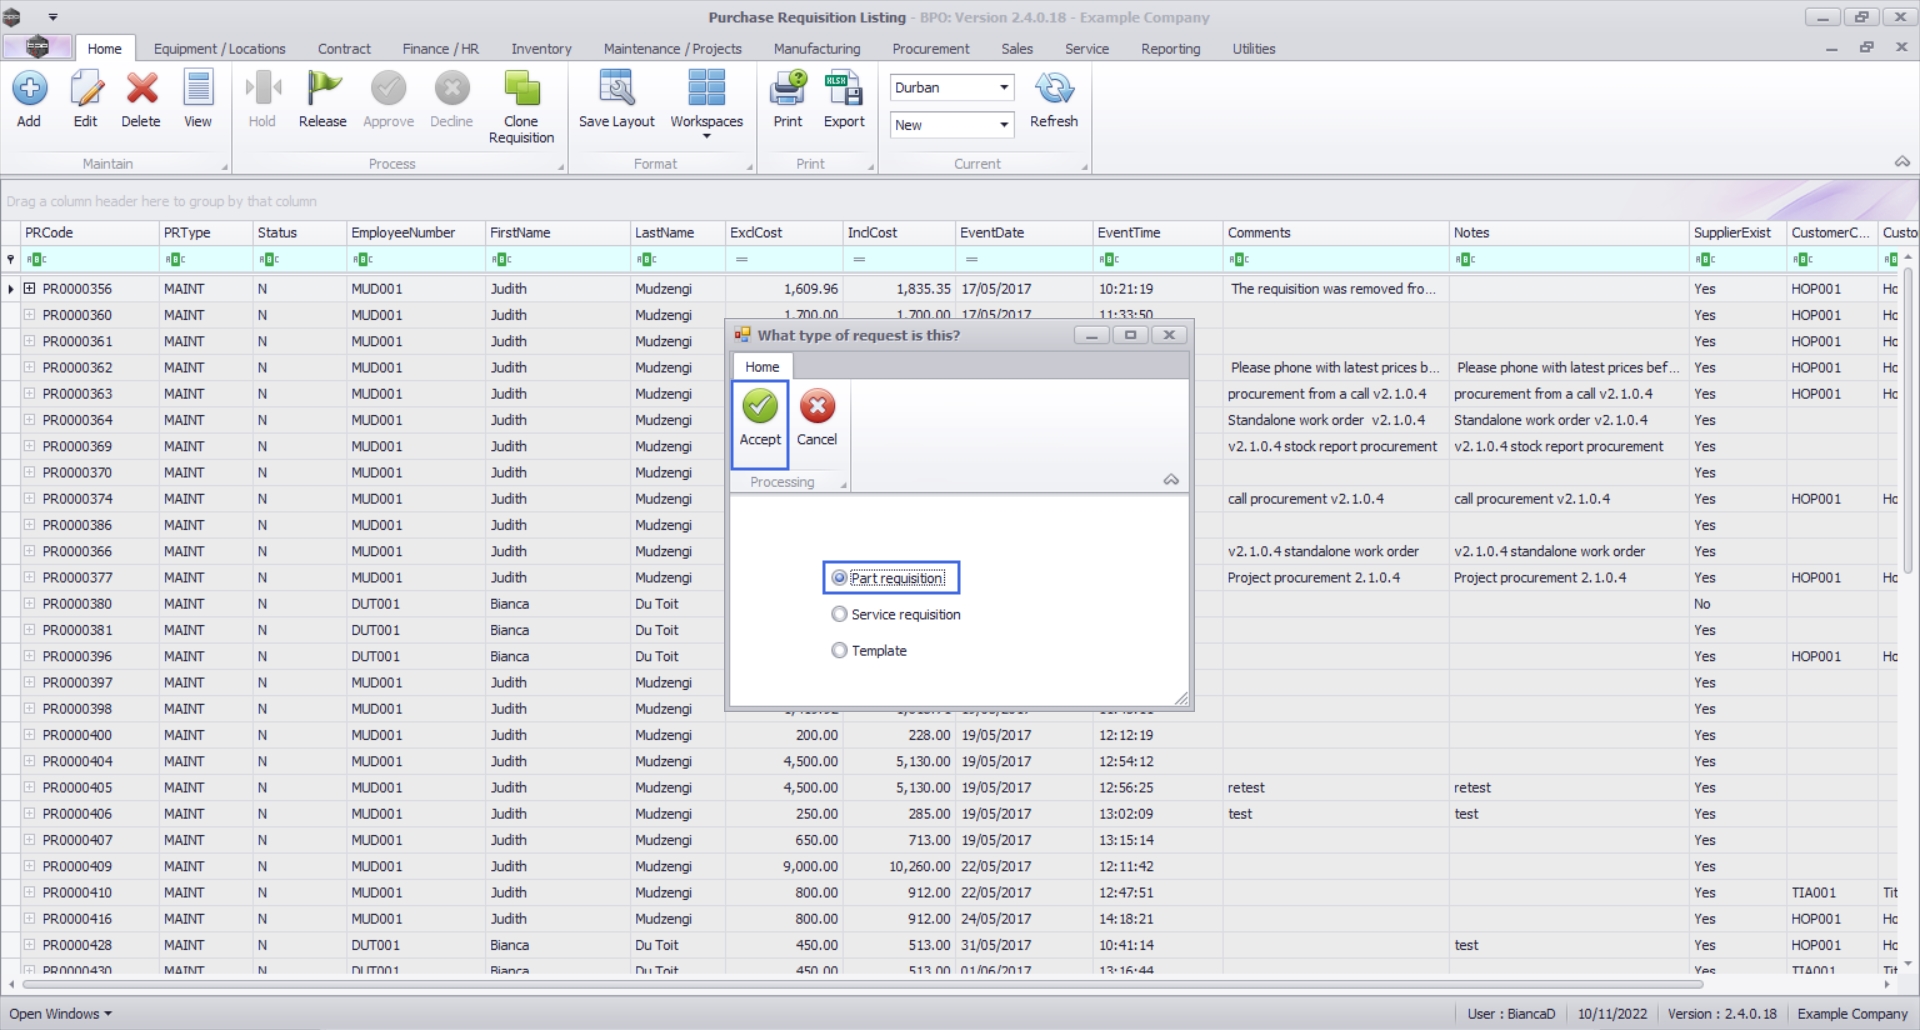
Requisition Type
- AWhat type of request is this?pop up screen will appear with two options;
- Part Requisition.
- Service Requisition
- Template
- Click on the Part Requisition radio button.
- Click on Accept.
The Add new Requisition screen will be displayed.
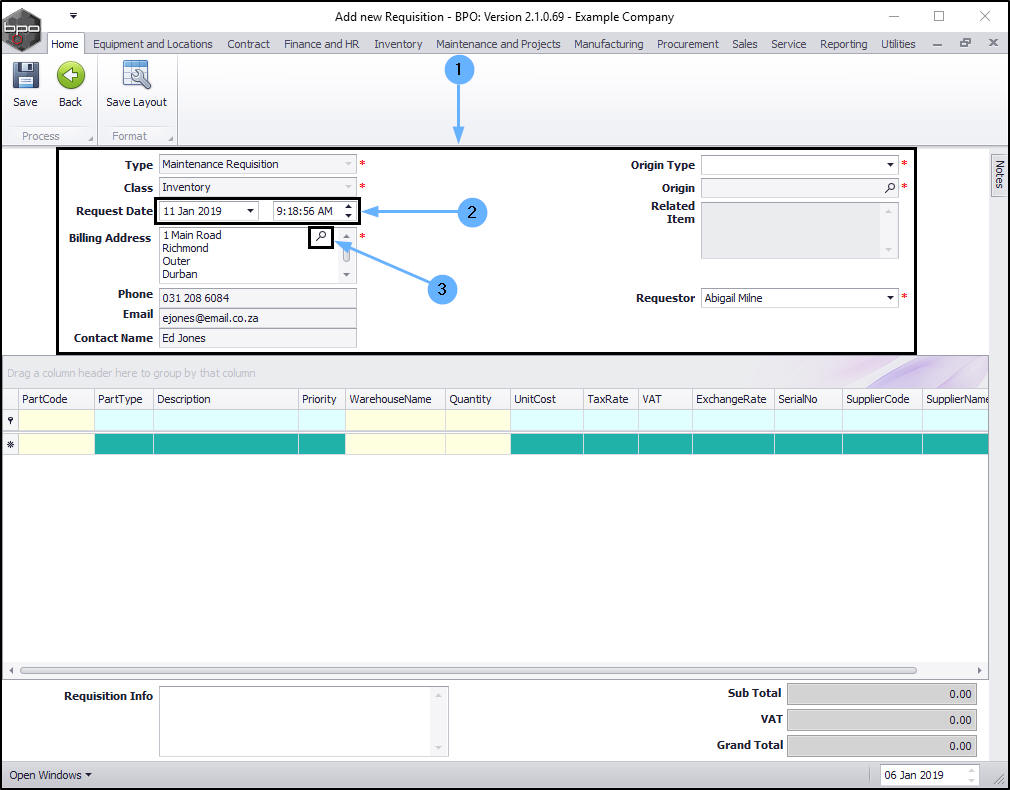
Requisition Header Information
- The requisition header frame will auto populate with most of the relevant details. Most of these are uneditable fields except the following:
-
Request Date and Time:
This will auto populate with the current date.
- Request Date: You can either type in or click on the drop-down arrow and use the calendar function to select an alternative date.
- Request Time: You can either type in or use the directional arrows to select an alternative time.
- Billing Address: This will auto populate with the billing address already set up on the system.
- You can click on the search button and select an alternative address, if required, from the Select an address for this requisition pop up screen.
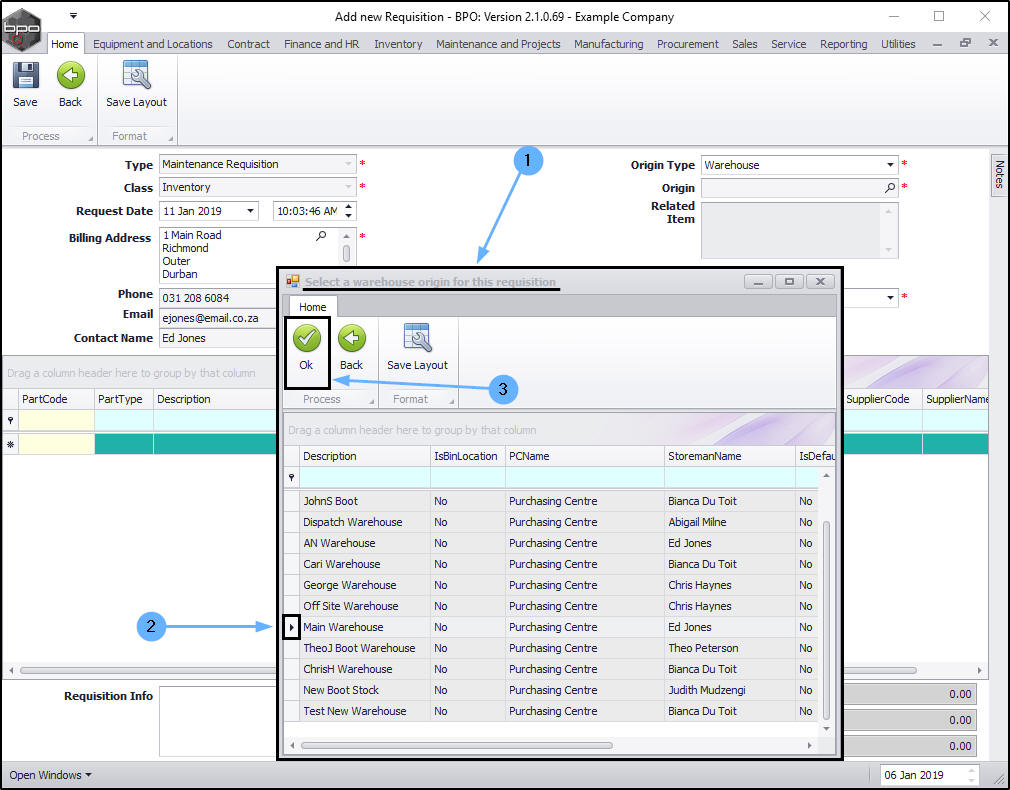
Origin Type and Origin
This information is mandatory.
- Click on the drop-down arrow in the Origin Type field.
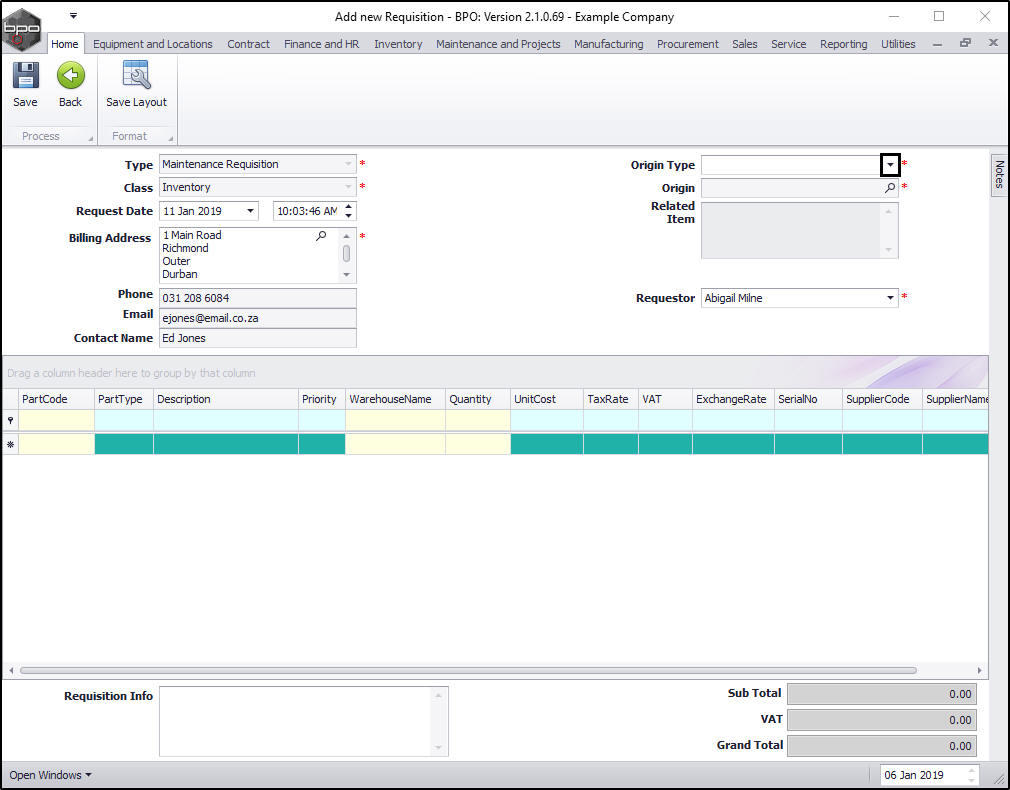
- The Origin Type menu will be displayed.
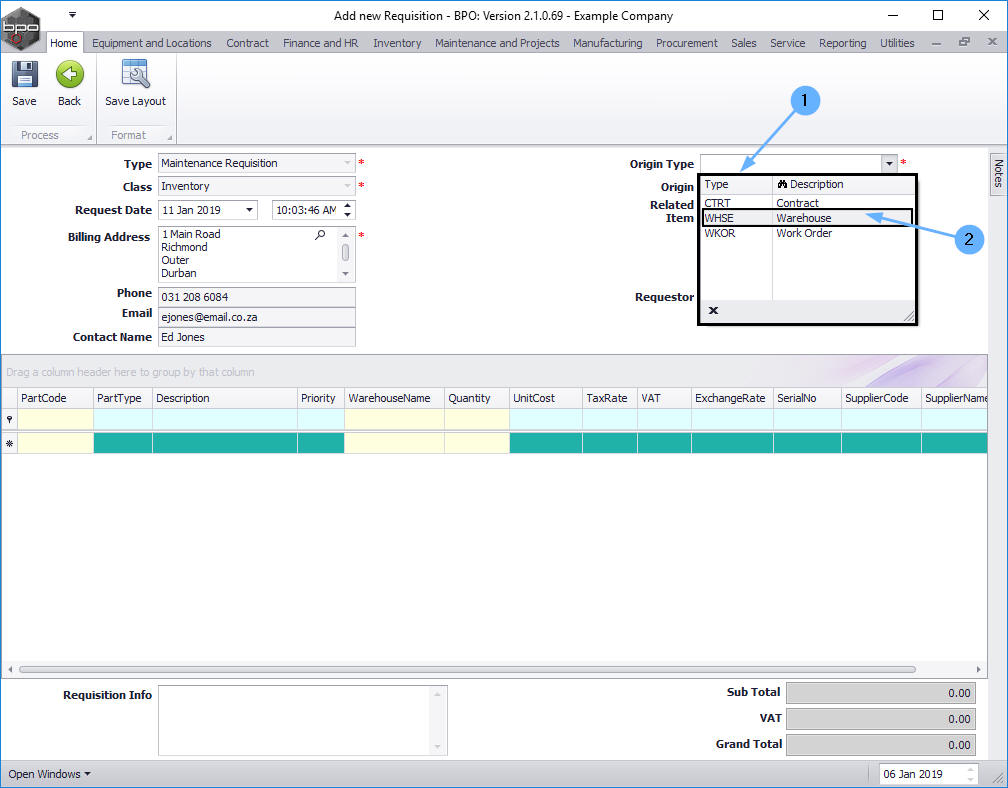
- Select from this menu, the origin of this requisition:
- Contract
- Warehouse
- Work Order
-
In this image, Warehouse has been selected.
- Click on the search button in the Origin field.
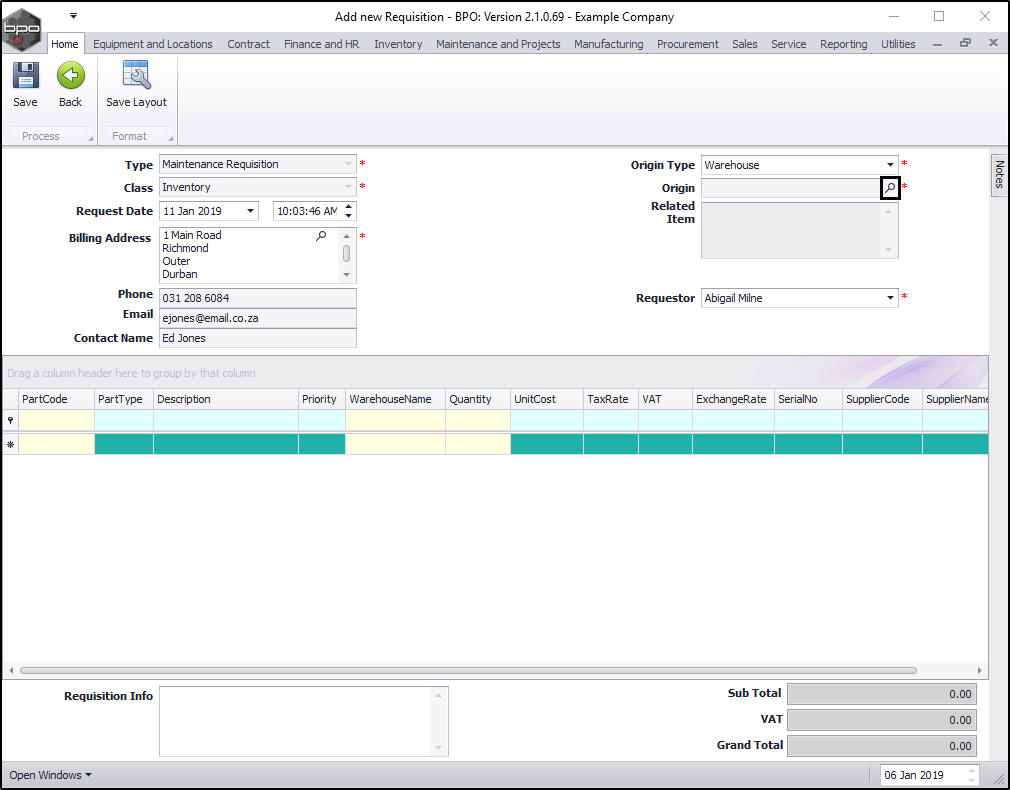
- The Select a warehouse origin for this requisition screen will pop up.
-
Note:
The
Select a... screen that pops up will be linked to the
Origin Type selected in the previous step. For example:
- If Contract Type was selected then the Select a contract origin for this requisition screen will pop up.
- If Work Order Type was selected then the Select a work order origin for this requisition screen will pop up.
- As Warehouse Type was selected then the Select a warehouse origin for this requisition screen has popped up.
- Select the row of the warehouse that is the origin of this requisition.
- Click on Ok.
Related Items
- Related Item: This field is uneditable.
Requestor
This field is mandatory.
- Requestor: This will populate with the person currently logged on to the system. You can click on the drop-down arrow and select from the menu an alternative person if required.
Requisition Info
- Requisition Info: Type in any extra information in this text box, if required. This will pull through to the Procurement Report
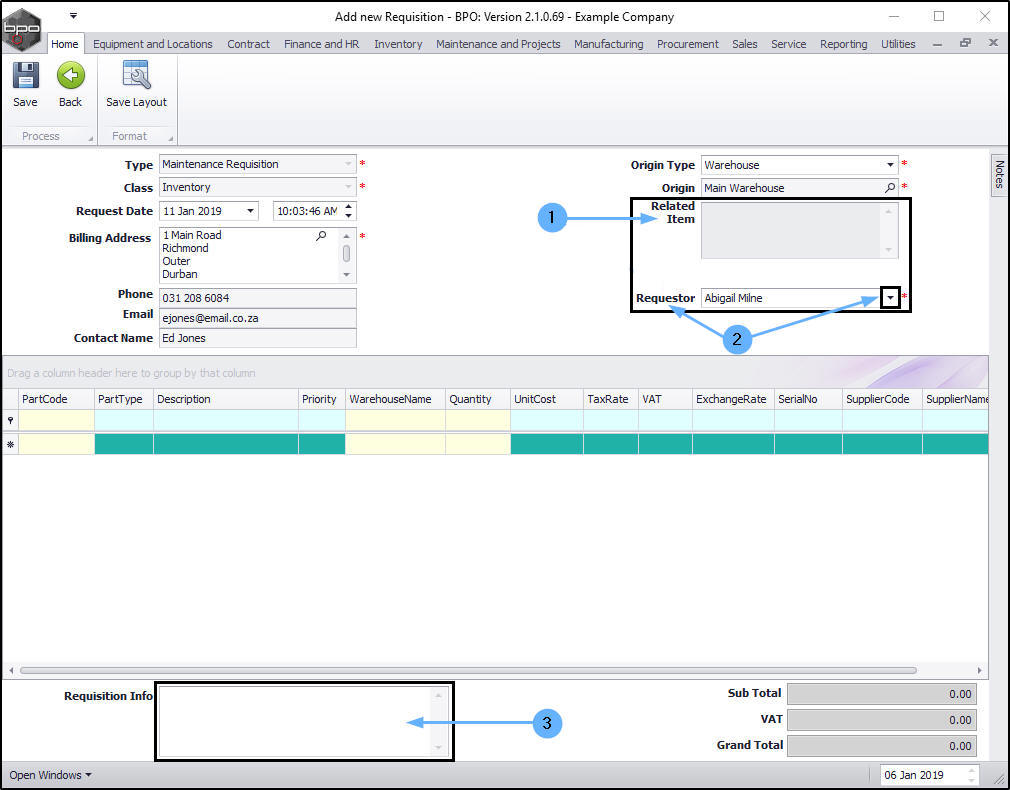
You can now move down to the Parts data grid.
Requisition Items Data Grid
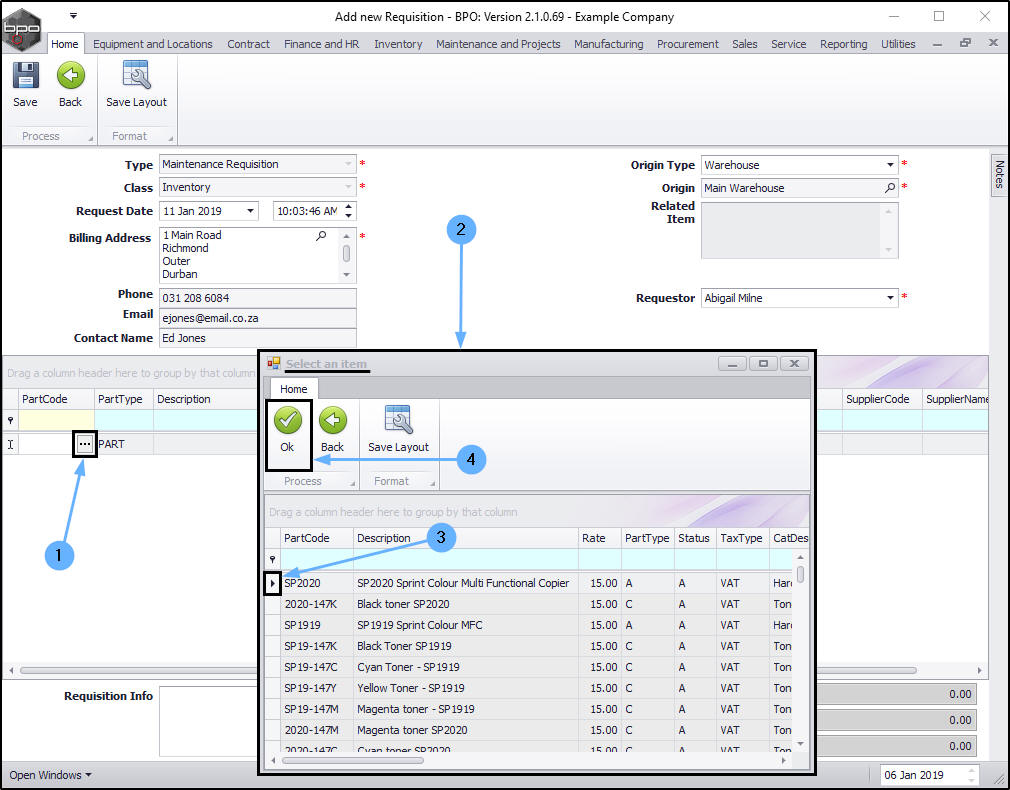
Item
- Click in the Part Code text box.
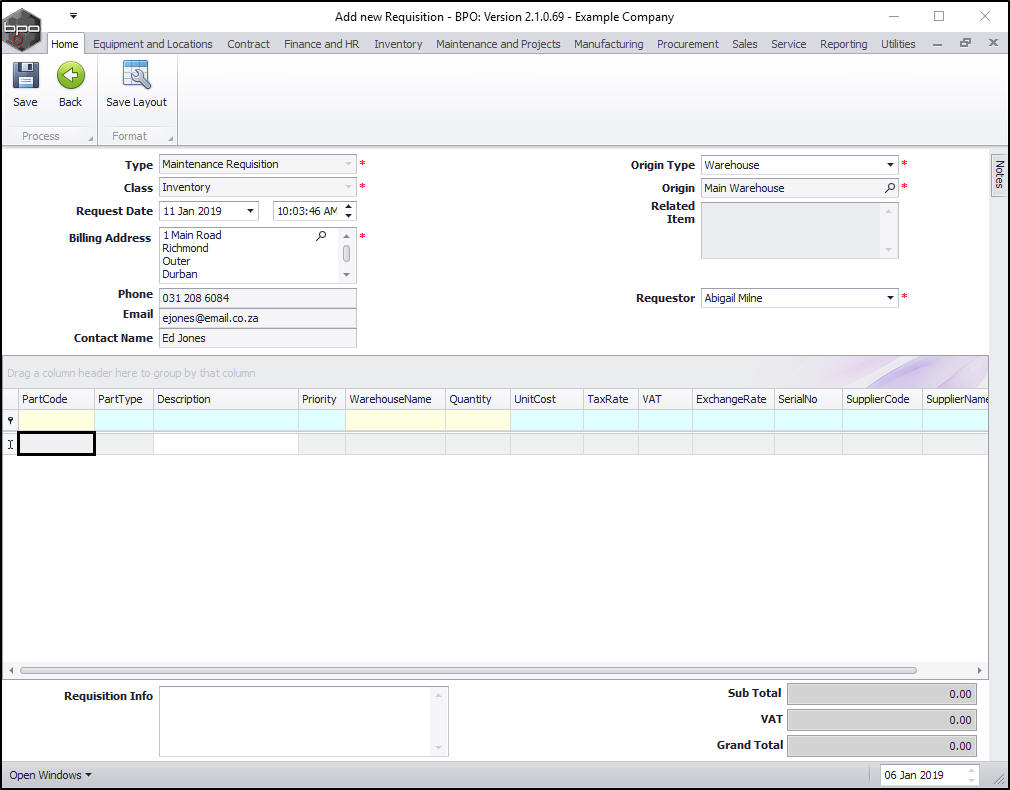
- An ellipsis button will be revealed.
- The following fields will auto populate:
- Part Type: This will auto populate will PART.
- Priority: This will auto populate with 3.
- Warehouse Name: This will only auto populate if the Origin Type selected is Warehouse. Then it will populate with the same Origin (Warehouse Name).
- Quantity: This will auto populate with 1 but can be edited as explained further in the manual.
- Unit Cost: This will auto initially populate with 0.00 but can be edited as explained further in the manual.
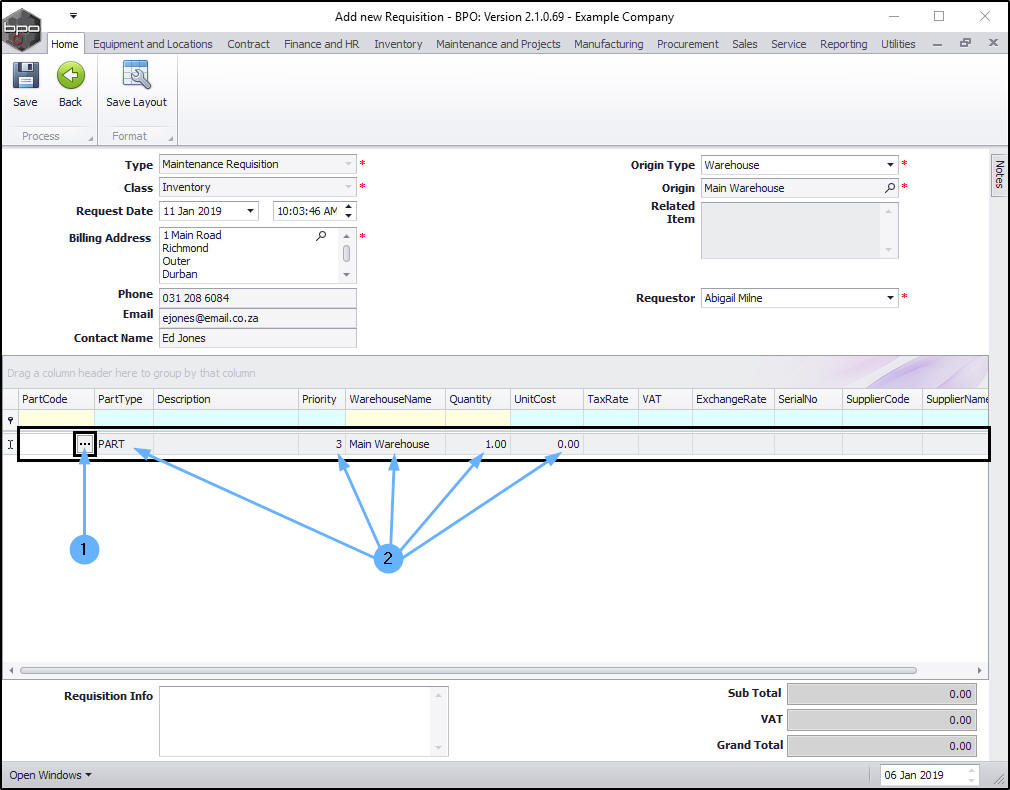
- Click on the ellipsis button.
- A Select an item pop up screen will appear.
- Select the row of the item you wish to add.
- Click on Ok.
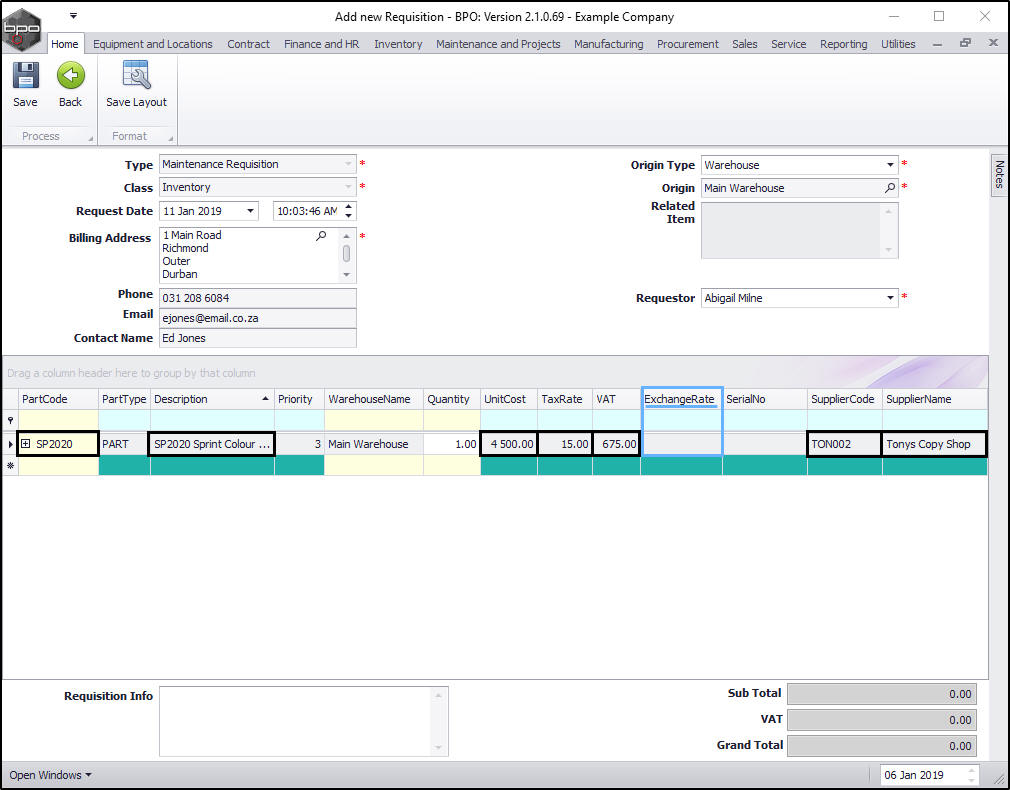
Item Details
The following fields will now populate:
- Part Code: This will populate with the code of the part selected in the previous step.
- Description: This will populate with the description of the part selected in the previous step.
- Unit Cost: If there is a Primary Supplier set up on this part then this field will populate with the unit cost of the of the part as set by that supplier.
- Tax Rate: This field will populate with the current VAT rate.
- VAT: If there is a Primary Supplier set up on this part then this field will populate with the VAT amount of the total part cost.
- Supplier Code: If there is a Primary Supplier set up on this part then this field will populate with the code of that primary supplier.
- Supplier Name: If there is a Primary Supplier set up on this part then this field will populate with the name of that selected supplier.
Note about Exchange Rate: This field will only populate if:
- The currency of the Primary Supplier set up is different to your company currency as set up in BPO2.
- If you manually select a supplier for this part and the currency of that supplier is different to your company currency as set up in BPO2.
Item Suppliers
- Click on the expand button in the Part Code field.
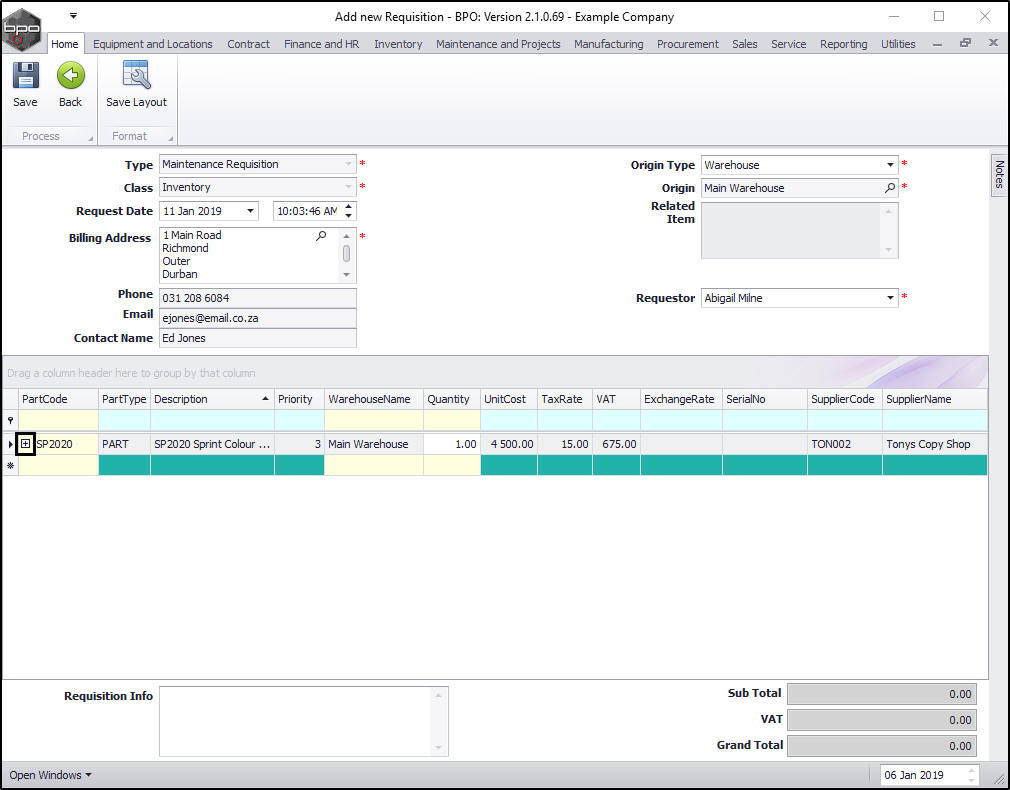
- The Item Suppliers frame will be expanded. Follow the process to add / edit an item supplier for this item as required.
- Collapse the Item Suppliers frame when you are done.

Link Additional Items
- The Item Suppliers frame will be hidden again.
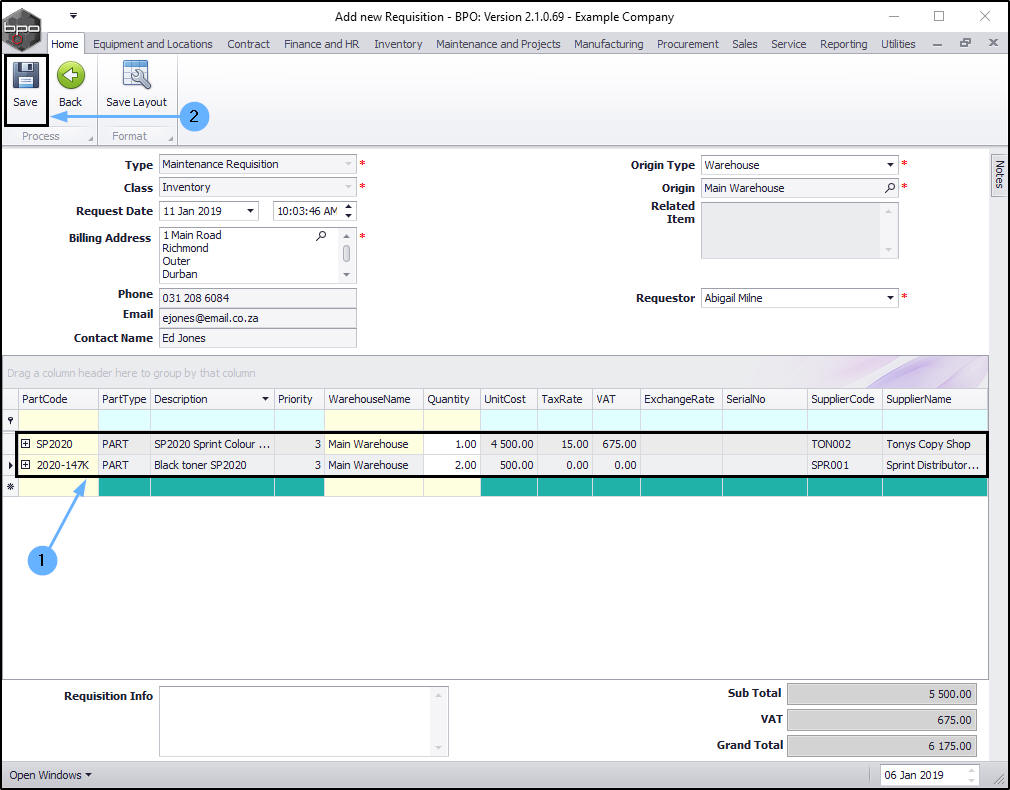
- Click in the Part Code field of the new row, to display the ellipsis button and continue to add A, B or C-Class items in this way until you have finished adding items to the requisition.
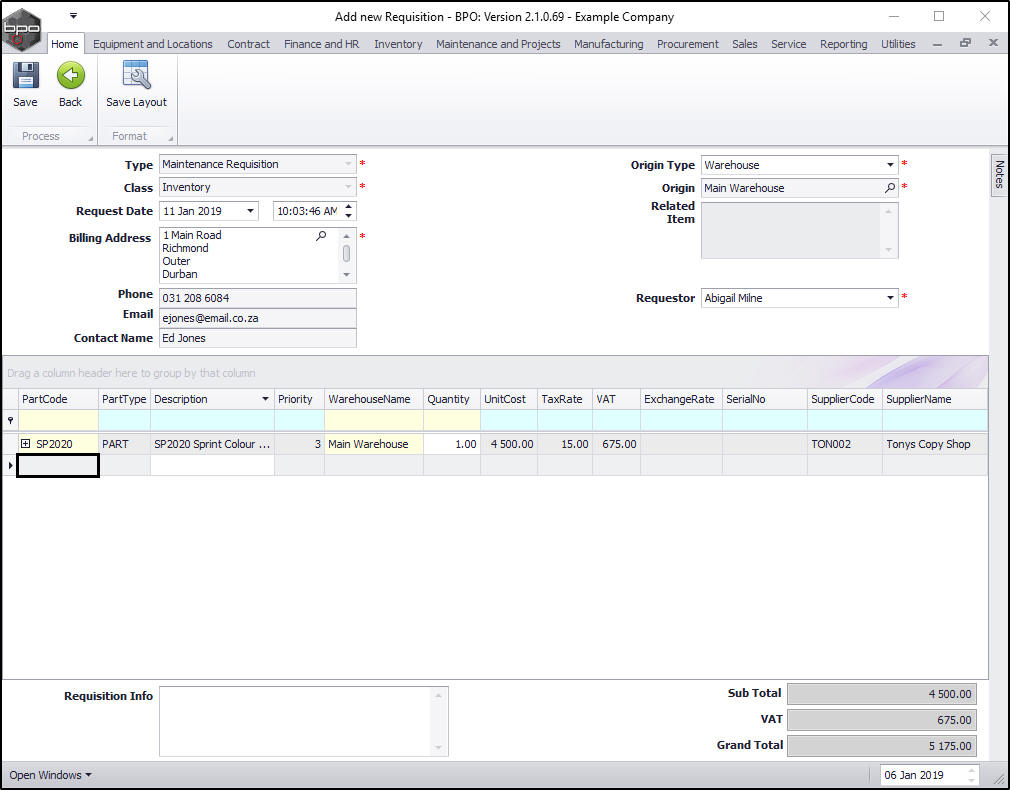
- In this image a Black toner SP2020 has also been added to the Parts data grid.
Save Requisition
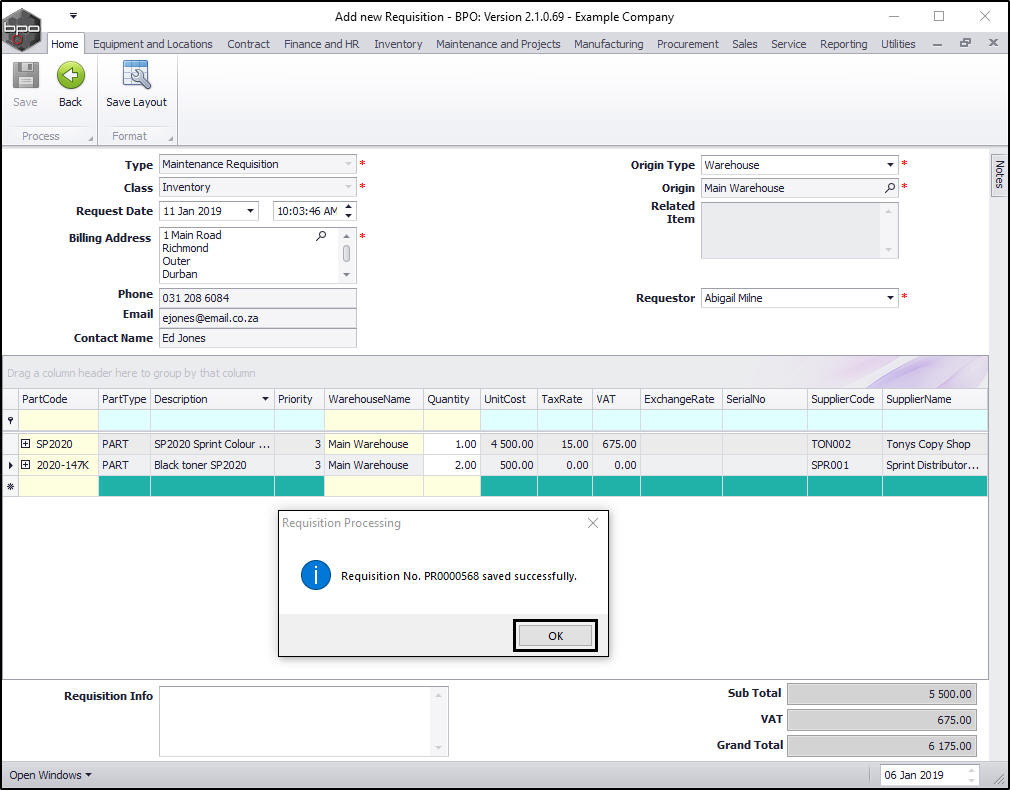
- When you have finished adding items, click on Save.
- A Requisition Processing message box will pop up informing you that;
- Requisition No. [ ] saved successfully.
- Click on Ok.
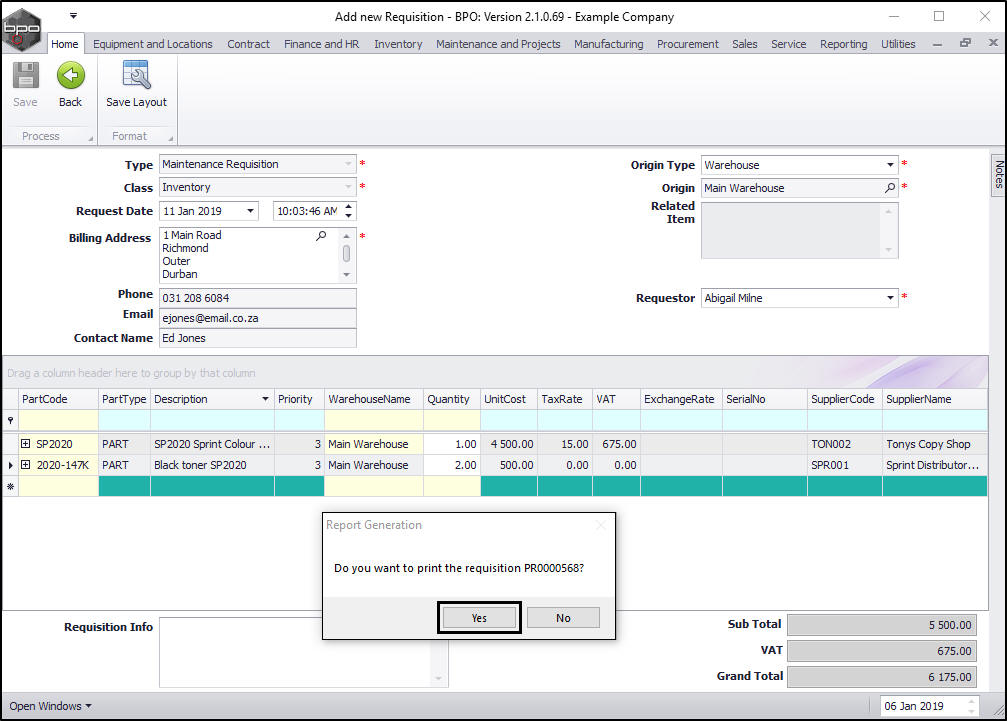
Print Requisition
- A Report Generation message box will pop up asking;
- Do you want to print the requisition [ ]?
- Click on Yes.
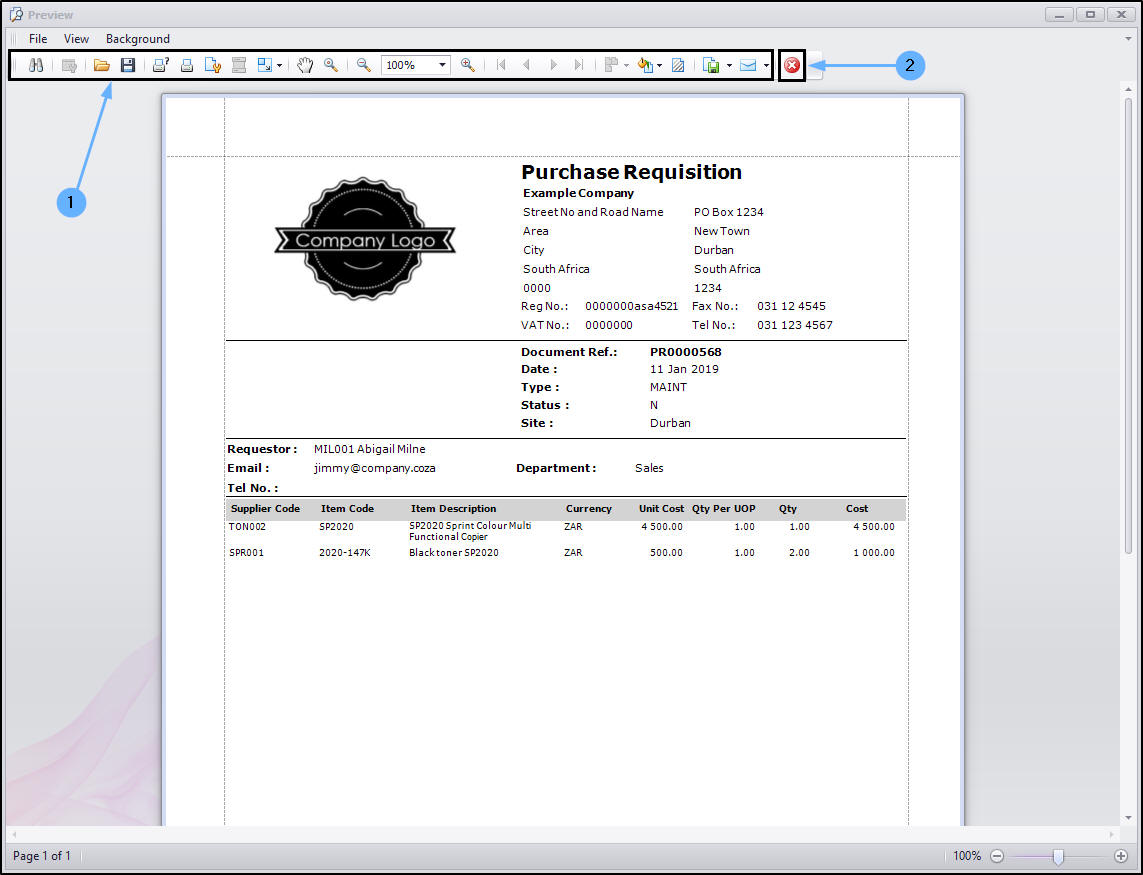
Report Preview
The Report Preview screen will be displayed.
- From here you can View, Print, Export or Email the requisition.
- Close the preview screen when you are done.
You will return to the Purchase Requisition Listing screen.
View Requisition
- Here you can view the new requisition has been added to the list.
- Close the preview scree when you are done.
-
Note:
The requisition will need to be
released and approved.
Delete a Requisition
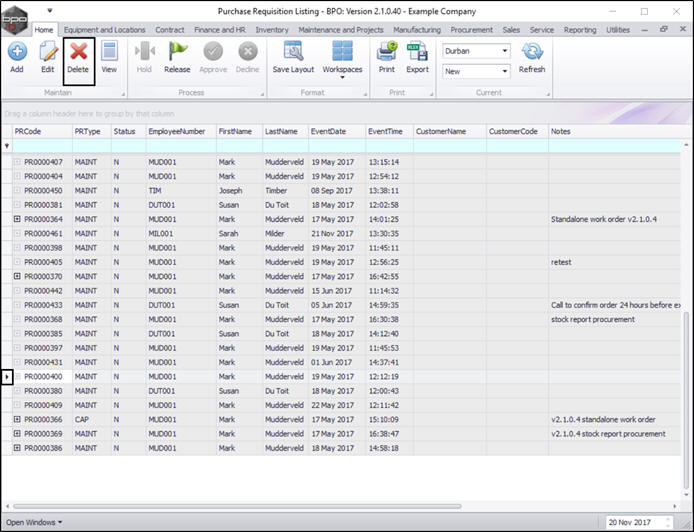
Select the Site and Status
- Select the Site .
- In this image Durban has been selected.
- Select the status.
- This must be set to New.
Select Requisition
- Select the row of the purchase requisition you wish to delete.
- Click on Delete.
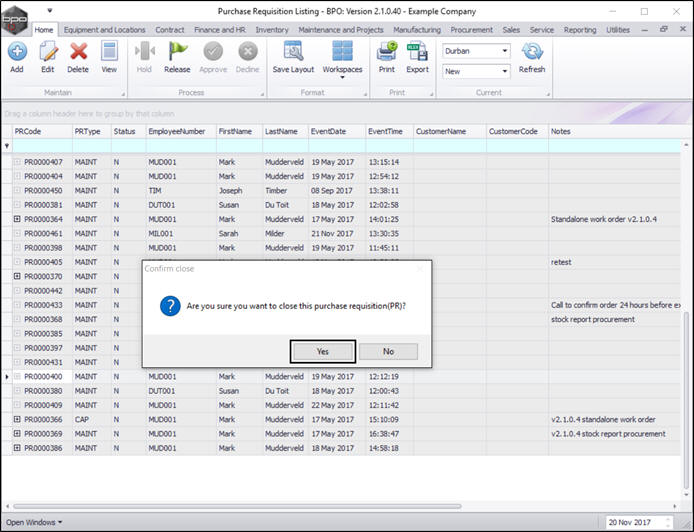
Confirm Deletion
- A Confirm Close message box will pop up asking;
- Are you sure you want to close this purchase requisition ( )?
- Click on Yes.
- A Process Validation message box will pop up asking;
- Are you sure that you want to close requisition [ ]?
- Click on Yes.

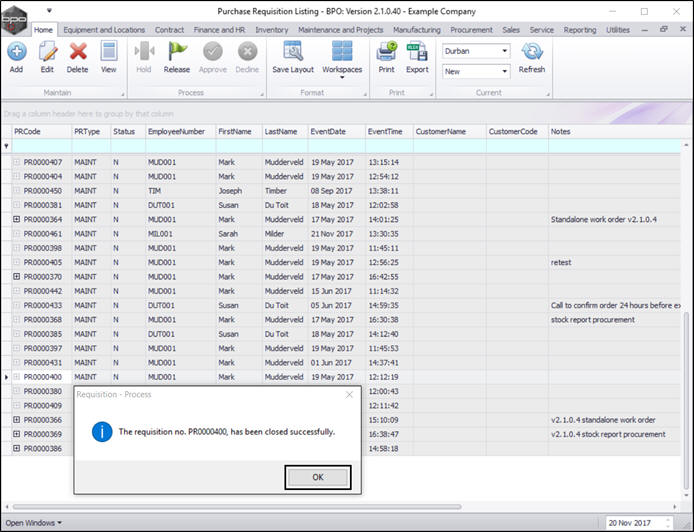
- A Requisition Process message box will pop up informing you that;
- The requisition no. [ ] has been closed successfully.
- Click on OK.
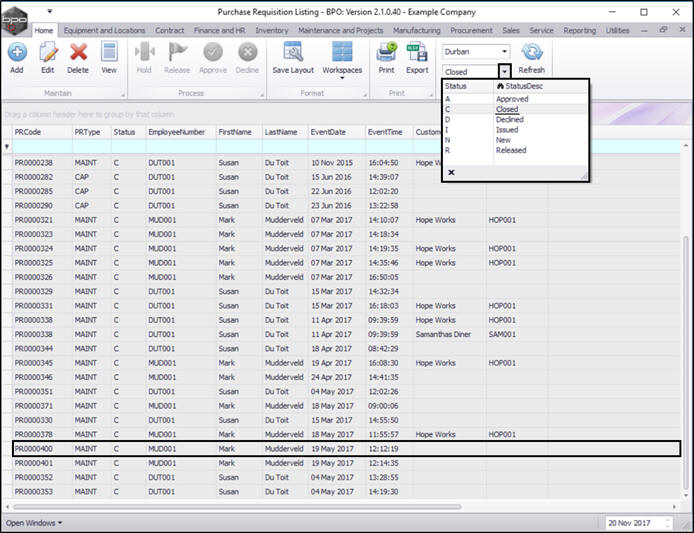
View Deleted (Closed) Requisition
- The deleted requisition can now be viewed in the Purchase Requisition Listing screen where the status is set to Closed.
MNU.053.009