We are currently updating our site; thank you for your patience.
TechConnect
Environment
Tech Connect Call Screen
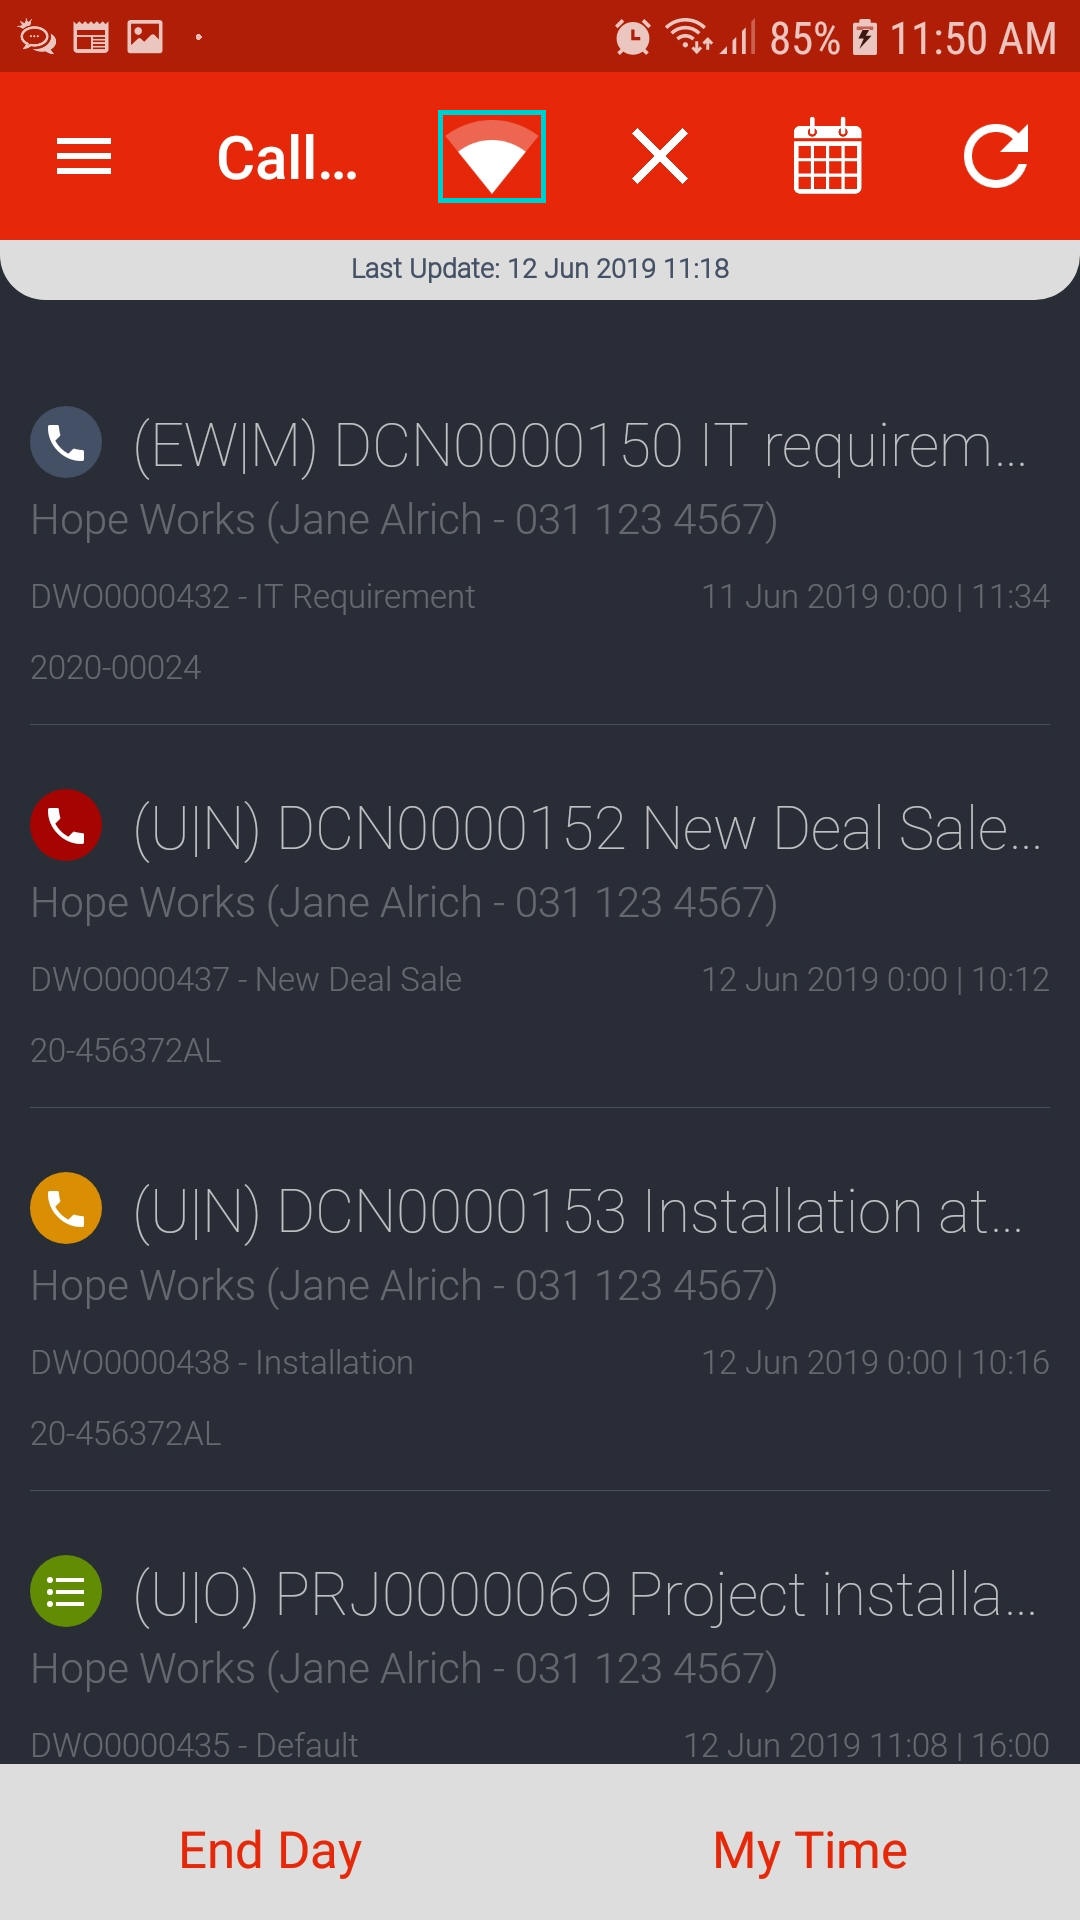
- After logging in, a list of calls / projects assigned to you will appear in the Calls List screen.
- If there was a period where you did not have internet connection, you can select Refresh to check for any additional calls.
- From this screen, you can:
- View assigned calls
- Accept / Reject a call
- Switch to Online / Off-line mode
- Update current call (you can only work on one call at a time)
- View your boot stock
- View Time for the day
- View Travel for the day
- View Expenses for the day
- Configuration: Refresh boot stock, 'main' warehouse part list, and services list.
- When your work is done for the day: End Day
- Tip: Press Back on your device to go back to a prior screen.
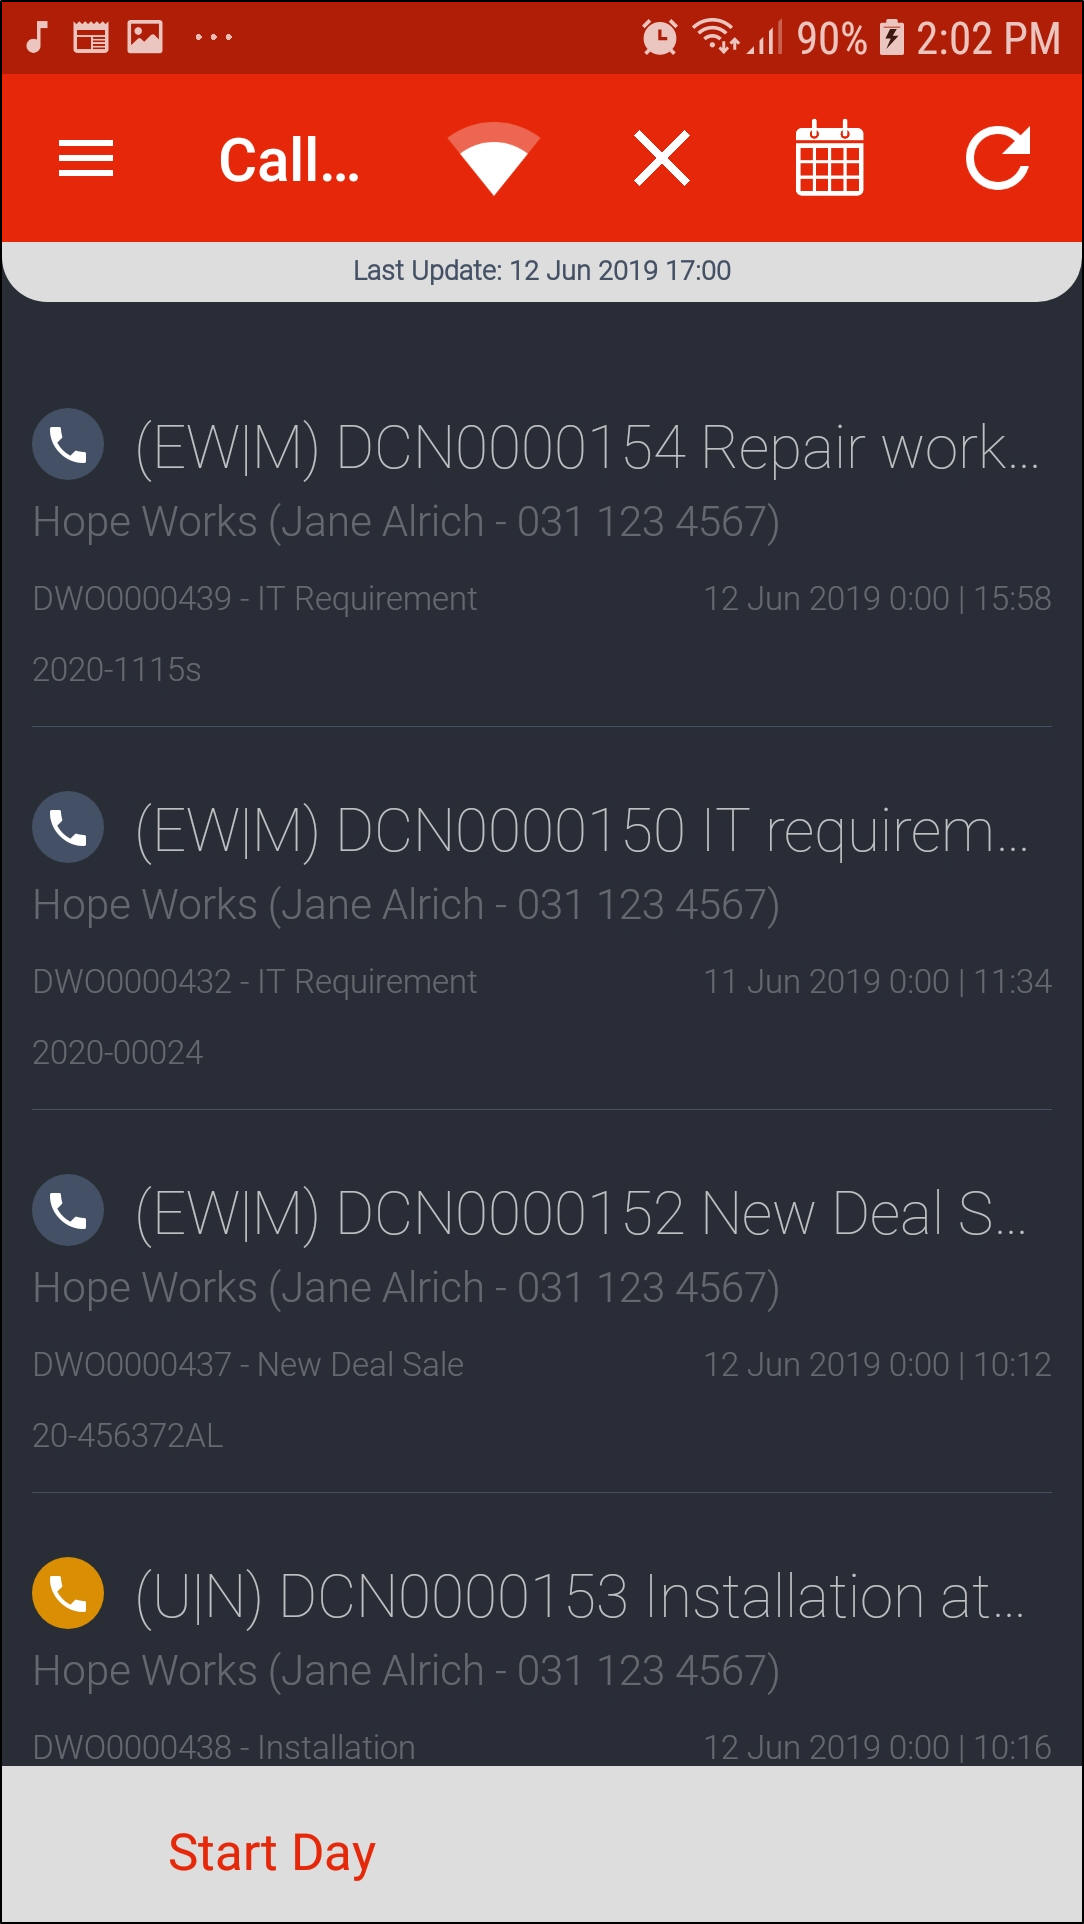
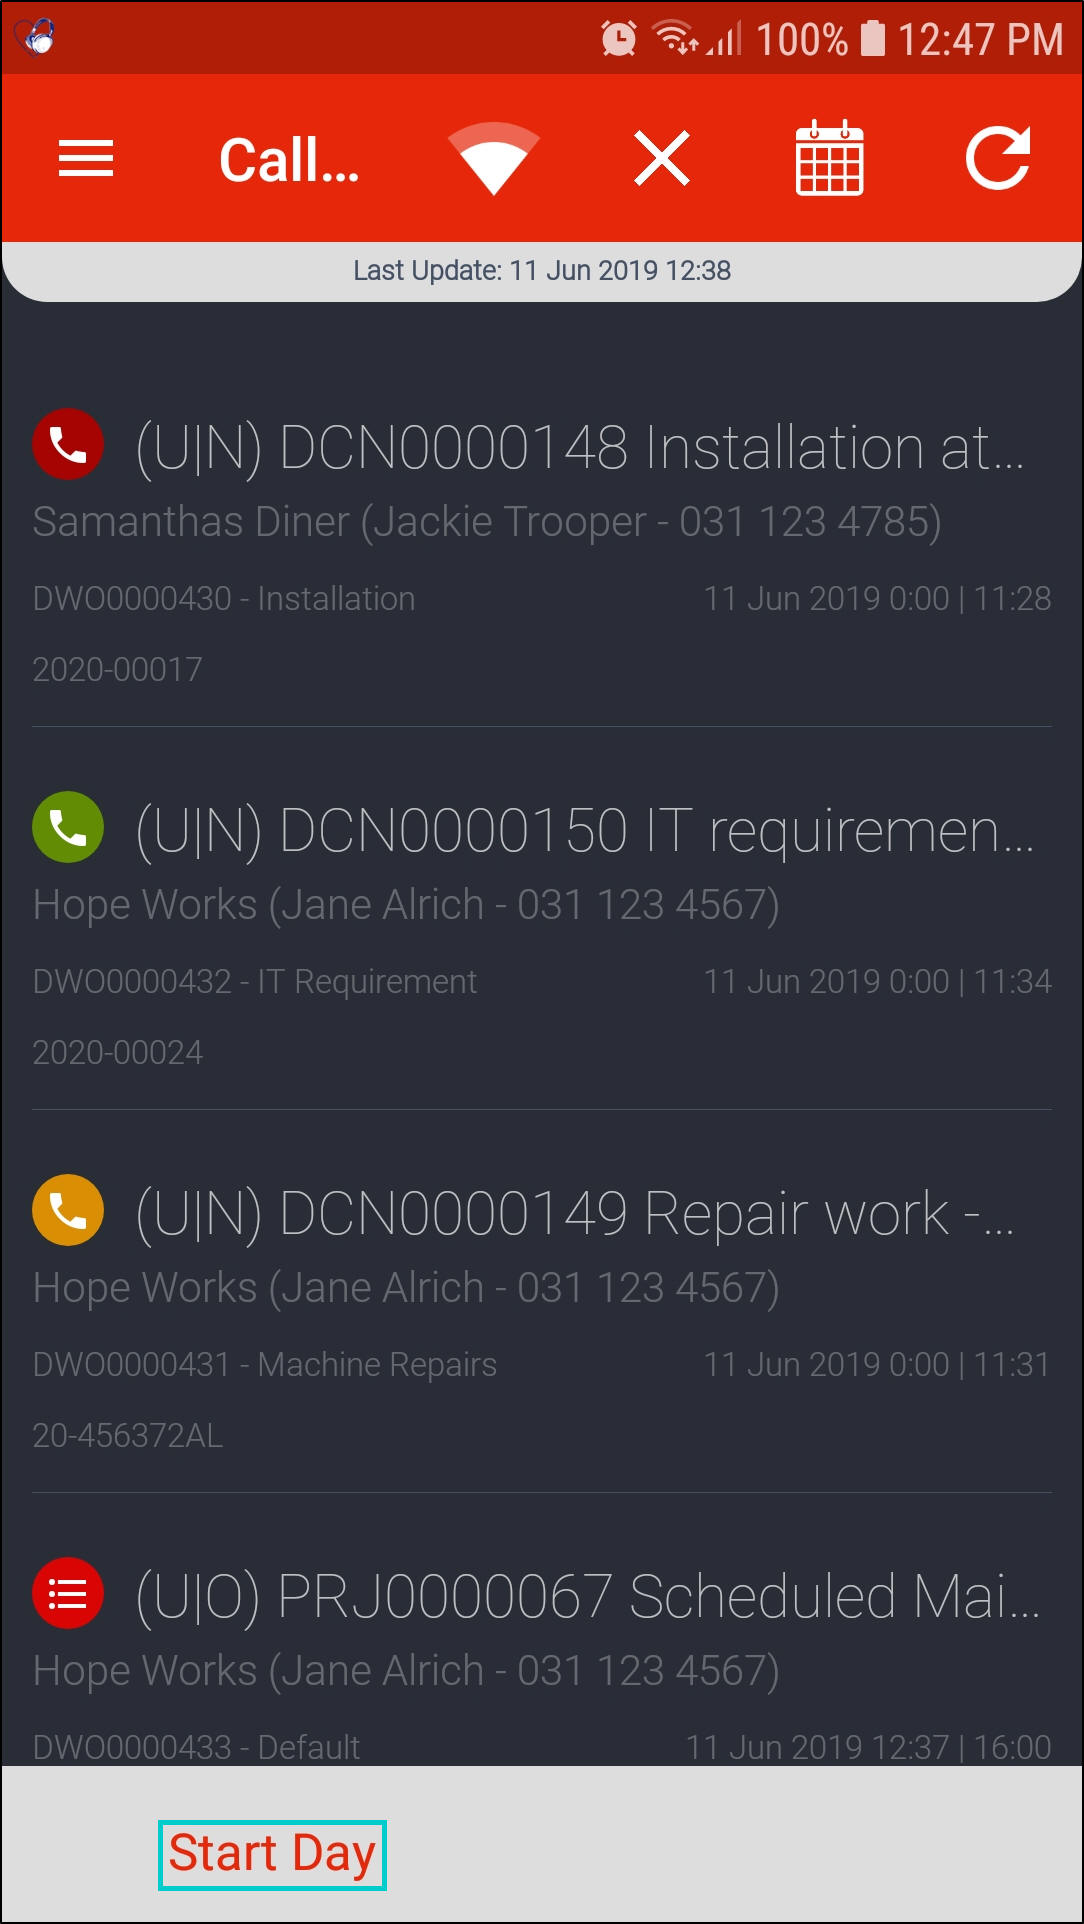
Start Day
- Once you are ready to begin work, click on Start Day.
End Day
- Once all calls are done for the day, click on End Day.
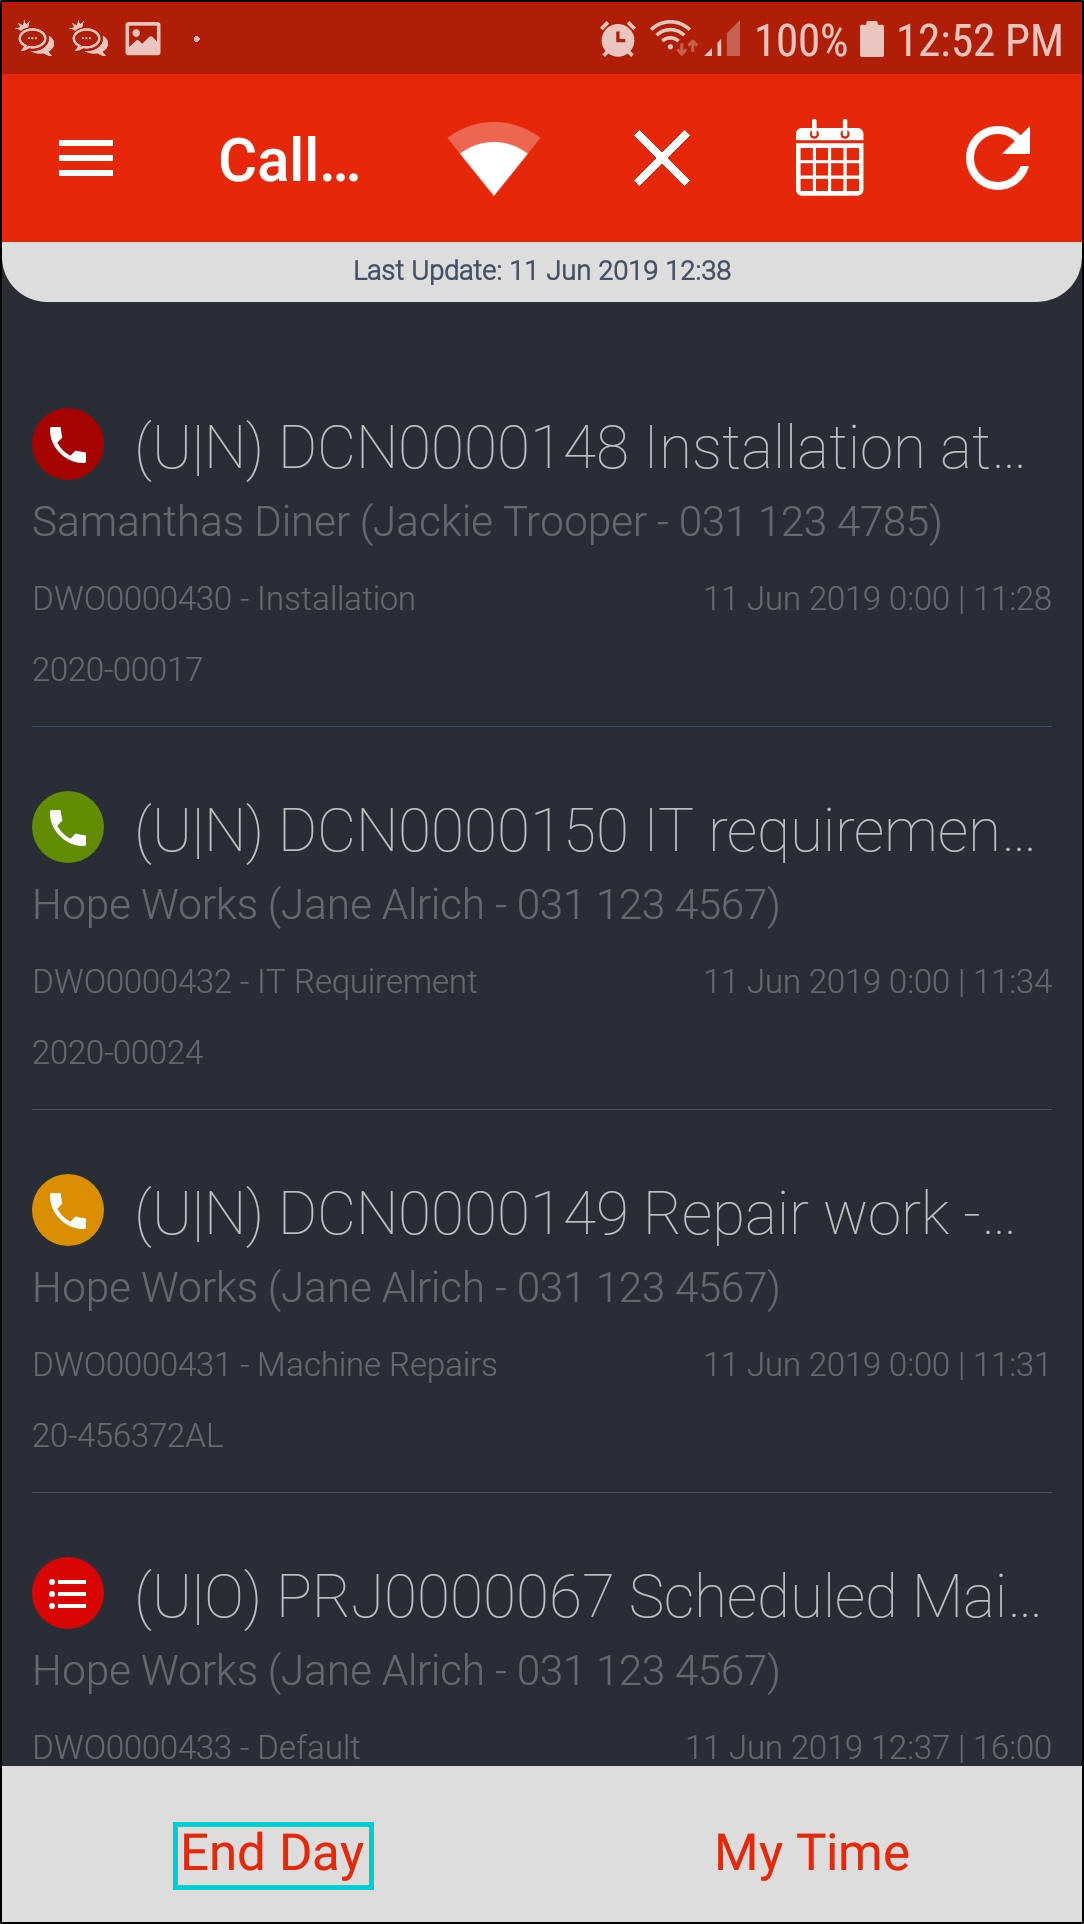
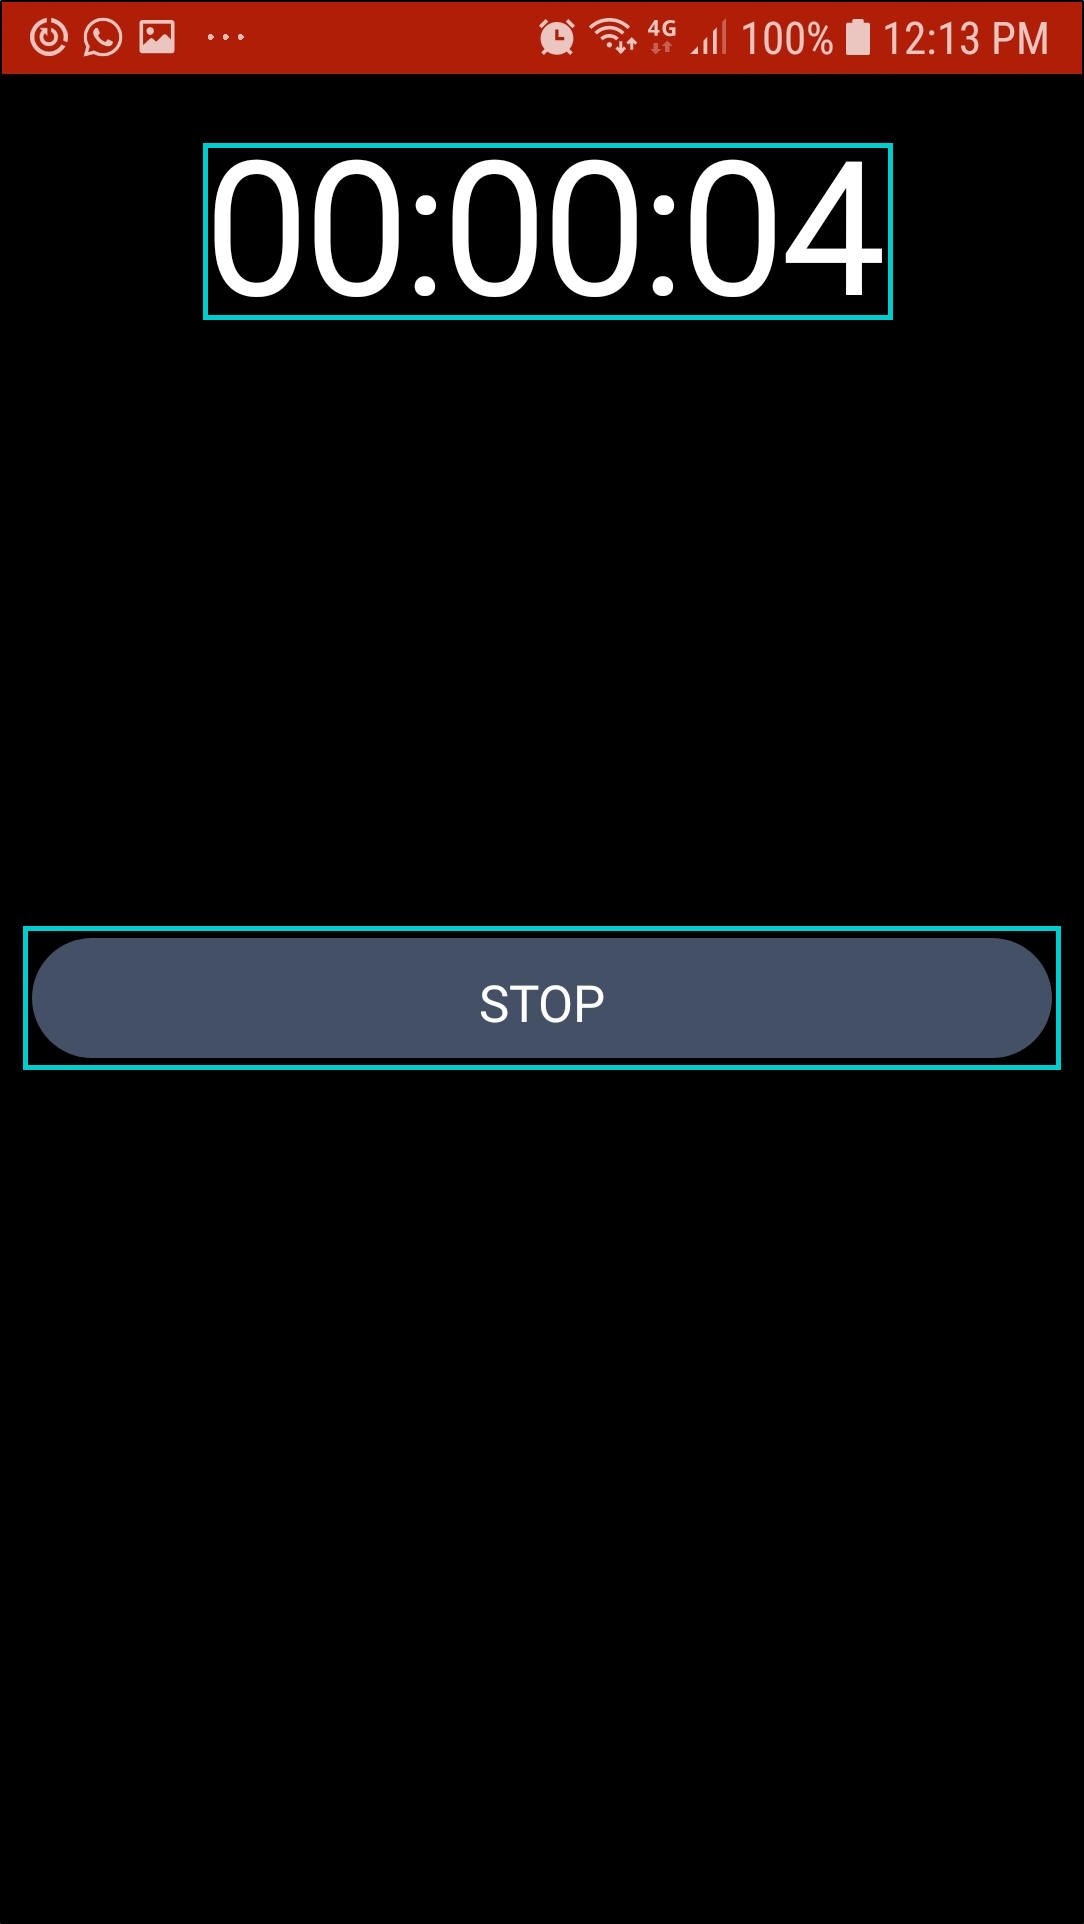
My Time
- Click on My Time.
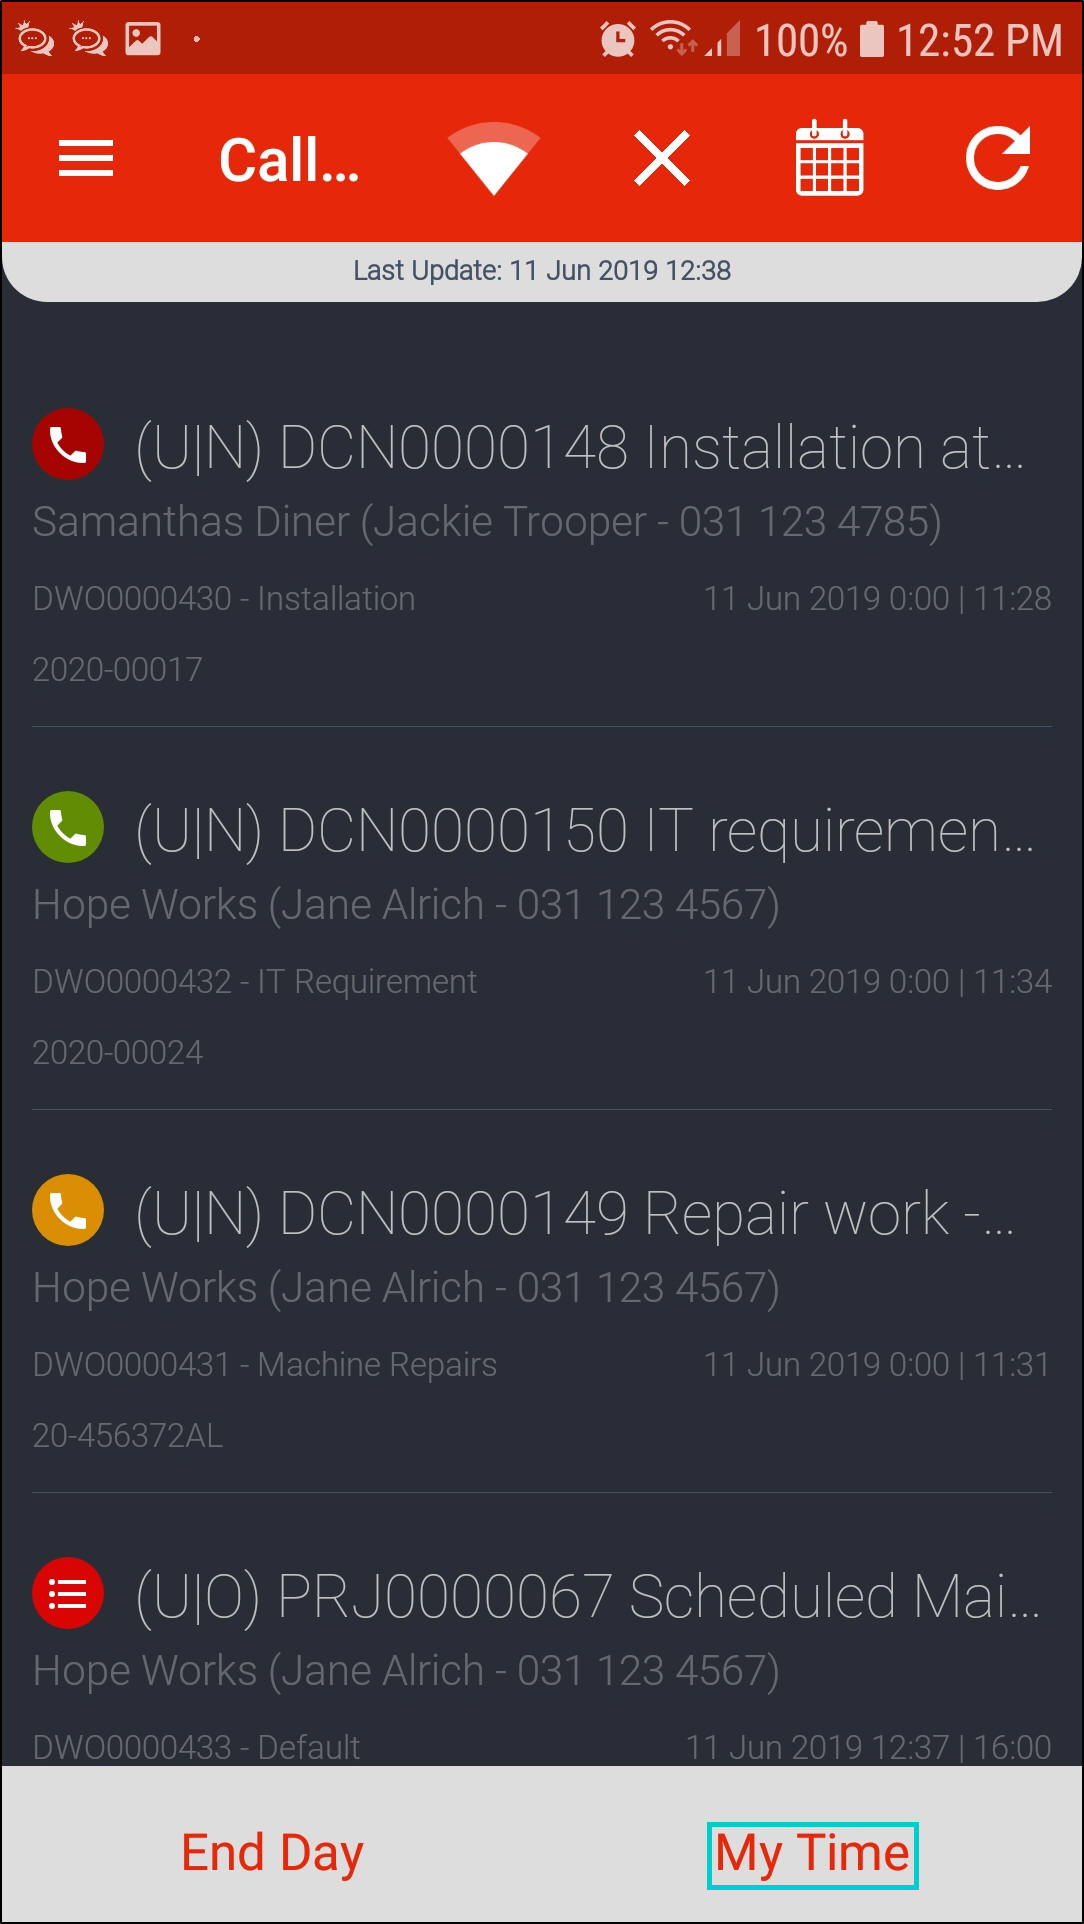
- The Timer will be displayed.
- Click on Stop to stop the Timer and you will return back to the Calls List screen.
Online / Offline Mode
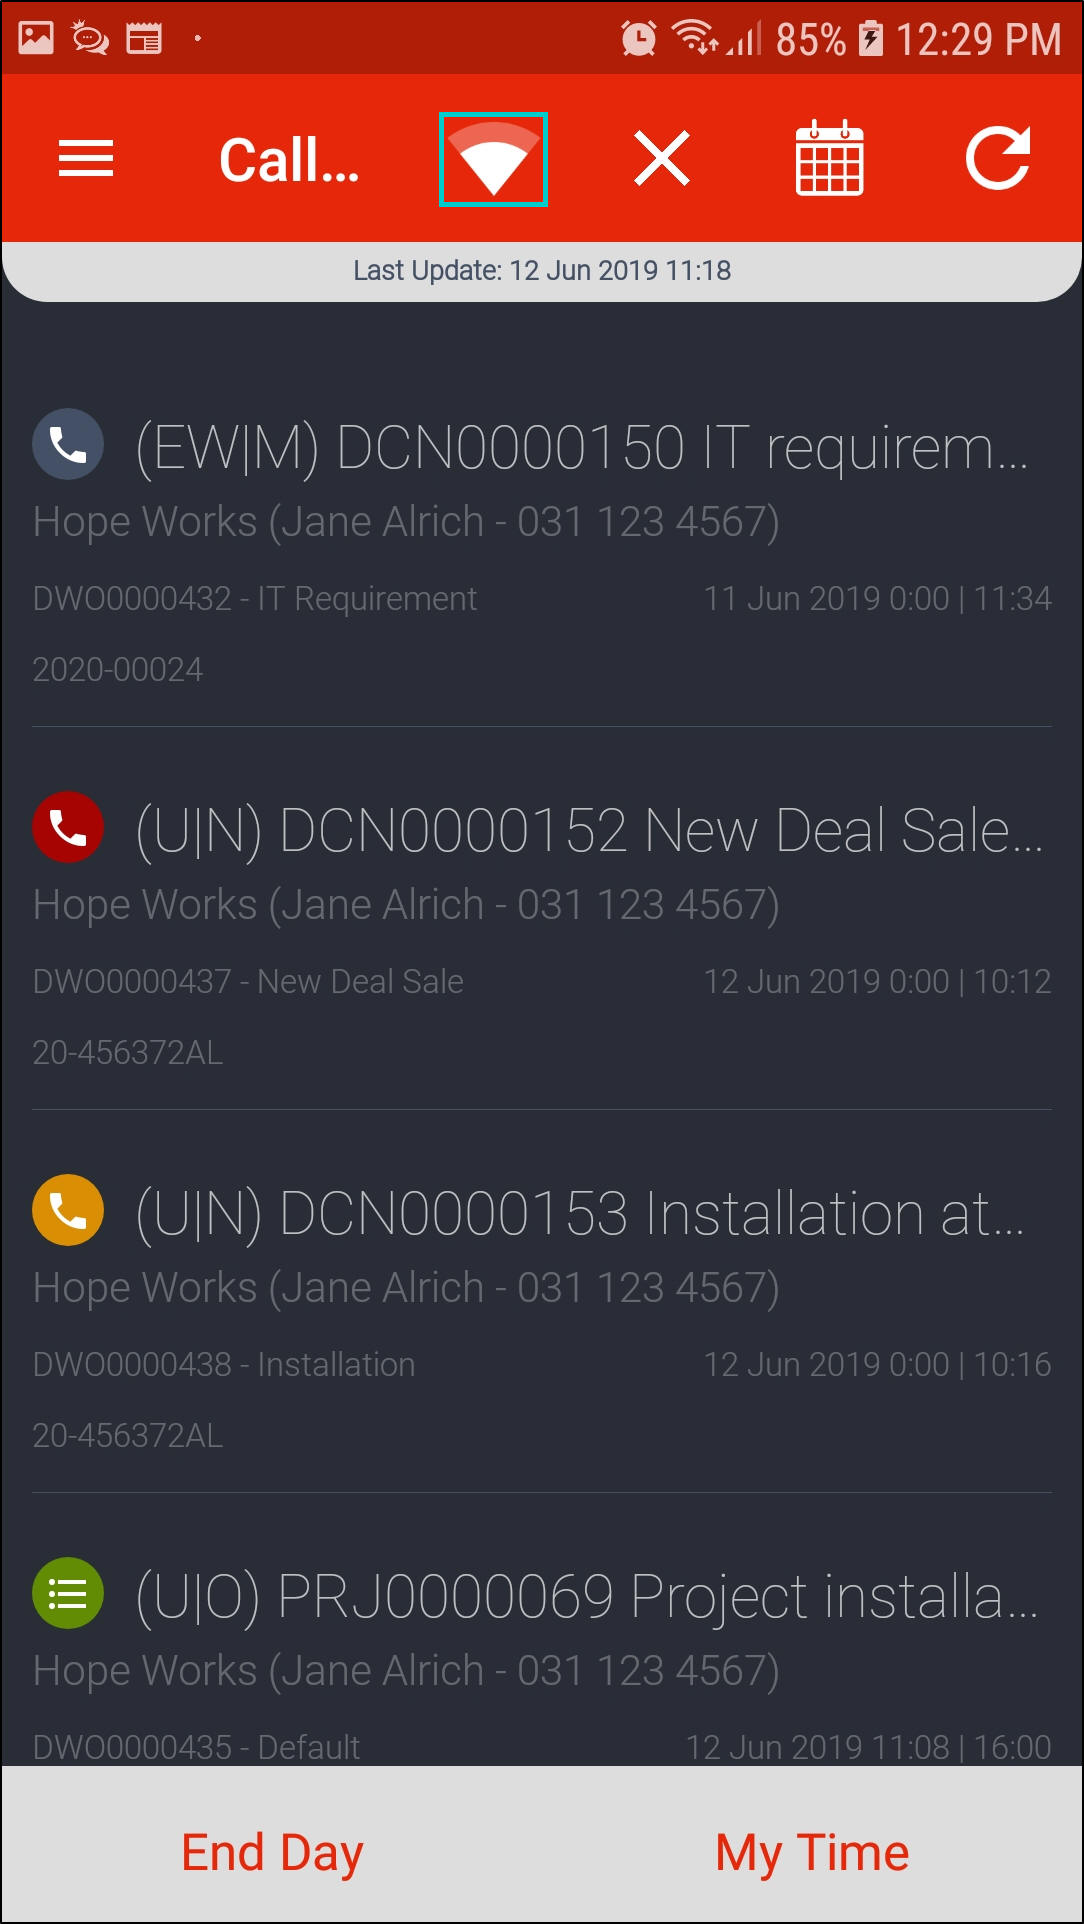
- By default, Tech Connect will be Online.
- When Tech Connect is Online, the network icon will be 'activate'.
- In this image, Tech Connect is Online.
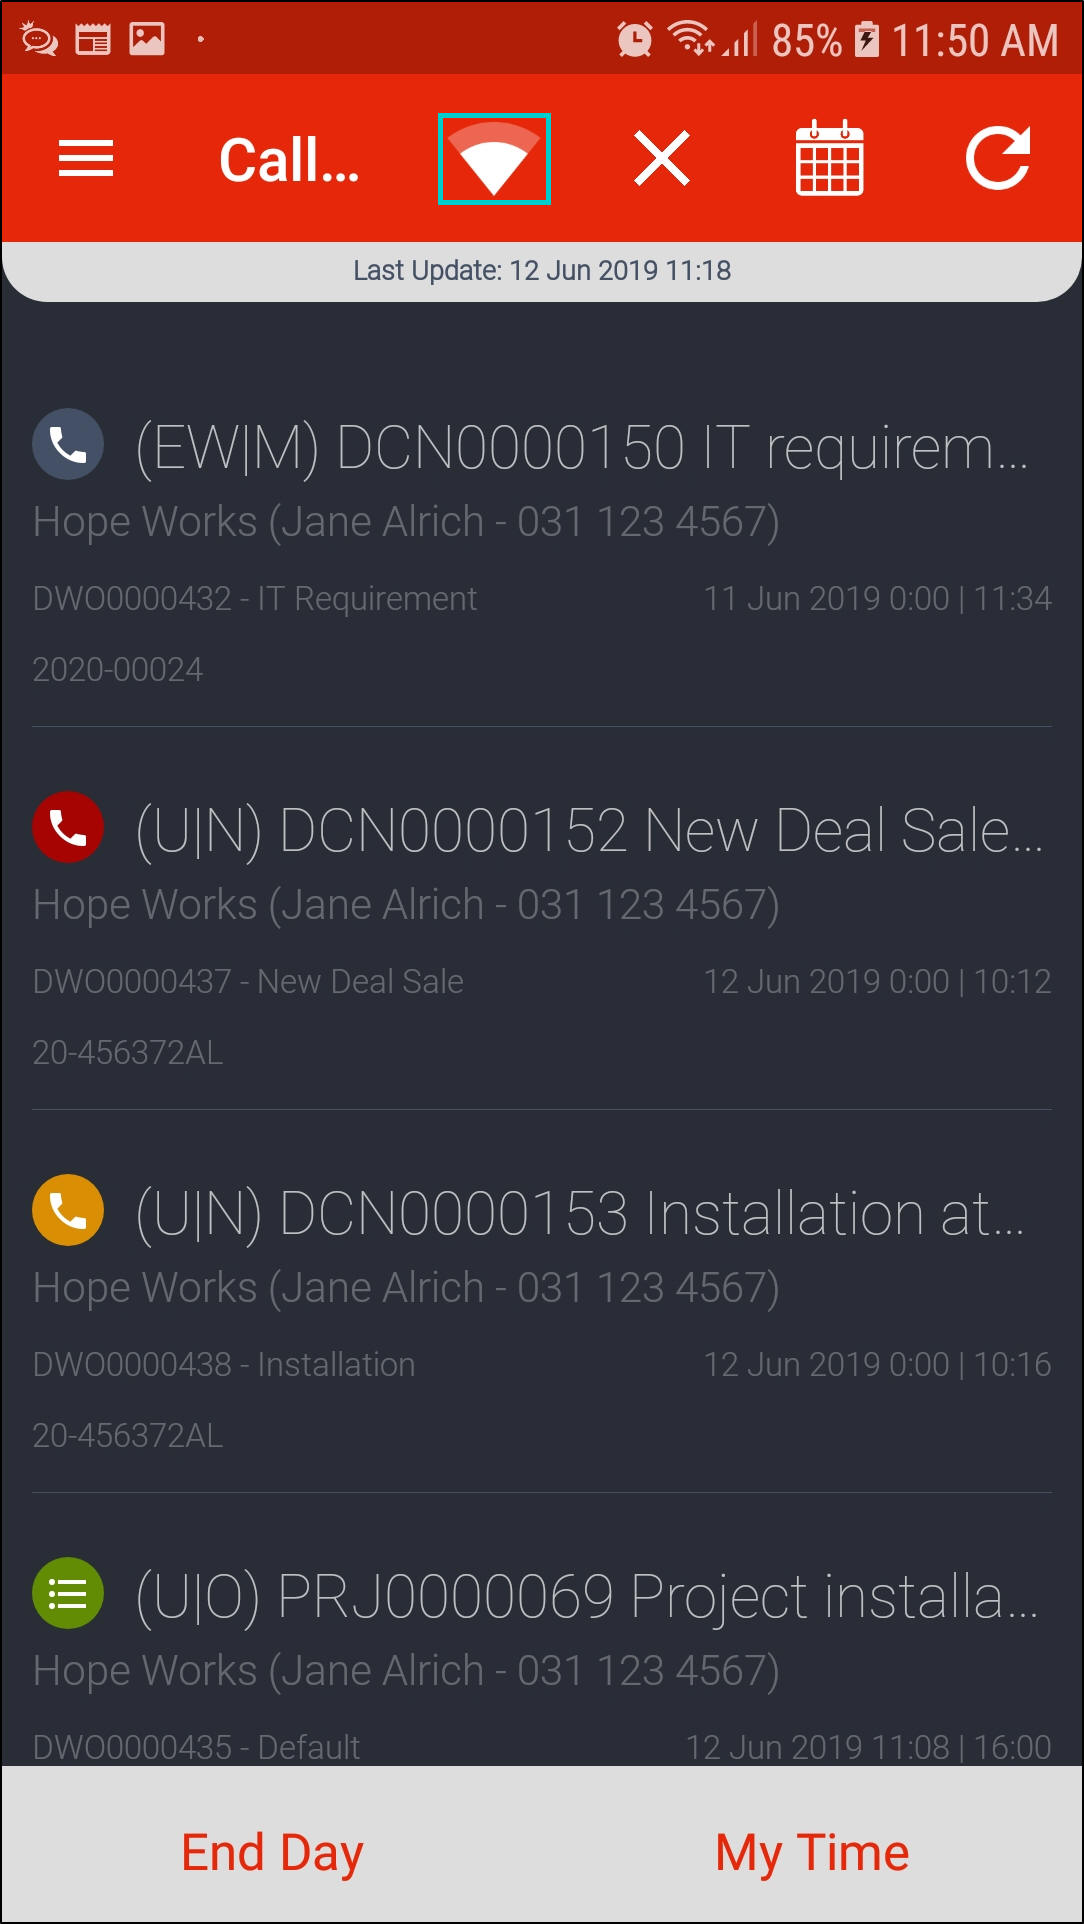
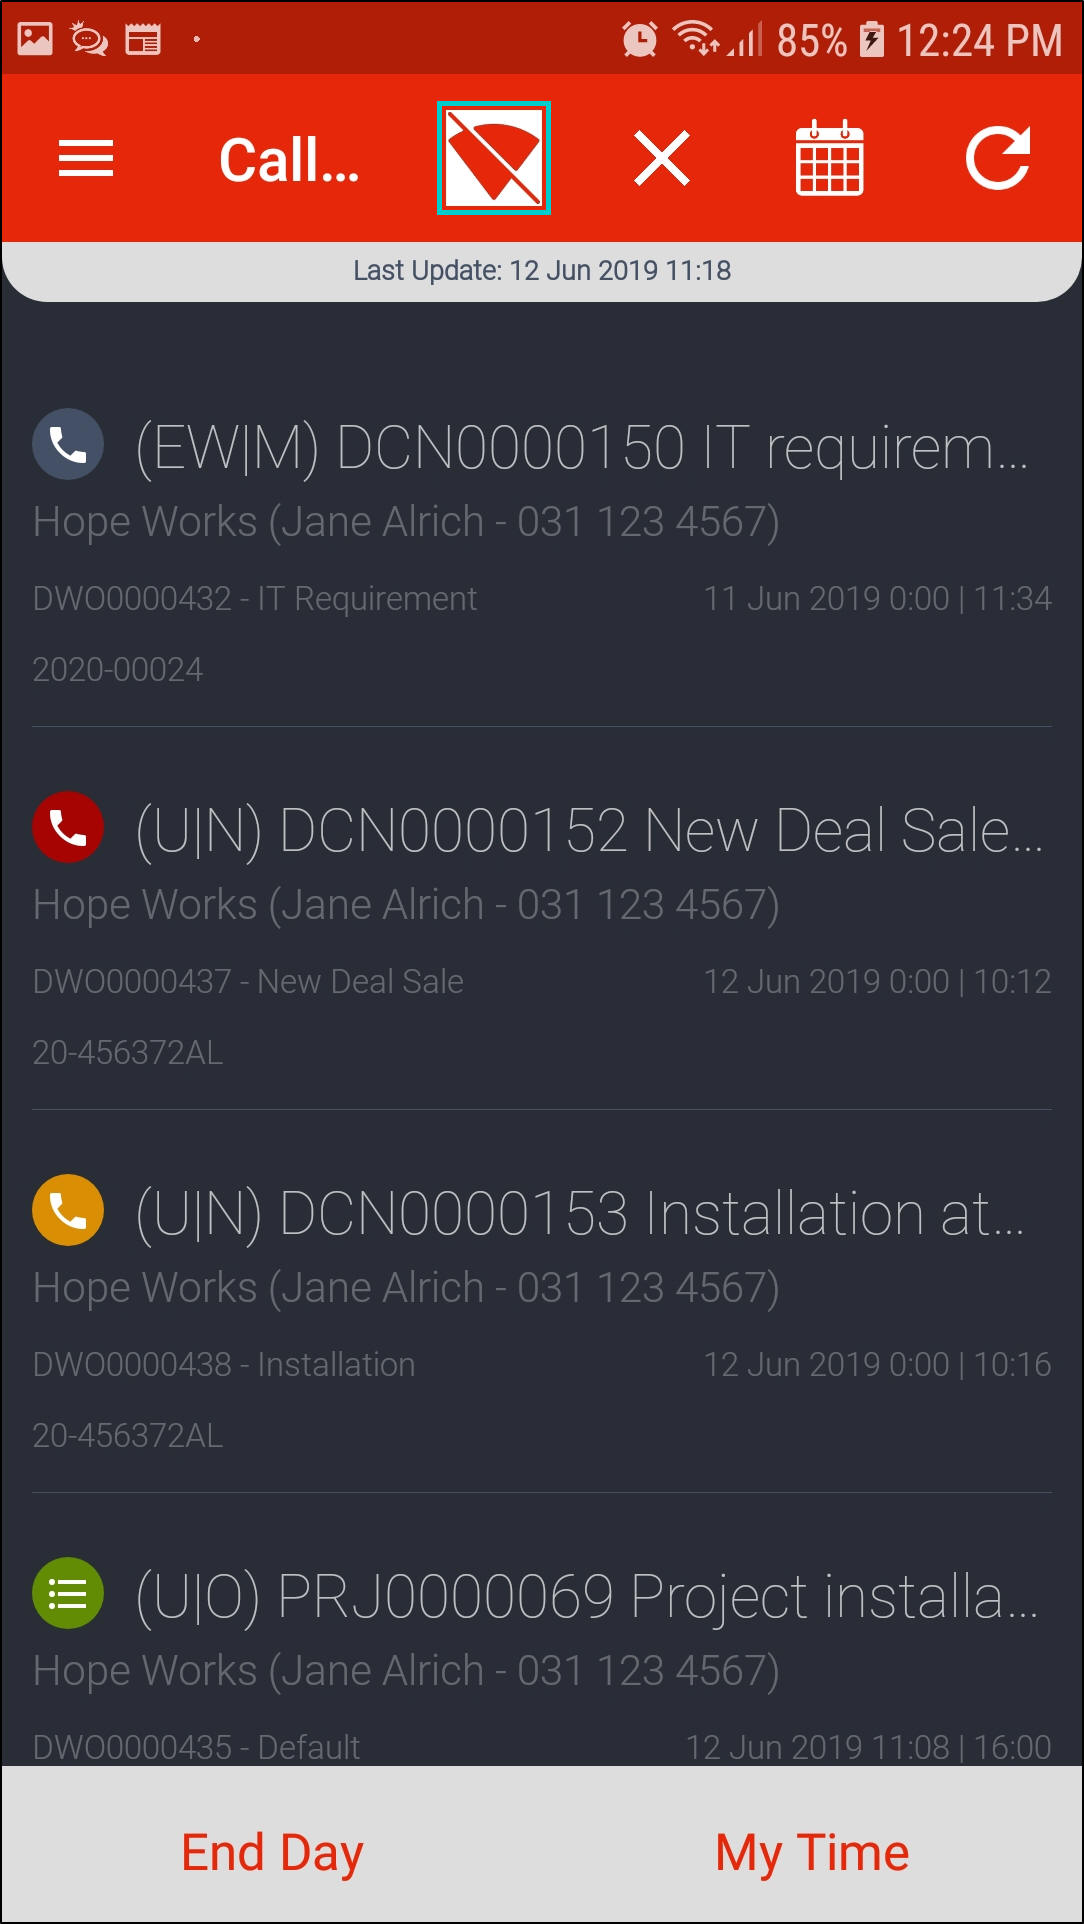
- To switch to Offline mode,
- click on the network icon.
- An Offline mode message will pop up asking you;
- Are you sure you want to switch to Offline Mode?
- Click on Yes.
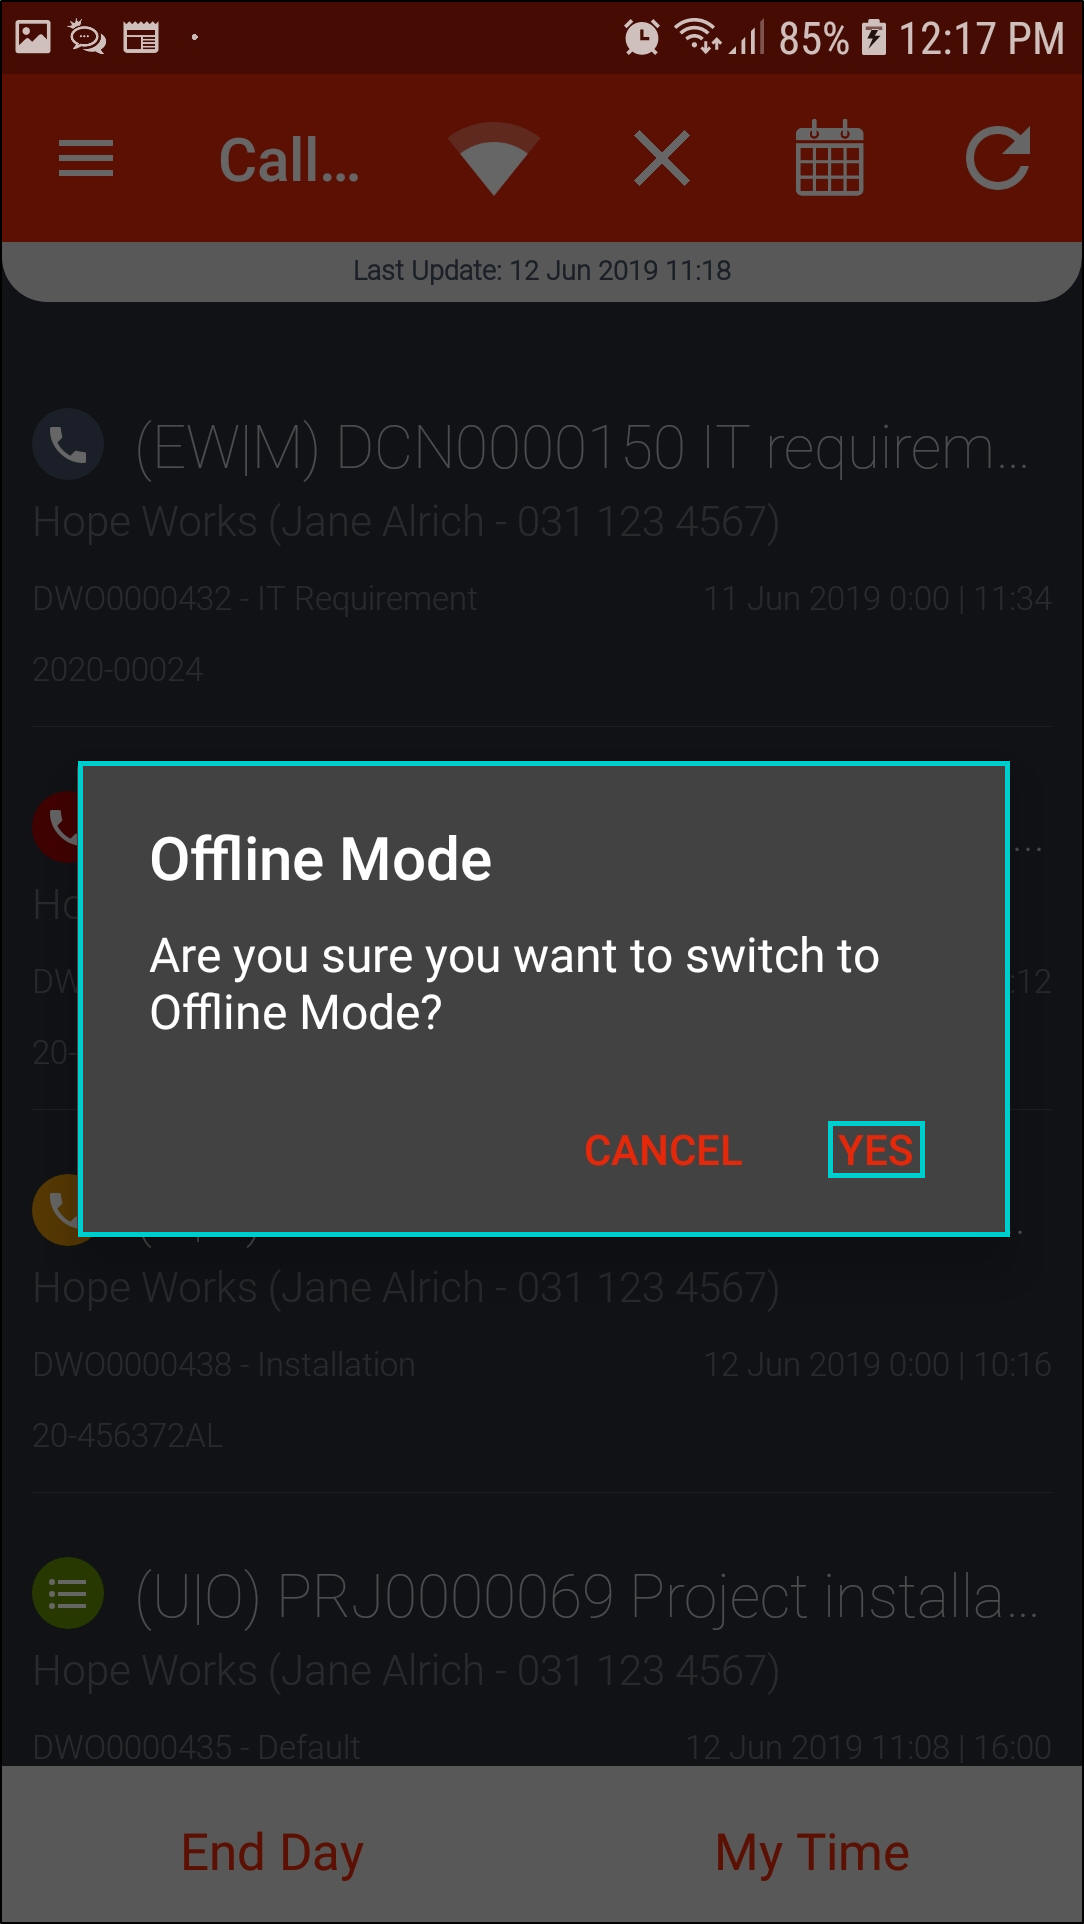
- The network icon will become 'cancelled'.

- To switch back to Online mode,
- click on the 'cancelled' network icon.
- The network icon will become 'active'.
View Calls by Date
- Click on the Calendar icon.
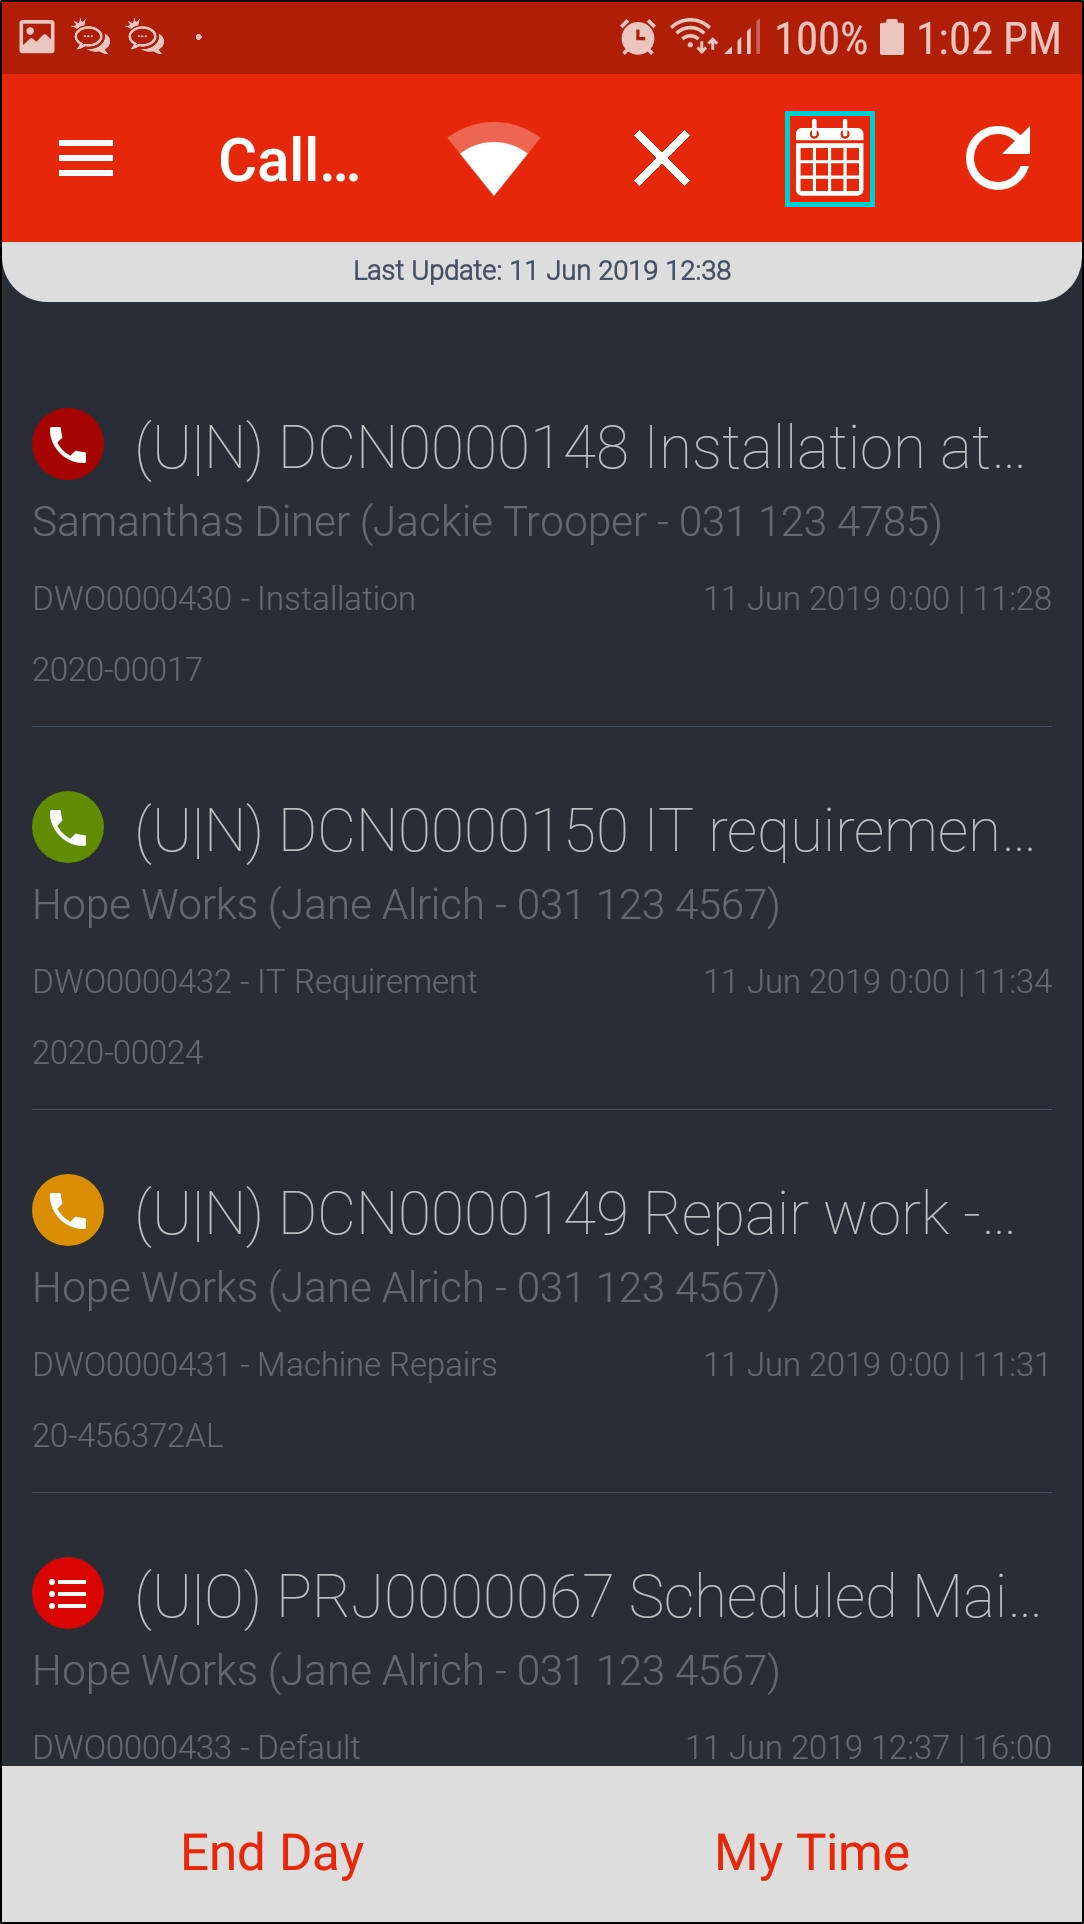
- A Calls Filter screen will be displayed.
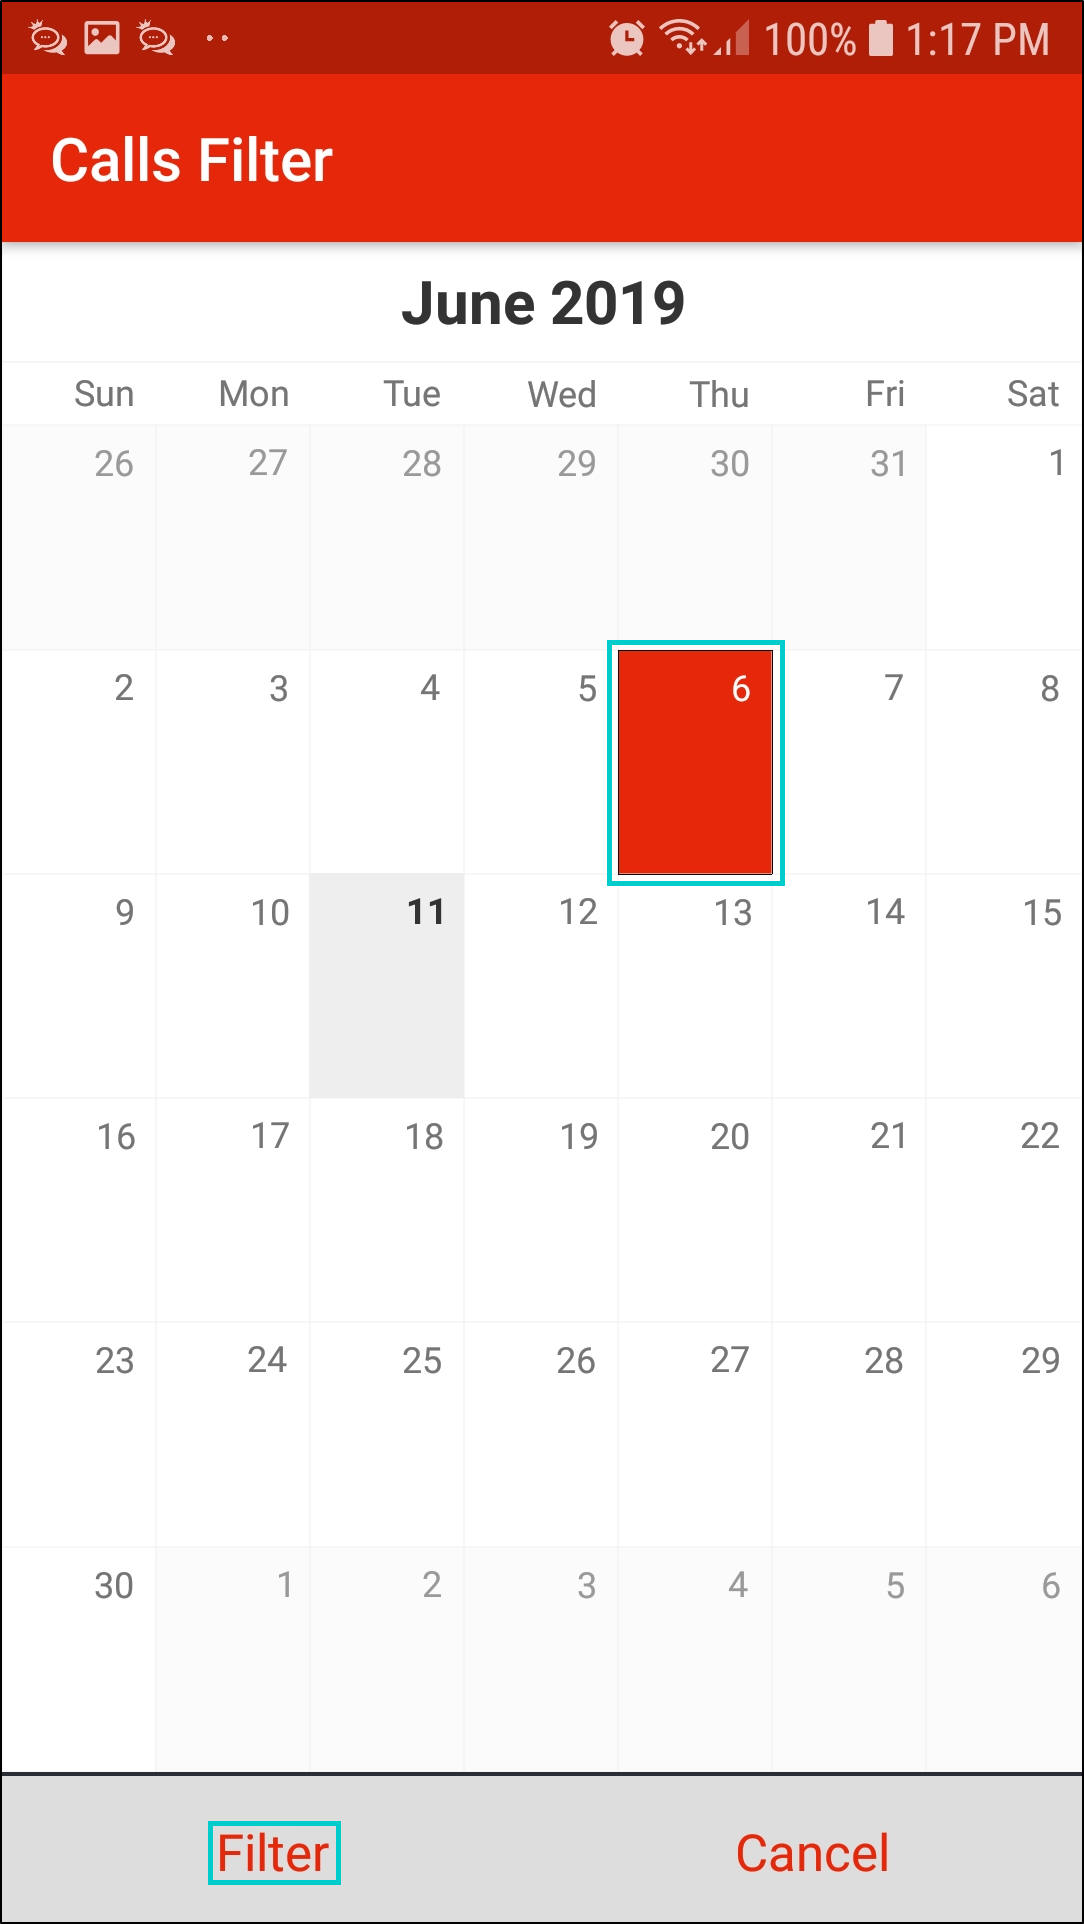
- Click on the desired date.
- The selected date will change colour to red.
- Click on Filter.
-
The call list will
now be filtered by the selected date.
- Note: The date displayed and filtered for, is the Scheduled Start Date of the underlying work order.
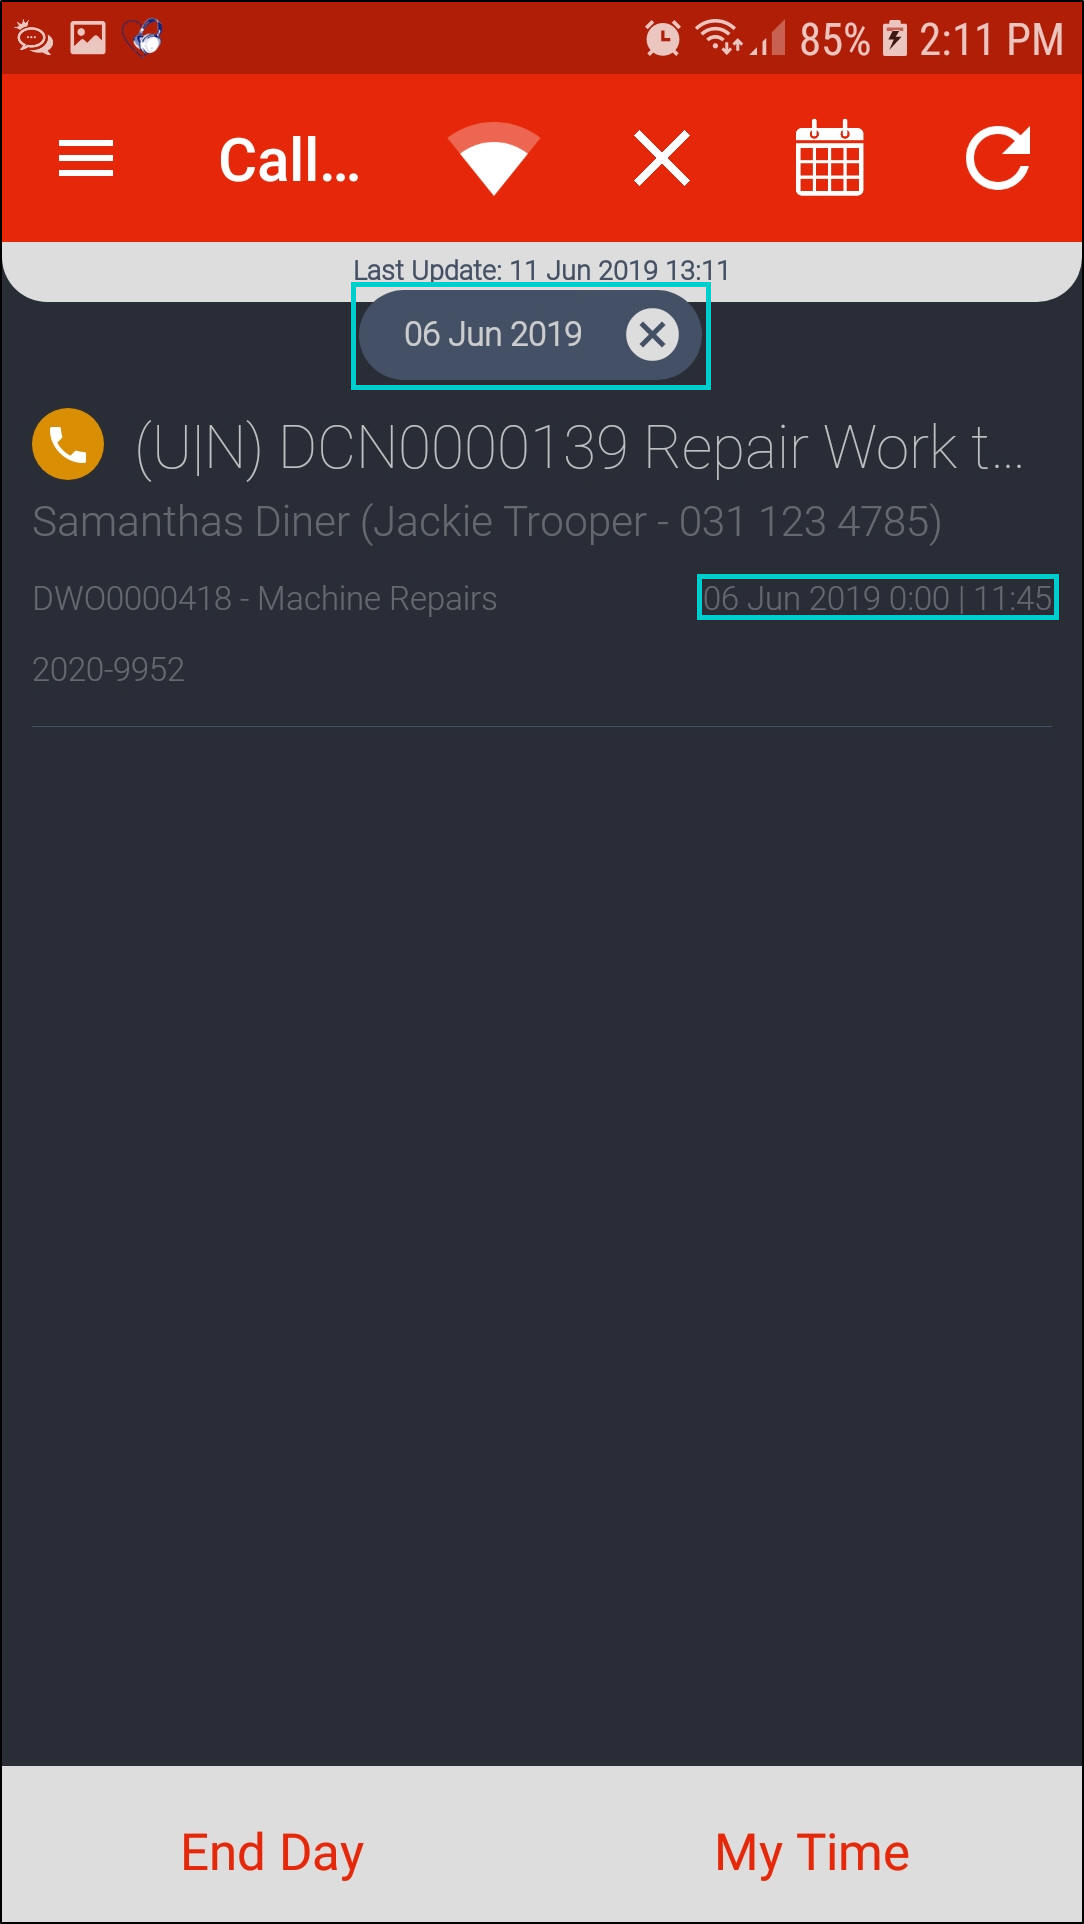
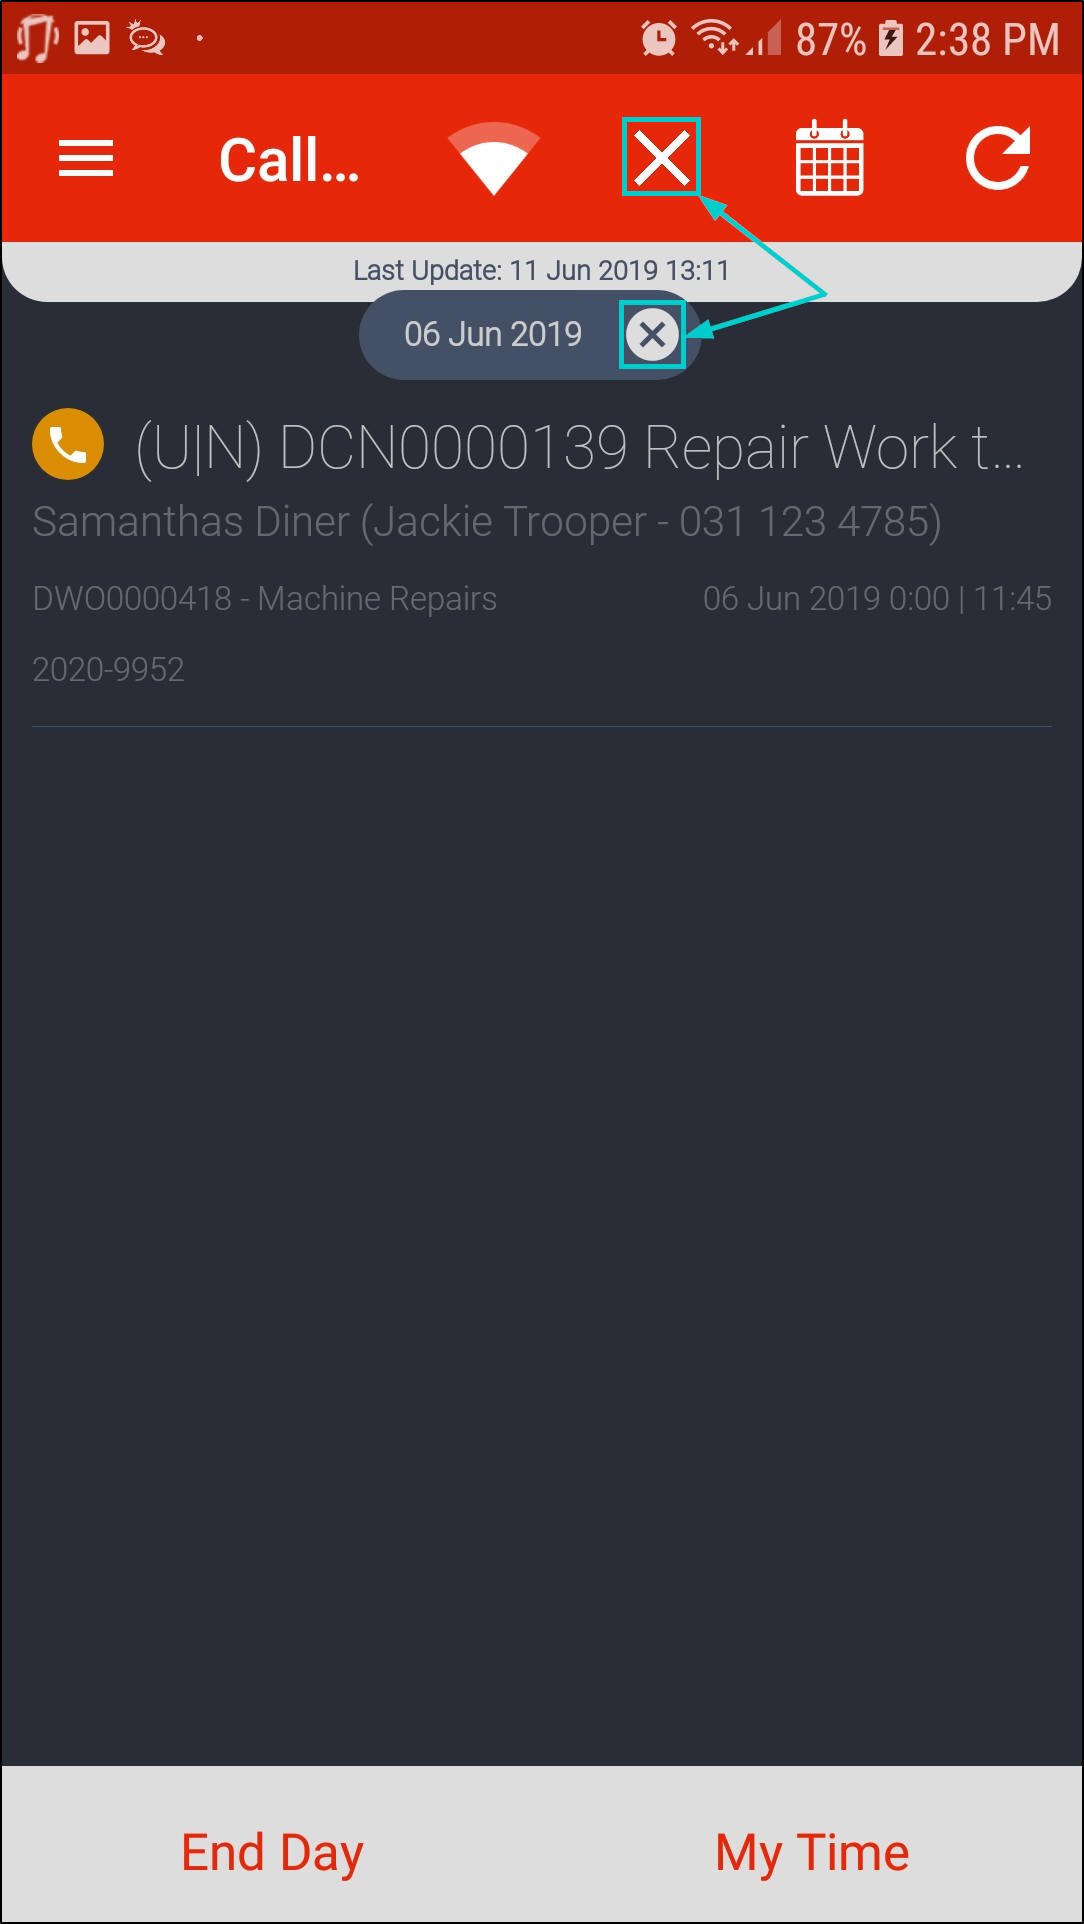
- To remove the filter, click on the (X) button in either the Filter Calls by Date section or the Calls List screen.
Syncing and Refreshing
- Due to the functionality that enables the use of Tech Connect offline, data is saved to the phone and will sync with the database, via the TechWebService, whenever a connection is available.
- It is essential that the Call Centre does not close off calls whilst the Technician is still working on a call or is offline.
- Syncing will happen during different application events but you can sync / refresh your data manually.
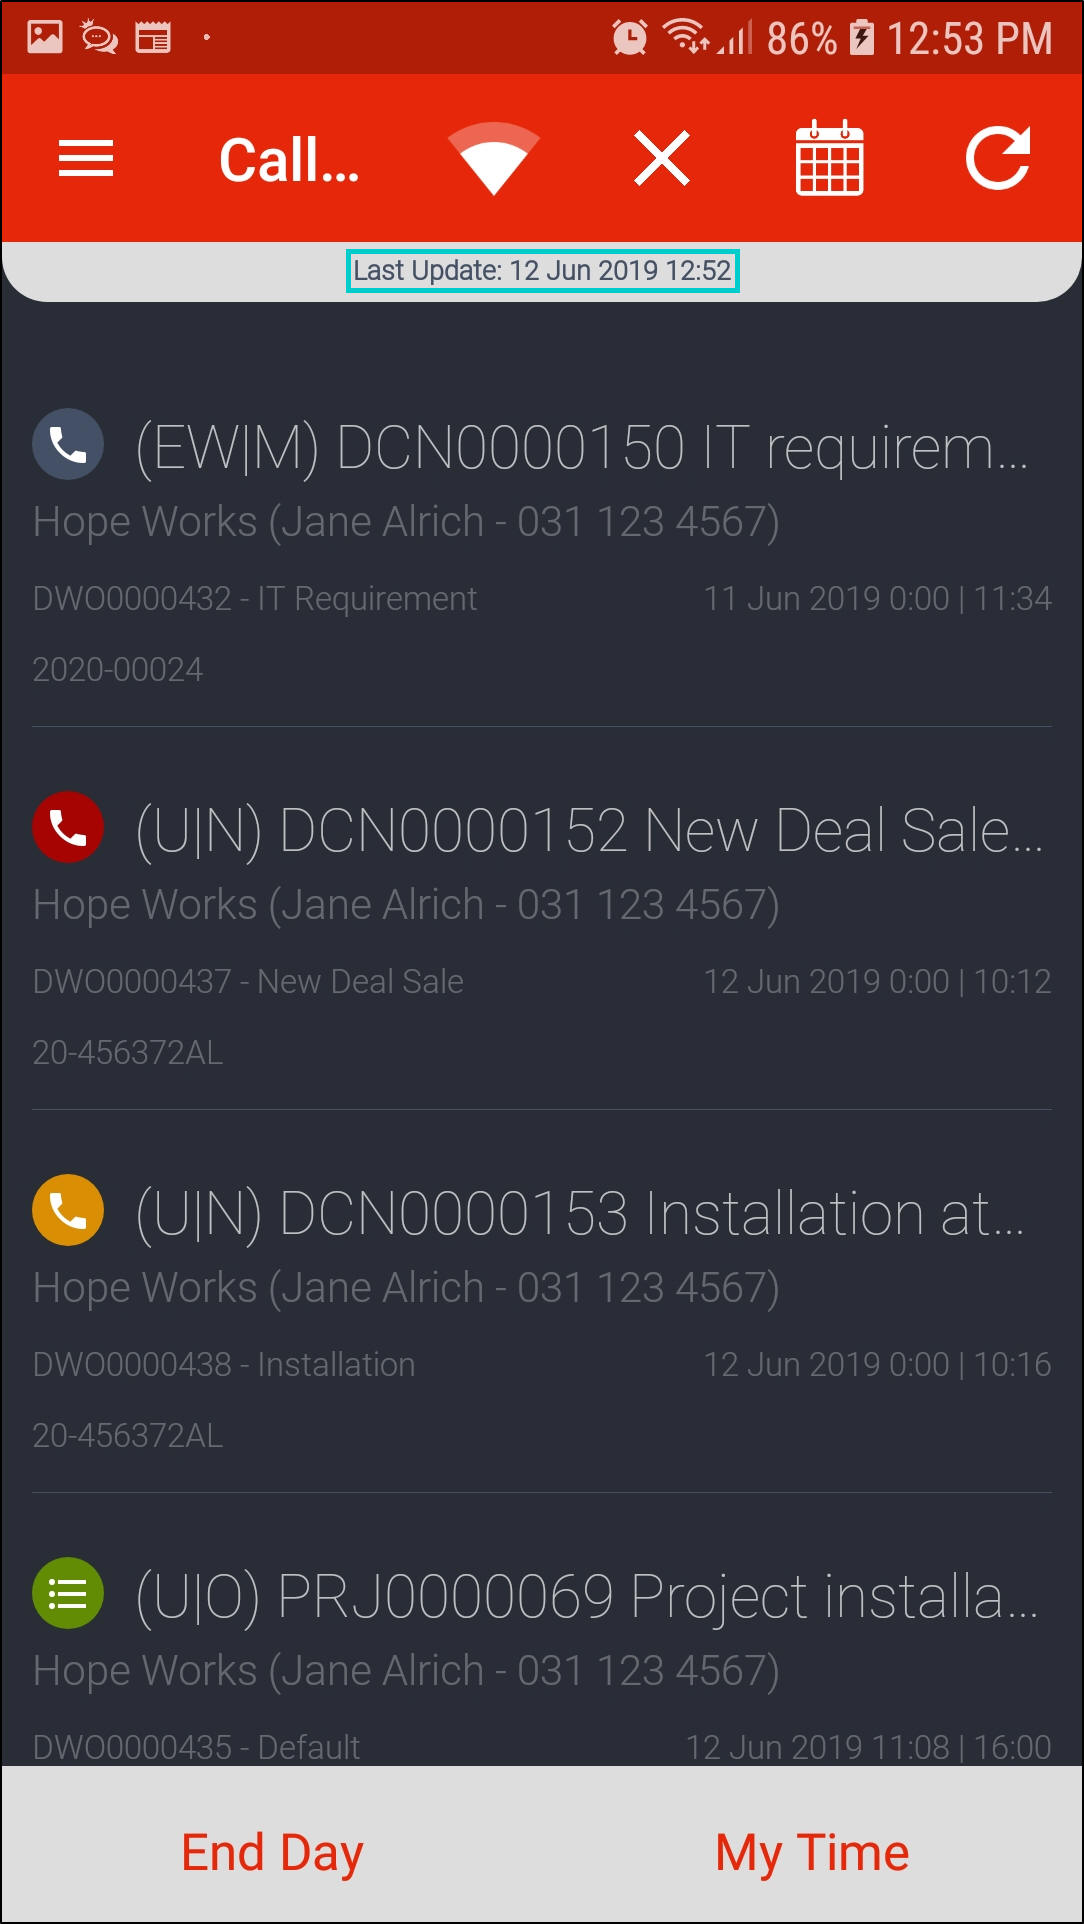
- Last update [ ] shows you the date and time the data was last manually refreshed.
- To refresh your data manually, click on the Refresh button.
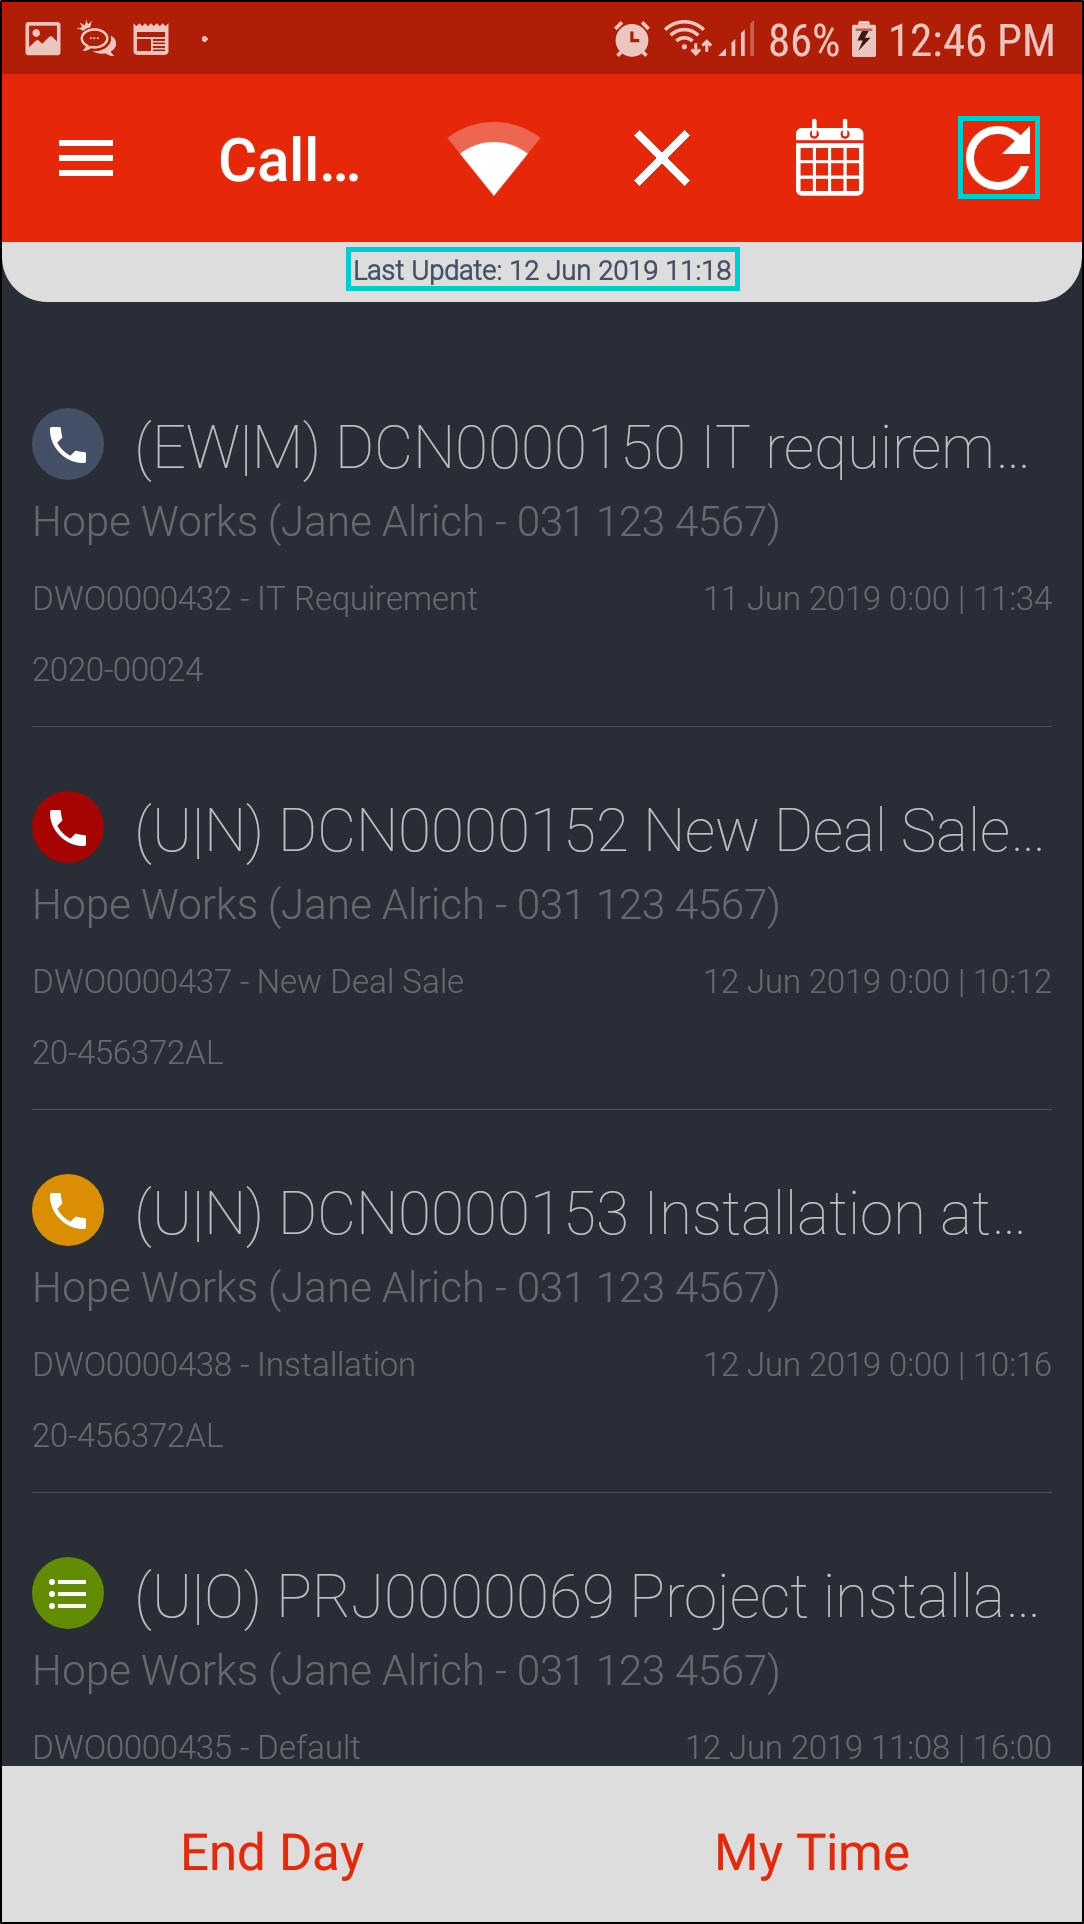
- The Last Update [ ] will change to the current date and time.
Assigned Calls / Projects
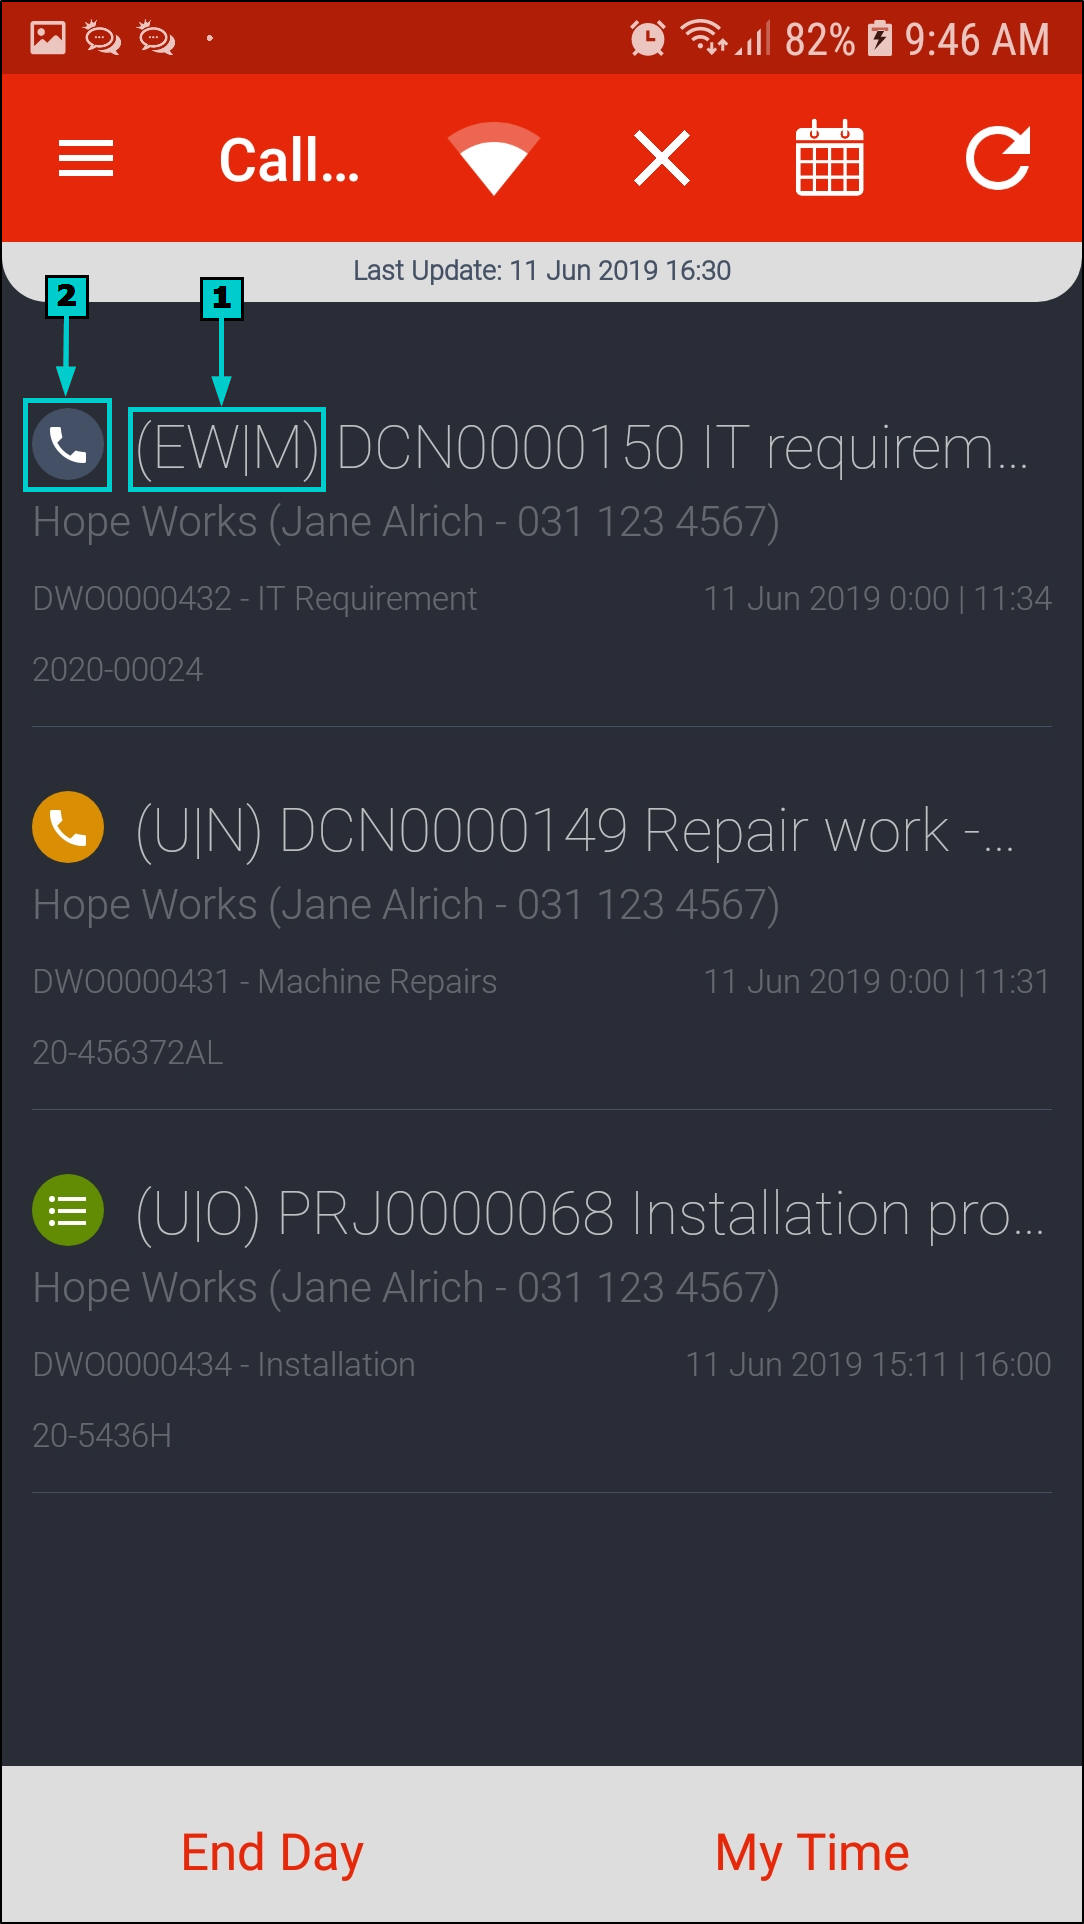
Call / Project Icon
- If a work order is linked to a
- Call - a phone icon will display.
- Project - a '3 task list' icon will display.
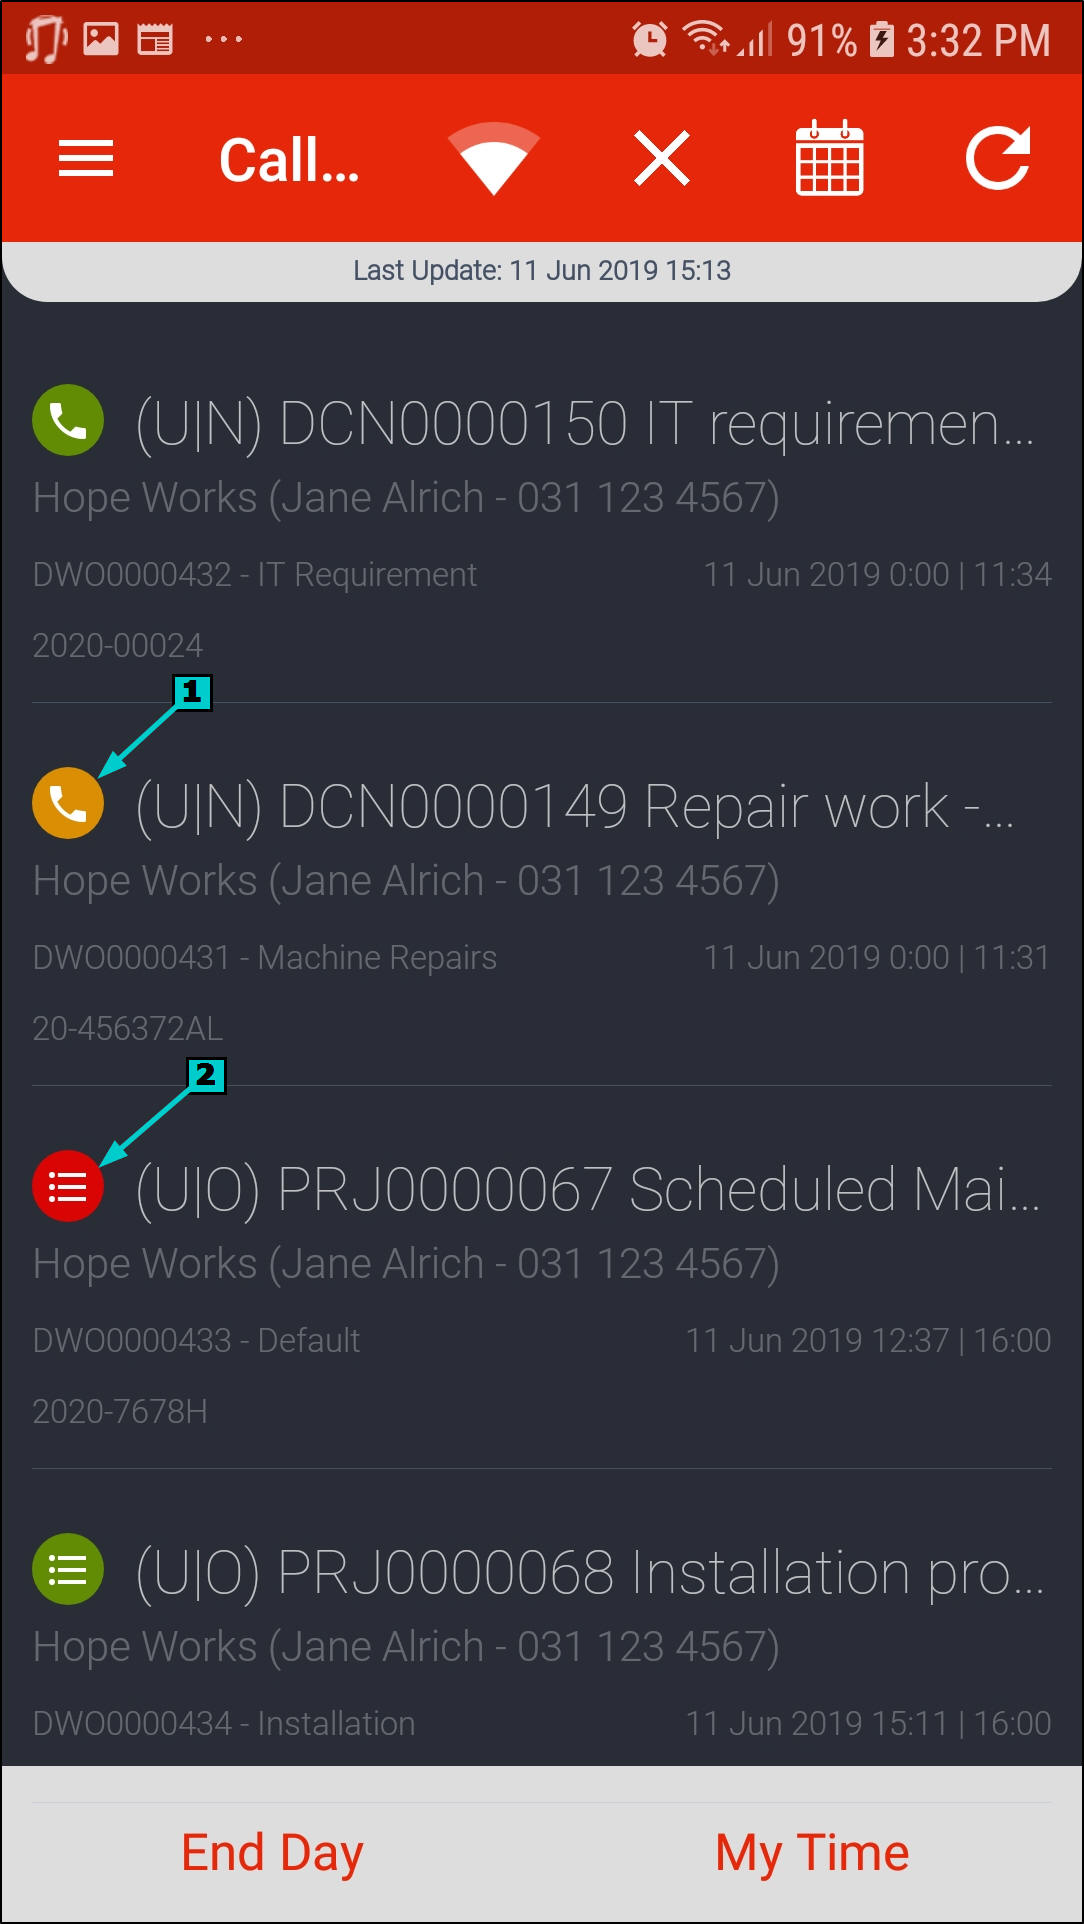
Work Info Circle
- The work info circle will be:
- Grey for Completed Work,
- Red for High Priority Work,
- Orange for Medium Priorty Work
- and Green for Low Priority Work.
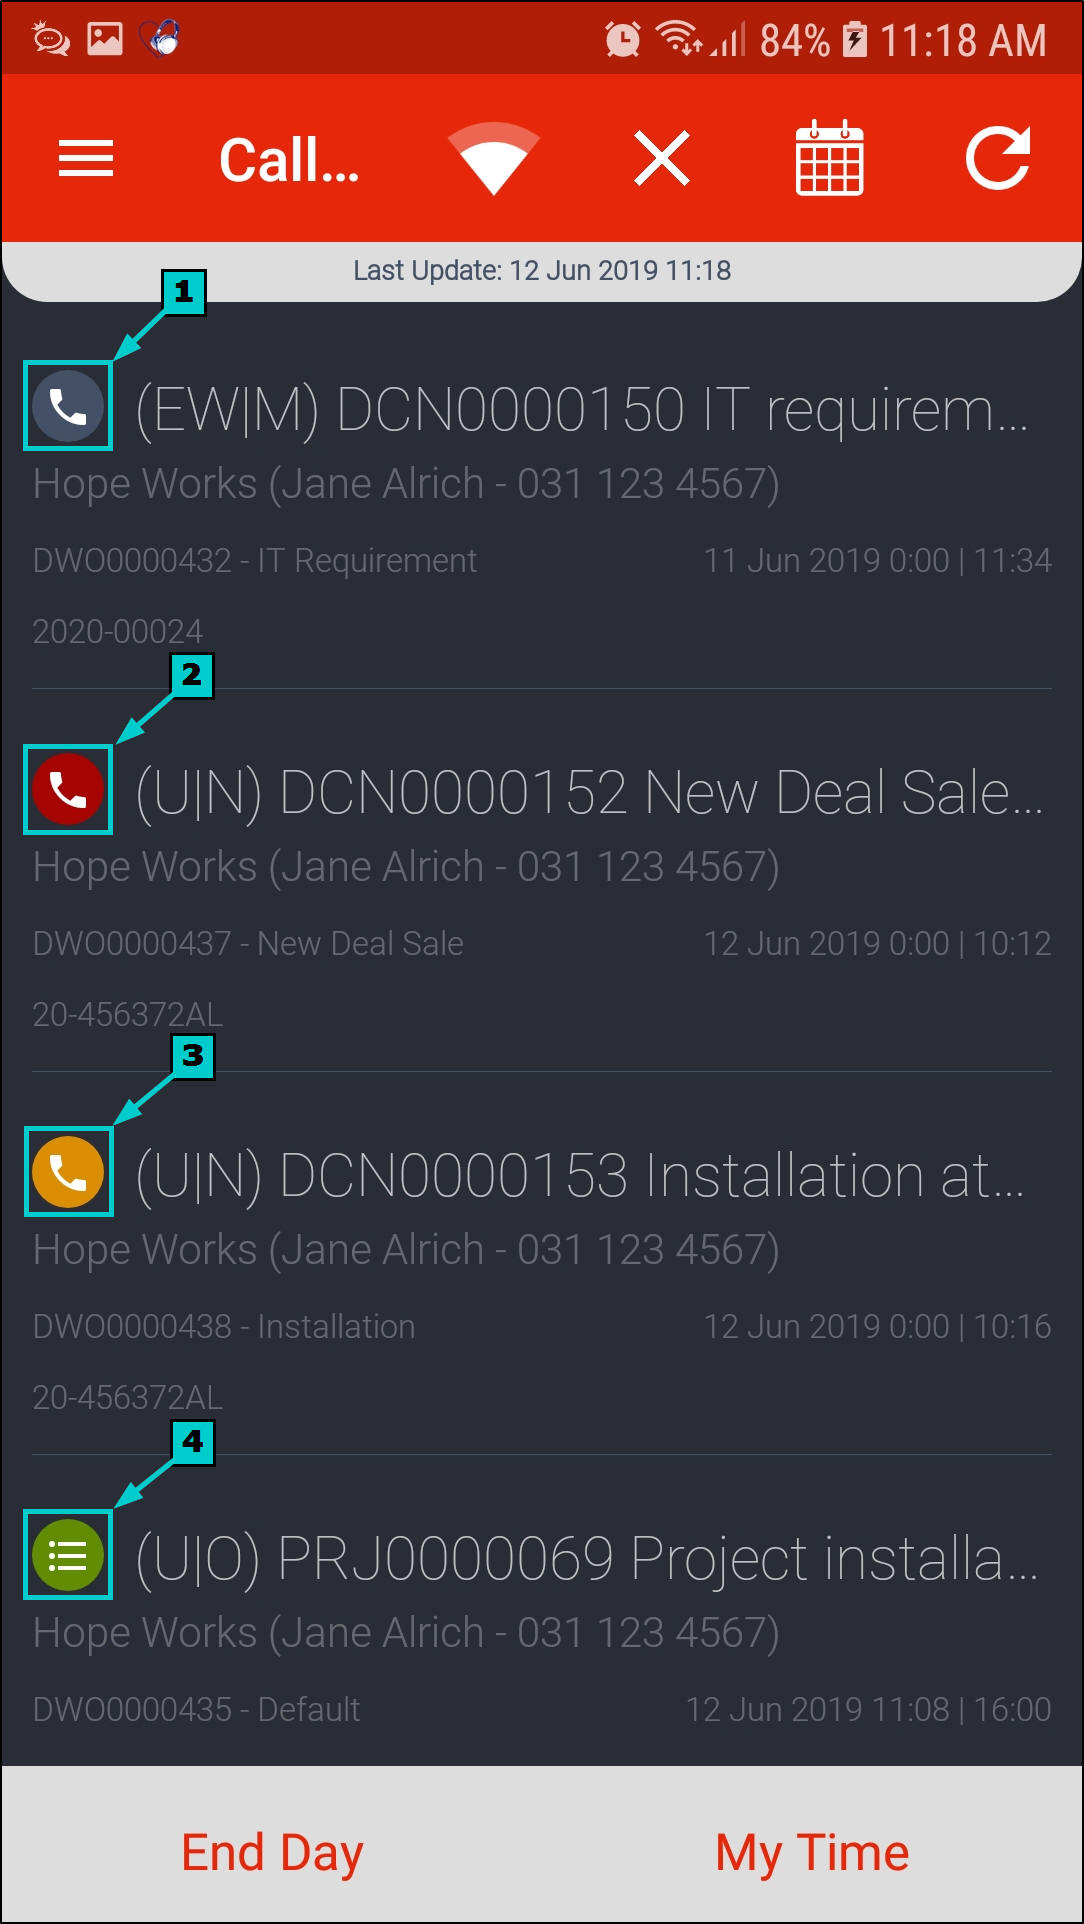
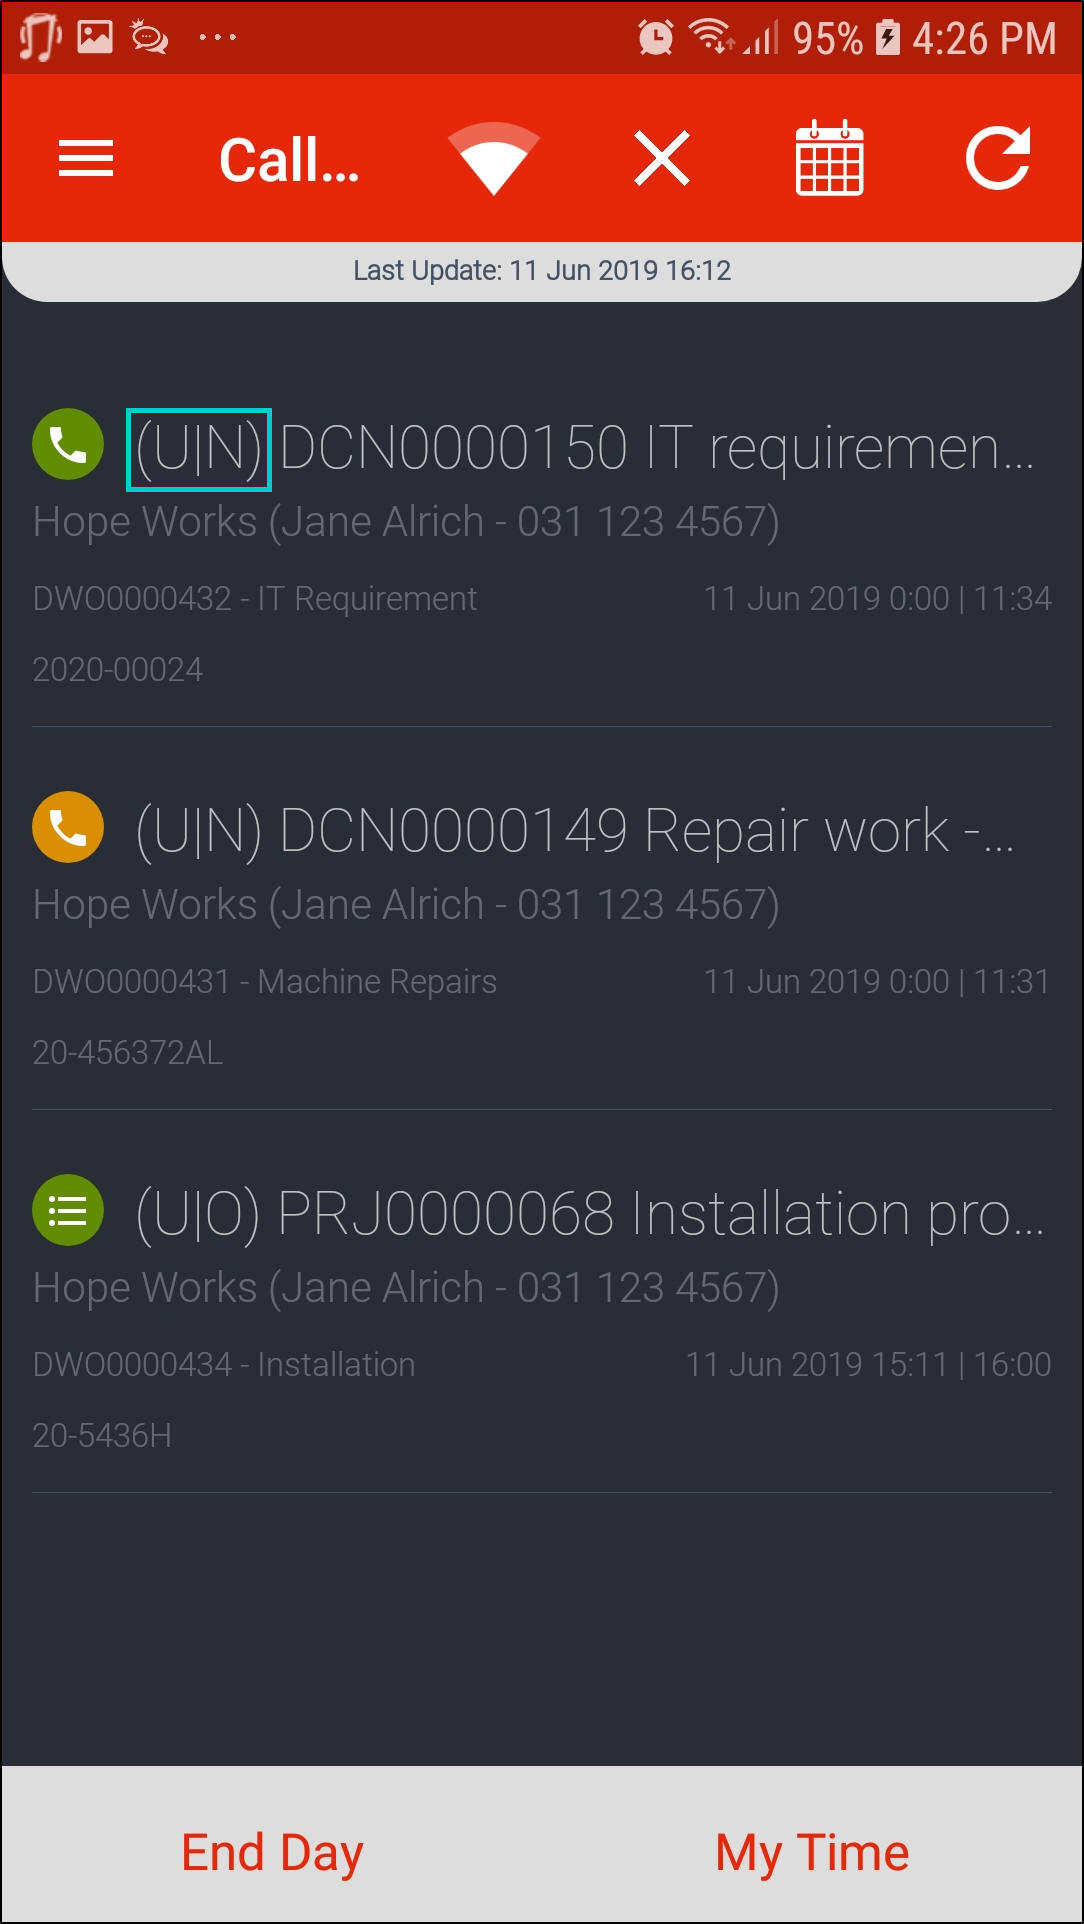
Call Status
- If a work order linked to a call is awaiting acceptance - you will see the status as;
- (U|N) - Awaiting Acceptance | New
- The call will be in Status - New in the Call Listing screen in BPO.
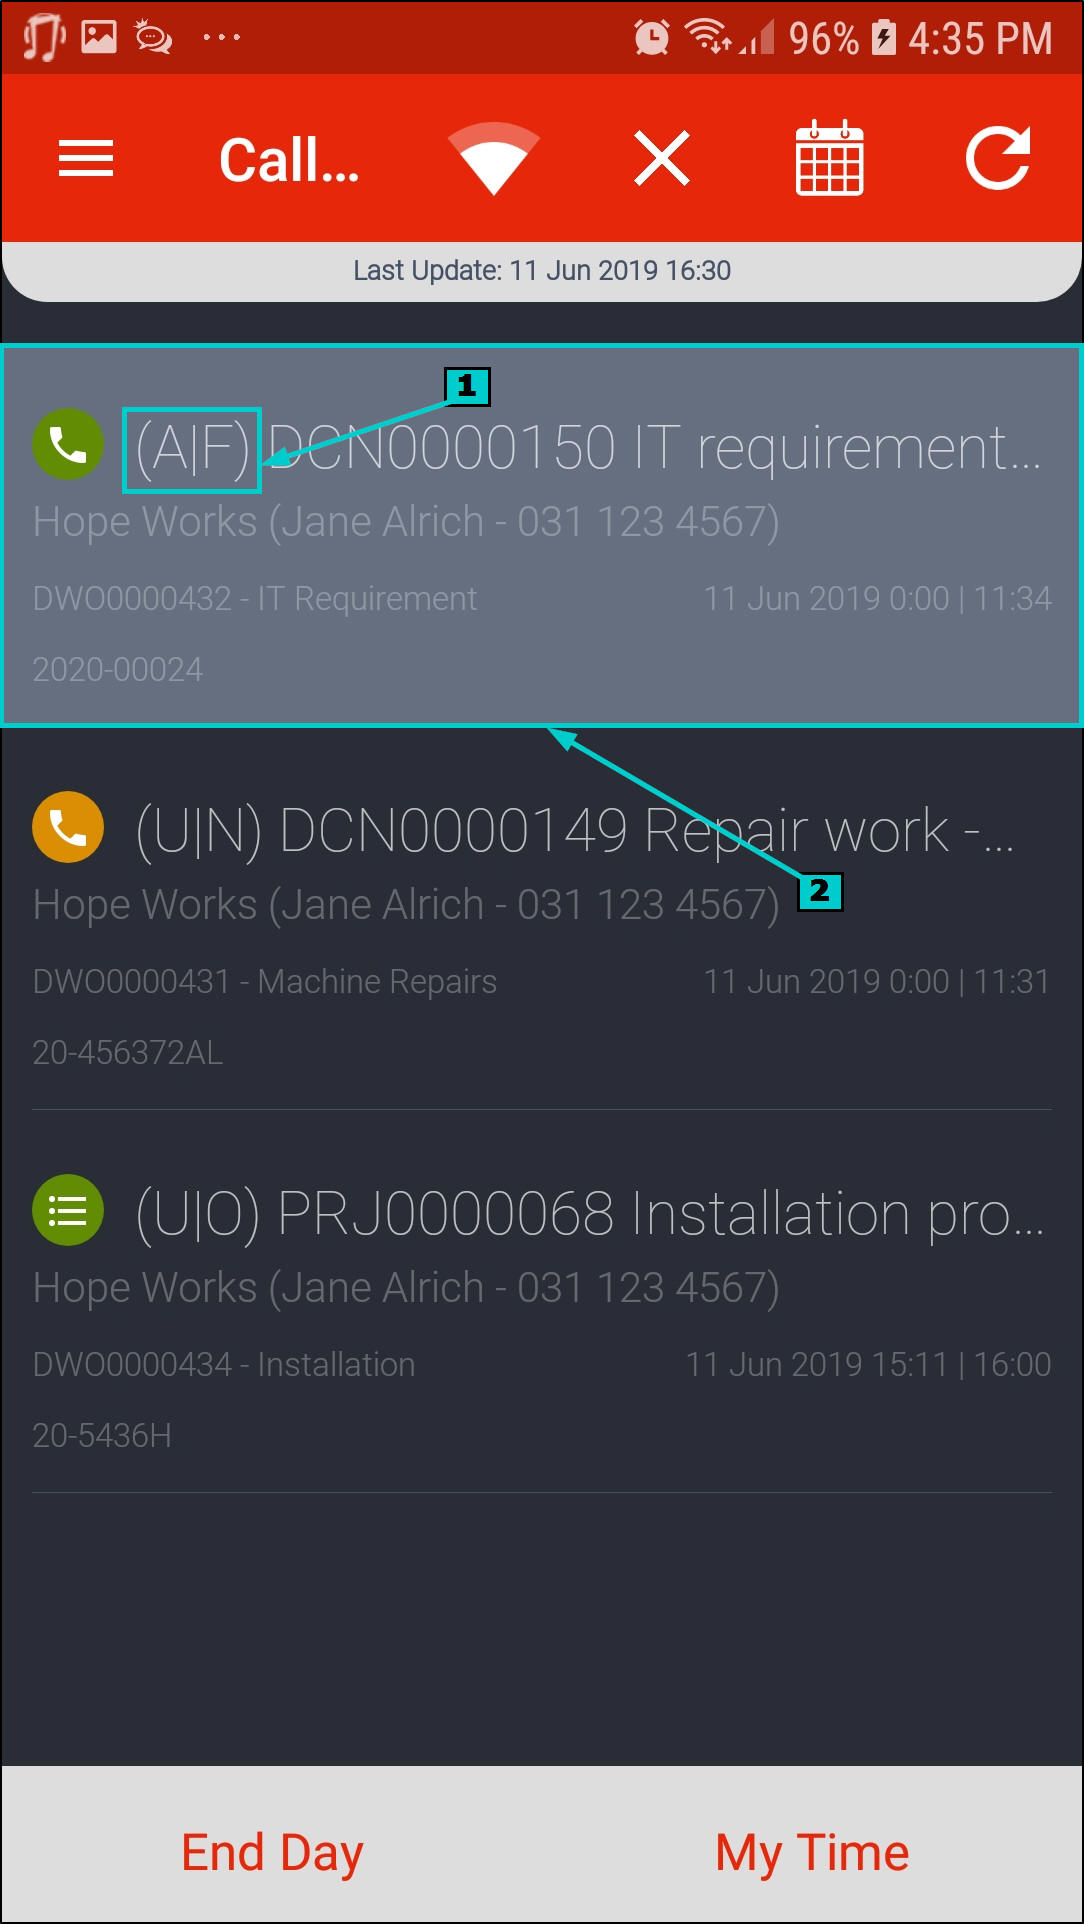
- If a work order linked to a call has been accepted - you will see the status as;
- (A|F) - Accepted | In progress
- and the colour will be grey.
- Sometimes the status displays as (A|N) - Accepted | New but changes as soon as the screen is refreshed to (A|F).
- The call will be in Status - In Progress in the Call Listing Screen in BPO.
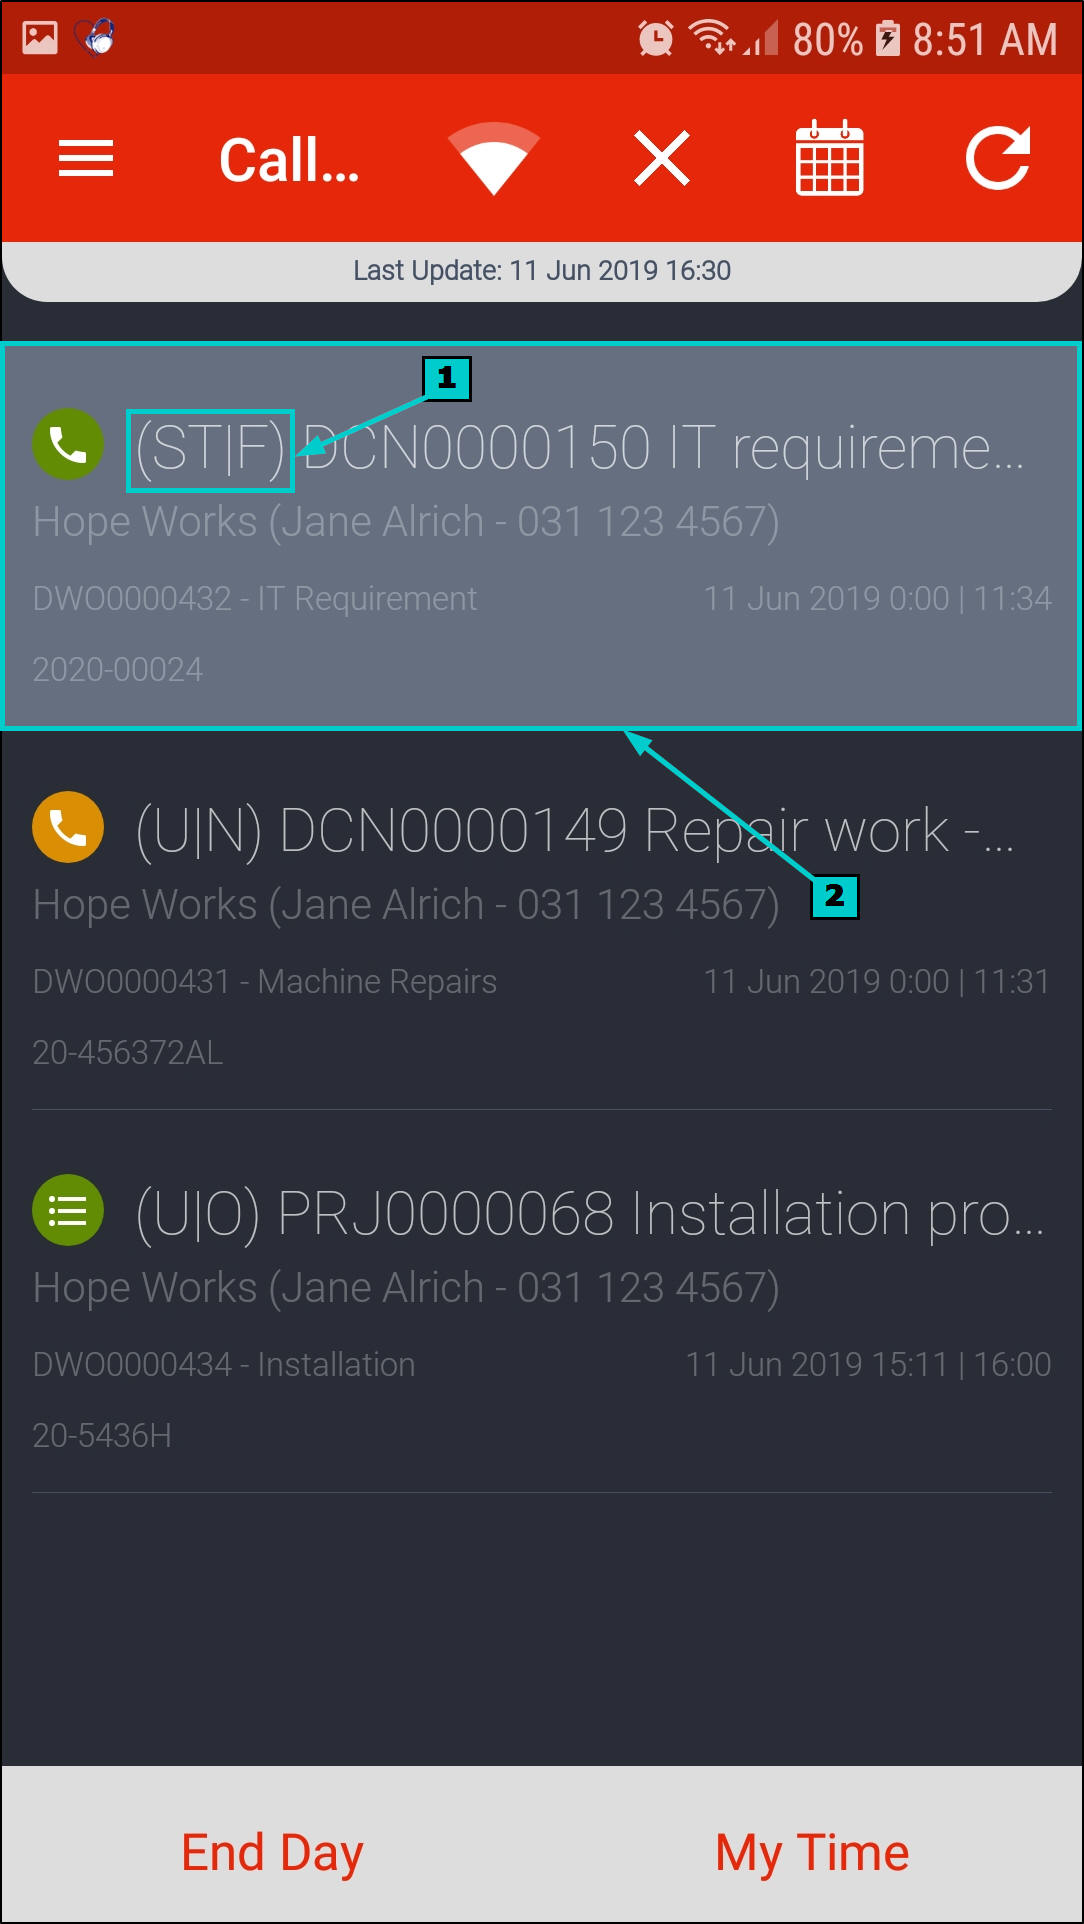
- If a work order is linked to a call and start travel has been selected - you will see the status as;
- (ST|F) - Start Travel | In progress
- and the colour will be grey.
- The call will be in Status - In Progress in the Call Listing Screen in BPO.
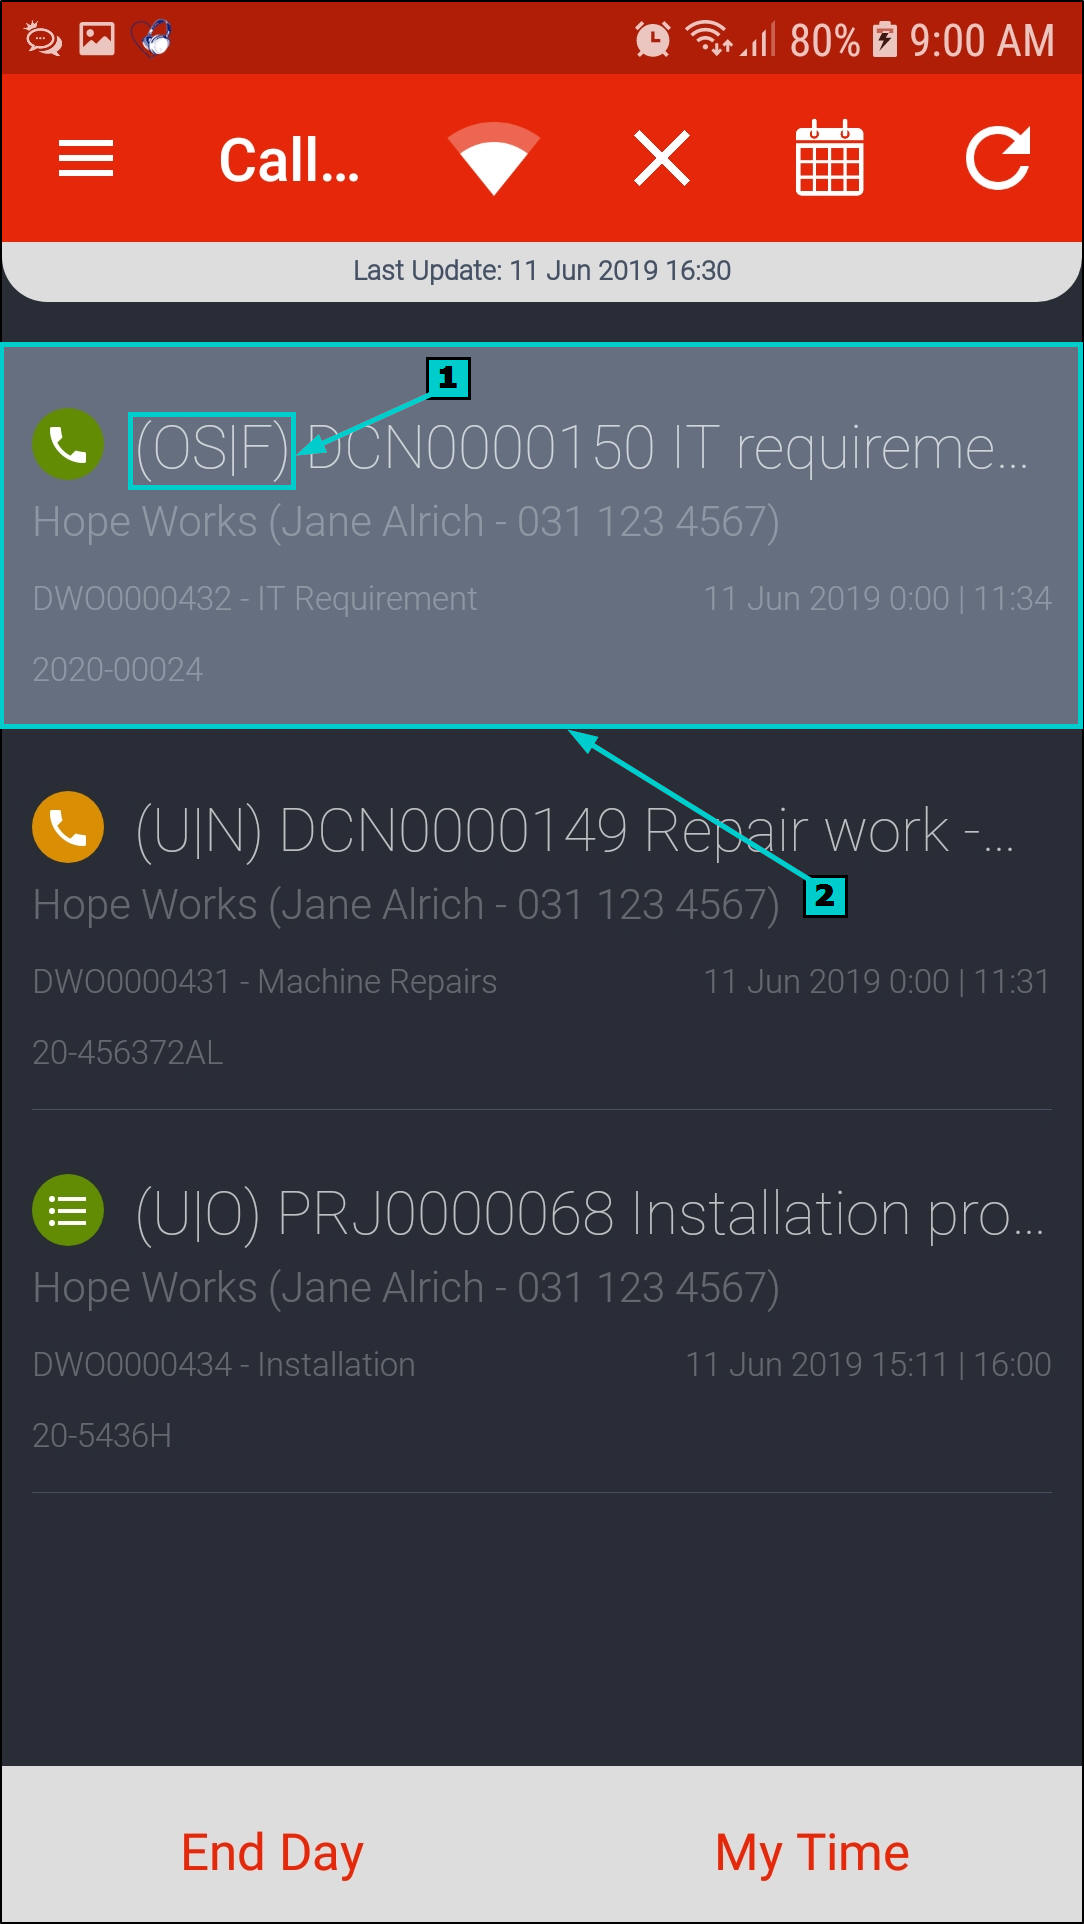
- If a work order is linked to a call and on site has been selected - you will see the status as;
- (OS|F) - On Site | In progress
- and the colour will be grey.
- The call will be in Status - In Progress in the Call Listing Screen in BPO.
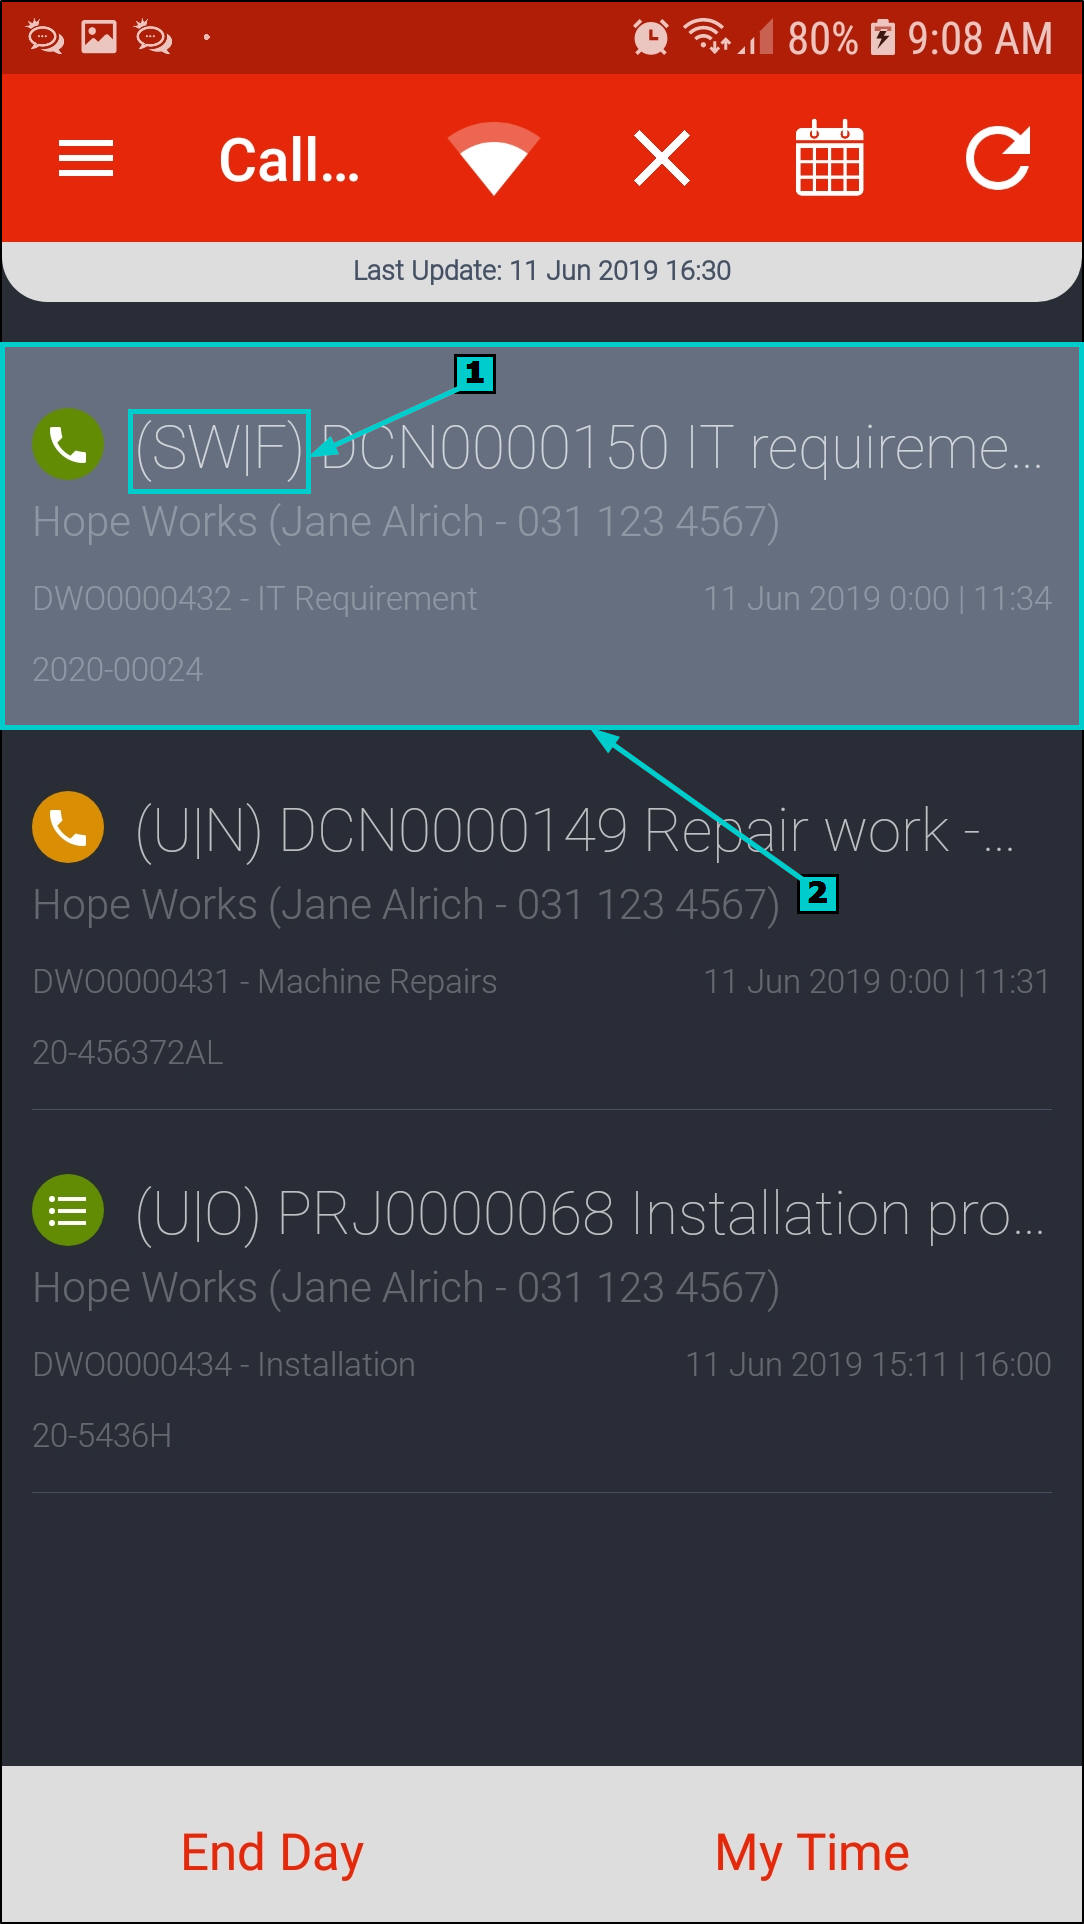
- If a work order is linked to a call and start work has been selected - you will see the status as;
- (SW|F) - Start Work | In progress
- and the colour will be grey.
- The call will be in Status - In Progress in the Call Listing Screen in BPO.
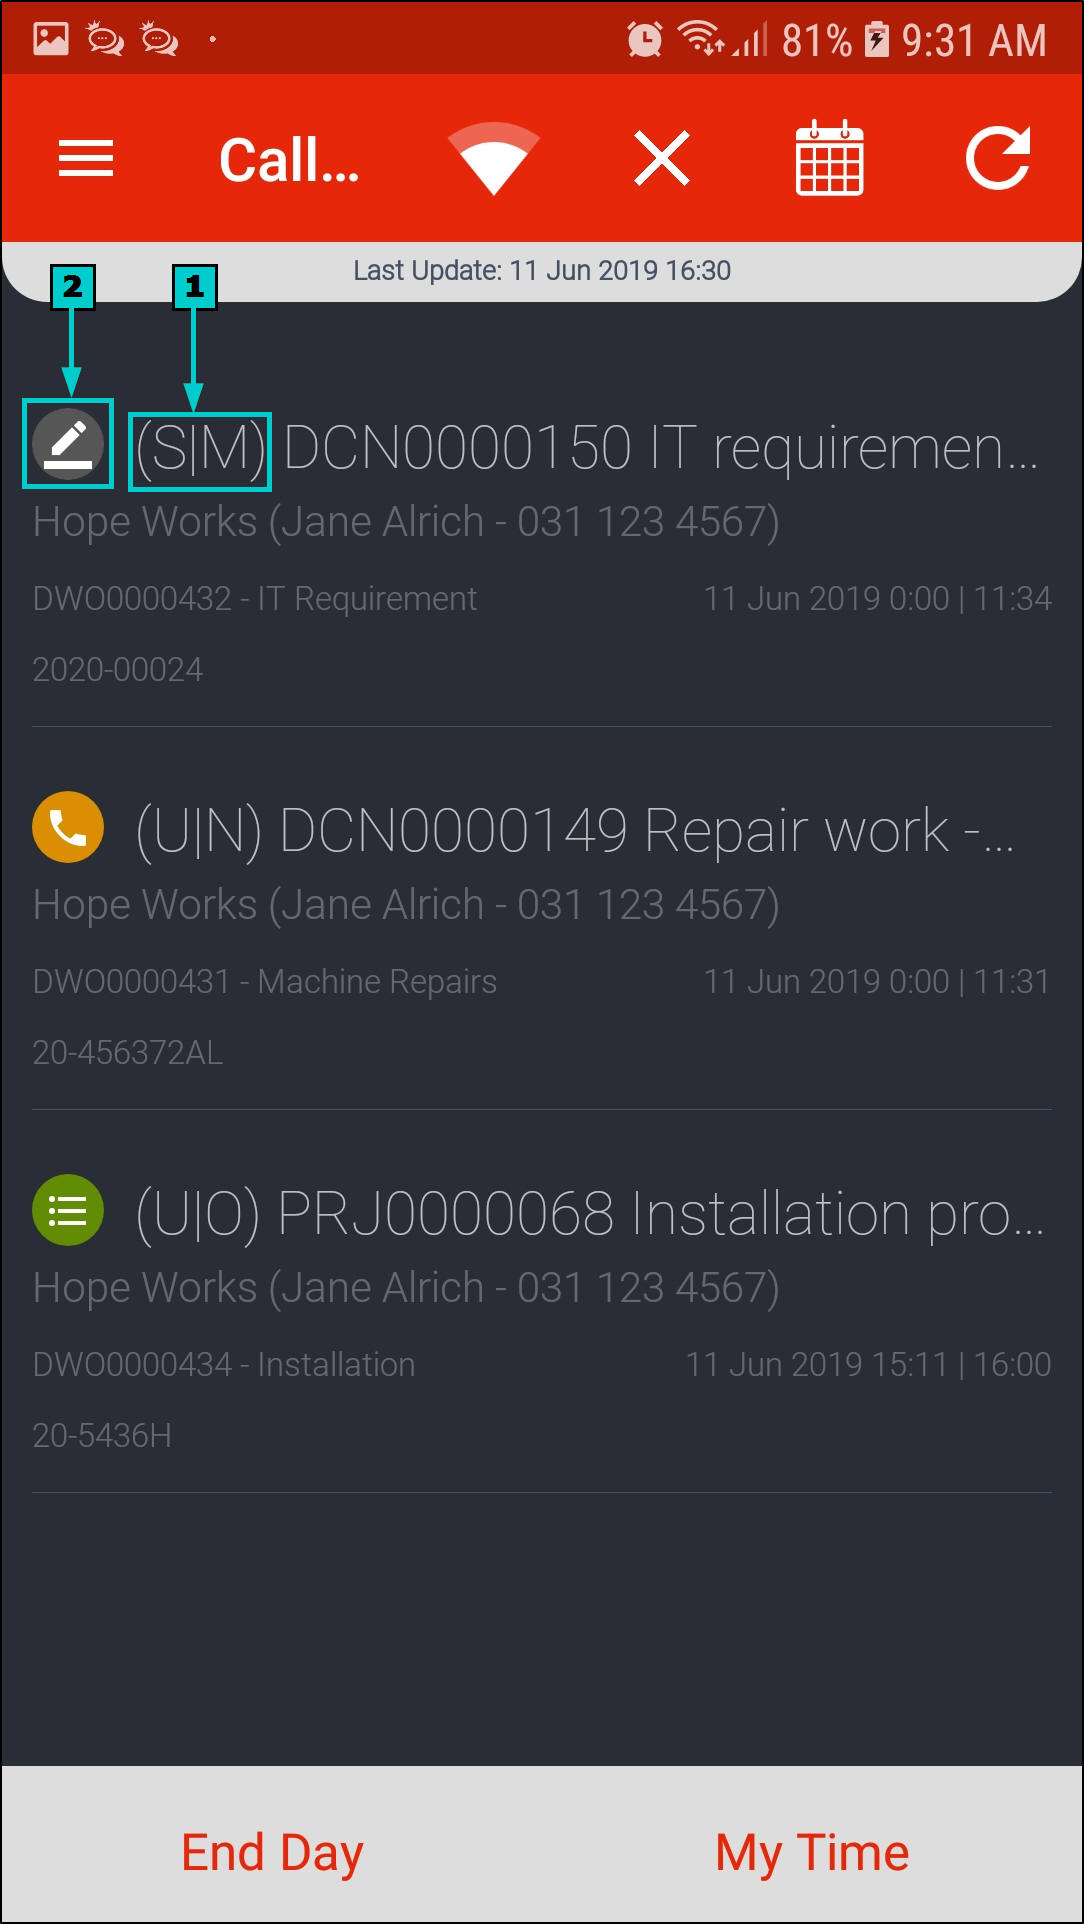
- If a work order is linked to a call and end work has been selected without signing off the work - you will see the status as;
- (S|M) - Awaiting Signature | Complete
- and a signature icon will be displayed and the work info circle will be grey.
- The call will be in Status - Complete in the Call Listing Screen in BPO.
- Note 1: Only a call / project that was ended as Resolved will be displayed in this status.
- Note 2: If work was ended as Unresolved or Unresolved Client without signing off the work, the call / project will be removed from the screen immediately.
- If a work order is linked to a call and work has been ended and signed off - you will see the status as;
- (EW|M) - End Work | Complete
- and the work info circle colour around the call icon will be grey.
- The call will be in Status - Complete in the Call Listing Screen in BPO.
- Note 1: If work was ended as Resolved, the call / project will remain on the technicians list until the following day, unless closed from BPO the same day.
- Note 2: If work was ended as Unresolved or Unresolved Client, the call / project will be removed from the screen immediately or when the the screen is refreshed.
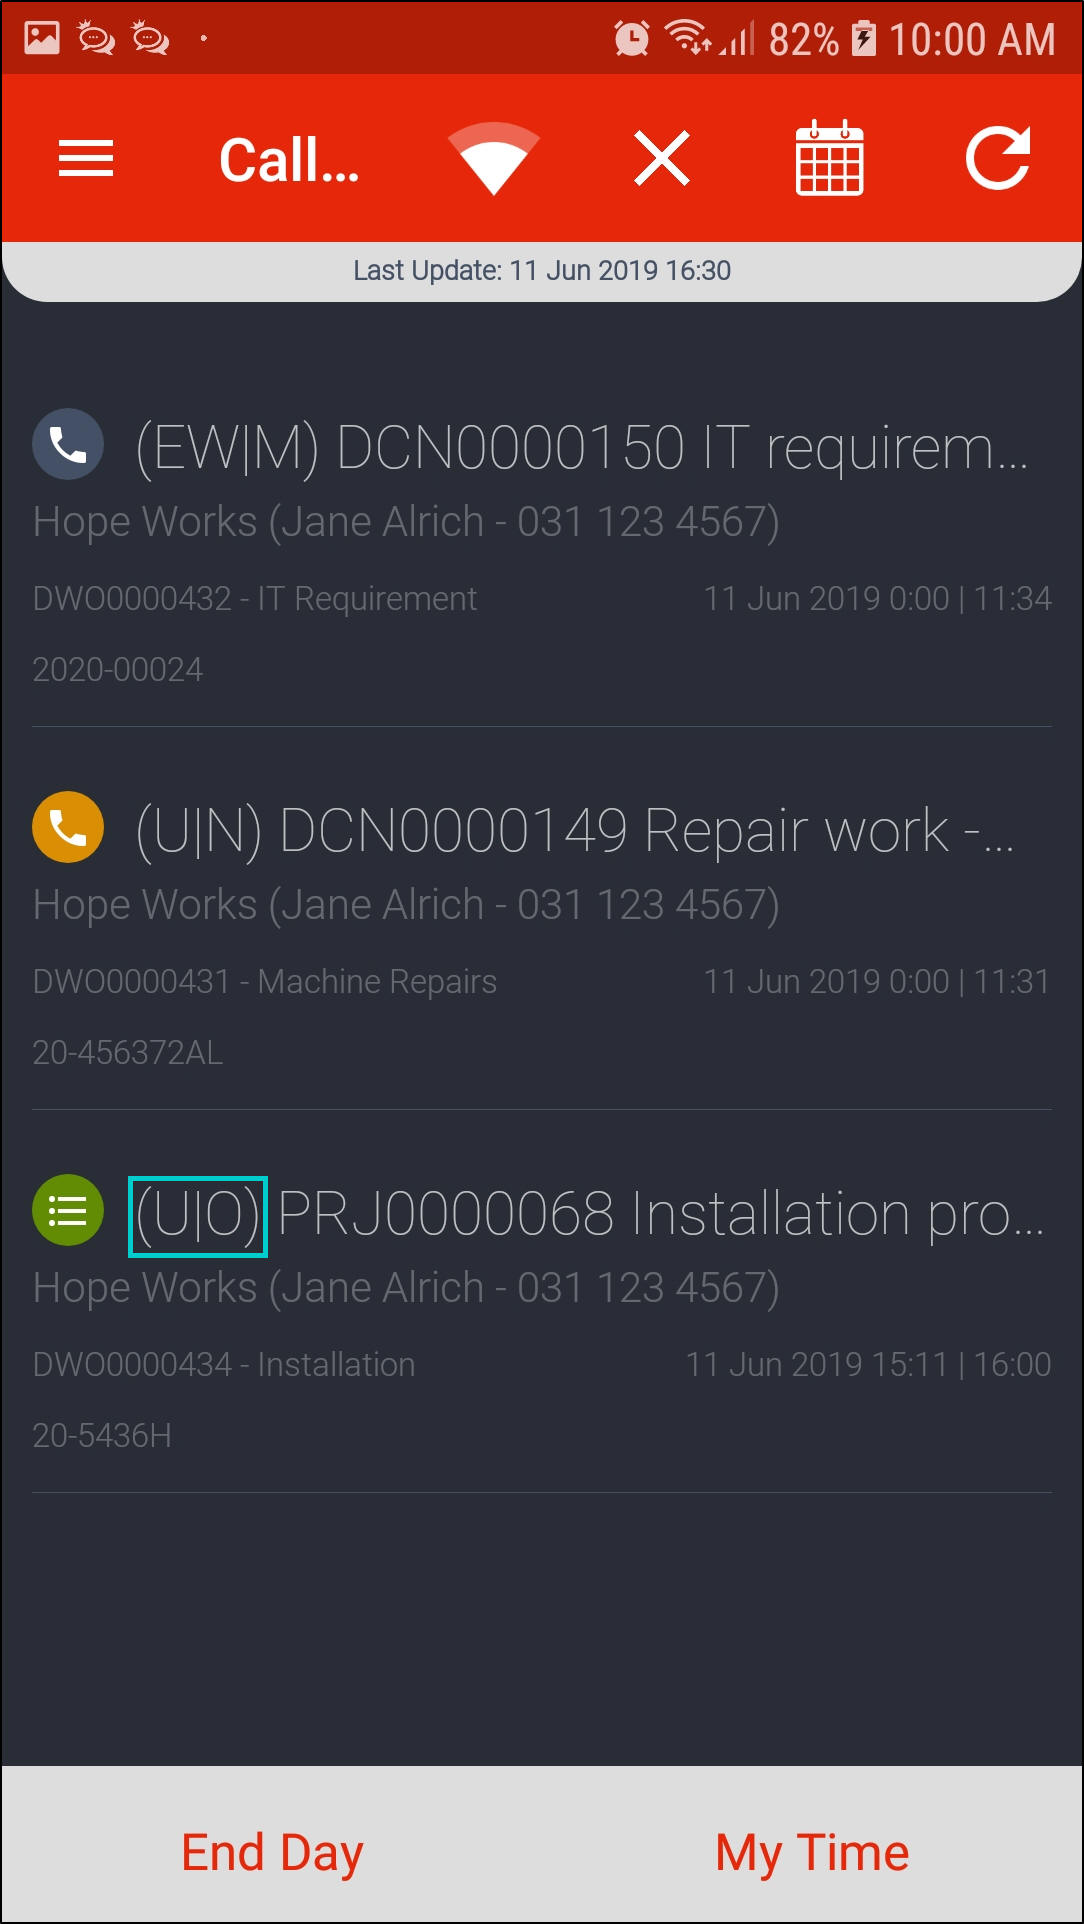
Project Status
- If a work order linked to a project is awaiting acceptance - you will see the status as;
- (U|O) - Awaiting Acceptance | Open
- The project work order will be in Status - Open in BPO.
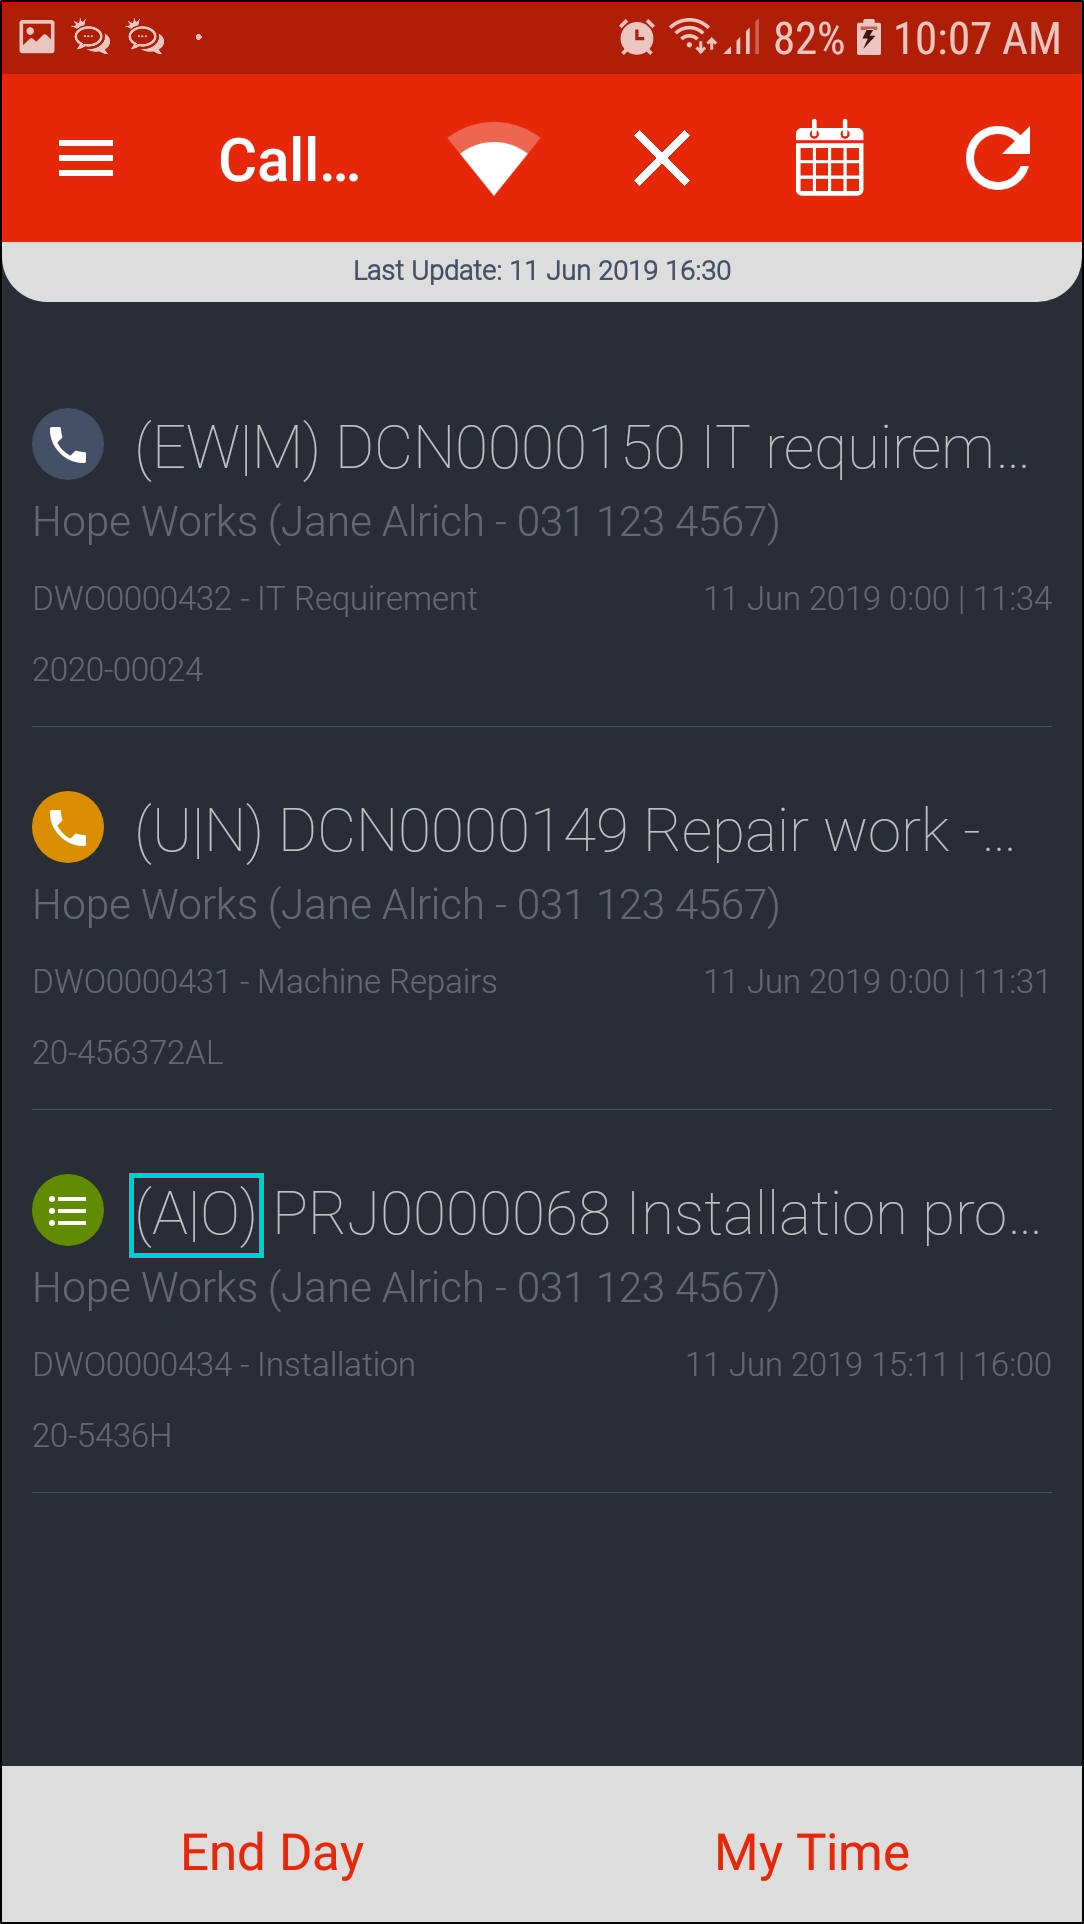
- If a work order linked to a project has been accepted - you will see the status as;
- (A|O) - Accepted | Open
- The project work order will be in Status - Open in BPO.
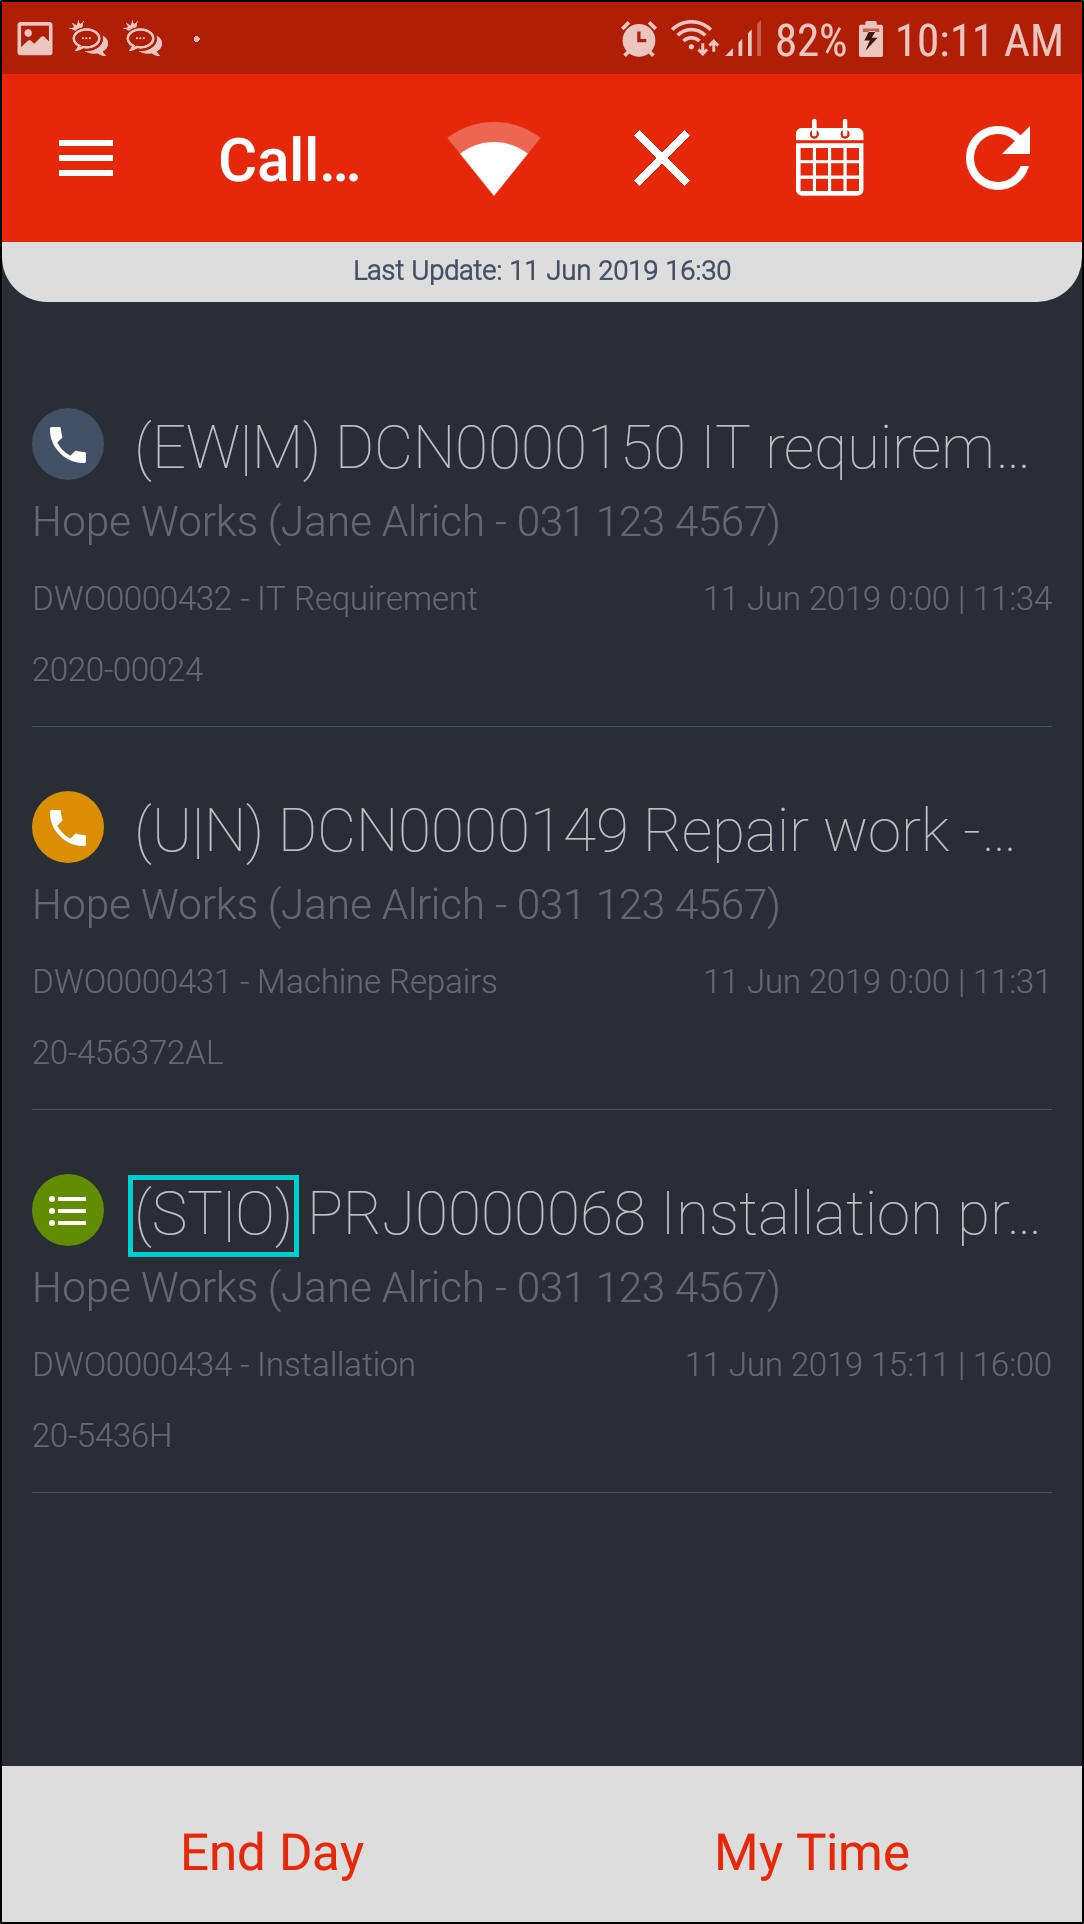
- If a work order is linked to a project and start travel has been selected - you will see the status as;
- (ST|O) - Start Travel | Open
- The project work order will be in Status - Open in BPO.
- If a work order is linked to a project and on site has been selected - you will see the status as;
- (OS|O) - On Site | Open
- The project work order will be in Status - Open in the BPO.

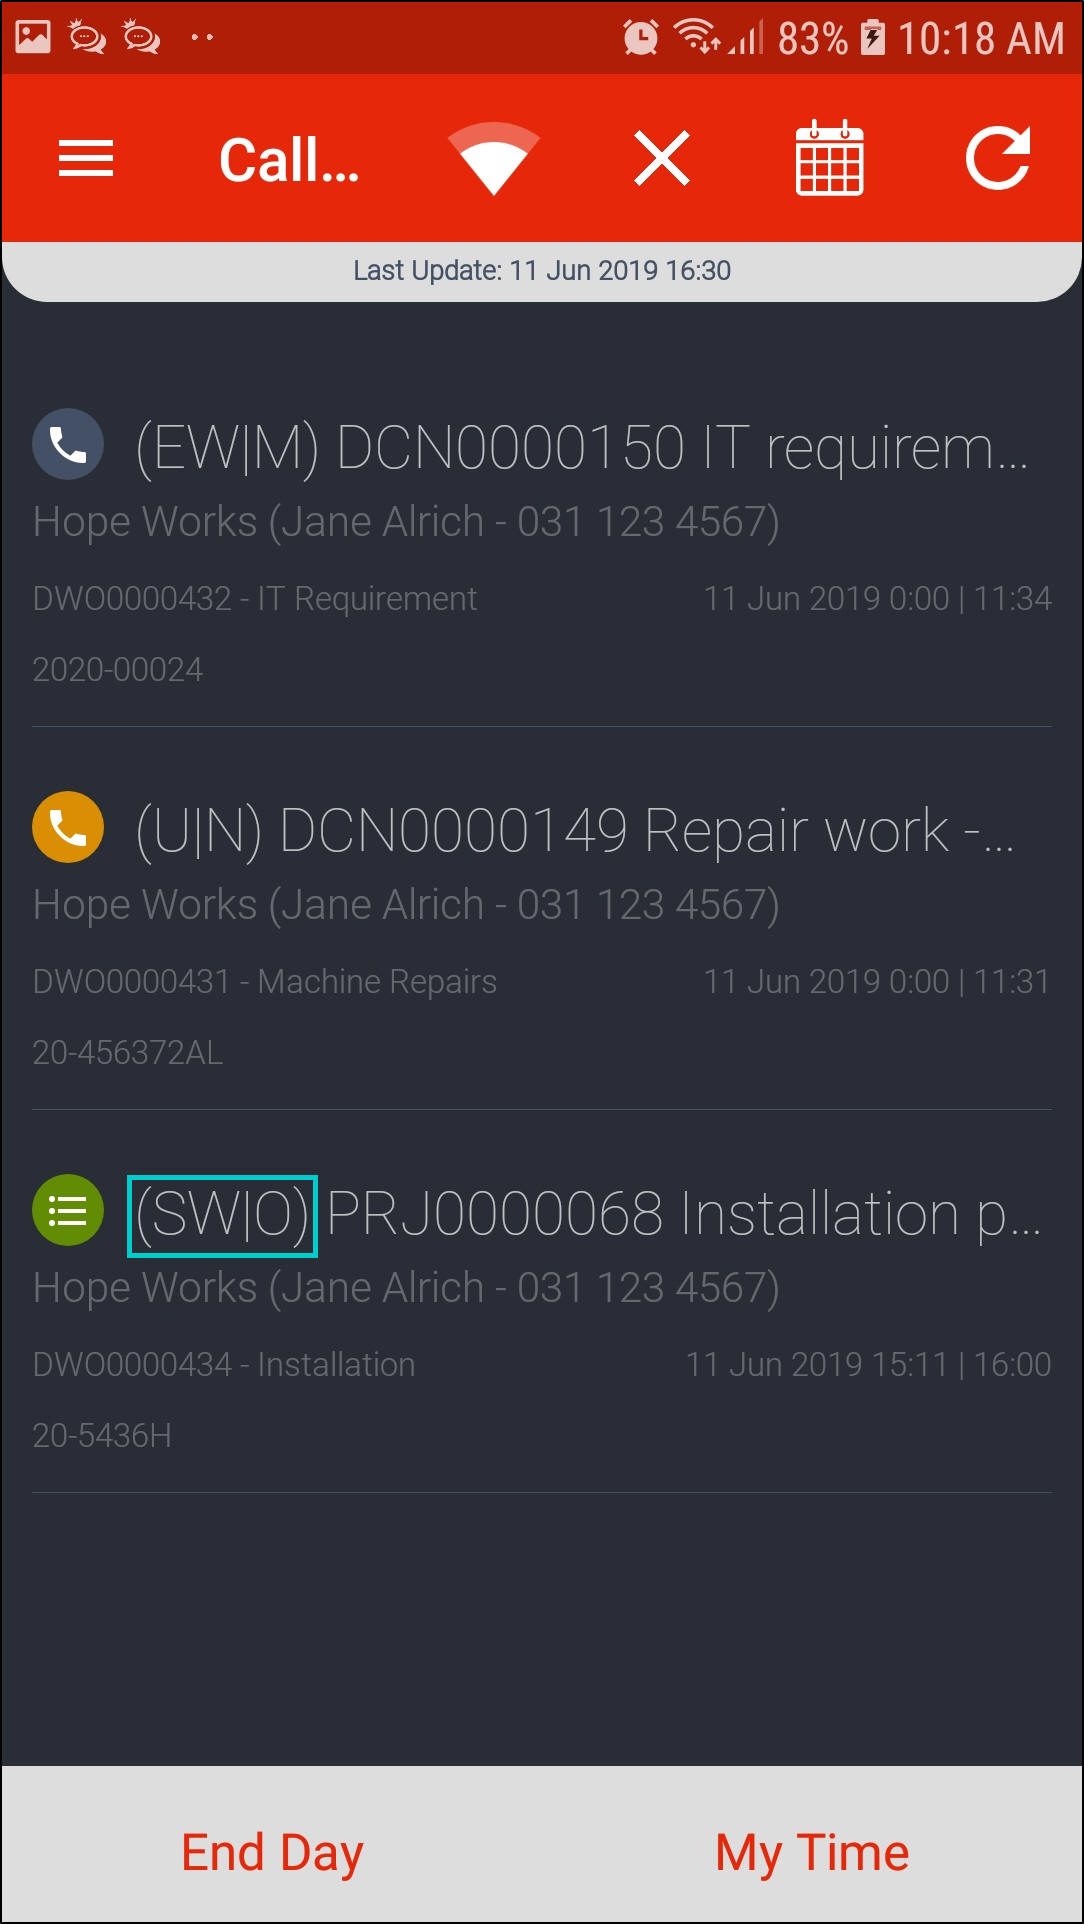
- If a work order is linked to a project and start work has been selected - you will see the status as;
- (SW|O) - Start Work | Open
- The project work order will be in Status - Open in BPO.
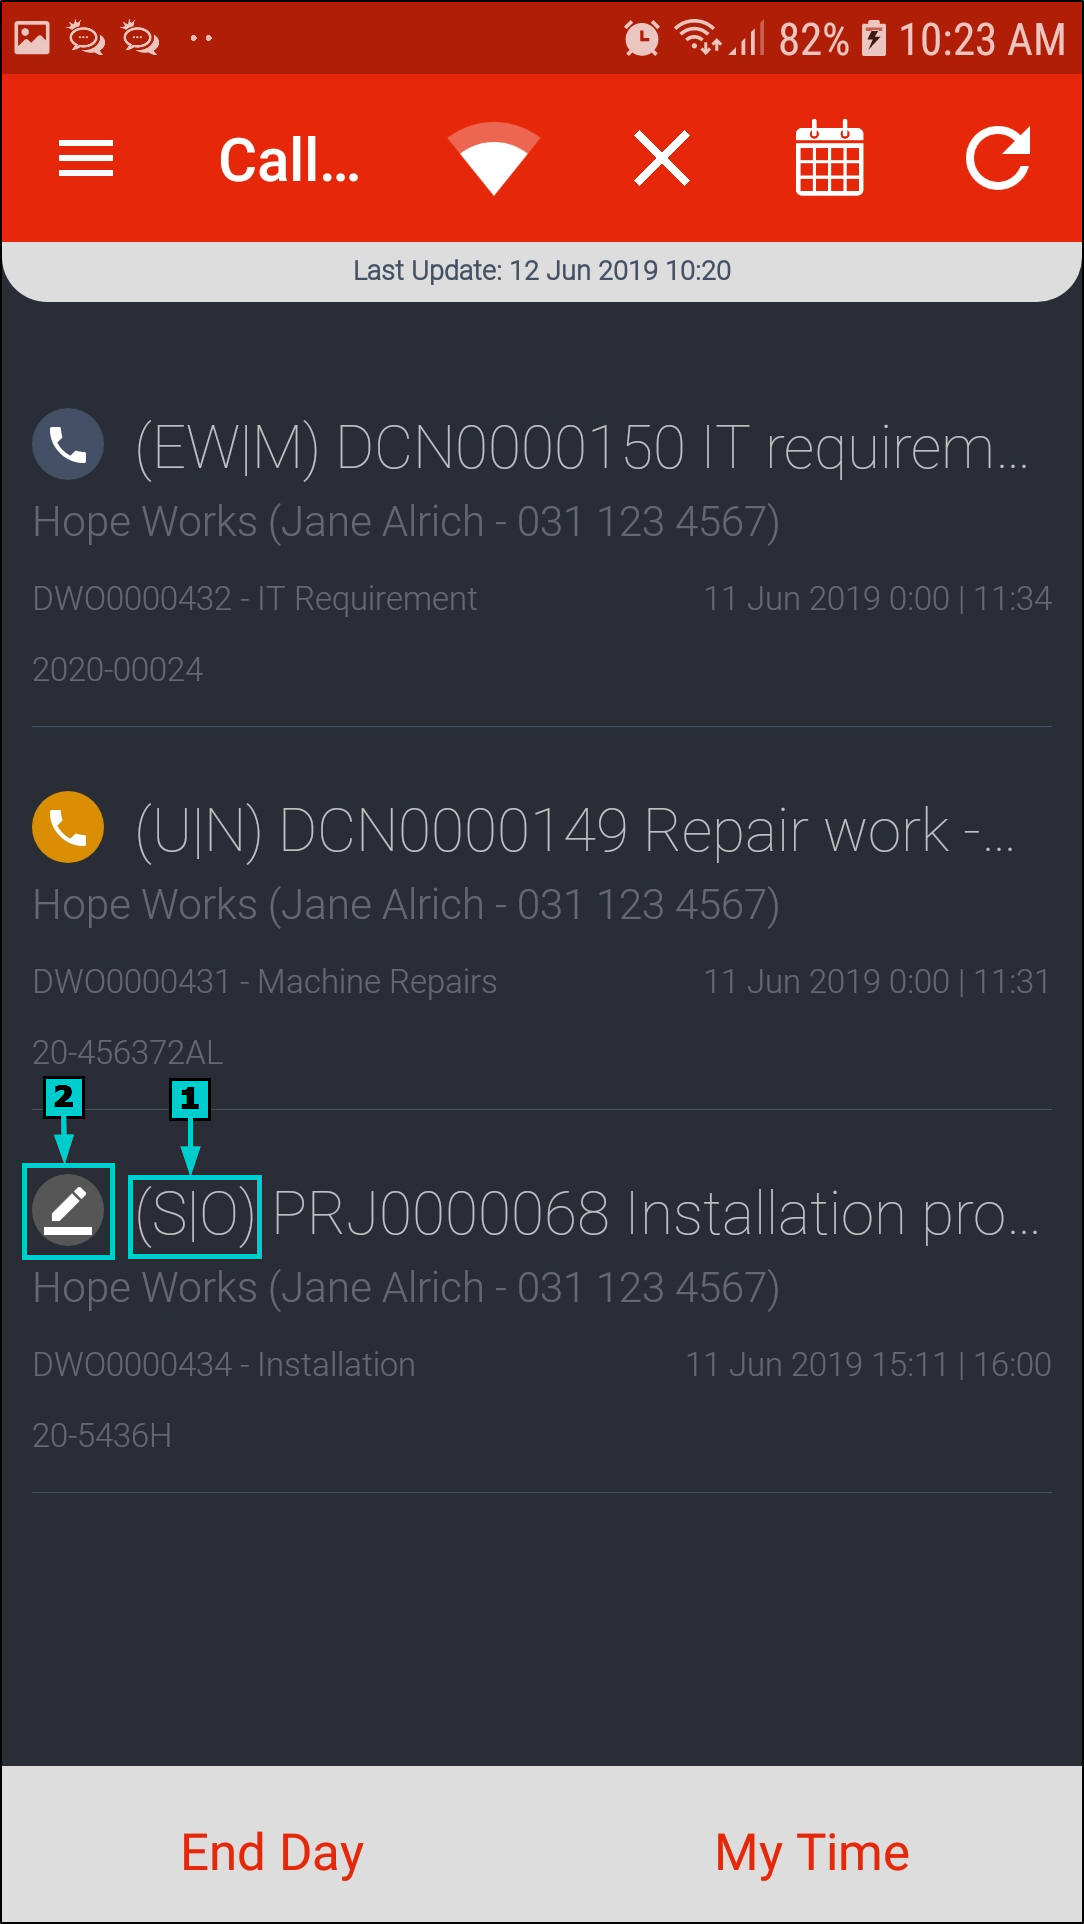
- If a work order is linked to a project and work has been ended as resolved without signing off the work - you will see the status as;
- (S|O) - Awaiting Signature | Open
- and a signature icon will be displayed and the work info circle will be grey.
- The project work order will be in Status - Open in BPO.
- Note 1: Only a call / project that was ended as Resolved will be displayed in this status.
- Note 2: If work was ended as Unresolved or Unresolved Client without signing off the work, the call / project will be removed from the screen immediately.
- If a work order is linked to a project and work has been ended as resolved and signed off - you will see the status as;
- (EW|M) - End Work | Complete
- and the work info circle colour around the project icon will be grey.
- The project work order will be in Status - Complete in BPO.
- Note 1: If work was ended as Resolved, the call / project will remain on the technicians list until the following day, unless closed from BPO the same day.
- Note 2: If work was ended as Unresolved or Unresolved Client, the call / project will be removed from the screen immediately or when the the screen is refreshed.

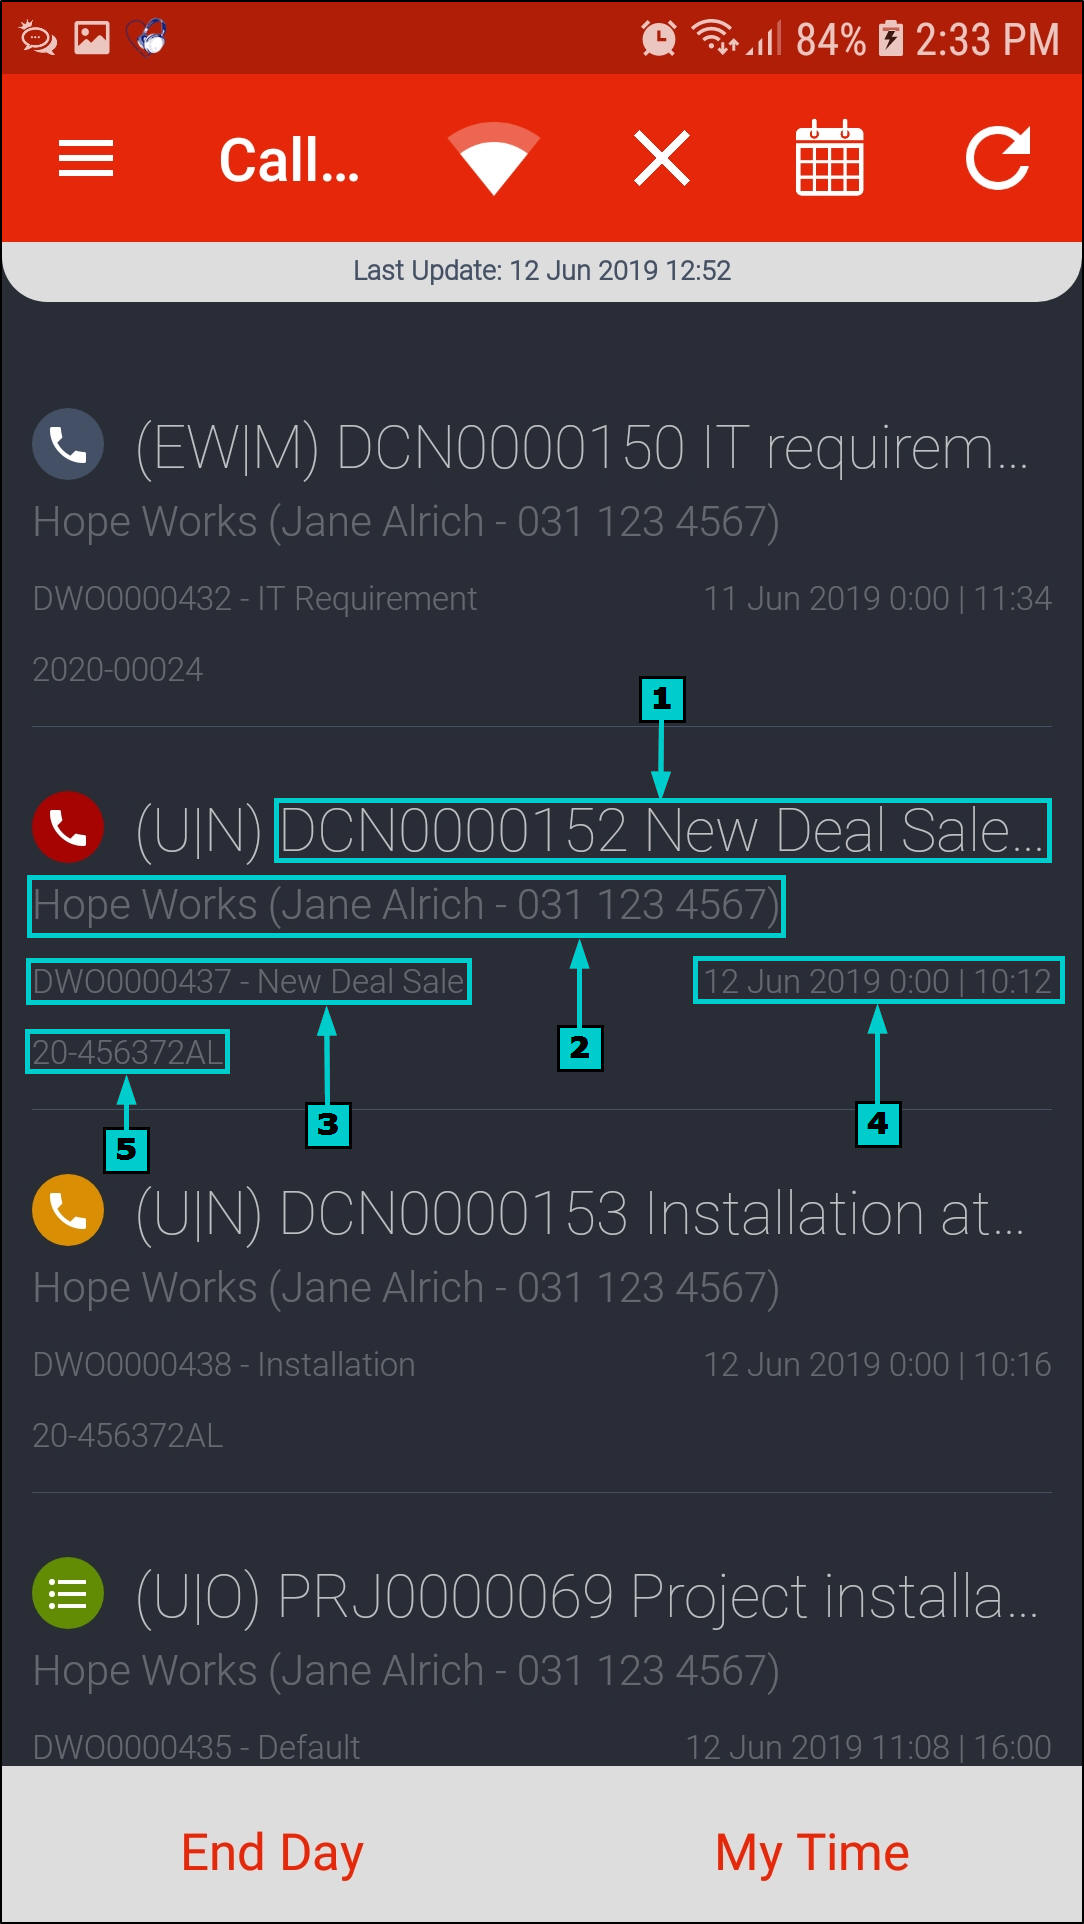
Assigned Call / Project Details - Calls List Screen
- This shows the call / project number and description.
- This shows the customer name, customer contact person and phone number.
- This shows the work order number and the work order type.
- This shows the scheduled start date and time.
- This shows the serial number linked to the call / project work order.
- To view an assigned project / call, click on the project / call you want to view.
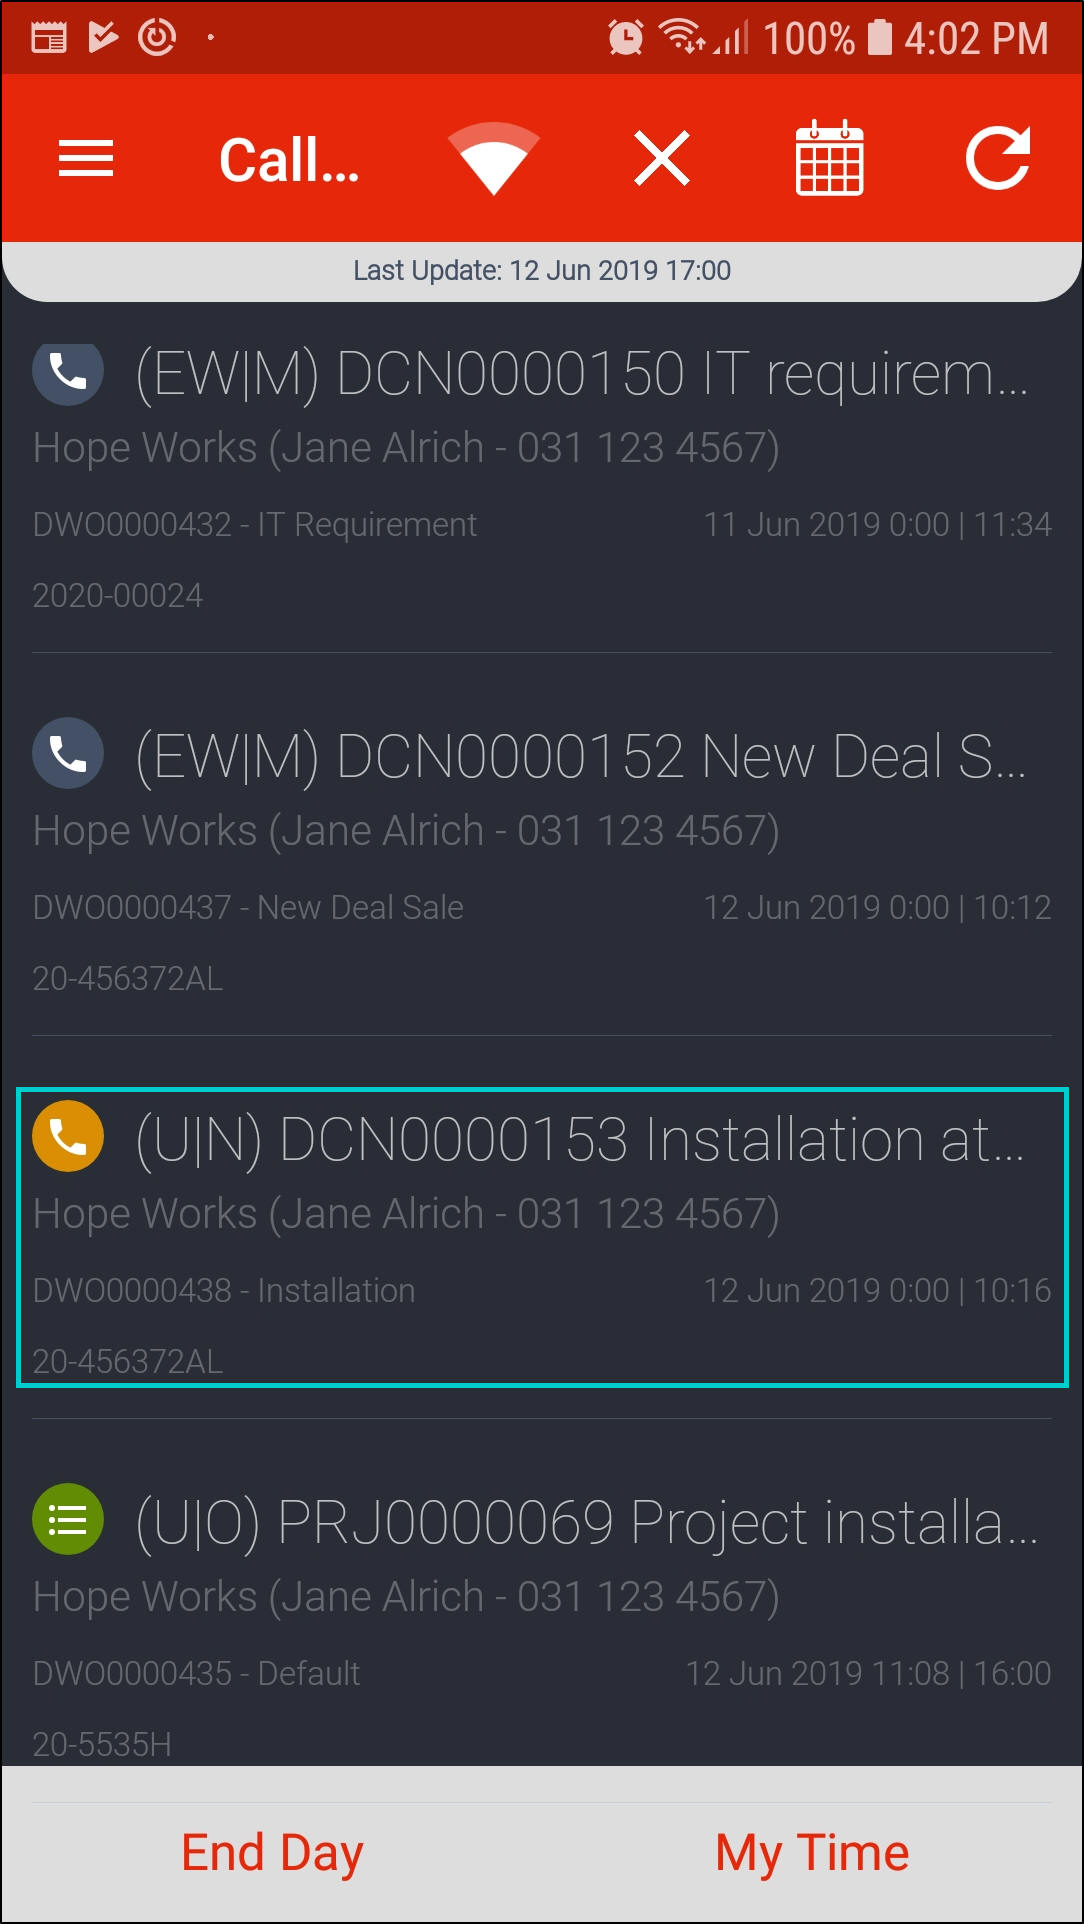
- The Call screen will be displayed.
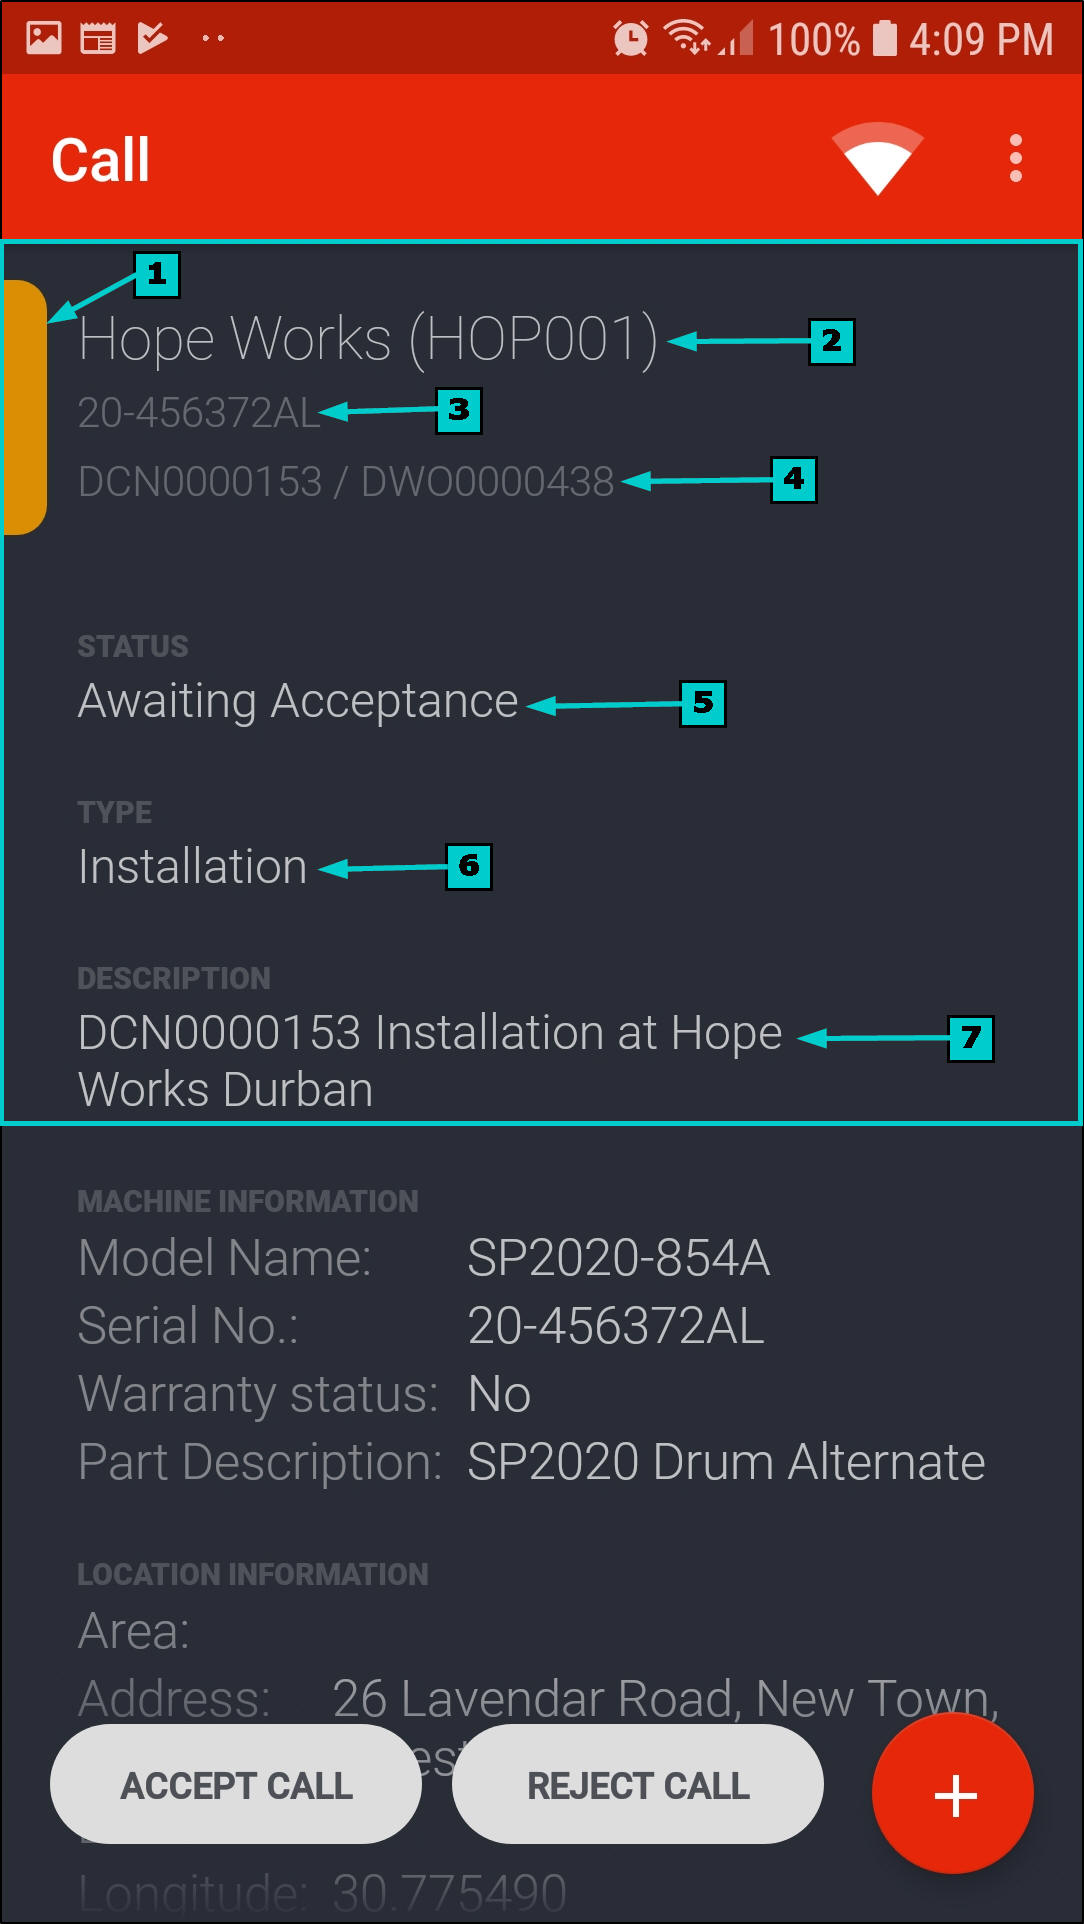
Call / Project Details - Call Screen
- Work Info Bar: This shows the priority of the call / project.
- Customer Details: This shows the Customer Name and Customer Code.
- Machine Details: This shows the Serial Number linked to the project / call.
- Call / Project Details: This shows the call / project number and the call / project work order number
- Status: This shows the status of the call / project.
- Type: This shows the call / project work order type.
- Description: This shows the call / project number and description.
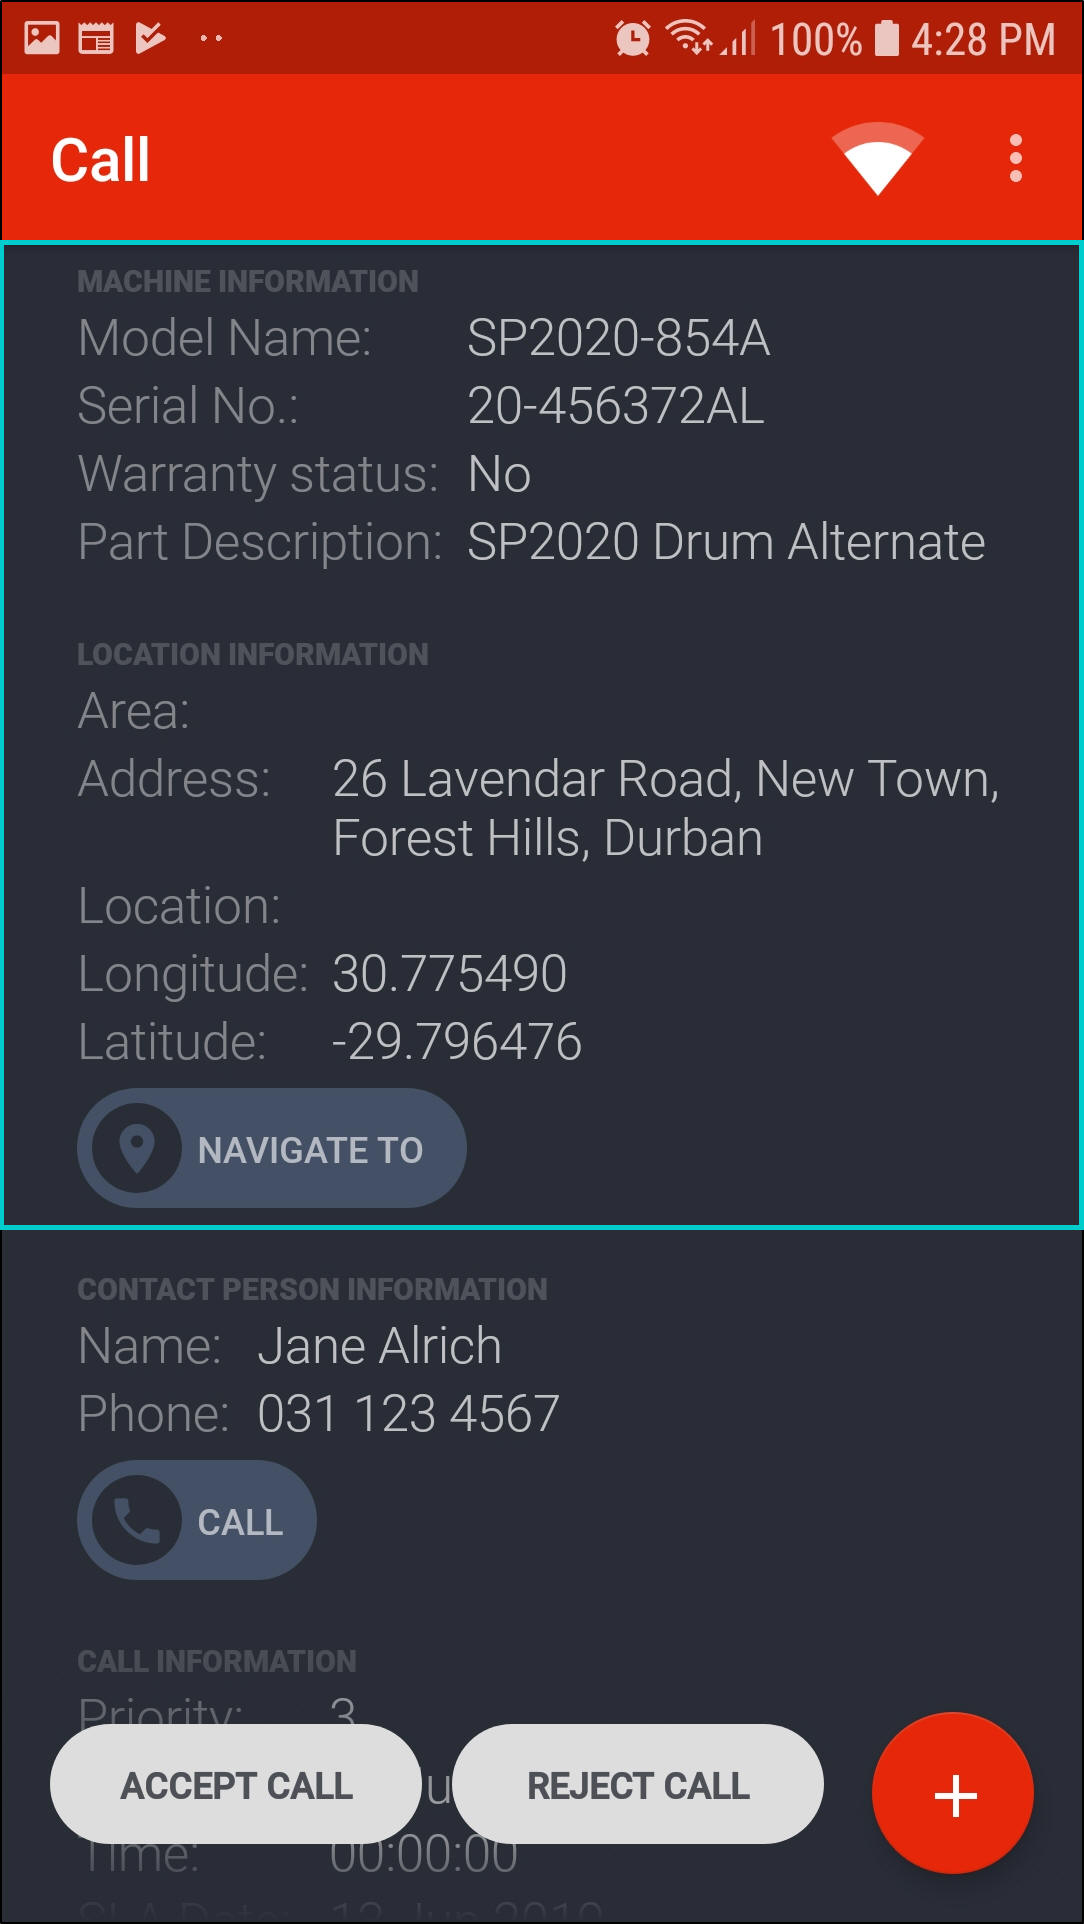
Machine Information
- Model Number: This shows the model number of the machine linked to this call / project.
- Serial Number: This shows the serial number of the machine linked to the call / project.
- Warranty Status: This shows whether the machine linked to the call / project is on warranty and if linked to a warranty whether the warranty is active or inactive.
- Part Description: This is the description of the machine linked to the call / project.
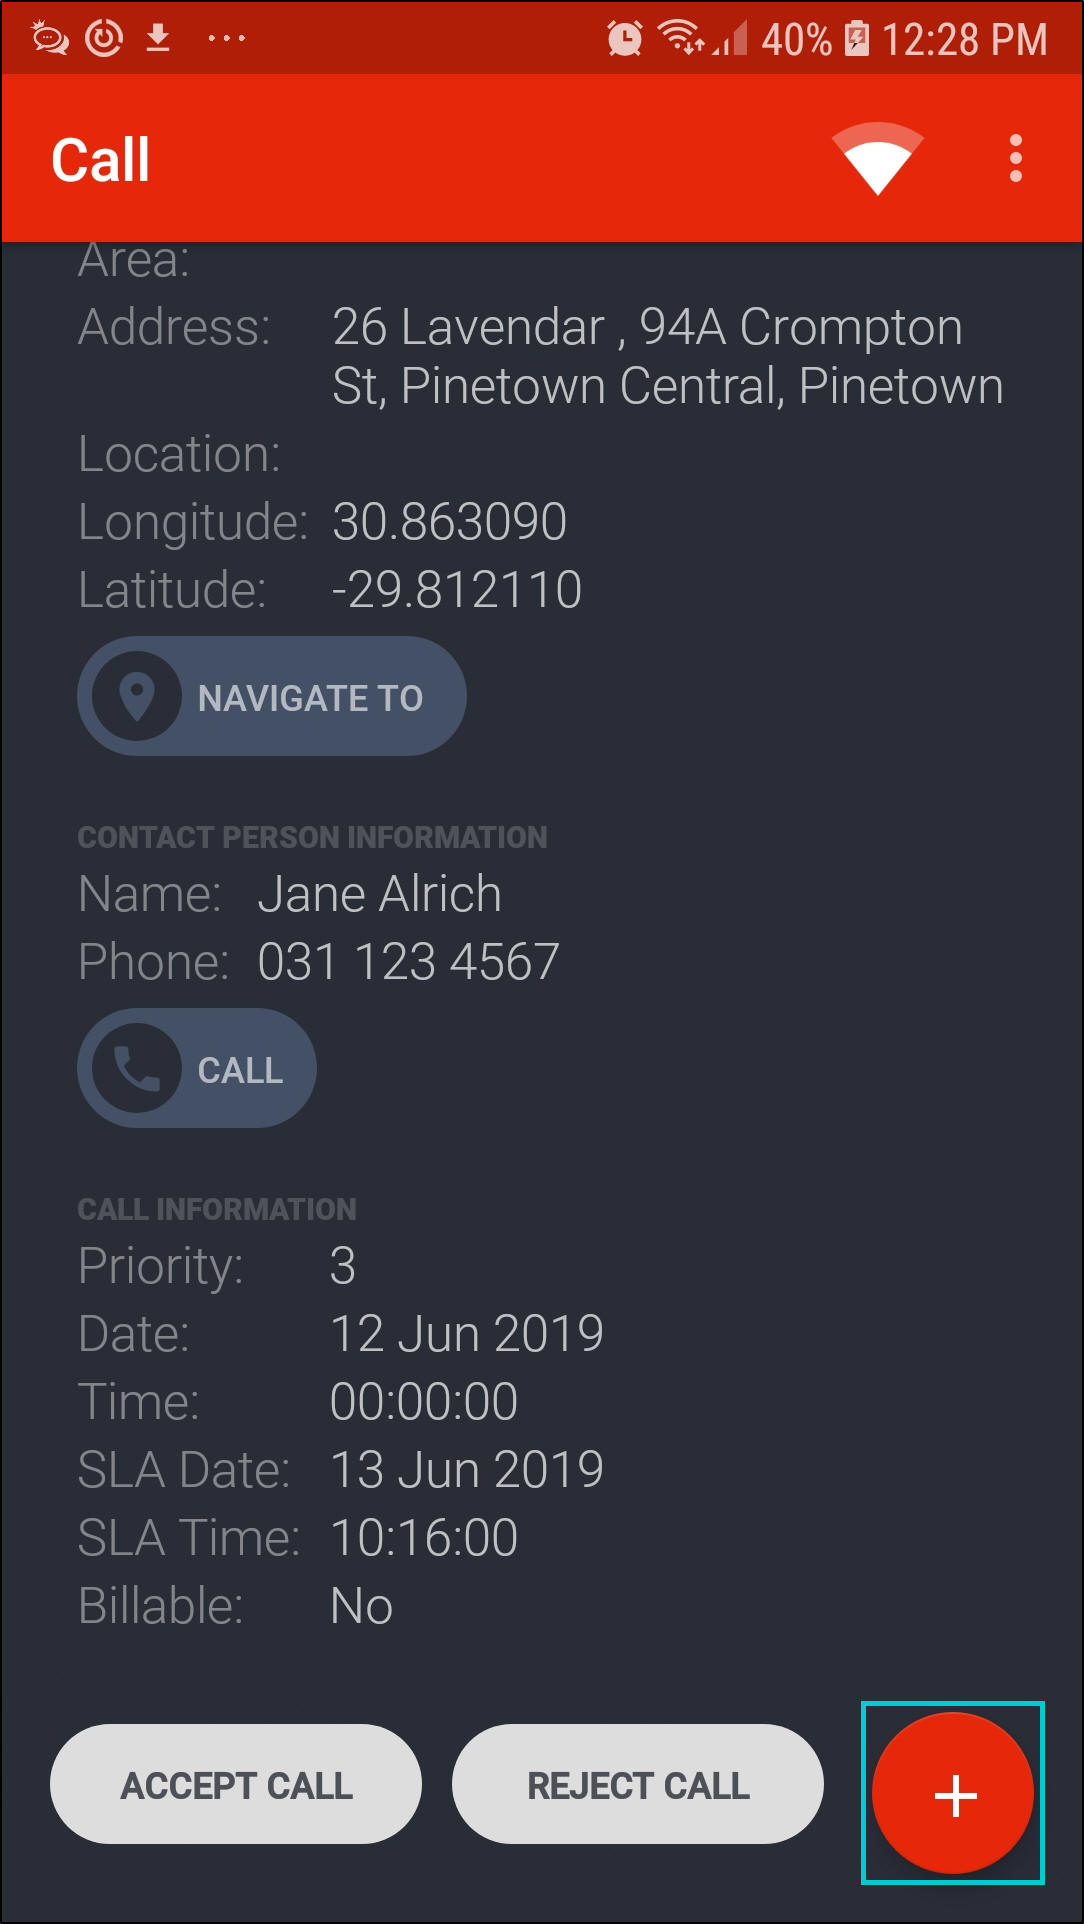
Location Description
- Address: This shows the customer address.
- Location: This shows where the machine is located.
- Longitude/Latitude: This shows global address of the customer location for easy navigation.
- Navigate To Icon: Click on this if you want to use the longitude / latitude points to navigate to the customer address using Google Maps etc. This works if a valid global address was captured in the Longitude / Latitude fields.
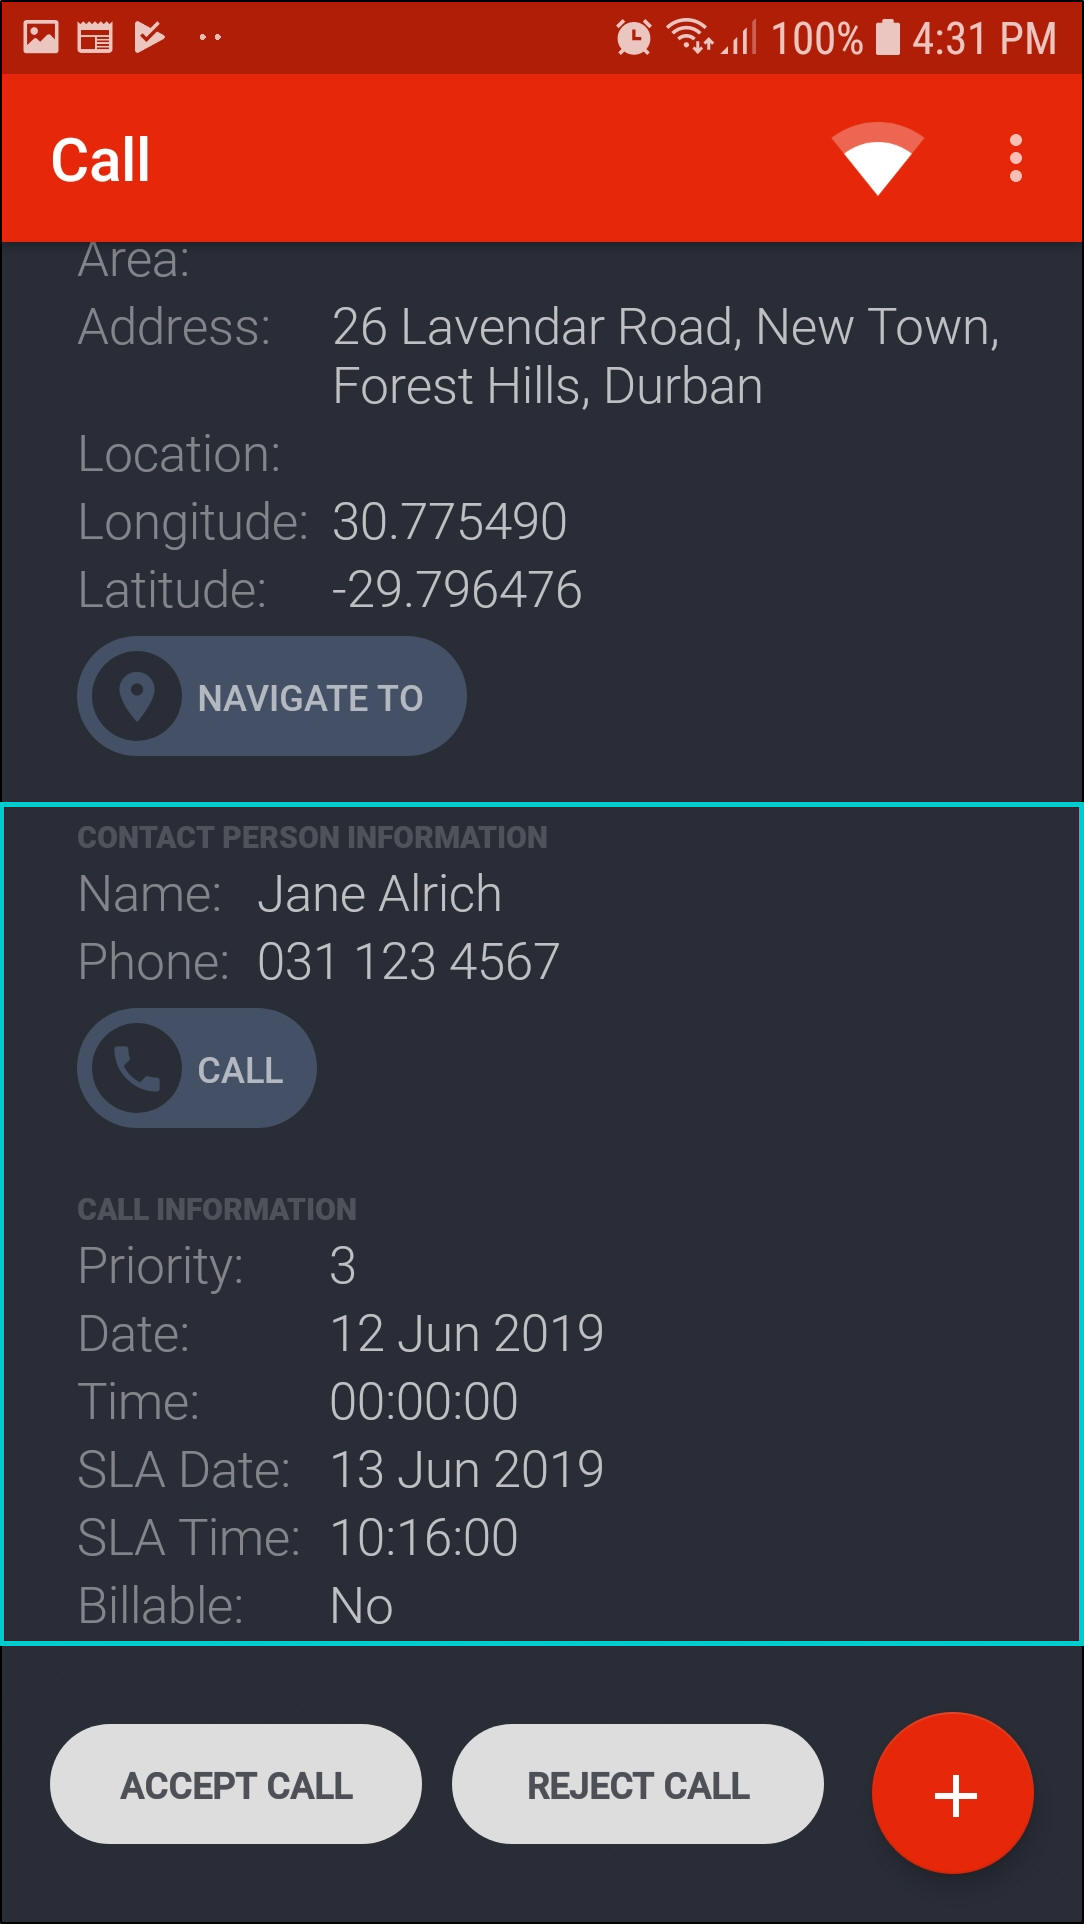
Contact Person Information
- Name: This is the customer contact person.
- Phone: This is the customer contact phone number.
- Call Icon: Click on this if you want to call the customer contact person. This only works if a valid phone number was captured in the Phone field.
Call Information
- Priority: This shows the priority of the call / project. High priority - 1 and Low Priority - 5.
- Date: This is the scheduled start date.
- Time: This is the scheduled start time.
- SLA Date: This is the scheduled end date.
- SLA Time: Scheduled end time.
- Billable: This shows whether the call is billable or non billable.
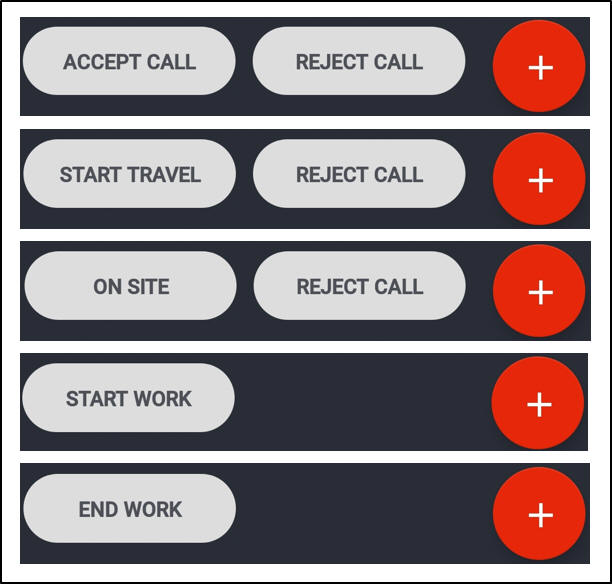
Action Buttons
- Action buttons will be displayed at the bottom of the screen, they will vary according to the status of the call / project selected;
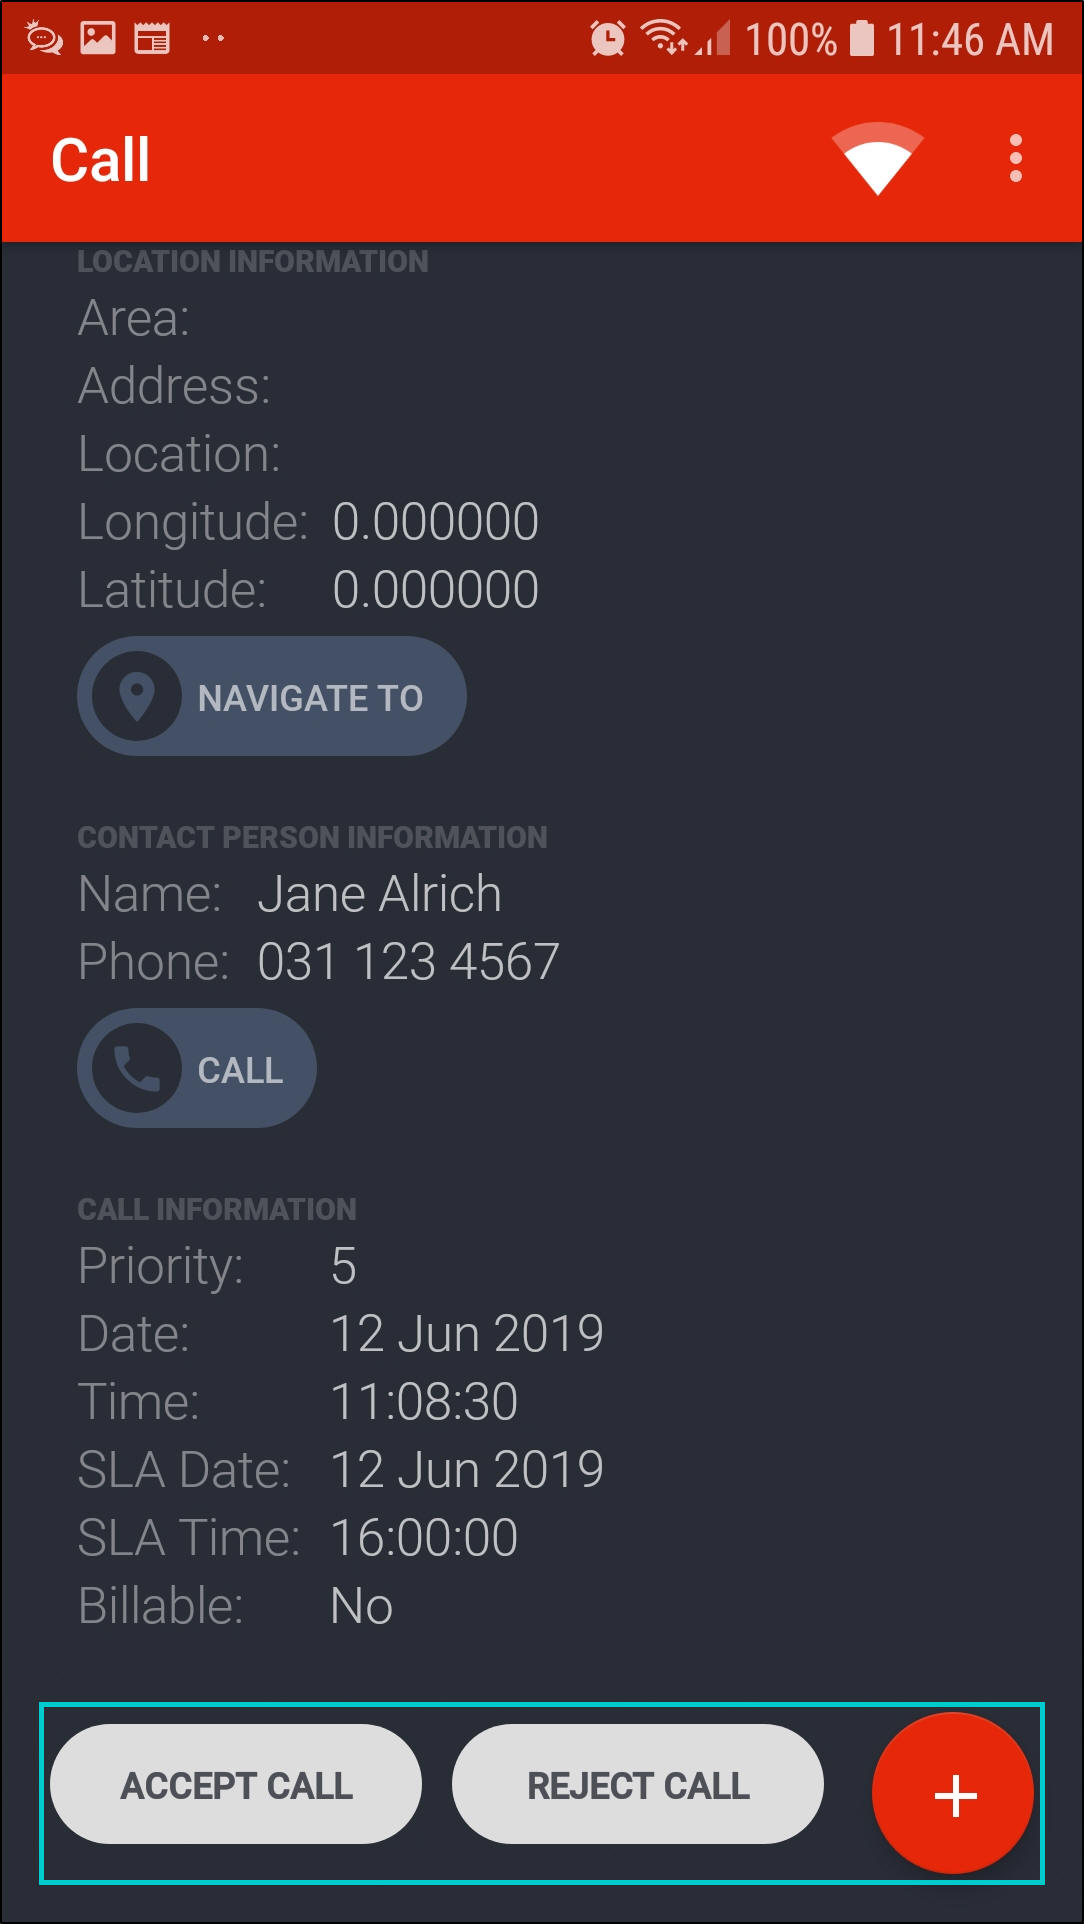
- Awaiting Acceptance Status: Accept Call | Reject Call buttons will be displayed.
- Accepted Status: Start Travel | Reject Call buttons will be displayed.
- Start Travel Status: On Site | Reject Call buttons will be displayed.
- On Site Status: Start Work button will be displayed.
- Start Work Status: End Work button will be displayed.
- Note: No action buttons are displayed in Awaiting Signature and End Work statuses.
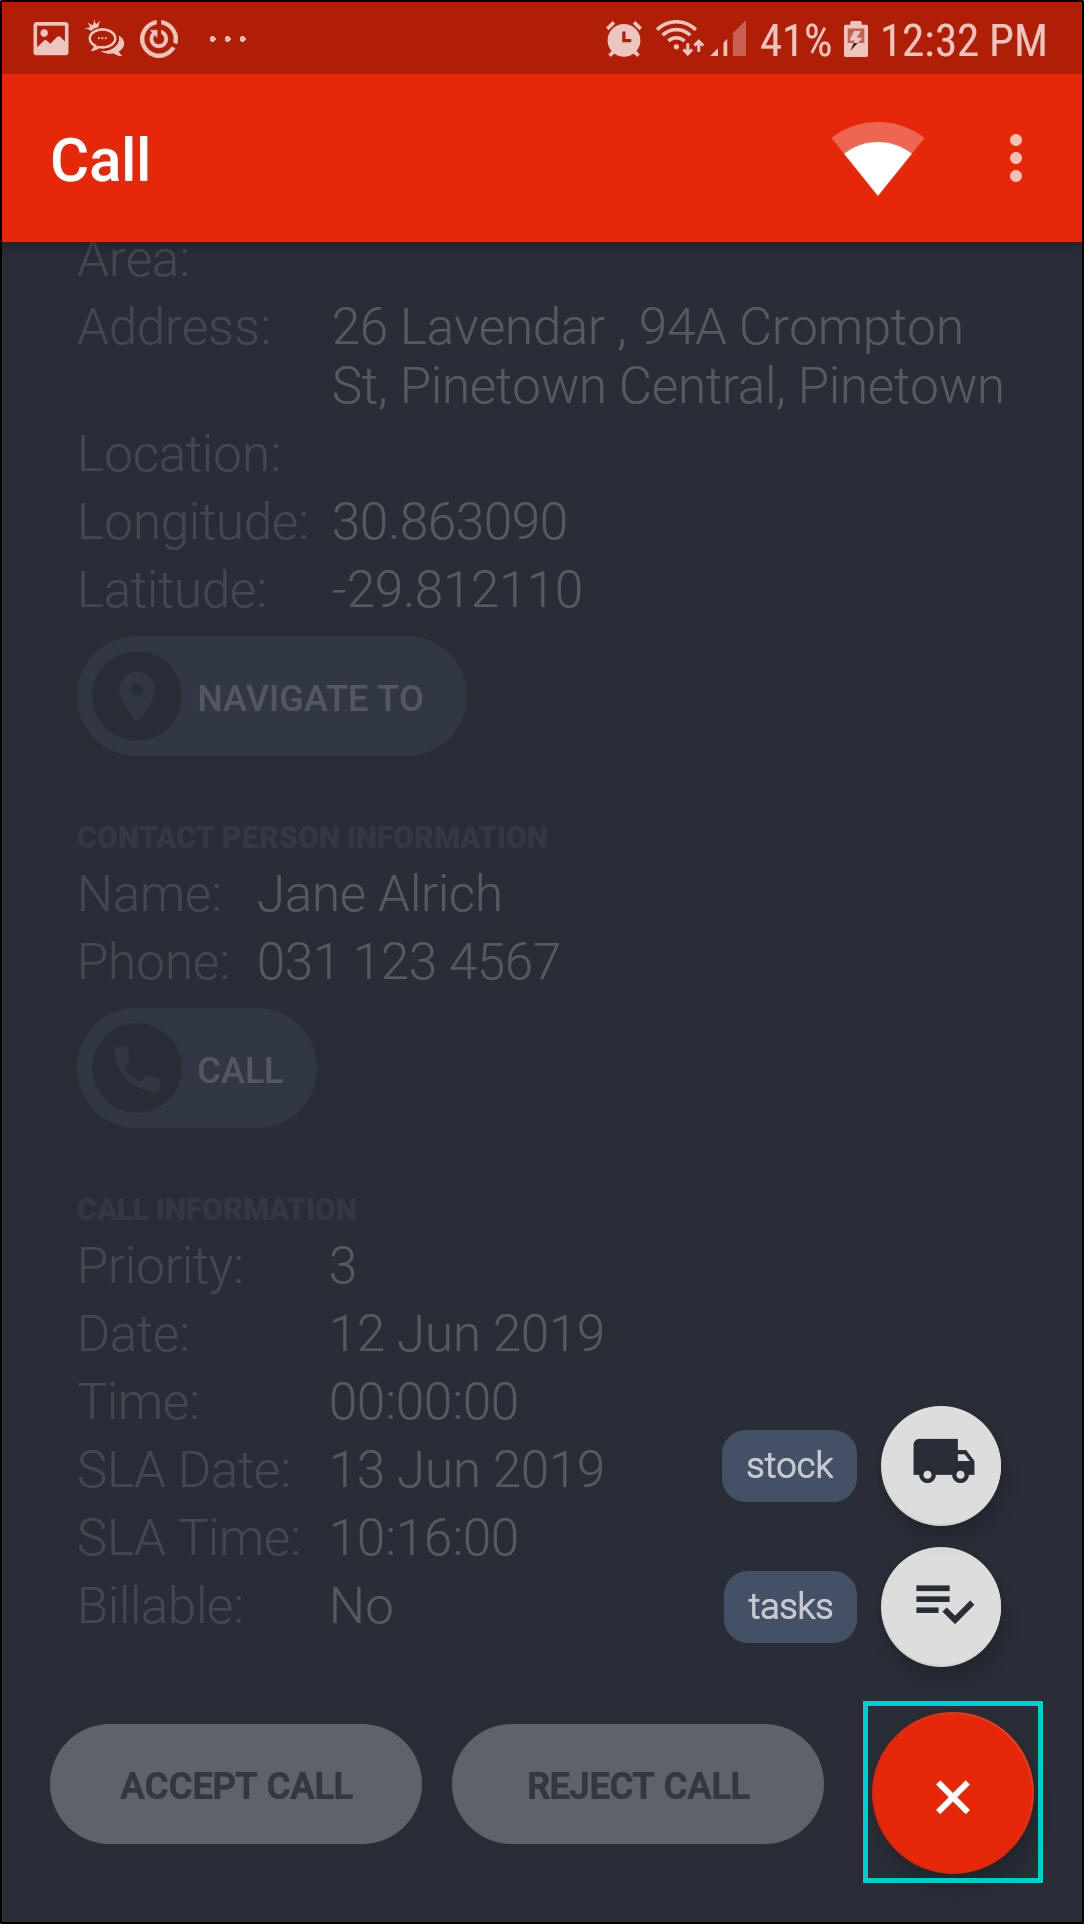
- Click on the '+' button.
- A menu will be displayed showing different work options. The work options displayed will vary depending on the status of the call / project.
- For more information, refer to Work Options.
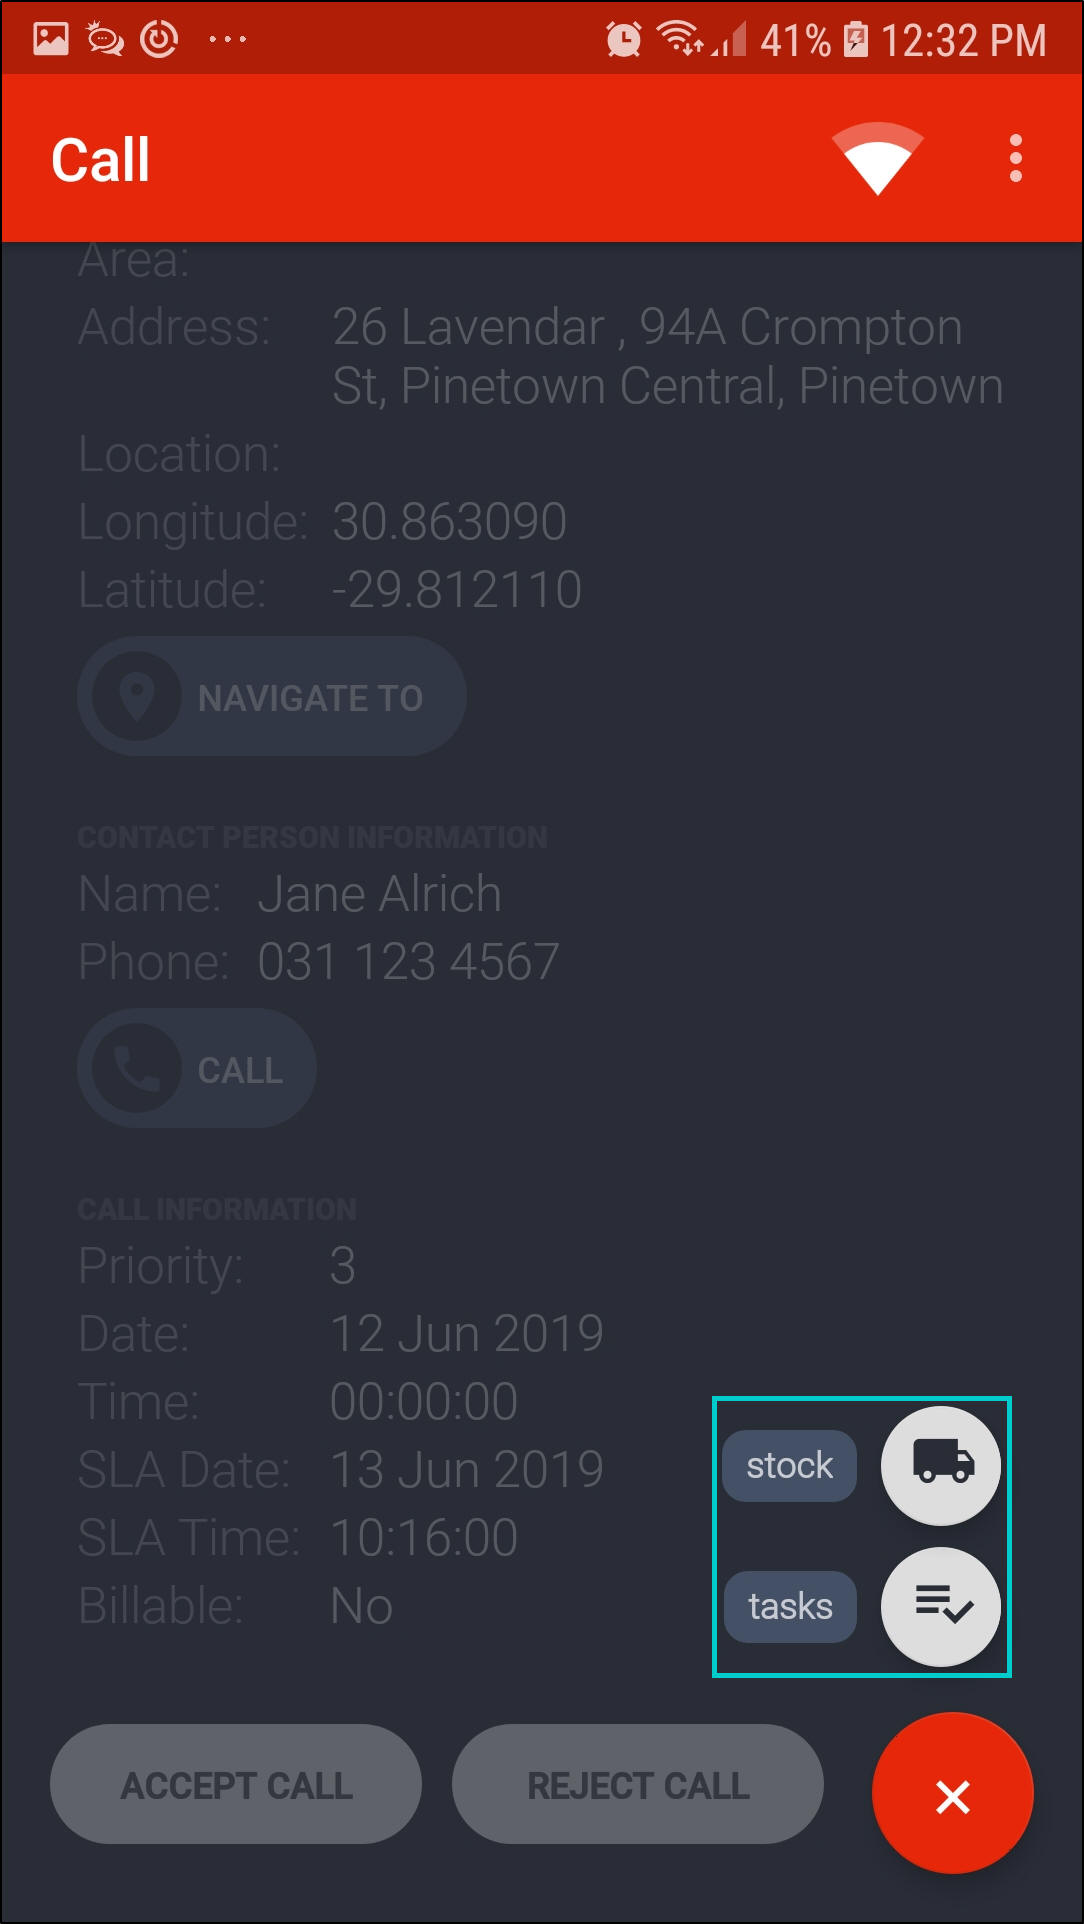
- Click on the 'X' button to close this menu.
MNU.150.003