We are currently updating our site; thank you for your patience.
TechConnect
Work Flow
Tech Connect Work Flow
- In the Calls List screen, click on the call / project you want to work on.
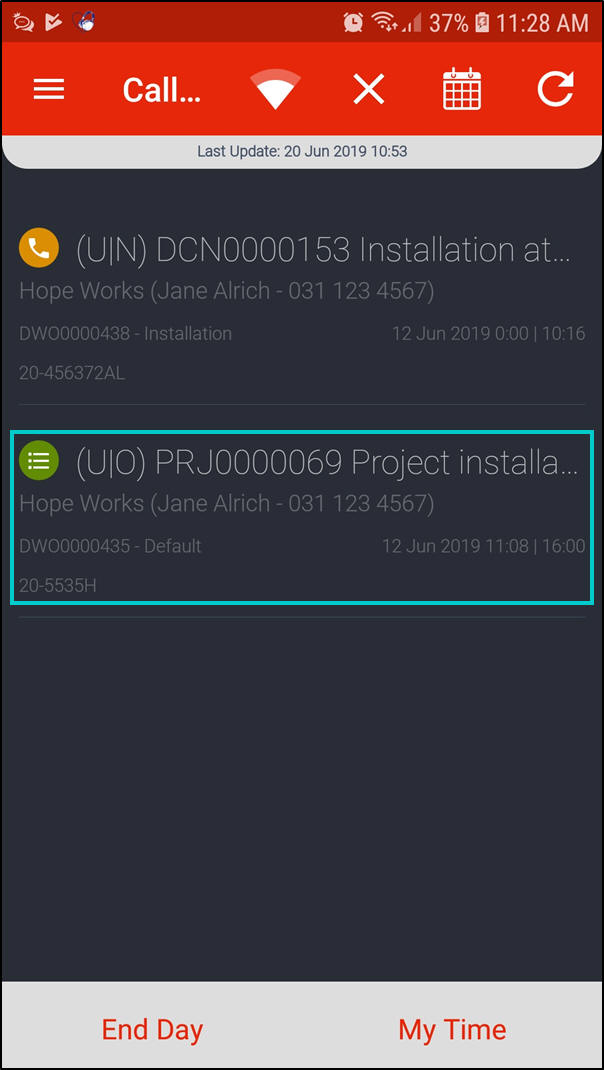
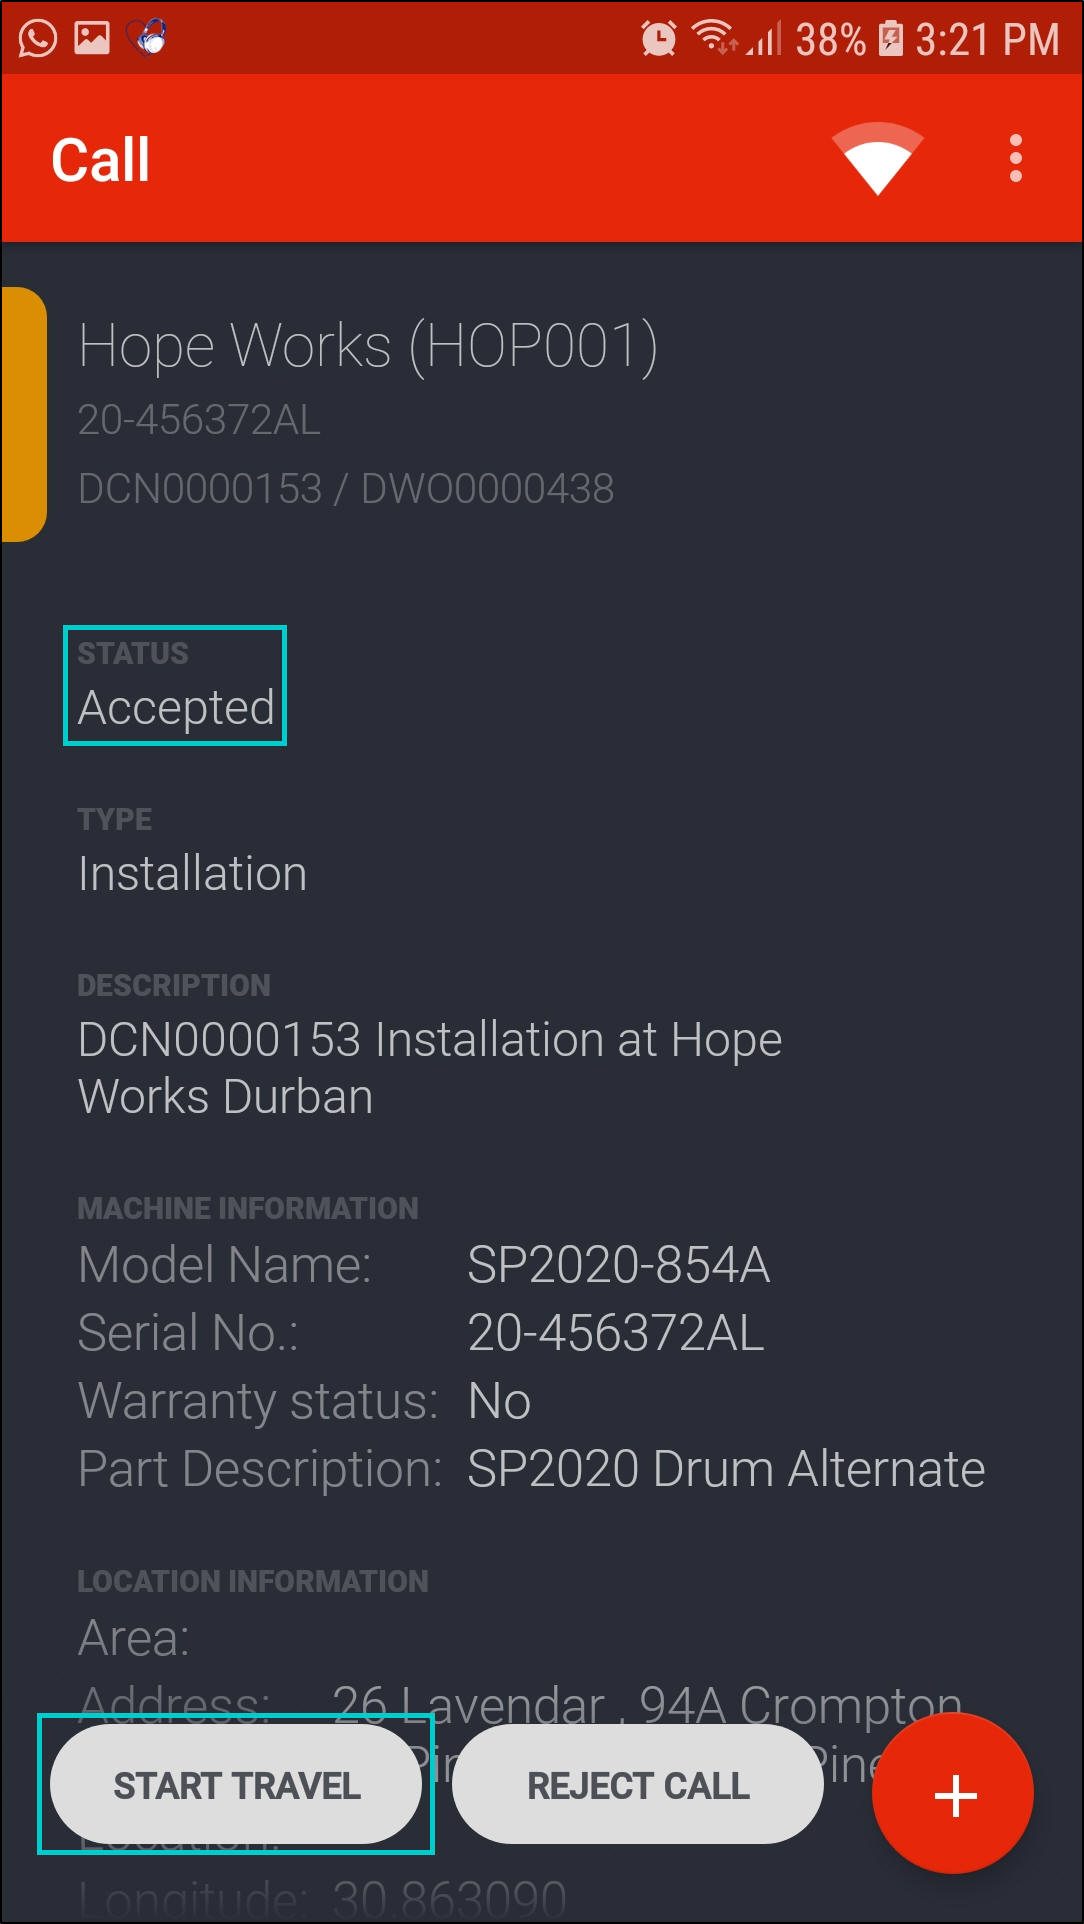
Call Awaiting Acceptance
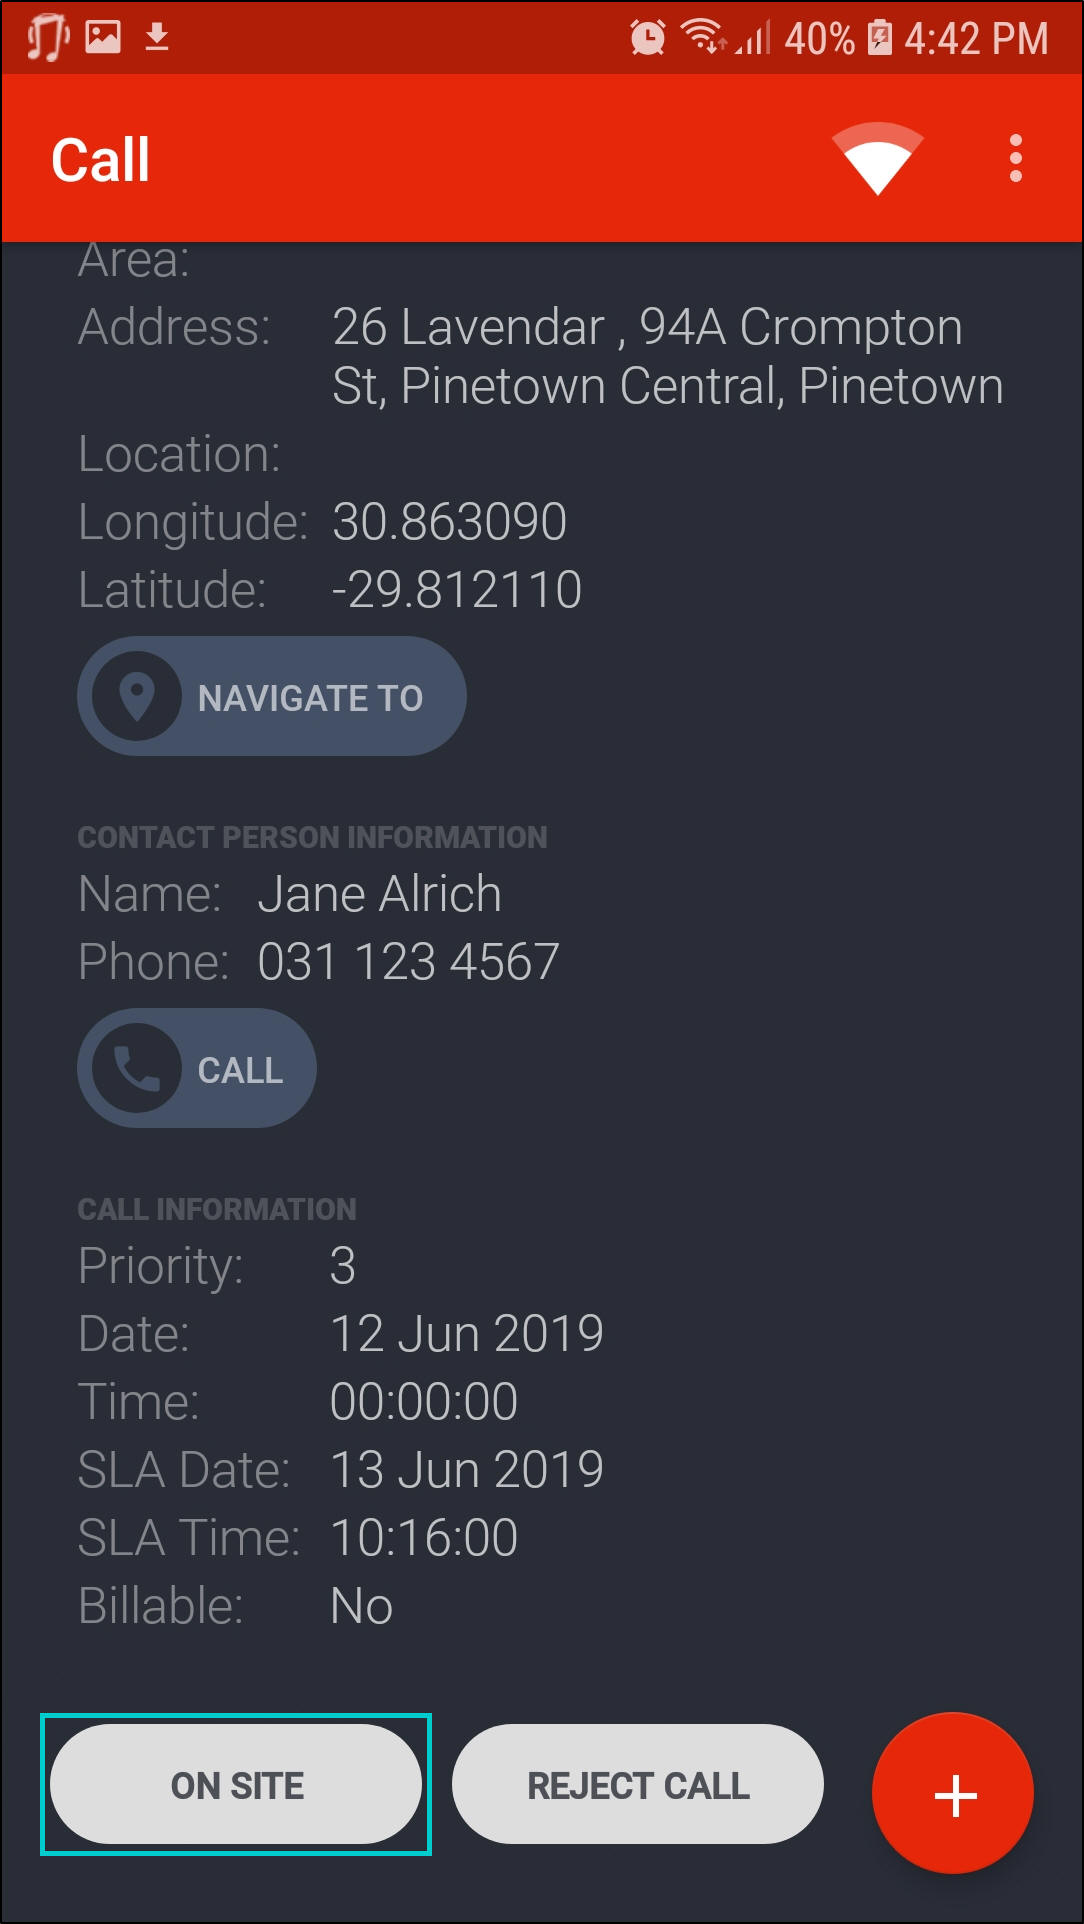
- In the Call screen you will see the:
- Call Detail
- Status
- Call Type
- Description
- Machine Information (including warranty status - 'No warranty' / 'Active' / 'Inactive')
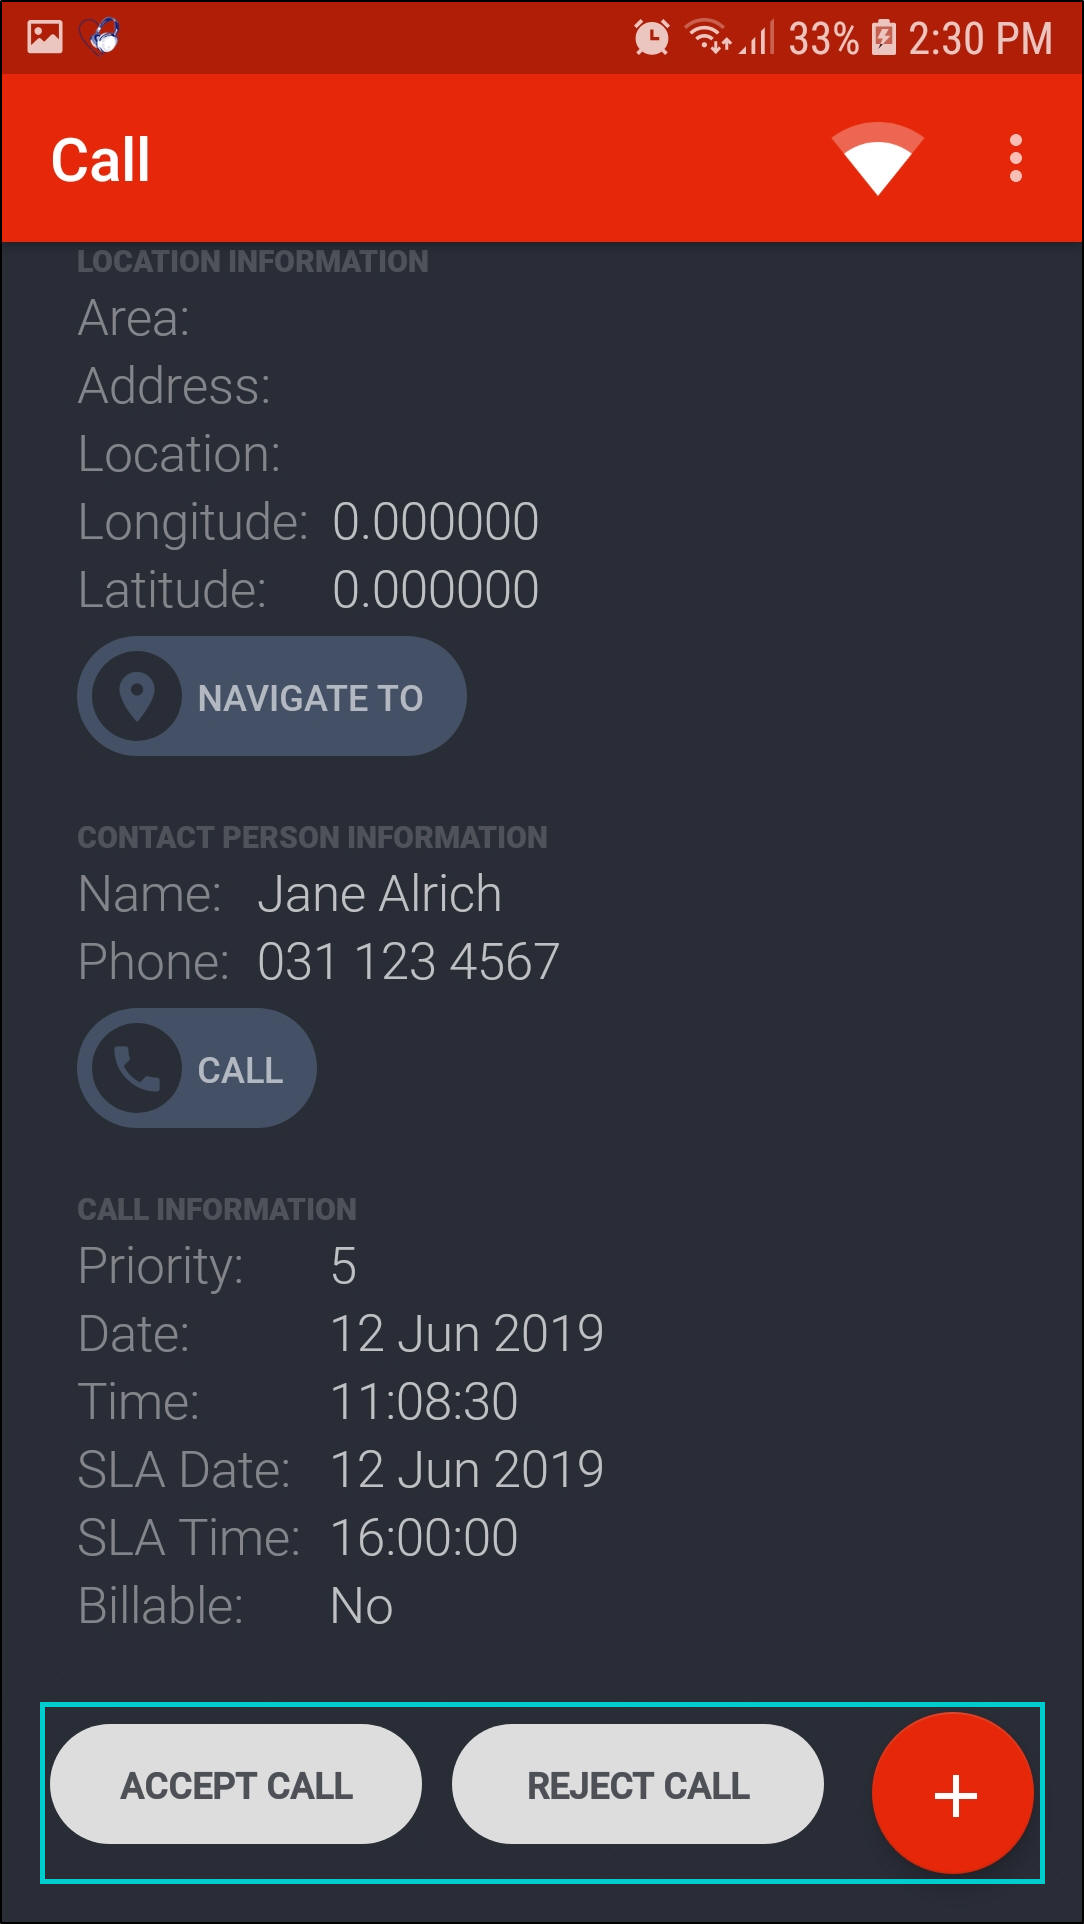
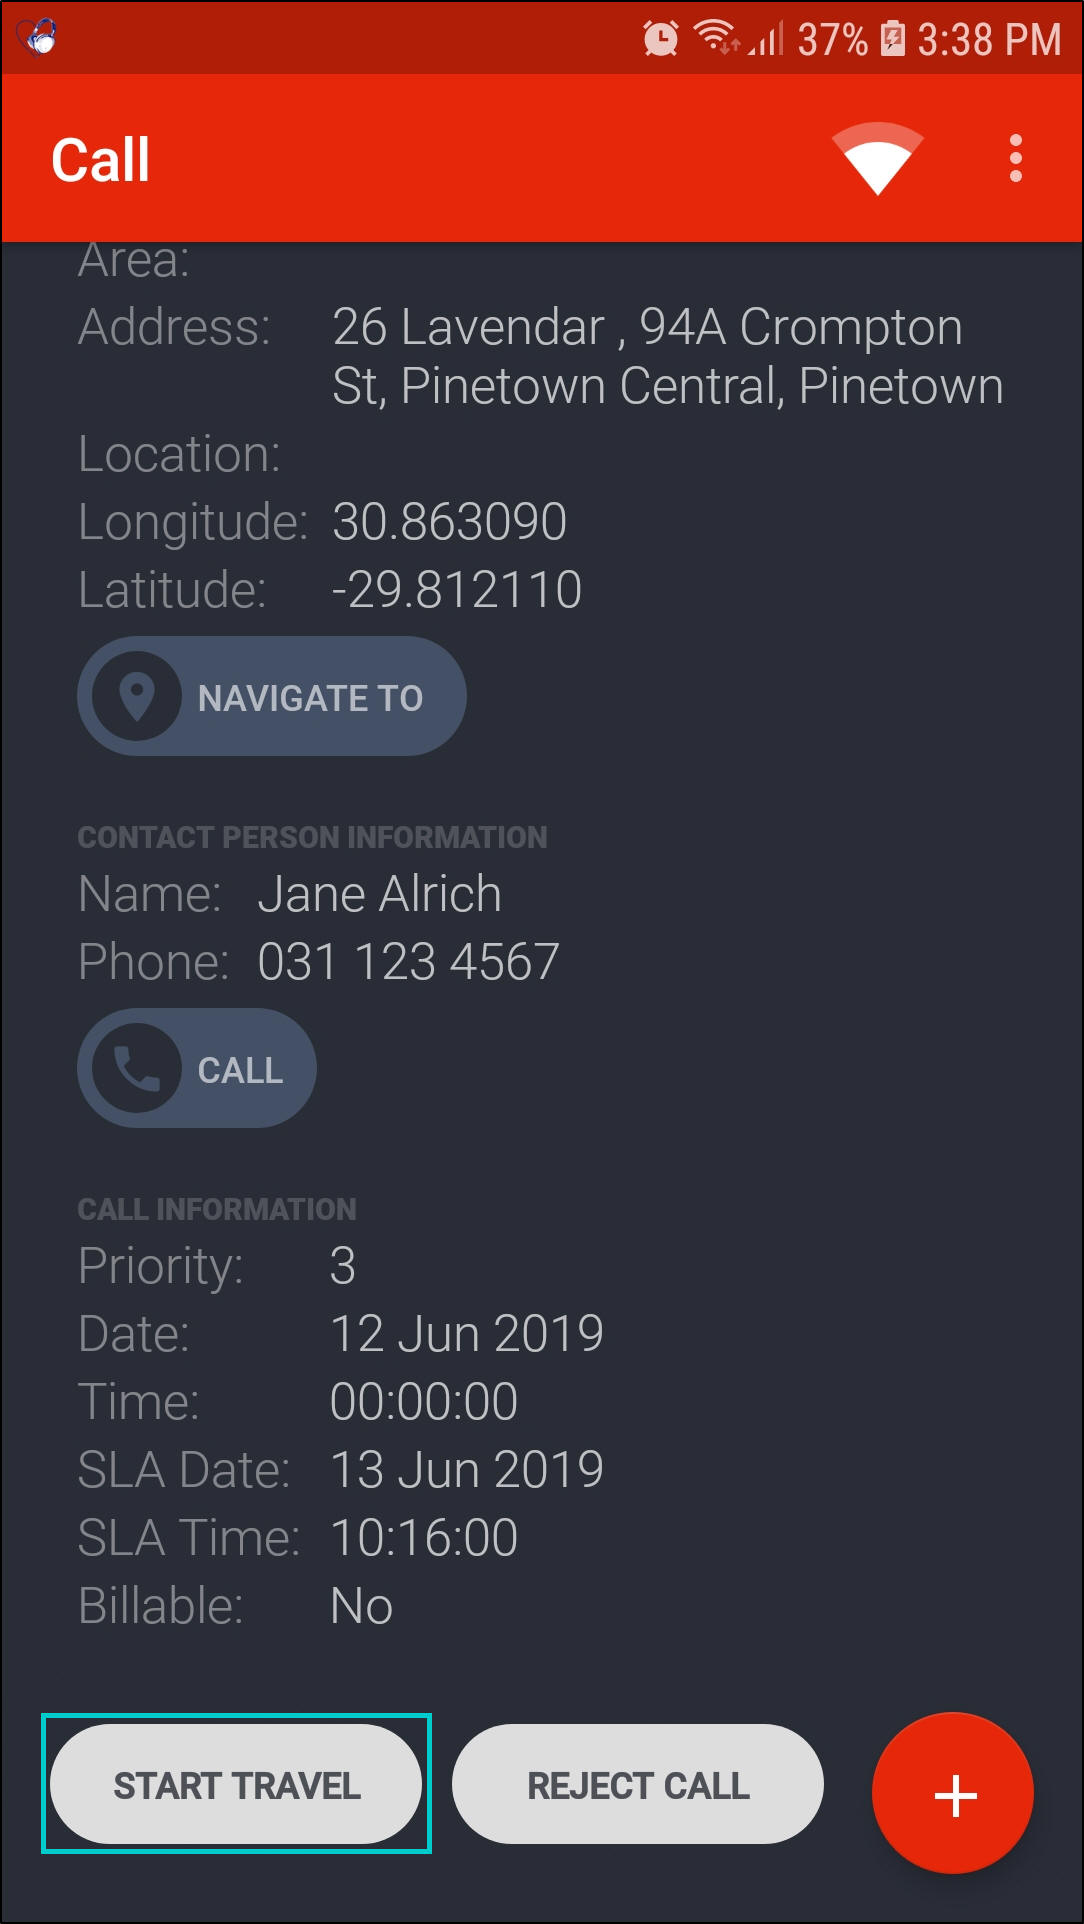
- Location Information (including GPS co-ordinates)
- Contact Person Information
- Call Information
- Note: If you cannot see any of these details, scroll up / down your screen.
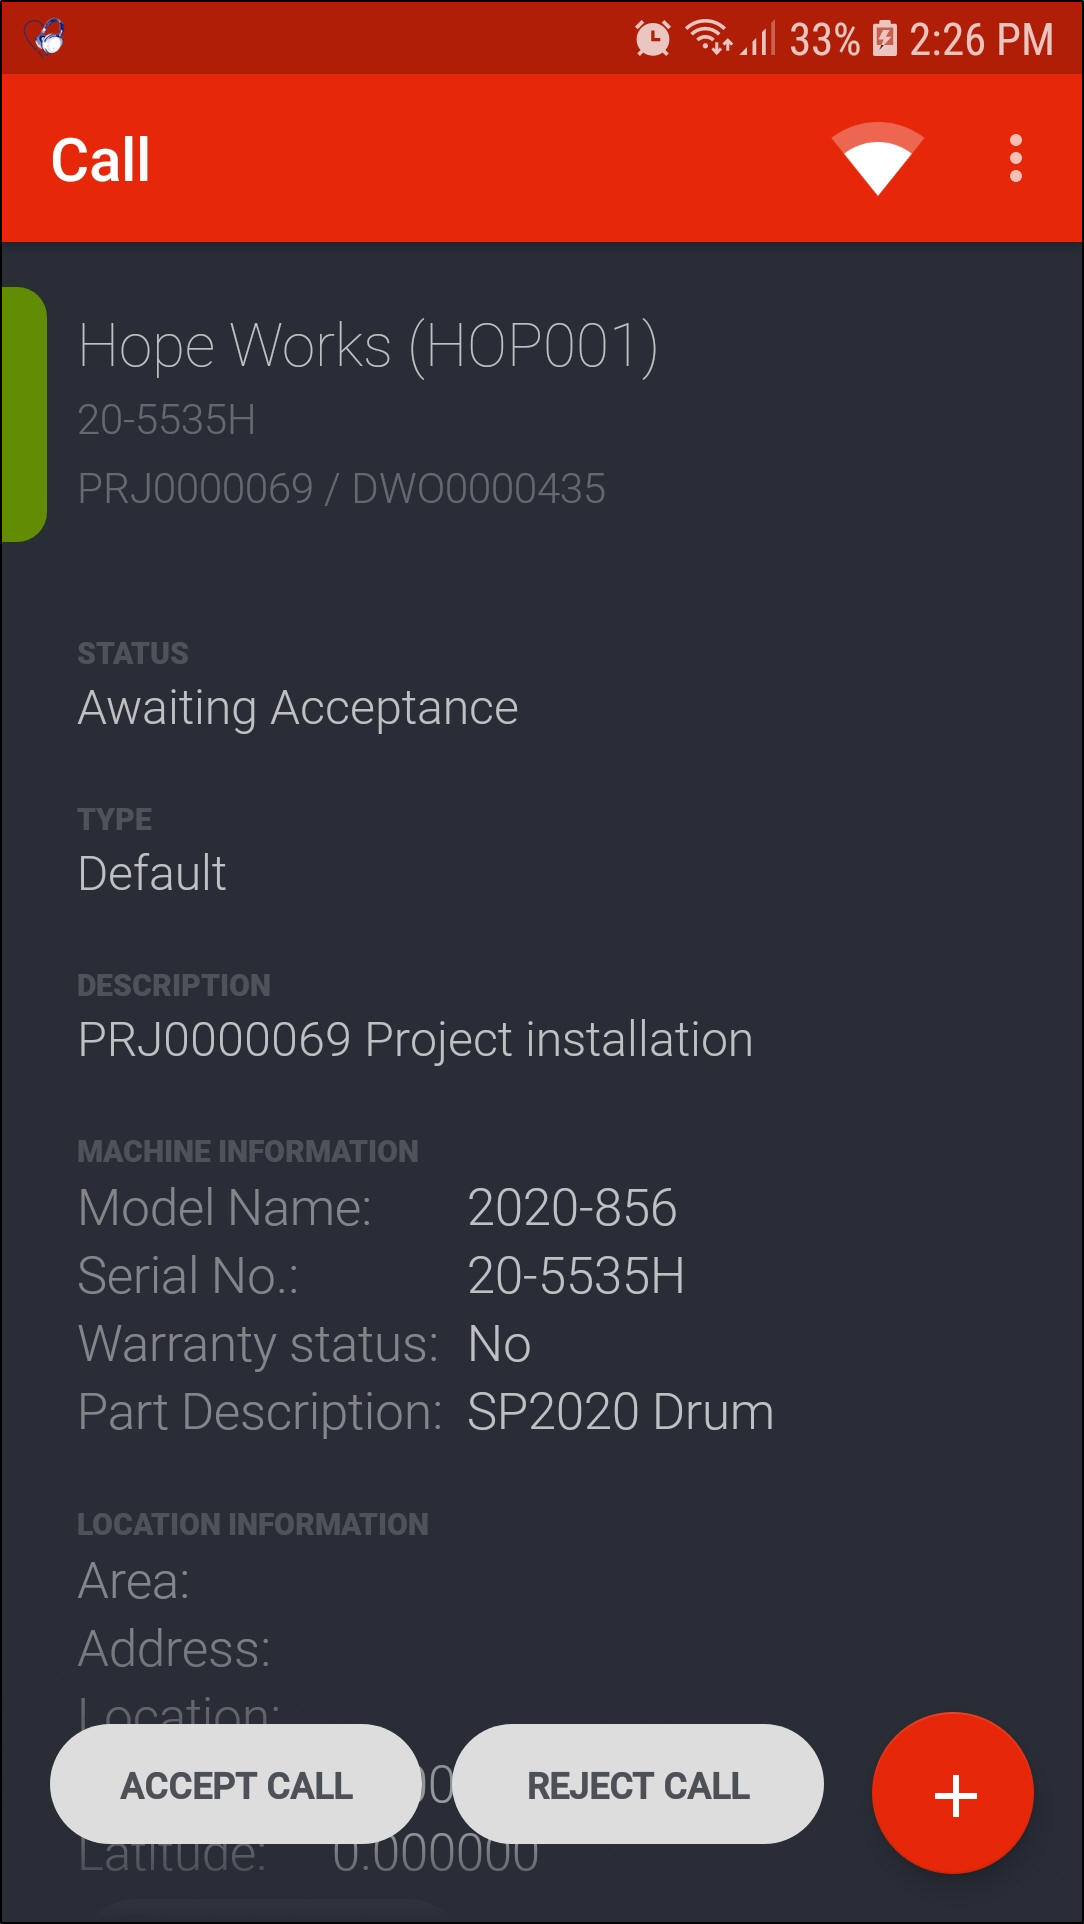
- Clicking the '+' button will give you a Stock option to view any part requests that have been logged, (e.g. the client has requested toner). This way you will know if you first need to collect stock from stores.
- You can either Accept a Call or Reject a Call.
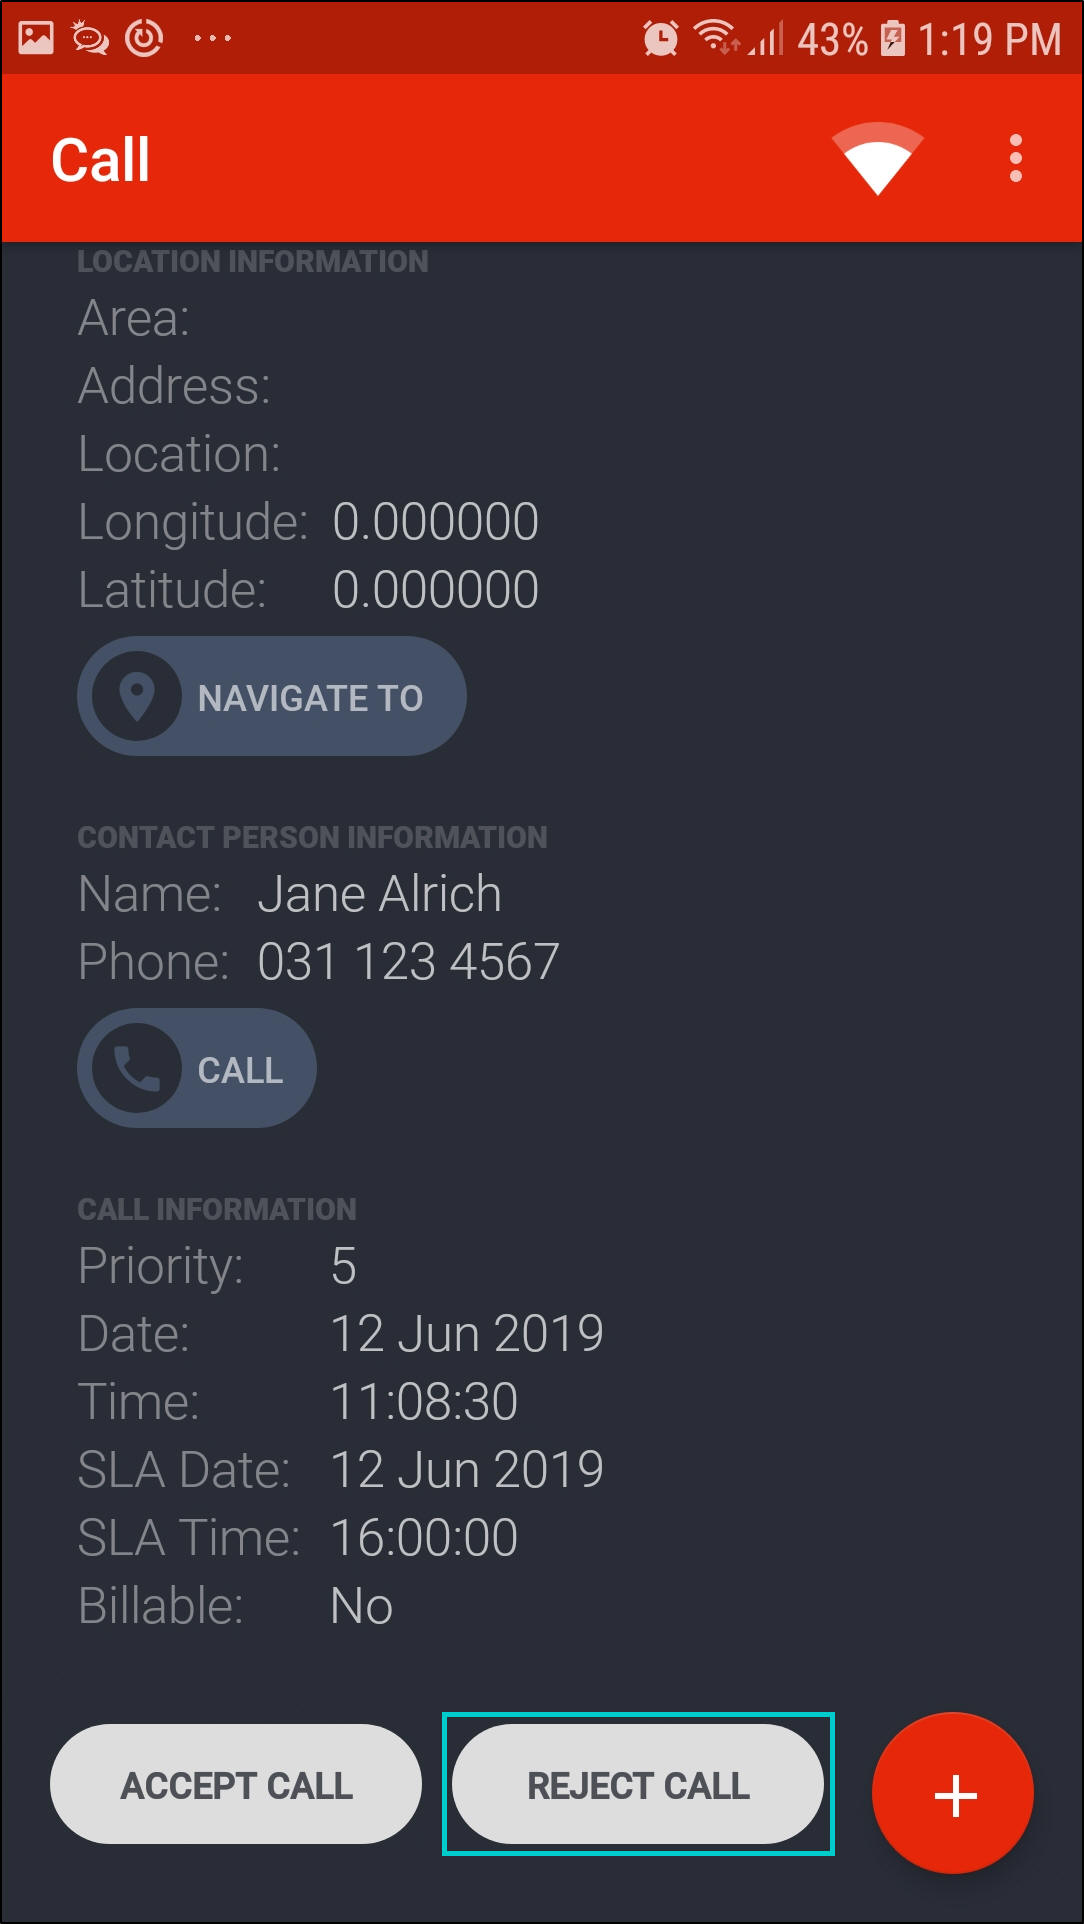
Reject a Call
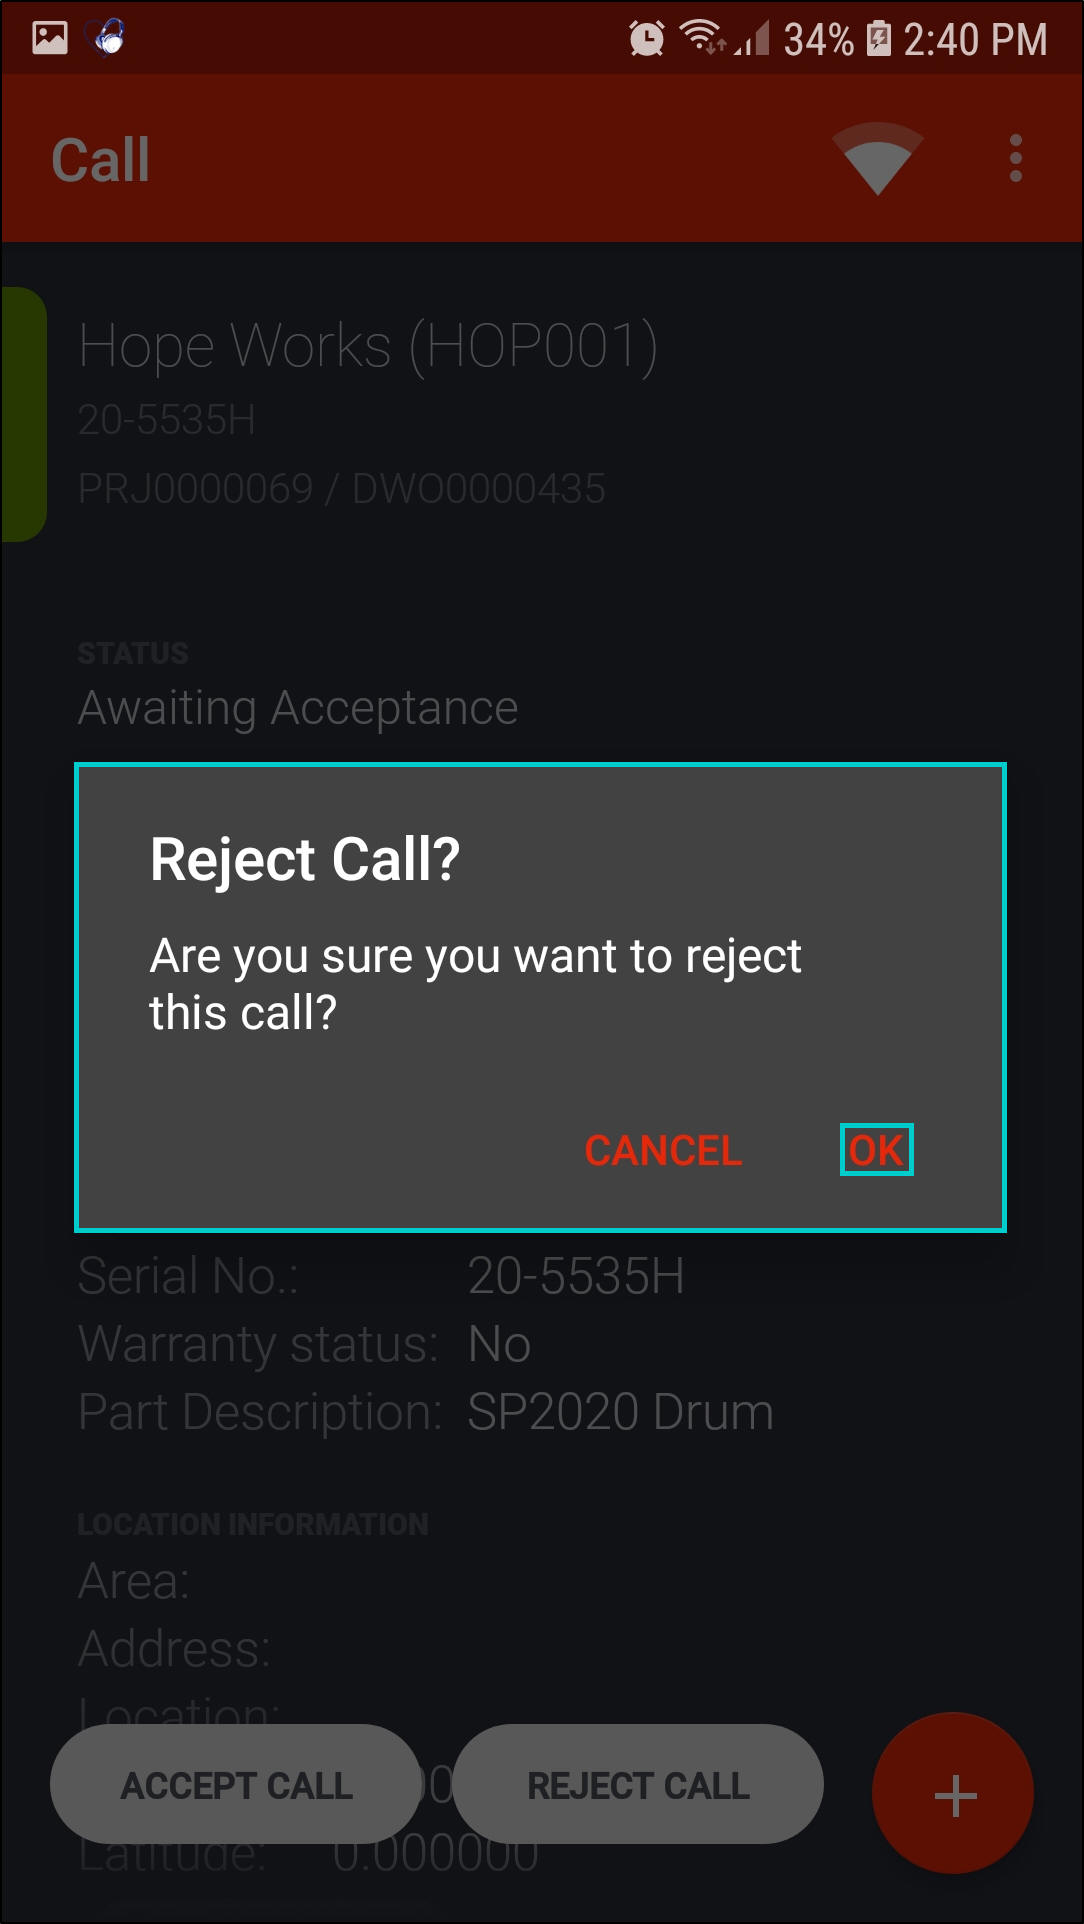
- Click on Reject Call.
- A Reject Call? message box will pop up asking you;
- Are you sure you want to reject this call?
- Click on Ok.
- A Prompt message box will pop up telling you;
- Please enter the Rejection Comments:
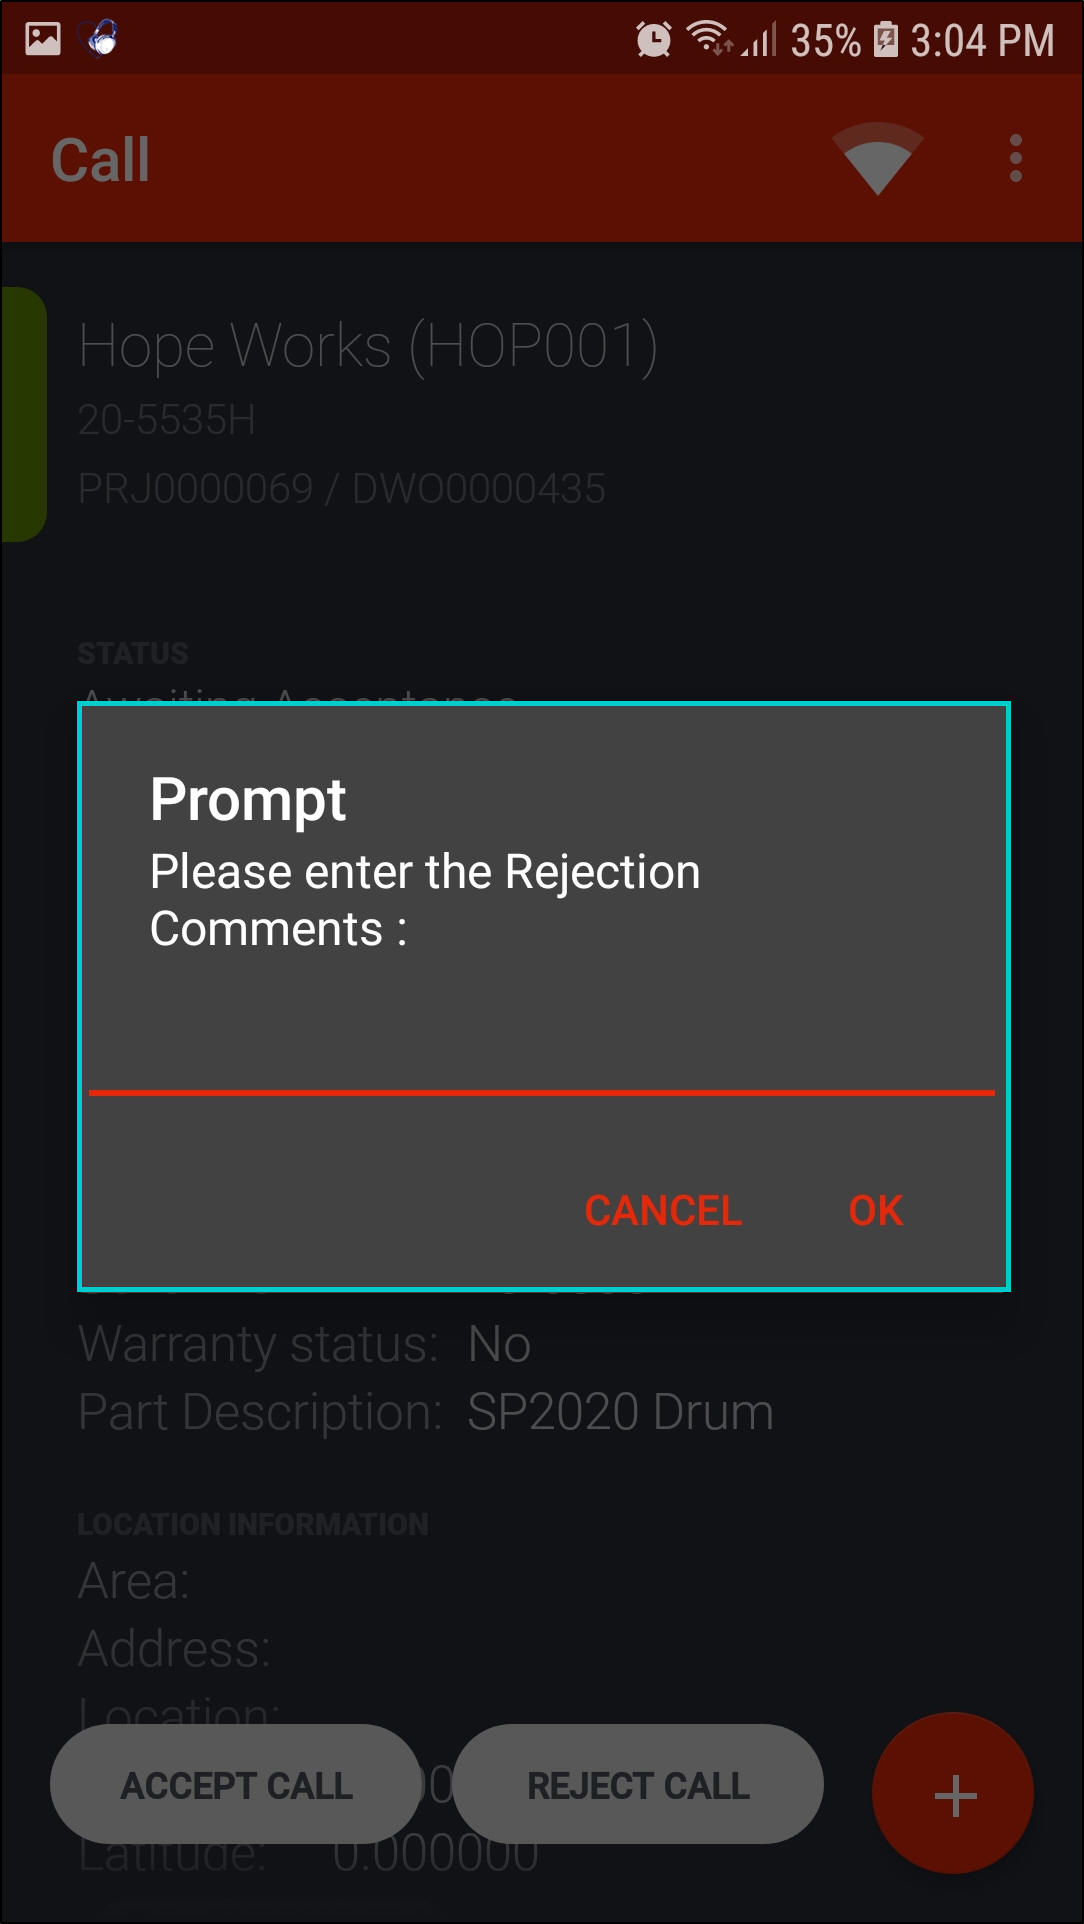
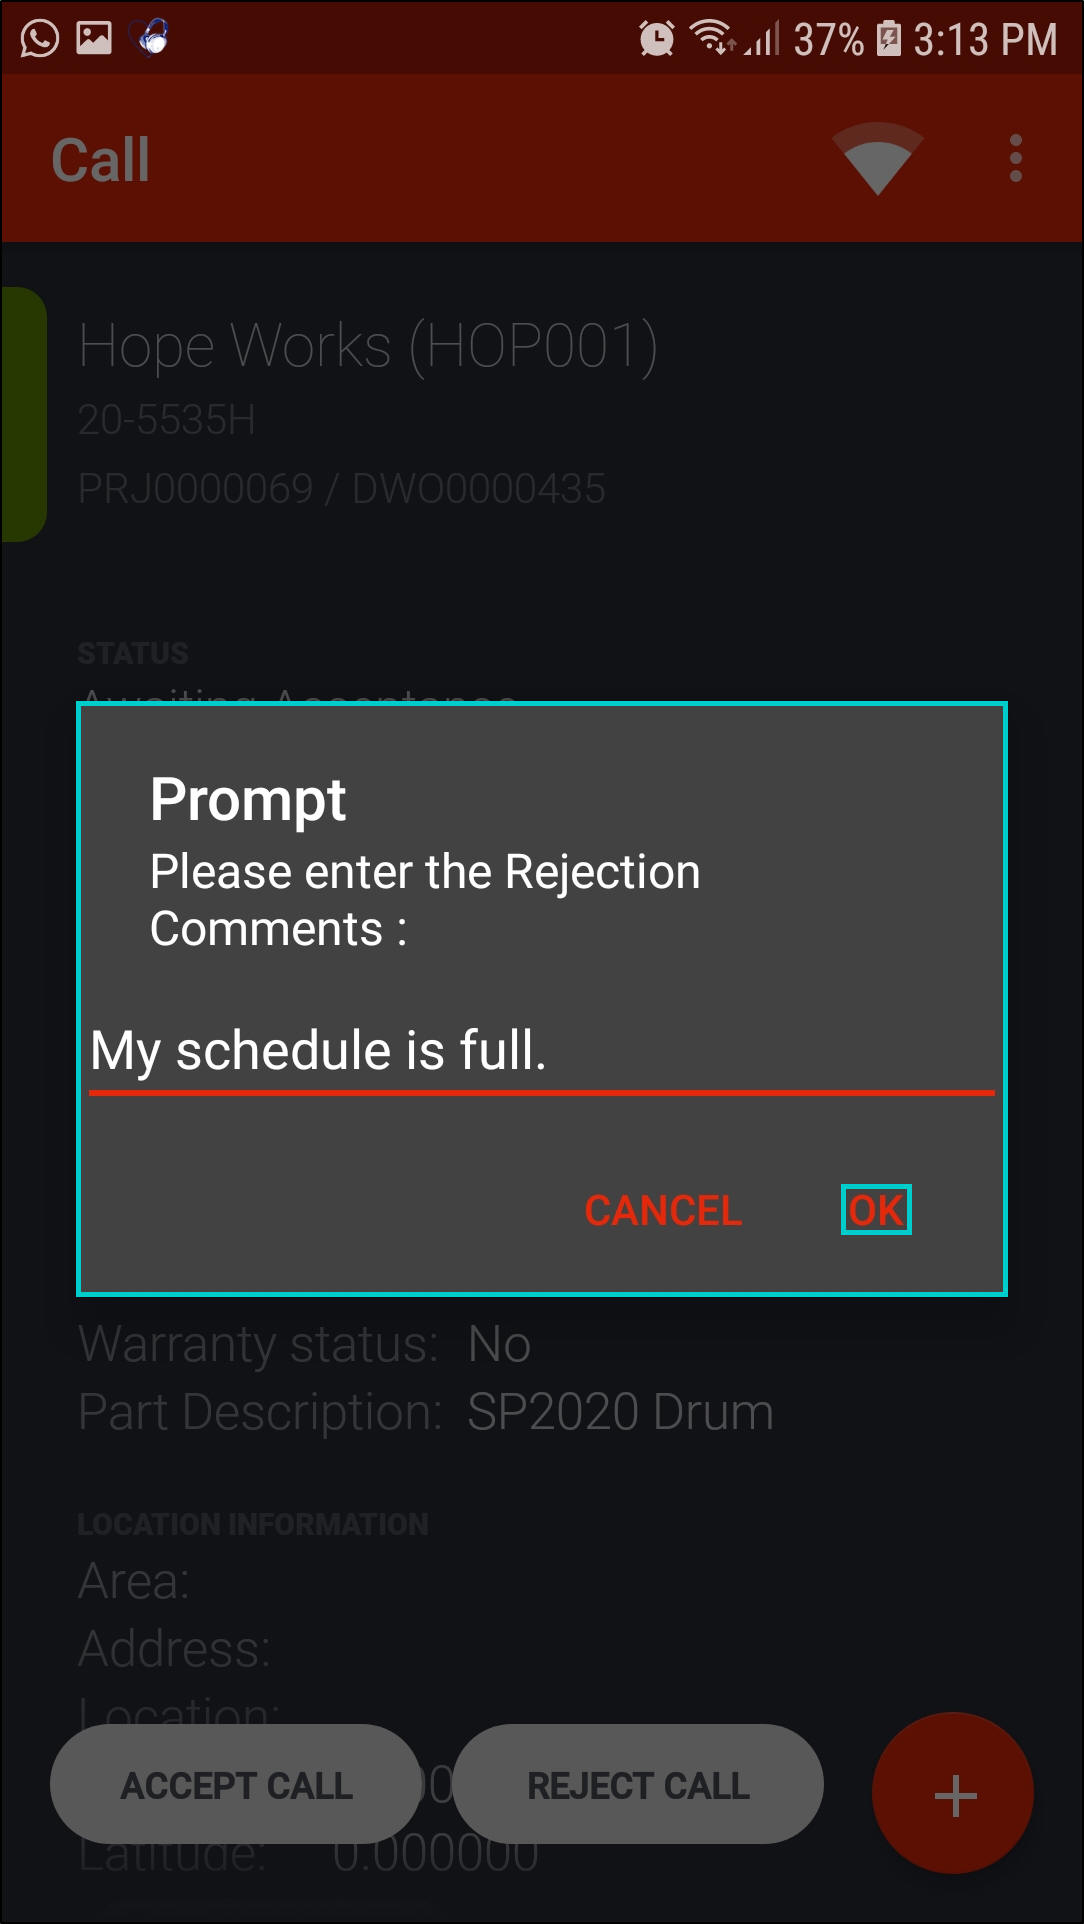
- Type in your rejection comments.
- Click on Ok.
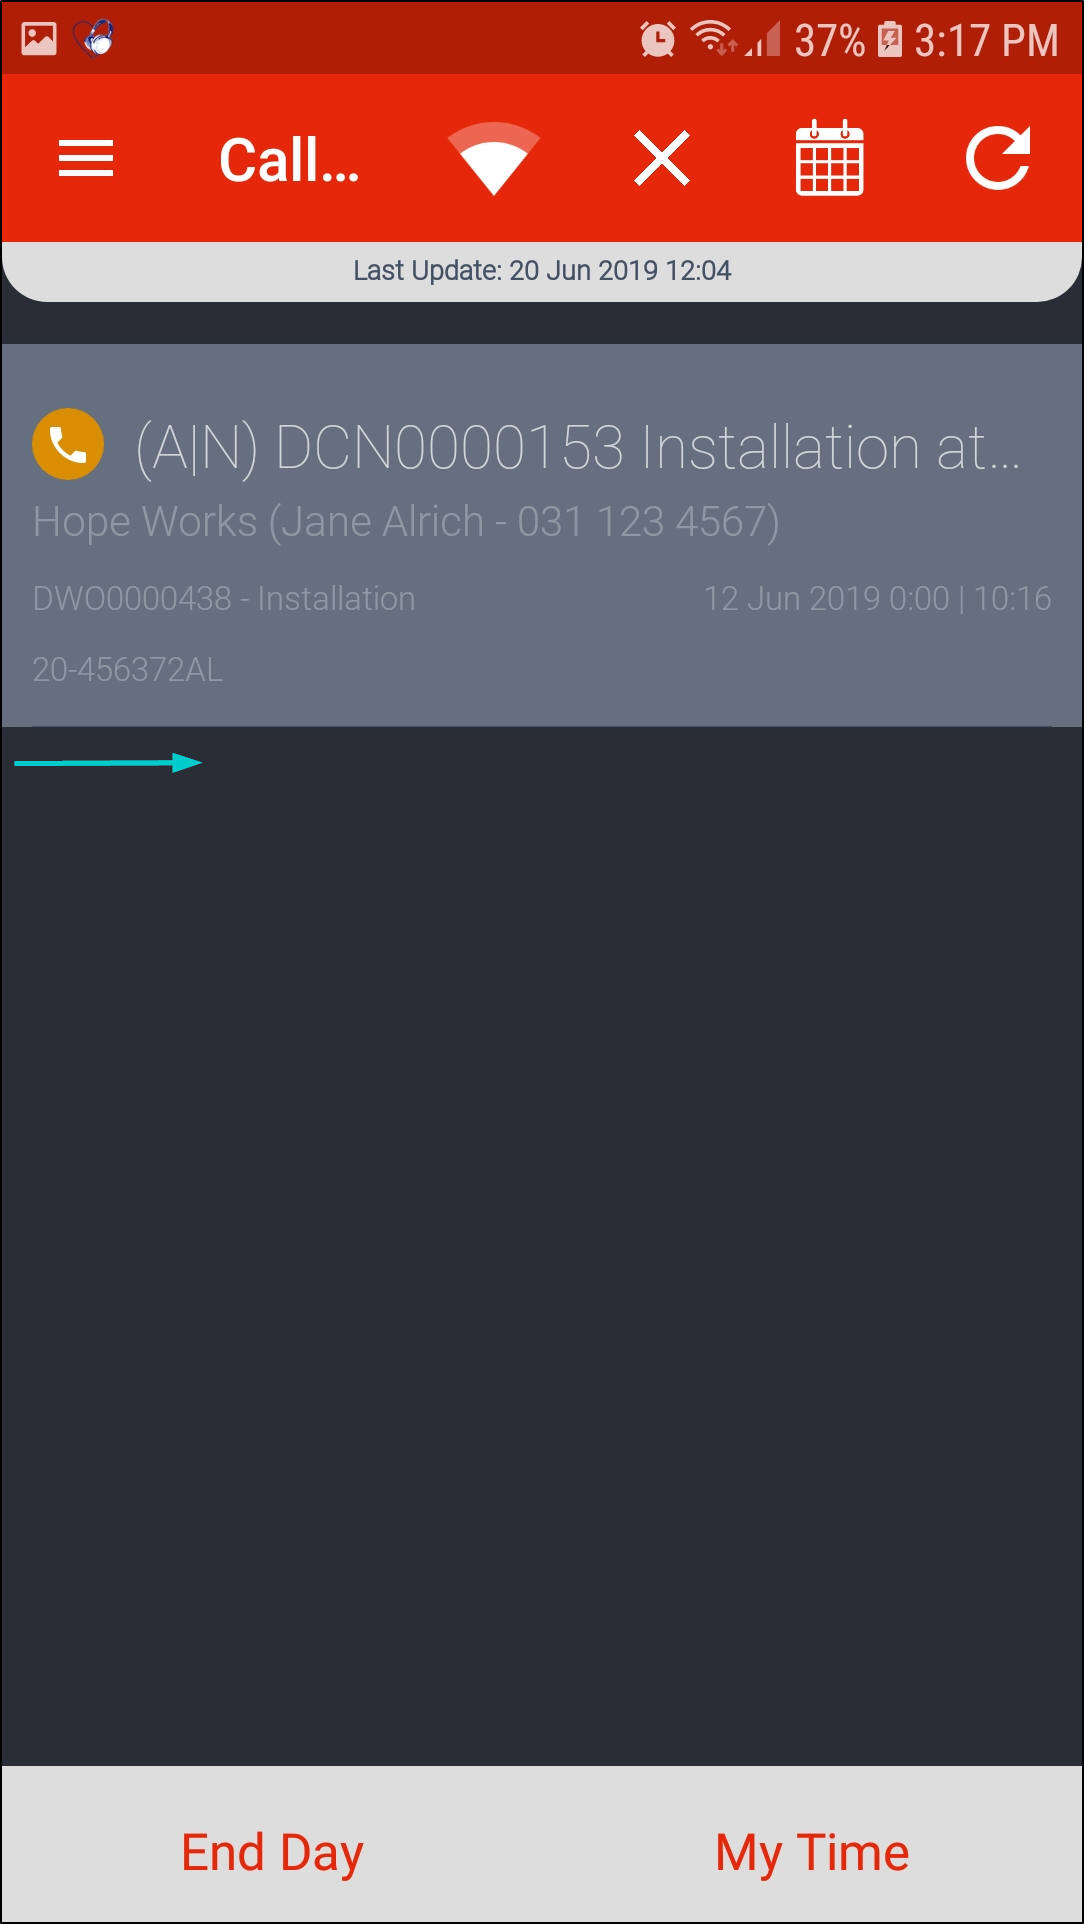
- The call / project will be removed from your list of assigned calls / projects.
- The the call / project work order will remain in status New in the Call Centre in BPO and needs to be re-assigned.
Accept a Call
- Click on Accept Call.

- The call will move to status Accepted.
- The action button will change to Start Travel.
- You can now start working on the call.
Start Travel
- When you are ready to drive to your client, click on Start Travel.
Open Odometer Reading
- A Current Odometer Reading message will pop up.
- To update your Current Odometer Reading, touch any digit you want to update and scroll up or down.
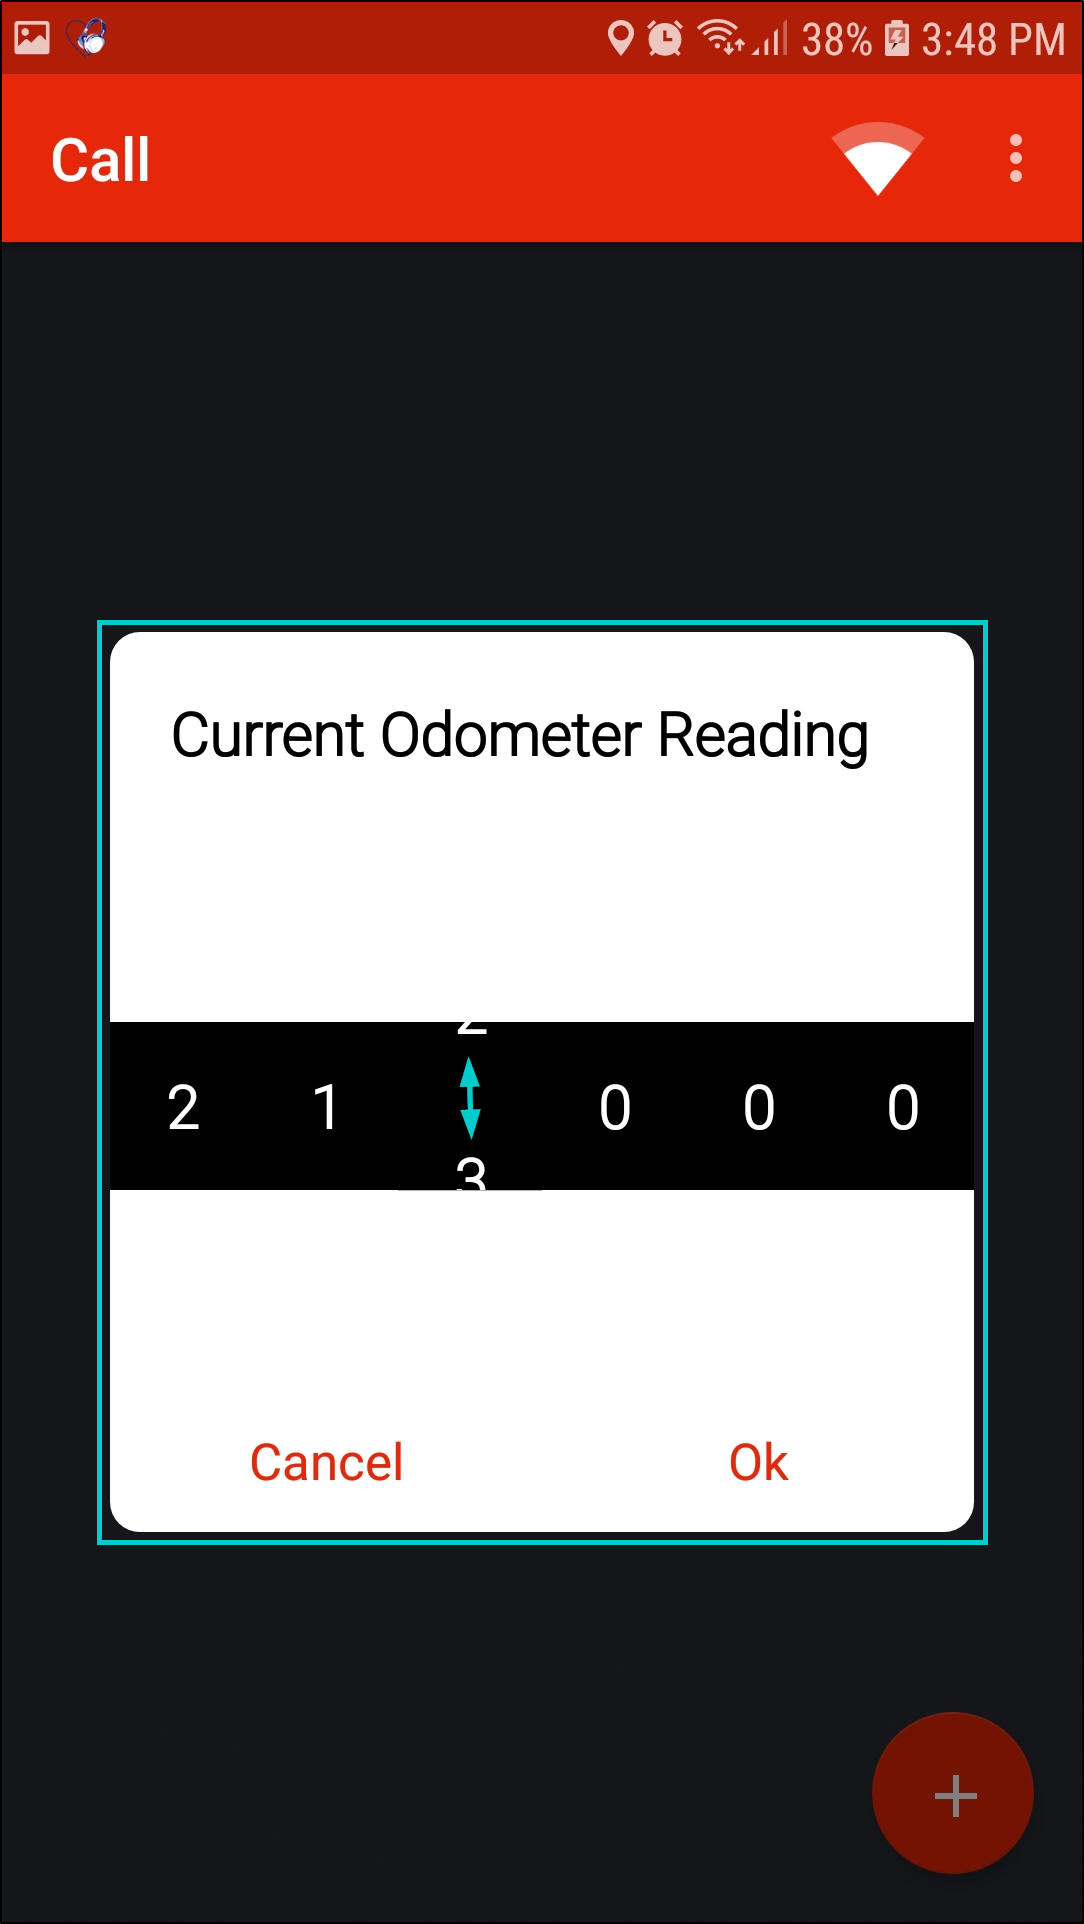
- Ensure your Current Odometer Reading is correct.
- Click on Ok.
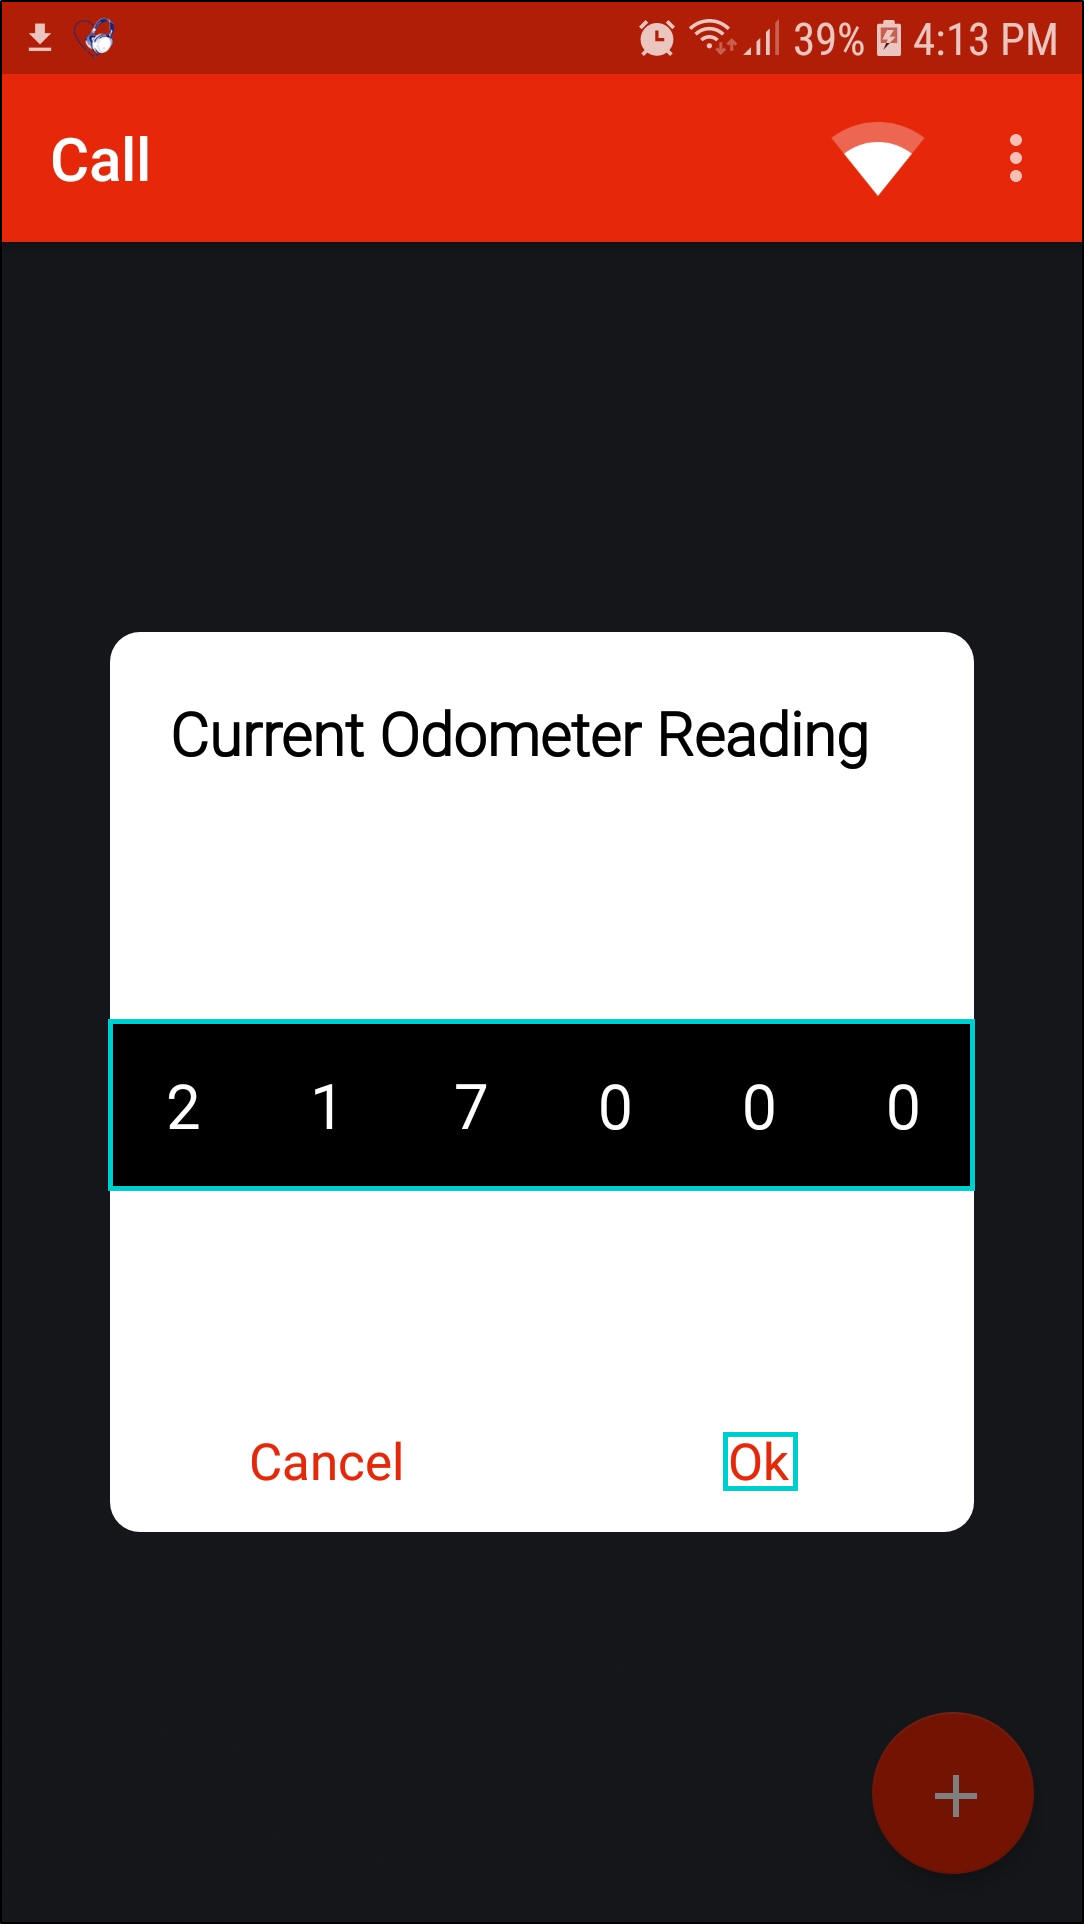
- The call will now move to status Start Travel.
- The action button will change to On Site.
- Note: In this status, you can still reject the call / project.

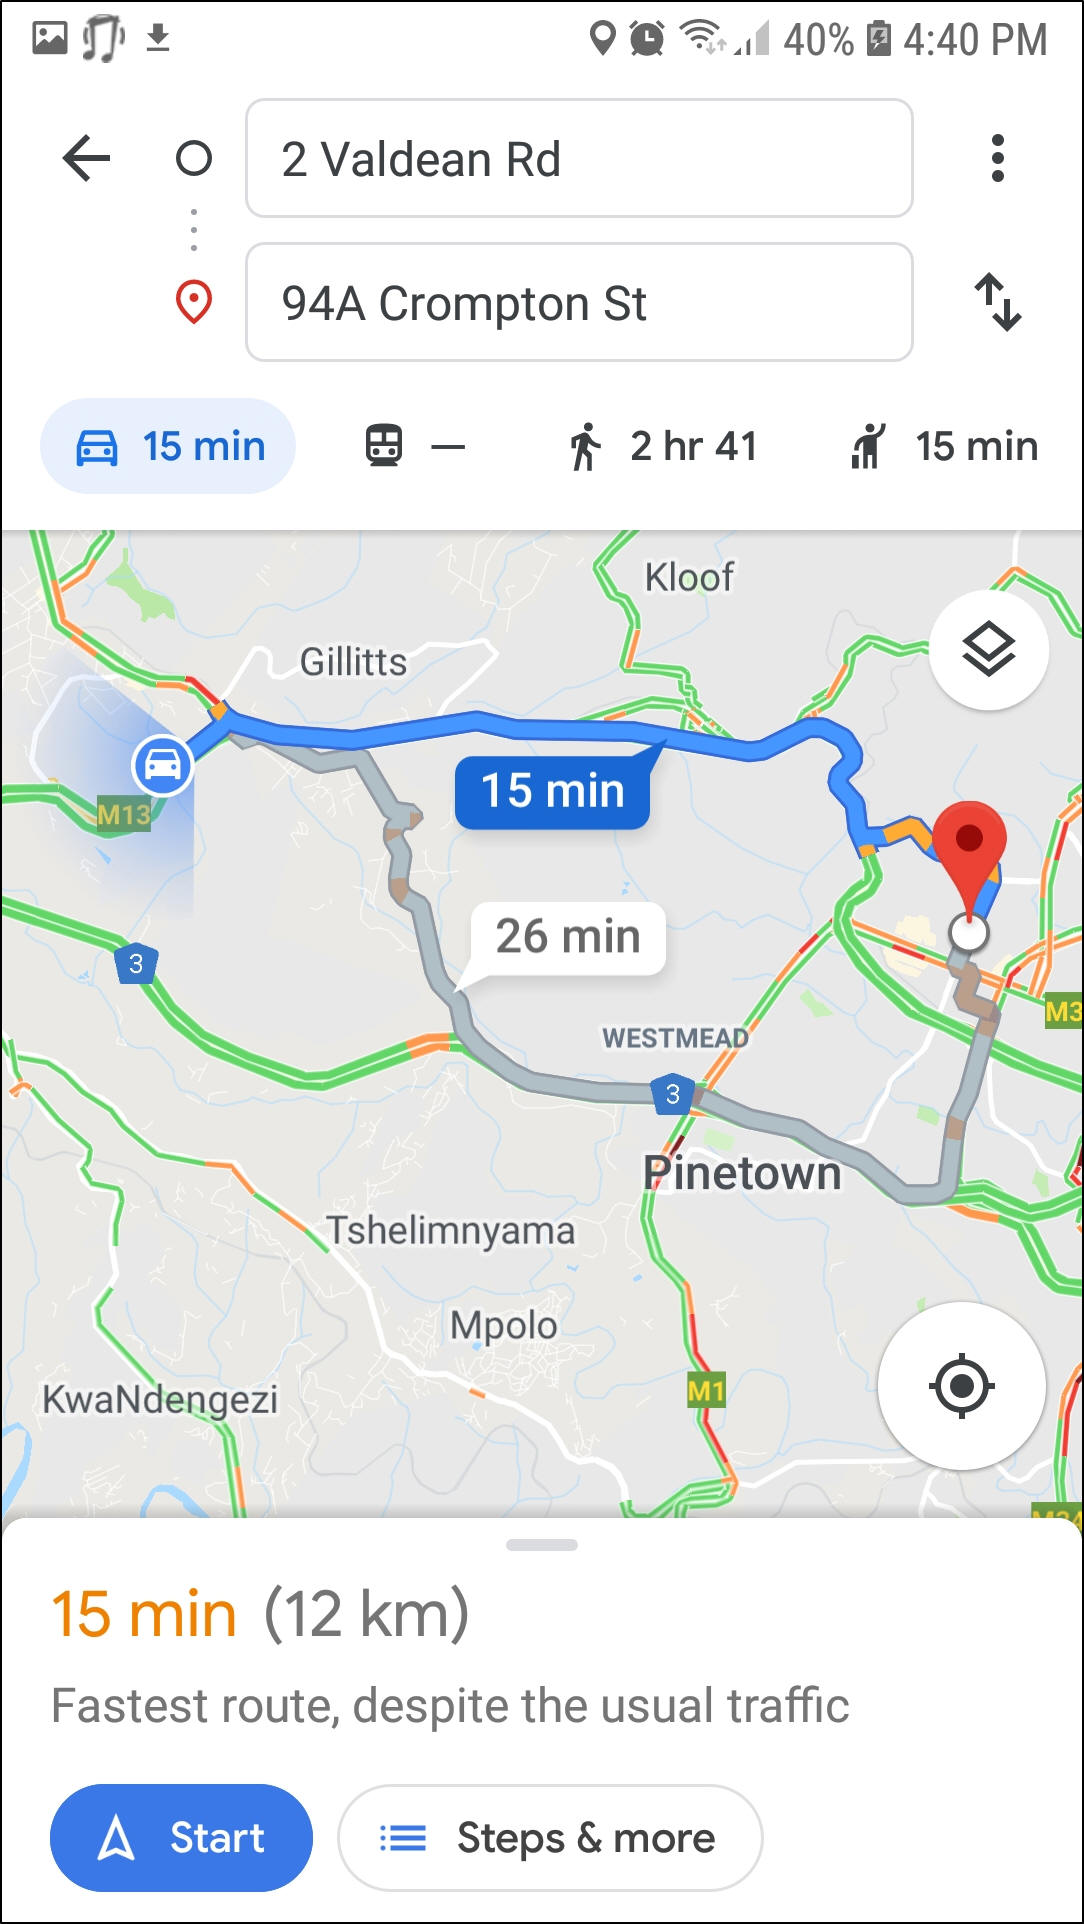
- If you would like your GPS to direct you to the location, then click on Navigate To next to the GPS co-ordinations.
- Note: If there are no GPS co-ordinates set, Tech Connect will give you an option to update the system when you are closing your odometer reading, so that they will be available next time.

- Google Maps will be displayed.
- You can now follow Google Maps directions from your current location to your client.
On Site
- When you have arrived at your client, click on On Site.
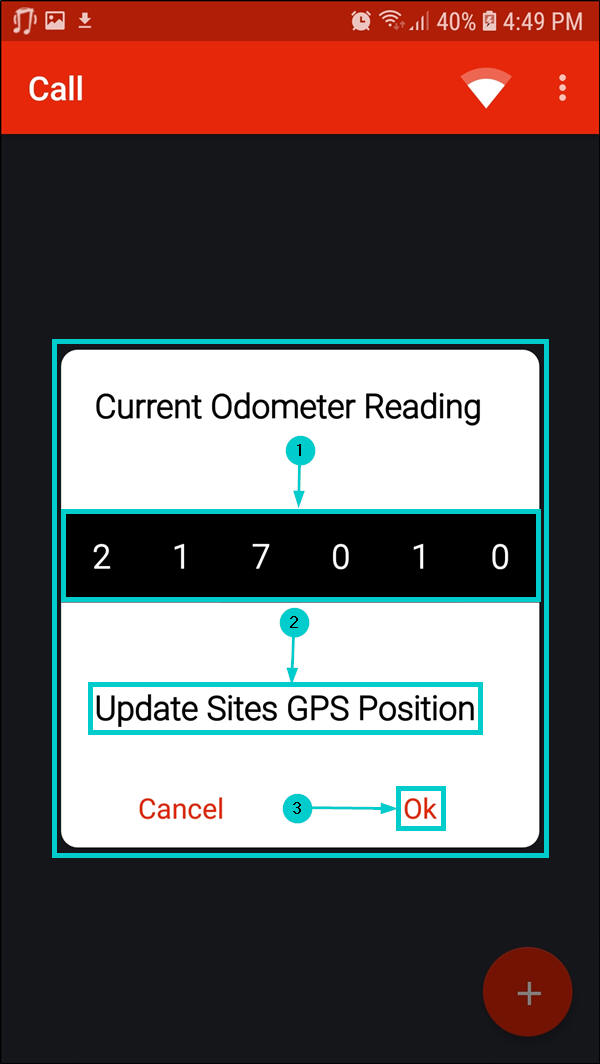
Close Odometer Reading
- A Current Odometer Reading message will pop up.
- Update your Odometer Reading.
- If the customer's GPS co-ordinates have not been updated yet - click on Update Site's GPS Position. Tech Connect will update the system so that they will be available next time.
- Select Ok.
- The call will now move to status On Site.
- The action button will change to Start Work.
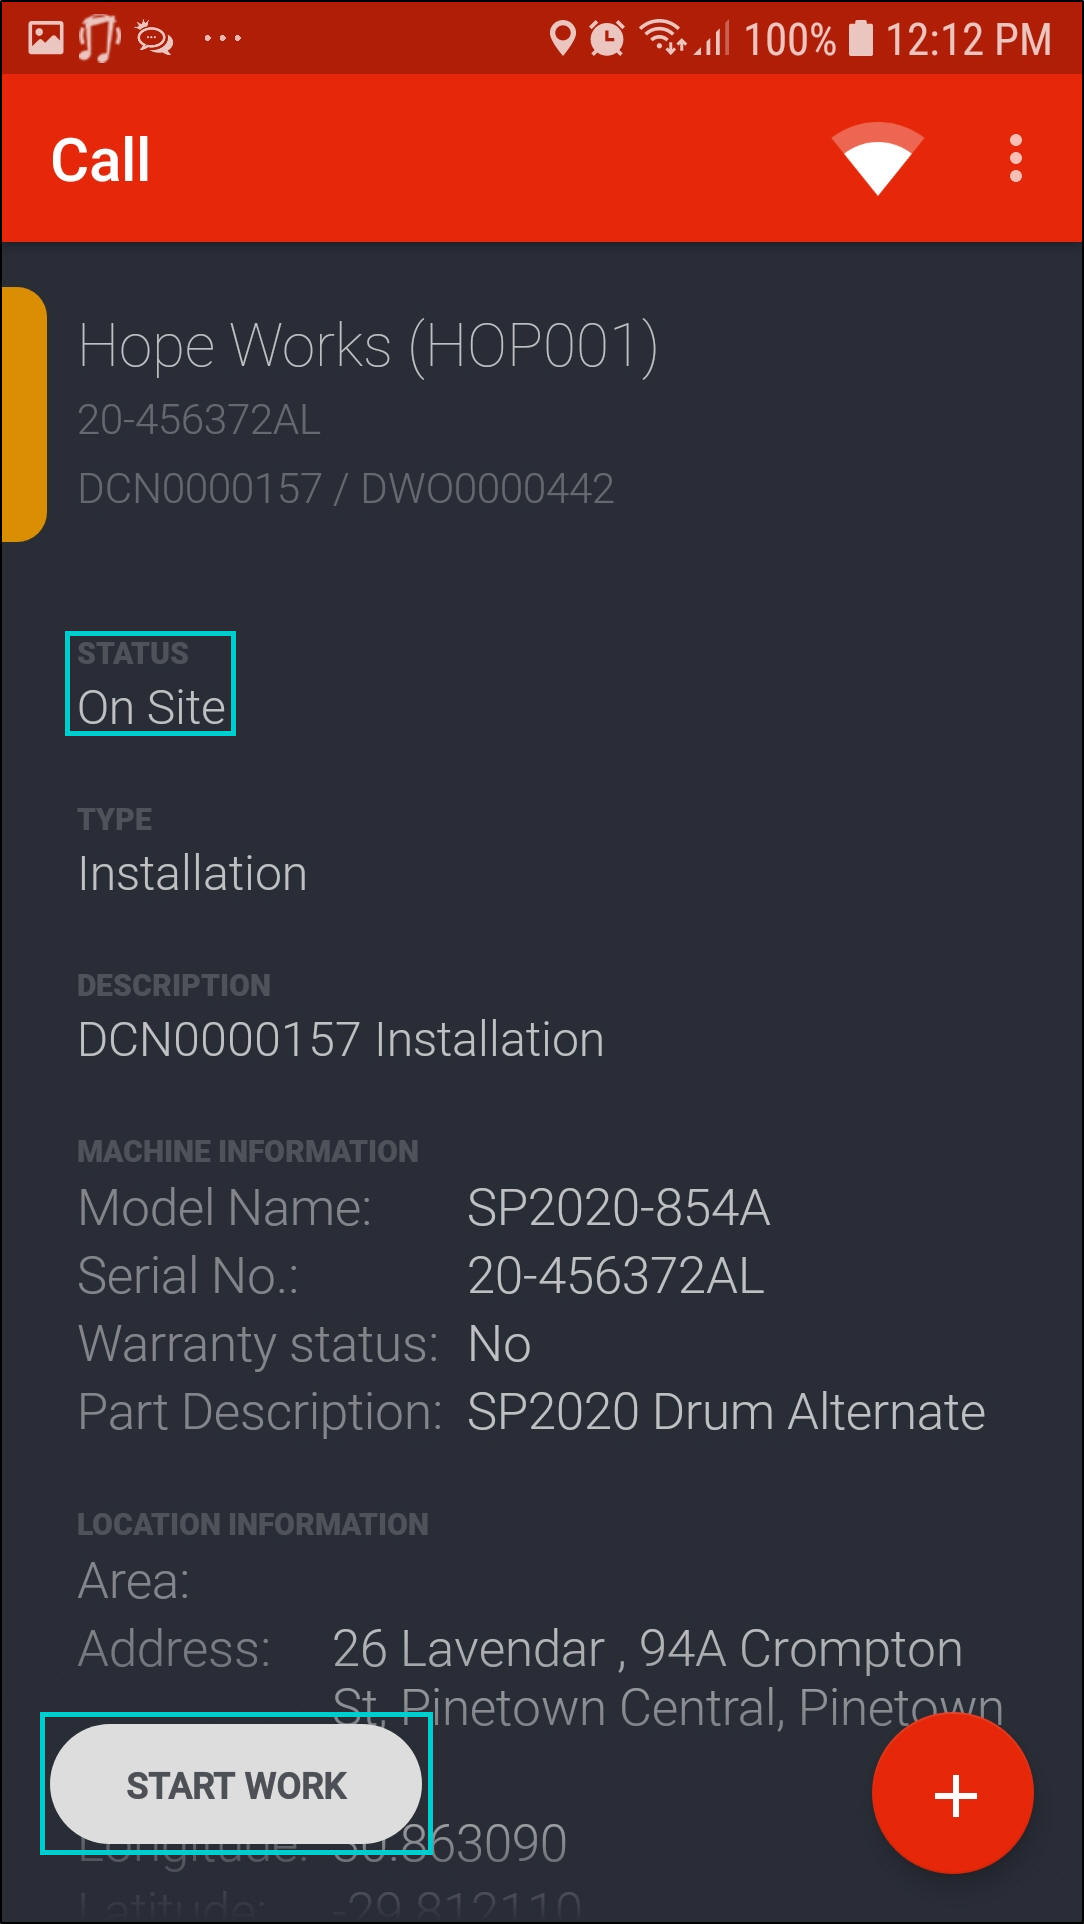
Start Work
- Once you are ready to start, click on Start Work.
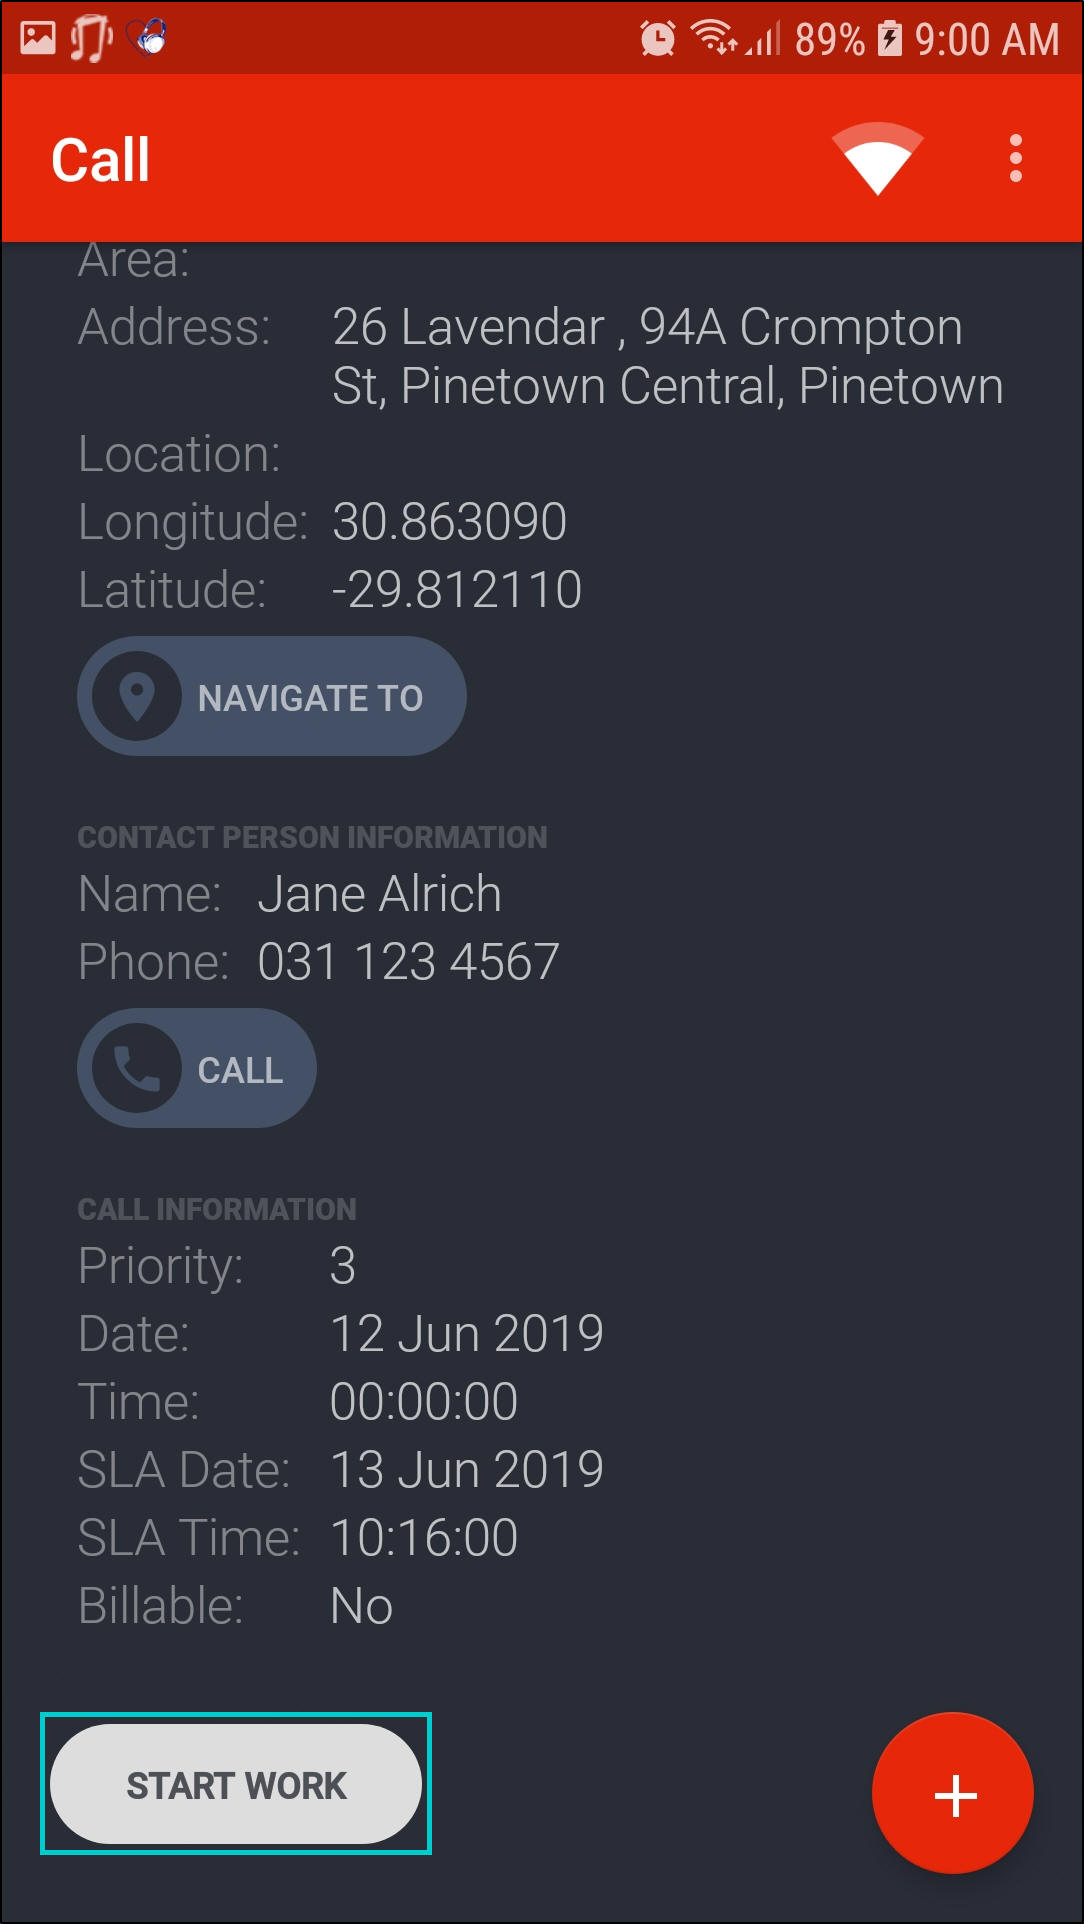
- The call will now move to status Start Work.
- The action button will change to End Work.
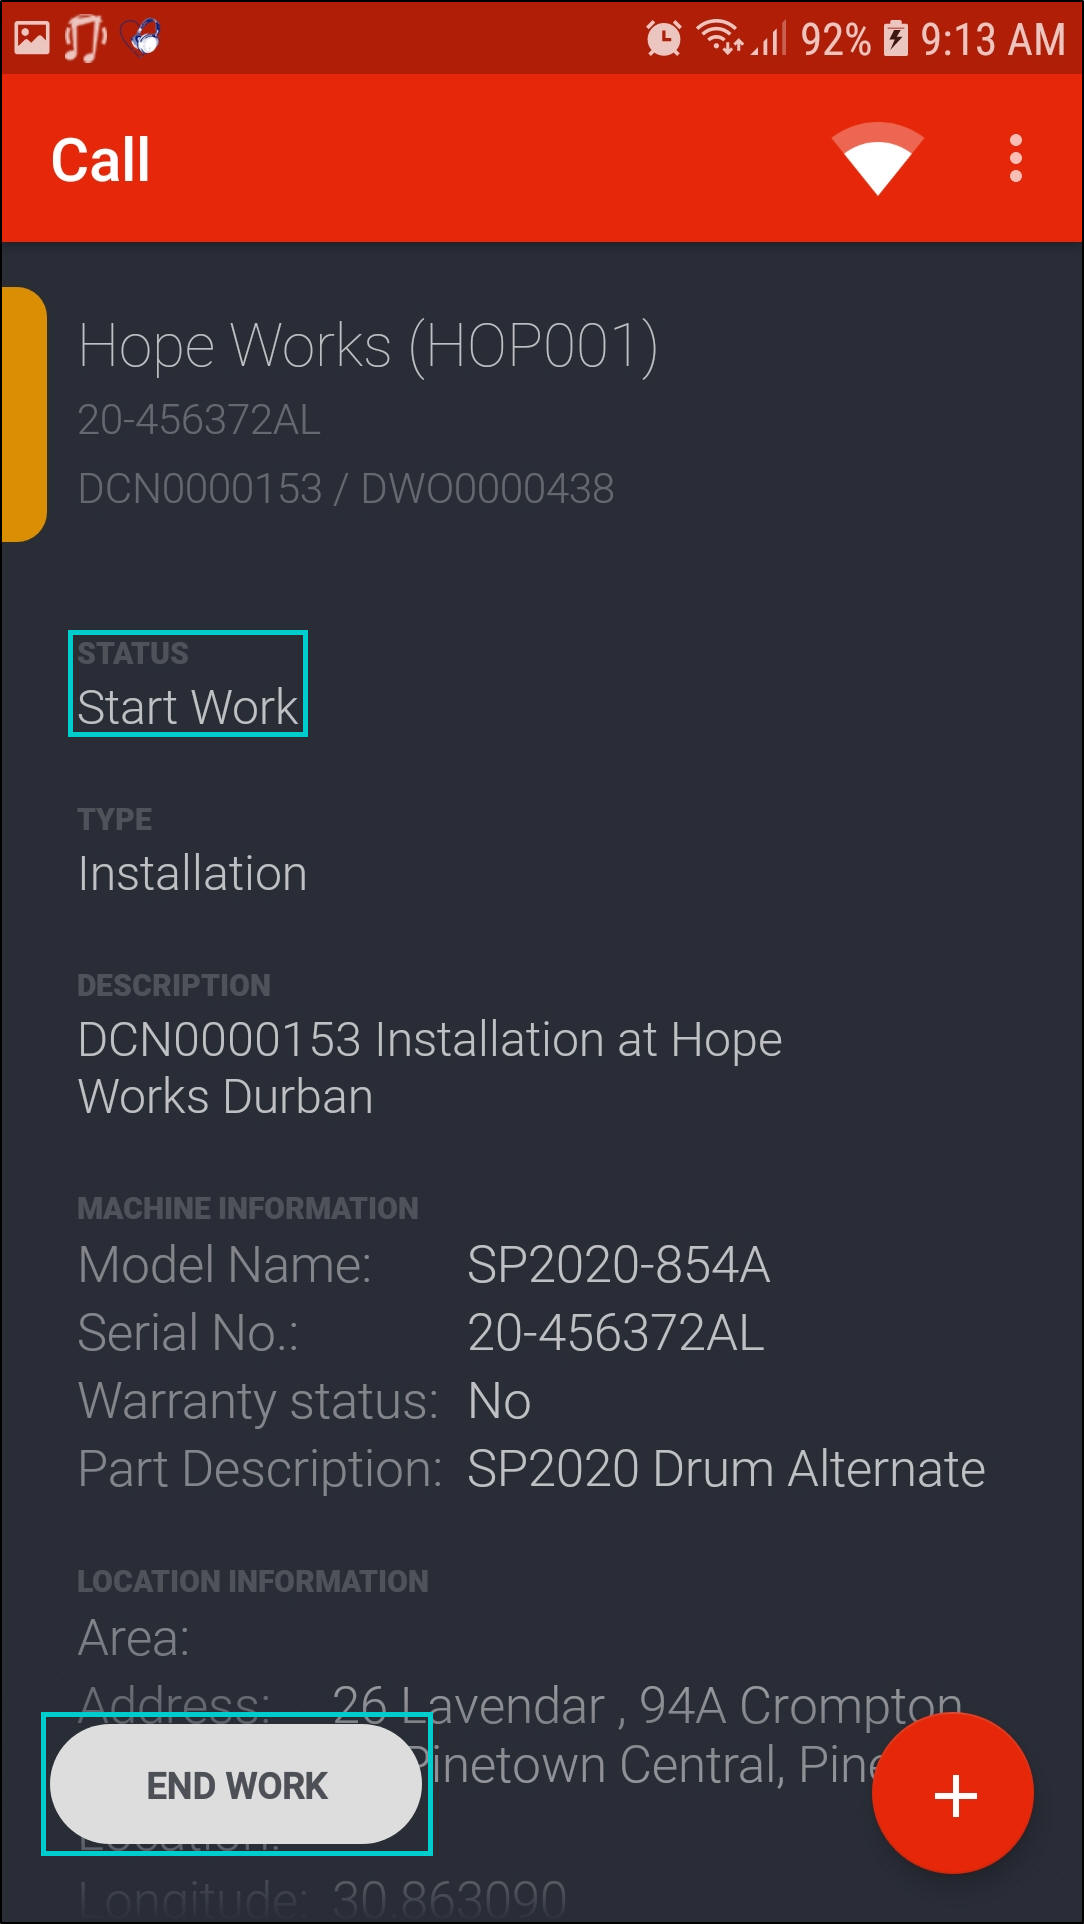
Start Work Call Screen
- Your call has now started. You need to end work before you can work on another call.
- Click on the '+' button to bring up more options for this call.
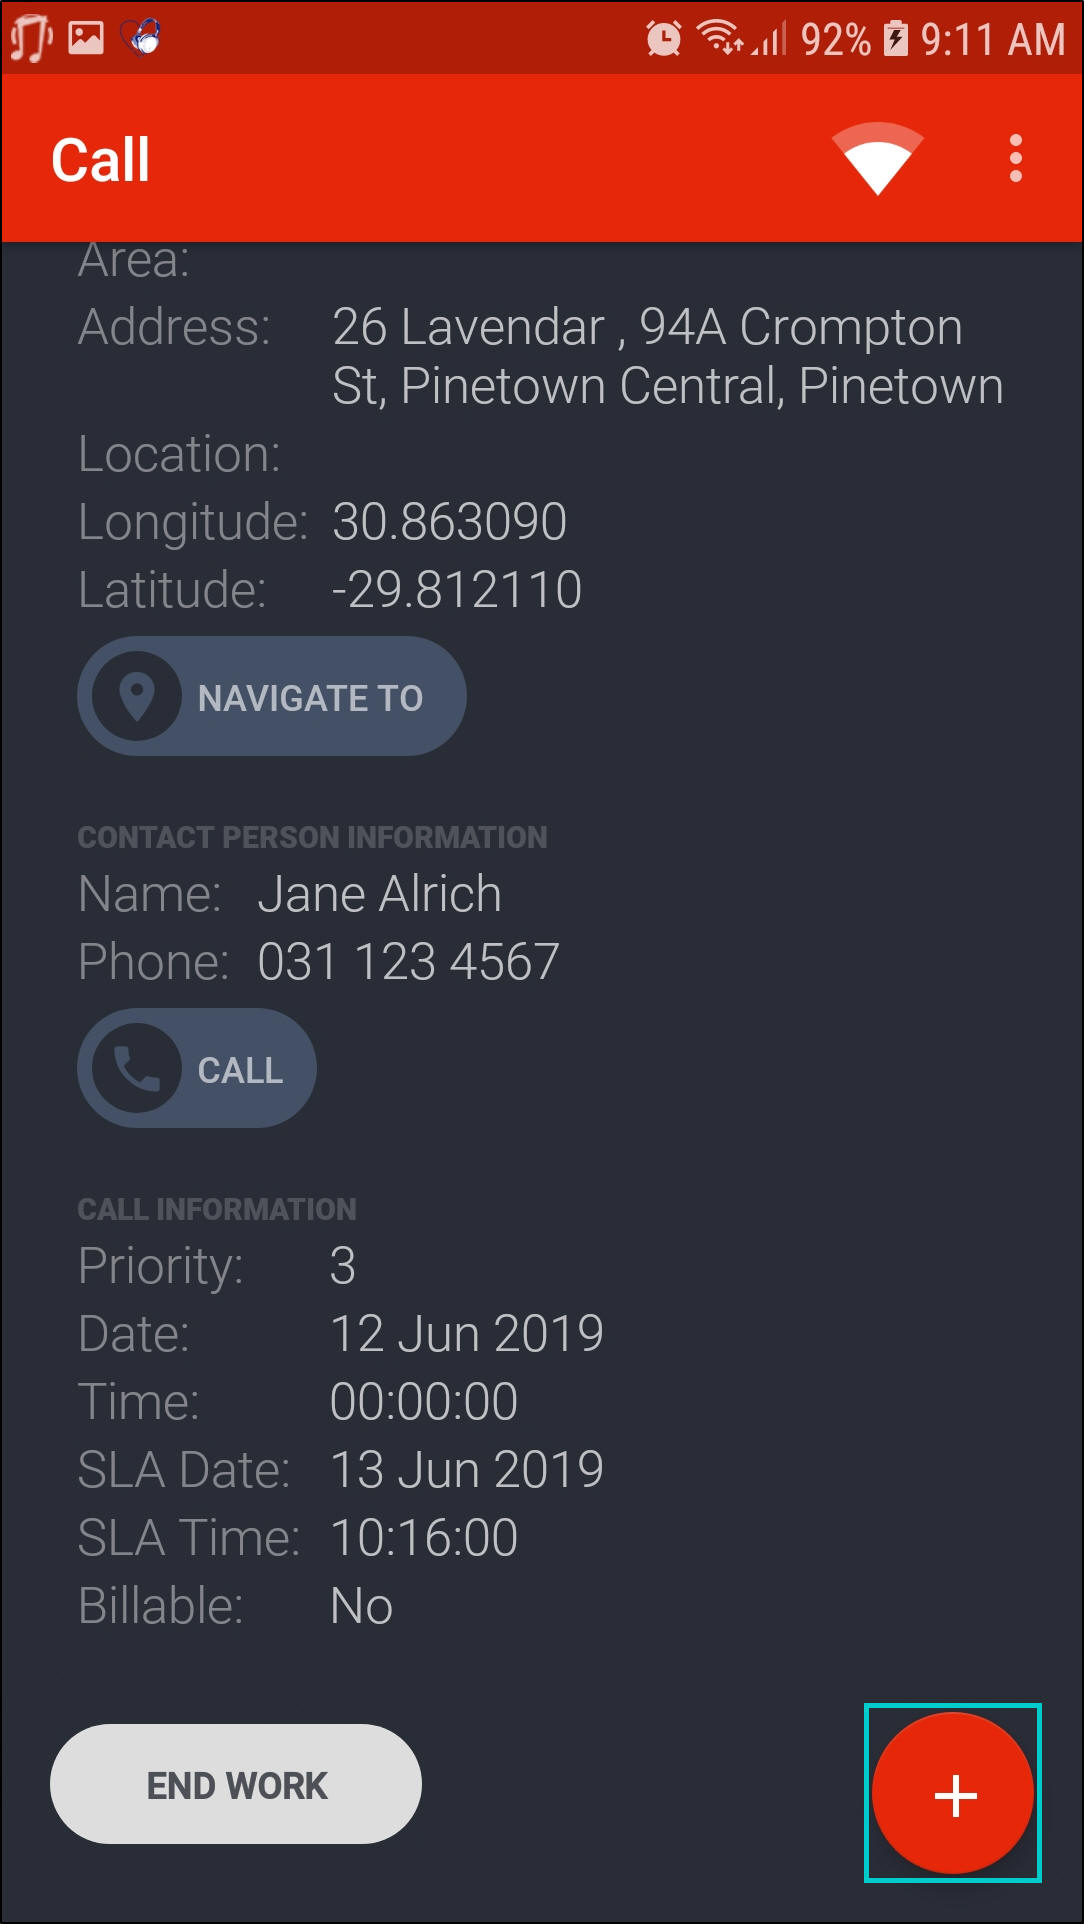
End Work
- Once your work has been completed, or if you can no longer continue with the call, e.g. Parts Required or Awaiting Client Confirmation.
- Click on End Work.

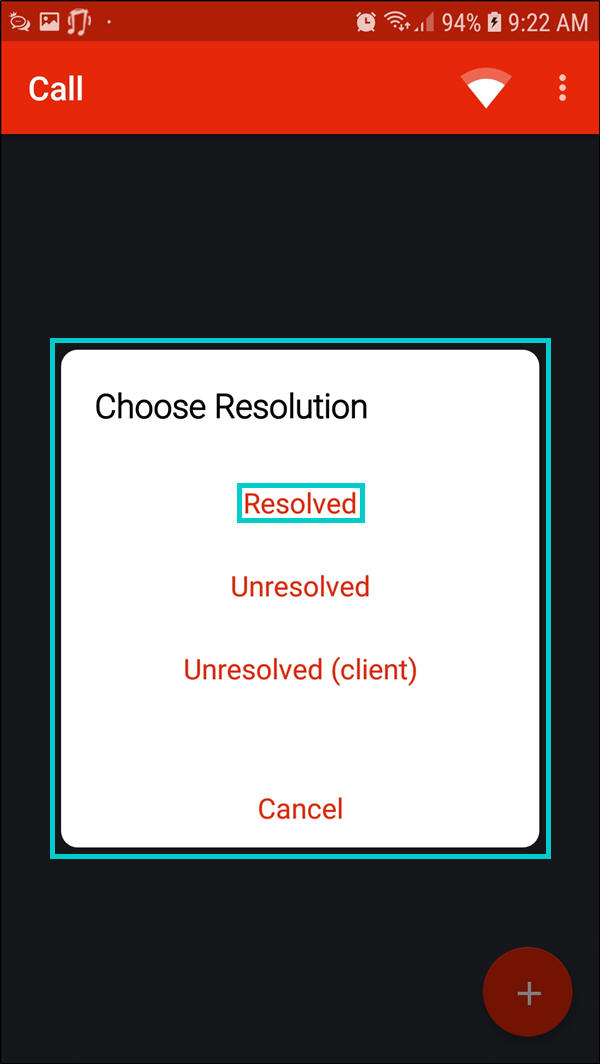
Resolution Actions
- A Choose Resolution message will pop up.
- Select one of the 3 listed Resolution Actions;
- Resolved - once processed, this call will move to Status - Complete in the Call Centre in BPO.
- Unresolved - once processed, this call will move to Status - Pending in the Call Centre in BPO.
- Unresolved (Client) - once processed, this call will move to Status - On Hold in the Call Centre in BPO.
- For the purpose of this manual, Resolved was selected.
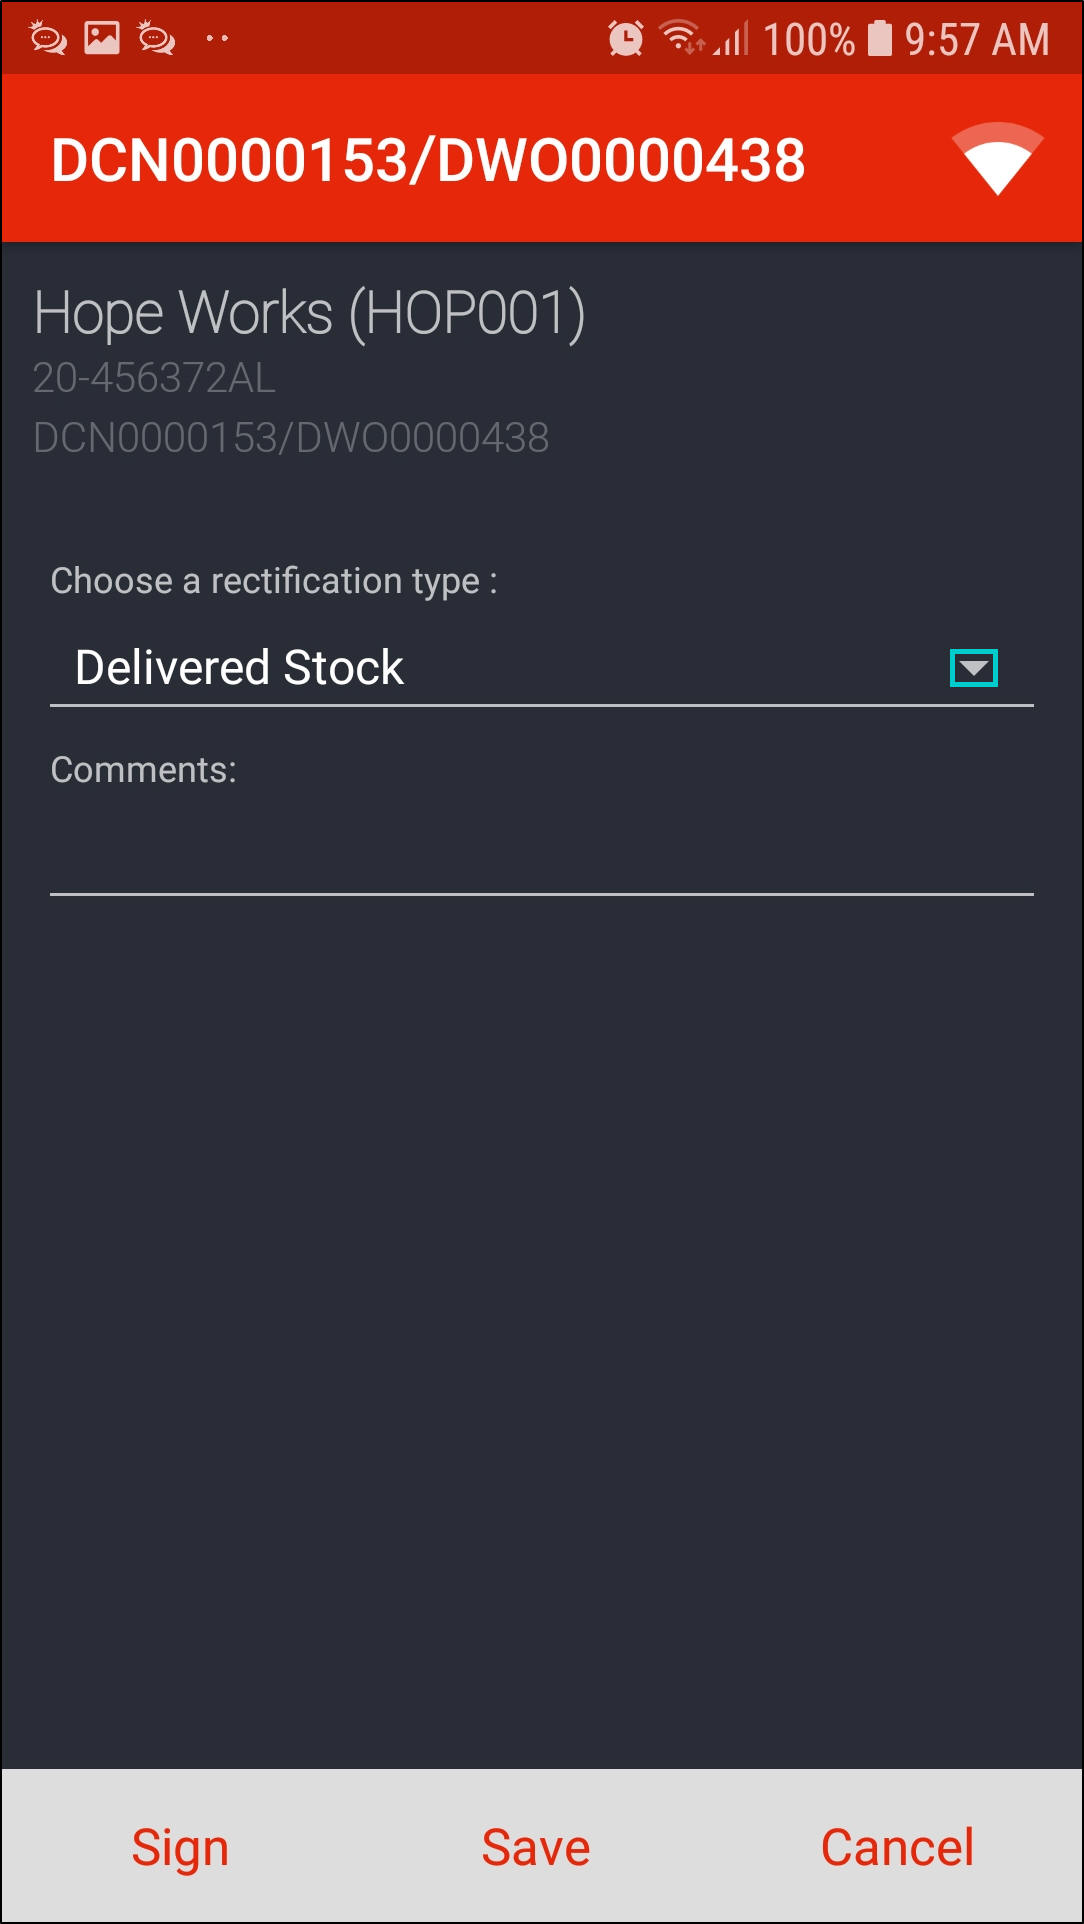
Rectification Comments
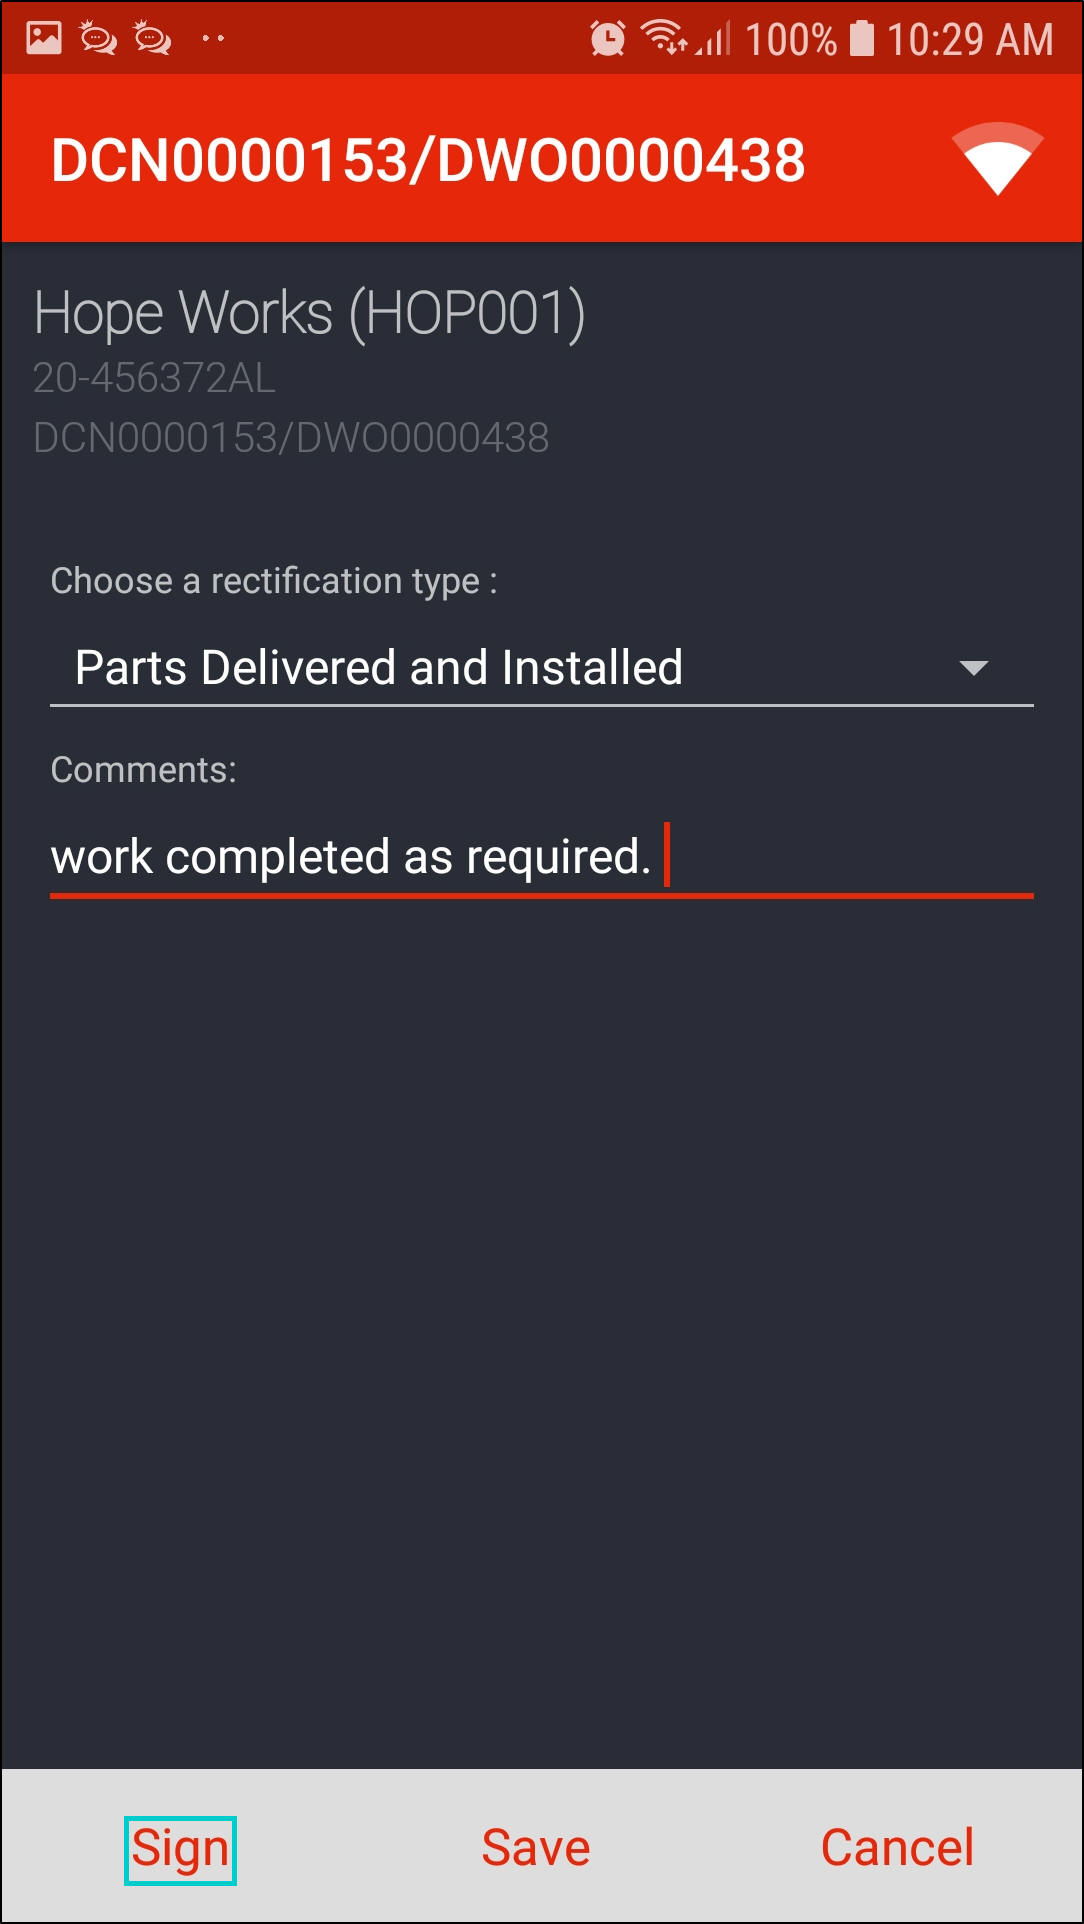
- A rectification comments screen will be displayed.
- In the Choose a rectification type field, Delivered Stock will auto populate but this can be changed.
- To choose another rectification type, click on the down arrow.
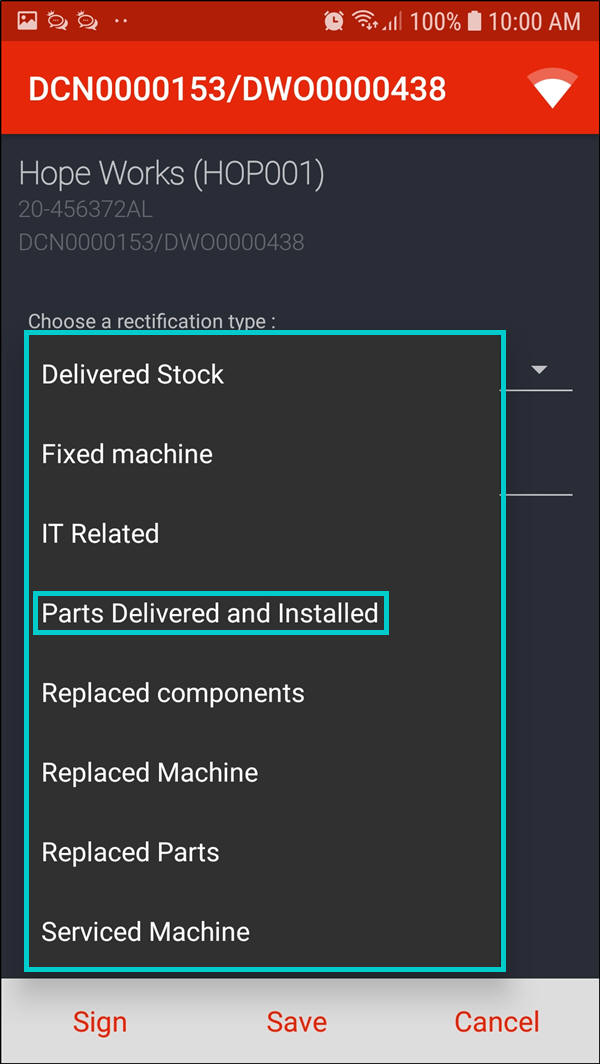
- A menu will be displayed.
- Select a resolution type of your choice.
- In this image, Parts Delivered and Installed was selected.
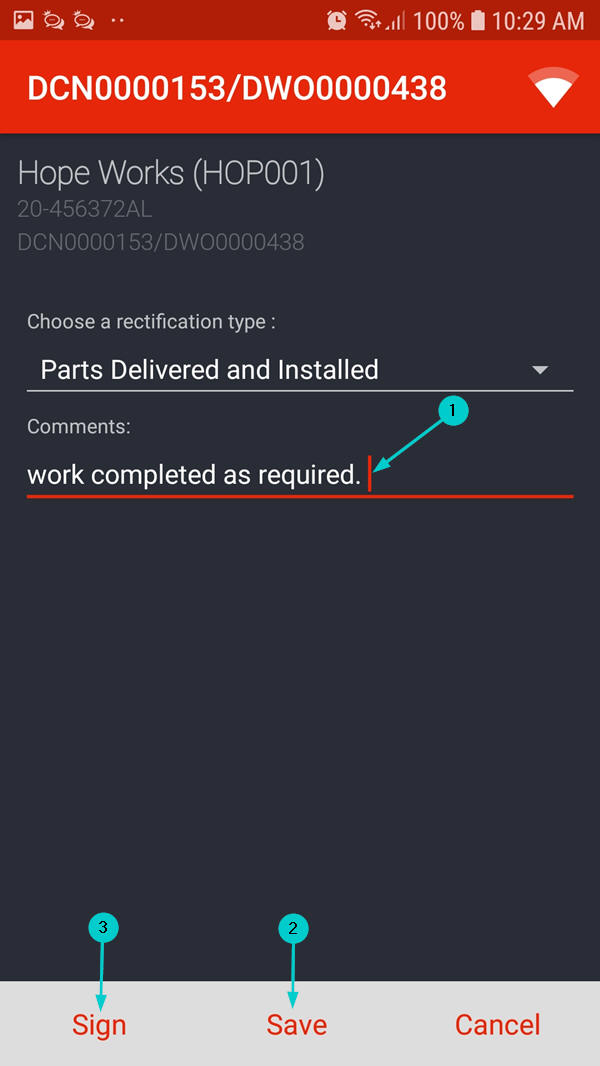
Save Without Signing Off Work
- Select Save if you have a few calls that need to be signed by the same customer - then you can get them all signed afterwards.
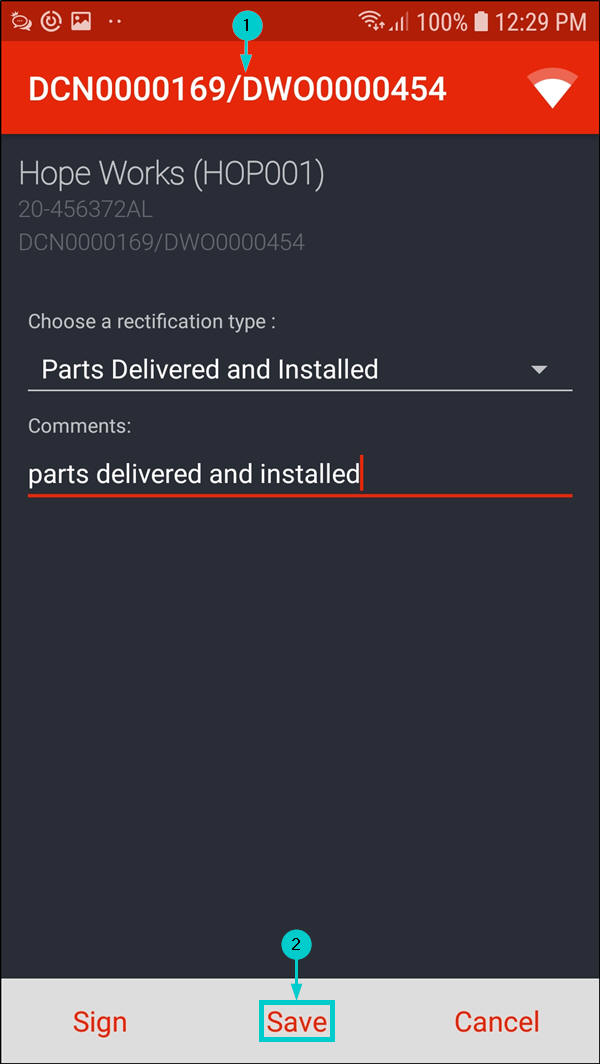
- For the purpose of this manual, DCN0000169 is used as an example.
- Click on Save.
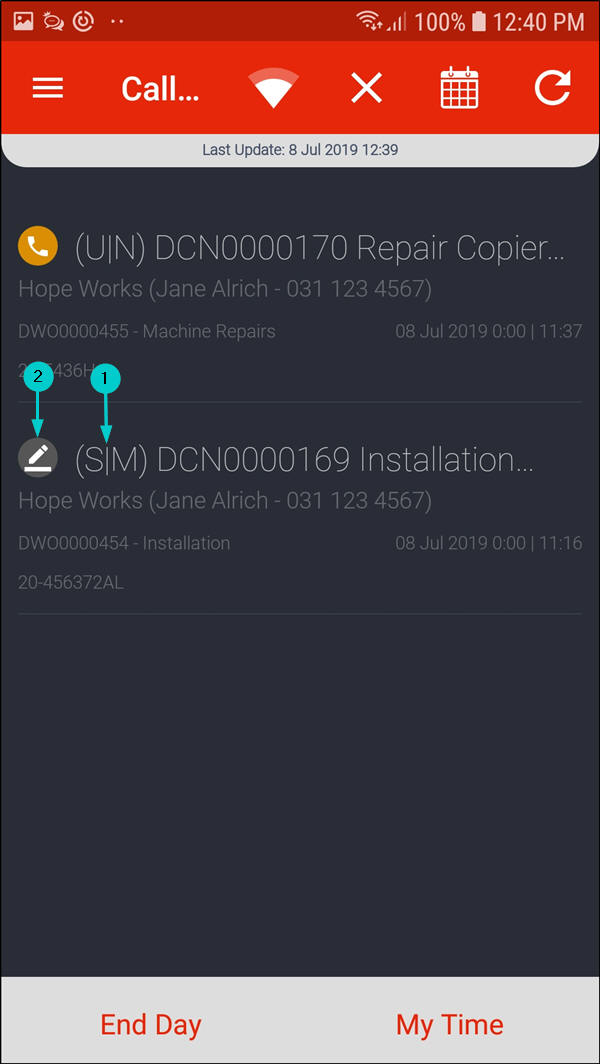
- You will return to the Calls List screen.
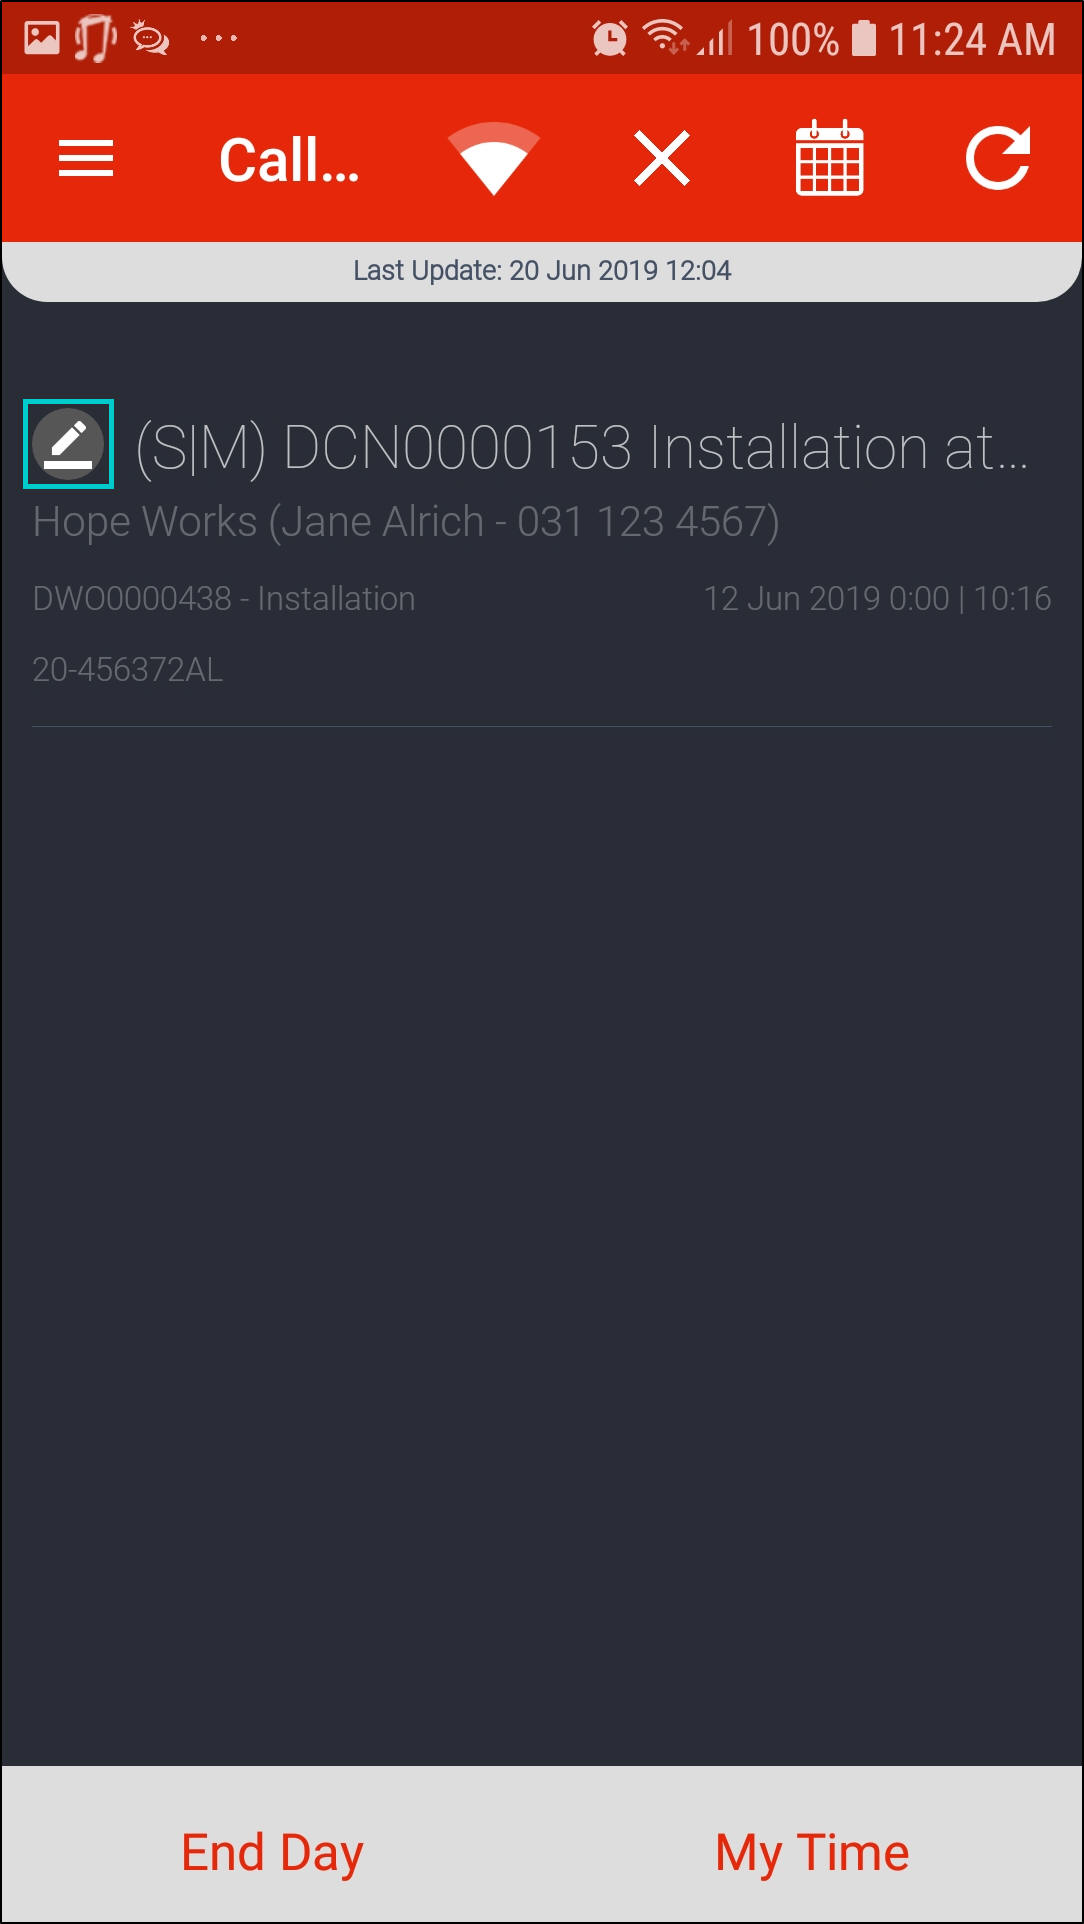
- The status of the call / project will be;
- (S|M) - Awaiting Signature | Complete for a call or (S|O) - Awaiting Signature | Open for a project.
- A signature icon will be displayed and the work info circle will be grey.
- Note 1: Only a call / project that has been ended as Resolved will be displayed in the Calls List screen.
- Note 2: If work has been ended as Unresolved or Unresolved Client, the call / project will be removed from the Calls List screen immediately on Save.
- Note 3: Remember to get the call / project signed off afterwards.
Sign Off Work
- Click on Sign.
Call Report
- A Call Report will be displayed.
- The customer has to check the report, if s/he is satisfied, then
- click on Accept.

Client Comment
- Before the client signs for the work done, they have the ability to add a comment.
- Name: Customer name required.
- Comments: Customer comments required.
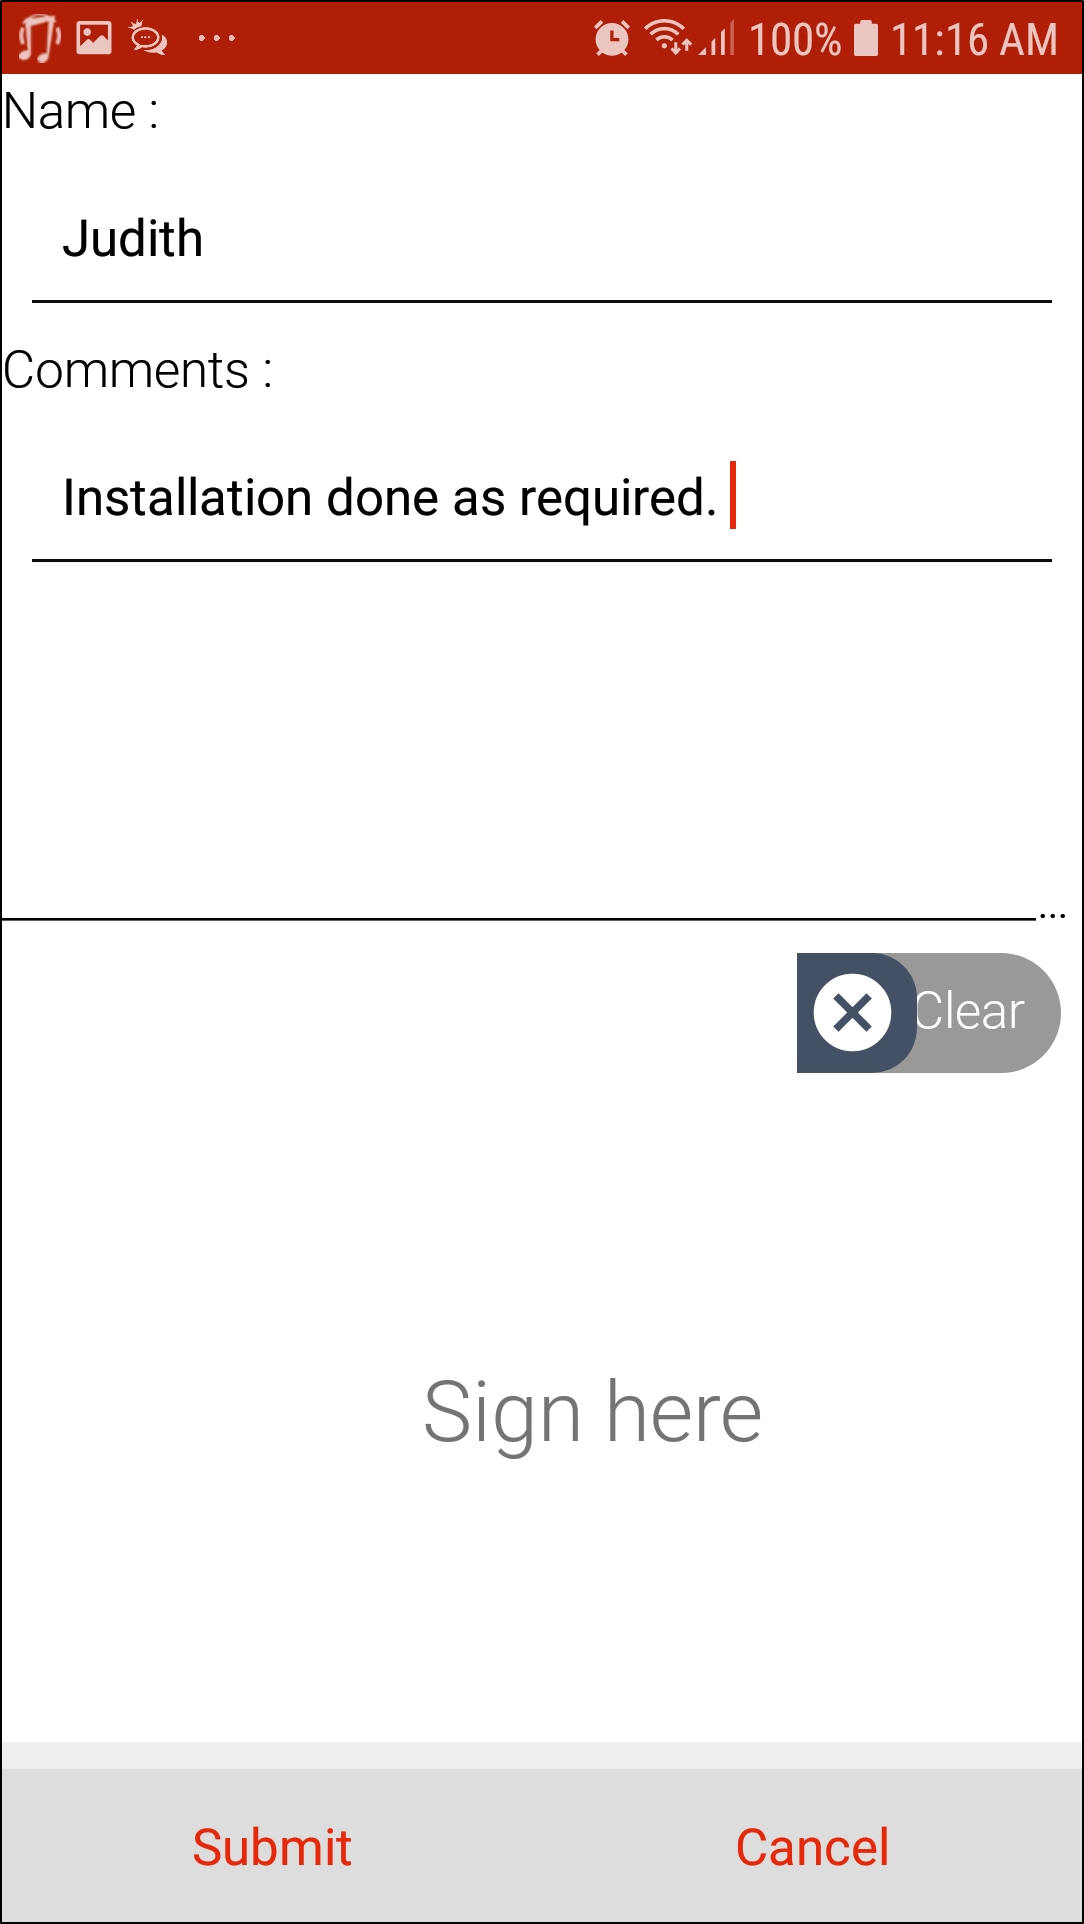
Client Signature
- The client should sign for work done.
- Sign here: Customer signature required.
- Clear: Click on this to clear the signature if a mistake was made.
- Once done, select the Submit.
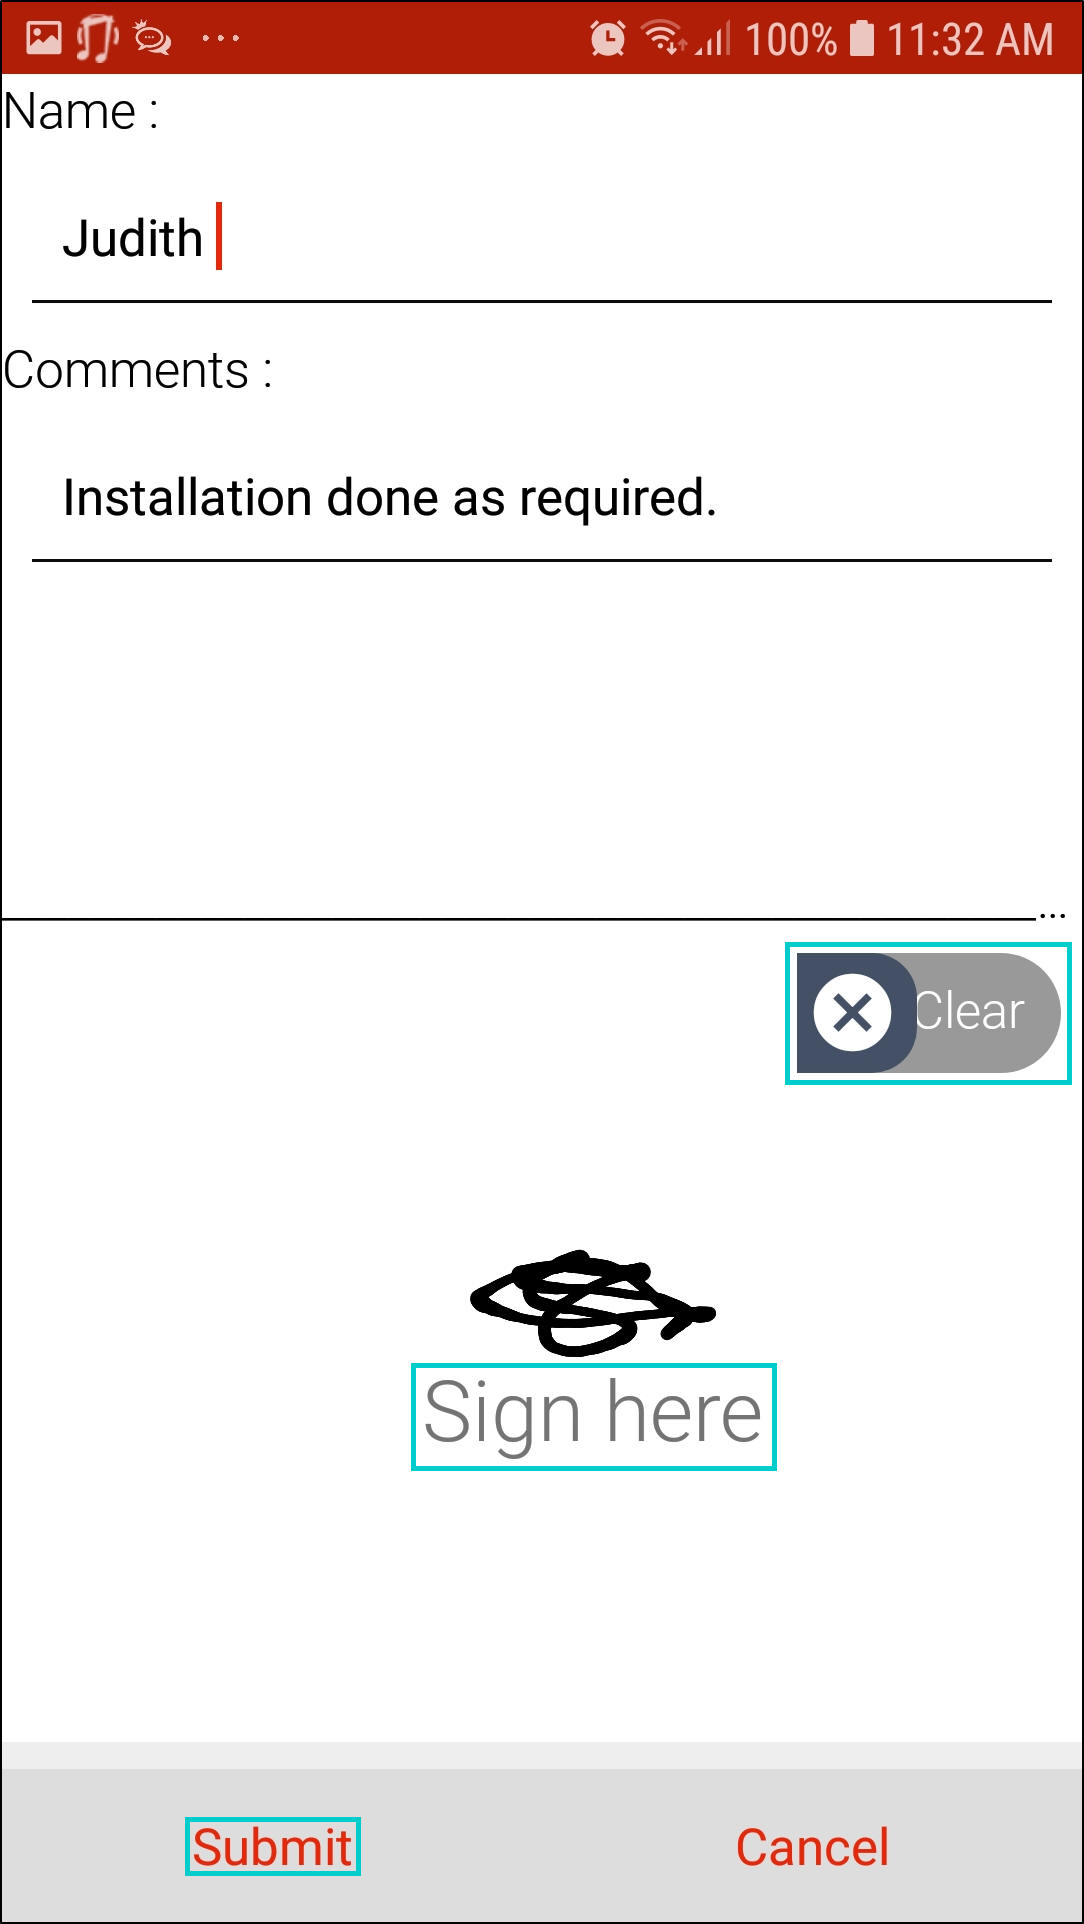
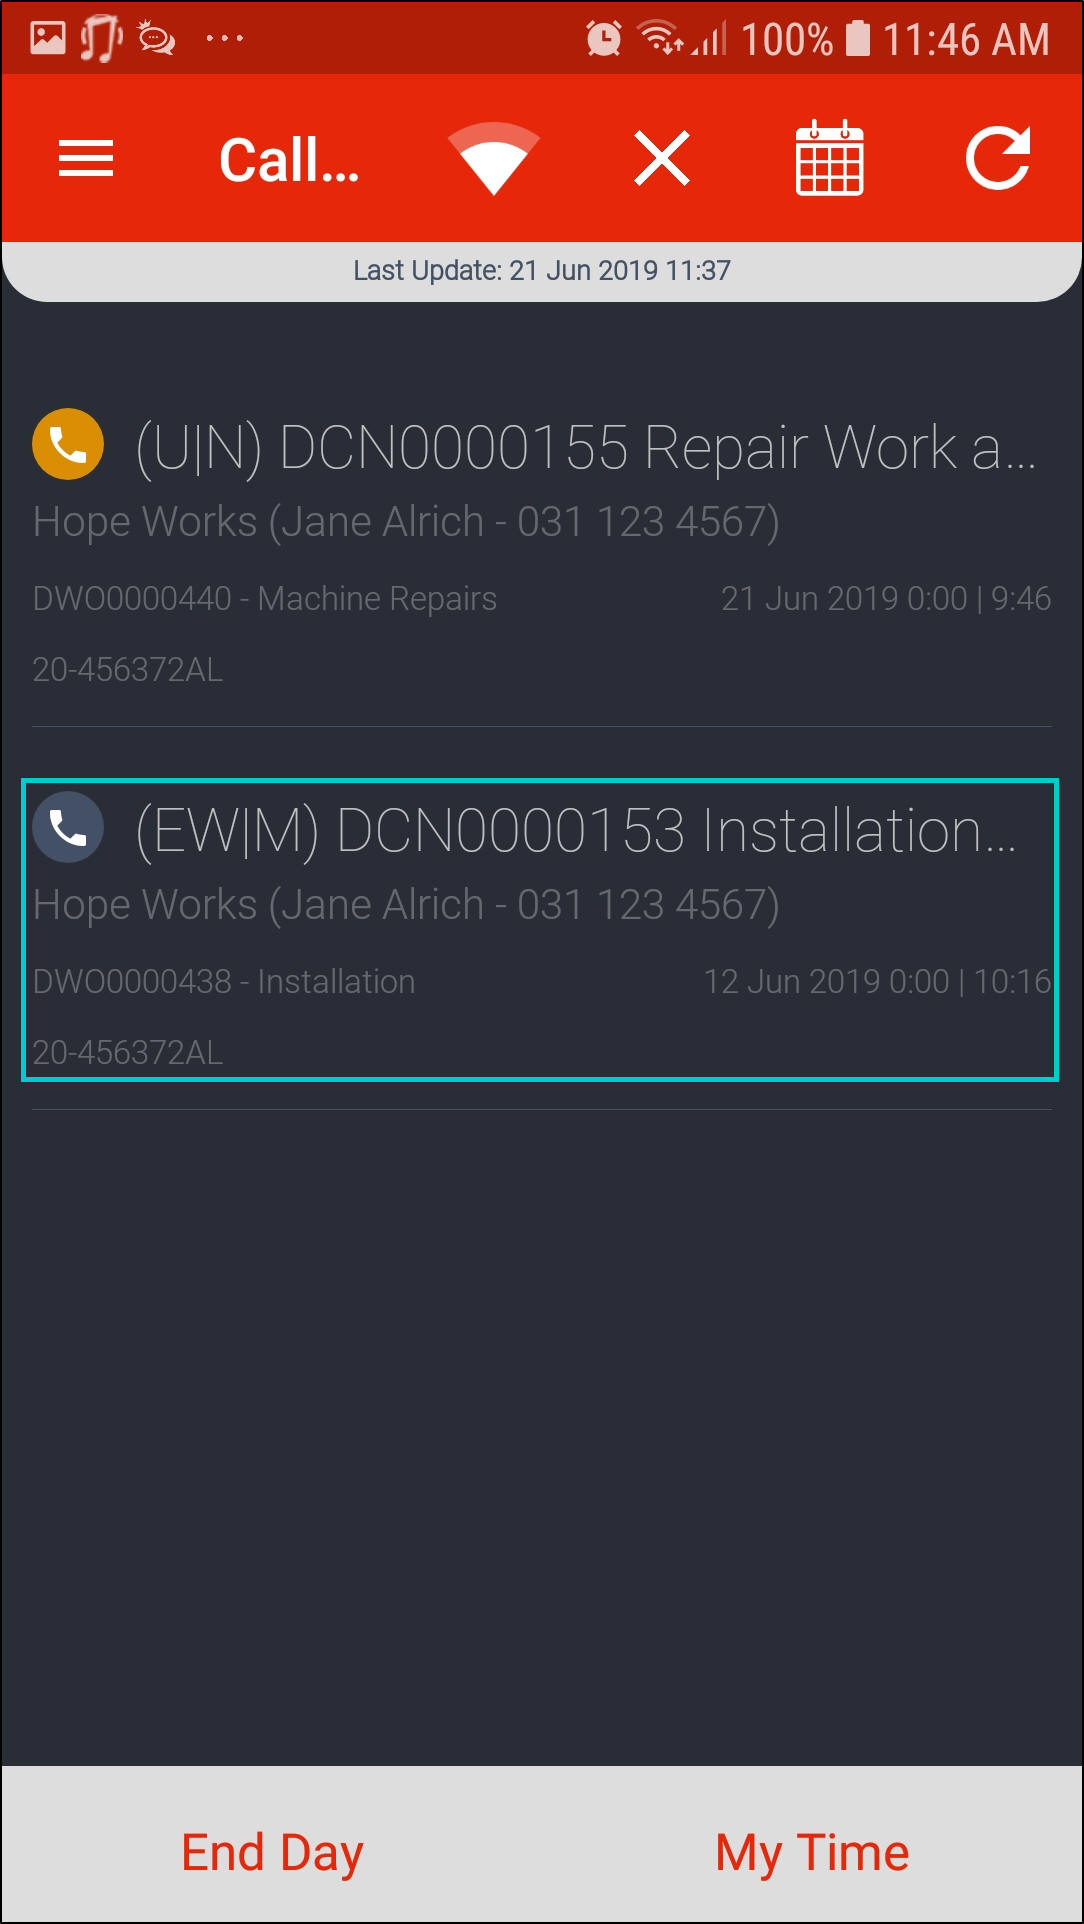
- The call status will change to (EW|M) - End Work.
- If work was ended as Resolved, the call will remain on the technicians list until the following day, unless closed from BPO the same day.
- If work was ended as Unresolved / Unresolved Client, the call will be removed from the technicians list immediately or when the screen is refreshed.
- Follow the same process starting from Tech Connect Work Flow for each call assigned to you, until the end of the day.
Sign Later
- If you selected to Save a completed call without a signature (in order to sign off a couple of calls at once), in the Calls List screen, you will see a signature icon appear in front of the call - notifying you that you still need a signature for that call.
- Click on the call and follow the same process from Call Report for each call assigned that requires a signature.
MNU.150.004