Chart of Accounts
Add a New Account - Segmented ledger
In the Chart of Accounts, you can add a new Account Code. In this topic we will look at adding a non-segmented (or flat) account.
- Segmented Chart of Accounts: This structure is more complex and is used by larger organizations that require detailed tracking and reporting. A segmented COA breaks down accounts into multiple segments or dimensions, such as department, location, or project. Each segment can have its own set of codes, allowing for a more granular and detailed categorization of financial transactions. This facilitates more sophisticated reporting and analysis, as it enables filtering and sorting of financial data across different segments of the organization.
- For more information on segment types that can be configured - refer to Account Drivers - Segment Types.
Note: ensure that your have configured Segment Codes in Segment Mapping before processing any transactions against Segmented Accounts.
Chart of Accounts Listing Screen
- In the example below I am using a Segment Chart of Account structure with 2 segments: Site (SITE) and Employee Department (DEMP).
Ribbon Select Chart of Accounts - Chart of Accounts

- The Chart of Accounts Listing screen will be displayed.
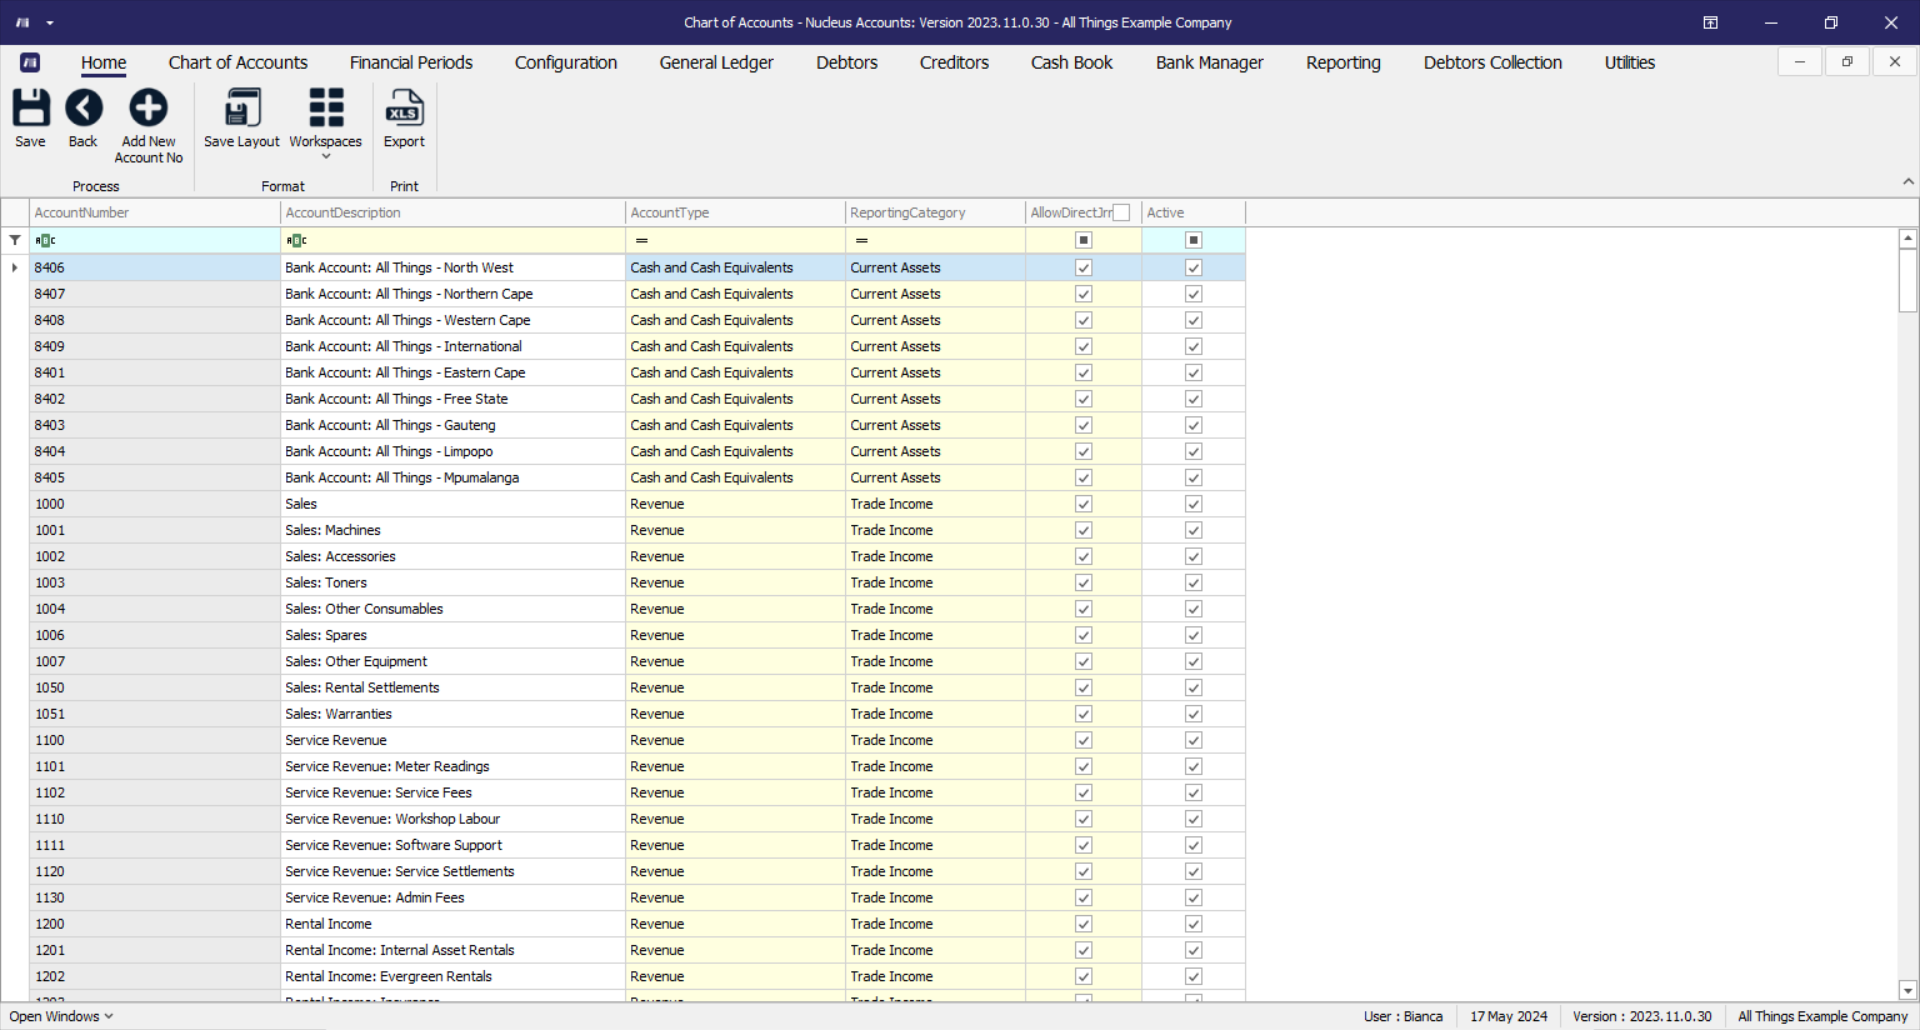
- Account Number: Is a unique multi-digit numeric code assigned to each financial account within a company's general ledger. This numbering system is designed to categorize and identify accounts easily, facilitating the organization, recording, and reporting of financial transactions.
- Account Description: A brief narrative that explains the purpose or nature of a specific account within the general ledger. It provides clarity on what types of transactions should be recorded in that account, ensuring accurate and consistent financial reporting. This description helps users of the financial statements, like accountants and auditors, to quickly understand the financial activities represented by each account.
Add New Account
- Click on the Add New Account No button.

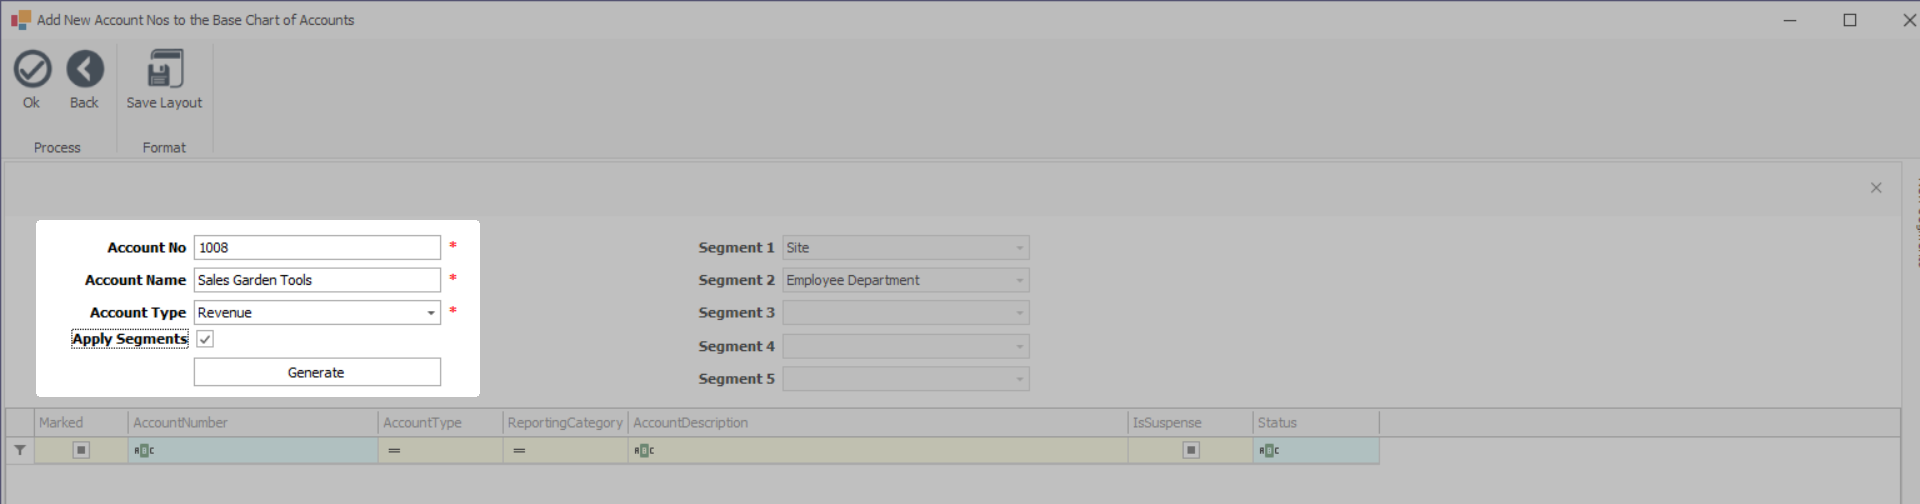
- The Add New Account maintain screen will open.
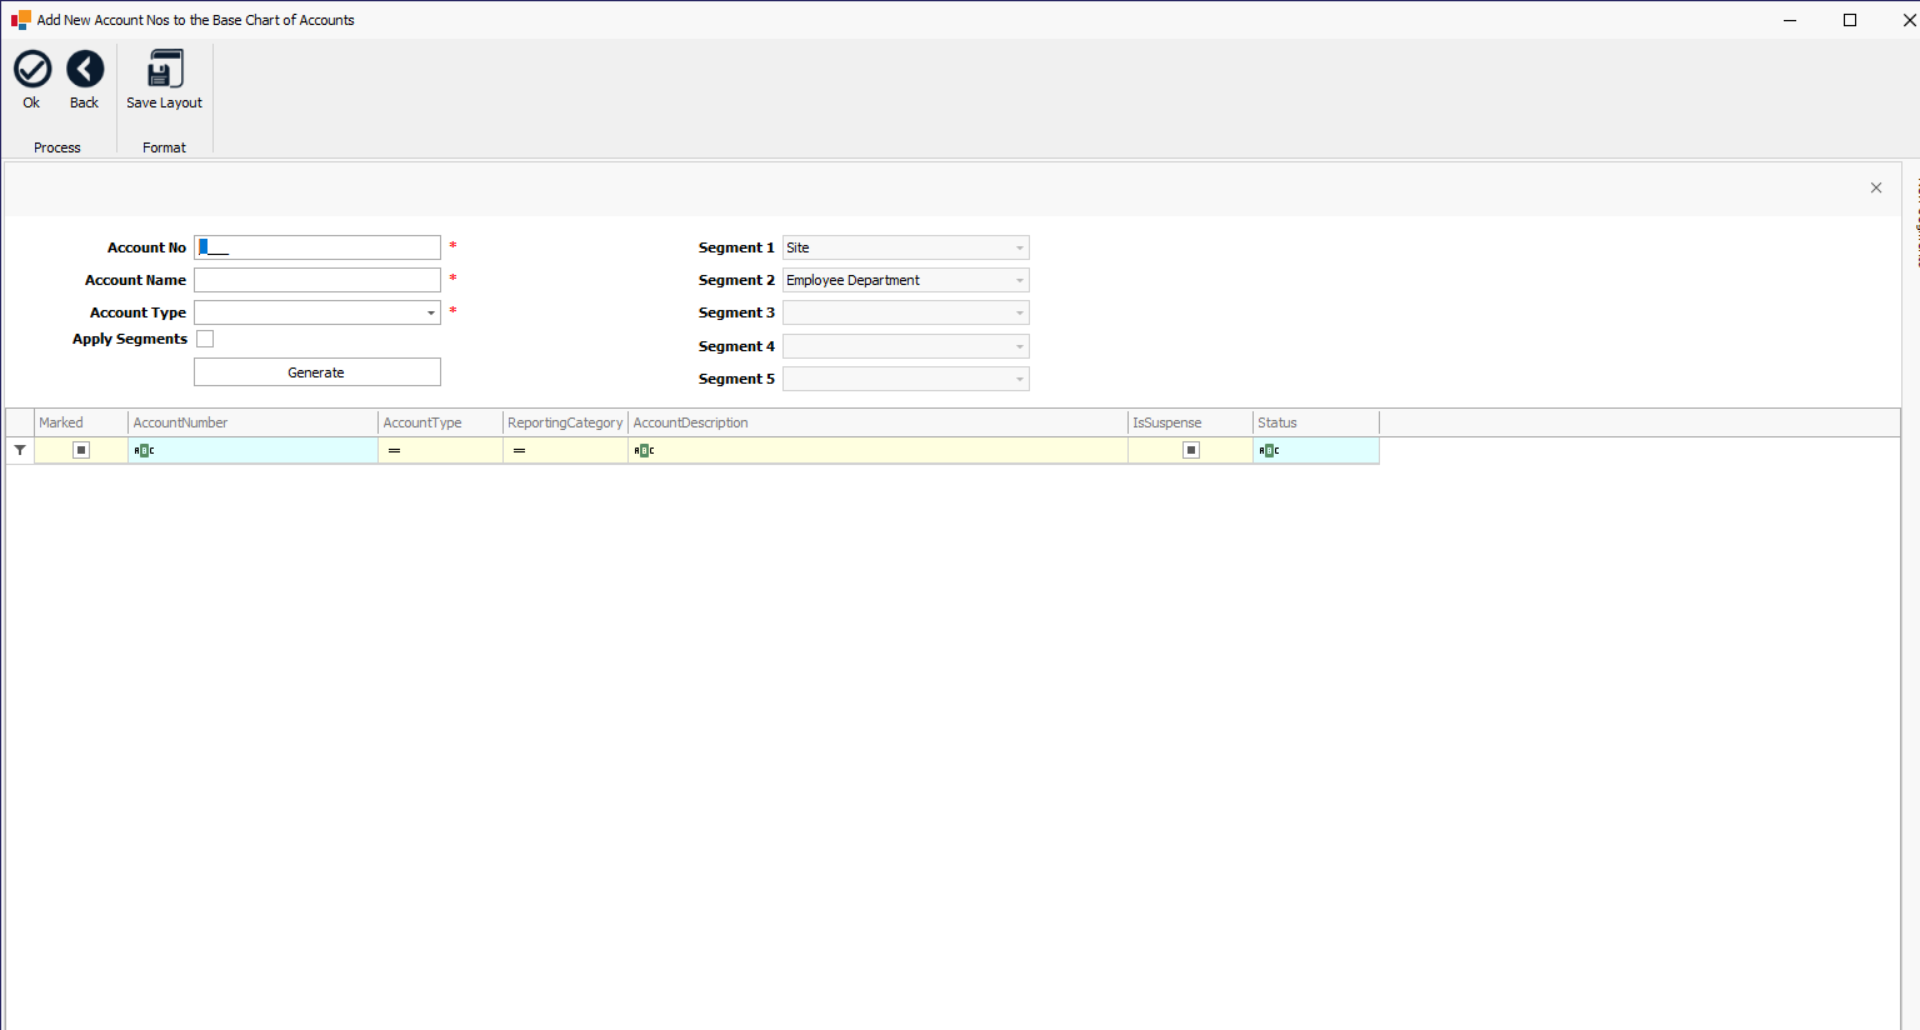
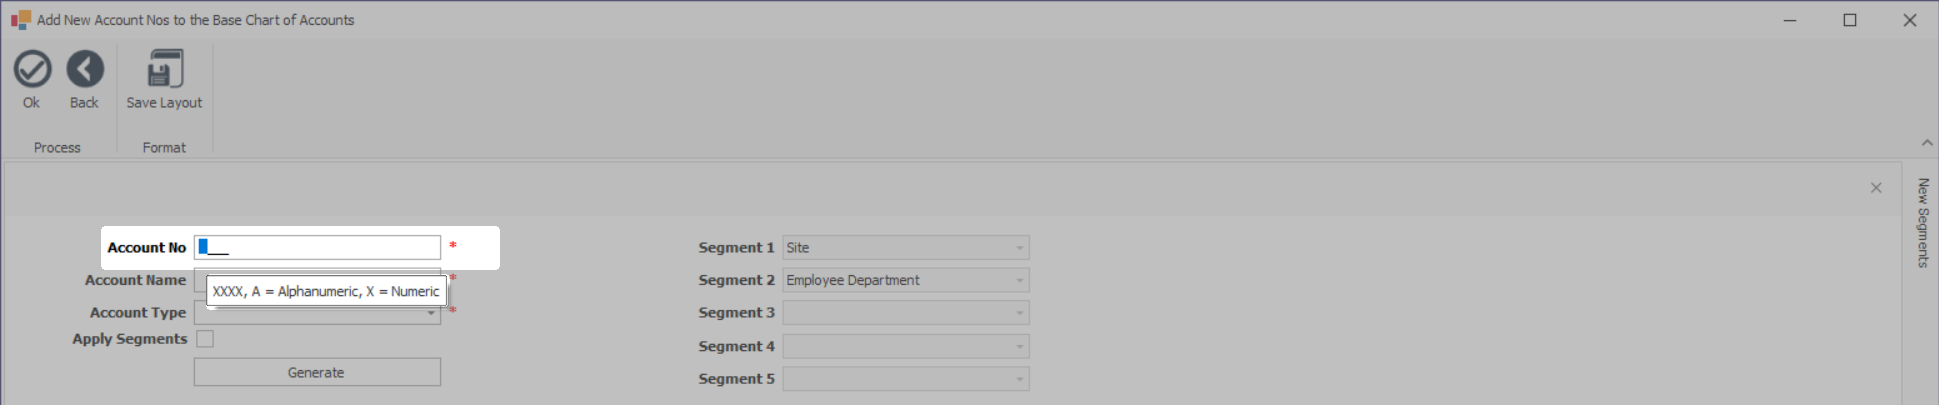
- The Account No field is masked so that the correct formatting is used when creating a new account. This is set up in Nucleus Configurator - Company Config - AccountCodeMask. This flag utilizes a combination of X and A characters that denotes Numerical and Alphanumerical characters, respectively.
- In the example below, you will note that the tool tip text indicates the mask is XXXX (i.e. four numerical characters).
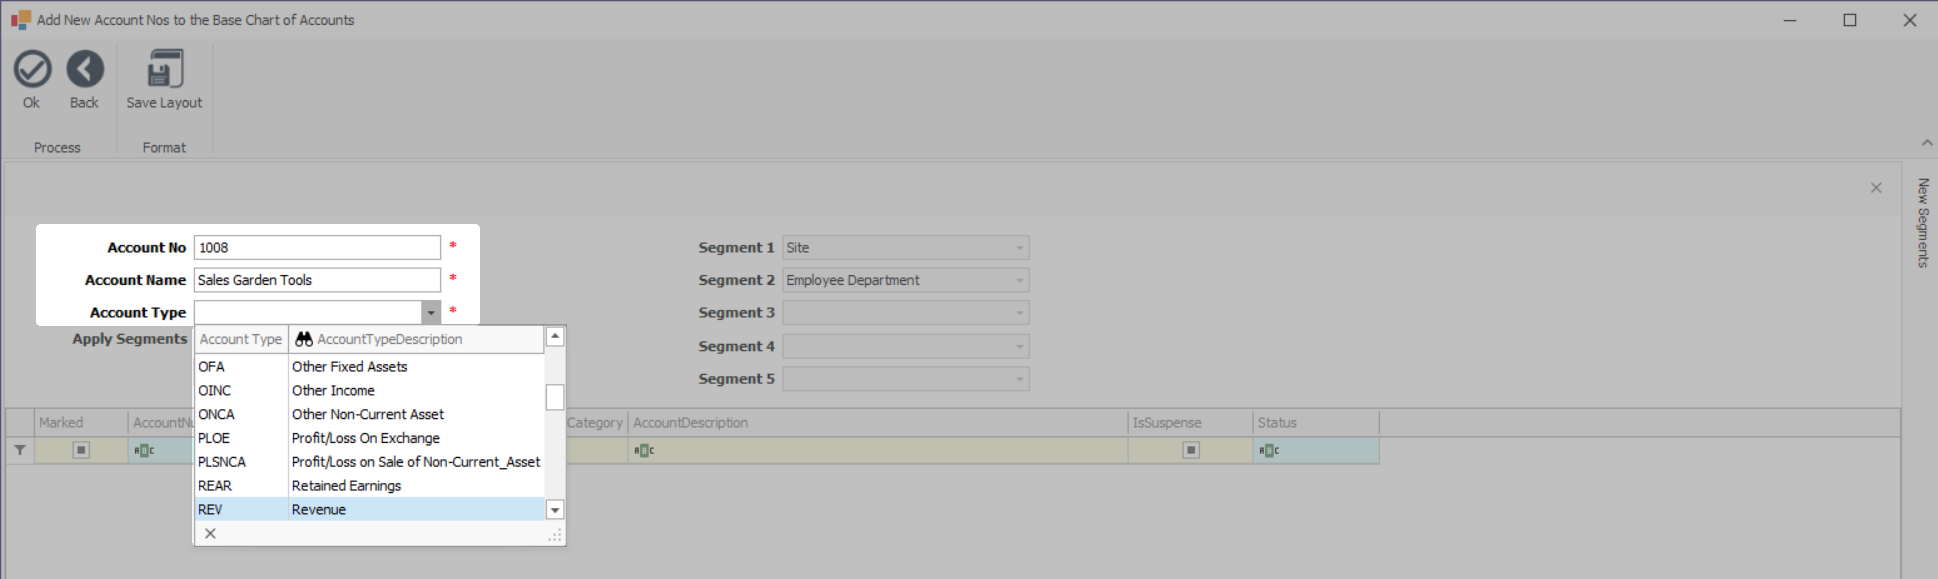
- Account Name: Briefly describe the account in a way that is concise and meaningful, so that it is easy to understand the financial activities represented.
- Account Type: This refers to the broad classification within the Chart of Accounts that organizes financial transactions. Account types are the main categories under which accounts are grouped, such as assets, liabilities, equity, revenues, and expenses. Each account type is designed to reflect a specific aspect of the business's financial situation and is used to structure the general ledger for systematic recording and reporting.
- Select an account type from the drop down list.
- Apply Segments: This flag is to specify whether segments should be created for this account. By default, this option is turned off. It will automatically activate only if your Account Type is set to Apply Segments. If not set and a segmented account is required, ensure the flag is selected.
- Click on the Generate button.
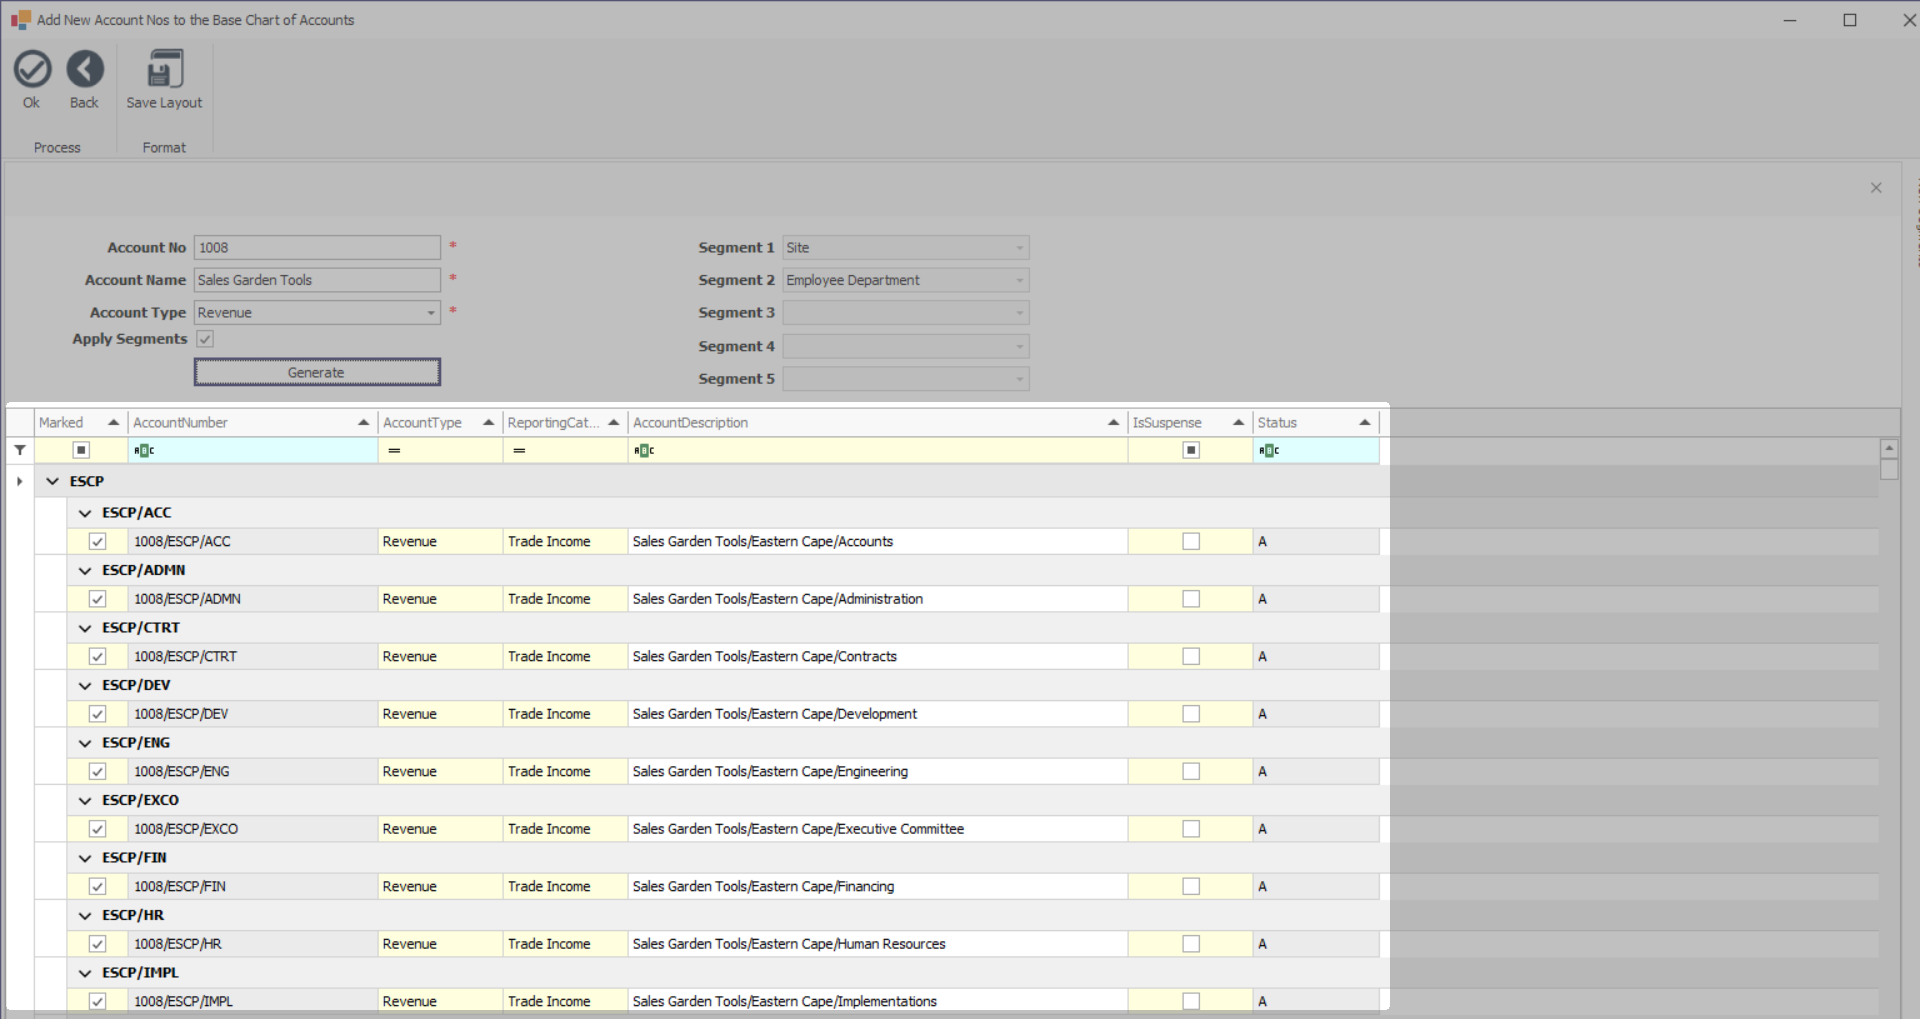
- The Segmented Accounts to be generated will display in the Account List datagrid, with the ability to change the Account Description and Suspense Account option.
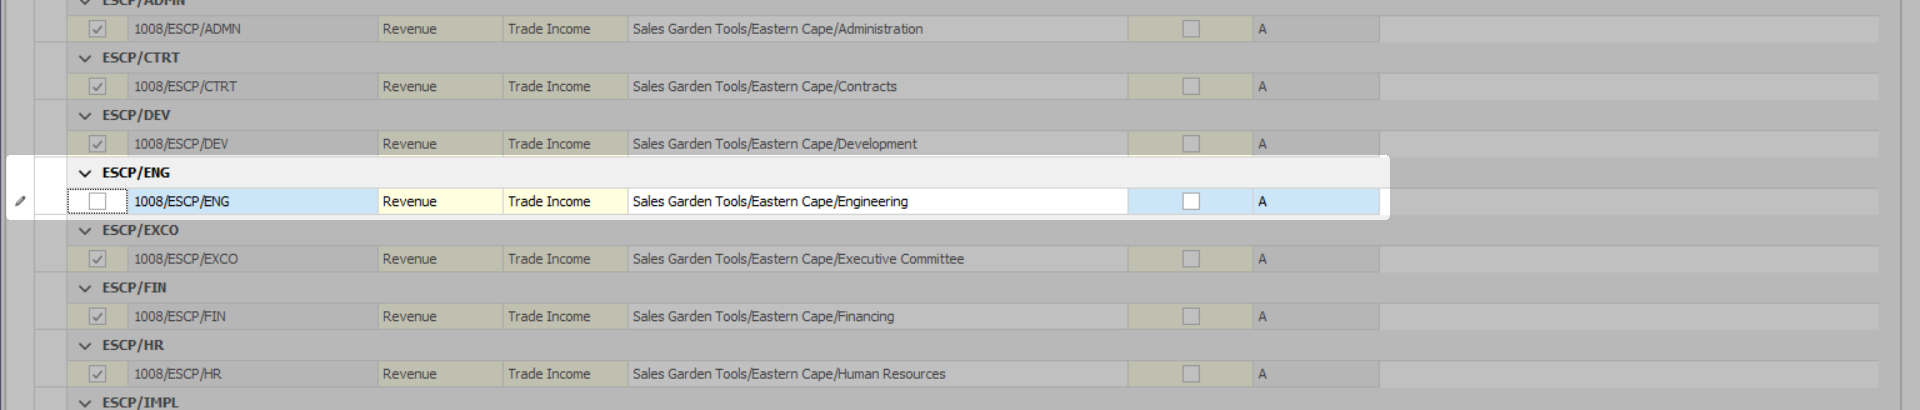
- The Marked column is used for Segmented Accounts.in the instance where you do not need all the segments that have been generated in this listing. For example, let us say that the Eastern Cape branch does not have an Engineering department - this account can be unselected and won't be added to the Chart of Accounts.
- As per the example above, I have unselected the 100/ESC/ENG account (Sales Garden Tools/EasternCape/Engineering).
- Once you have completed deselecting the accounts that are not required, you can move on to the next step.
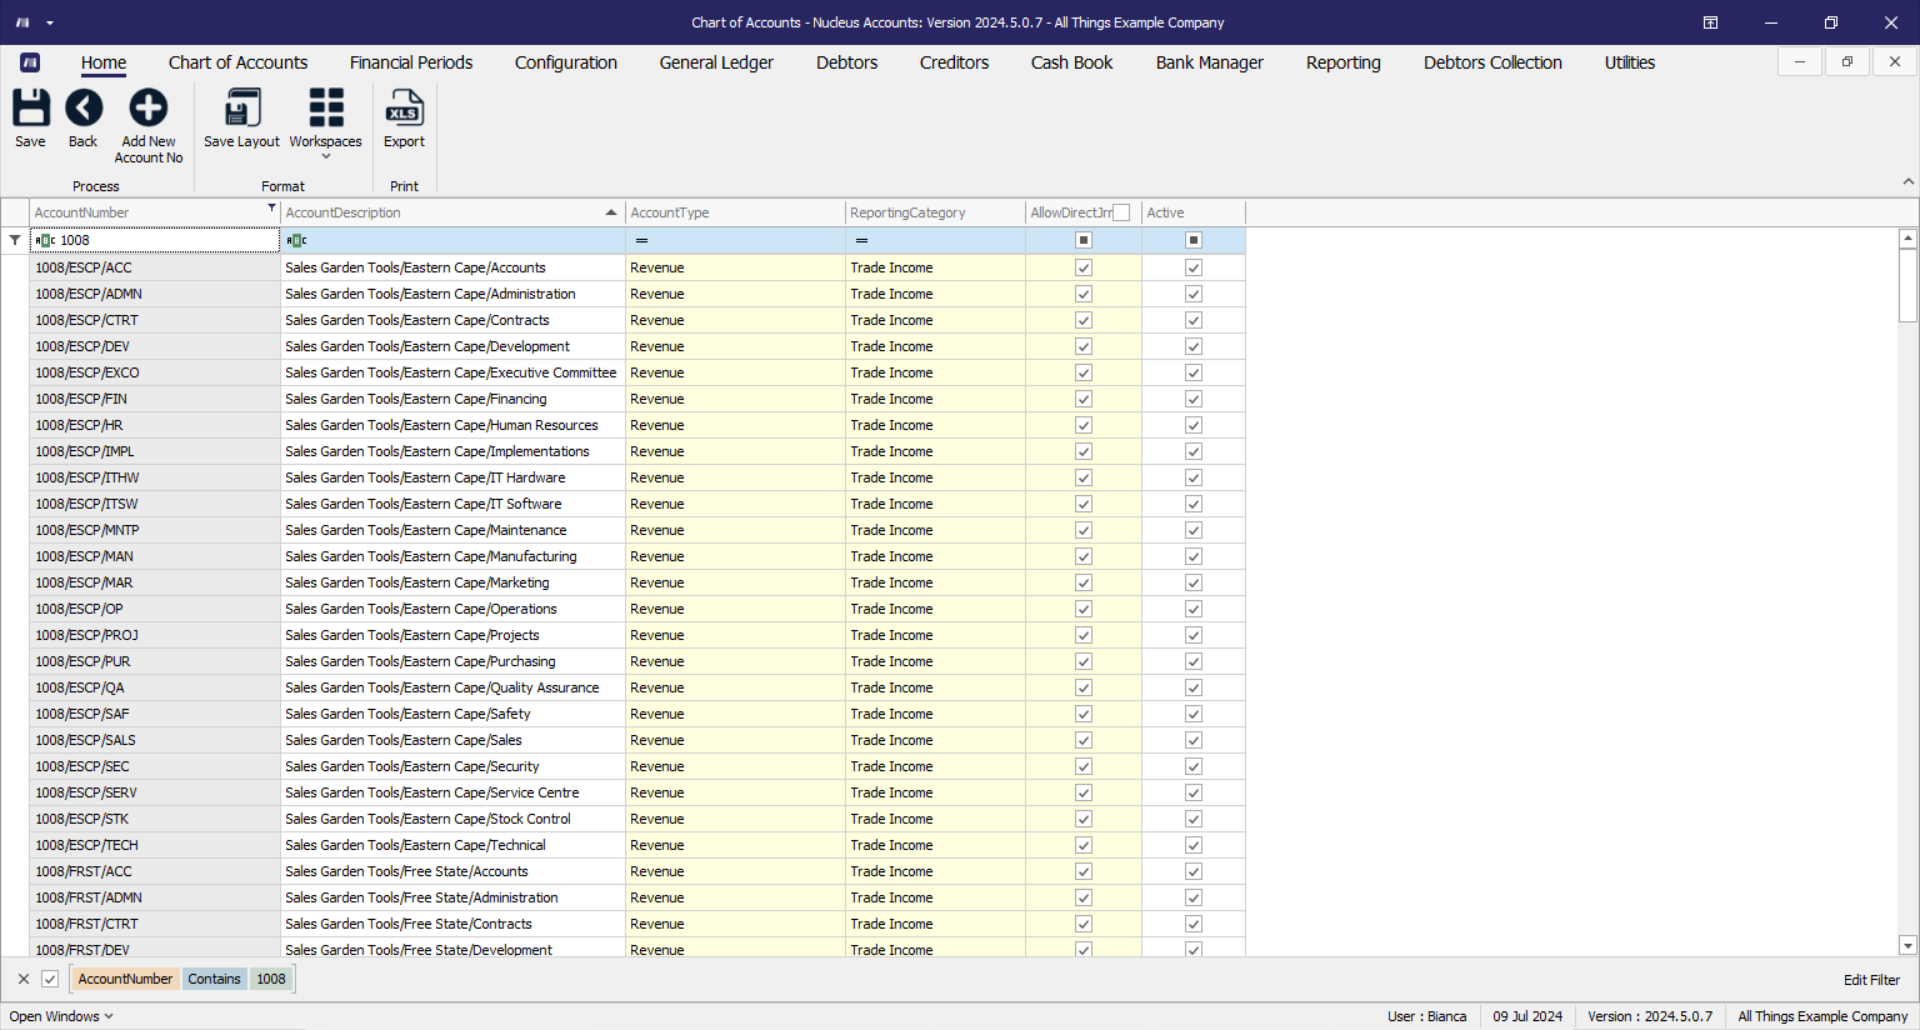
- Click on the Ok button to add the Segmented Account(s) to the Chart of Accounts listing screen.

- Before saving, you have the ability to make changes to the Account(s). Refer to Editing the Chart of Accounts for more information.
Save
- Click on the Save button to ensure all your changes are stored and updated in the system.

ACCT.COA.COA.AddSegAccNo