We are currently updating our site; thank you for your patience.
Sales
Customers - Call History
The Call History tile can be found in both the Customer Listing and the Customer Maintain screen. This tile will direct you to a data grid of history regarding Calls linked to a specific customer.
| Ribbon Access: Sales > Customers |
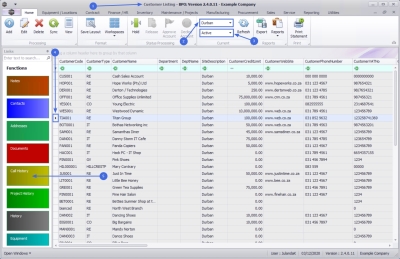
- The Customer Listing screen will display.
- Select the Site where the customer can be located.
- The example has Durban selected.
- Ensure that the Status has been set to Active.
- Click in the row of the customer for whom you wish to view the Call History for.
- Click on the Call History tile.
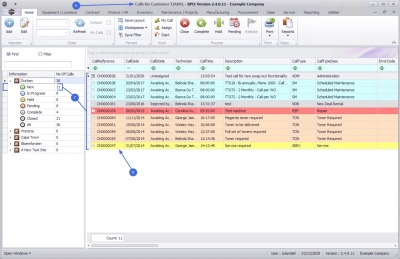
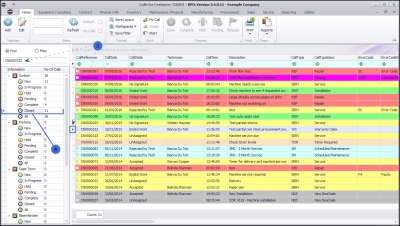
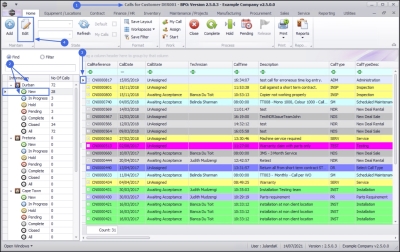
- The Calls for Customer [customer code] screen will display.
Calls Data Grid
- By default, all New calls linked for the selected customer will display.
- The Calls are colour-coded by Call Type, e.g. all Service Calls are displayed as yellow.
![]() Call Type Colours can be configured according to your company requirements.
Call Type Colours can be configured according to your company requirements.
Information Panel
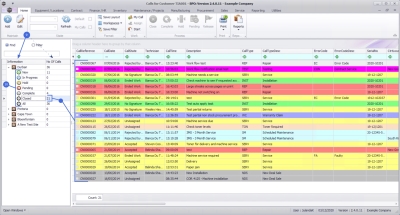
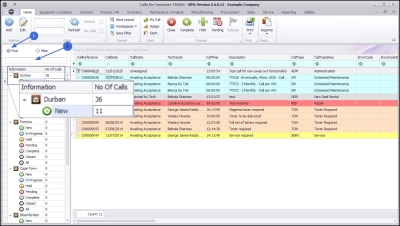
- The Information panel lists the number of calls for each Call Status.
- You can select to view any Call Status, by clicking on one of the Call Status discs on the left of the panel.
- The example has the Closed Call Status selected and all the Closed calls for the customer are displayed in the Calls for Customer data grid.
Find Option
The Find option allows you to search for a specific Call, regardless of site, status or date range, using the Call Reference number.
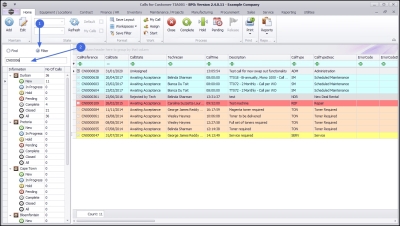
- Make sure that the 'Find' radio button is selected.
- In the text box, type in the full Call Reference number that you wish to find, then press Enter.
 Note that the example is currently open in the Durban Site and the Status is set to New.
- The example is set to search for CN0000222.
- The system has filtered for this Call Reference number and selected it.
- The search has resulted in the Call being located in the Closed status.
![]() Note that if the full reference number is not entered, the system will not be able to search for the specific Call and will return an error message.
Note that if the full reference number is not entered, the system will not be able to search for the specific Call and will return an error message.
Filter Option
The Filter option allows you to specify a range of Calls by typing the prefix or part of the Call Reference number.
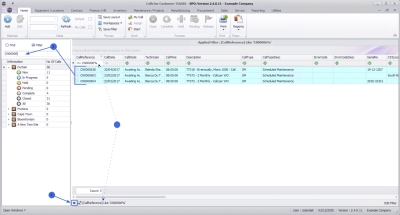
- Make sure that the 'Filter' radio button is selected.
- Type the Call Reference number up to the point where you would like to display the range and press Enter.
- The example has the Reference CN00006 entered, which will search for and display all the Call References that start with CN00006.
 Note that the Call Reference column filter row added the ‘%’ variable at the end of the Call Reference, and the Edit Filter row now contains the filter details: [Call Reference] Like 'CN00006%'.
 - To remove the Filter, either, Delete or backspace over the text in the in the Filter Row of the Call Reference column, or click on the [X] in the Edit Filter row.
Log a Call
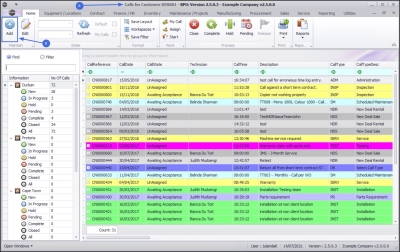
- From the Calls for Customer [customer code] screen,
- Click on Add.
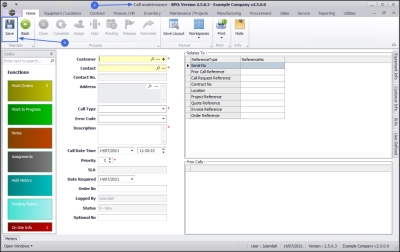
- The Call maintenance screen will be displayed.
- Complete the Call information for the Customer and click on Save.
Edit a Call
- From the Calls for Customer [customer code] screen,
- Select the Site and Call Status.
- The example has Durban and New call status selected.
- Click on the row of the Call you with to edit.
- Click on Edit.
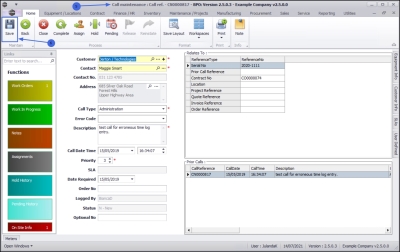
- Call Details
- Make the necessary changes to the Call information and click on Save.
State Panel
In the State panel the following filters are not available in this view, because all the calls linked to the specific customer are displayed:
- Start Date,
- End Date,
- Default and
- My Calls.
The Refresh button will update the Calls for Customer screen with the latest version of the information. Any changes made from the ribbon will be updated in the Call List data grid.
Format Panel
Any changes that you may have made to the Calls for Customer screen e.g. changing the column order or resizing columns, will return to the original layout when you exit the screen. By clicking on Save Layout, Workspaces or Save Filter in the Format panel, will save your settings for the next time you select a customer and open this screen.
![]() For a detailed handling of this topic refer to BPO2 Data Grid Layouts
For a detailed handling of this topic refer to BPO2 Data Grid Layouts
My Call
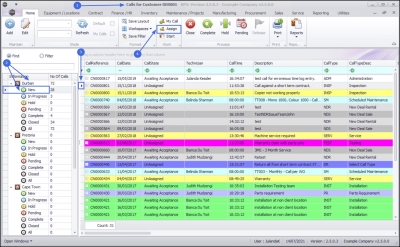
- From the Calls for Customer [customer code] screen,
- Select the Site and the Call Status.
- The example has Durban and New call status selected.
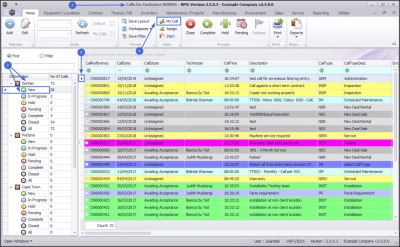
- Click on the row of the Call you wish to assign to yourself.
 Note that the Technician field is currently empty and the Call State is UnAssigned.
 - Click on My Call.
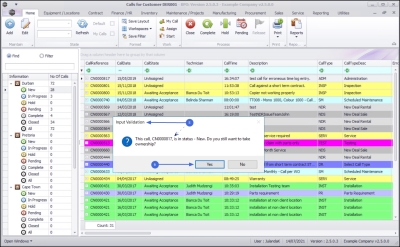
- When you receive the Input Validation message to confirm;
- This call, [call ref number], is in status - [status]. Do you still want to take ownership?
- Click on Yes.
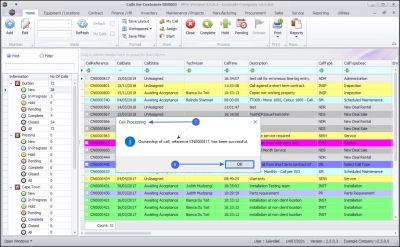
- Next you will receive the Call Processing message to confirm;
- Ownership of call, reference [call ref number], has been successful.
- Click on OK.
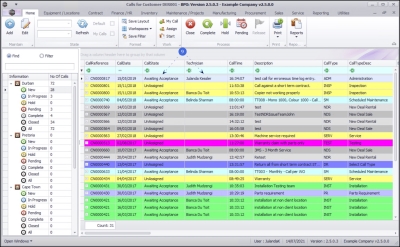
- The call has now been updated with the name of the Technician currently logged on to the system and the Call Status has changed to Awaiting Acceptance.
Assign a Call
By assigning an employee to a call, will move the call to the In Progress status. By assigning the call to a Technician, Driver, or Responsible Person will identify who will be working on the call.
- From the Calls for Customer [customer code] screen,
- Select the Site and the Call Status.
- The example has Durban and New call status selected.
- Click on the row of the Call you wish to assign.
Note that the Technician field is currently empty and the Call State is UnAssigned.
- Click on Assign.
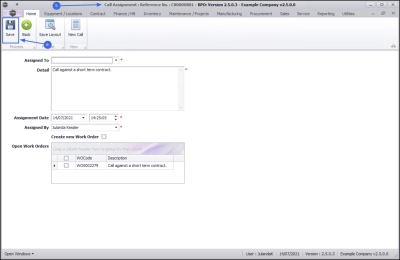
- The Call Assignment: Reference No: [call ref number] screen will be displayed.
- Complete the Call Assignment information and click Save when done.
Start Work
Use the Start Work feature to Start and End work on Calls that you are working on. A Call must be in the New status to Start Work, and will then move to the In Progress status where you can continue the process until End Work.
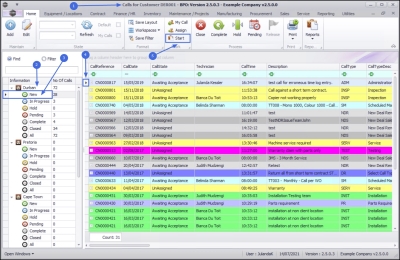
- From the Calls for Customer [customer code] screen,
- Select the Site.
- The example has Durban selected.
- Ensure that the Call Status is set to New.
- Click on the row of the Call you wish to start work on.
- Click on Start.
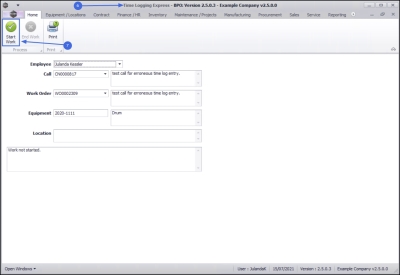
- The Time Logging Express screen will be displayed.
- Complete the Time logging screen and click on Start Work.
Close a Call
When a call has been closed, it cannot be re-opened, and can only be viewed. You will receive a notification when trying to close a Call that have outstanding items, such as billable items not yet invoiced, linked to the call.
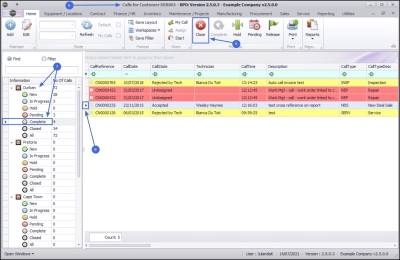
- From the Calls for Customer [customer code] screen,
- Select the Site and Call Status.
- The example has Durban selected and the status has been set to Complete.
- Click on the row of the Call you wish to close.
- Click on Close.
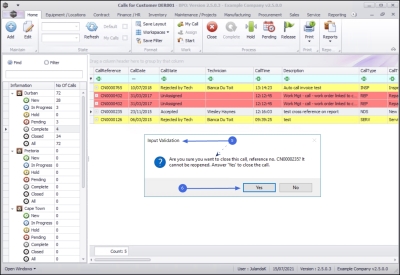
- When you receive the Input Validation message to confirm;
- Are you sure you want to close this call, reference no. [call ref number]? It cannot be reopened. Answer 'Yes' to close the call.
- Click on Yes.
![]() For a detailed handling of this topic refer to Calls - Close a Call
For a detailed handling of this topic refer to Calls - Close a Call
Complete a Call
Once the Technician has completed the work required, the call can be set to Completed.
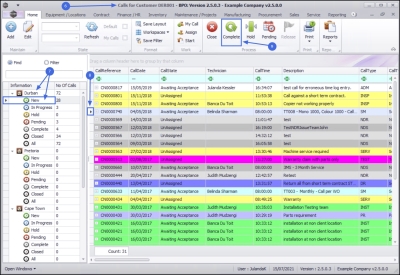
- From the Calls for Customer [customer code] screen,
- Select the Site and Call Status.
- The example has Durban selected and the call status is New.
- Click on the row of the Call you wish to complete.
- Click on Complete.
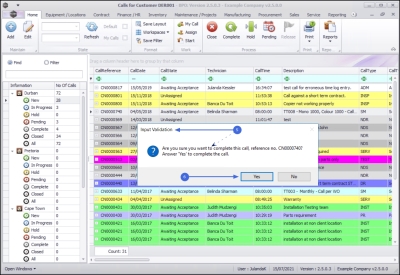
- When you receive the Input Validation message to confirm;
- Are you sure you want to complete this call, reference no. [call ref number]? Answer 'Yes' to complete the call.
- Click on Yes.
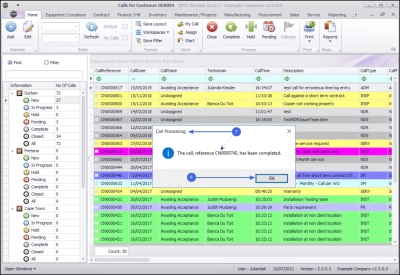
- Next you will receive the Call Processing message to confirm that;
- The call, reference [call ref number], has been completed.
- Click on OK.
![]() For a detailed handling of this topic refer to Calls - Complete a Call
For a detailed handling of this topic refer to Calls - Complete a Call
Place Call on Hold
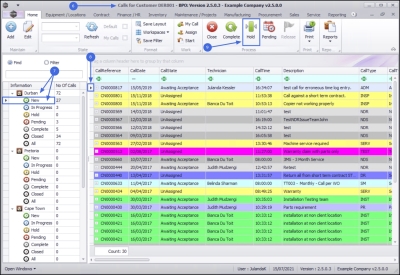
Placing a call on Hold will result in work being stopped to resolve a client/customer issue e.g there is no one available on site to allow a technician access to a location, or the client is awaiting approval from their finance department before a new part request can be fitted. The SLA Monitor will "pause" until the call is Released from Hold.
- From the Calls for Customer [customer code] screen,
- Select the Site.
- The example has Durban selected and the call status is New.
- Click on the row of the Call you wish to place on hold.
- Click on Hold.
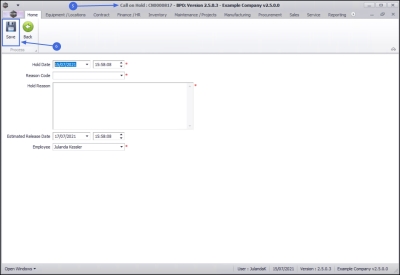
- The Call on Hold : [call ref number] screen will be displayed.
- Complete the hold information for the call and click on Save.
For a detailed handling of this topic refer to Calls - Place on Hold
Move to Pending
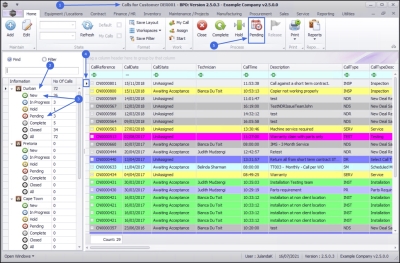
Placing a Call in a Pending status differs from placing a call on Hold. A call is placed in a pending status when work needs to be stopped to resolve a company issue, e.g. lack of stock to complete the work. The SLA Monitor will continue to run.
- From the Calls for Customer [customer code] screen,
- Select the Site.
- The example has Durban selected.
- The Call Status must be in either the New or In Progress status.
- Click on the row of the Call you wish to place in pending.
- Click on Pending
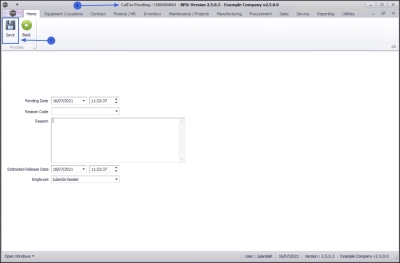
- The Call in Pending : [call ref number] screen will be displayed.
- Complete the pending information for the call and click on Save.
![]() For a detailed handling of this topic refer to Calls - Move to Pending Status
For a detailed handling of this topic refer to Calls - Move to Pending Status
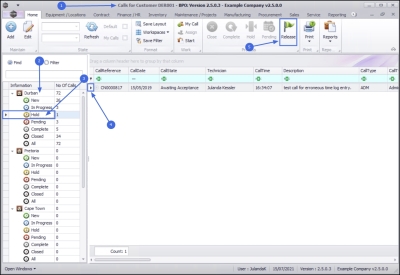
Release a Call
When a call is released, it will move back to the New status where it can be re-assigned. When the call is re-assigned, a new work order should be created.
- From the Calls for Customer [customer code] screen,
- Select the Site.
- The example has Durban selected.
- Ensure that the Call Status has been set to Hold.
- Click on the row of the Call you wish to release from hold.
- Click on Release.
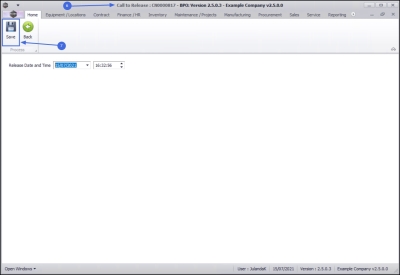
- The Call to Release : [call ref number] screen will be displayed.
- Complete the release information for the call and click on Save.
For a detailed handling of this topic refer to Calls - Release a Call
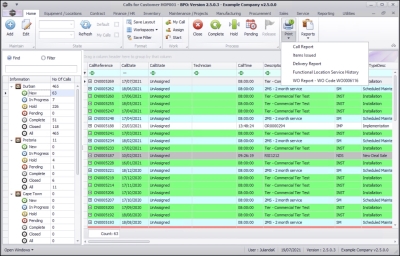
Print Panel
You can Print Call Report, Items Issued History Report, Delivery Report, Functional Location Service History Report, or a Work Order Report for the Call from the Calls for the Customer screen, by selecting the Print button.
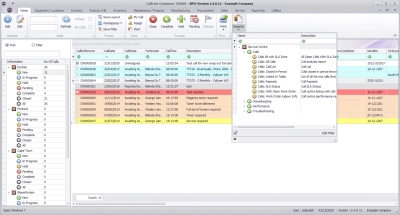
Reports Panel
The Reports button allow you to print Reports regarding the Service Centre for:
- Calls,
- Housekeeping,
- Performance and
- Troubleshooting on Calls linked to the selected Customer.
MNU.061.022

