We are currently updating our site; thank you for your patience.
CRM Basics
Quotes (Salesman-specific)
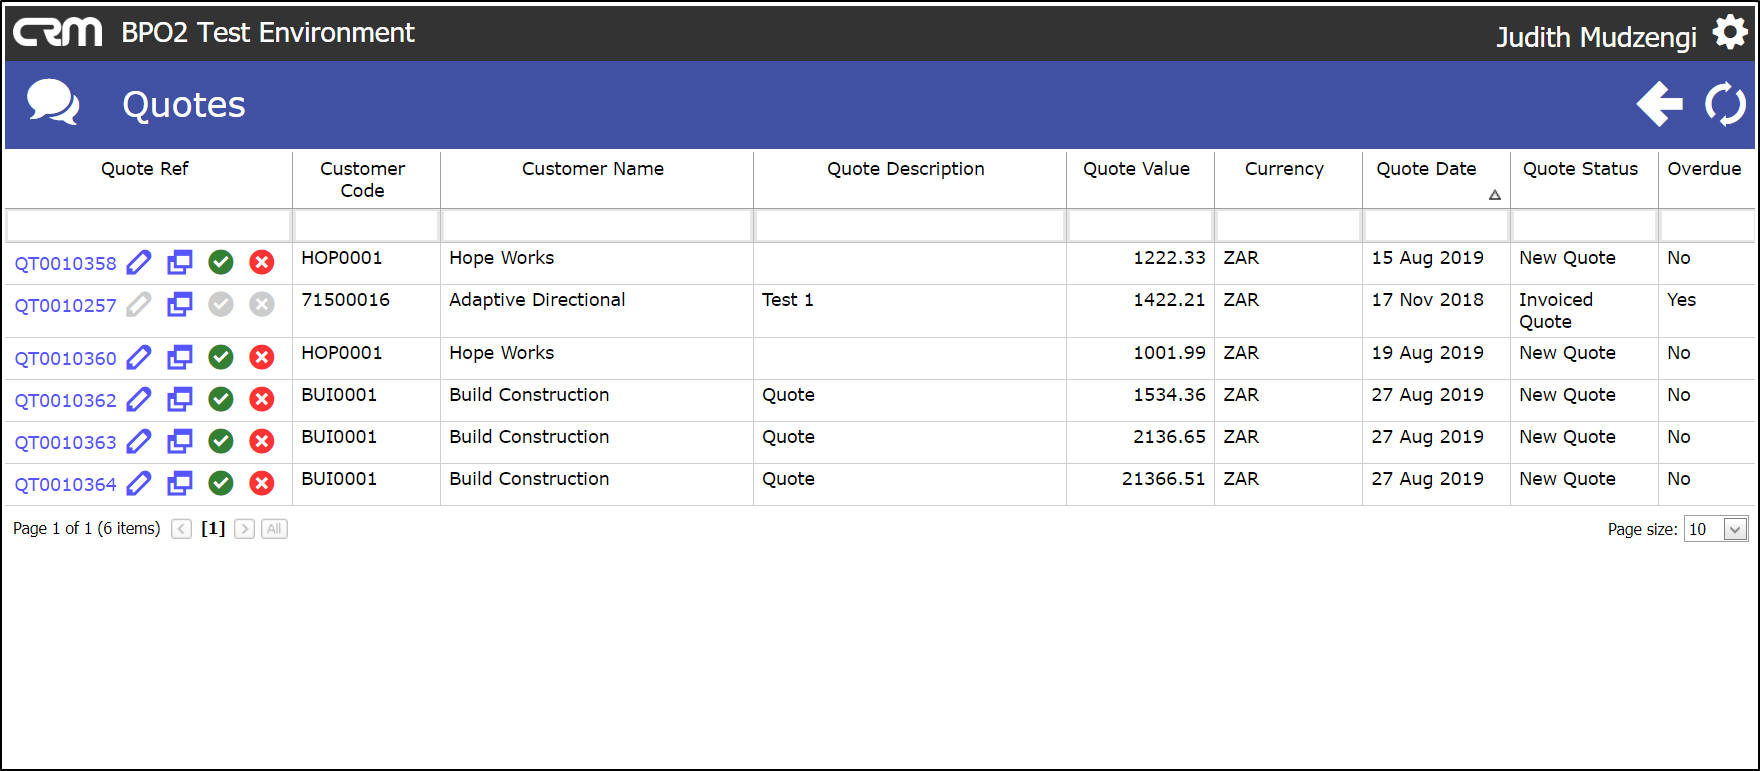
A full list of New , Accepted and Rejected quotes for all customers on the system, where you are the Salesman, can be accessed from the Dashboard (Home Page) as set out below.
Customer-specific Quotes can be accessed from the Customer Dashboard (Customer Page).
Adding Quotes in CRM , will also create the quote in BPO as a New Quote. This Quote needs to be emailed to the client. The email include links to either:
- 'Accept' or
- 'Reject' the Quote,
- or to have the salesman 'Contact Me'
Once 'Accepted' a Quote can no longer be edited.
Quotes can be added when
- creating a new Case or
- editing a Case
- adding or editing an Activity
- or from the Case and Activity lists.
You can view, edit, print and delete Quotes for your Customers in CRM.
| Access: Webpage > http://[servername]:[portno]/BPOCRM/User.aspx |
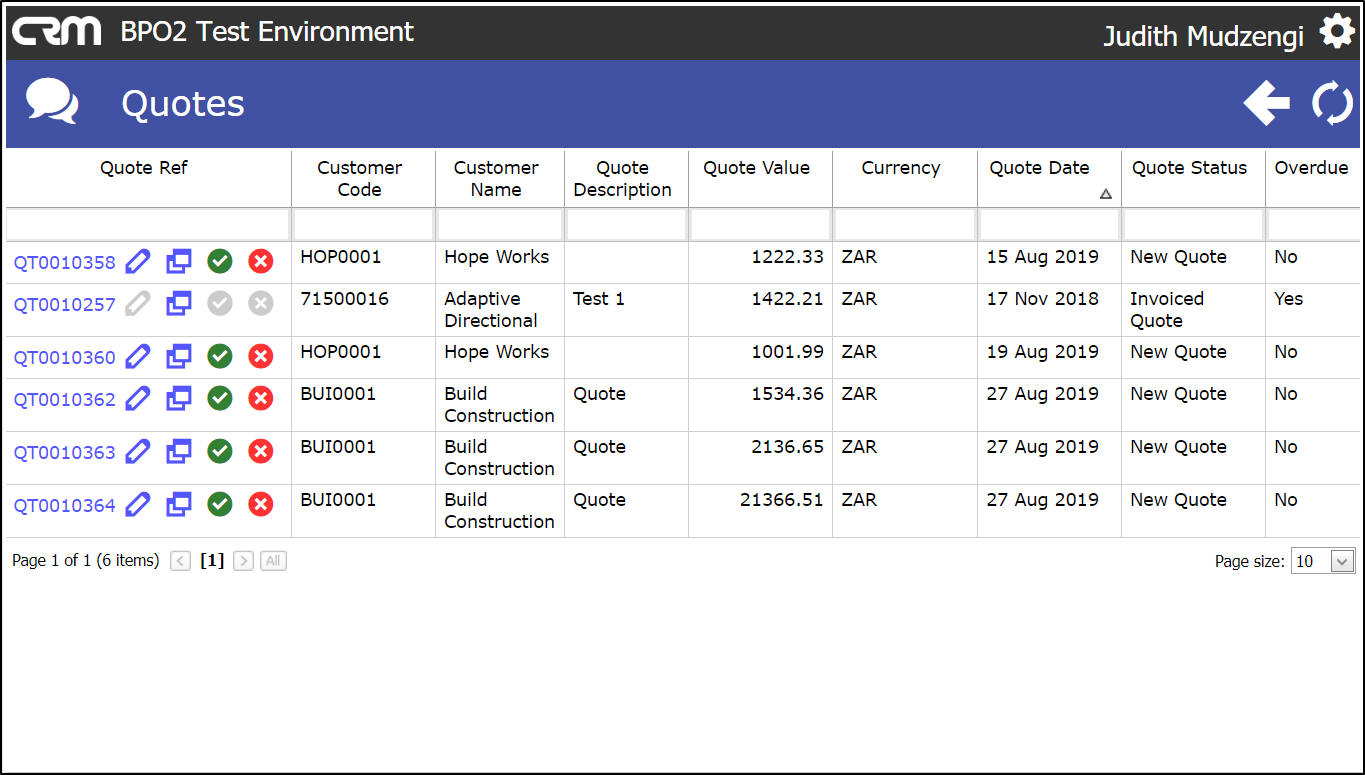
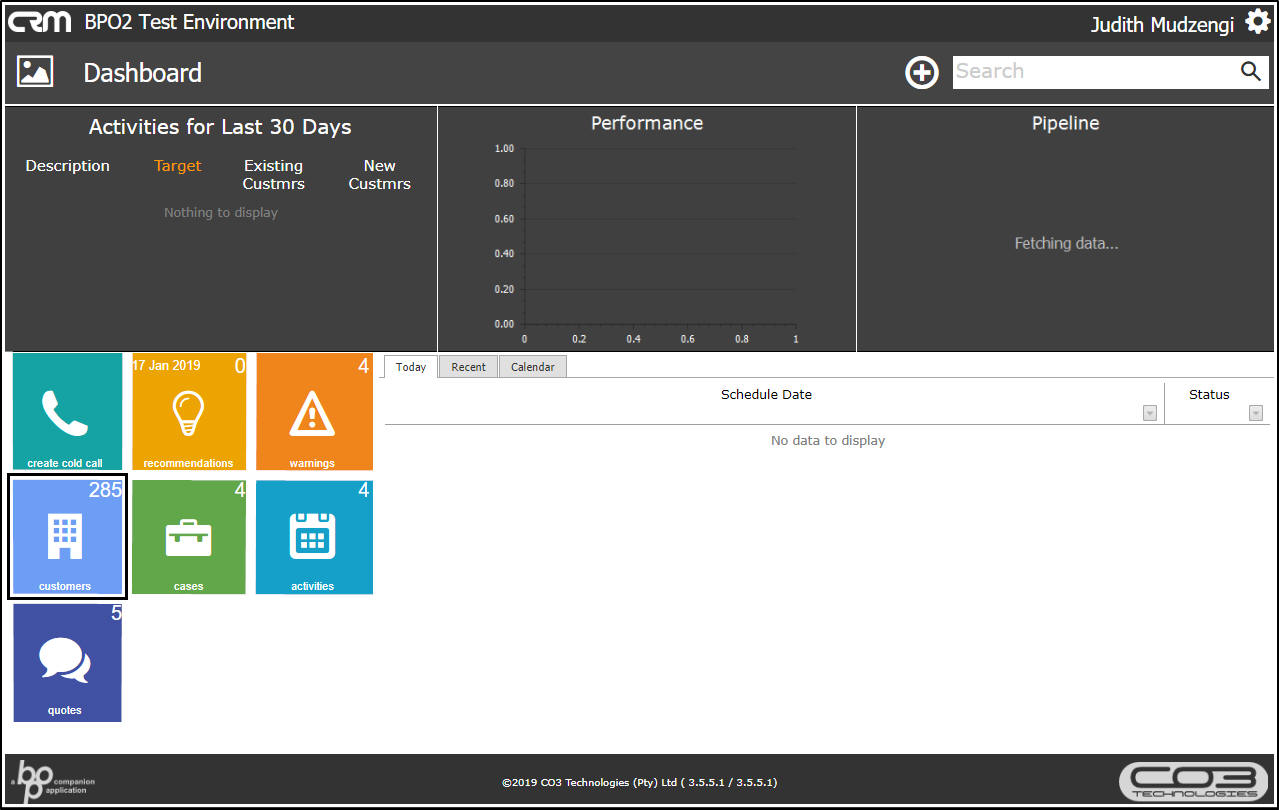
Access all Quotes from the Dashboard
- Click on the Quotes tile from the Dashboard .
- The number in the top right of this tile shows the total number of New , Accepted and Rejected Quotes (for all customers) that are linked to you as the Salesman.
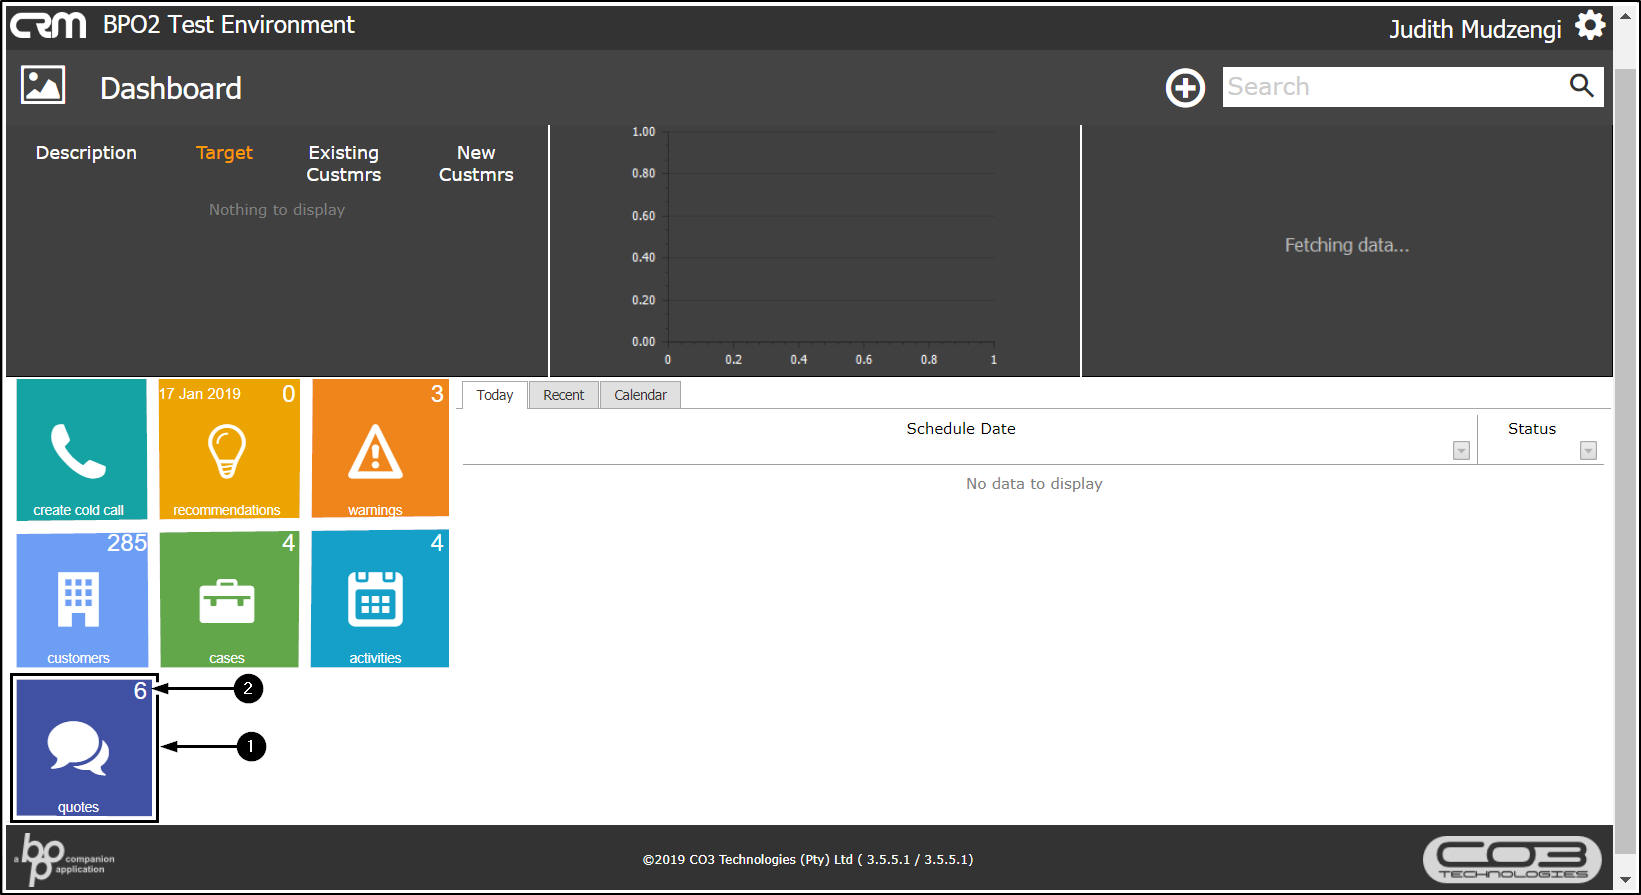
- The Quotes listing page will open.
- A list of New , Accepted and Rejected quotes for all customers on the system, where you are the Salesman, will be displayed.
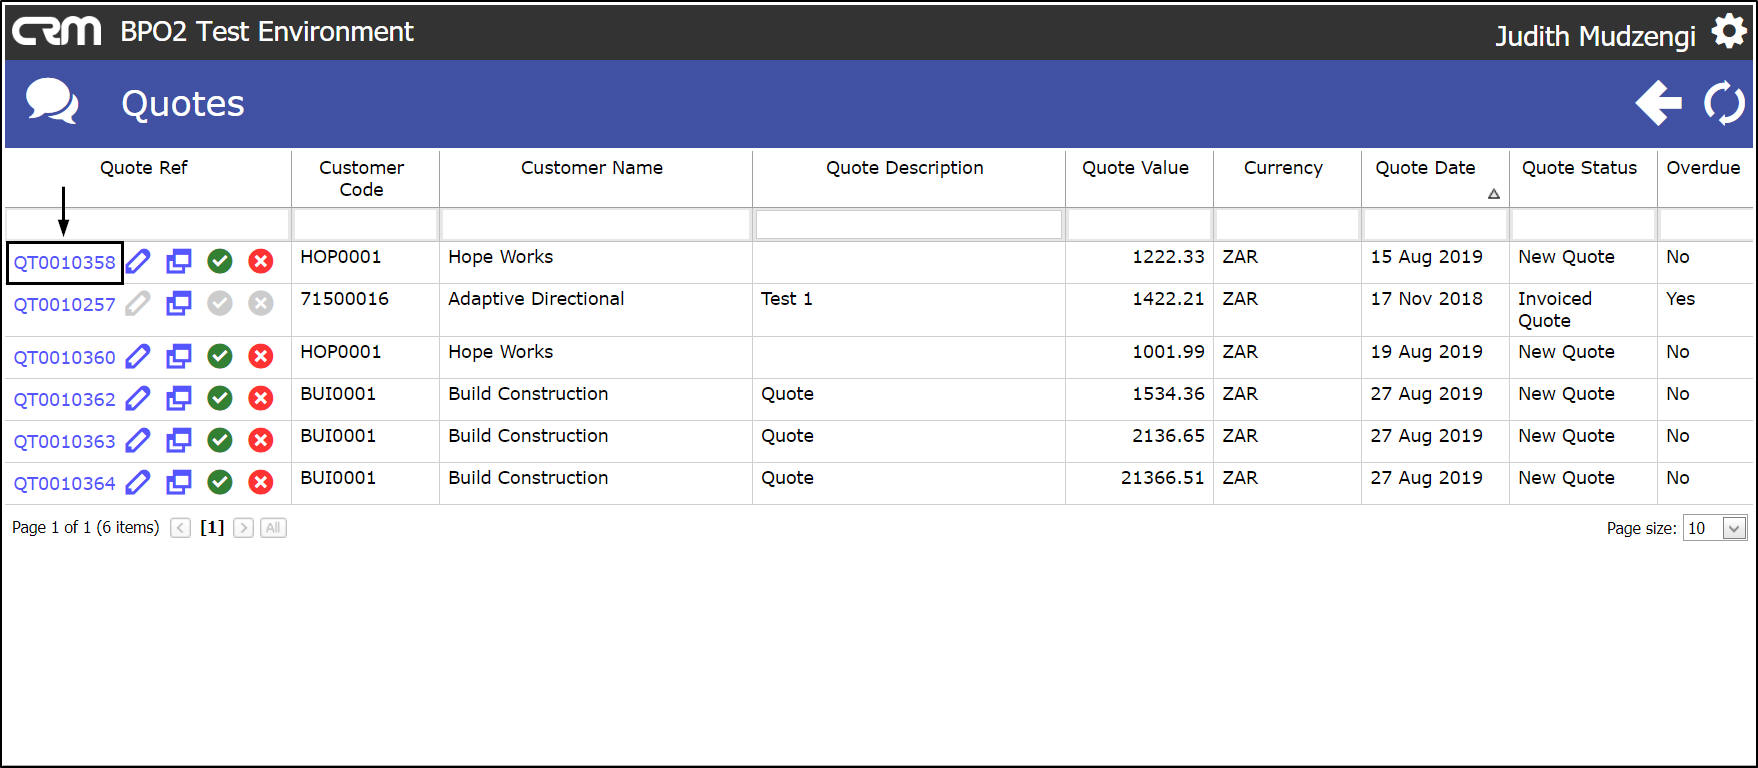
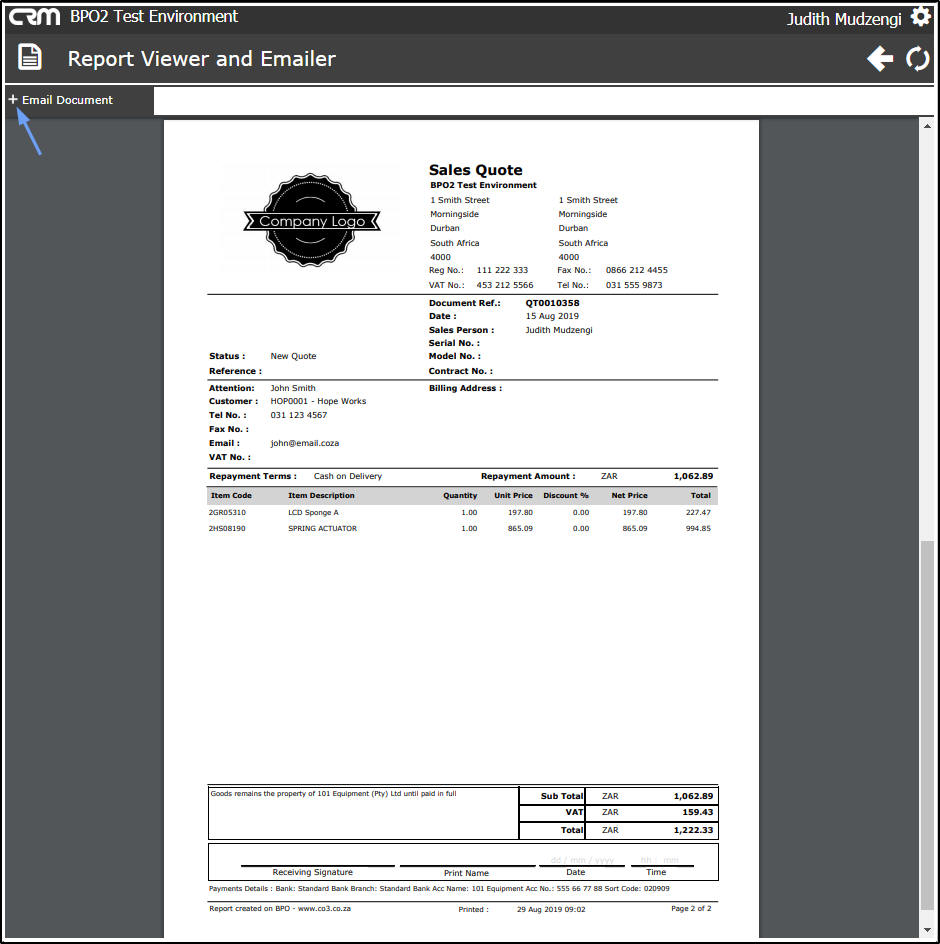
Print / Email Quote
- Click on the Quote Number you wish to Print / Email .
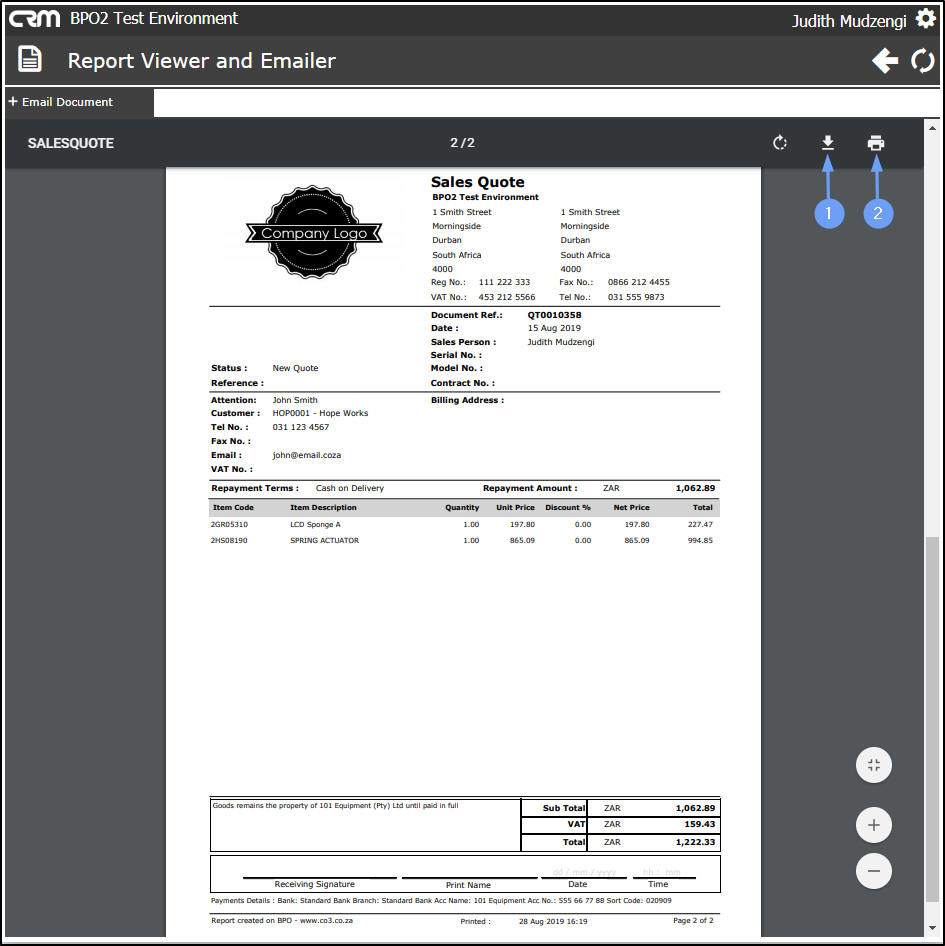
- The Report Viewer and Emailer screen will be displayed.
- The selected quote will be displayed.
- You can download the quote and or
- print the quote.
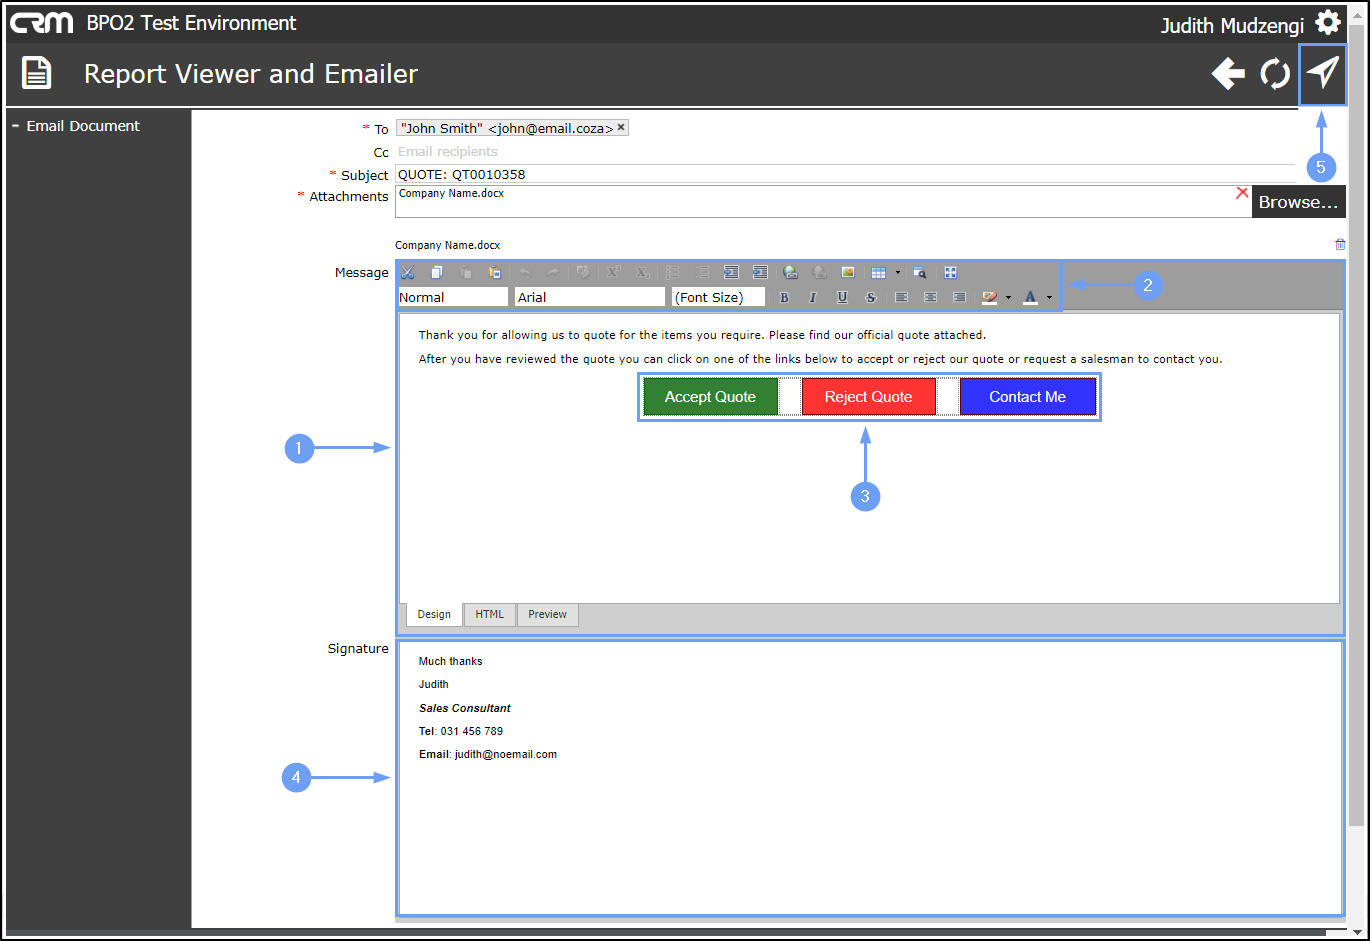
- To email the quote, click on the [ + ] sign in the Email Document section.
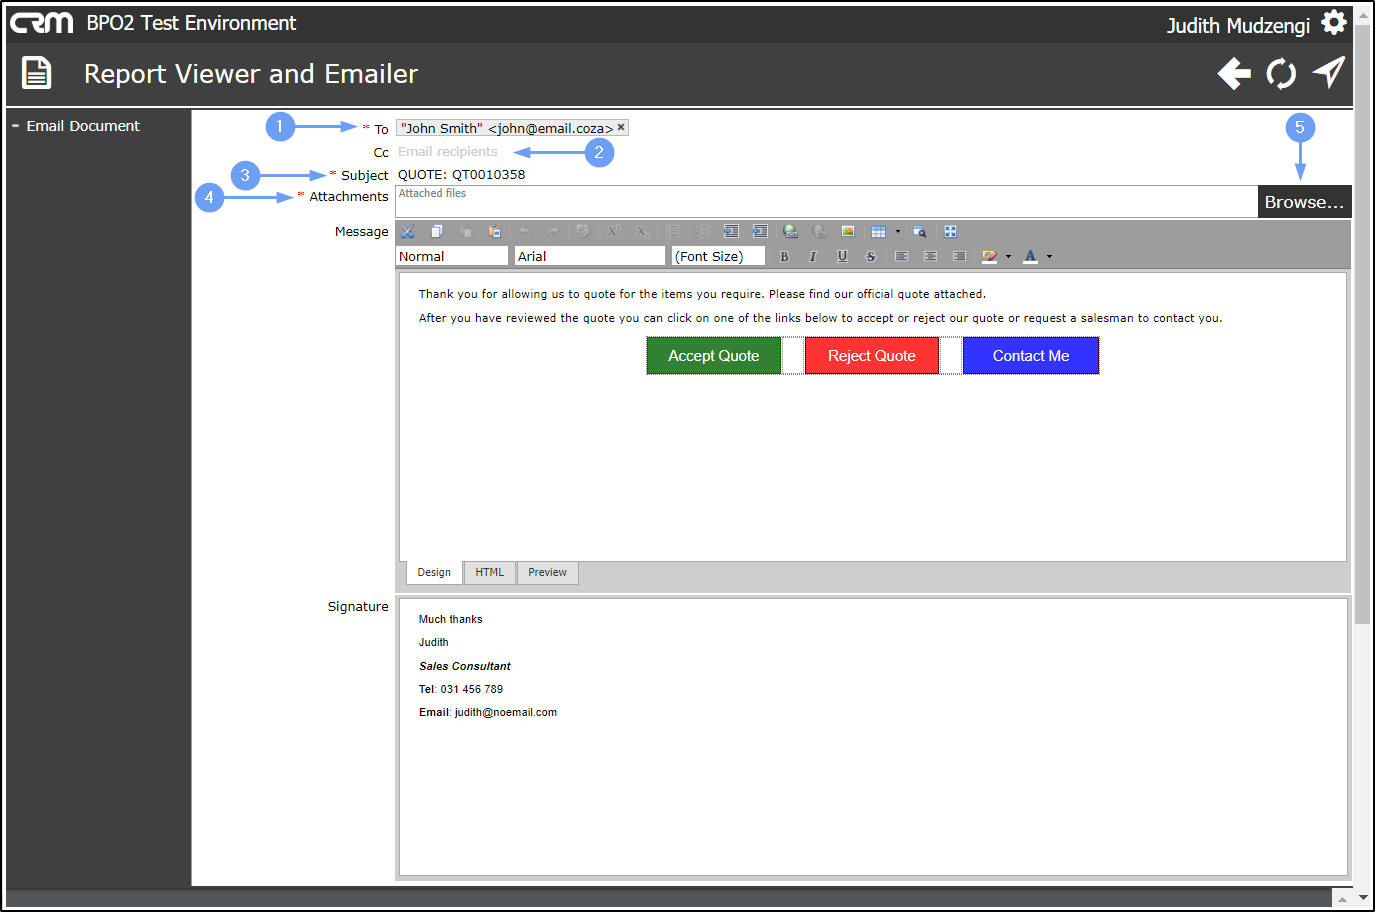
The Email Document section will be expanded.
- To: This field will auto populate with the CRM contact for the case but you can change this if applicable.
- Cc: In this field, you can add other email recipients if applicable.
- Subject: This field will auto populate with the selected quote number but you can edit this if applicable.
- Attachments: You can add other documents as attachments if required.
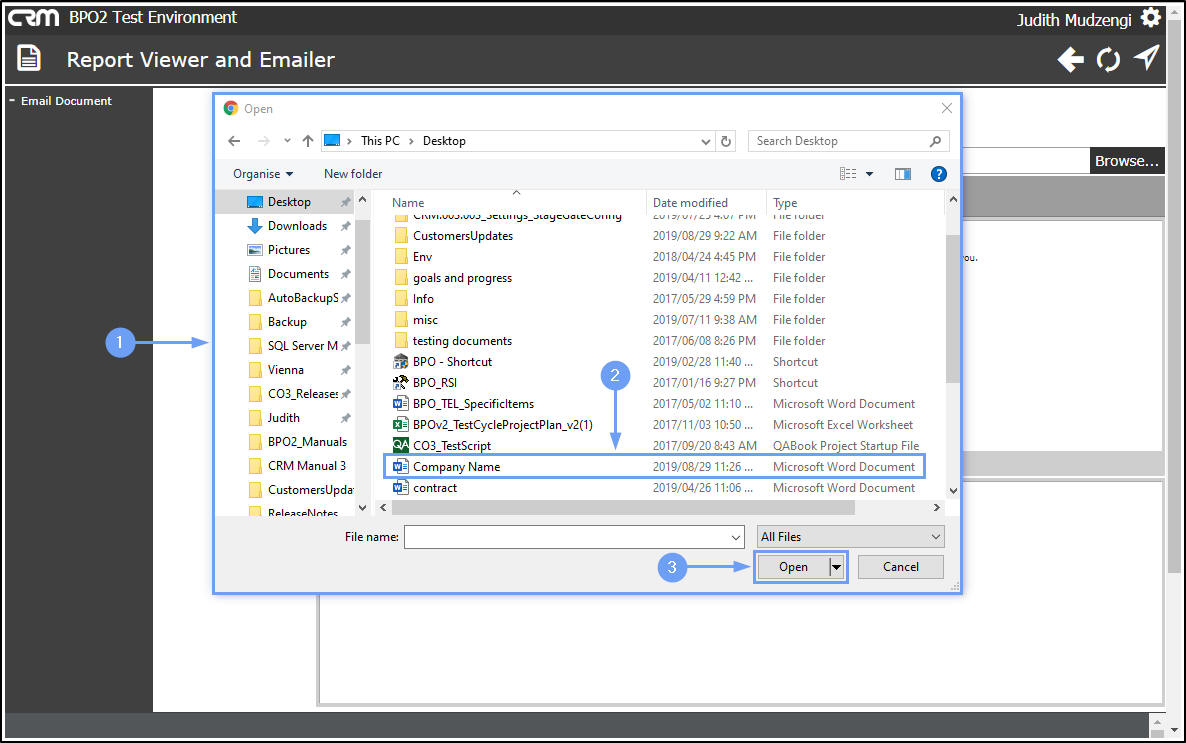
- To add an attachment, click on Browse .
- The Open screen will pop up.
- Search for and select the file you wish to link.
- Click on Open .
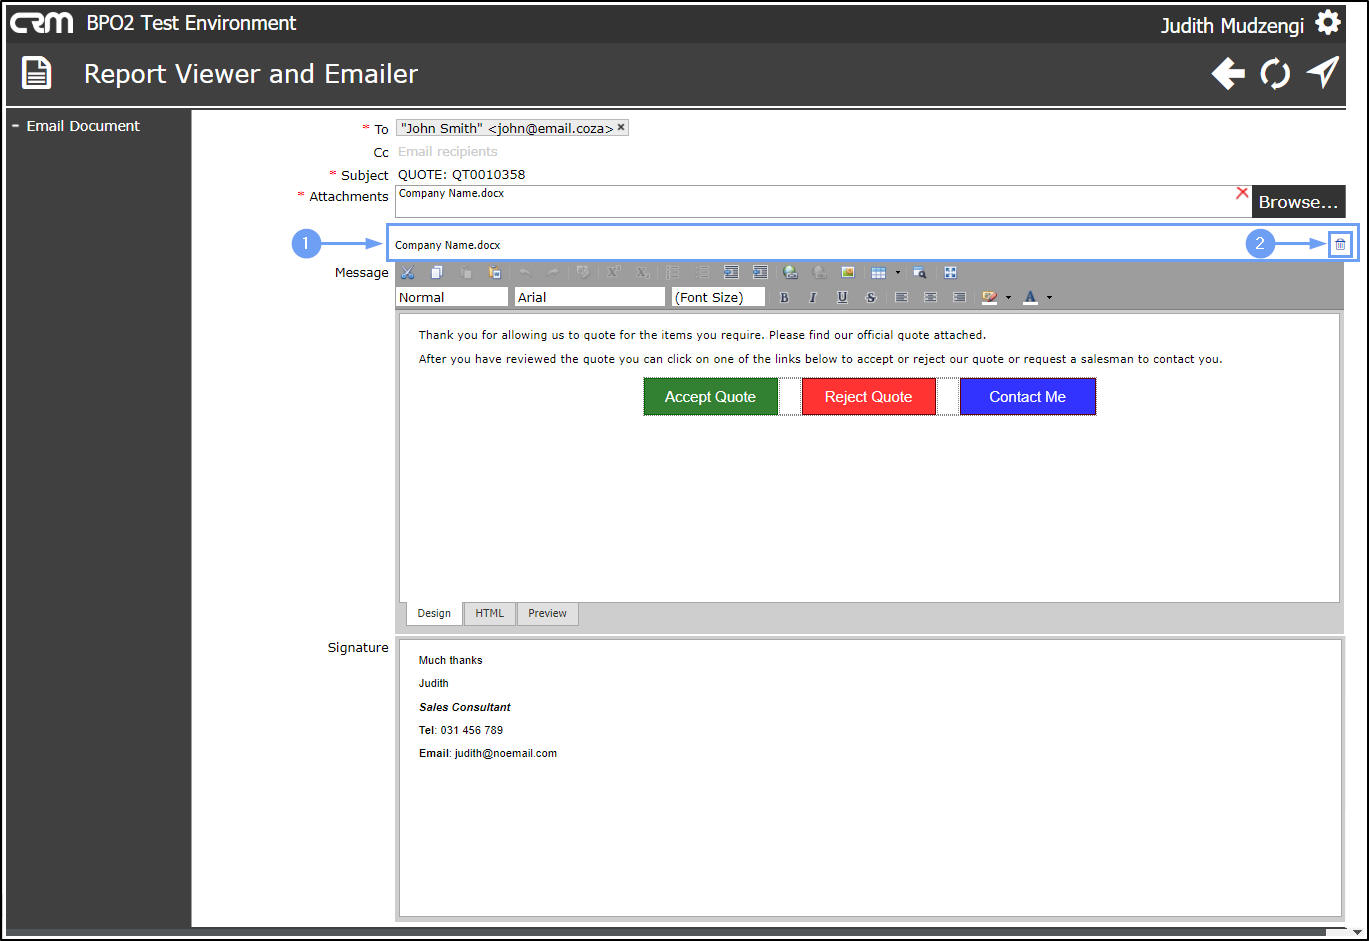
- The file will now be attached to the email.
- You can delete the attachment if required by clicking on the Delete icon.
- The message body may auto populate but you can edit this. Type in the relevant details in the message body.
- You can use the tool bar to customize your email message.
- The email body has a link that allows the recipient to:
- Accept Quote : The quote will automatically be marked as accepted in the Quotes / Quotes for [ ] screen when the recipient clicks on Accept Quote .
- Reject Quote : The quote will automatically be marked as rejected in the Quotes / Quotes for [ ] screen when the recipient clicks on Reject Quote .
- Contact (You)
- The Signature will auto populate depending on your personal email settings or the default email settings .
- When you are done, click on the Send icon.
- A message will pop up telling you the status of the sent email.
- Click on Back .
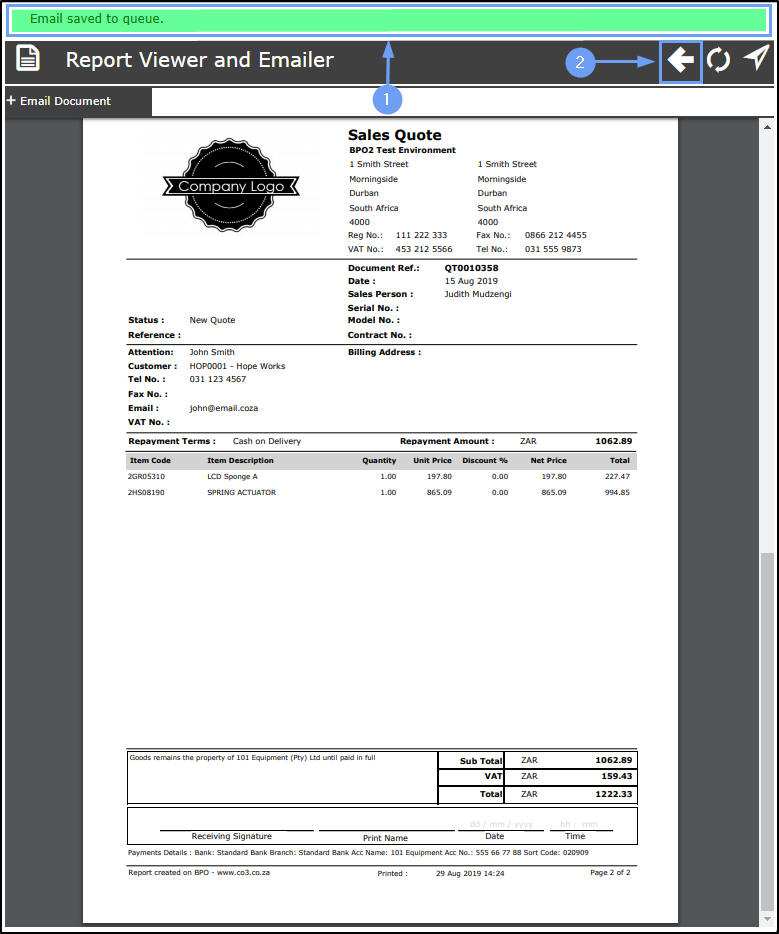
- You will return to the Quotes listing page.
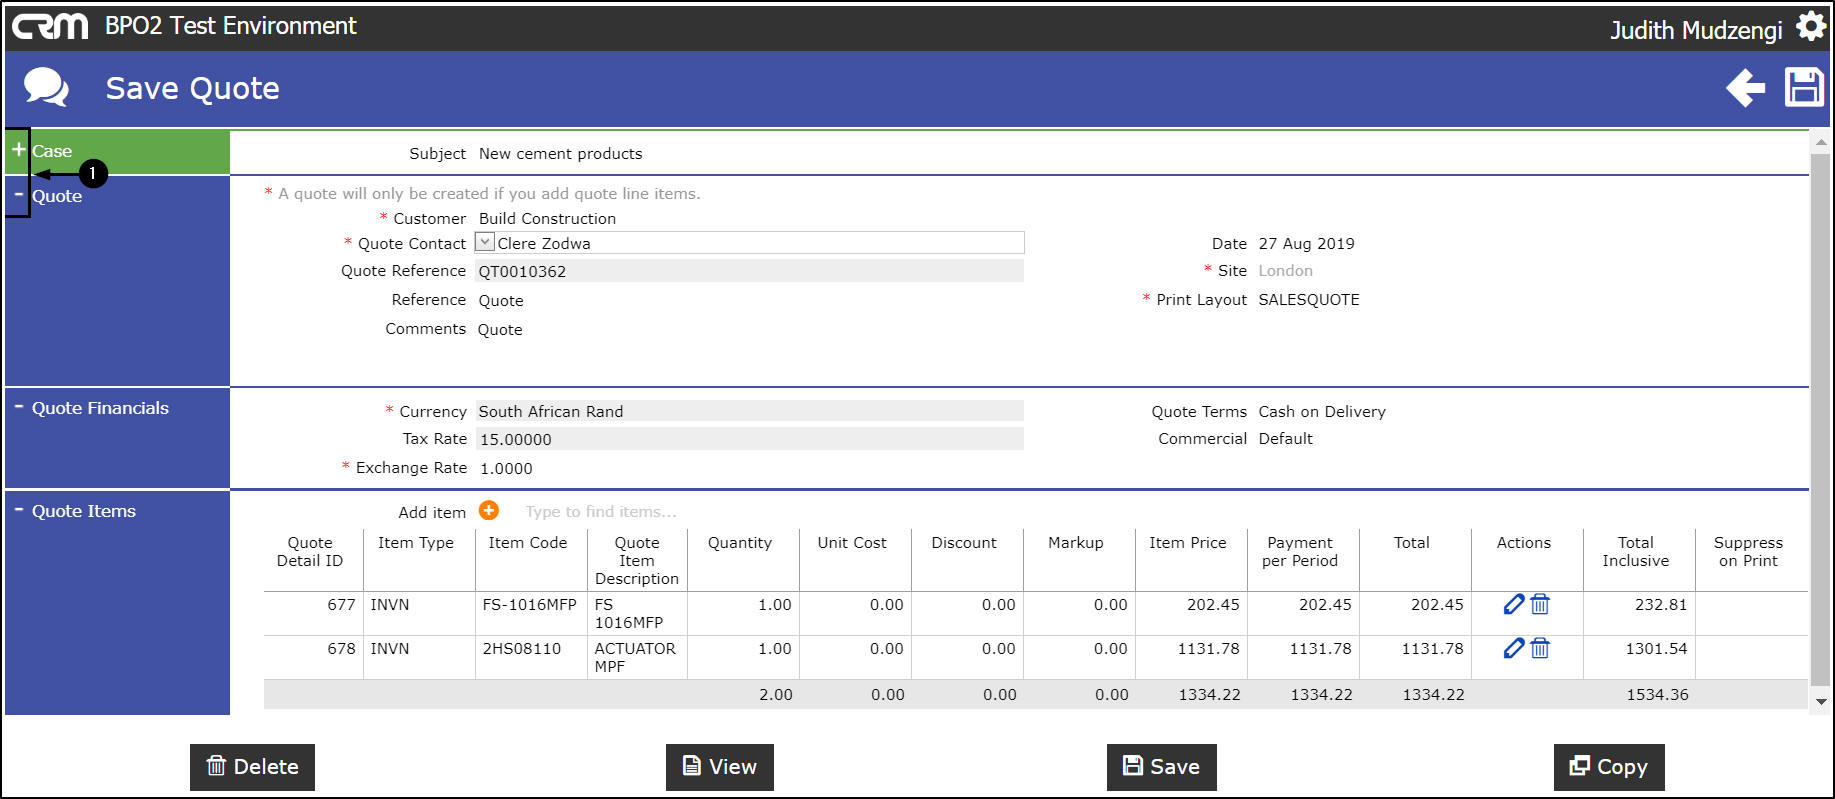
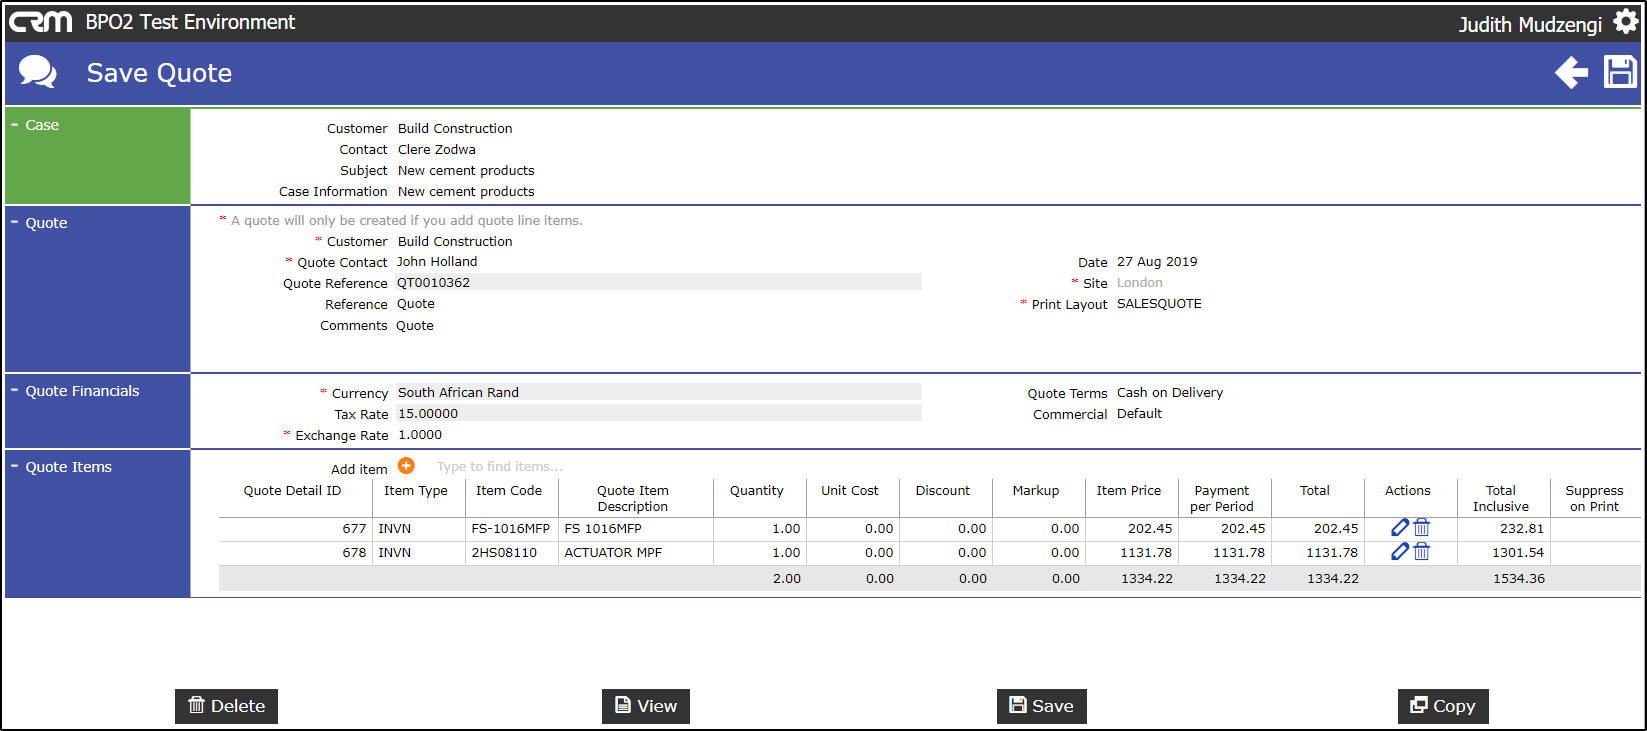
View / Edit / Delete Quote
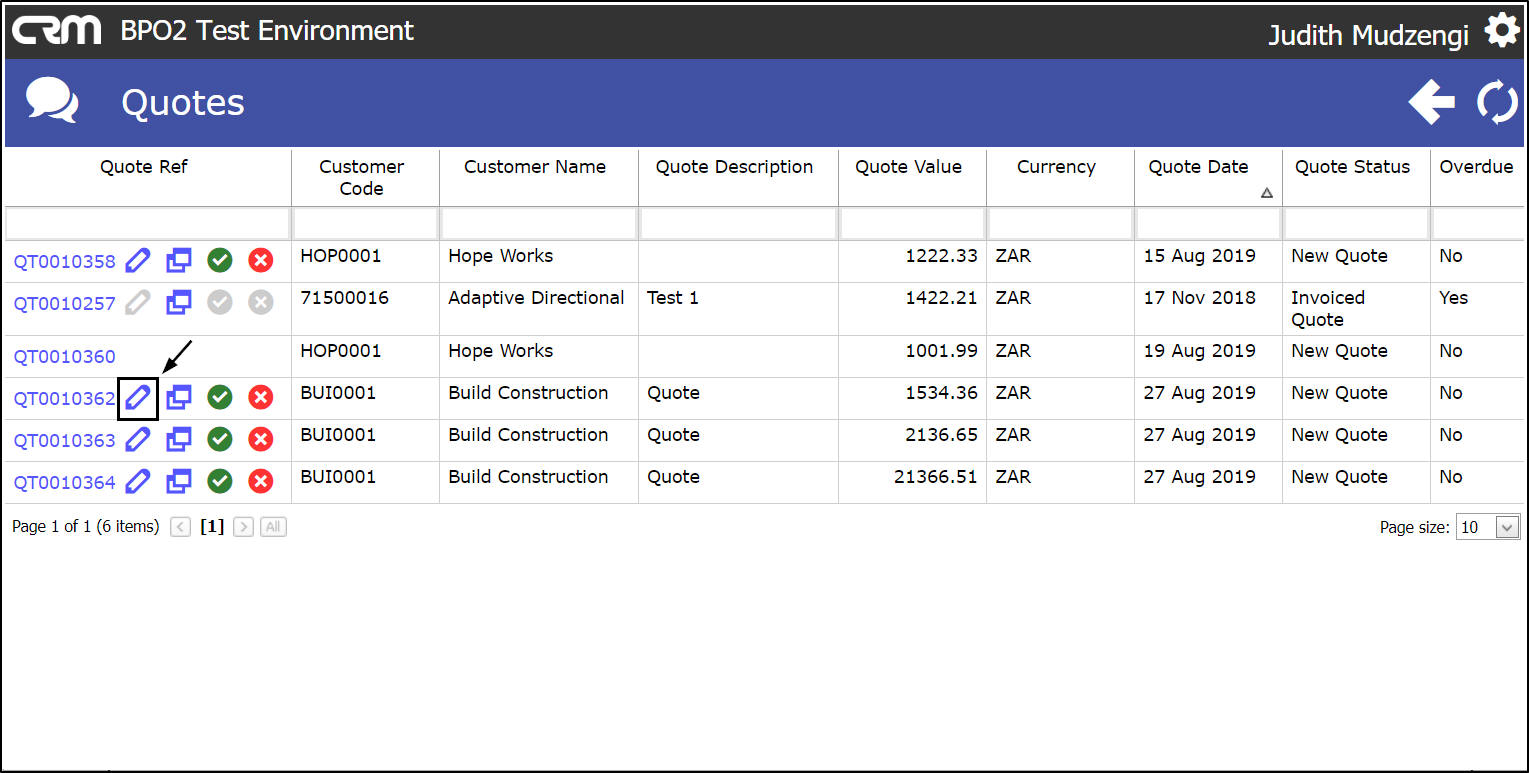
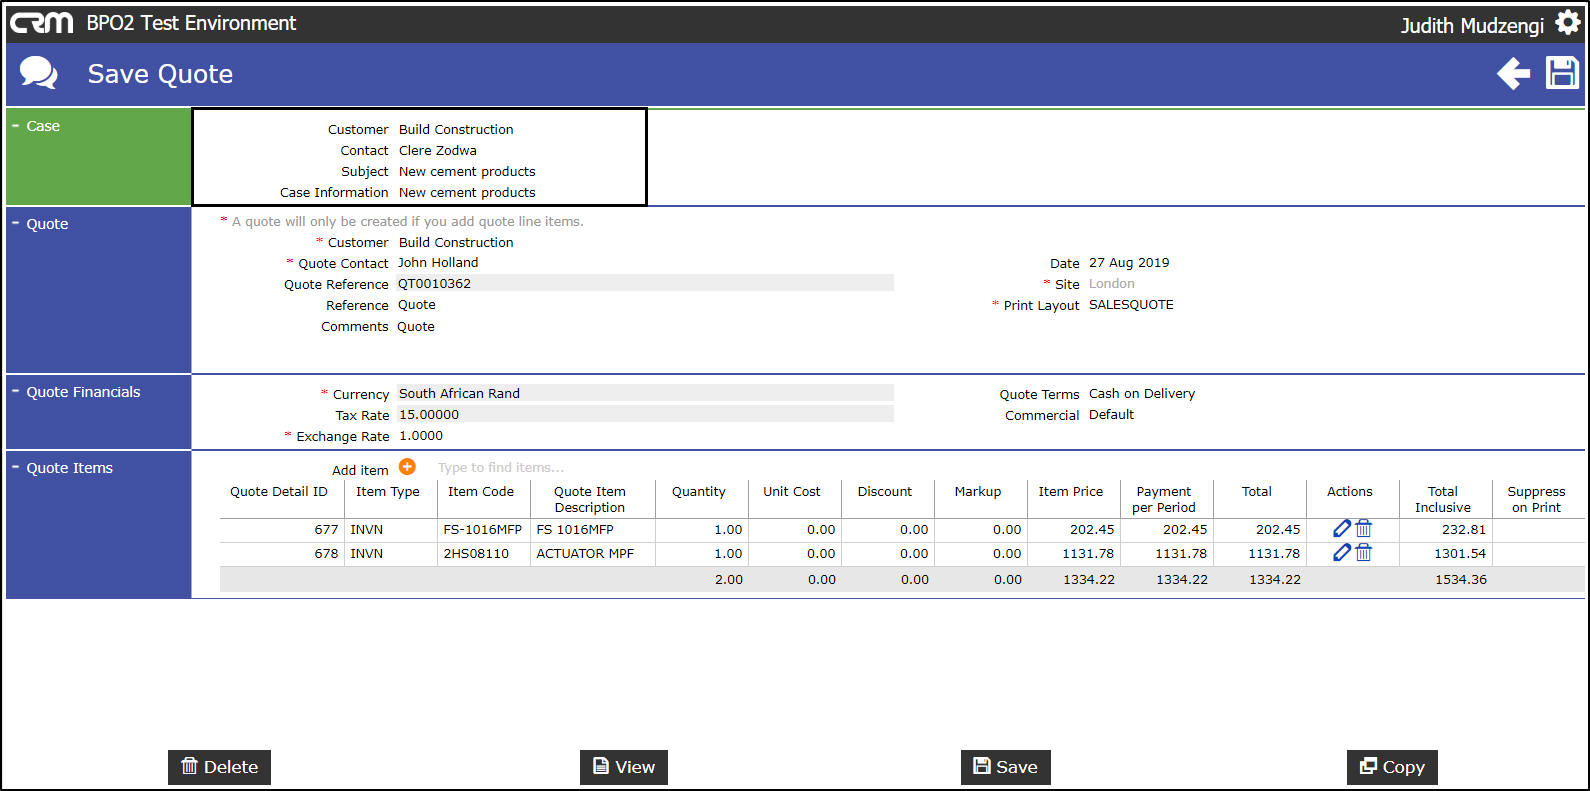
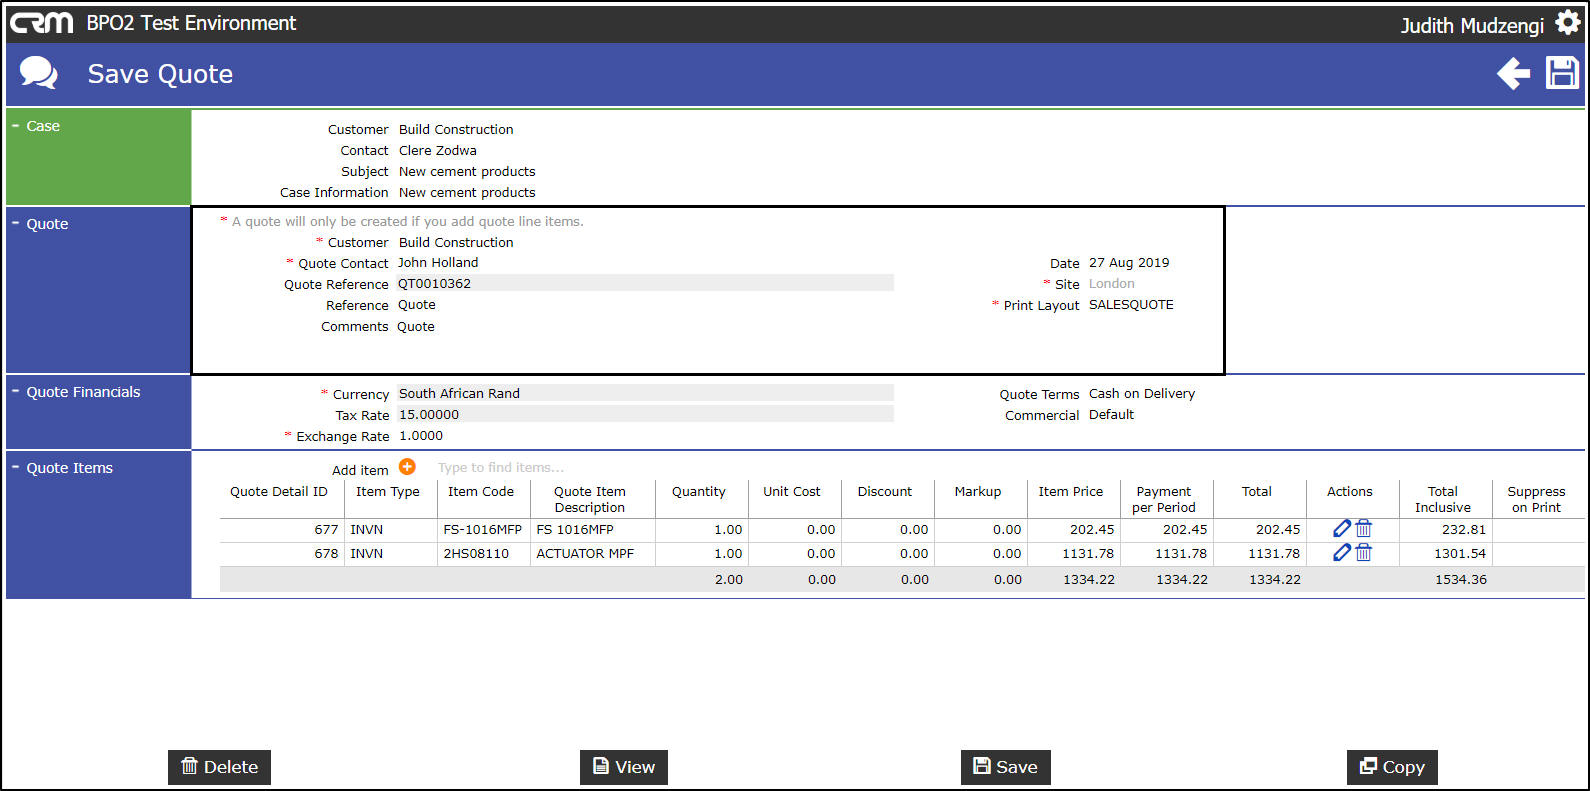
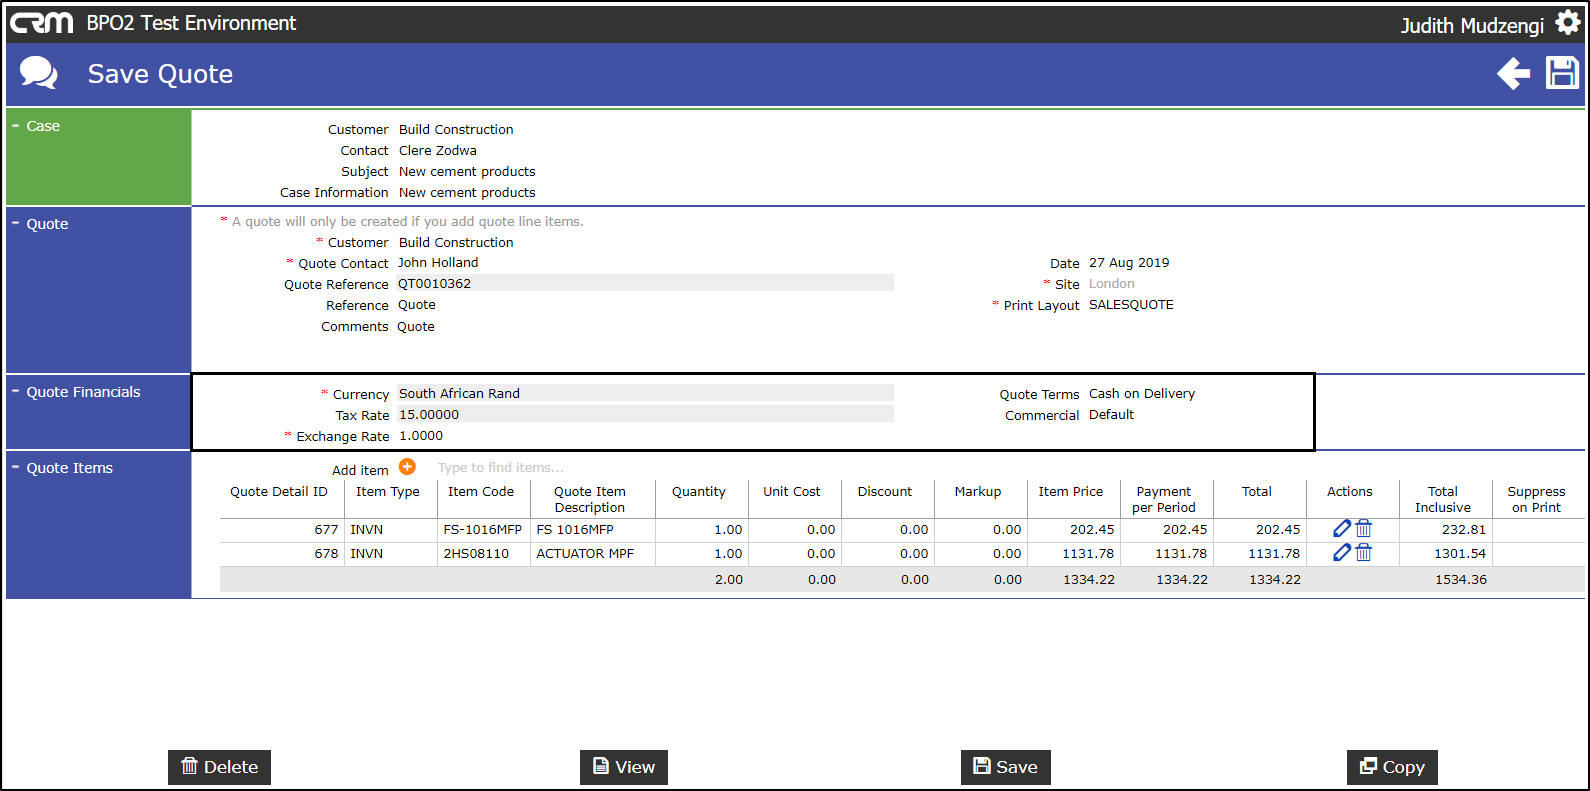
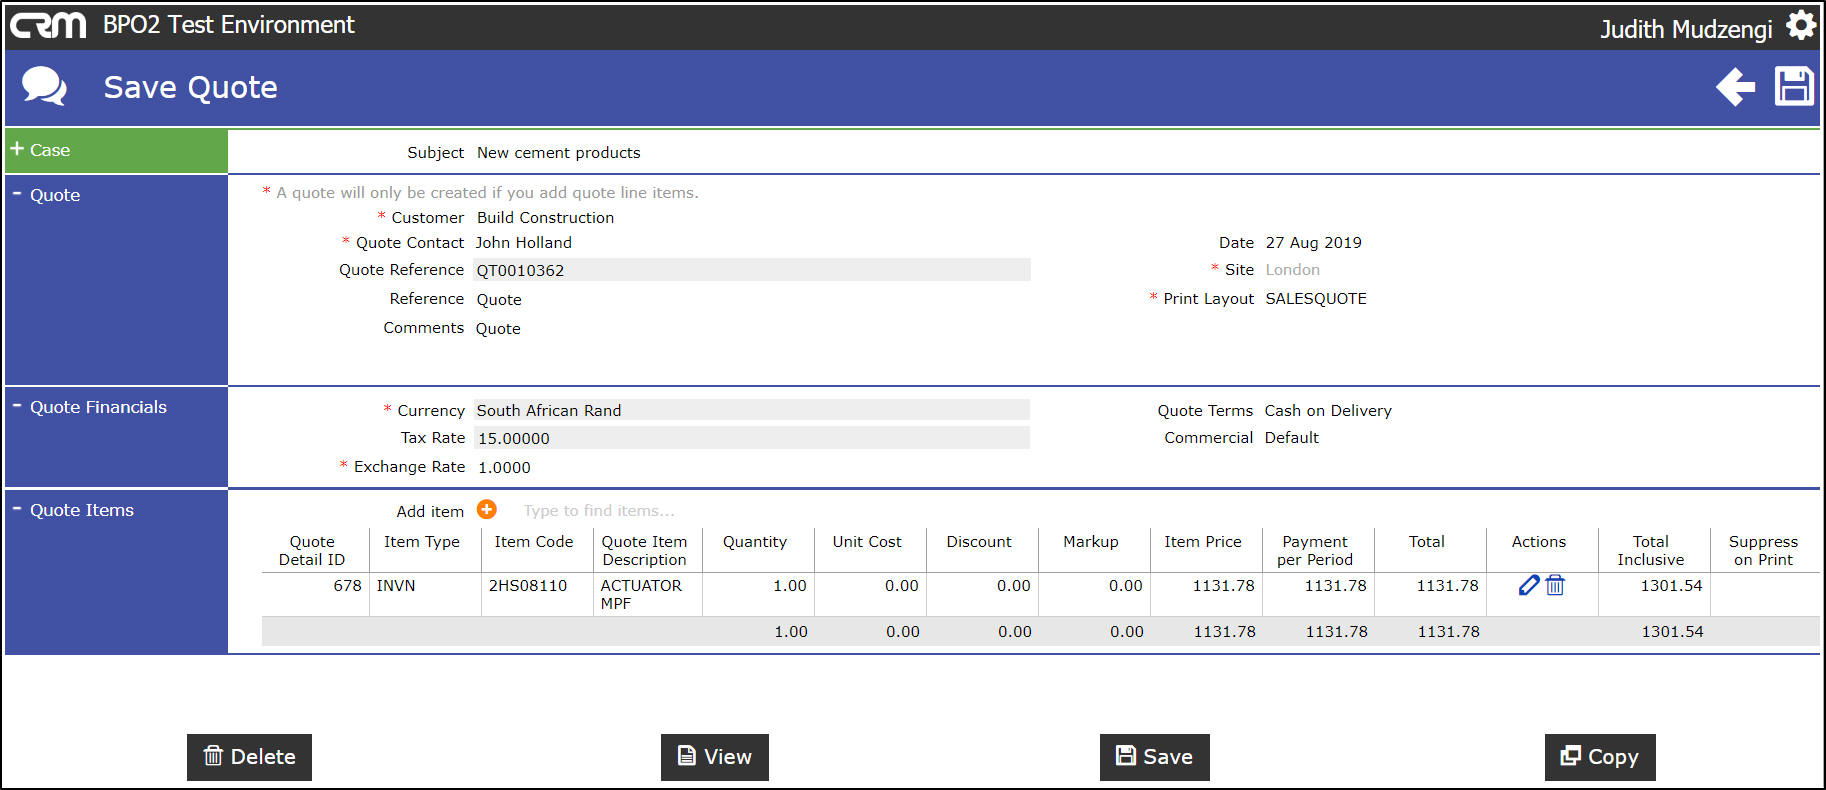
The Save Quote screen will be displayed.
- Click on the [ + ] sign to expand the frame to view more details or click on the [ - ] sign to collapse the frame to view less details.
View Quote
- Click on View .
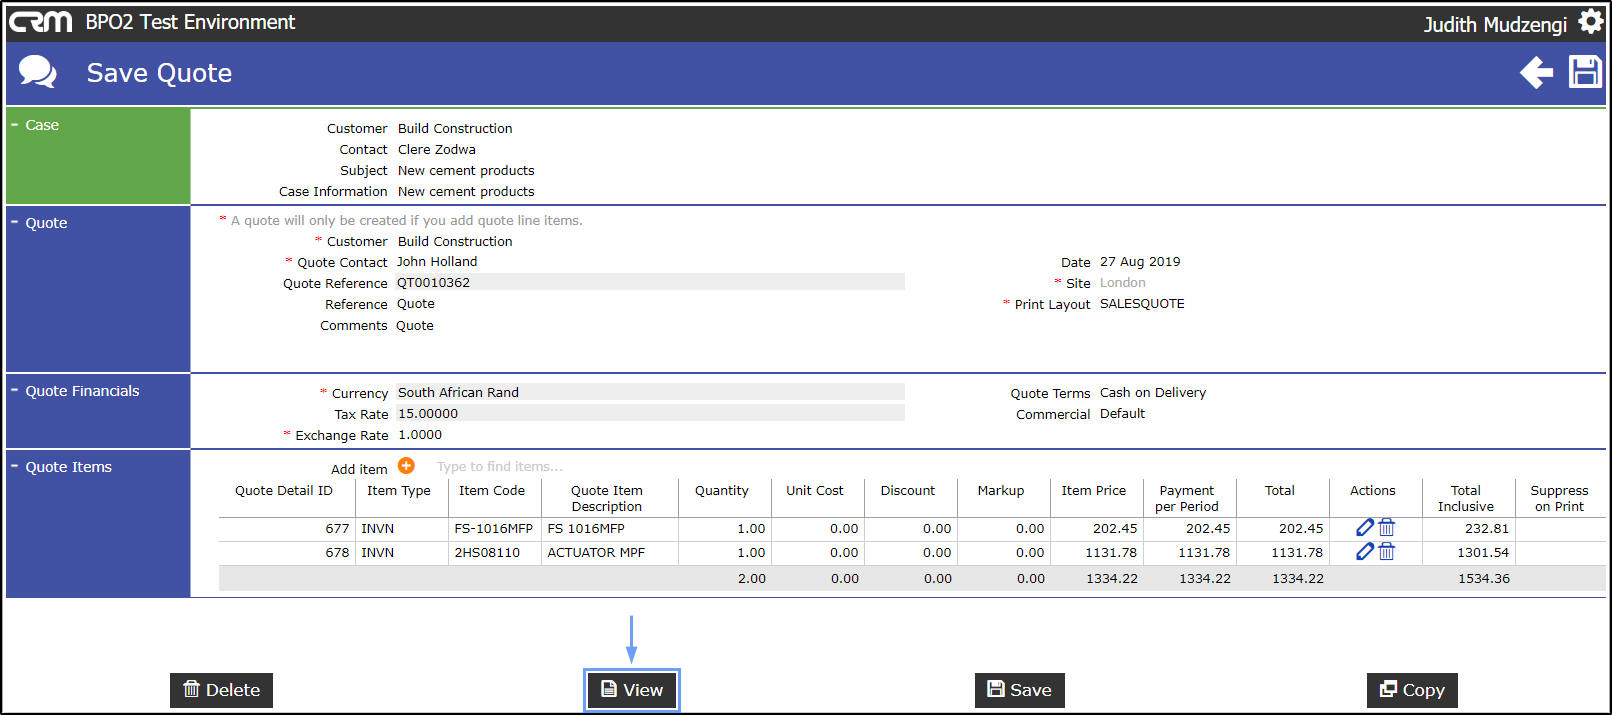
The Report Viewer and Emailer screen will be displayed.
- You can now view the Sales Quote.
- Click on Back.
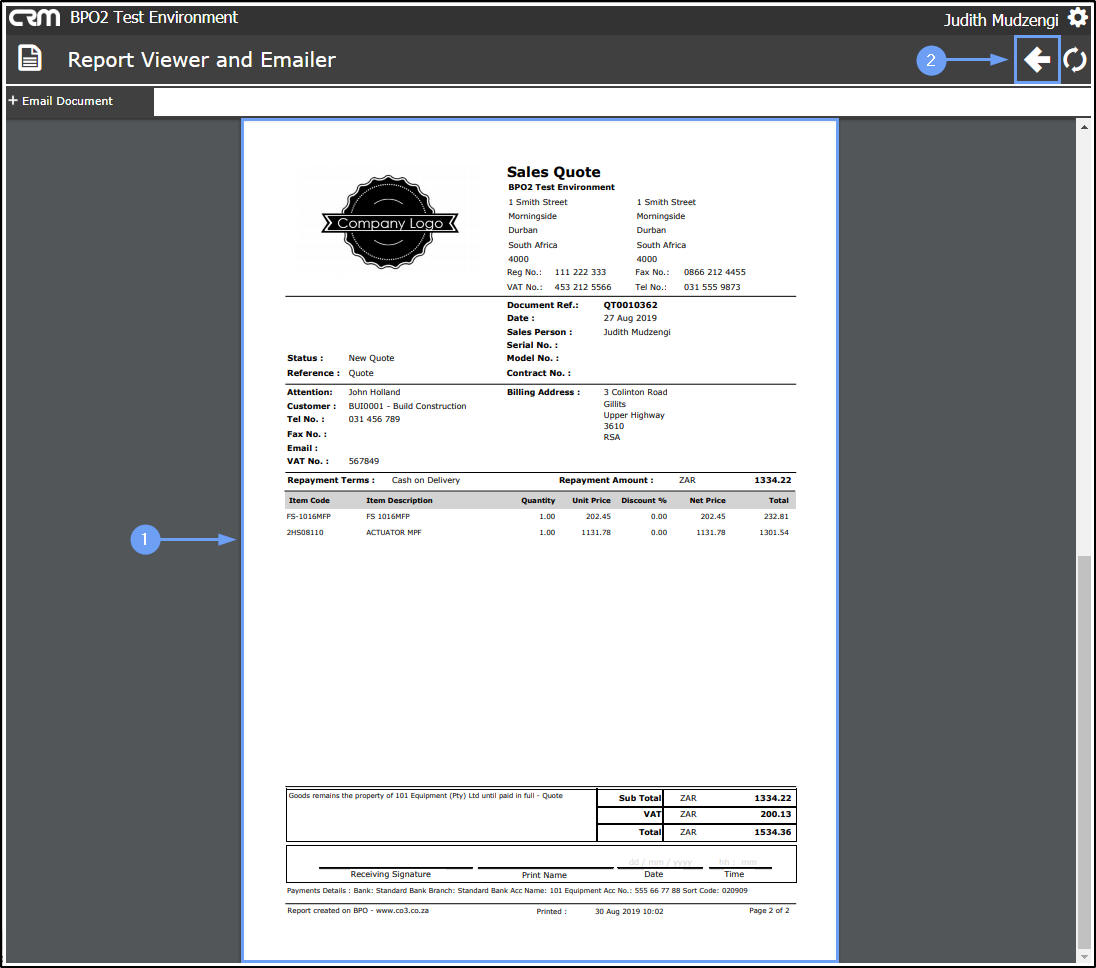
- You will return to the Save Quote screen.
Edit Quote
Case Frame
- Customer: The customer will auto populate and this field cannot be edited.
- Contact: The contact will auto populate and this field cannot be edited.
- Subject: The subject will auto populate and this field cannot be edited.
- Case Information: The case information will auto populate and this field cannot be edited.
Quote Frame
- Customer: The customer will auto populate. This field cannot be edited.
- Quote Contact: The quote contact will auto populate.
- To change the quote contact, click on the drop-down arrow and select an alternative contact, if applicable.
- Quote Reference: This quote reference will auto populate with the quote number. This field cannot be edited.
- Reference: The reference will auto populate but you can edit this, if applicable.
- Comments: The comments will auto populate but you can edit this, if applicable.
- Date : The date will auto populate.
- To change the date, click on the drop-down arrow and select an alternative date if applicable.
- Site: The site will auto populate. This field cannot be edited.
- Print Layout :The print layout will auto populate.
- To change this, click on the drop-down arrow and select an alternative layout, if applicable.
Quote Financials Details Frame
- Currency: The currency will auto populate. This field cannot be edited.
- Tax Rate: The tax rate will auto populate. This field cannot be edited.
- Exchange Rate: The exchange rate will auto populate.
- To change this, delete the current exchange rate and type in the new exchange rate.
- Quote Terms: The quote terms will auto populate.
- To change this, click on the drop-down arrow and select alternative payment terms if applicable.
- Commercial: The commercial will auto populate.
- To change this, click on the drop-down arrow and select an alternative commercial if applicable.
Quote Items Frame
- Add Item: You can add additional items to the quote.
- Edit Line Item: Click on the Edit icon to edit a line item .

- Delete Line Item: Click on the Delete icon.

- A message will pop up asking you;
- Confirm Delete?
- Click on Ok .
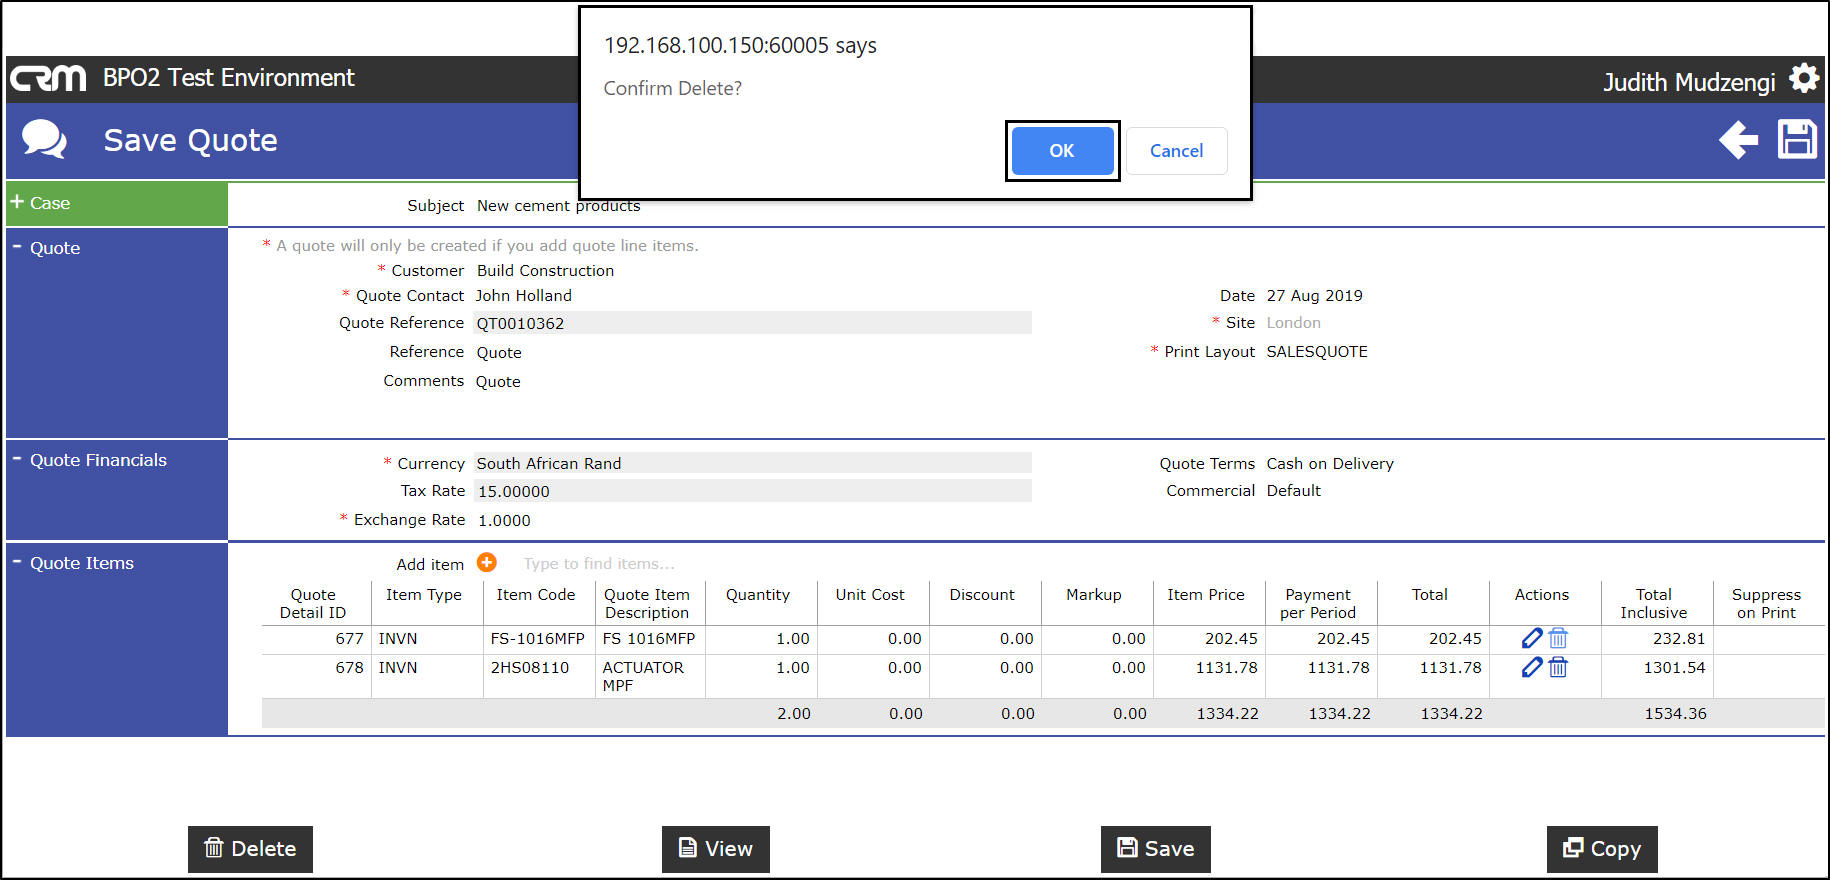
- The line item will be removed from the Quote Items section.
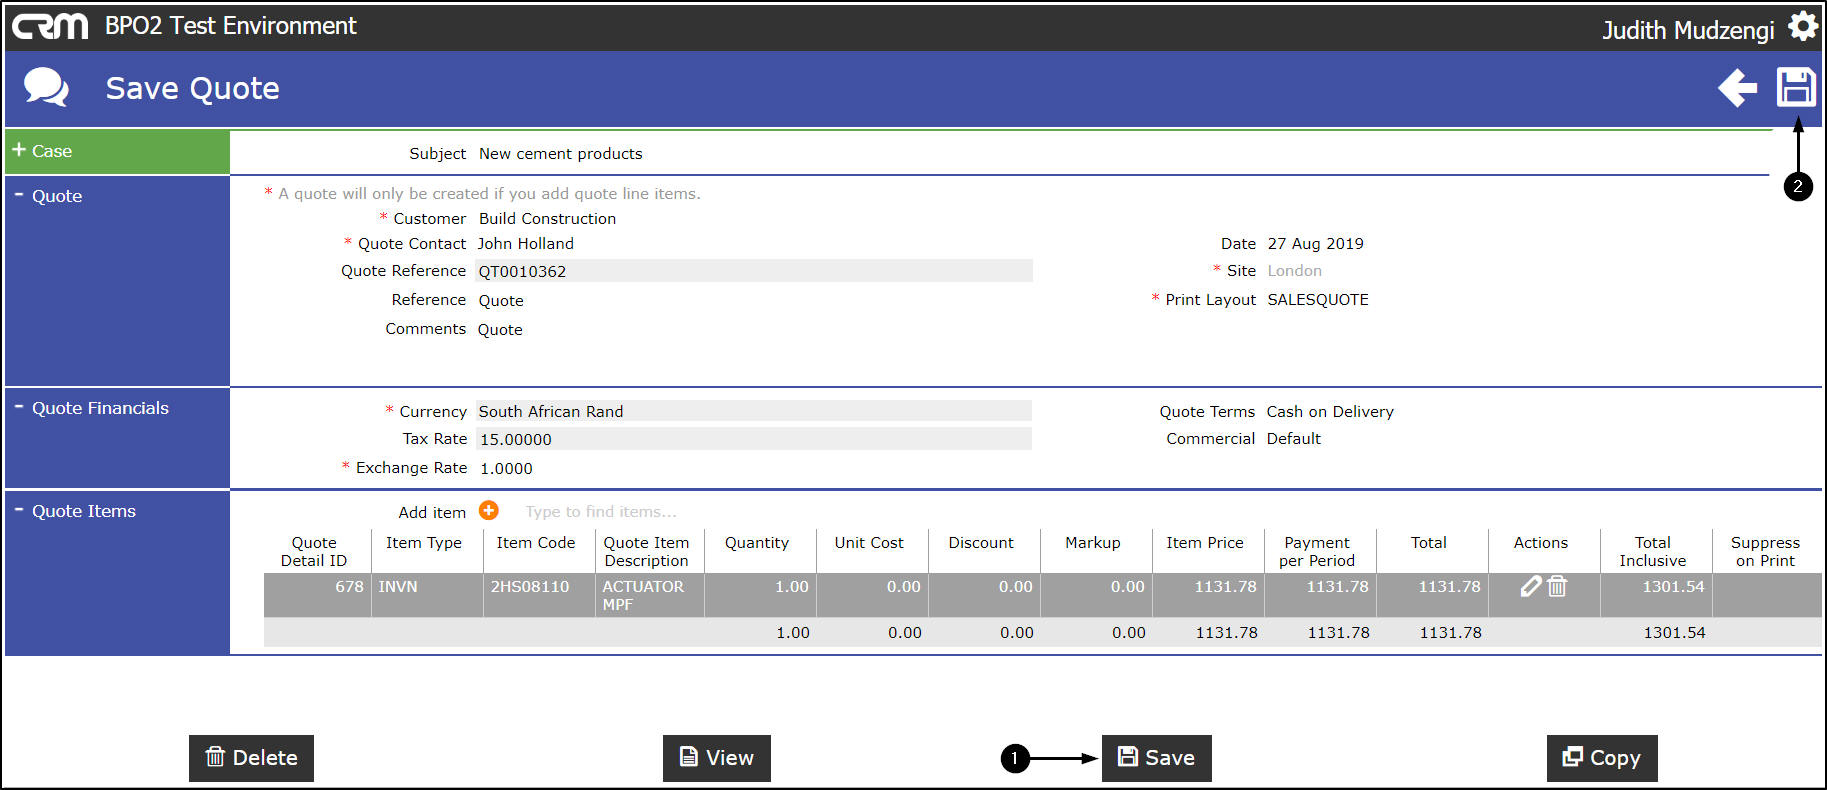
Save Changes
- Click on either the Save button or
- Save icon.
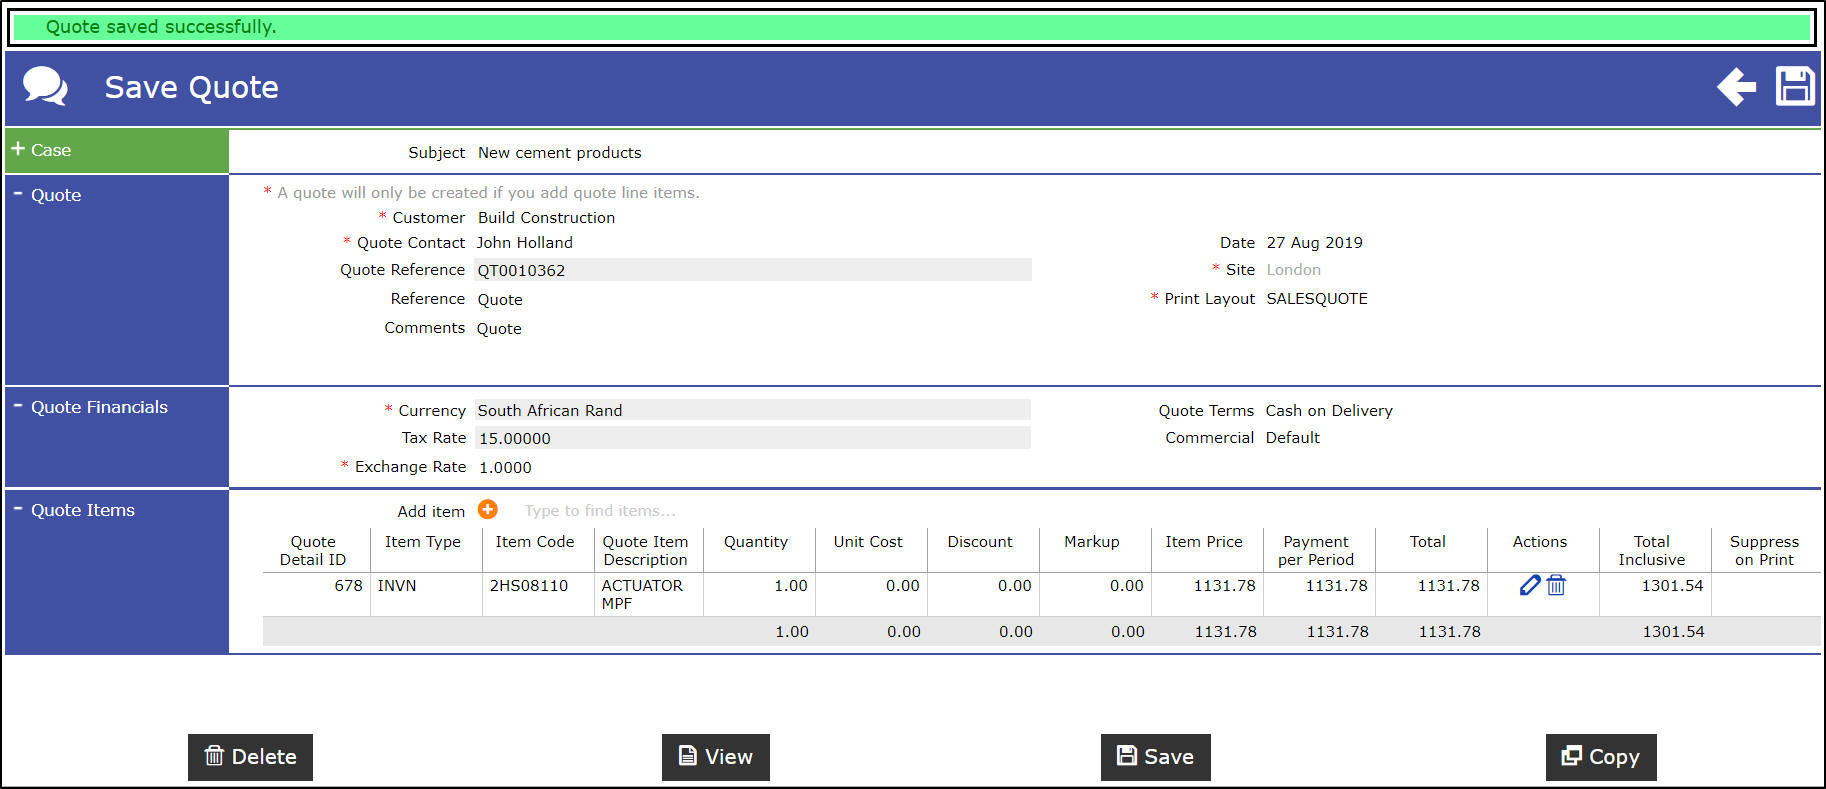
- A message will pop up informing you that;
- Quote saved successfully.
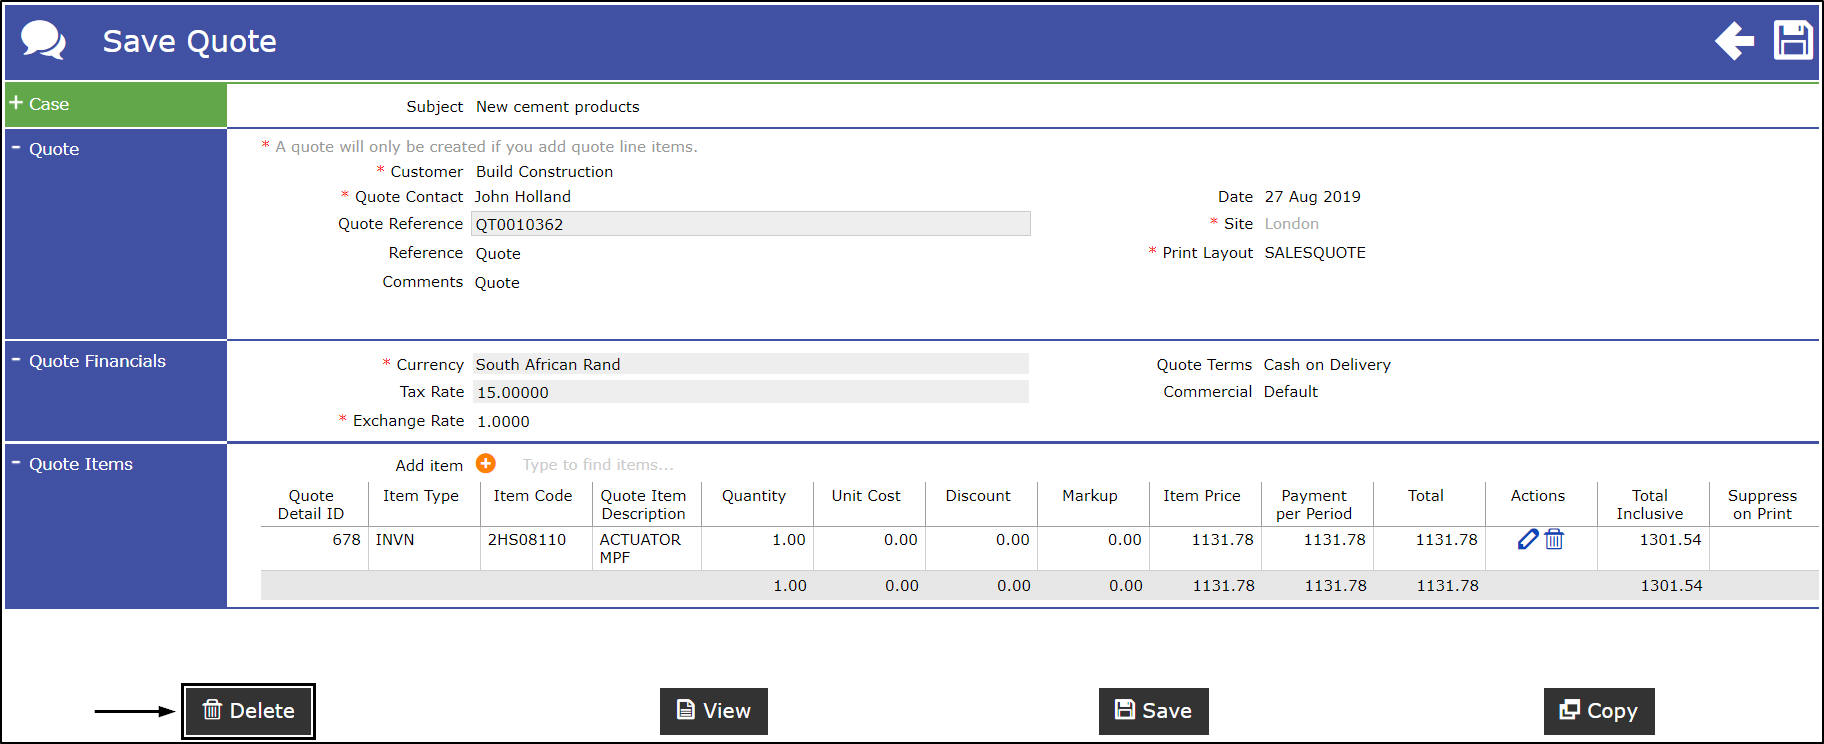
Delete Quote
- Click on Delete .
- A message will pop up asking you;
- Are you sure you want to delete this quote?
- Click on Ok .

- The quote will be removed from the Quotes screen.
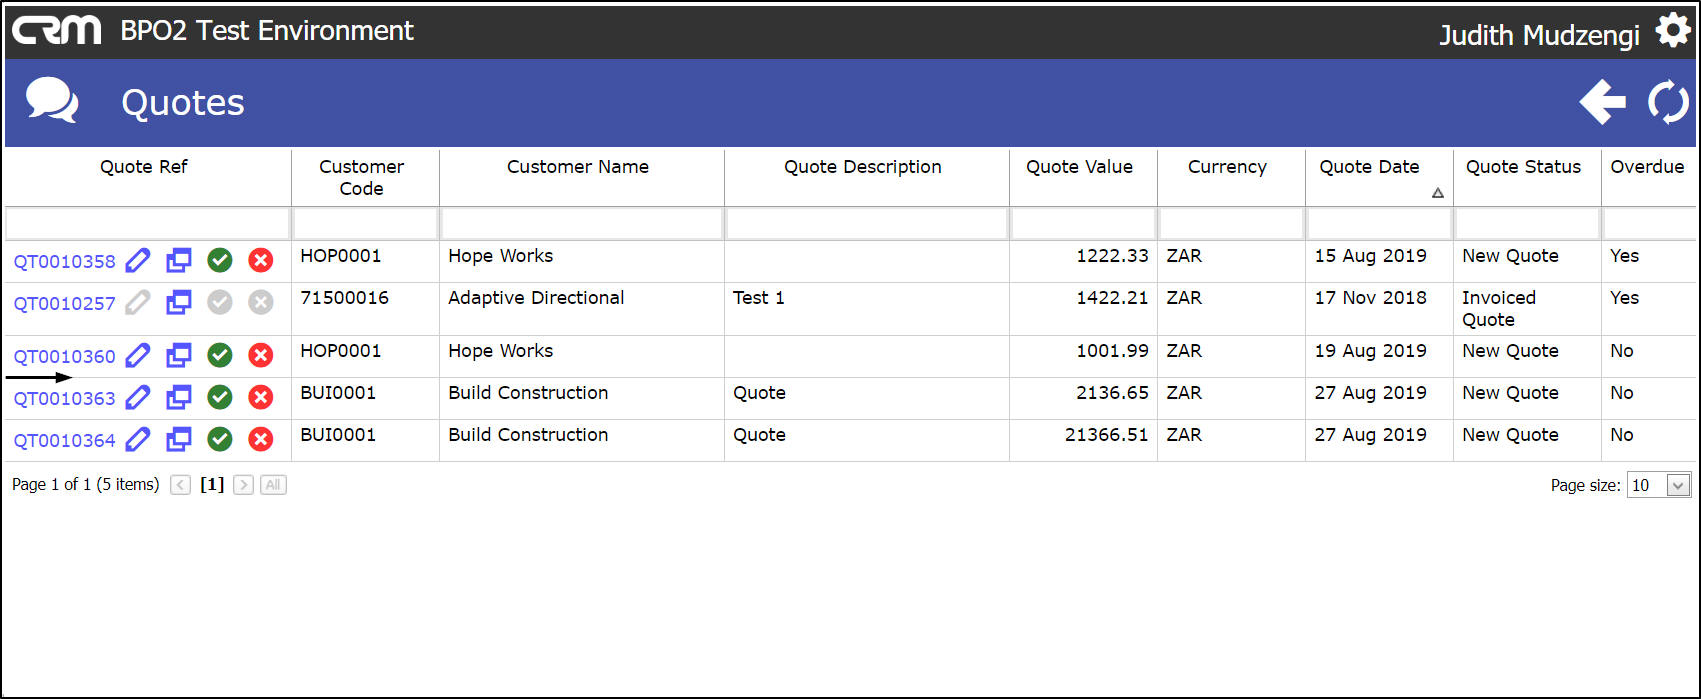
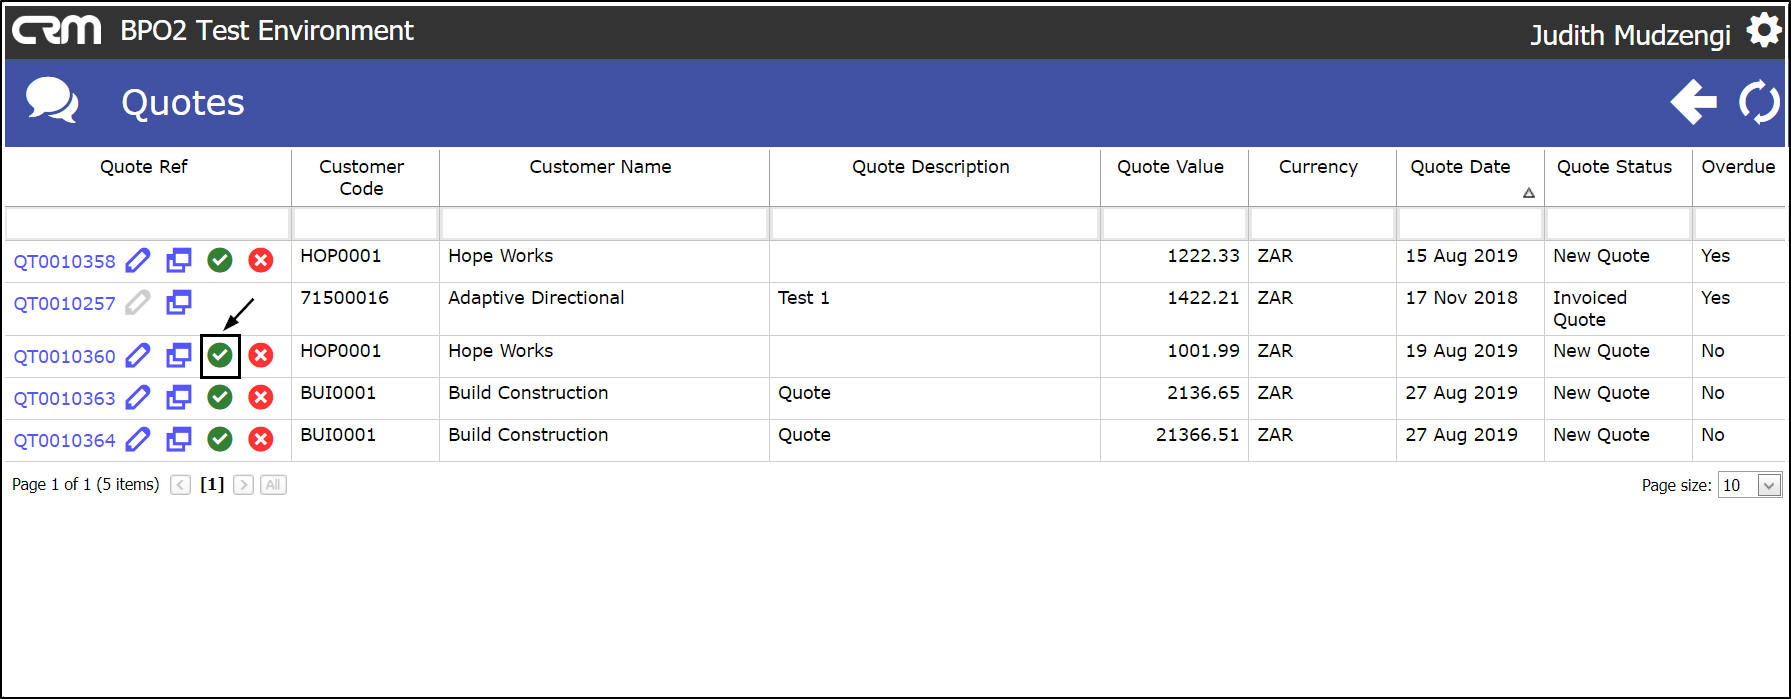
Mark Quote As Accepted
- Click on the Mark Quote As Accepted icon.
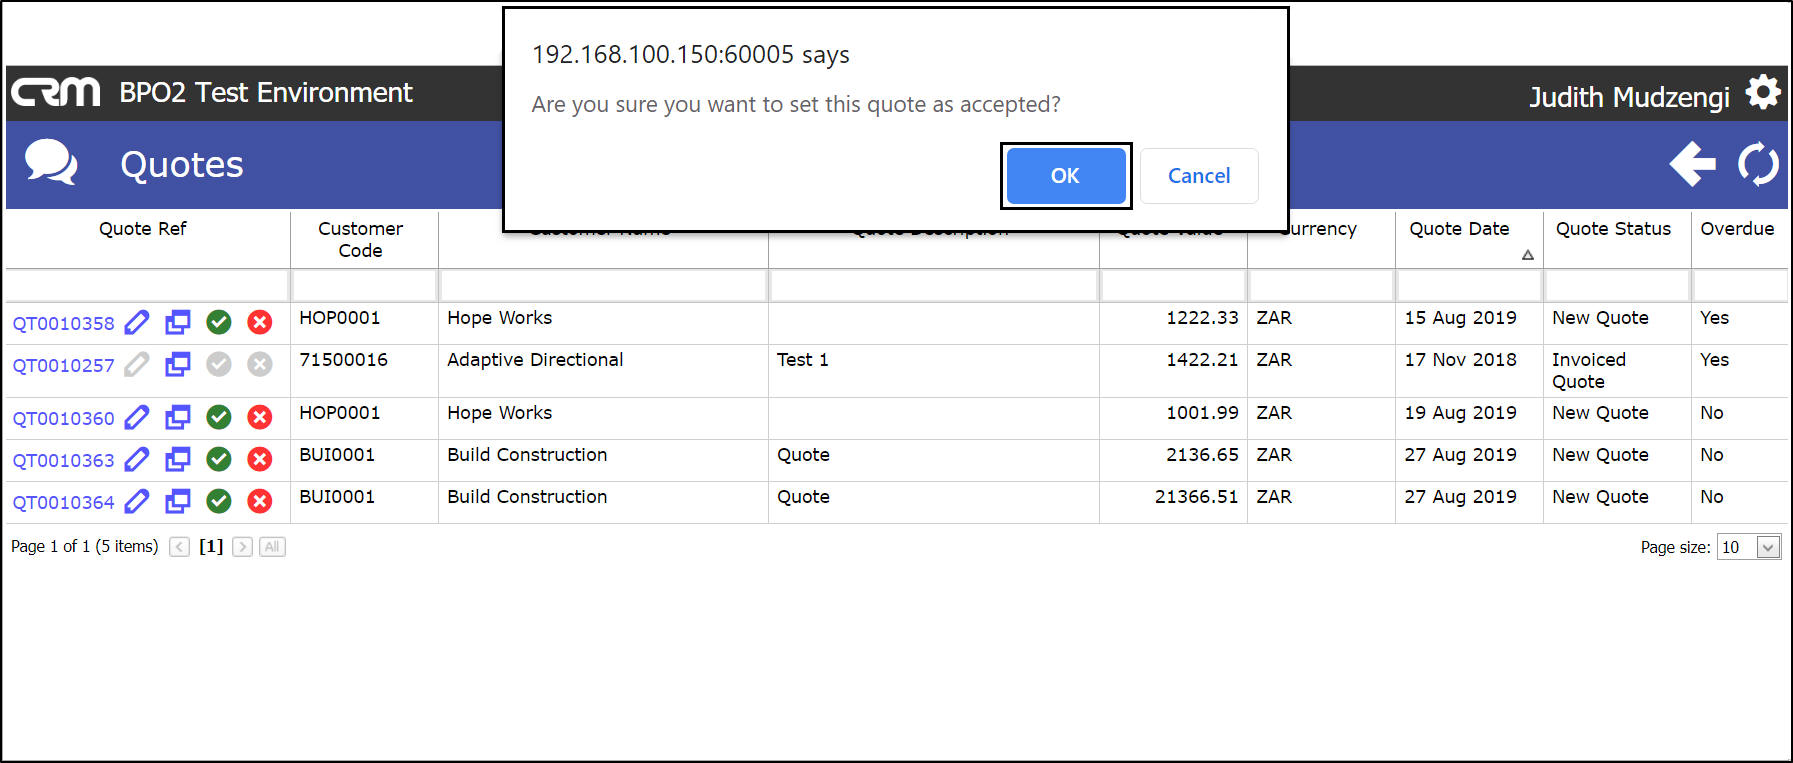
- A message will pop up asking you;
- Are you sure you want to set this quote as accepted?
- Click on Ok .
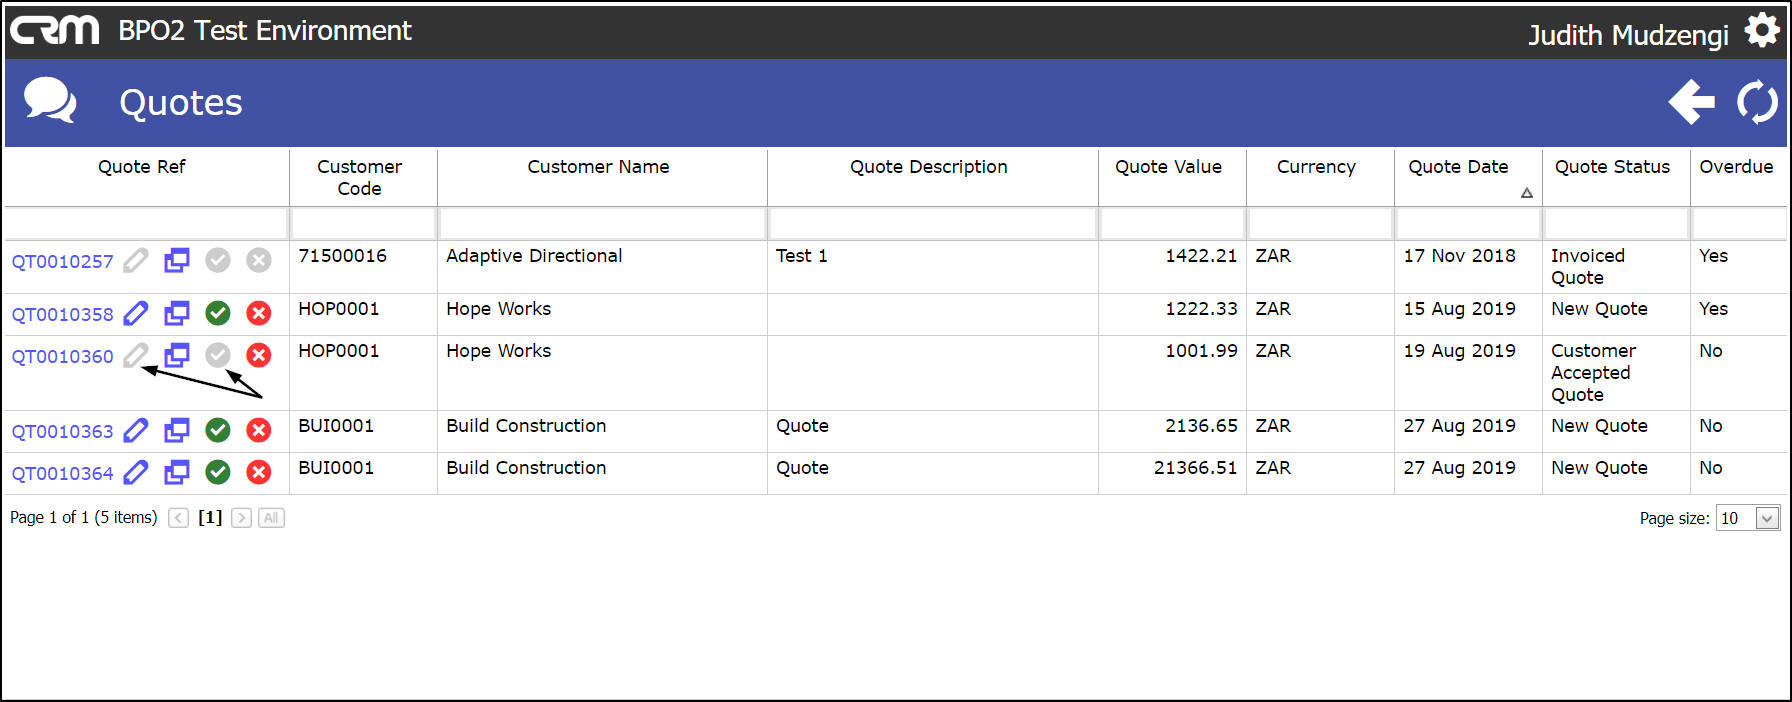
- The Edit Quote icon and Mark Quote As Accepted icon will become inactive (greyed out) when the quote is marked as accepted.
Mark Quote As Rejected
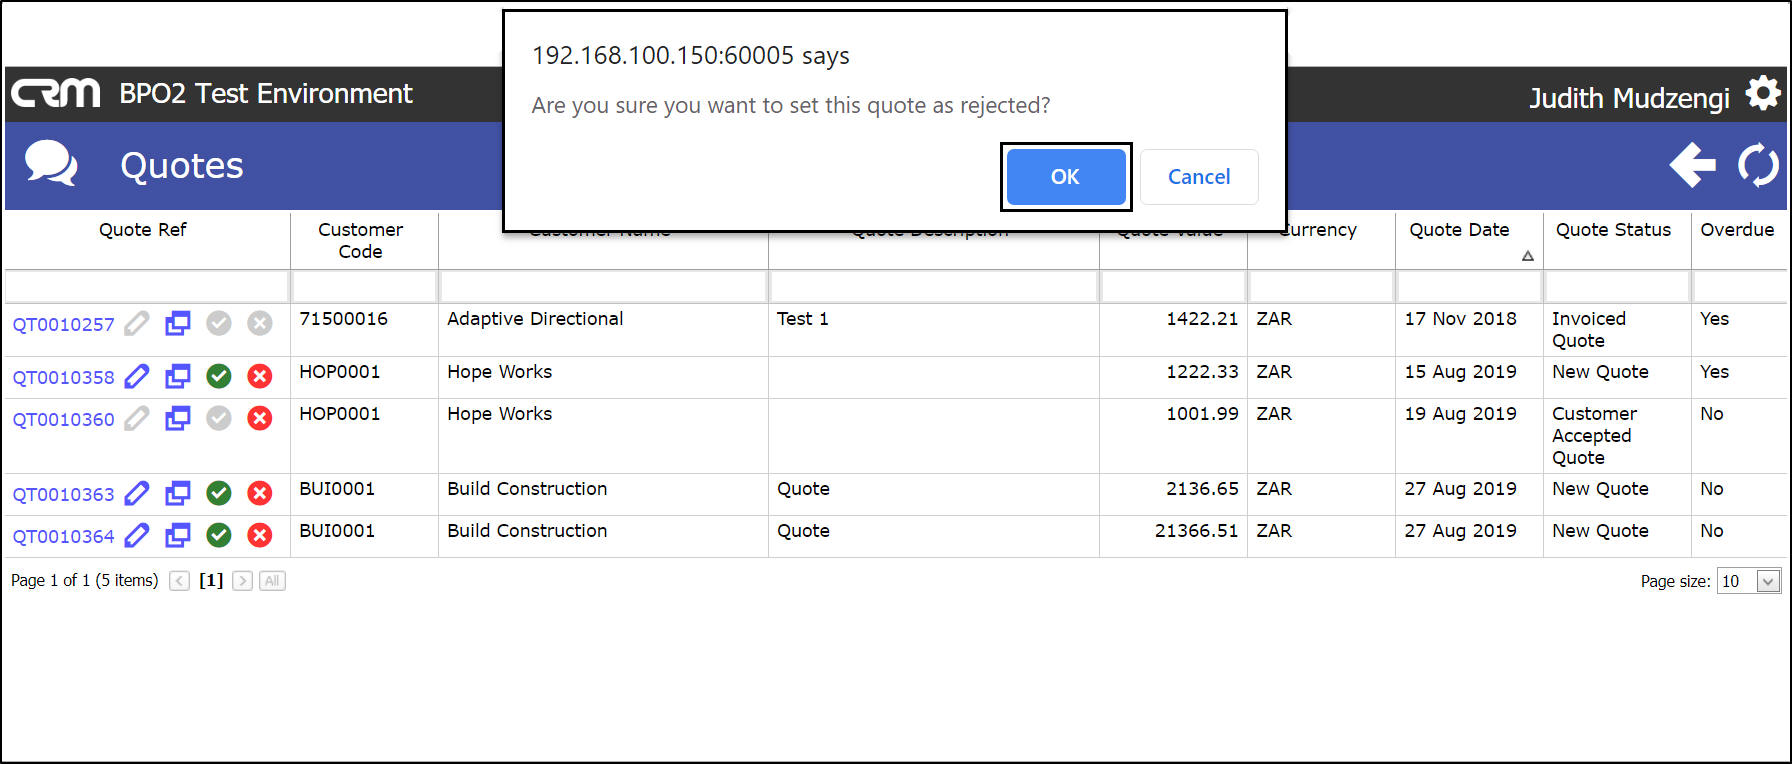
- Click on the Mark Quote As Rejected icon .
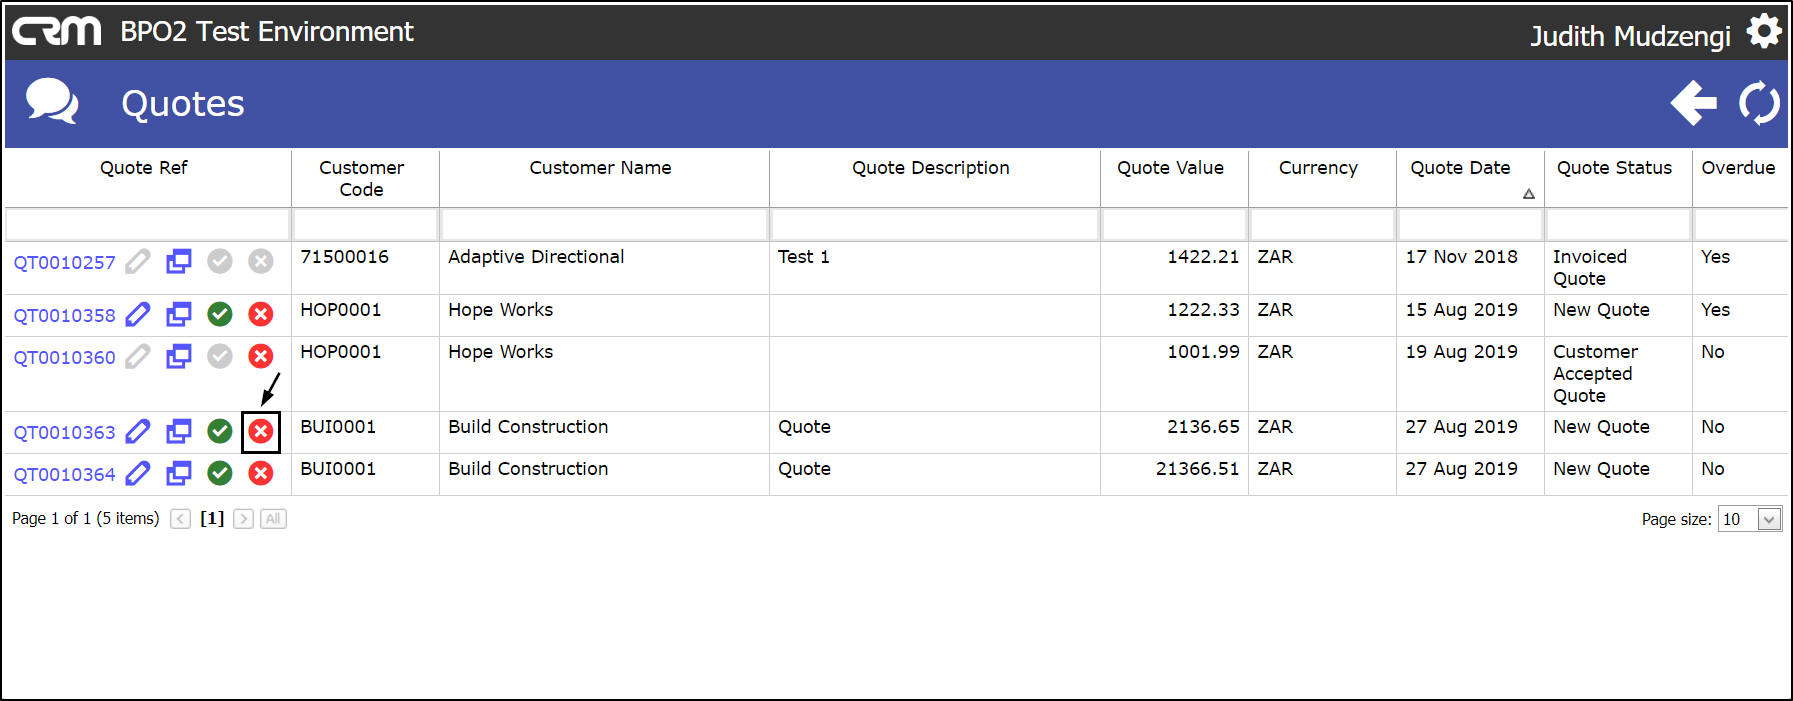
- A message box will pop up asking you;
- Are you sure you want to set this quote as rejected?
- Click on Ok.
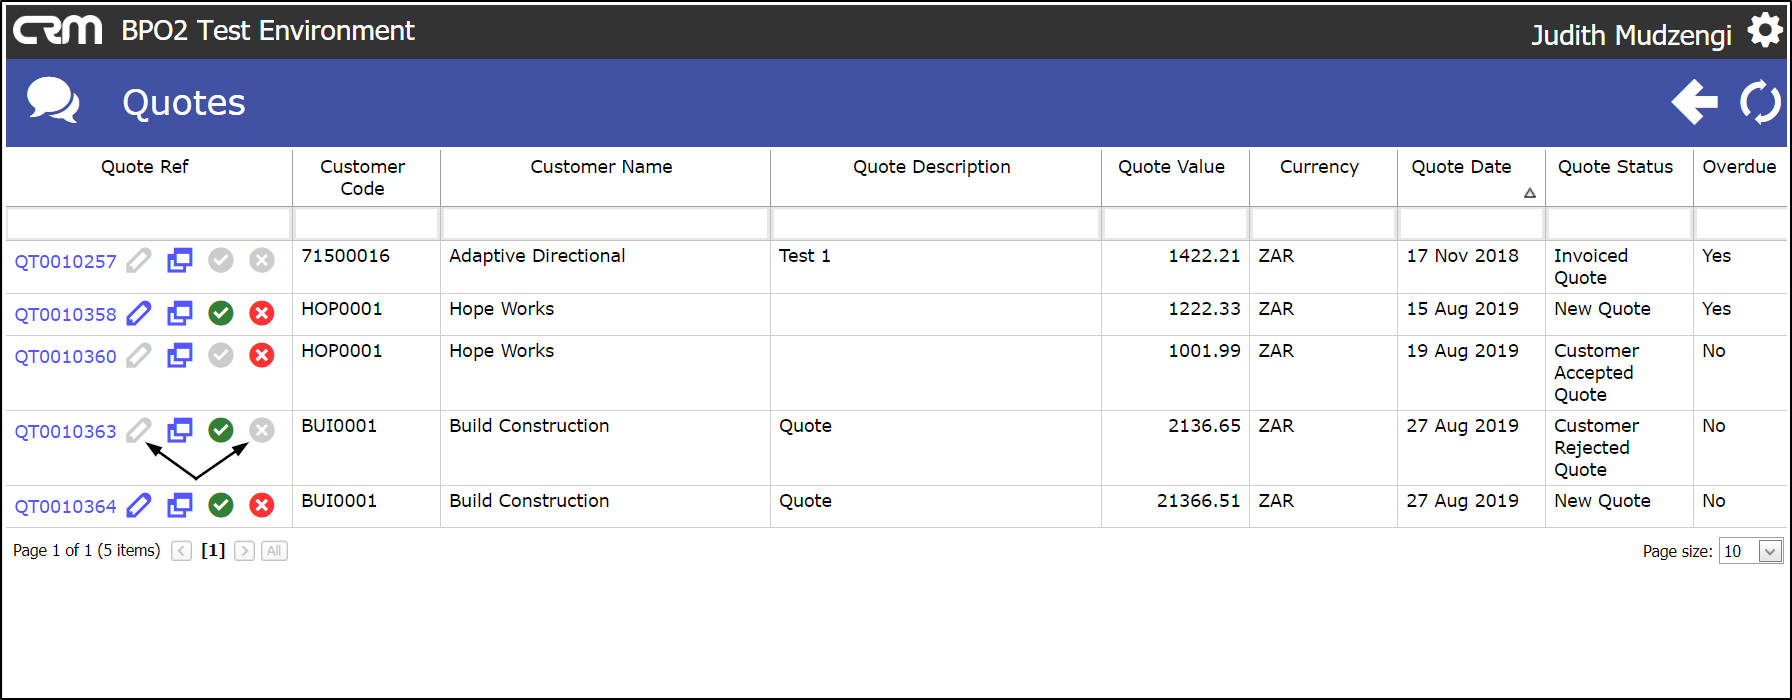
- The Edit Quote icon and Mark Quote As Rejected icon will become inactive (greyed out) when the quote is marked as rejected.
Access Customer Specific Quotes from Home page
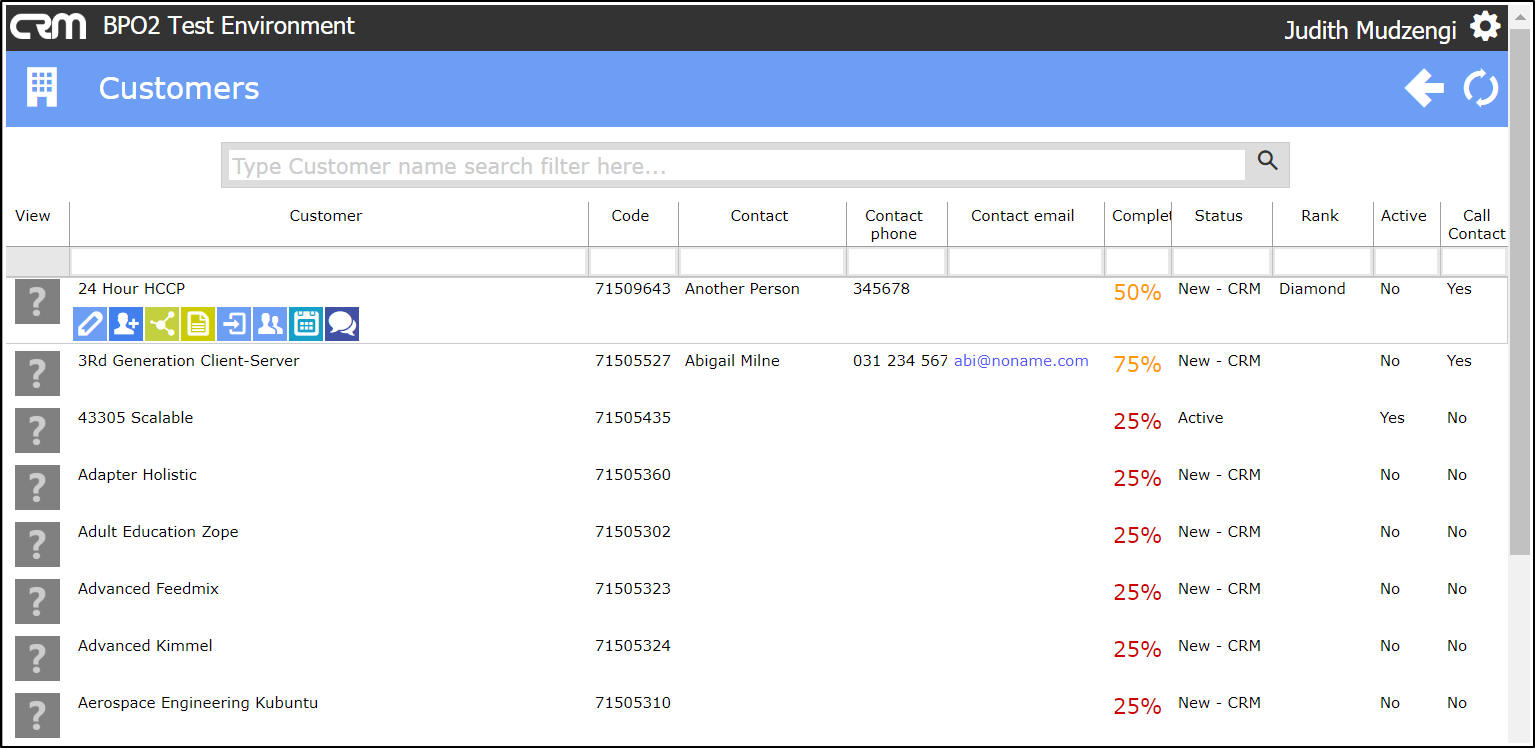
- Click on the Customers tile in the Home page .
- The Customers listing page will open.
- All of the customers will be listed here.
- Type in the customer name you wish to access quotes for in the Search bar.
- The system will filter for and display the customer in this page.
- Click on the View icon.
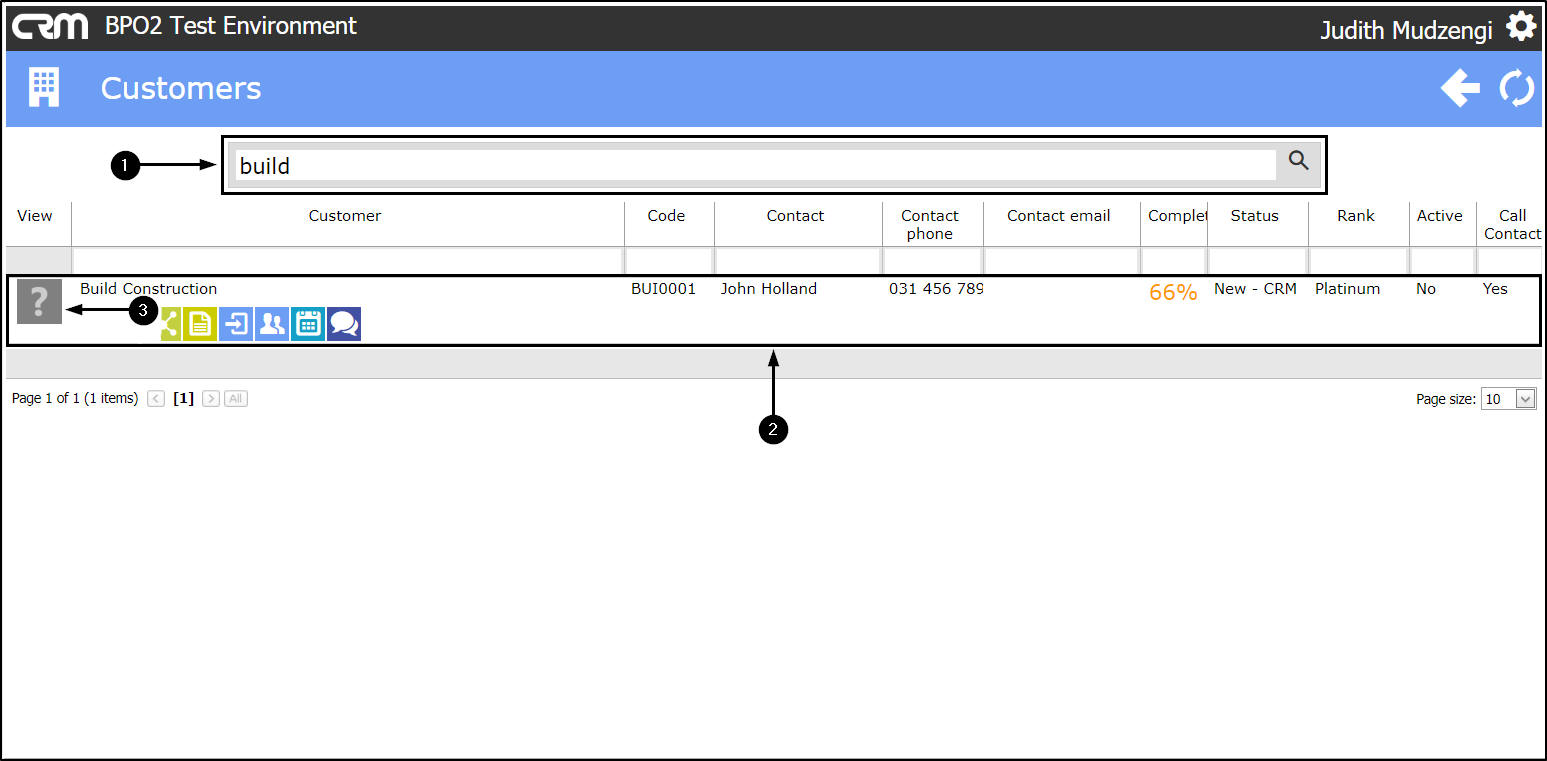
- The Customer Dashboard screen will be displayed.
- Click on the Quotes tile.
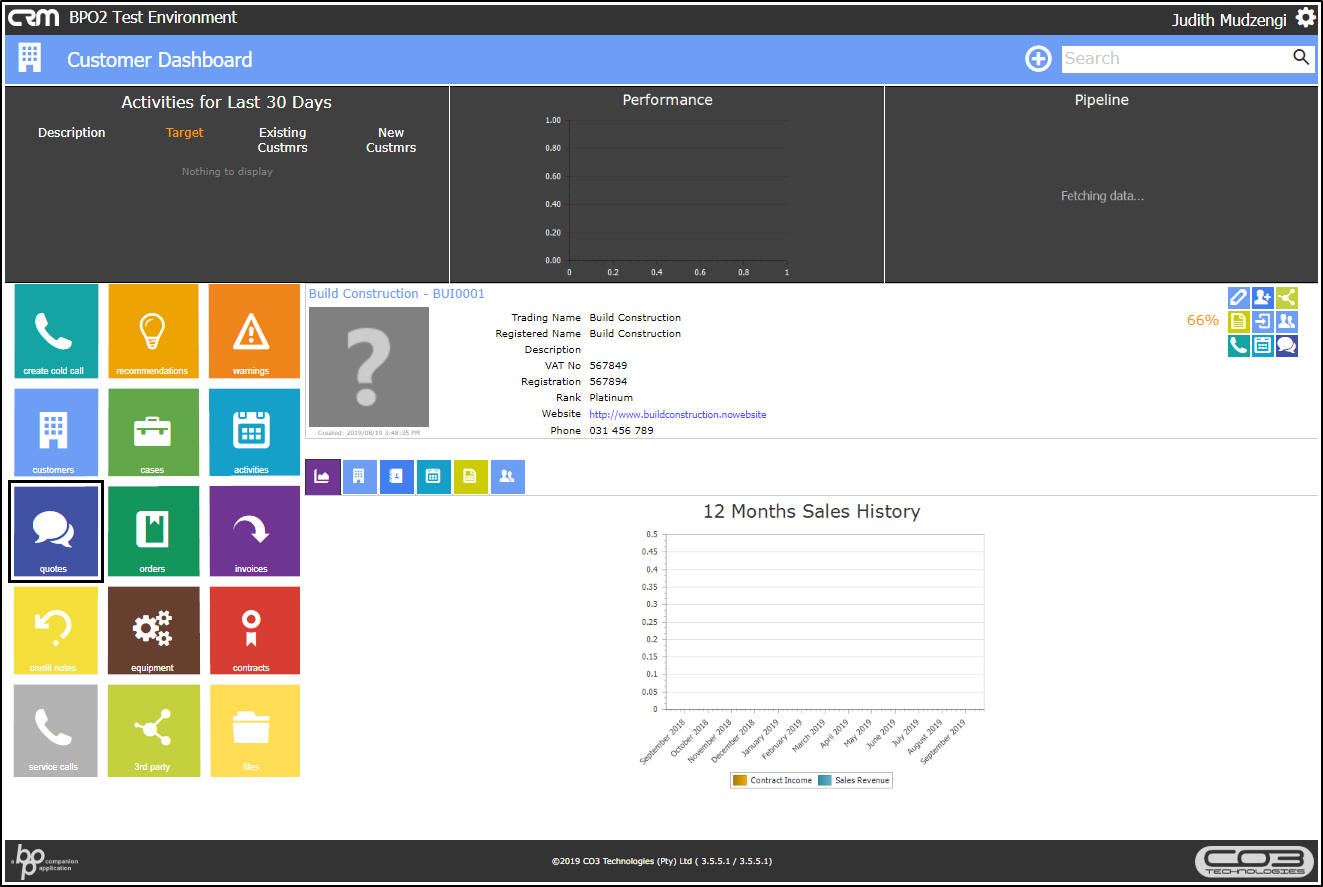
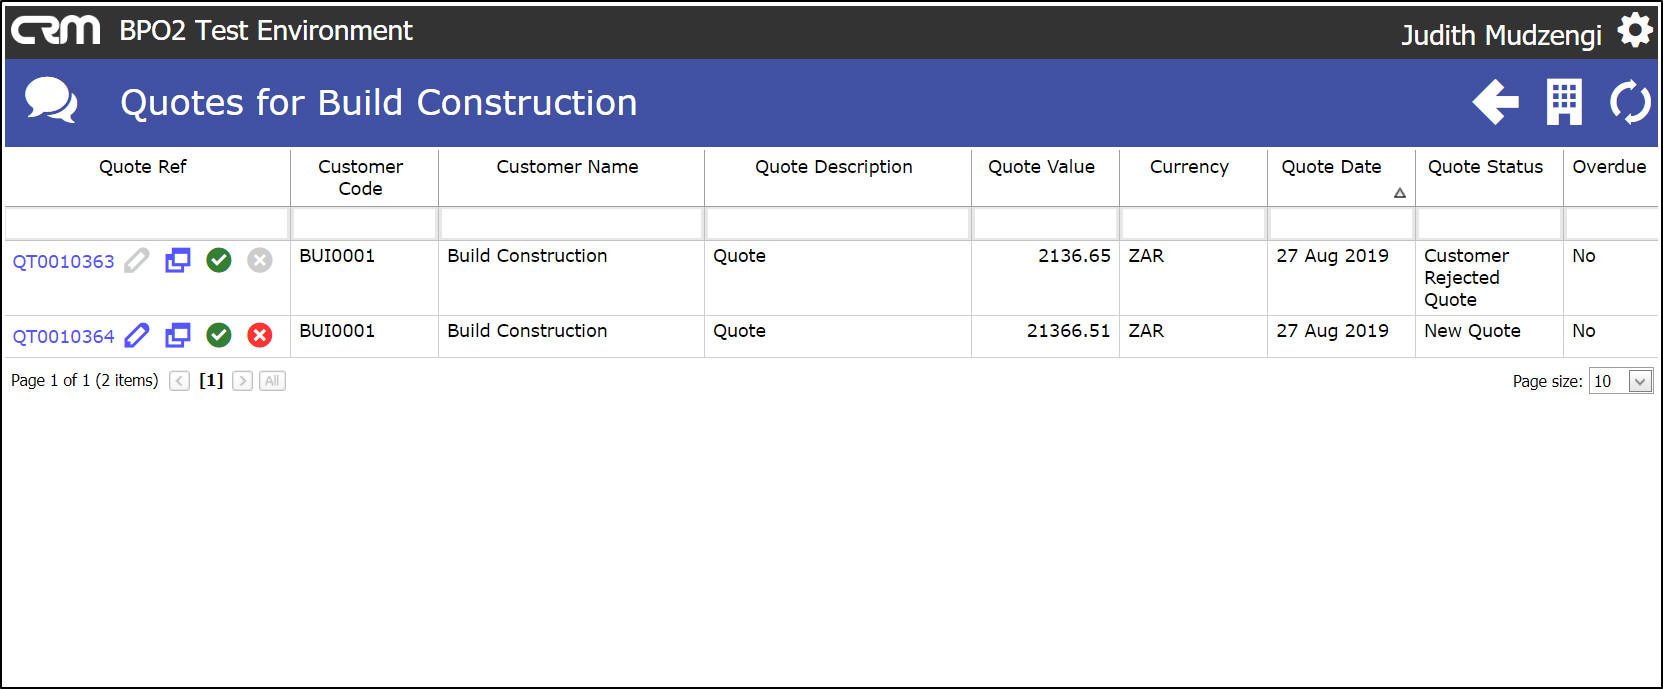
- The Quotes for [selected customer] page will open.
- All of the quotes linked to this customer will be displayed (even ones where you are not the Salesman).
- For more information refer to CRM Customers: Quotes.
CRM.000.015