We are currently updating our site; thank you for your patience.
CRM Basics
View / Print / Email a Quote
A full list of Quotes can be accessed from the Dashboard (Home page), or customer-specific Quotes can be accessed from the Customer Dashboard (Customer Home page).
Quotes in either of these pages can be: Viewed, Downloaded, Printed and Emailed.
| Ribbon Access: Webpage > http://[servername]:[portno]/BPOCRM/User.aspx |
List of All Quotes
(linked to you as the Salesman) from the Dashboard
- In the Dashboard,
- Click on the Quotes tile.
- The number in the top right of this tile shows the total number of New , Accepted and Rejected Quotes (for all customers) that are linked to you as the Salesman.
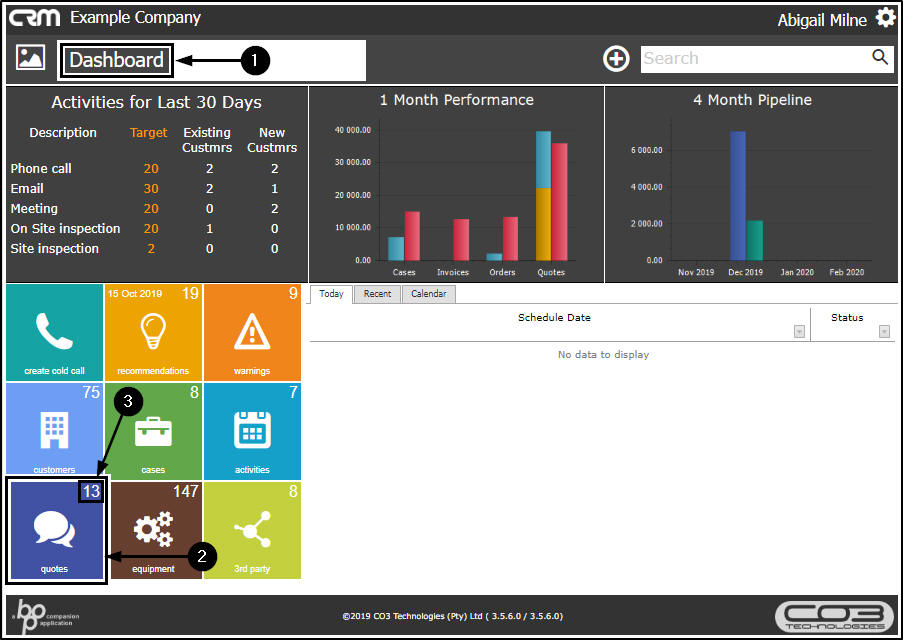
- The Quotes listing page will open.
- A list of New , Accepted and Rejected quotes for all customers on the system, where you are the Salesman, will be displayed.
- Use the Page Reference field, or the Filter Row to search for a particular quote.

Customer Specific Quotes
- In the Dashboard,
- Click on the Customers tile.
- The number in the top right of this tile shows the total number of Customers, on the System.

- The Customers listing page will open.
- You can use the Page Reference field,
- the Filter Row or
- the Filter Text Box to search for your customer.
- Click on the selected Customer icon in the View column.
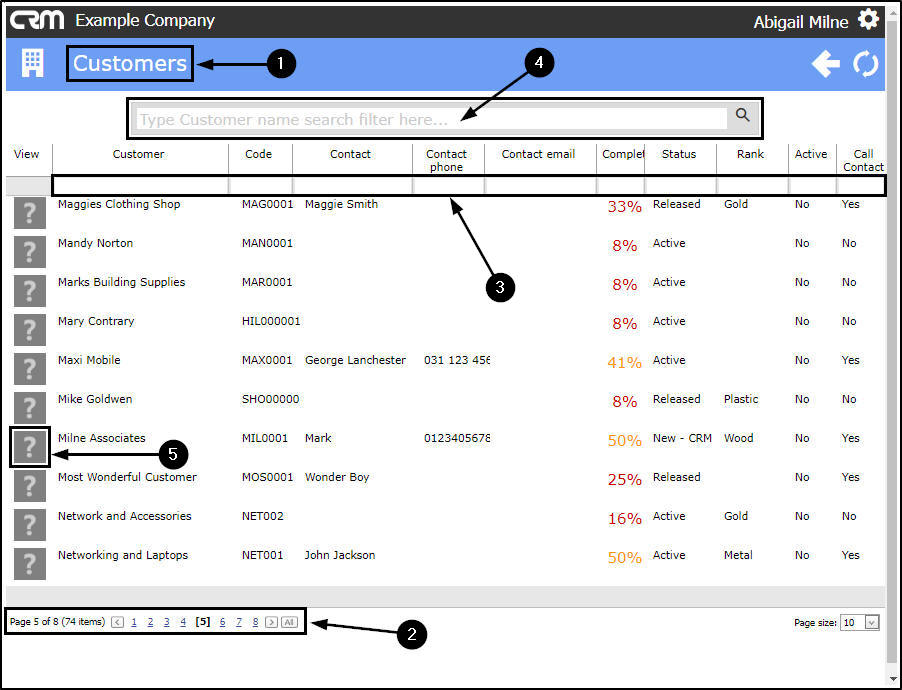
- The Customer Dashboard (Customer Home page) will open.
- Click on the Quotes tile.
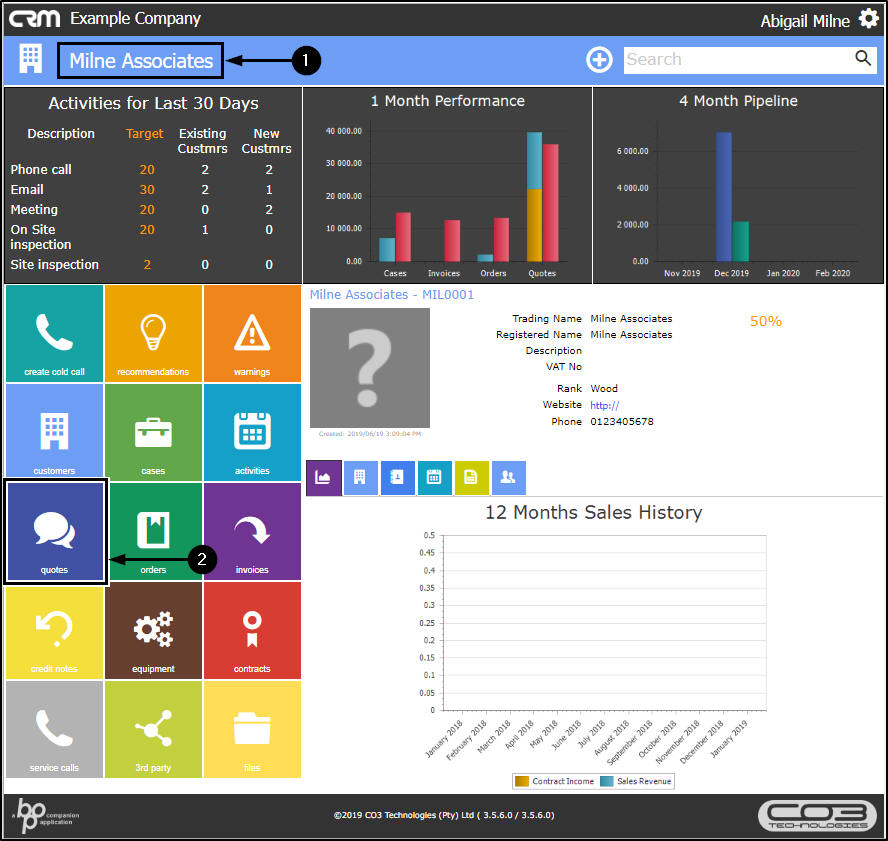
- The Quotes for [selected customer] page will open.
- All of the quotes linked to this customer will be displayed (even ones where you are not the Salesman).
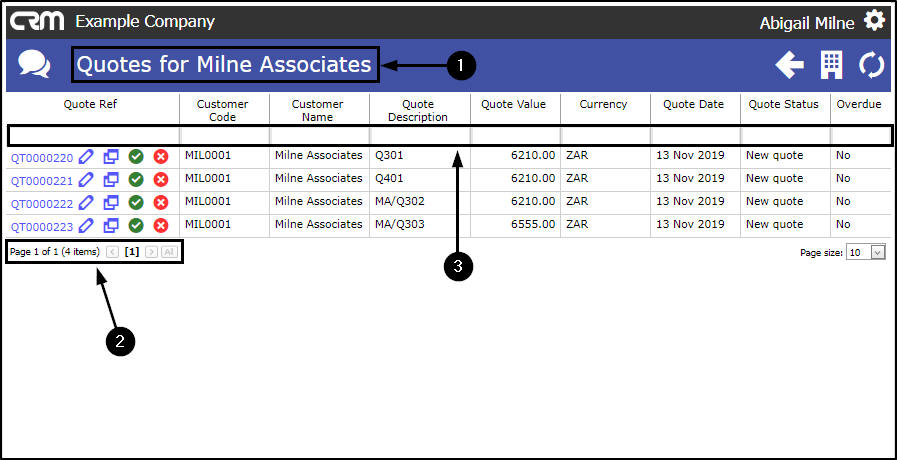
- You can use the Page Reference field or the
- Filter Row to search for a particular Quote.
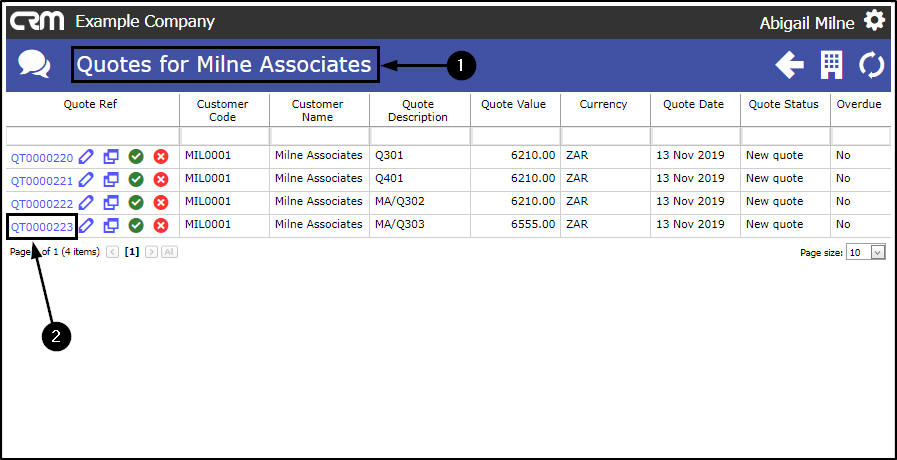
View a Quote
In either the Quotes listing page or the Quotes for [selected customer] page you can search for and View, Download, Print or Email a selected Quote. For the purpose of this manual, we will start from the Quotes for [selected customer] page.
- In the Quotes for [selected customer] page,
- Click on the blue number of the Quote that you wish to View, Download, Print or Email .
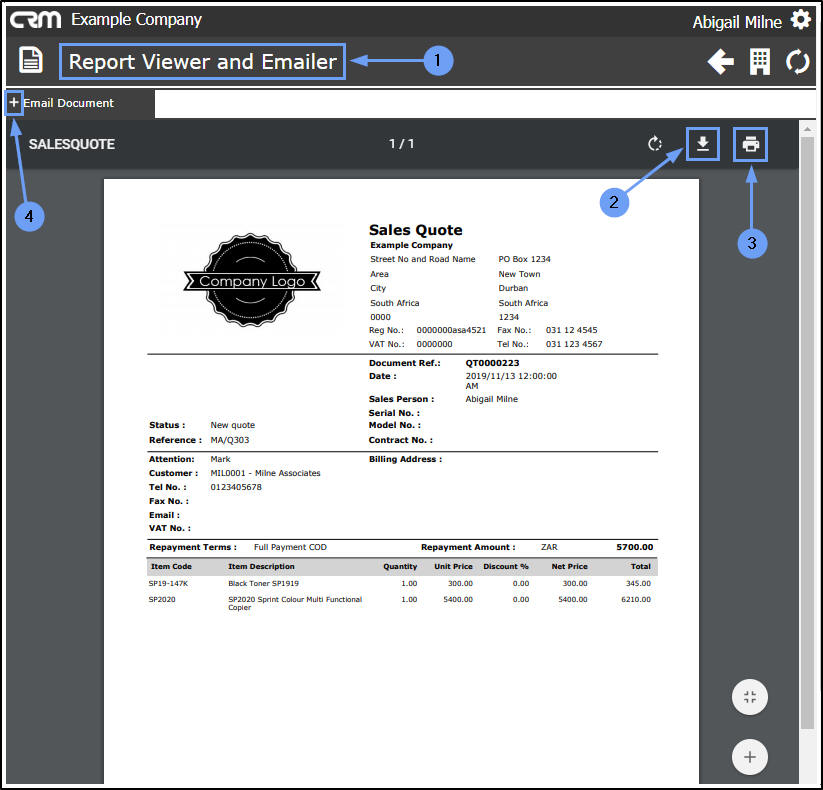
- The Report Viewer and Emailer page will open.
- The selected quote will be displayed in Report format.
- You can download and/or
- Print the Sales Quote, if required.
Email Quote
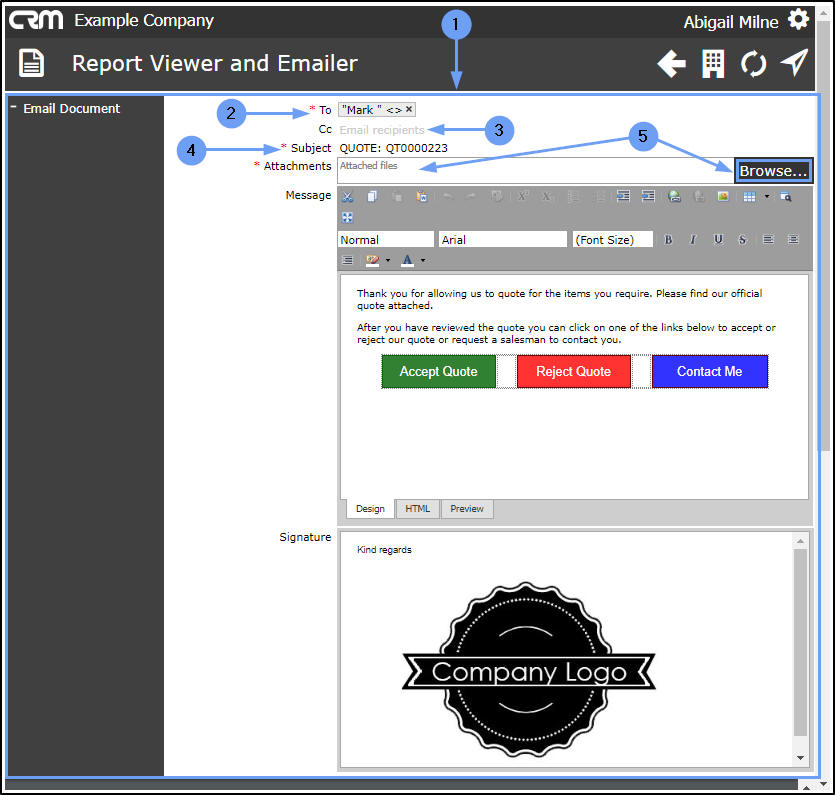
- Click on the expand [ + ] sign on the Email Document tab.
- The Email Document frame will be expanded.
-
Check and/or add the following details, as necessary:
- To: This will auto populate with the CRM contact for the quote (case) but you can change this, if required.
- Cc: Here, you can add other email recipients, if applicable.
- Either click in the field and select customer contacts from the list, or type in additional addresses as noted above (separated by a semi-colon and a space).
- Subject: This field will auto populate with the selected quote number but you can edit this, if required.
Add an Attachment to the Quote
You can add other documents, as attachments, if required.
- Attachments: Click on Browse.
- The Open screen will pop up.
- Search for and select the file you wish to link.
- Click on Open .
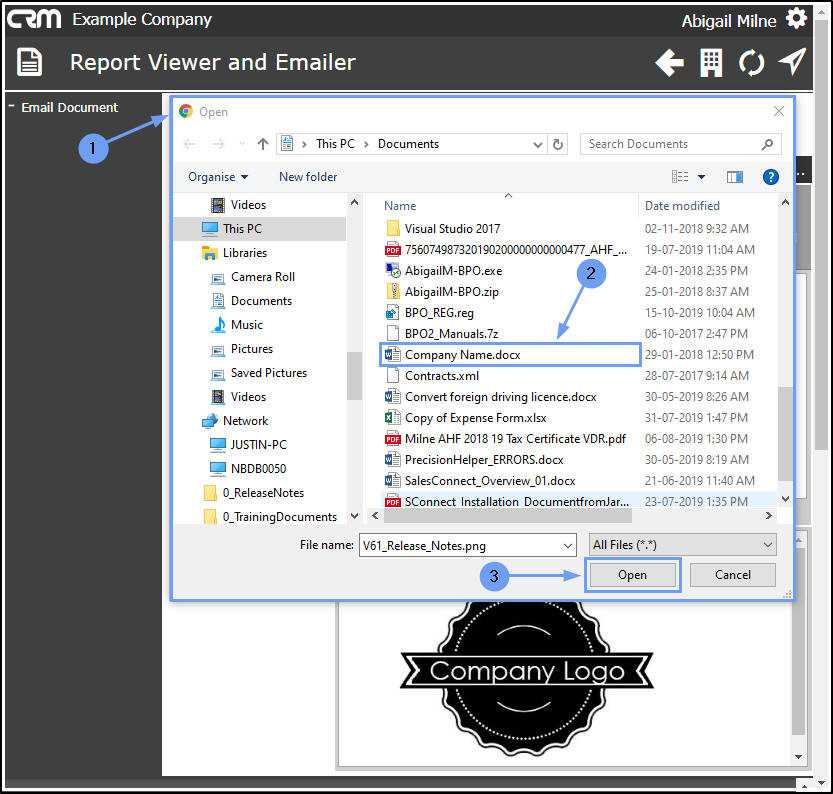
- The file will now be attached to the email.
- You can delete the attachment if required by clicking on either of the Delete icons.
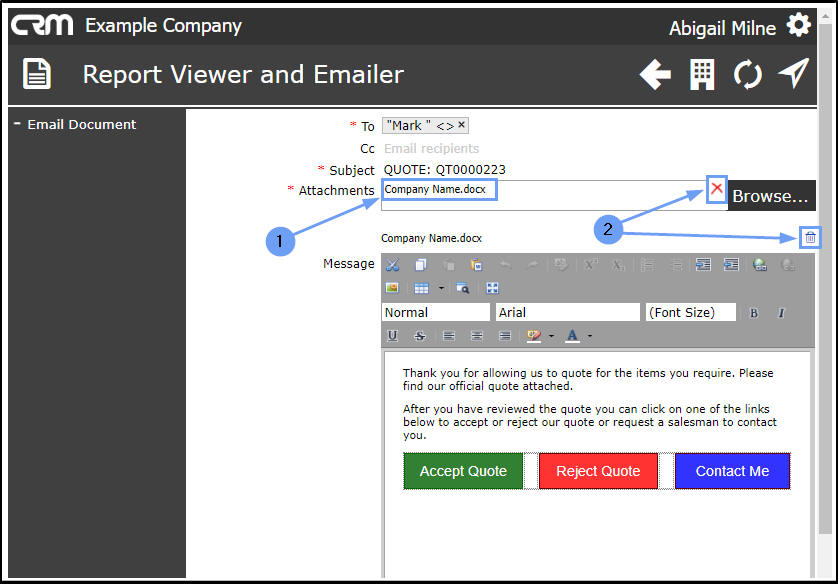
- A default message will populate the Message body but this can be edited, if required.
- Type in the relevant details in the message body.
- The Message tool bar can be used to customise your email message.
Email Action Buttons
The message body contains 3Action buttons that allow the recipient to:
- Accept Quote: If the client selects Accept - the Quote Status will be updated and a quote status notification email will be sent to the salesman (where the Quote Status Notification email flag is set to Yes). The quote will automatically be marked as accepted in the Quotes / Quotes for [ ] screen.
- Reject Quote: If the client selects Reject - the Quote Status will be updated and a quote status notification email will be sent to the salesman (where the Quote Status Notification email flag is set to Yes). The quote will automatically be marked as rejected in the Quotes / Quotes for [ ] screen.
- Contact Me: If the client selects to be contacted - the quote status will remain unchanged. An email will be sent to the salesman requesting that he/she follow up with the client.
- Signature: If you have a Signature configured in CRM - your Signature will pull through here, otherwise the Company default CRM mail signature will pull through.
- Click on the Send icon.
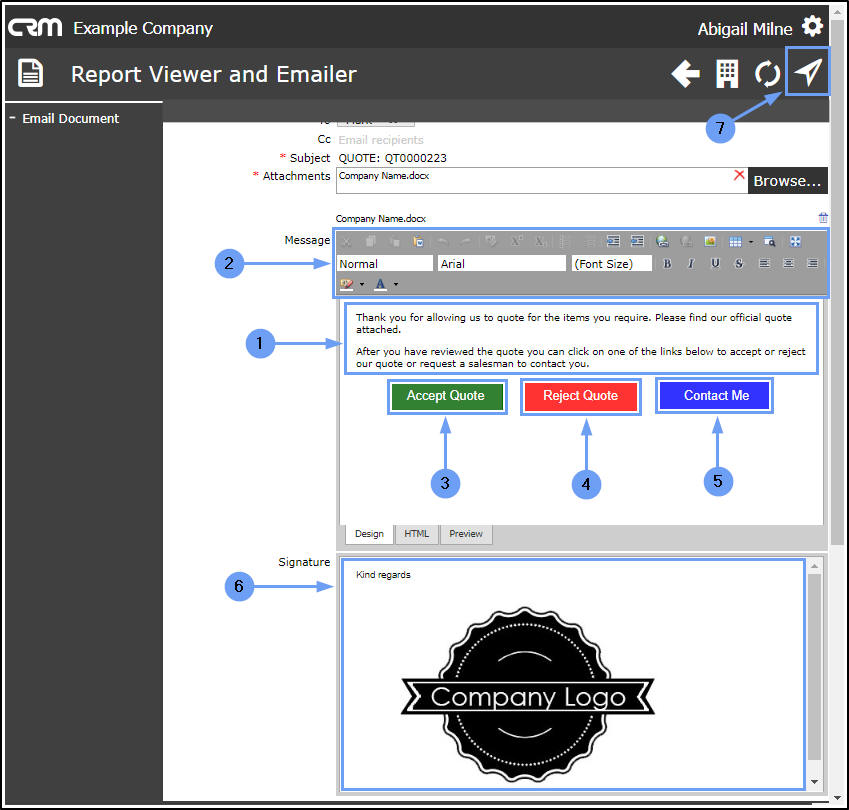
- A message box will pop up informing you of the status of the sent email.
- Click on Back .
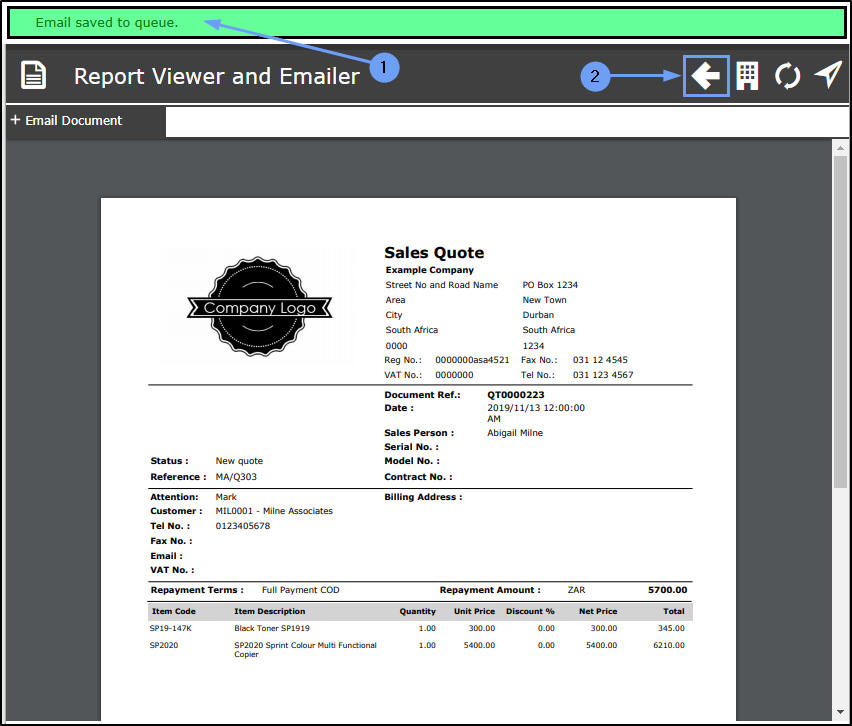
- You will return to the Quotes for [selected customer] listing page.
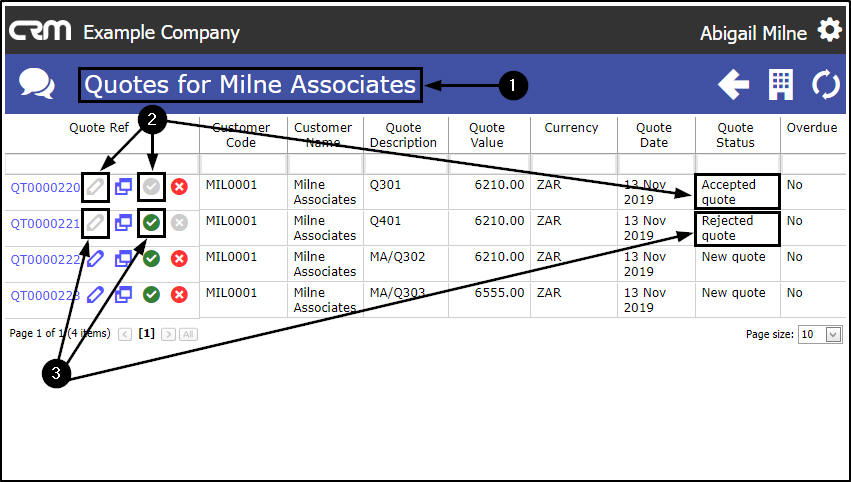
- If, on receipt of your email, your customer selected to Accept the Quote, then the Edit icon and the Mark as Accepted icon will now be Inactive (greyed out) and the Quote Status will have changed to Accepted Quote.
- If, on receipt of your email, your customer selected to Reject the Quote, then the Edit icon and the Mark as Rejected icon will now be Inactive (greyed out) and the Quote Status will have changed to Rejected Quote.
- Click on Back to return to the previous page or
- Click on the Customers icon to return to the Customer Dashboard or
- Click on the CRM logo to return to the Dashboard (Home page).

CRM.015.002