We are currently updating our site; thank you for your patience.
CRM Customers
Service Calls
In CRM, you can view the Service Call History for a selected customer. This Service Calls page displays both Open Calls and Calls in the Last 180 Days.
| Ribbon Access: Webpage > http://[servername]:[portno]/BPOCRM/User.aspx |
Select Customer
- In the Dashboard (Home page) screen,
- Click on the Customers tile.
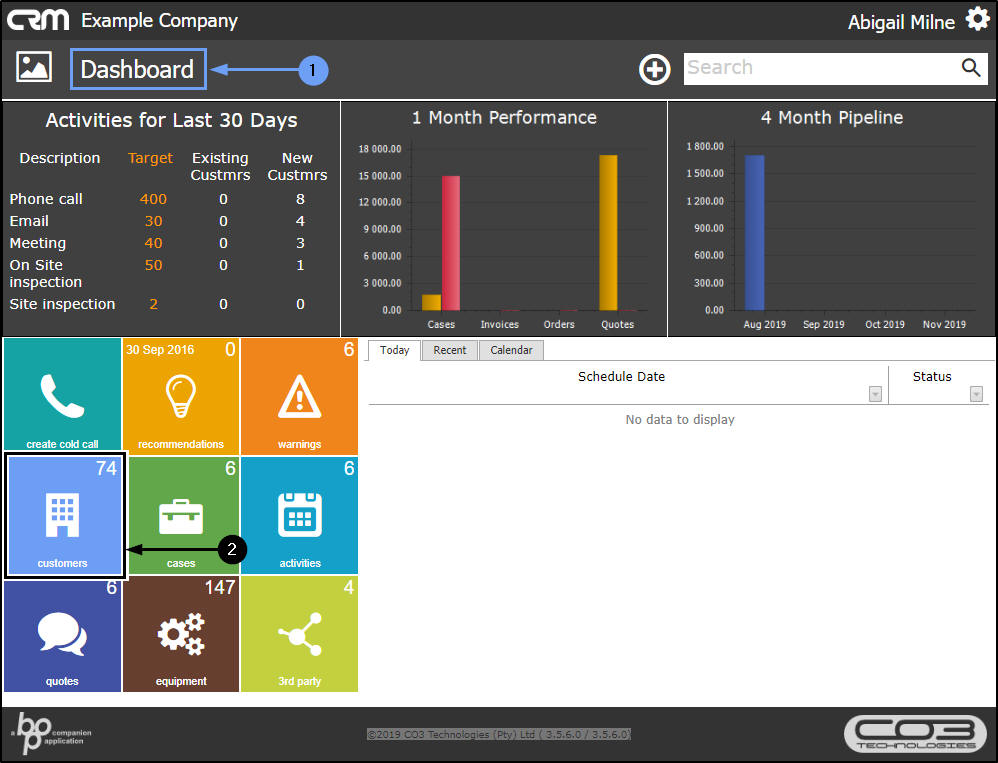
- The Customers page will open.
- Use the Page Reference field, Filter Row or Filter Text Box to find the applicable customer.
- Click on the selected Customer icon in the View column.
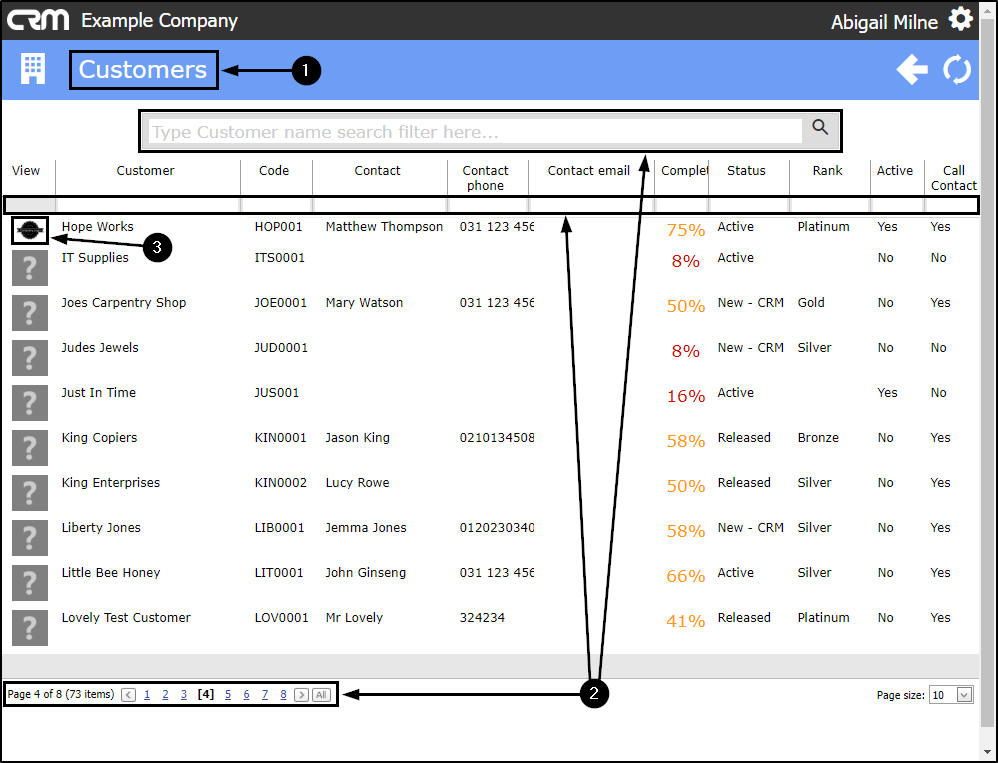
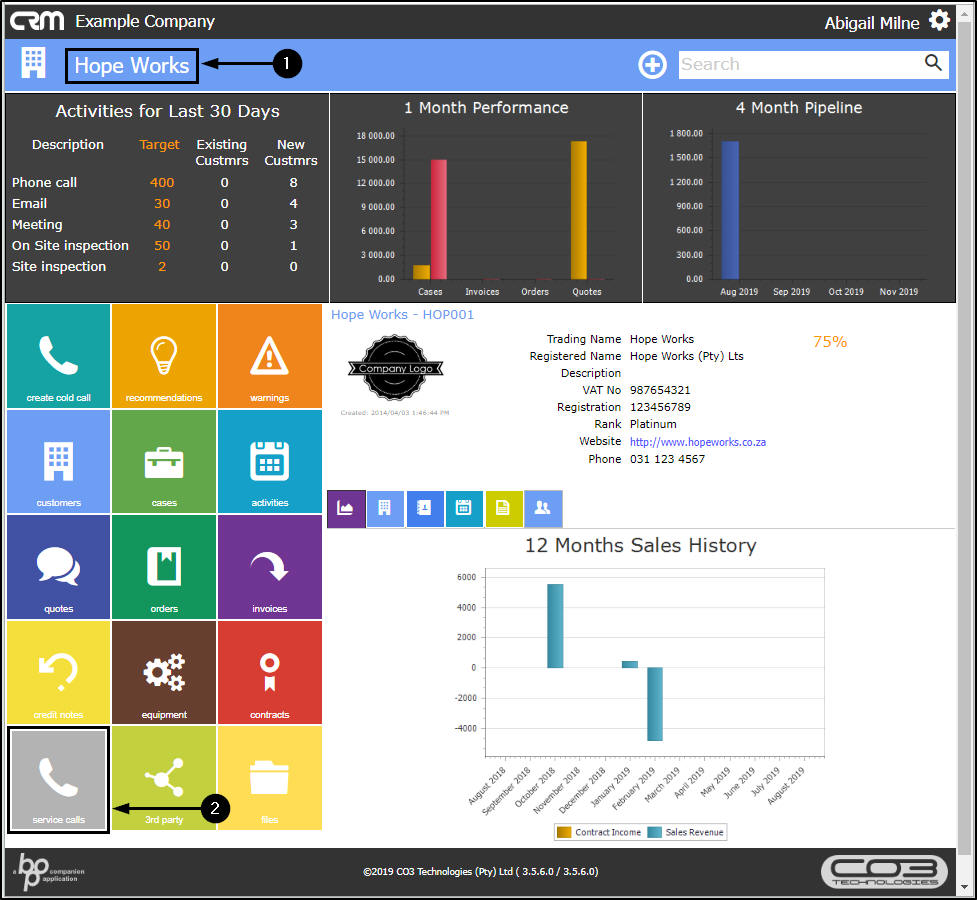
- The Customer Dashboard (Customer Home page) will open.
- Click on the Service Calls tile.
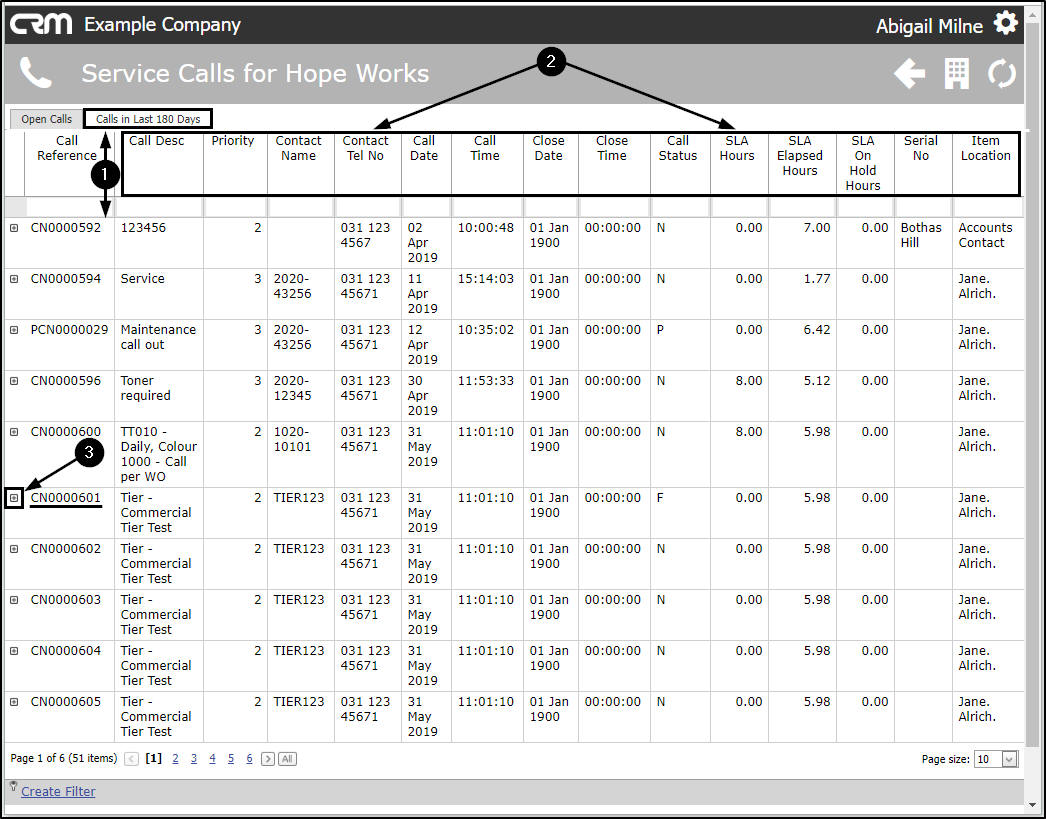
The Service Calls for [Customer Name] Page
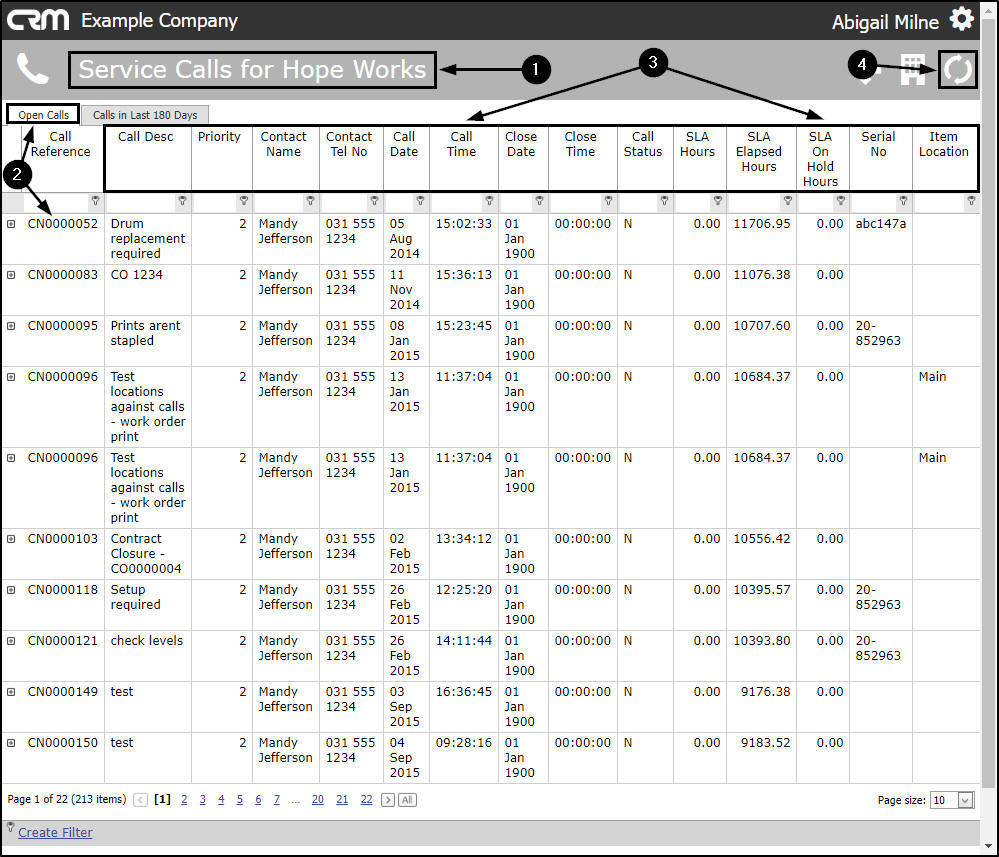
- The Service Calls for [Customer Name] page will open.
View Open Calls
- The Open Calls tab will be at the fore which lists by Call Reference No.all current/open calls linked to this customer.
- In this data grid you can view the details relating to each call.
- Click on the Refresh button at any time to bring the data up to date (if any changes have been made in Nucleus Service, for example).
View Calls in Last 180 Days
- Click on the Calls in Last 180 Days tab. This will list the calls linked to this customer over the last 6 months.
- In this data grid you can also view the details relating to each call.
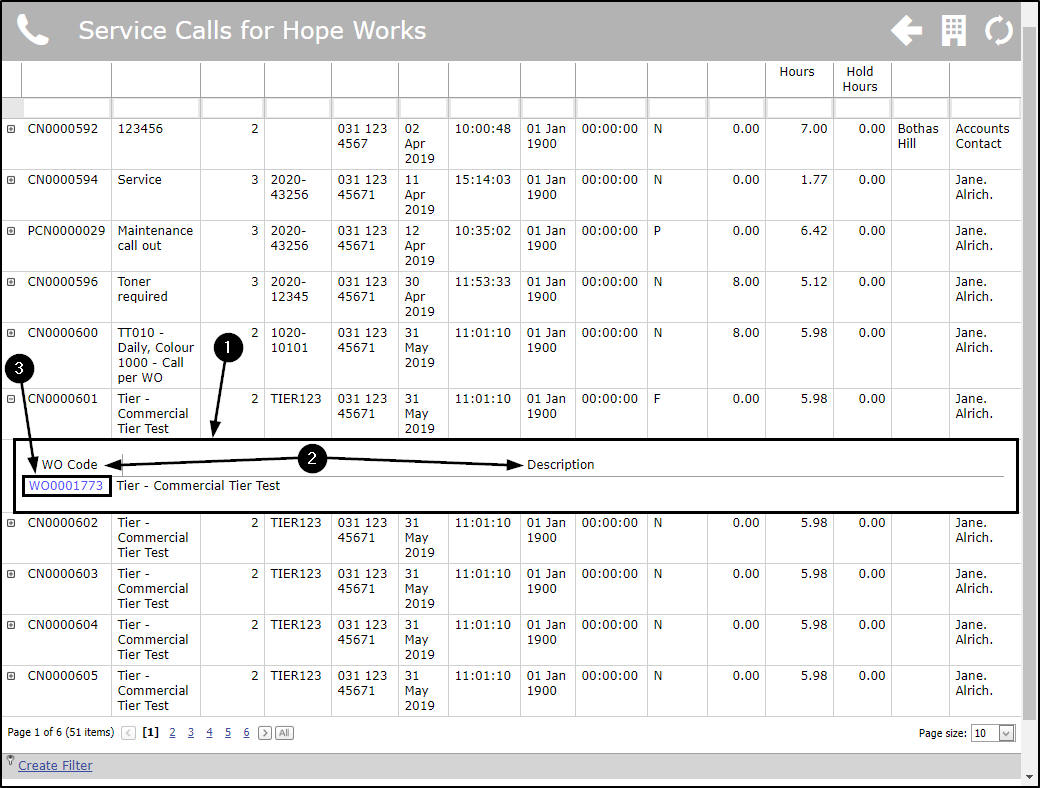
View Linked Work Order Code and Work Order Description
You can view the work order(s) linked to a call in both the Open Calls data grid and the Calls in Last 180 Days data grid. In this example, we will navigate from the Calls in Last 180 Days data grid.
- Click on the expand button in front of a Call Reference No.
- In this example, Call Reference No.: CN0000601 is selected.
- A Work Order sub grid will be expanded.
- Here you can view the WO Code and WO Description linked to the selected call.
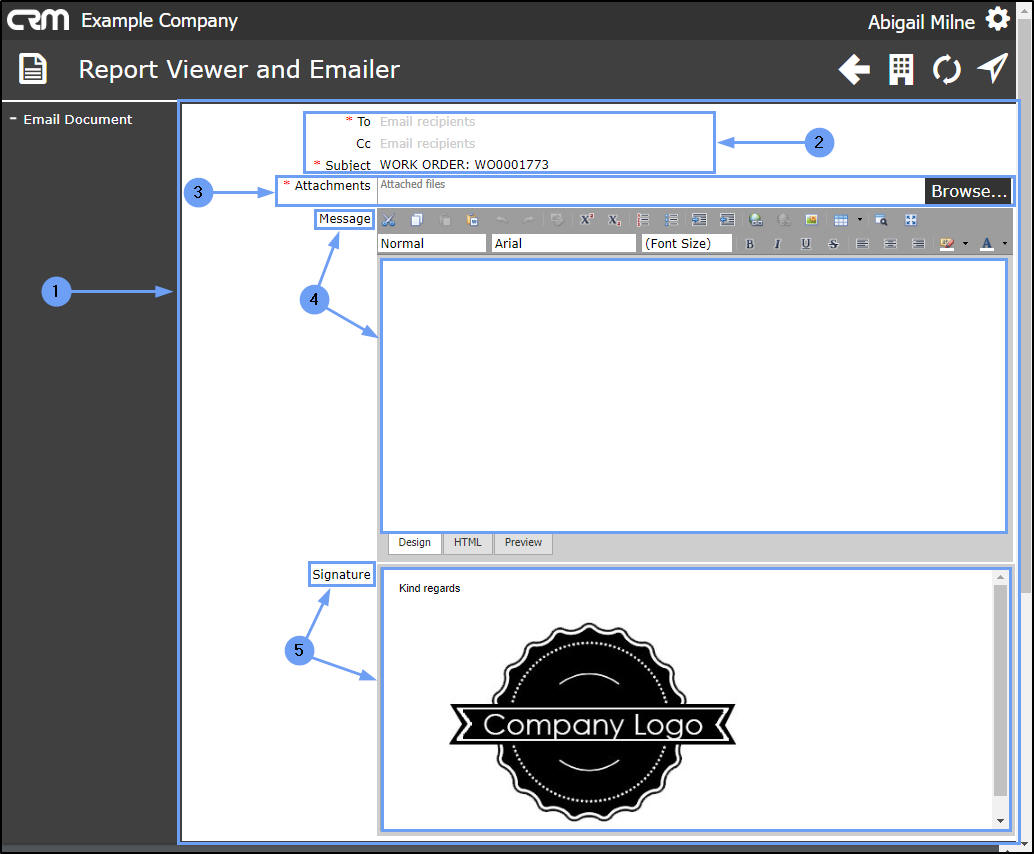
View/Download/Print the Work Order Report
- Click on the WO Code.
- The Report Viewer and Emailer page will open.
- Here you can view, download and/or print the Work Order report.
Email the Work Order Report
- Click on + Email Document.

- The Email Document details frame will open.
- To: Click in this text box and either type in the recipient email address or select an address from the drop-down menu.
- CC: Click in this text box and either type in the Cc recipient email address or select an address from the drop-down menu.
- Subject: This will auto populate with the Work Order number. You can type in additional text if required.
- Attachments: BPO will create a PDF of the order and attach it automatically. (You can attach additional documentation by clicking on Browse and selecting a file from the Open screen that pops up.)
- Message: Type in the email message in this frame.
- Signature: This will contain either the default Email Signature or the customised Email Signature depending on what has been set up in your CRM.
- When you have added the email details,
- Click on Send.
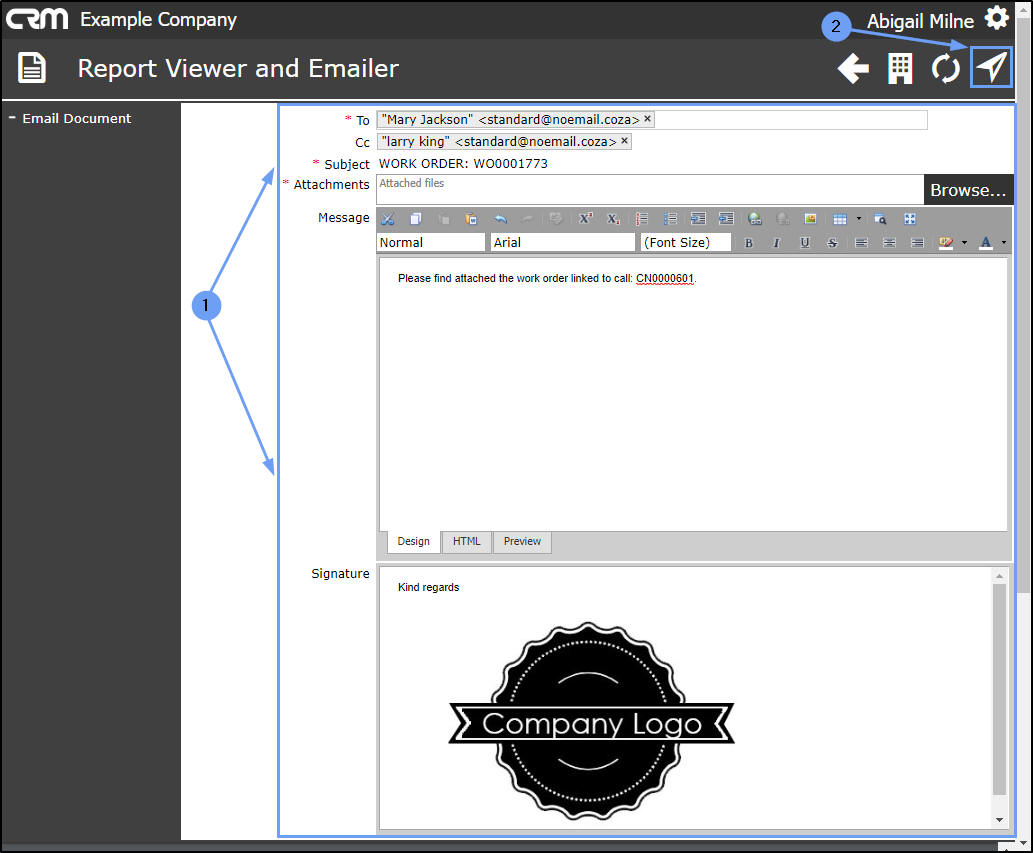
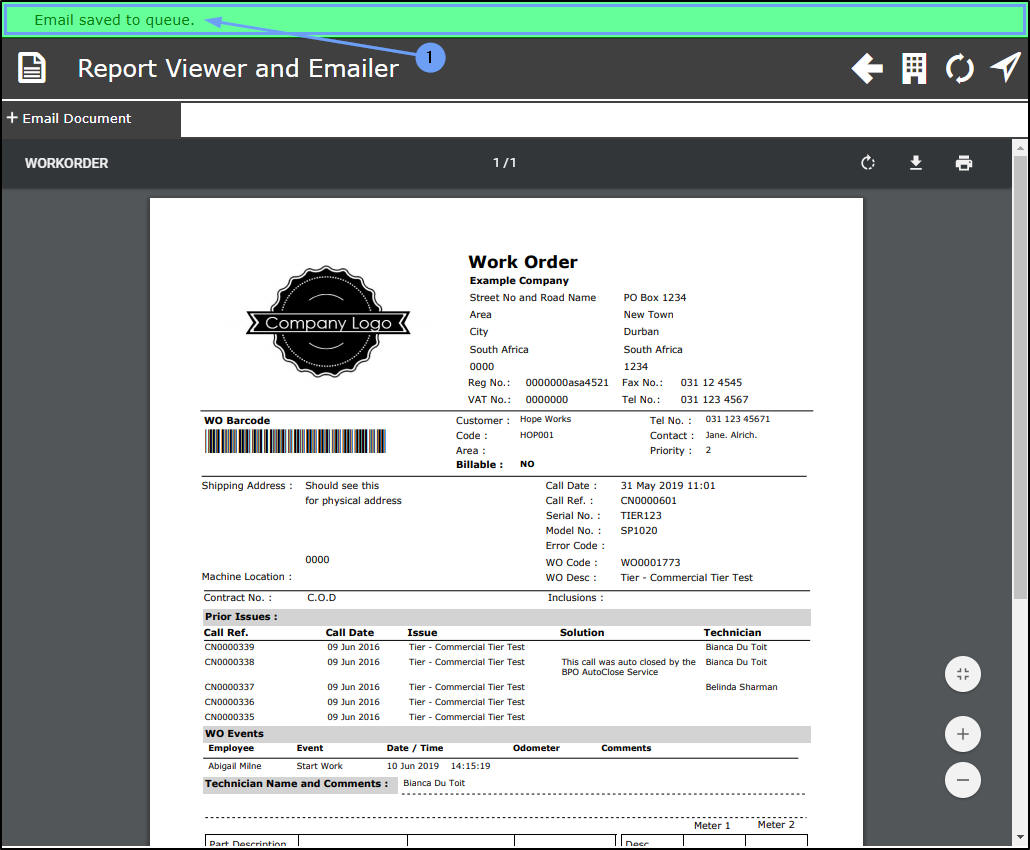
- The screen will refresh and a message bar will appear at the top of the page stating:
- Email saved to queue.
- Click on this message bar to acknowledge and dismiss the message.
-
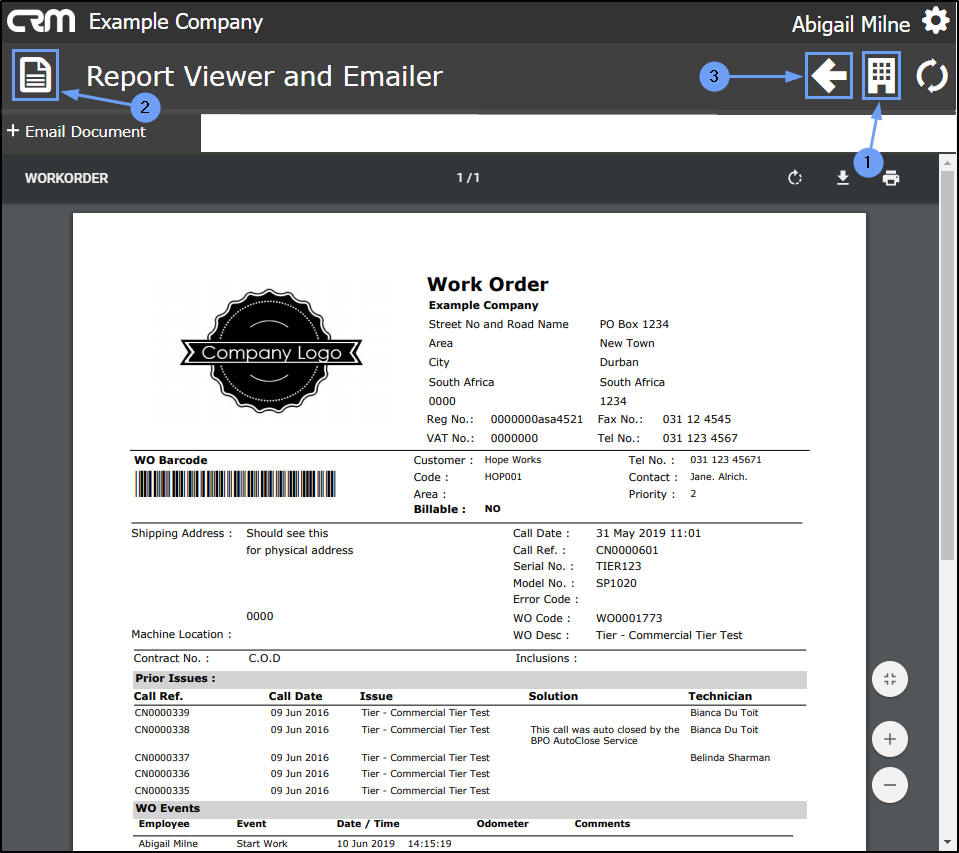
You can now decide to:
- Either, click on the Customers icon to return to the Customers Dashboard (Customers Home page).
- Or, click on the Page icon to return to the Dashboard (Home page).
- Or, click on the Back to return to the previous page.
- For the purpose of this manual, the Back button is selected to return you to the Service Calls for [Customer Name] page.
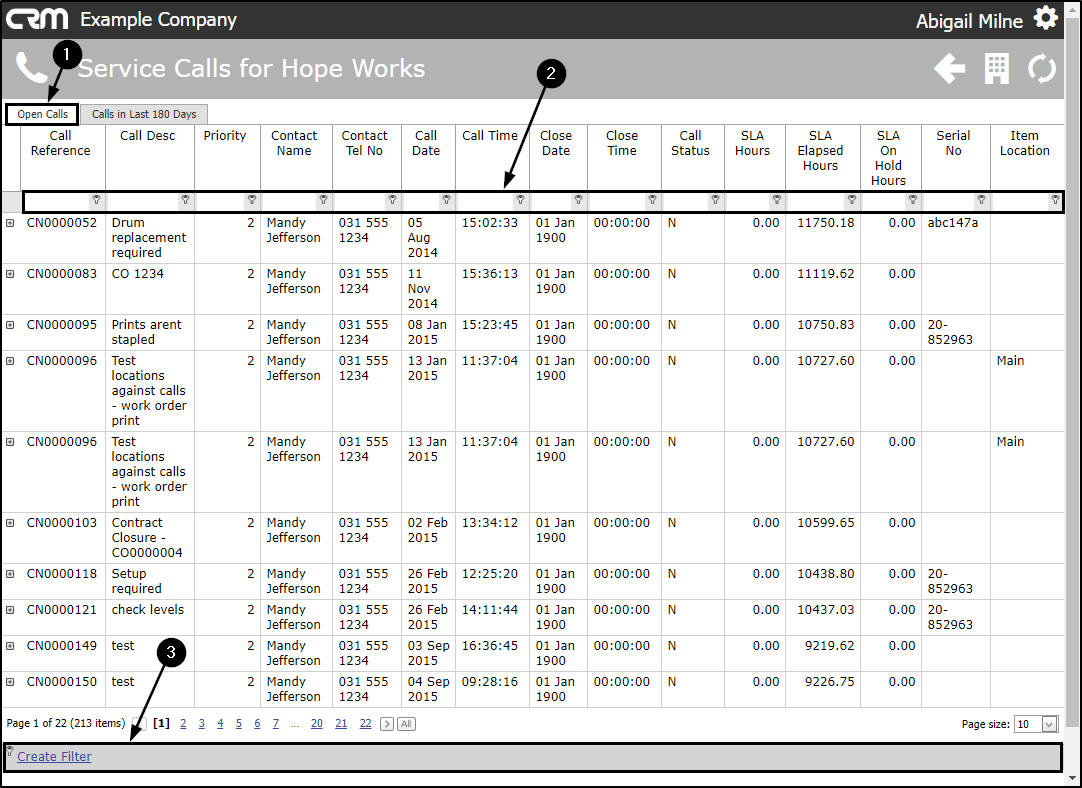
Search for a specific Call No.
In the Service Calls for [Customer Name] page, to search for a specific call, start by selecting the data grid from which to begin the search.
- In this example, we are searching from the Open Calls data grid.
- From here you can use the Filter Row or the
- Create Filter function to search for the applicable call no.
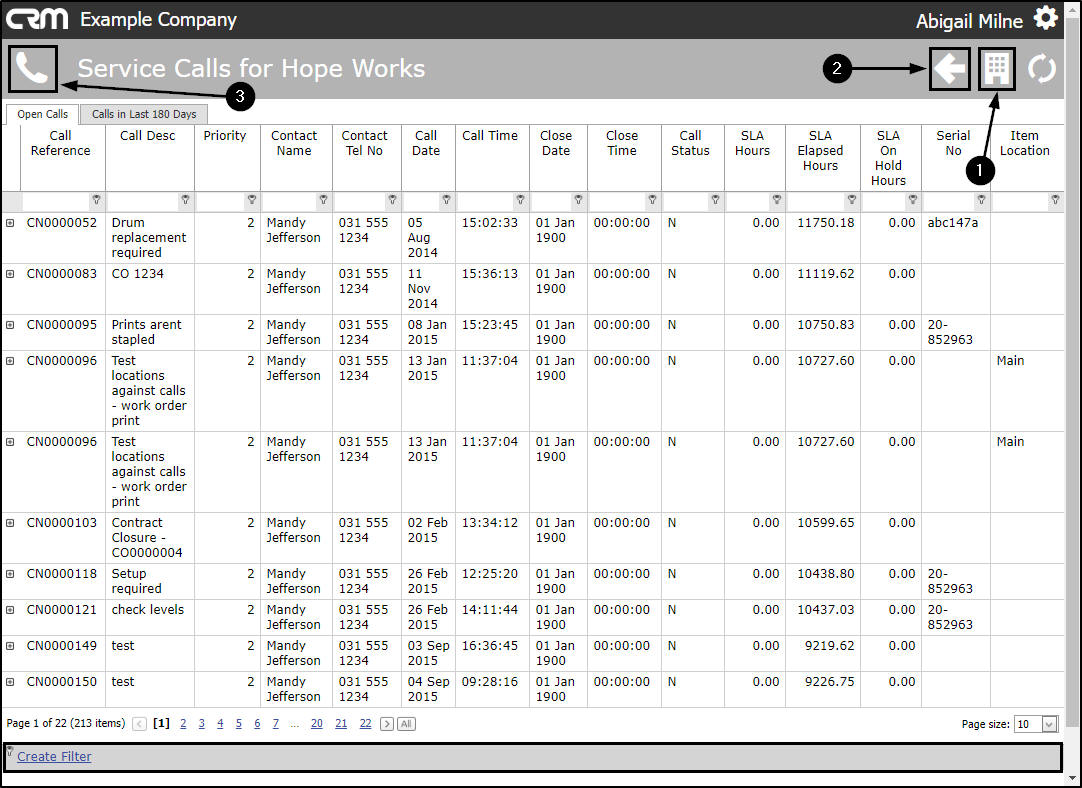
Exit the Service Calls for [Customer Name] Page
- Either, click on the Customer icon to return to the Customer Dashboard (Customer Home page)
- Or, click on the Back button to return to the previous page.
- Or, click on the Page icon in the top left of the page to return to the Dashboard (Home page).
CRM.002.012