We are currently updating our site; thank you for your patience.
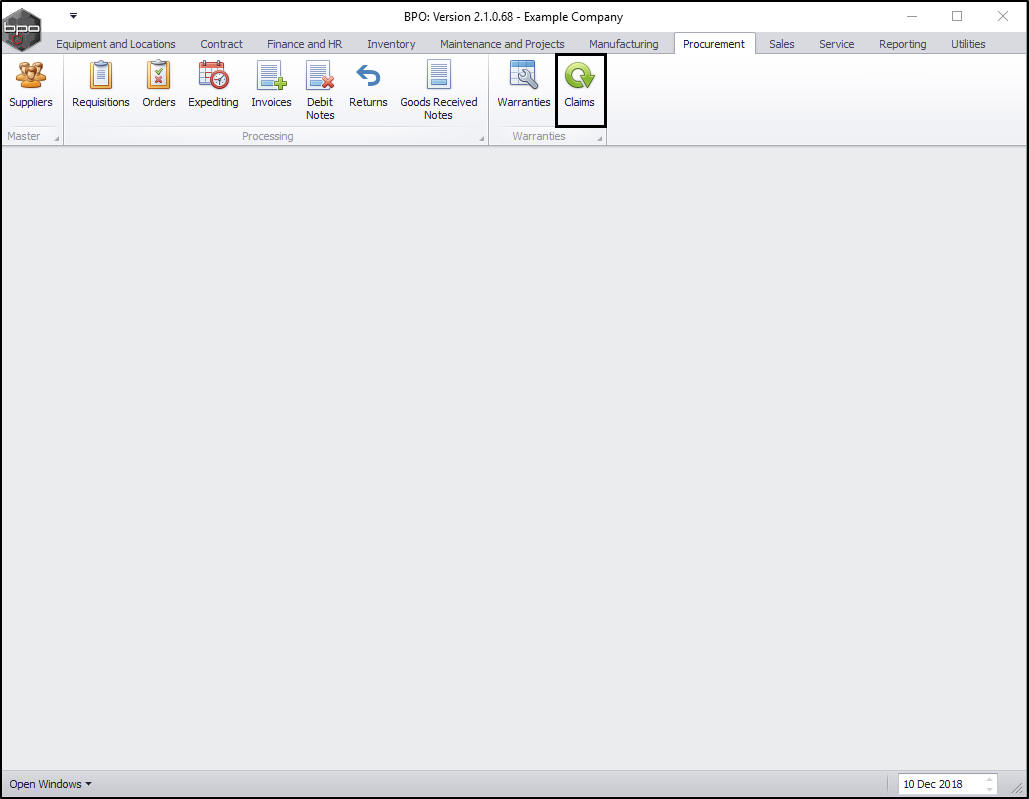
Procurement
Add a Warranty Claim
A serialised item, must be linked to a warranty in order to raise a warranty claim.
A call must be logged, linked to the machine under warranty, before the claim can be raised.
If the claim is against a part being replaced within the machine, this part must be requested and issued to the call - remember to mark this item as 'billable'. This will not bill the client, but enable the part to pull through to the warranty claim. In this case, the machine and part in question will pull through to the warranty claim item list. The machine line item can then be removed before saving the claim.
| Ribbon Access: Procurement > Claims |
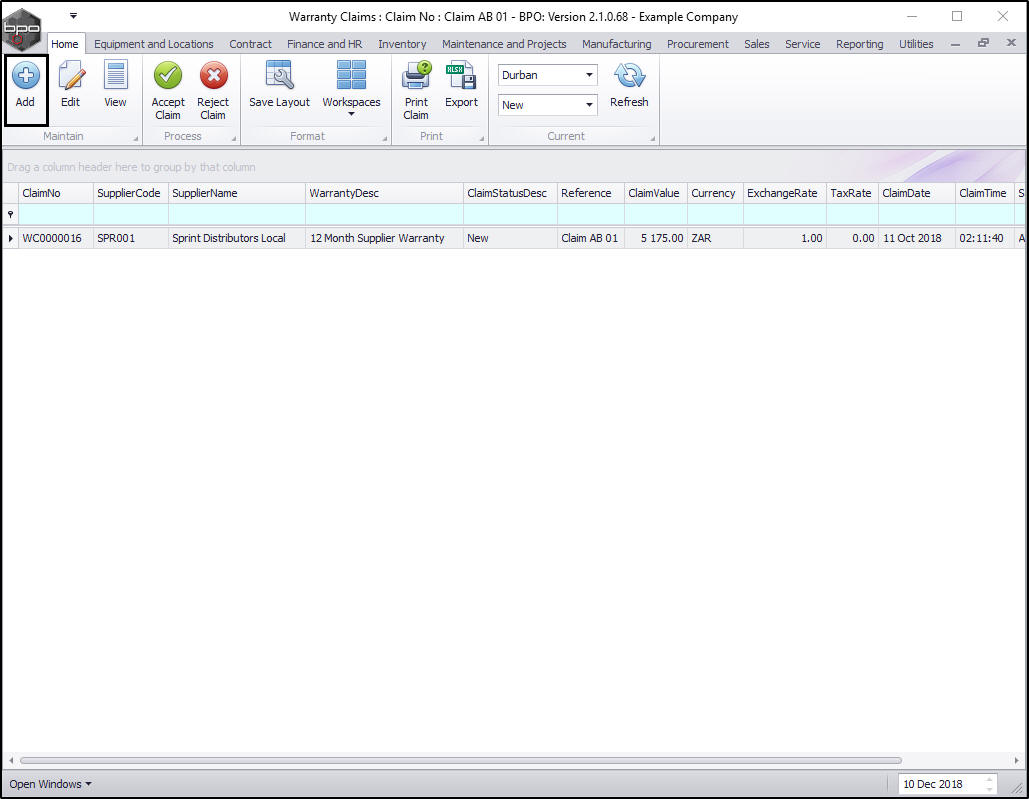
The Warranty Claims listing screen will be displayed.
- Click on Add.
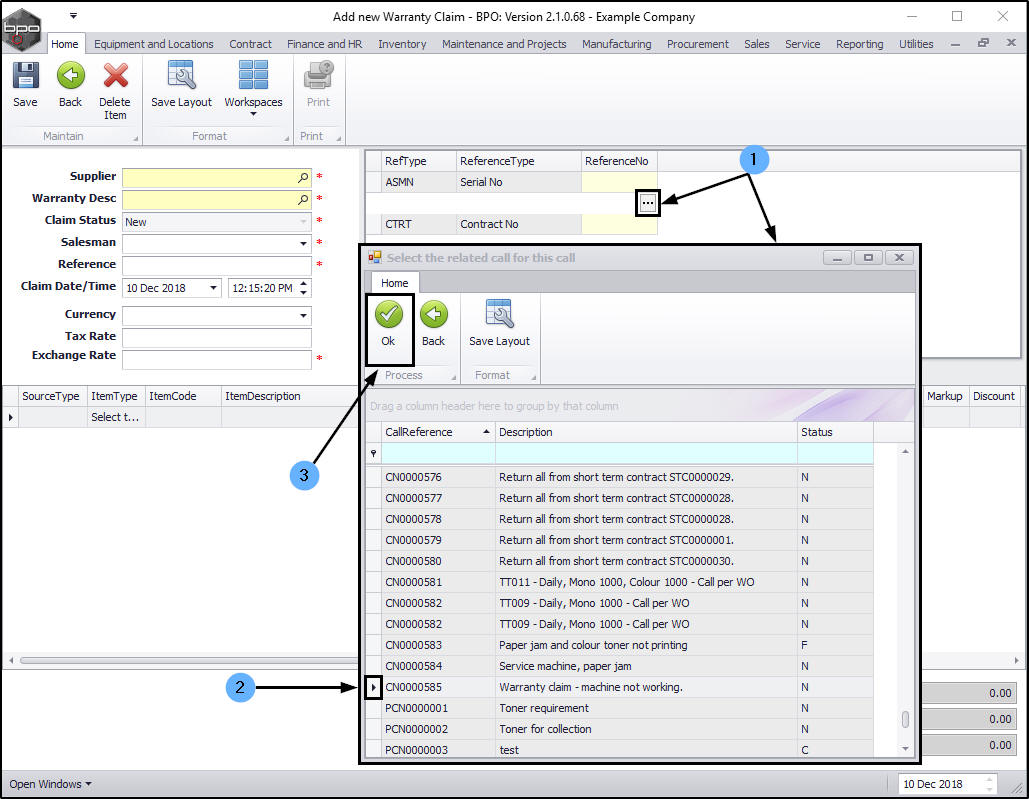
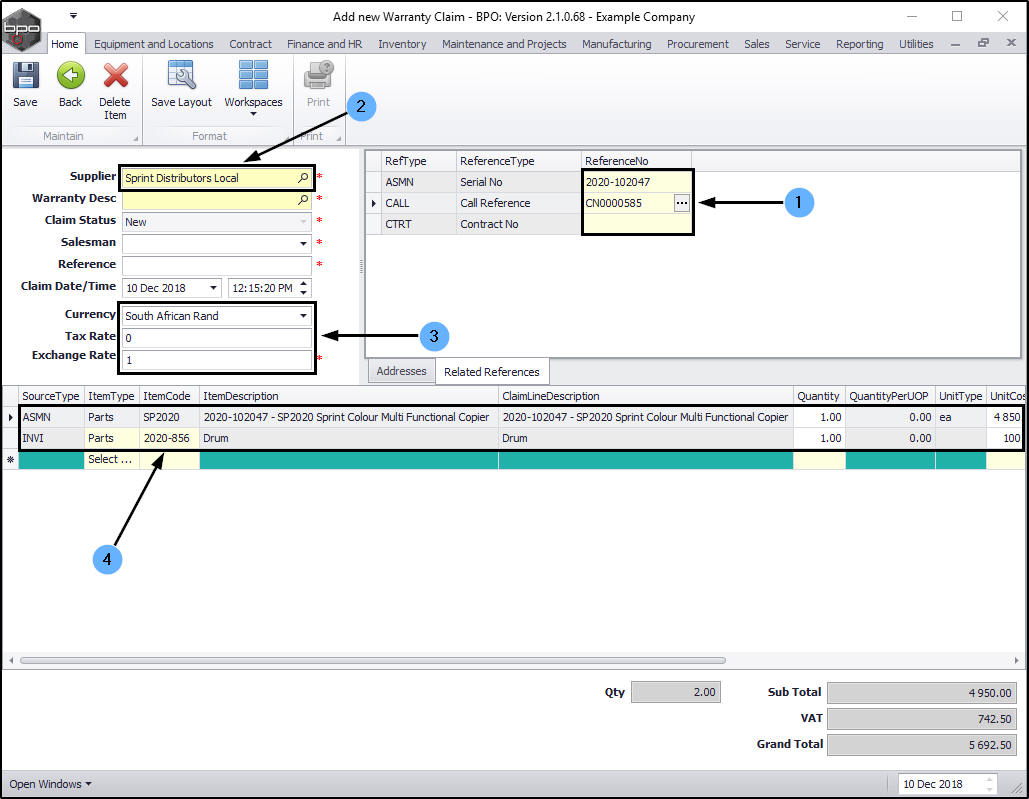
Search for and Select the Related Call
- Click in the Call row and Reference No column text box.
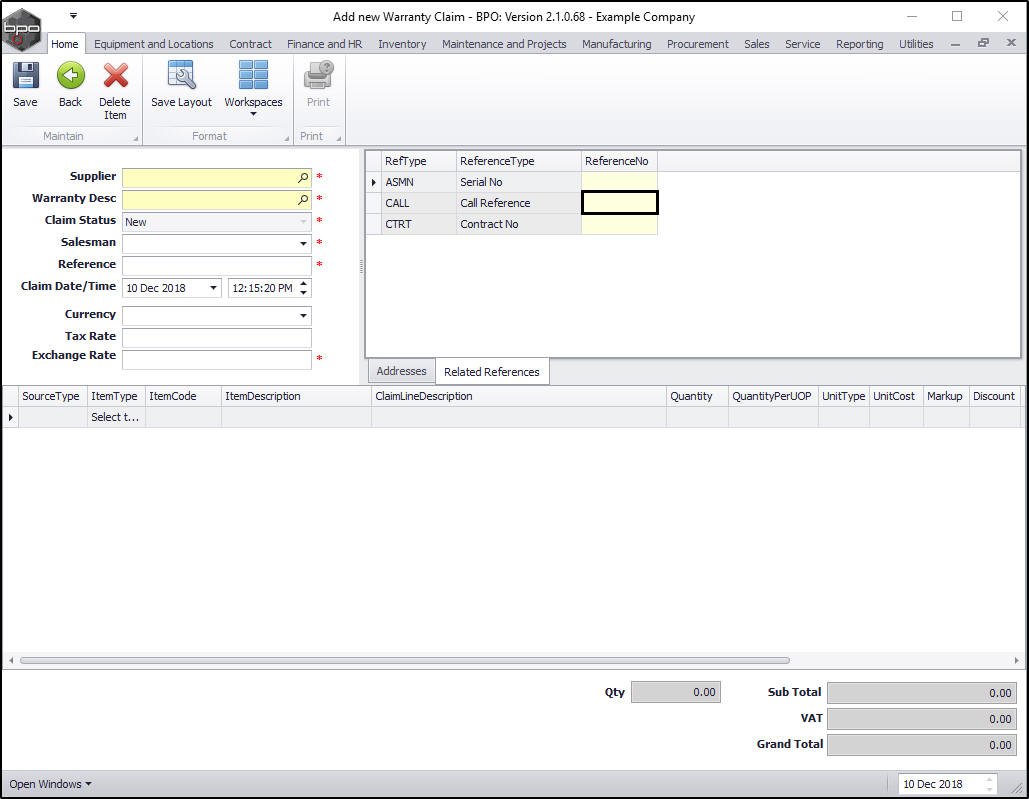
- An ellipsis button will be revealed. Click on the button to display the Select the related call for this call pop up screen.
- Click on the row selector in front of the linked call.
- Click on Ok.
View Supplier Details
The screen will now populate with:
- the machine Serial No, Call Reference No (and Contract No if applicable),
- Supplier,
- Currency, Tax and Exchange Rate details and
- the linked item(s) details.
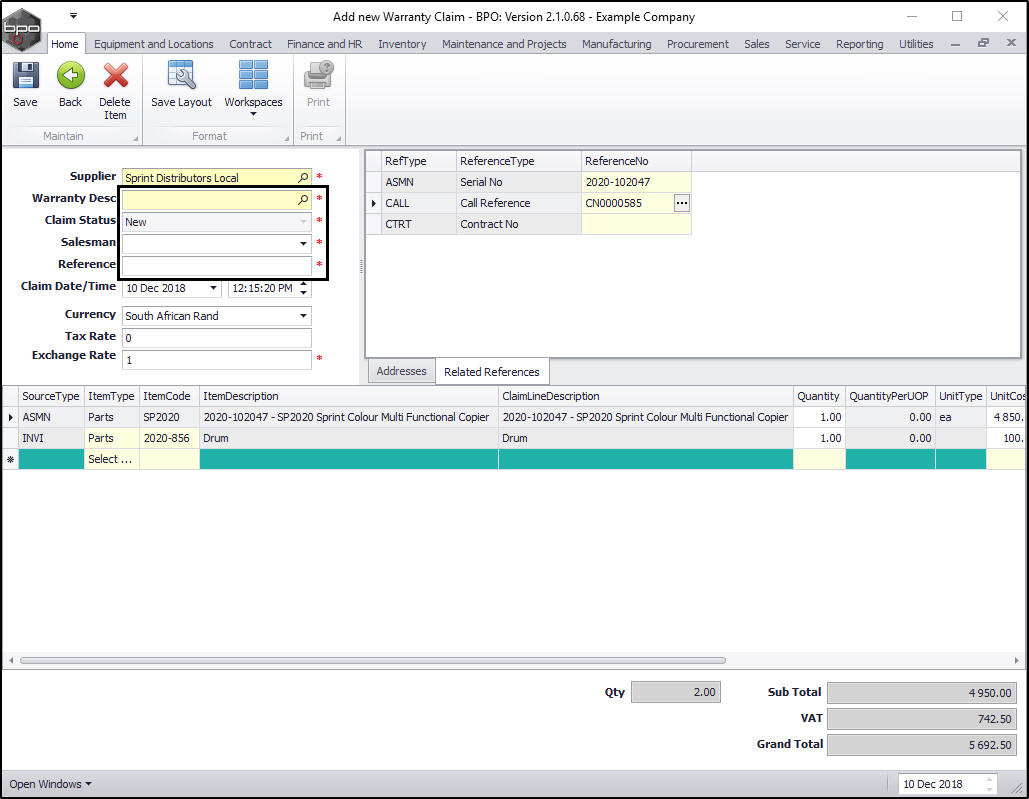
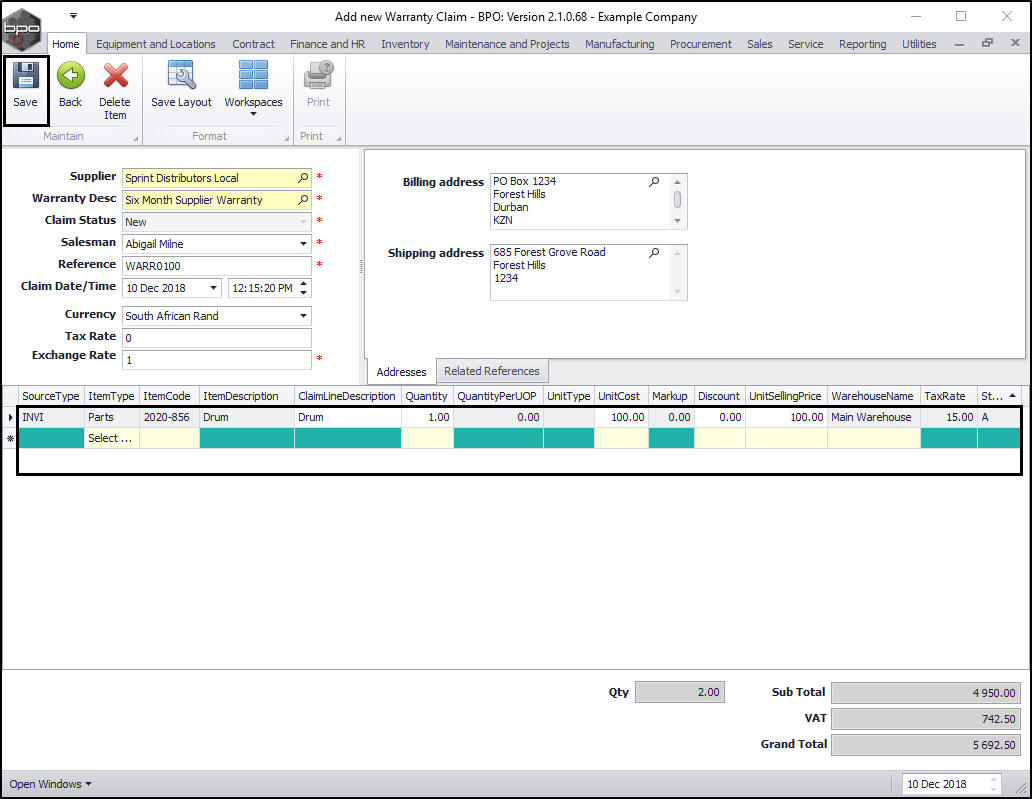
Add Warranty Claim Details
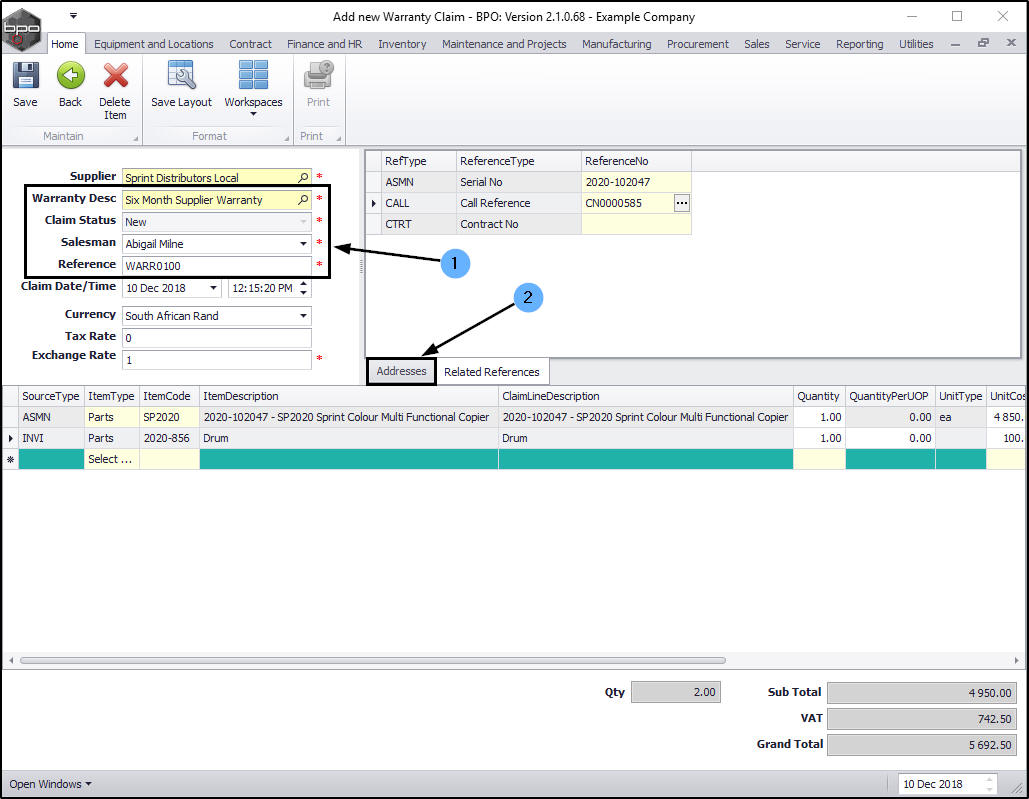
- Warrant Desc: Click on the search button and select the warranty.
- Claim Status: This will auto populate with New.
- Salesman: Click on the drop-down arrow and select from the list the salesman responsible for this warranty claim.
- Reference: Type in a claim reference.
Add Billing Address
- When you have finished adding the details as listed above,
- click on the Addresses tab.
The Addresses frame will be displayed.
- Click on the search button in the Billing Address text box.
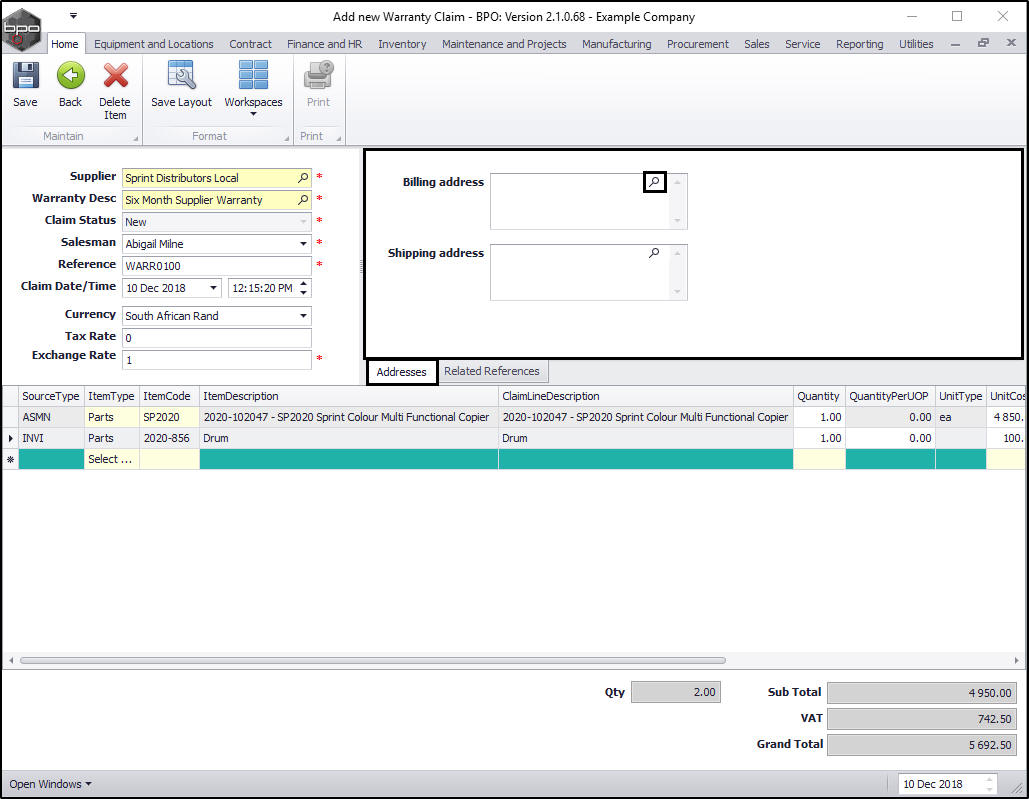
- The Select an address for this claim screen will pop up.
- Click on the row selector in front of the correct billing address
- Click on Ok.
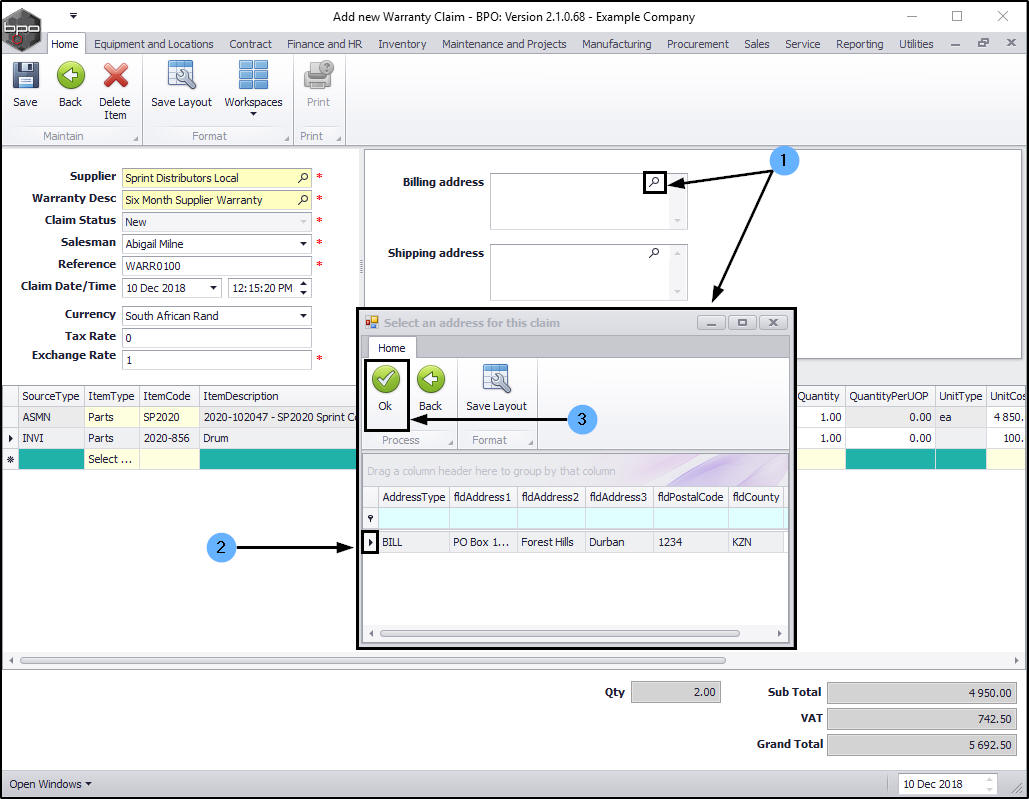
- The selected address will populate the Billing address text box.
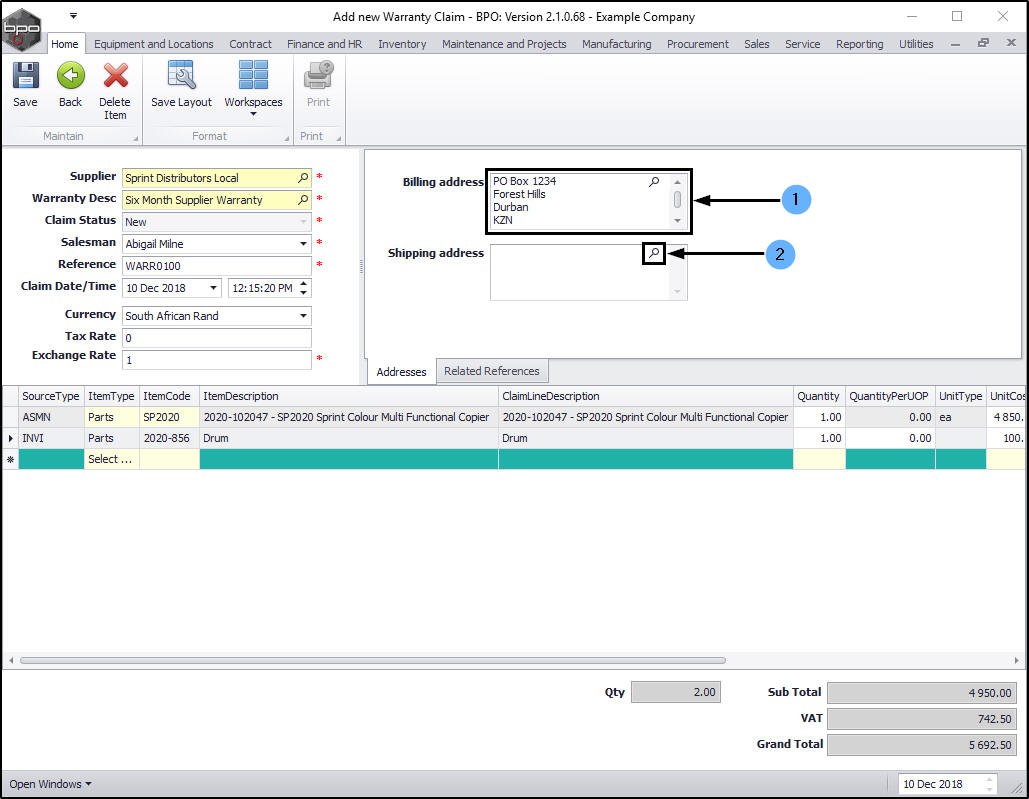
Add Shipping Address
- Click on the search button and follow the same process to add a Shipping Address.
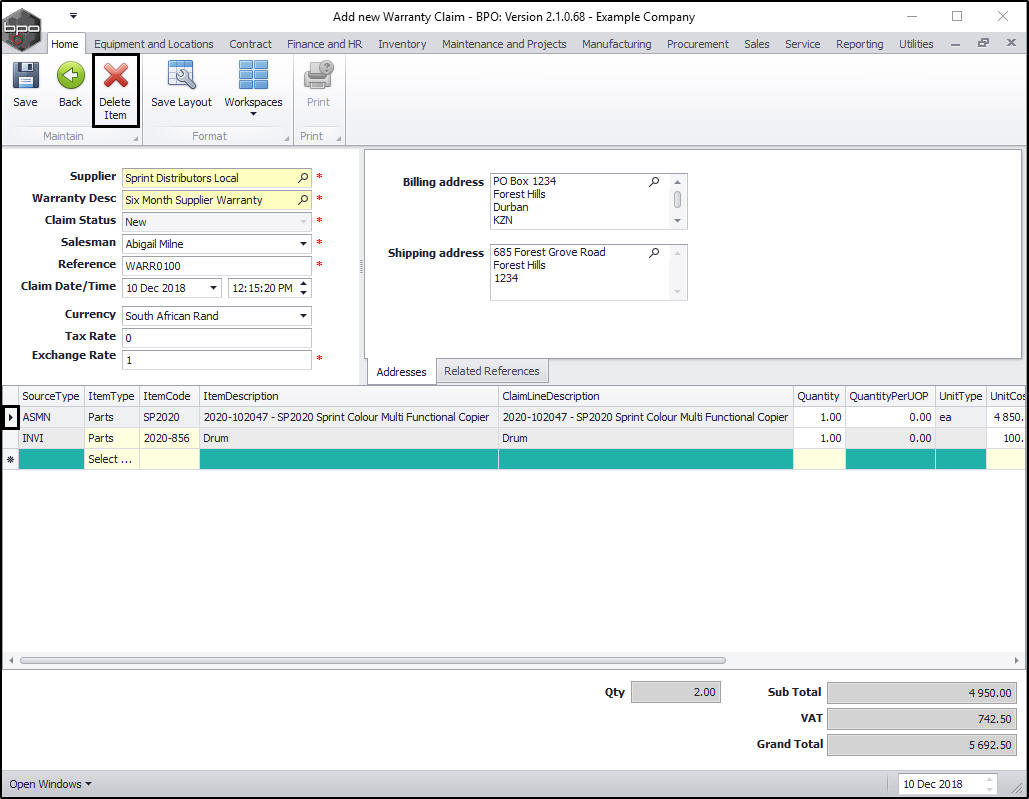
Items Data Grid
In this example, the claim is for replacement of a part within the machine, and not the machine itself. In which case the machine should be deleted from the list.
Delete Non-admissable Items
- Select the row of the item that is not having a claim raised against it.
- Click on Delete Item.
- A Confirm delete line message box will pop up asking;
- Are you sure you want to remove this line from the warranty claim?
- Click on Yes.
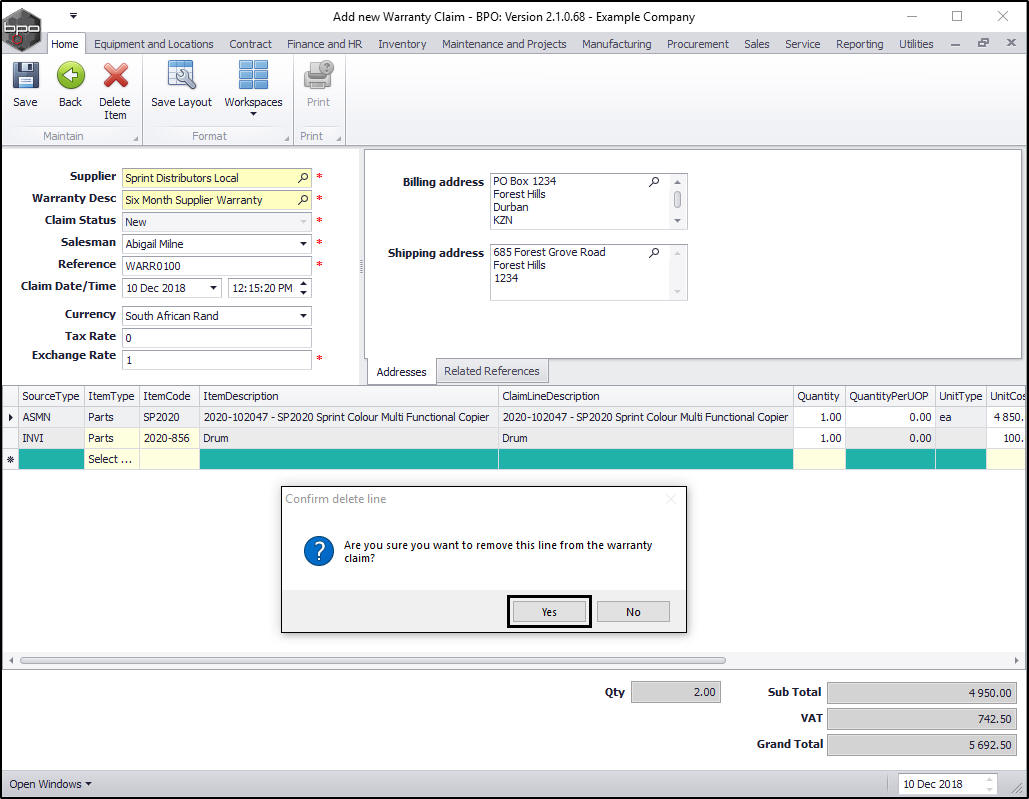
- The selected item will be removed from the Items frame.
- Continue deleting items until you are only left with the item(s) for which you are raising a claim.
Save Warranty Claim
When you have finished editing the Add new Warranty screen, click on Save.
- A Warranty Module - Claim Generation message box will pop up informing you that;
- The claim, [] has been saved.
- Click on OK.
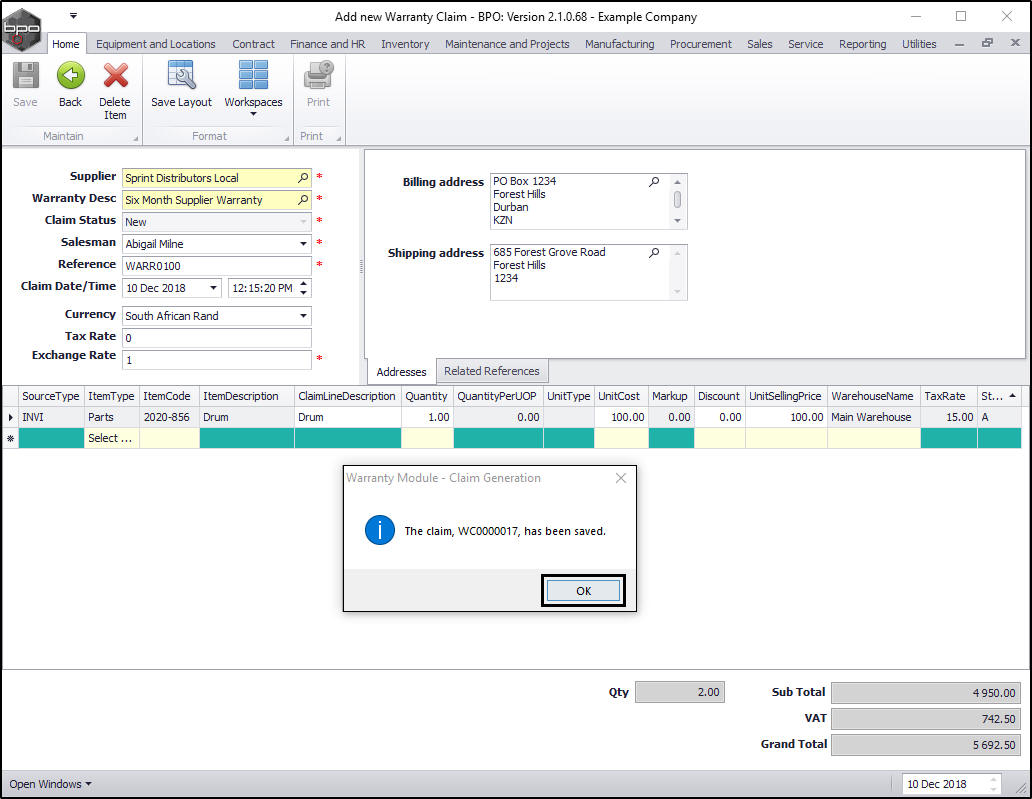
You will return to the Warranty Claims listing screen.
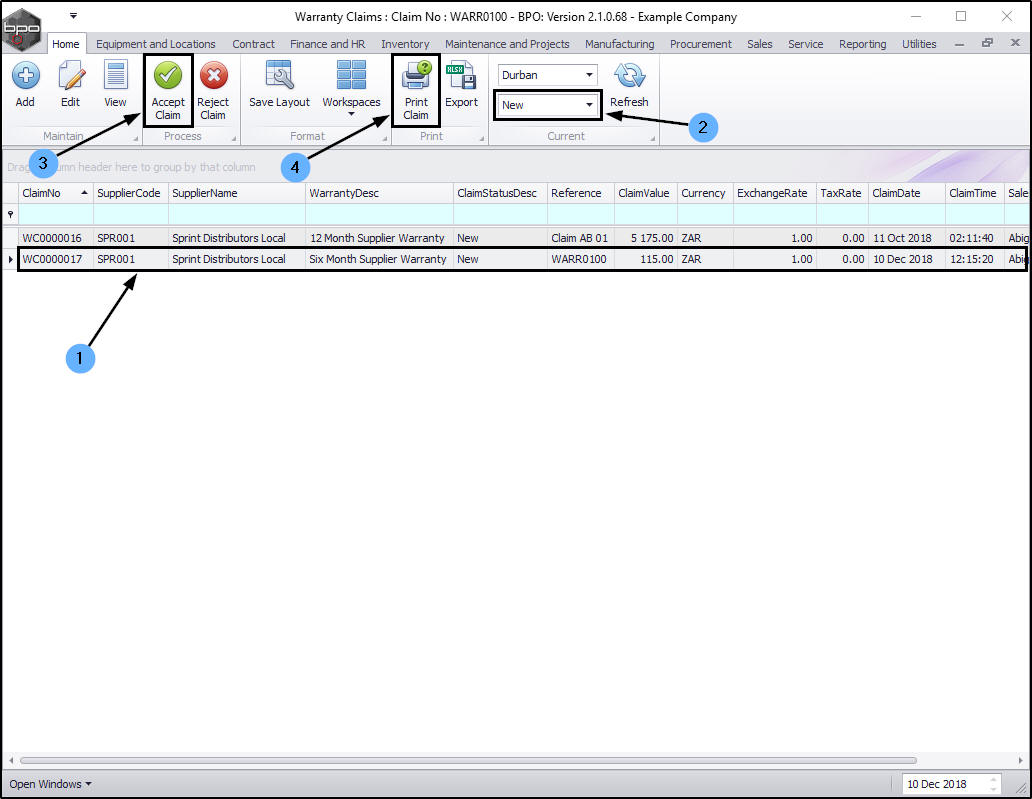
View new Warranty Claim
- The new warranty claim will display in this screen
- where the status is set to New.
- The claim will need to be Accepted and then
- Printed in order to complete the process.
MNU.133.001