We are currently updating our site; thank you for your patience.
Projects
Projects - Add Sub-Project
| Ribbon Access: Maintenance / Projects > Projects |

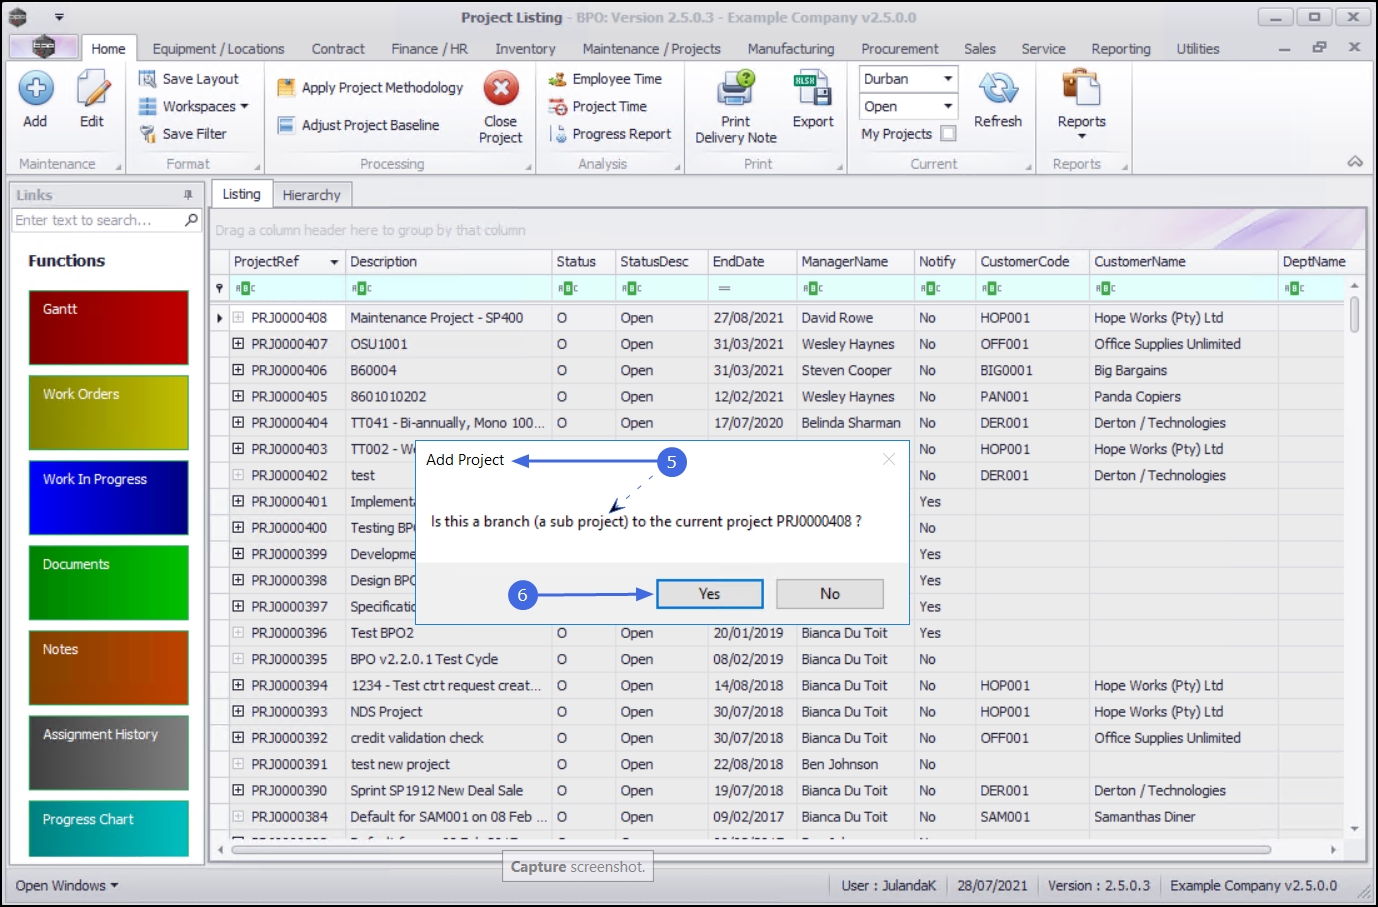
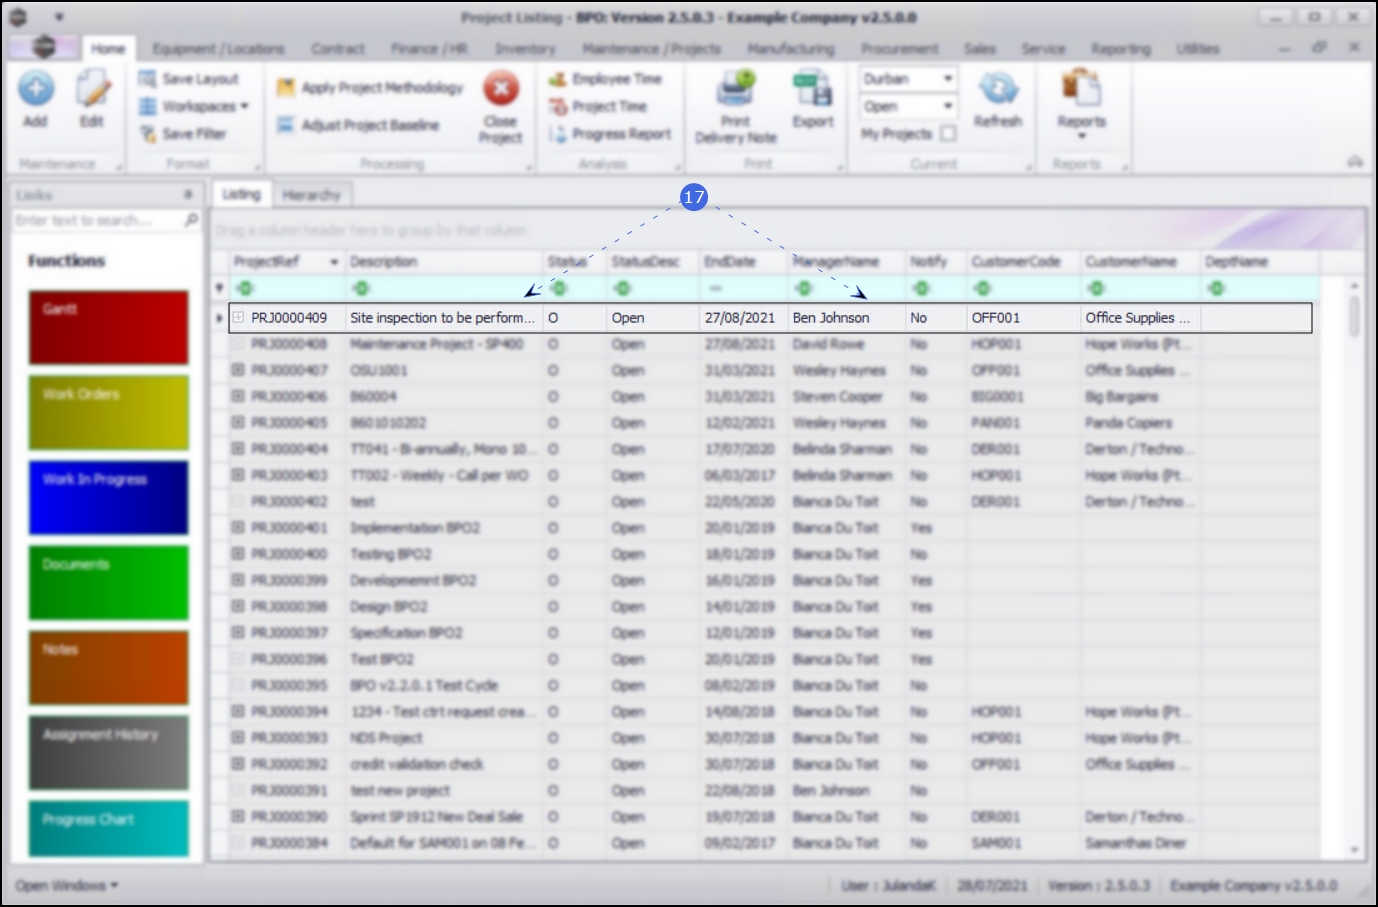
- The Project Listing screen will be displayed.
- Select the Site where the Main Project can be located.
- The example has Durban selected.
- Click on the row of the project you wish to create a sub project for.
- Click on Add.
![]() Short cut key: Right click to display the All groups menu list. Click on Add.
Short cut key: Right click to display the All groups menu list. Click on Add.

Add Sub-Project
- When you receive the Add Project message to confirm;
- Is this a branch (a sub project) to the current project [project ref number]?
- Click on Yes to create the sub-project.
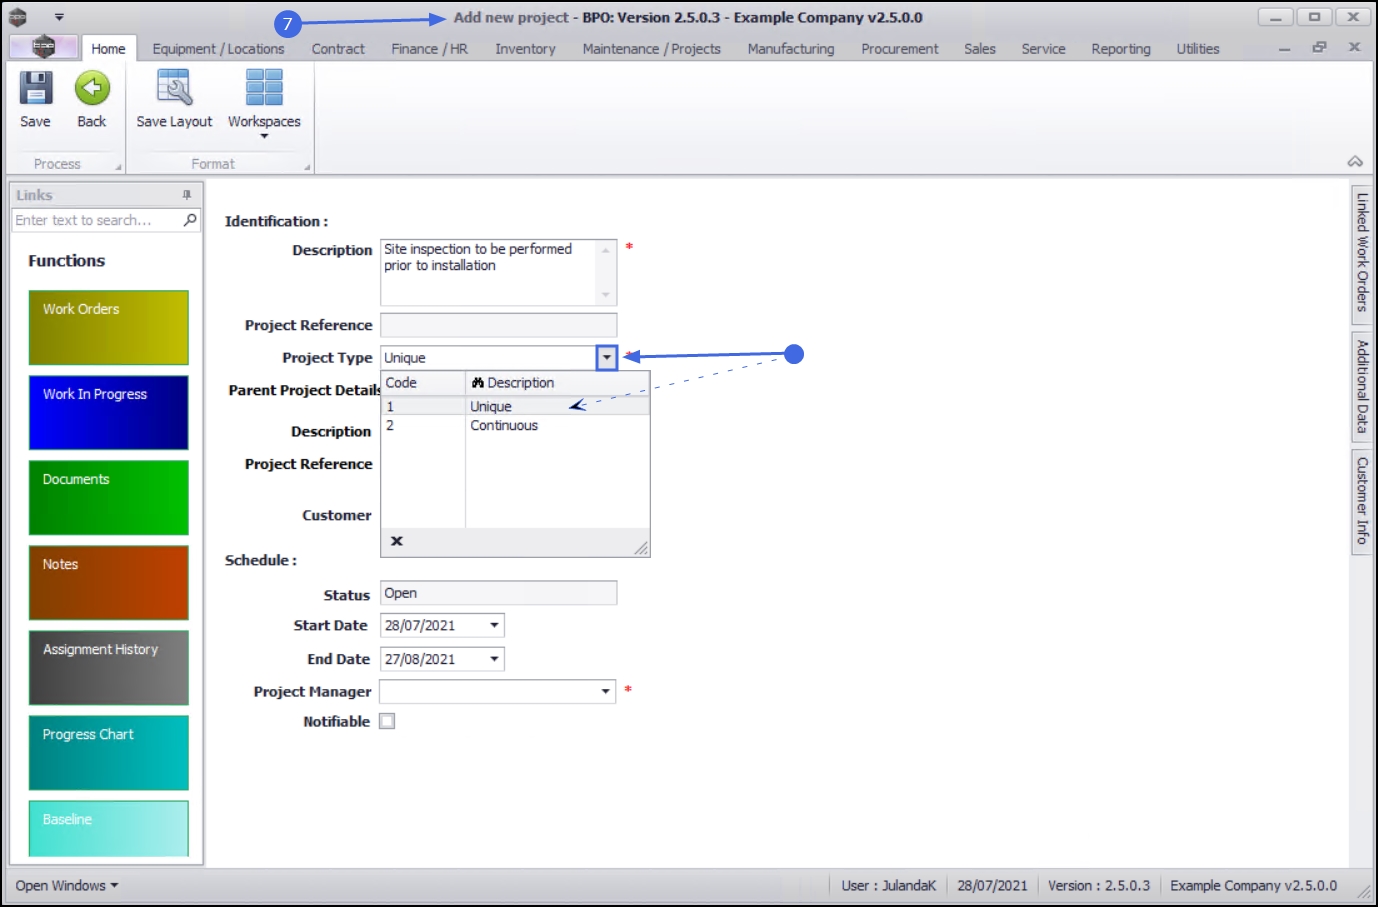
- The Add new project screen will be displayed.
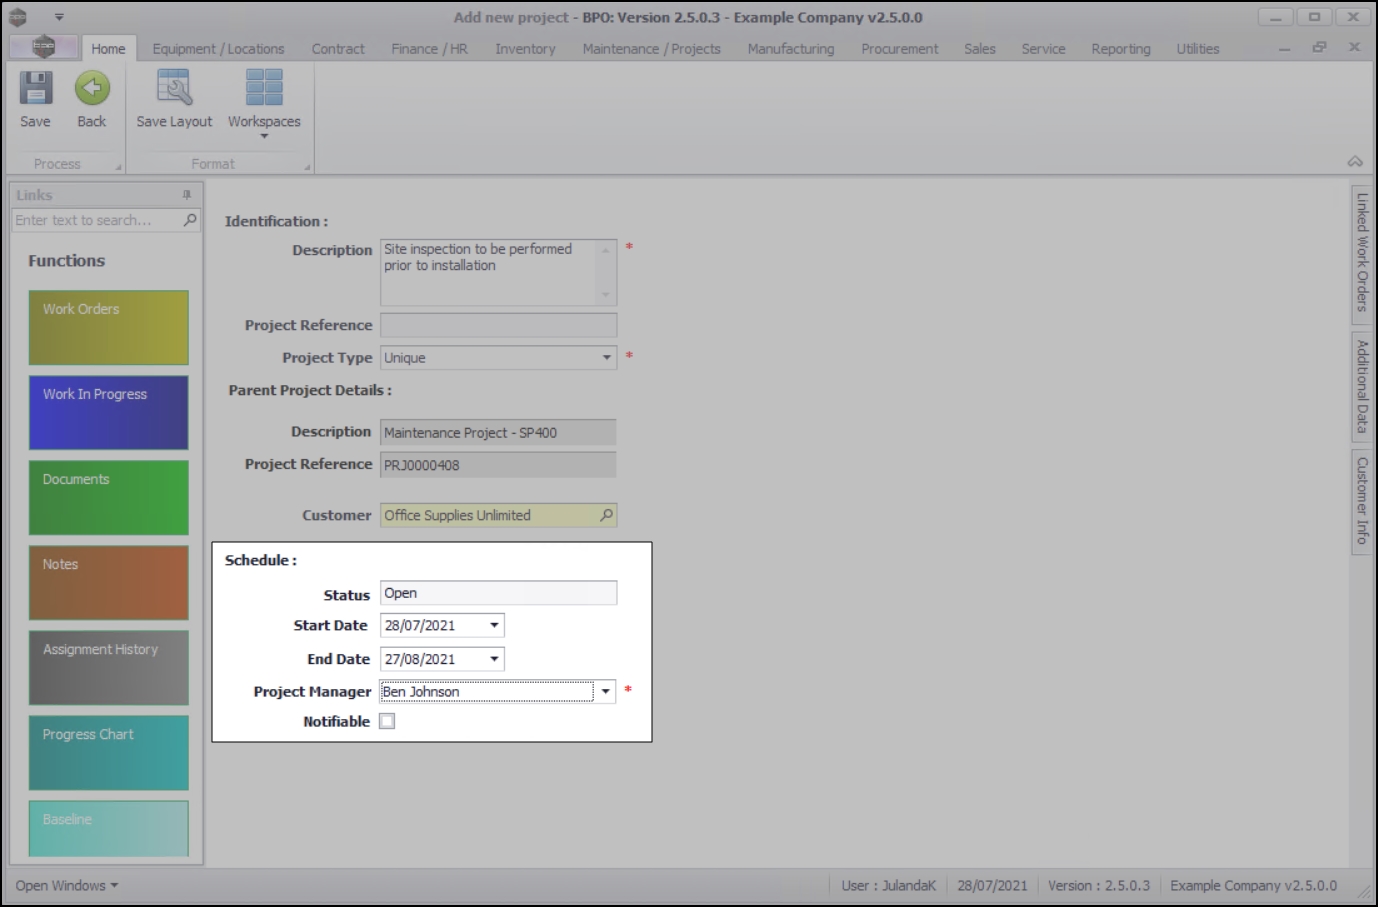
Identification
- Description: Type in a description for the sub-project you are creating.
- Project Reference: Type in the
Project reference Number.
 If the field is greyed out, then the Project Reference has been set to automatically issue the project reference number. Refer to
project configuration
for more information.
If the field is greyed out, then the Project Reference has been set to automatically issue the project reference number. Refer to
project configuration
for more information.
- Project Type: Click on the down arrow to select the project type that applies to the sub-project you are creating.
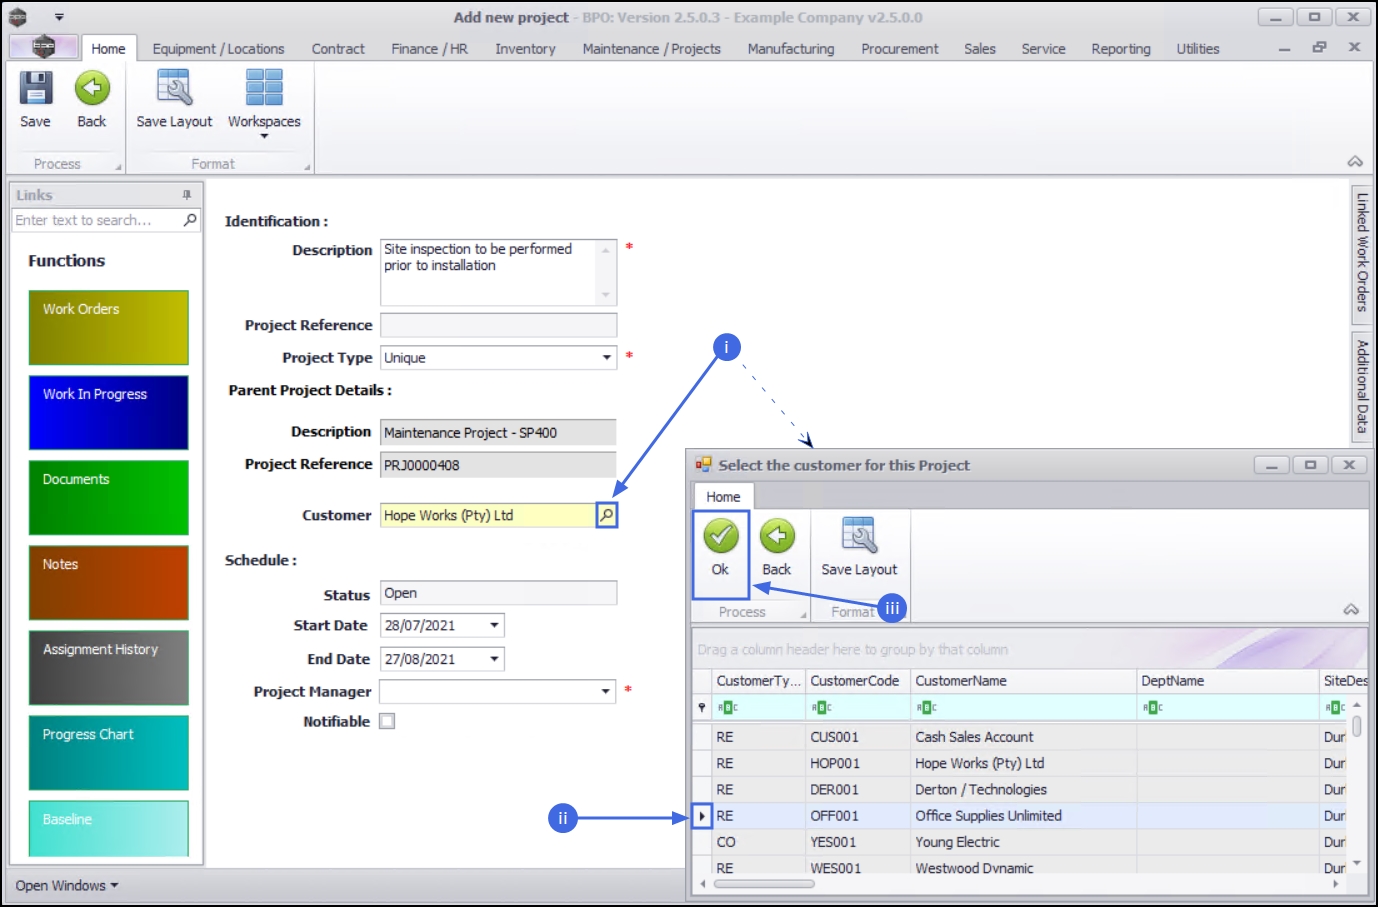
Parent Project Details
- Description: The description field has been auto populated with the project description of the main project you have selected.
- Project Reference: The project reference has been auto populated with the project reference of the main project you have selected.
- Customer: The customer field has been auto populated with the customer selected on the main project. You may wish to change the customer for the sub-project, if you are linking the sub-project to a different customer.
- Click on the search button to display the Select the customer for this Project screen.
- Click on the row of the Customer you wish to link to the sub-project.
- Click on OK.
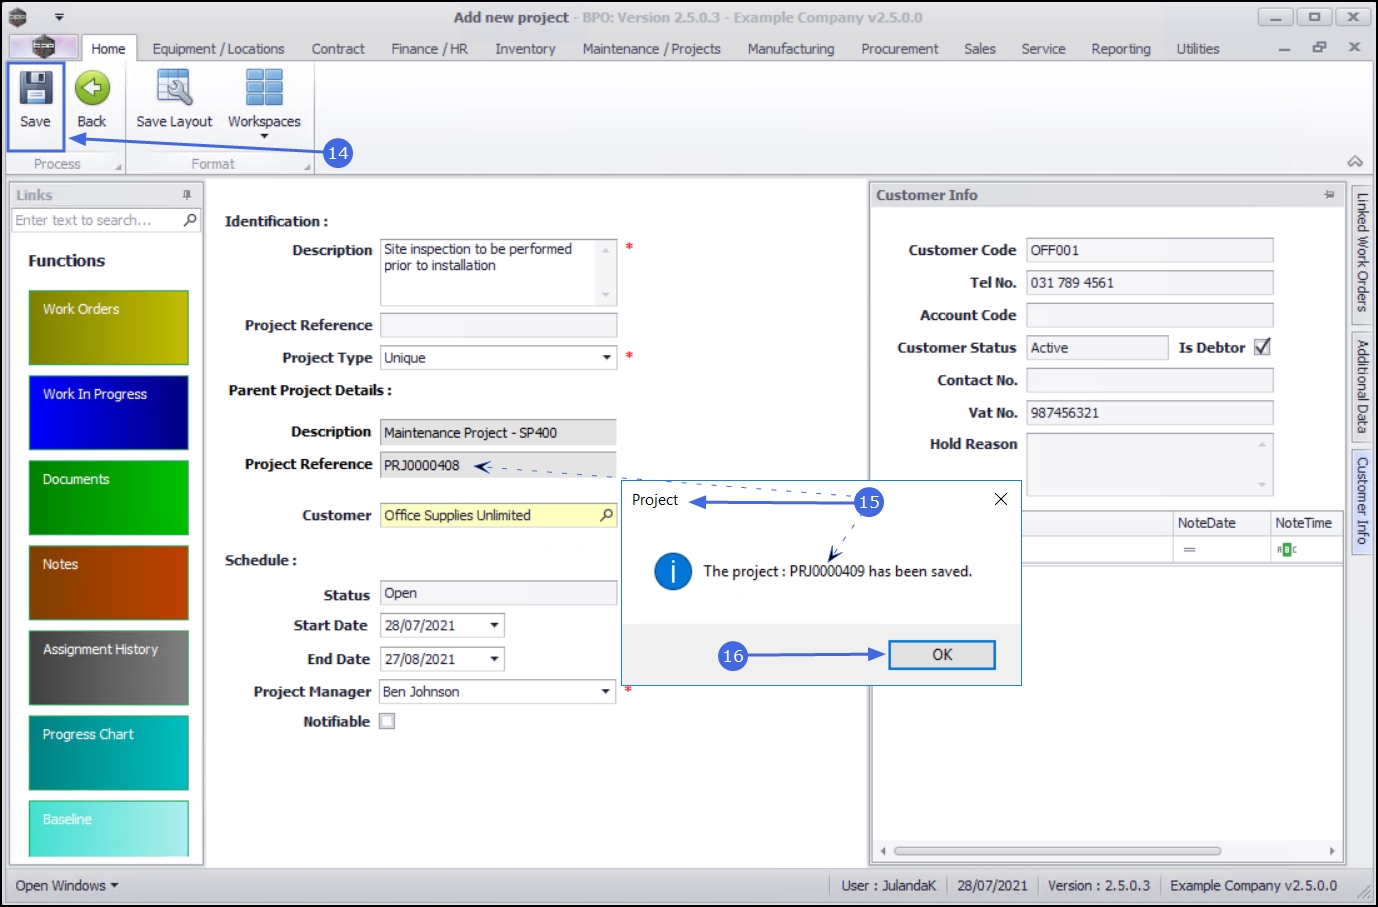
Customer Info
- The Customer Info frame will auto populate with the customer information you have selected as the Parent Project Details.
- Any Notes linked to this customer can also be viewed from this screen.
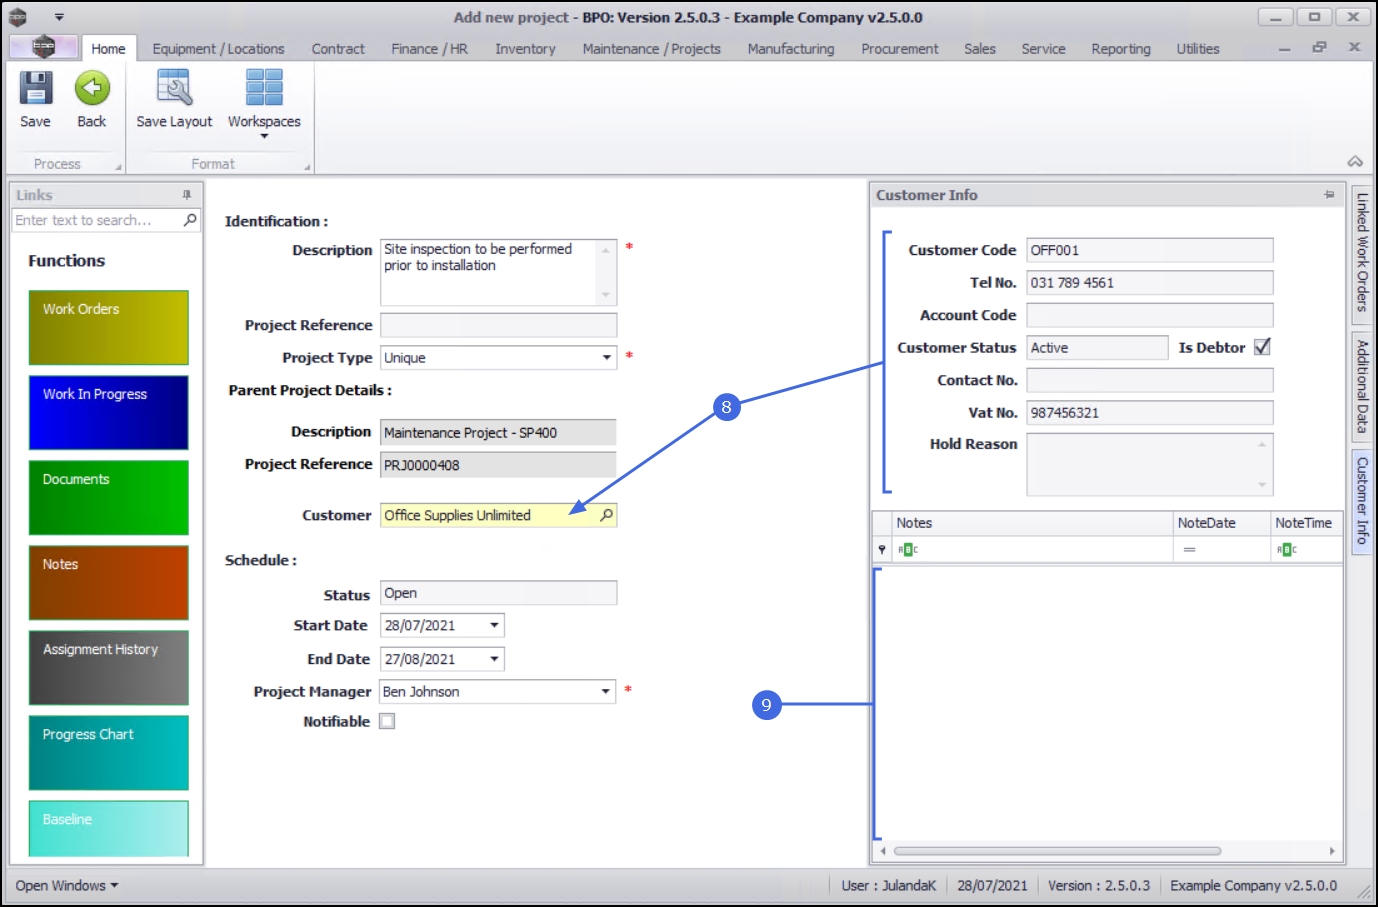
Schedule
- Status: This is the current status for the sub-project and will display as Open by default. This field cannot be changed on this screen.
- Start Date: This date will auto populate with the current date. Type in or click on the down arrow to select an alternative starting date for the sub-project using the Calendar function.
- End Date: The end date will be set a month from the start date. Type in or click on the down arrow to select the expected end date for the project using the Calendar function.
- Project Manager: Click on the down arrow to select the name of the project manager for the project.
- Notifiable: This option is not used by the system. Note For notifications, use the Assign Technician to the project work order(s) function. If the Company Configuration is set up correctly, then the technician will receive an email for the assignment.
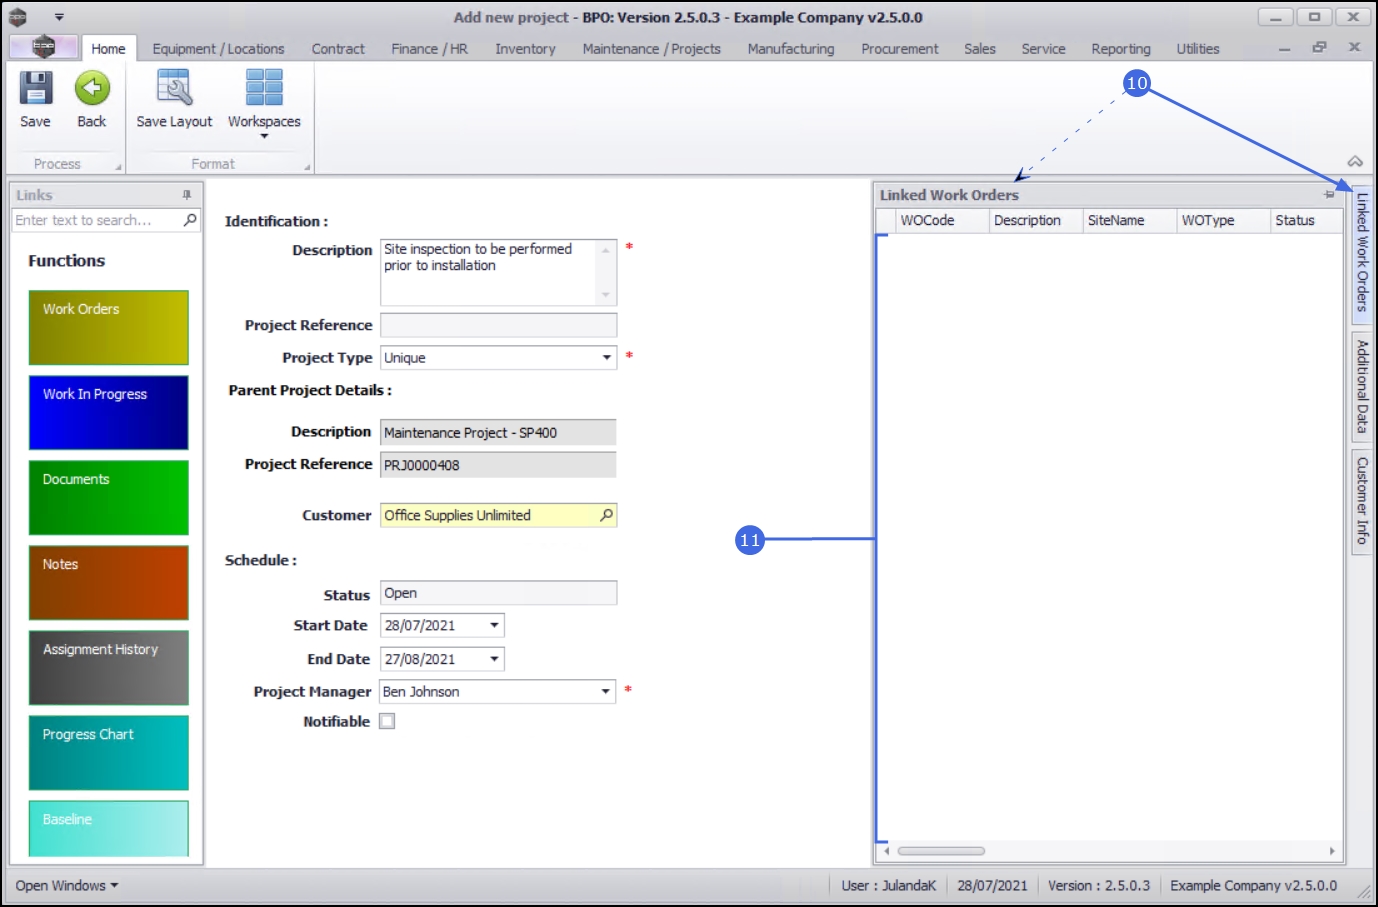
Linked Work Orders
- Click on the Linked Work Orders tab, on the right hand side of this screen, to display the Linked Work Orders frame.
 This panel can be docked to leave it expanded on the screen, which will make it easier to work in.
 - Any work order(s) linked to this sub-project will display in this frame.
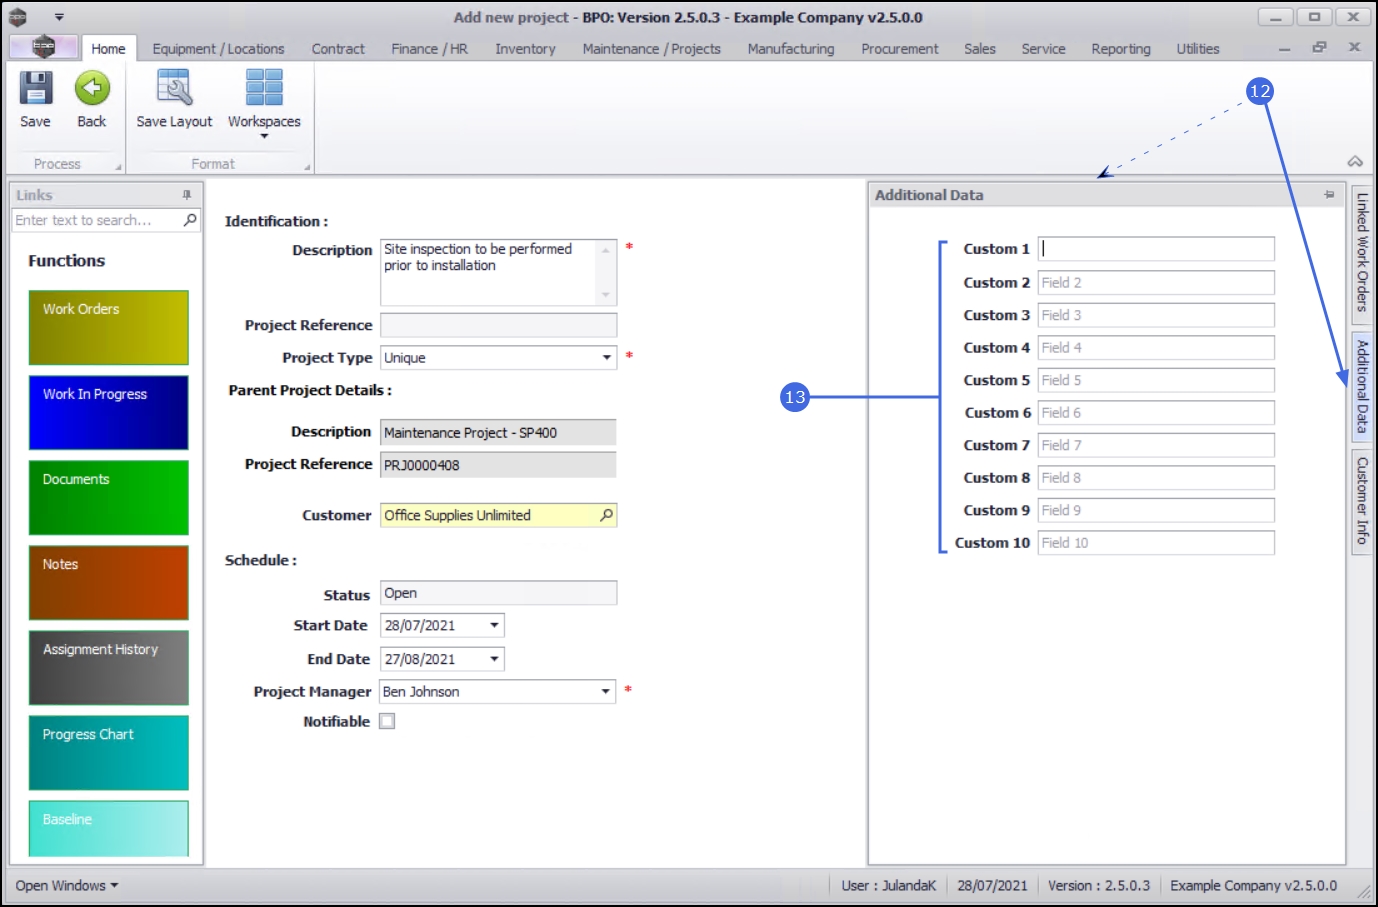
Additional Data
- You may wish to include information not covered in the sub-project frames. Click on the Additional Data tab to expand the Additional Data frame.
-
Any extra information can be added in the Custom 1 - 10 fields. These field names can be re-named to suit your company requirements.
- Please contact your BPO Analyst or CO3 Support for assistance.
Save Sub-Project
- After adding the relevant information for creating the Sub-Project, click on Save.
- When you receive the Project message screen informing you that;
- The project: [project ref number] has been saved. Note that the sub-project number is different from the main project number.
- The project: [project ref number] has been saved.
- Click on OK.
- You will return to the Project Listing screen where you can view the sub-project.
View in Hierarchy View
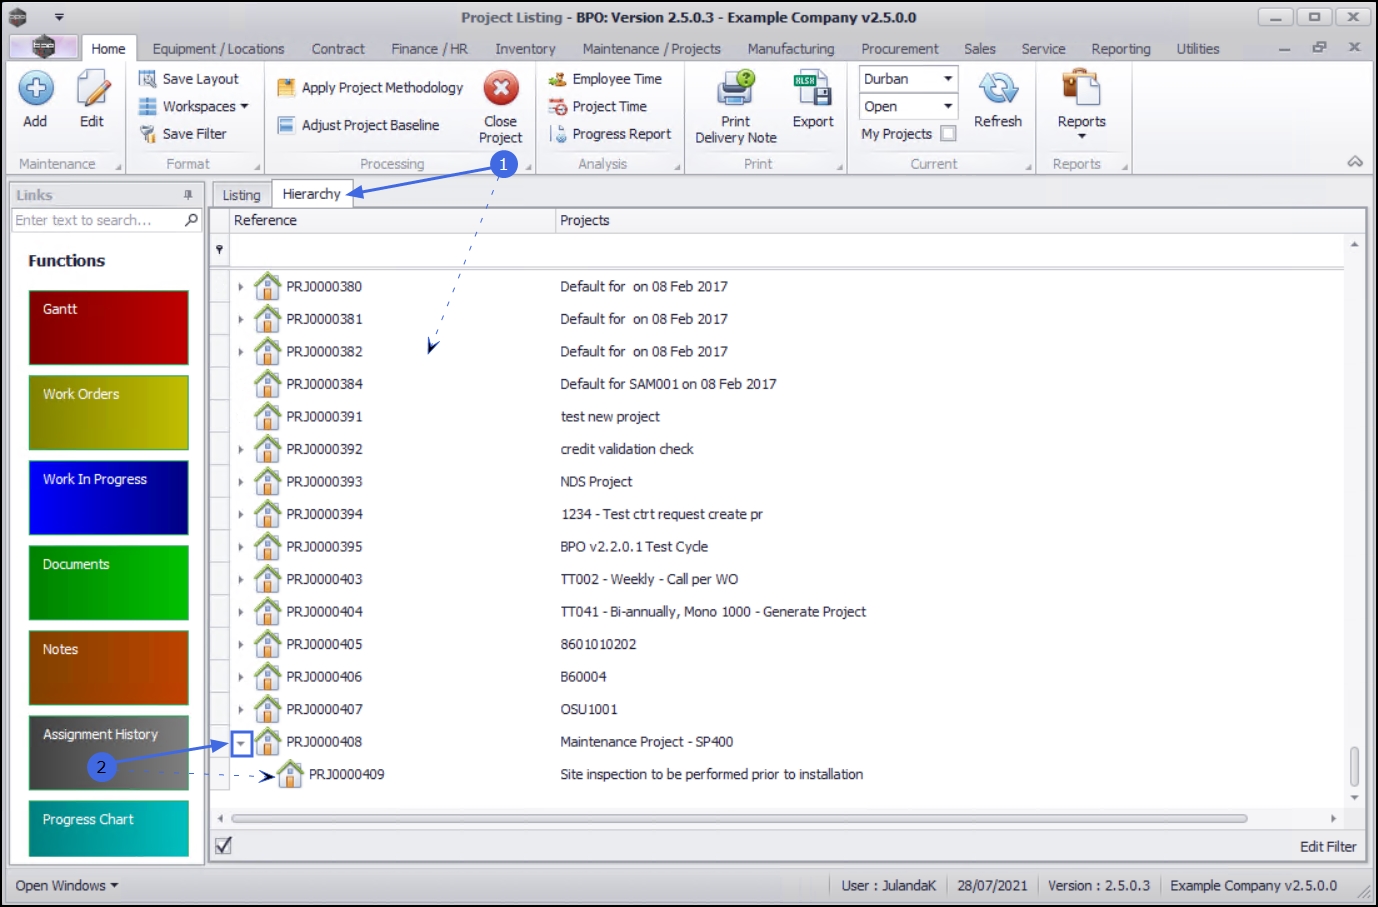
- Click on the Hierarchy tab to display the Project Listing screen in Hierarchy view.
- Scroll to the parent project number and click on the tree view node to expand the parent project hierarchy.
- The linked sub-project number and description can now be viewed.
MNU.058.006