Sales
POS Lite - Add Point of Sale (POS) Invoice
The POS (Point of Sales) Invoice screen was created as a simplified Over the Counter Invoice screen. With OTC Invoicing, stock must be manually issued after the invoice is created, but with POS Invoicing, stock is auto issued from the Auto Issue Warehouse. Only Inventory Items can be invoiced via this process.
- Company configuration flag:
- AutoSaleIssue – enables auto sale stock issuing.
- Auto Issue Warehouse Config (1 auto issue warehouse per site)
- Is Stock = ‘Yes’
- Is Asset = ‘No’
- Quarantine Location = ‘No’
- Is Default = ‘No’
- Auto Issue = ‘Yes’
- Sales Office Config:
- Identification of a customer as a cash sales account to be configured on the Sales Office. Ensure a Cash Sale Customer Account has been set up, linked to all sites and configured as the Cash Sales Account in the Sales Office(s).
- User Config:
- The default site of the user is used to determine the auto issue warehouse and the cash sales account. Ensure that each user has a default site configured ‘Default Site’ in User Right screen for that user. (that they have security right access to).
- For a multi-site environment, users must be in a site specific group (configured in user rights – AccessType: ‘SITE’).
Ribbon Select Sales > POS Lite

- The POS Lite Invoices listing screen will be displayed.
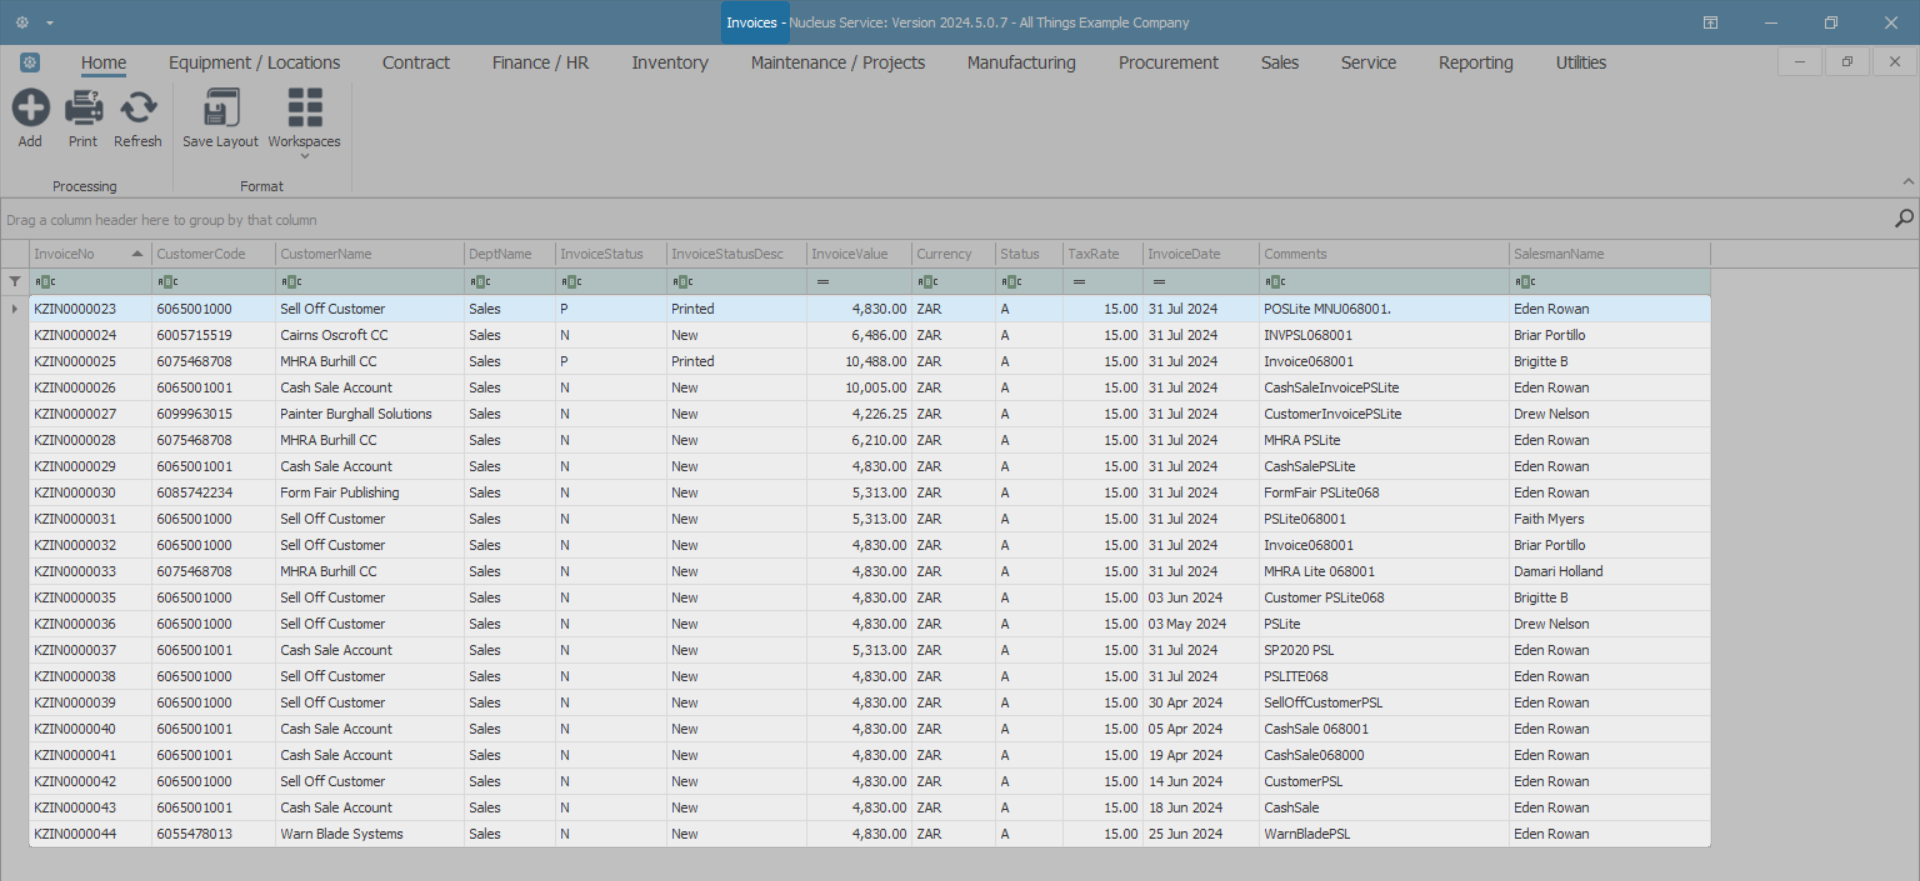
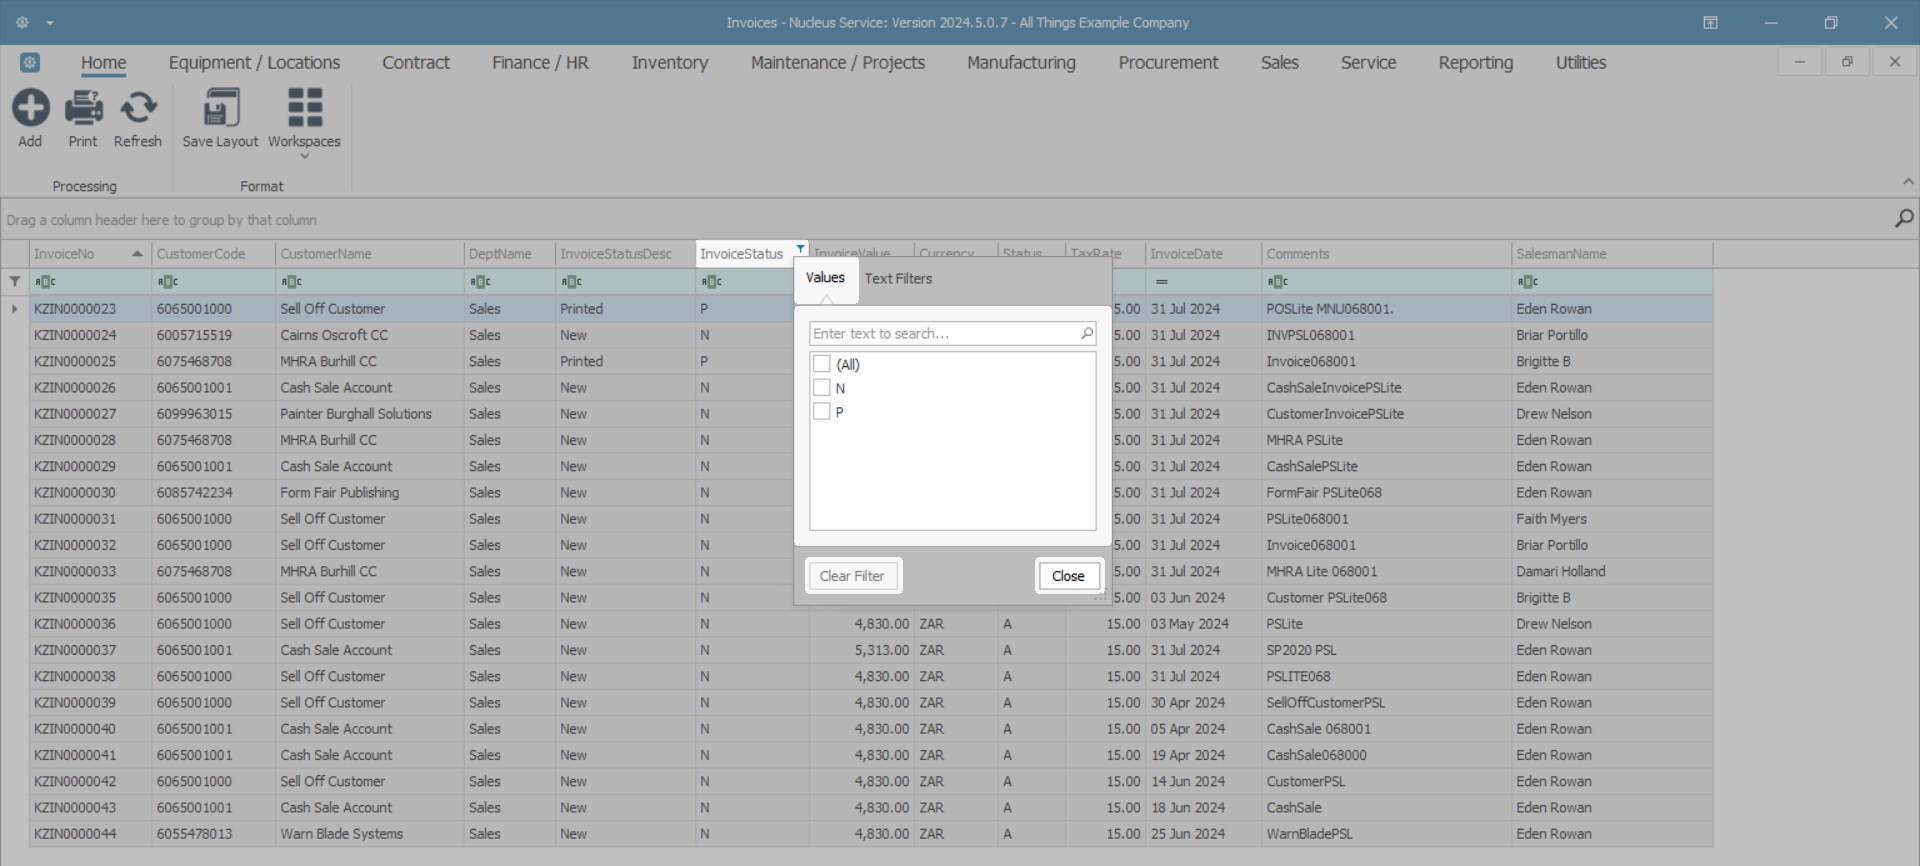
This screen does not have a status filter, instead all New and Printed Invoices will be displayed.
You can filter by the Invoice Status Column or as required.
Add Invoice
- Click on the Add button.
![]() Short cut key: Right click on a row in the data grid to display the Process menu list. Click on Add.
Short cut key: Right click on a row in the data grid to display the Process menu list. Click on Add.

-
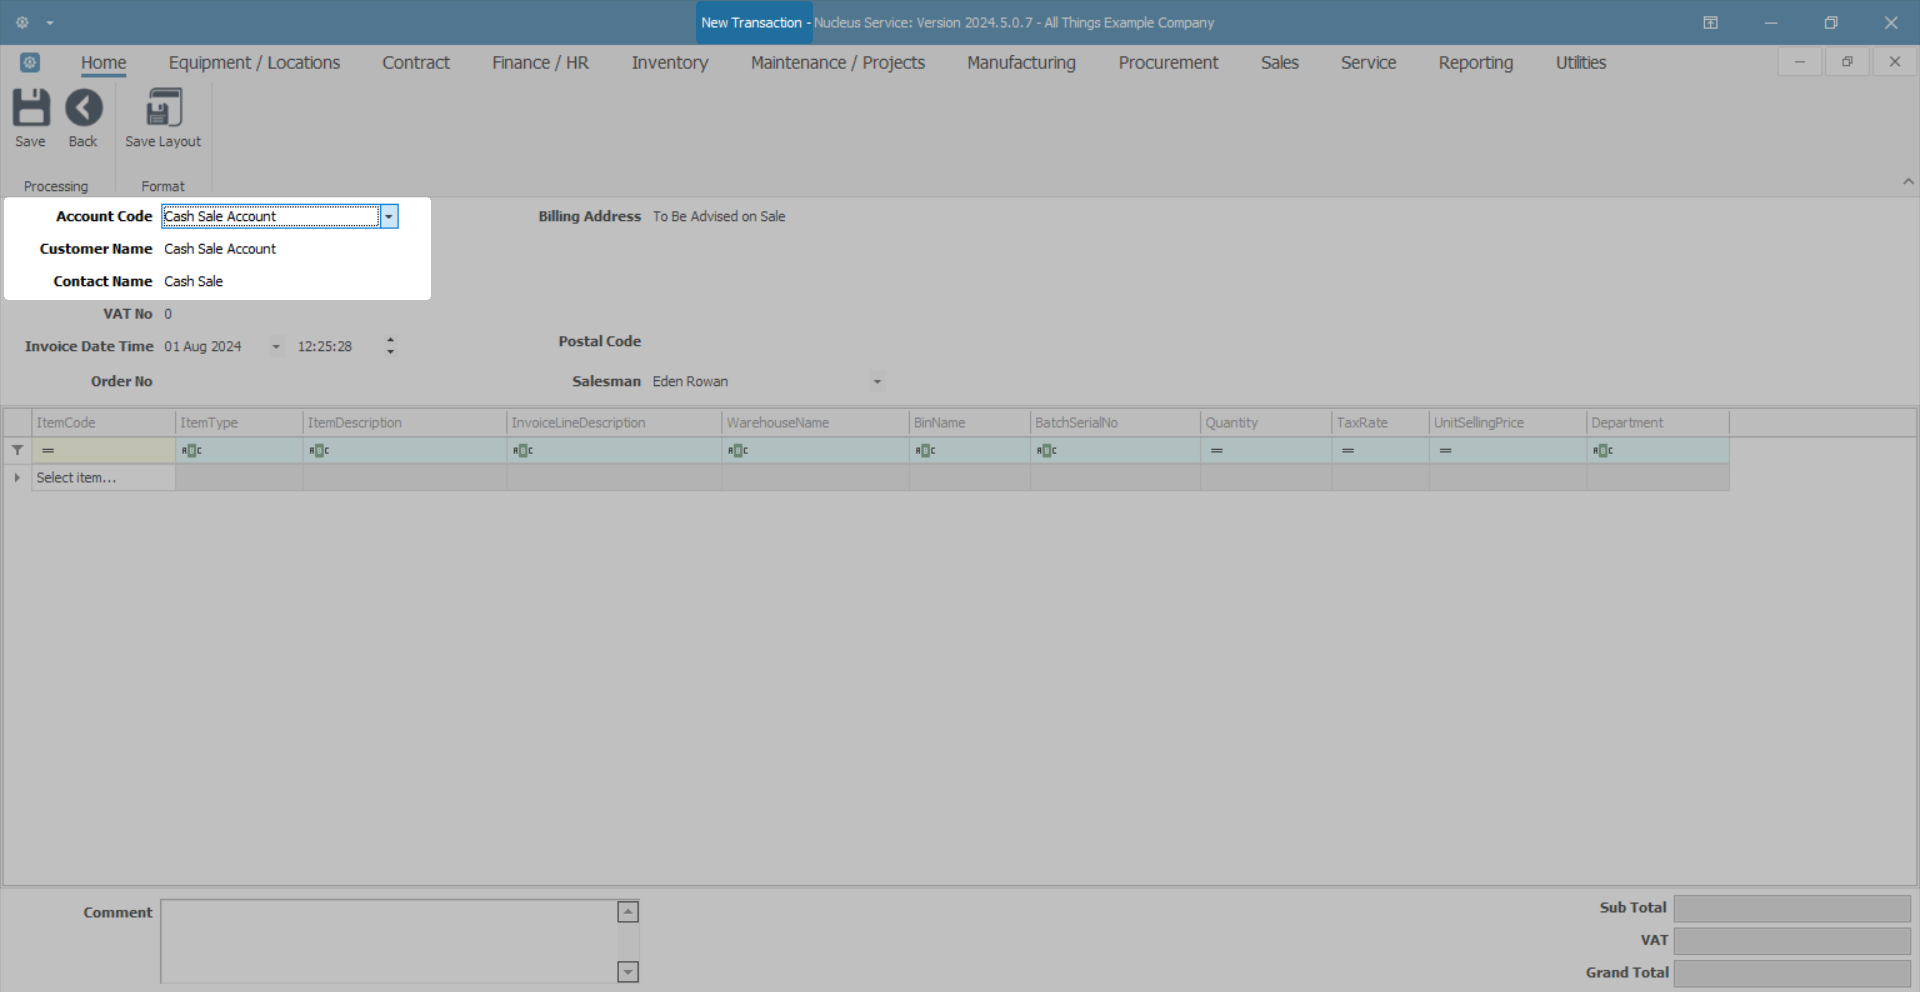
The POS Lite Invoice Maintain screen will display.
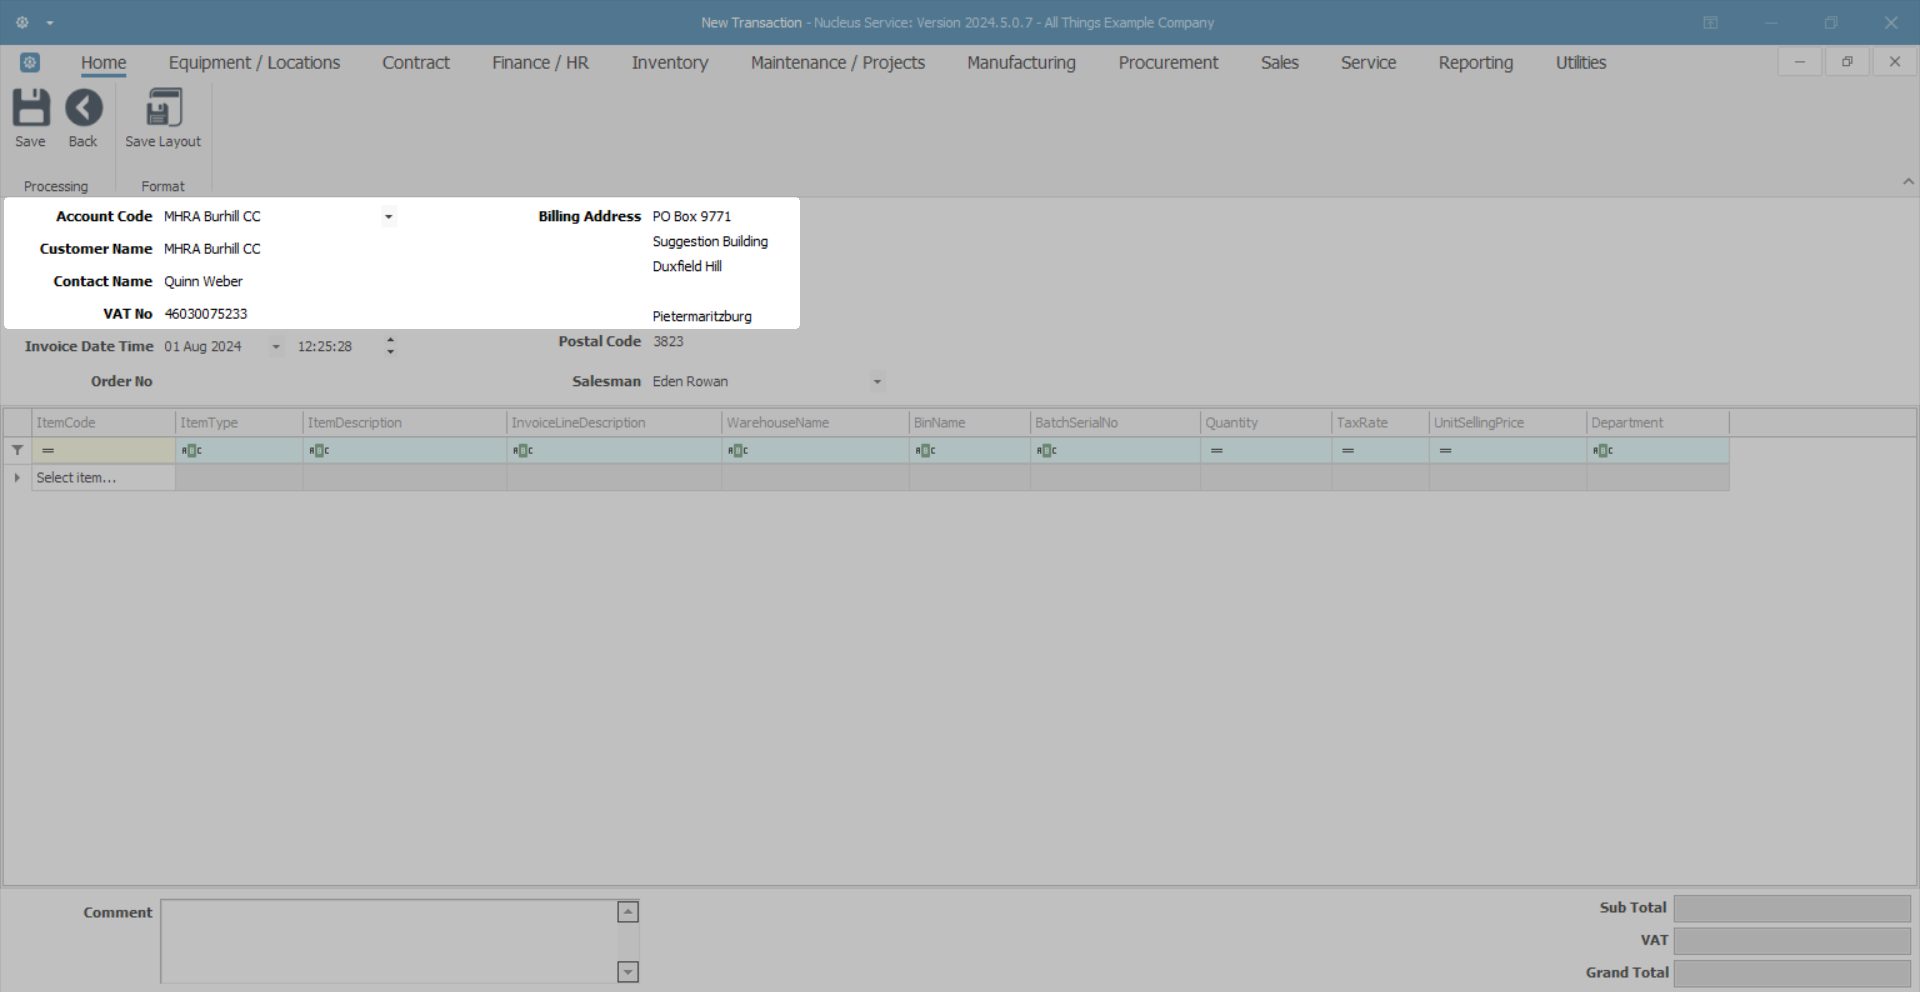
Invoice Header Information
- The customer information and Salesman fields will auto populate based on the Default Customer Account configured in the Sales Office, which should ideally be a Cash Sale Customer.
- If this is a walk in customer, you can then type in the information you would like to keep on record, such as the Contact Name and Billing Address. The financial transaction will post to the Cash Sale Account, but you will have the walk in customer's details on record.
-
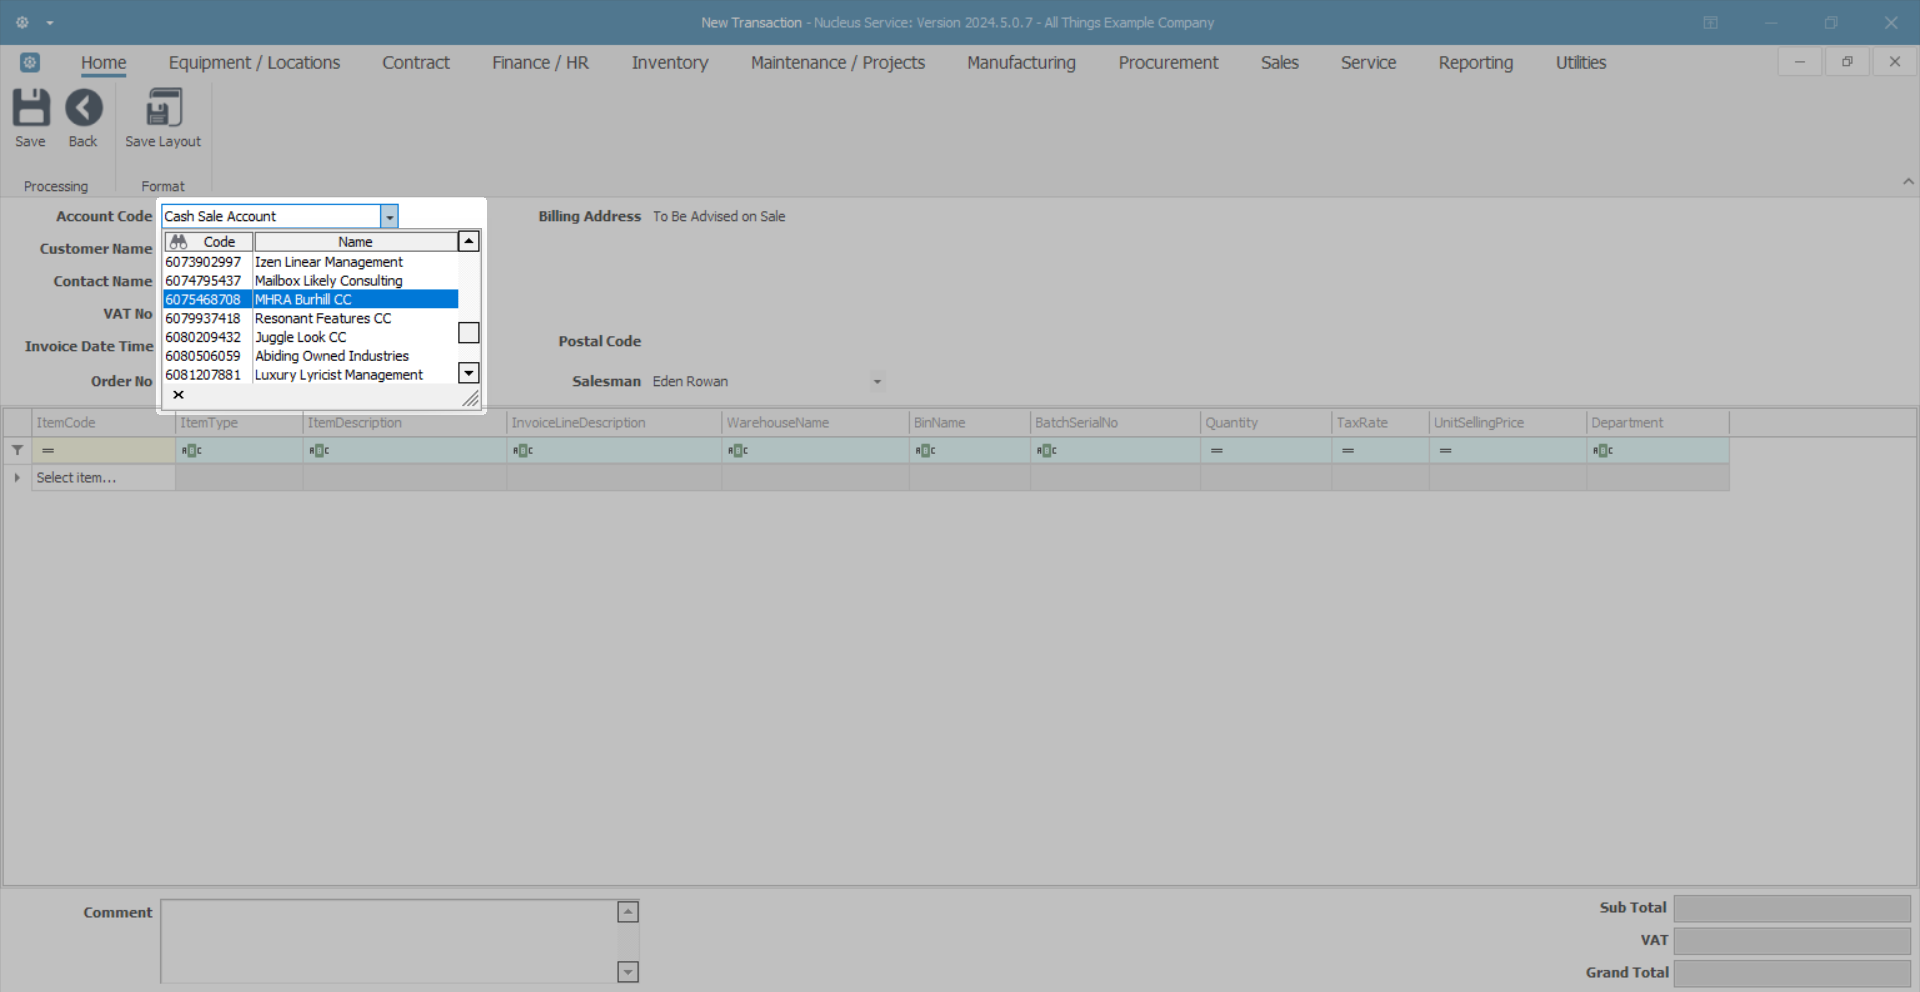
If this is an existing customer, you use the Account Code drop-down menu to select the customer.
-
The selected customer's detail will populate, including the Primary Contact and Billing Address. If required, you can type in the details for this specific invoice. This will not change any information on the customer itself, but you will have the details on record for this transaction.
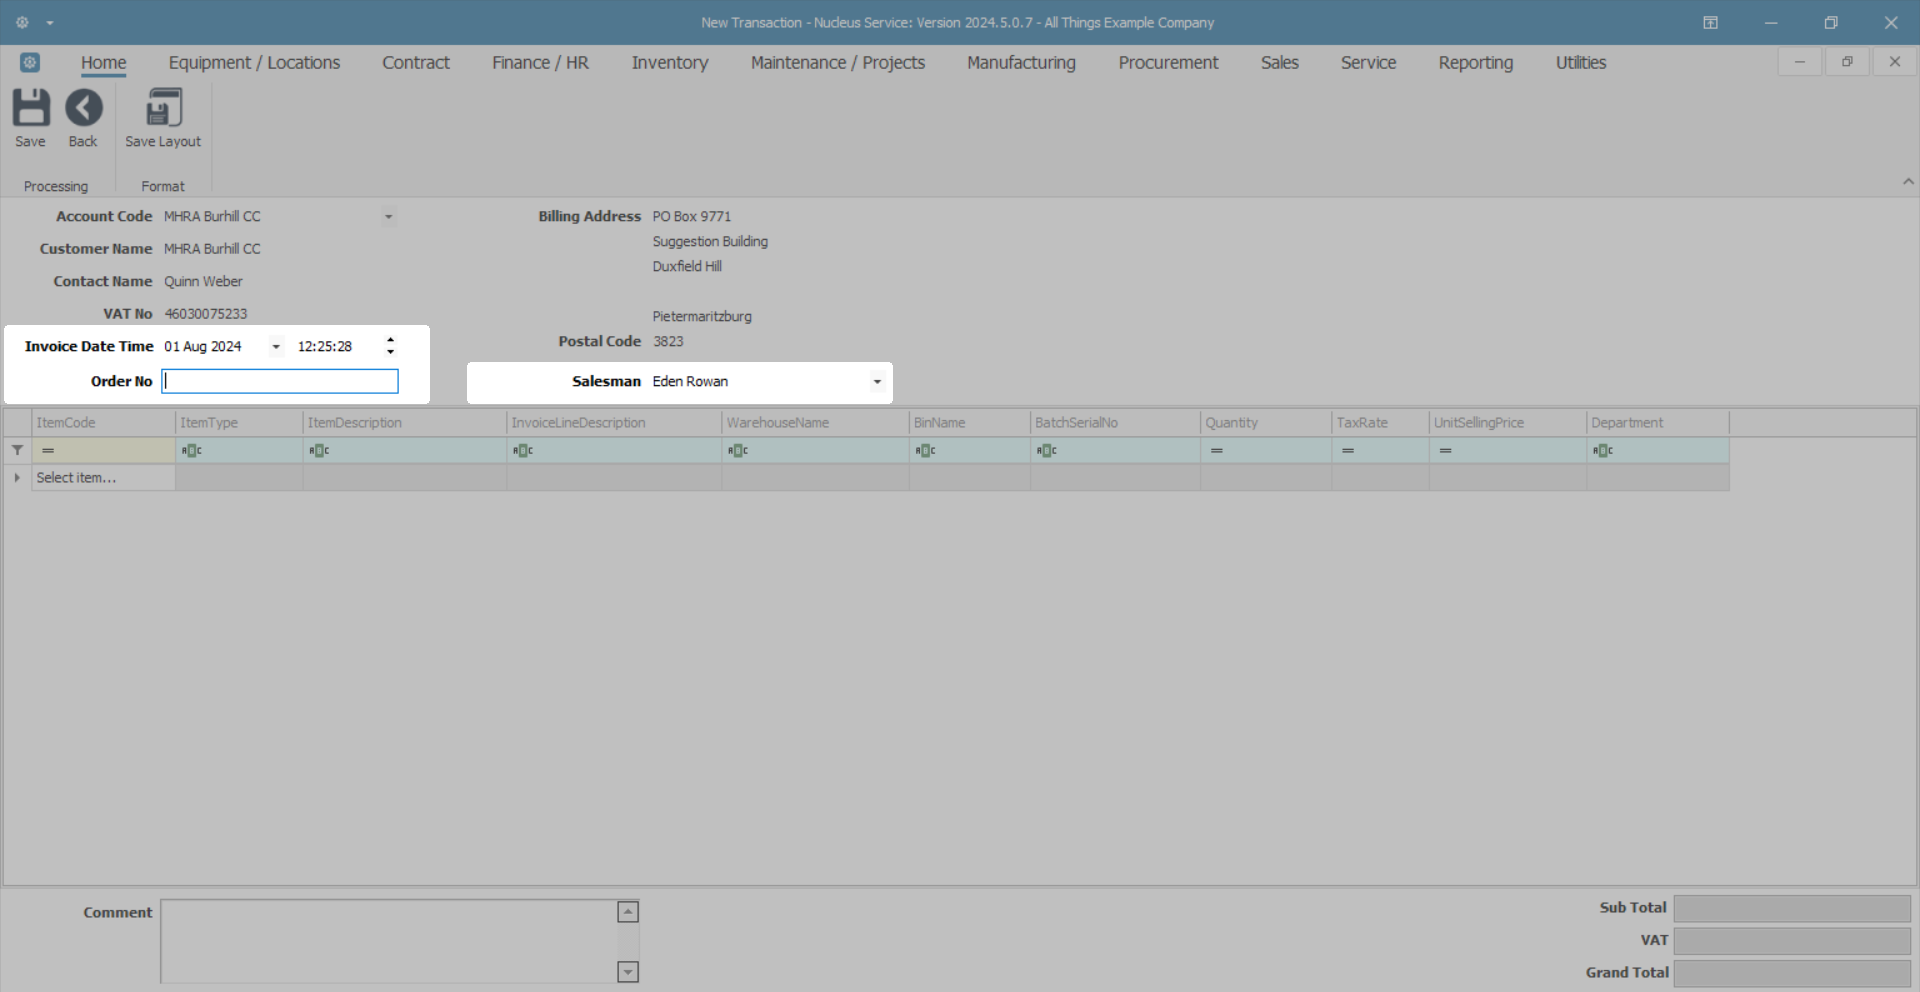
- Invoice Date and Time:These fields will auto populate with the current date and time the invoice was created.
- Invoice Date: Type in or click on the drop-down arrow to use the calendar function to select an alternative date, if required.
- Invoice Time: Type in or use the arrow indicators to select an alternative time, if required.
- Order No: Click in the field to type in the order number if an order is linked to the cash sales invoice.
- Salesman: The salesman field will populate with the employee currently logged onto the system. Click on the drop-down arrow to select a different salesman, if required.
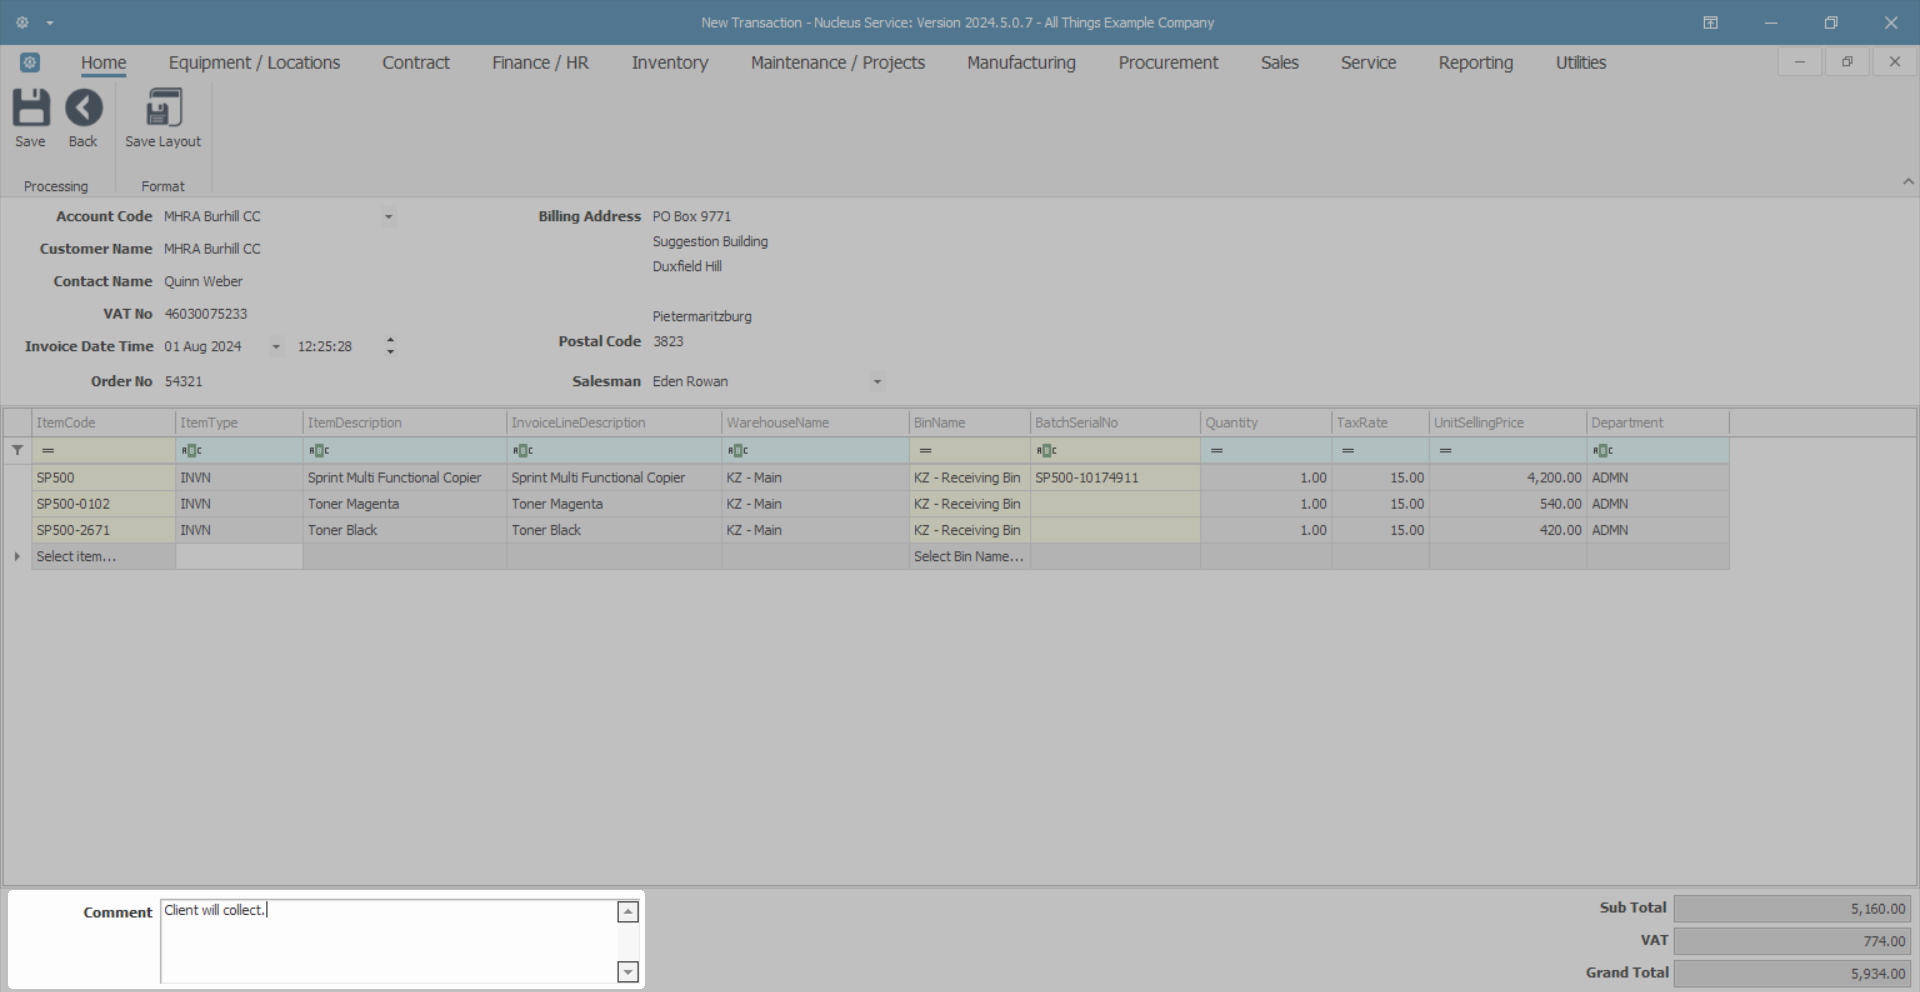
Add Items to the Invoice
Item Code, Stock Codes and Part Number
- Click in the Item Code text box, and then on the drop-down arrow to display the list of part codes available in the POS Auto Issue Warehouse.
- Select the part code required.
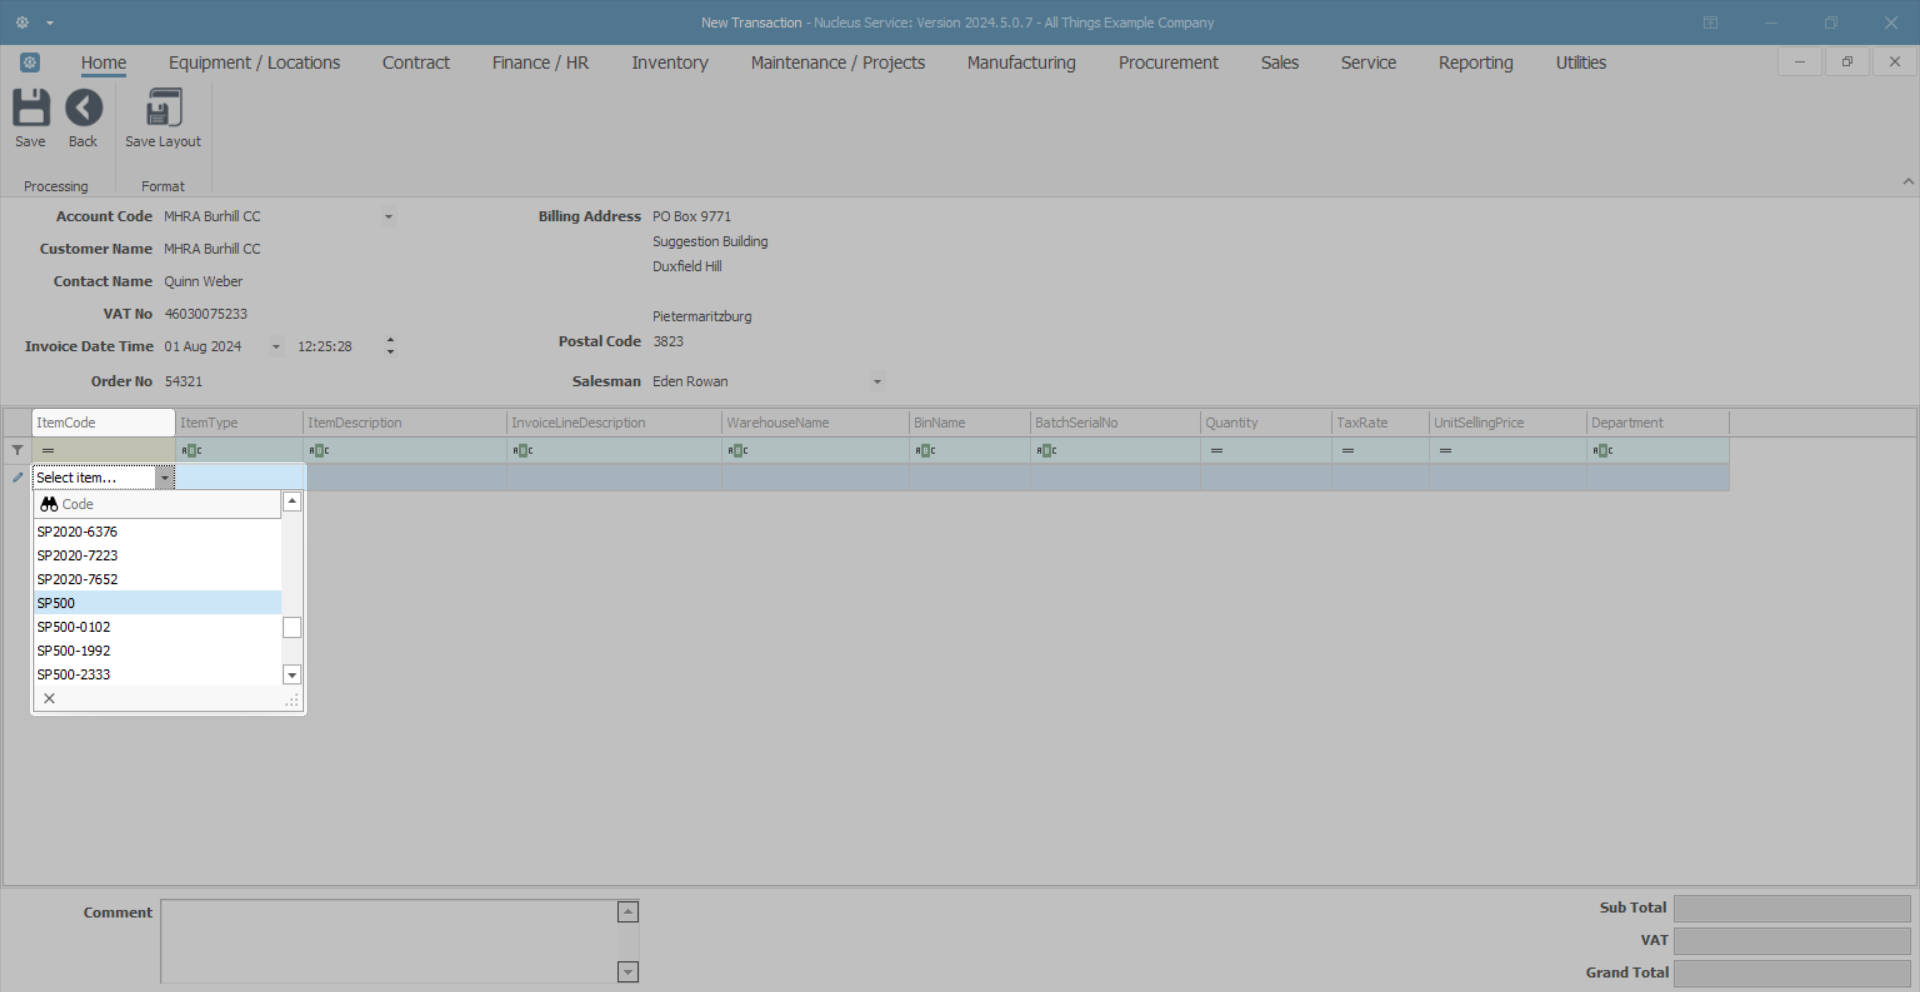
- Once you have selected the Part Code the Item Code, Item Type, Item Description and Invoice Line Description will populate based on the Item selected.
- The Warehouse Name will populate with the POS Auto Issue warehouse.
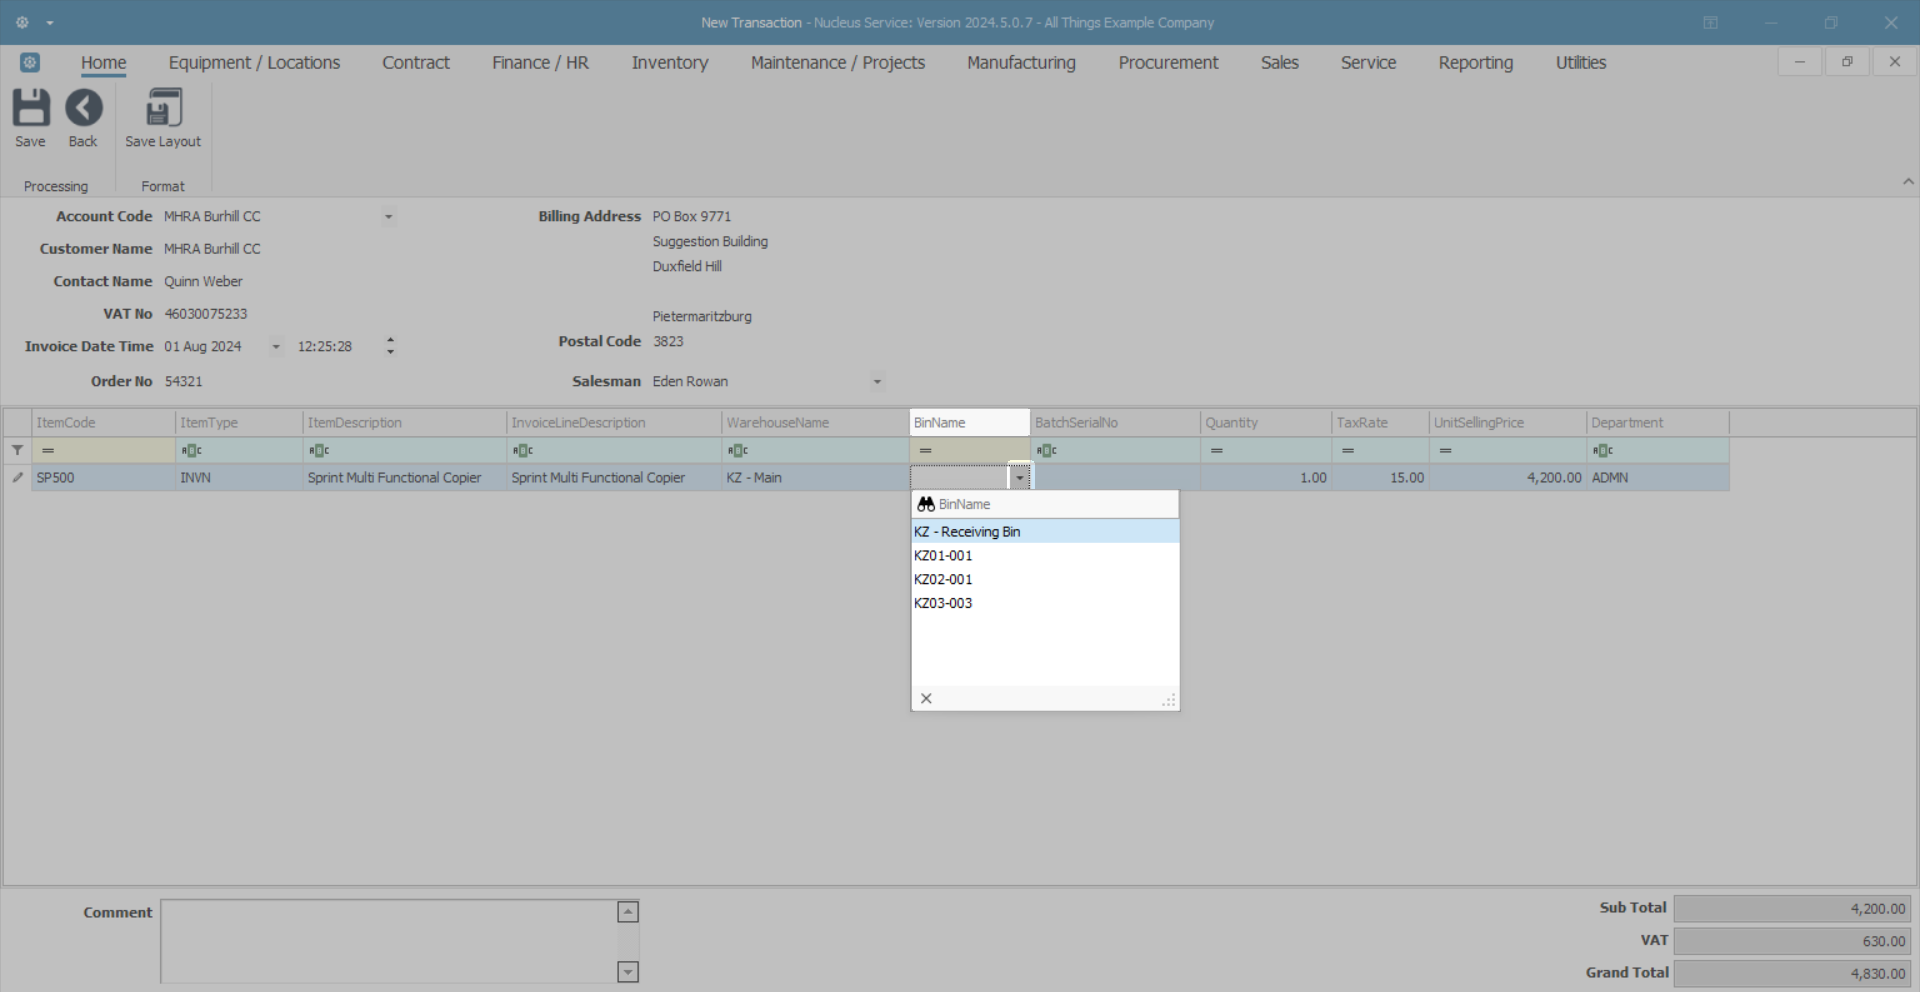
- From BPO2 v2.5.1.3, you have the ability to select the Bin Name, if you have multiple bins within the POS Auto Issue Warehouse.
- Note that only bins with stock will display.
- For non serialised items, where Batch Tracking is not enabled, select the Bin Name.
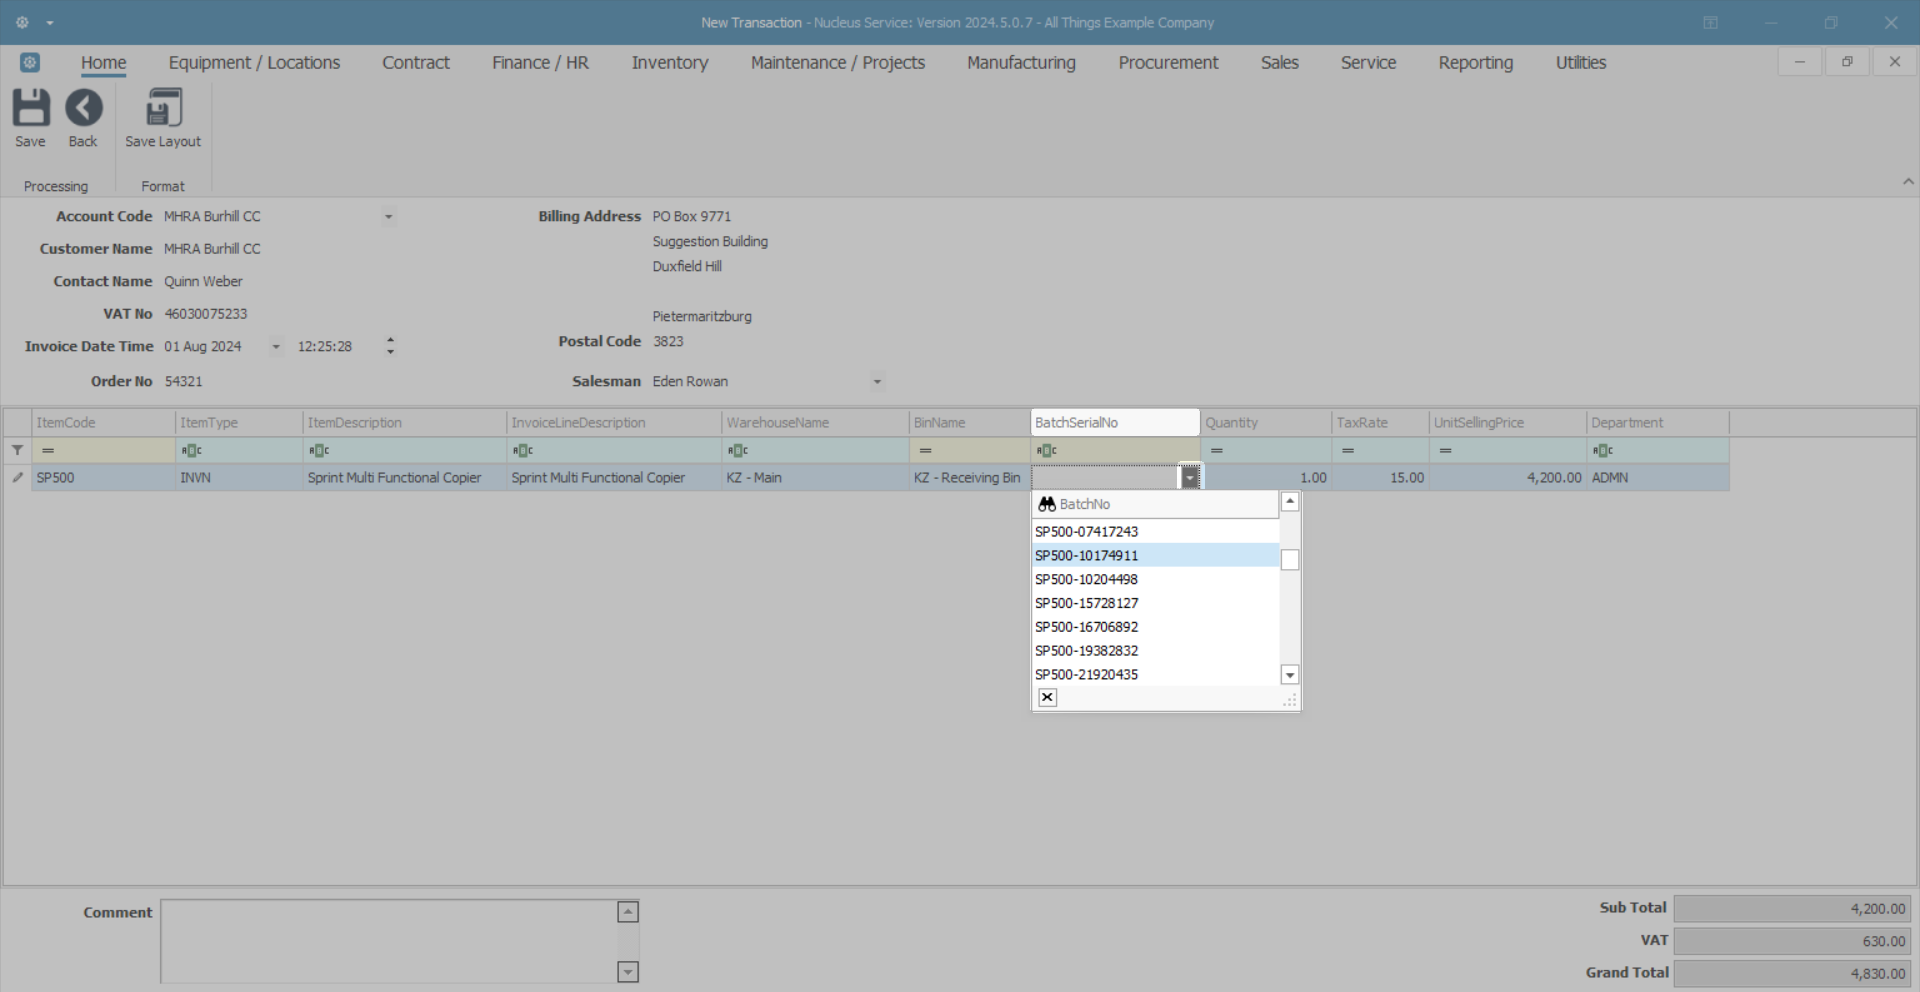
- or, if Batch Tracking is enabled, once the Batch Number is selected, the system will set the associated bin.
- or, if selecting a Serial Number, the system will set the associated bin.
Batch Serial Number
This field serves two purposes depending on the part type:
- Batch Number selection for C-Class (or non-serialised stock items). Note that this is only required for Batch Tracking environments where multiple stock batches exist.
- Serial Number selection for A-Class and B-Class (or serialised stock items). This applies to all environments.
- Taking the above notes into account, select the Batch Number, if required for C-Class items; or Serial Number for A-Class or B-Class items.
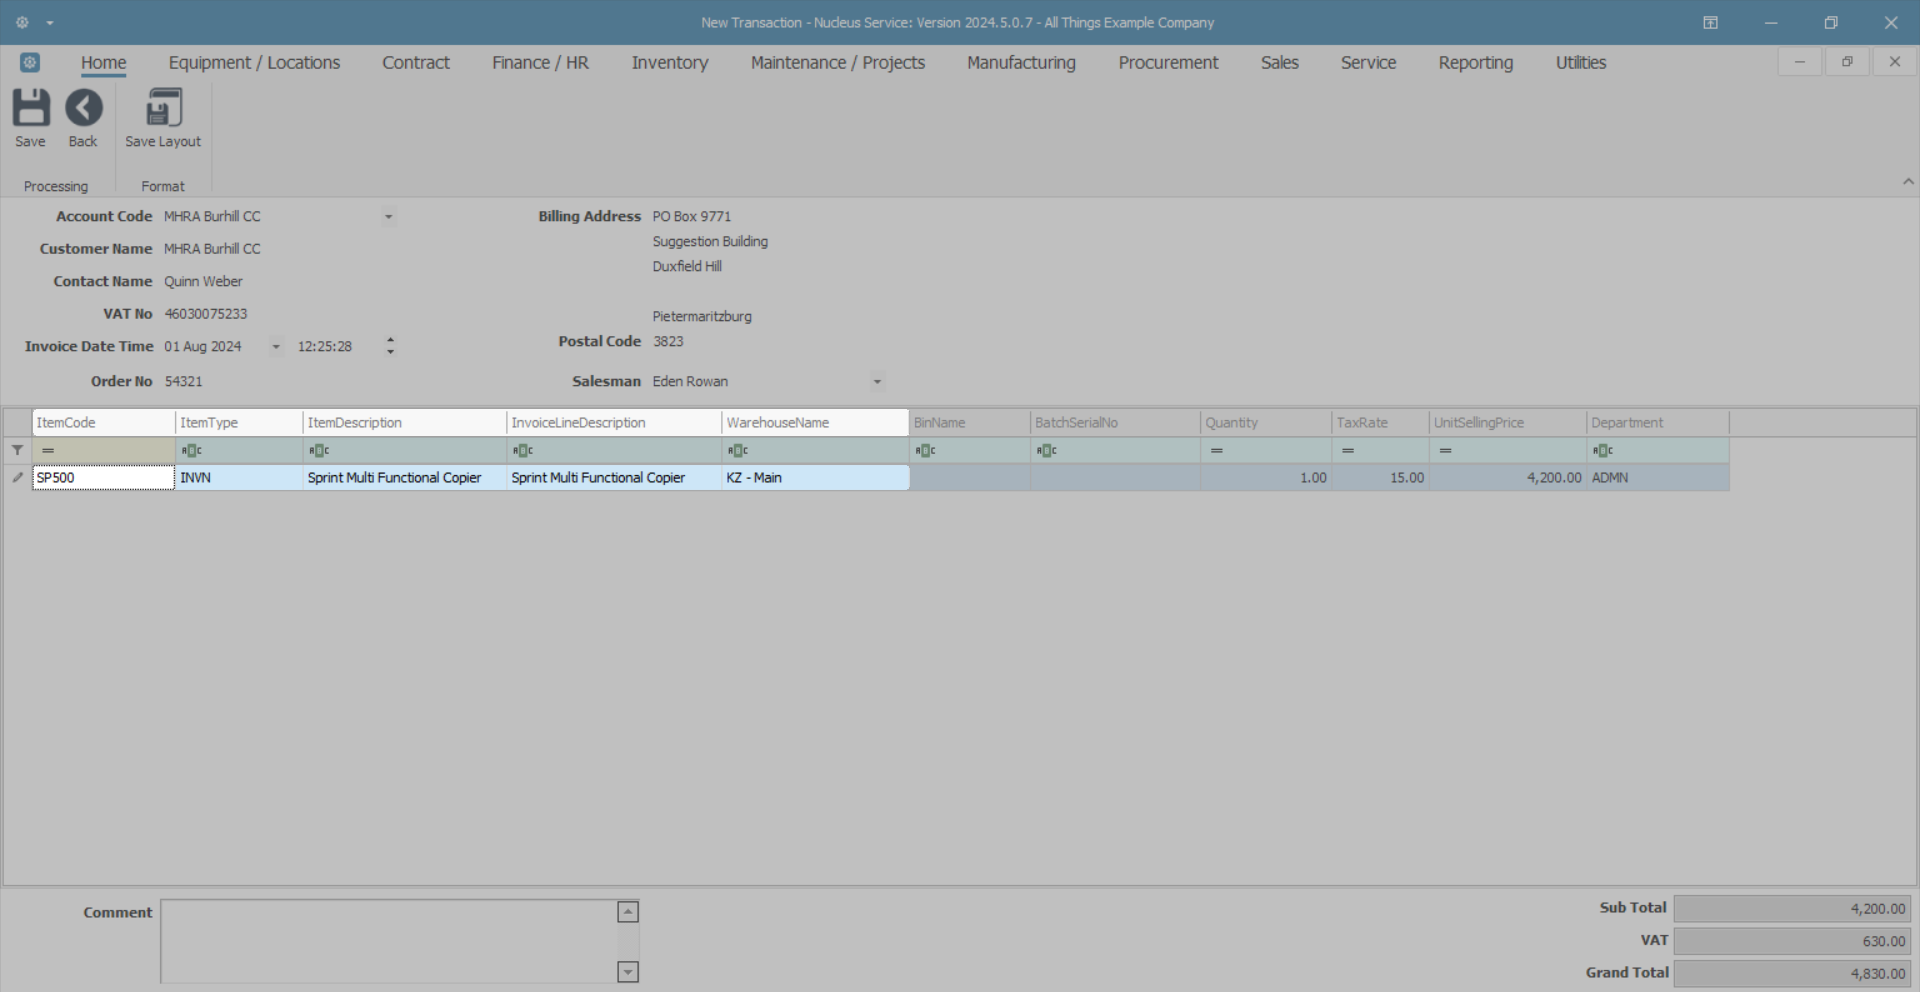
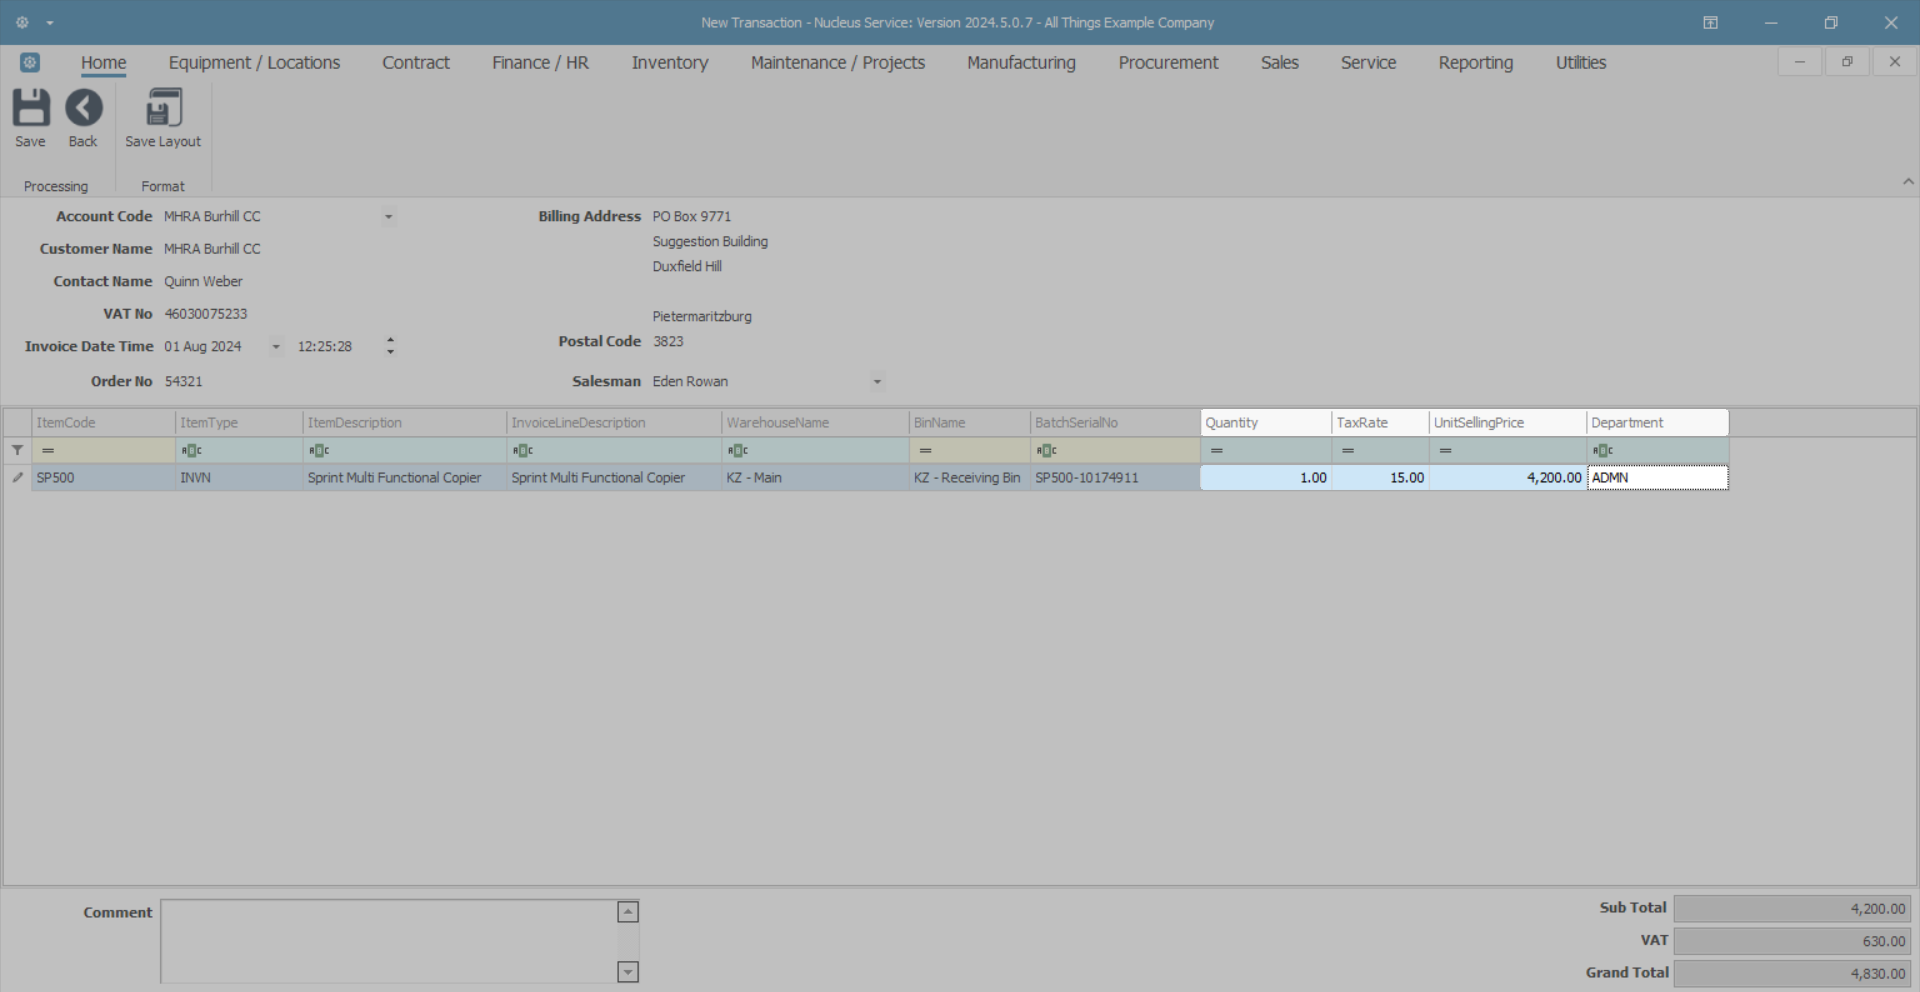
Quantity, Unit Selling Price and Department
- Quantity: The quantity is set to 1 by default.
- Serialised Items (A- and B-Class) - This will always be 1 as an individual serial number is selected.
- Non-serialised Items (C-Class) - You can click in the text box to type in the quantity required, but cannot exceed the amount of stock in the bin, (and where batch tracking is enabled), the batch selected.
- Unit Selling Price: The unit selling price field will auto populate based on the commercial set on the customer. This amount can be modified, if applicable.
- Department: The department name will display as configured by the Sales Office.
Additional Invoice Items
- After completing an Item line, press the Enter or Tab key or click anywhere in the data grid to open a new Item line.
- Add items as required.

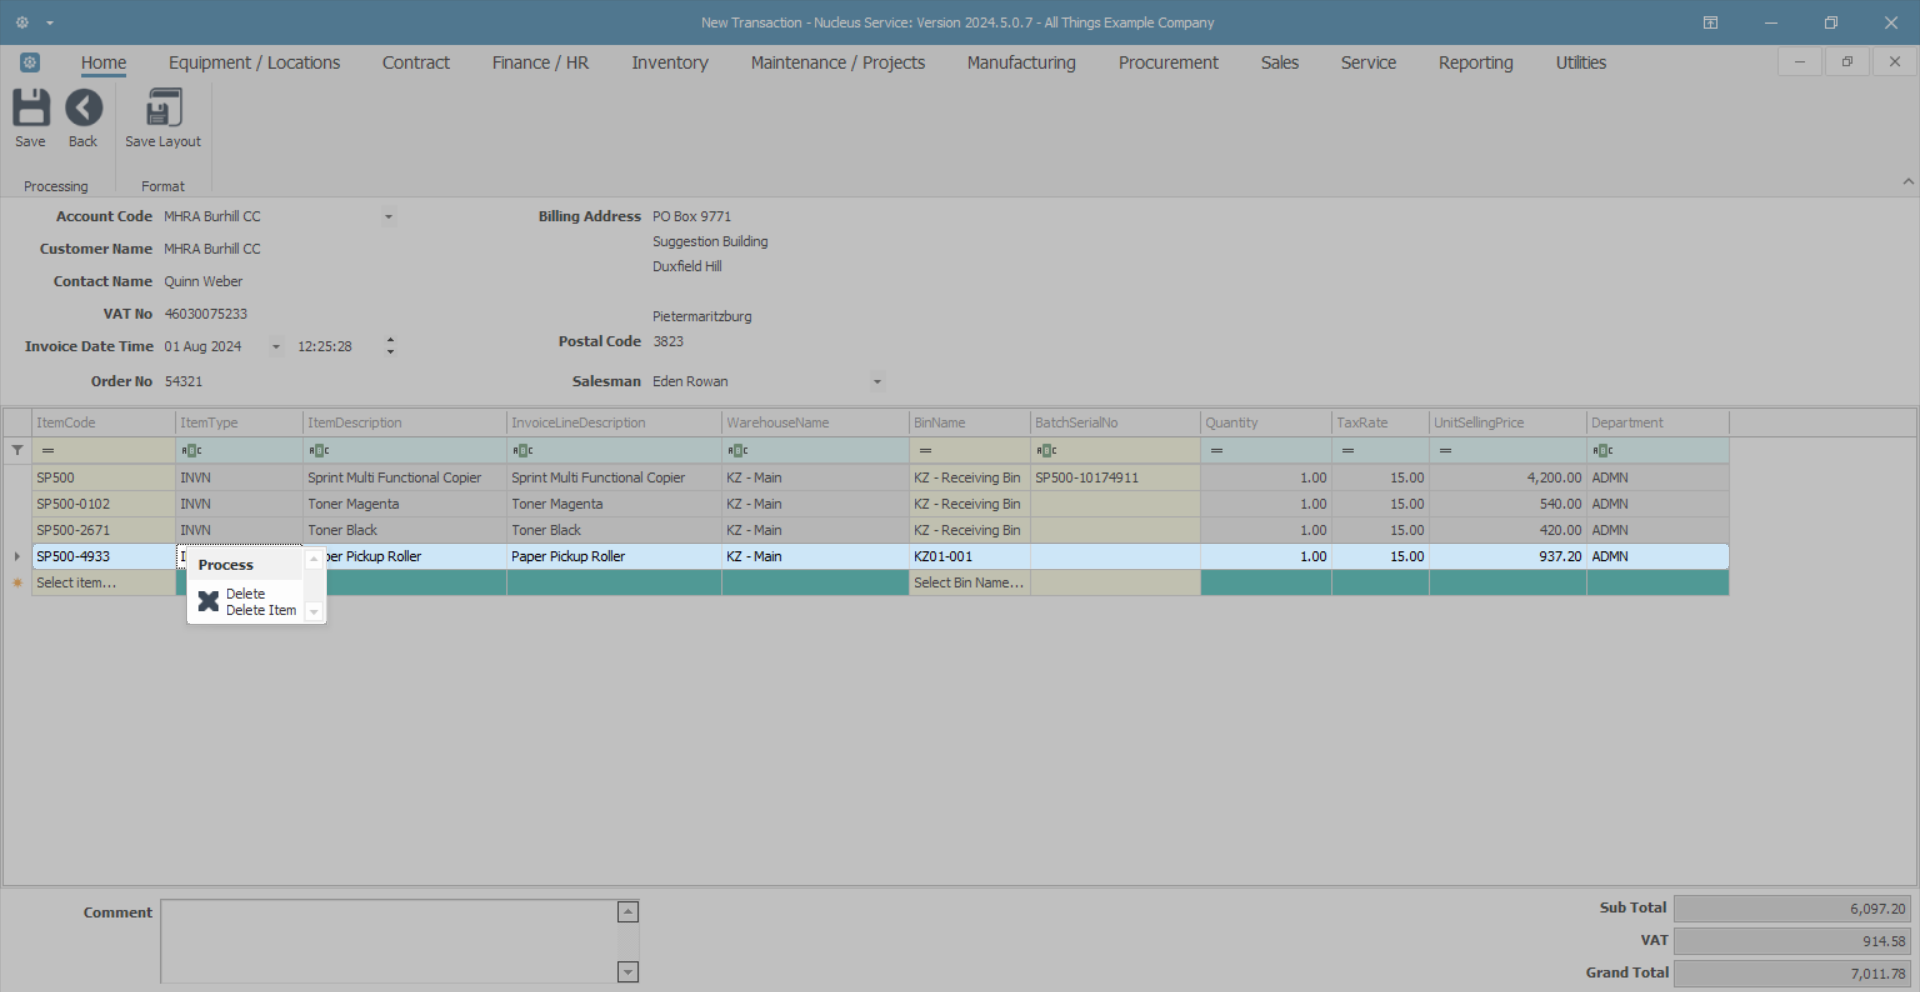
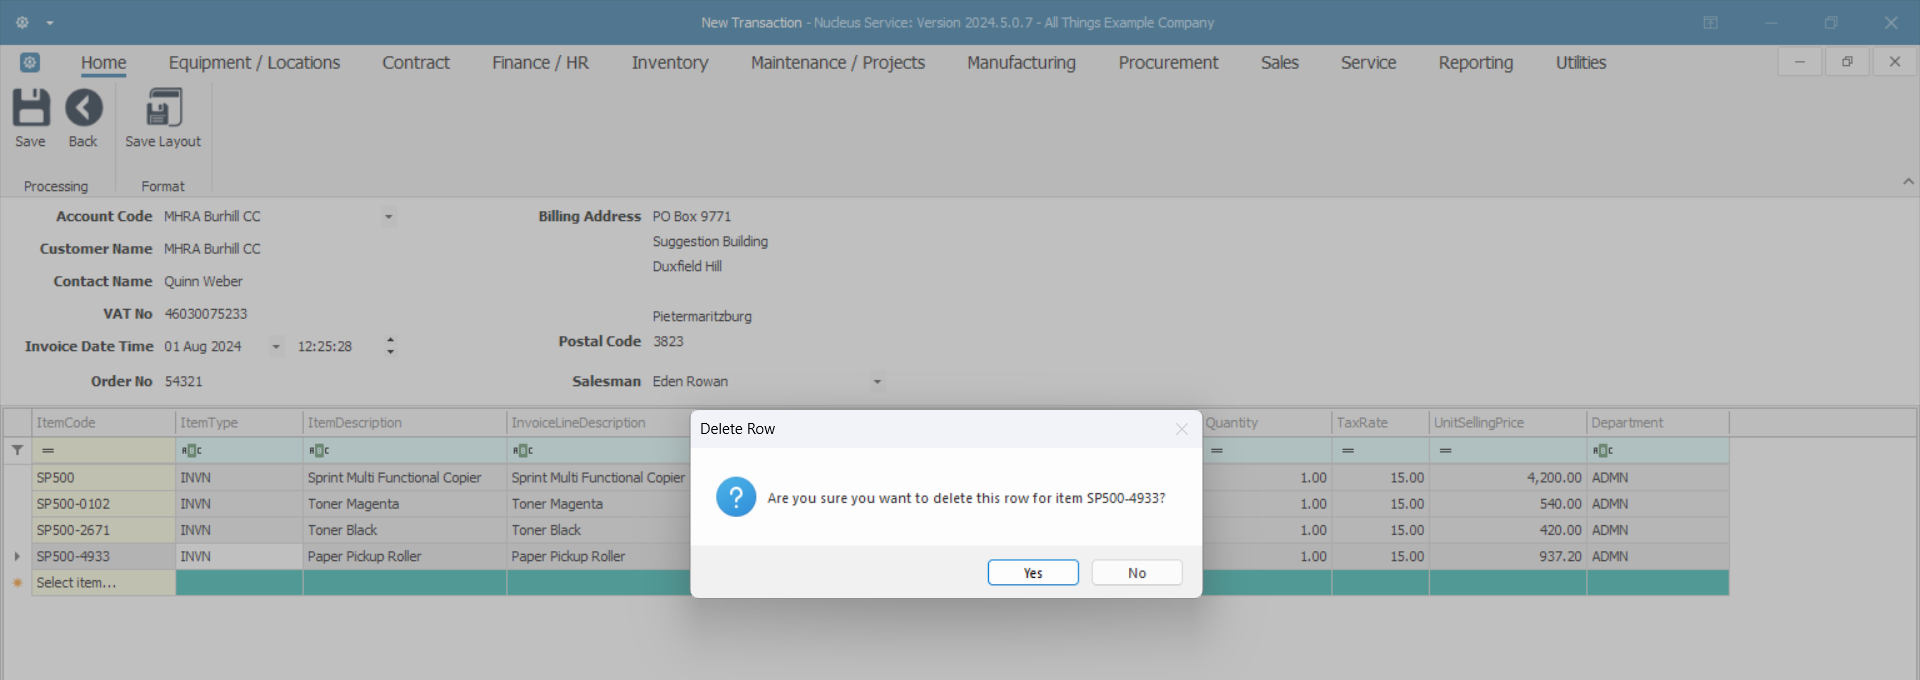
Delete Item
- Incorrect line items can be removed from the invoice before saving it.
-
 Right click on the line item you wish to remove to display the Process menu.
 - Click on Delete - Delete Item.
- When you receive the Delete Row message to confirm -
- Are you sure you want to delete this row for item [ ].
- Click on Yes to delete the row item, or
- Click on No to ignore the request and to leave the item row on the invoice.
Comment Text box
- Click in the Comment text box to type in a comment for the invoice. The comment will display on the Invoice when it is printed.
 Note that this is a mandatory field.
Save the Invoice
- Click on Save.
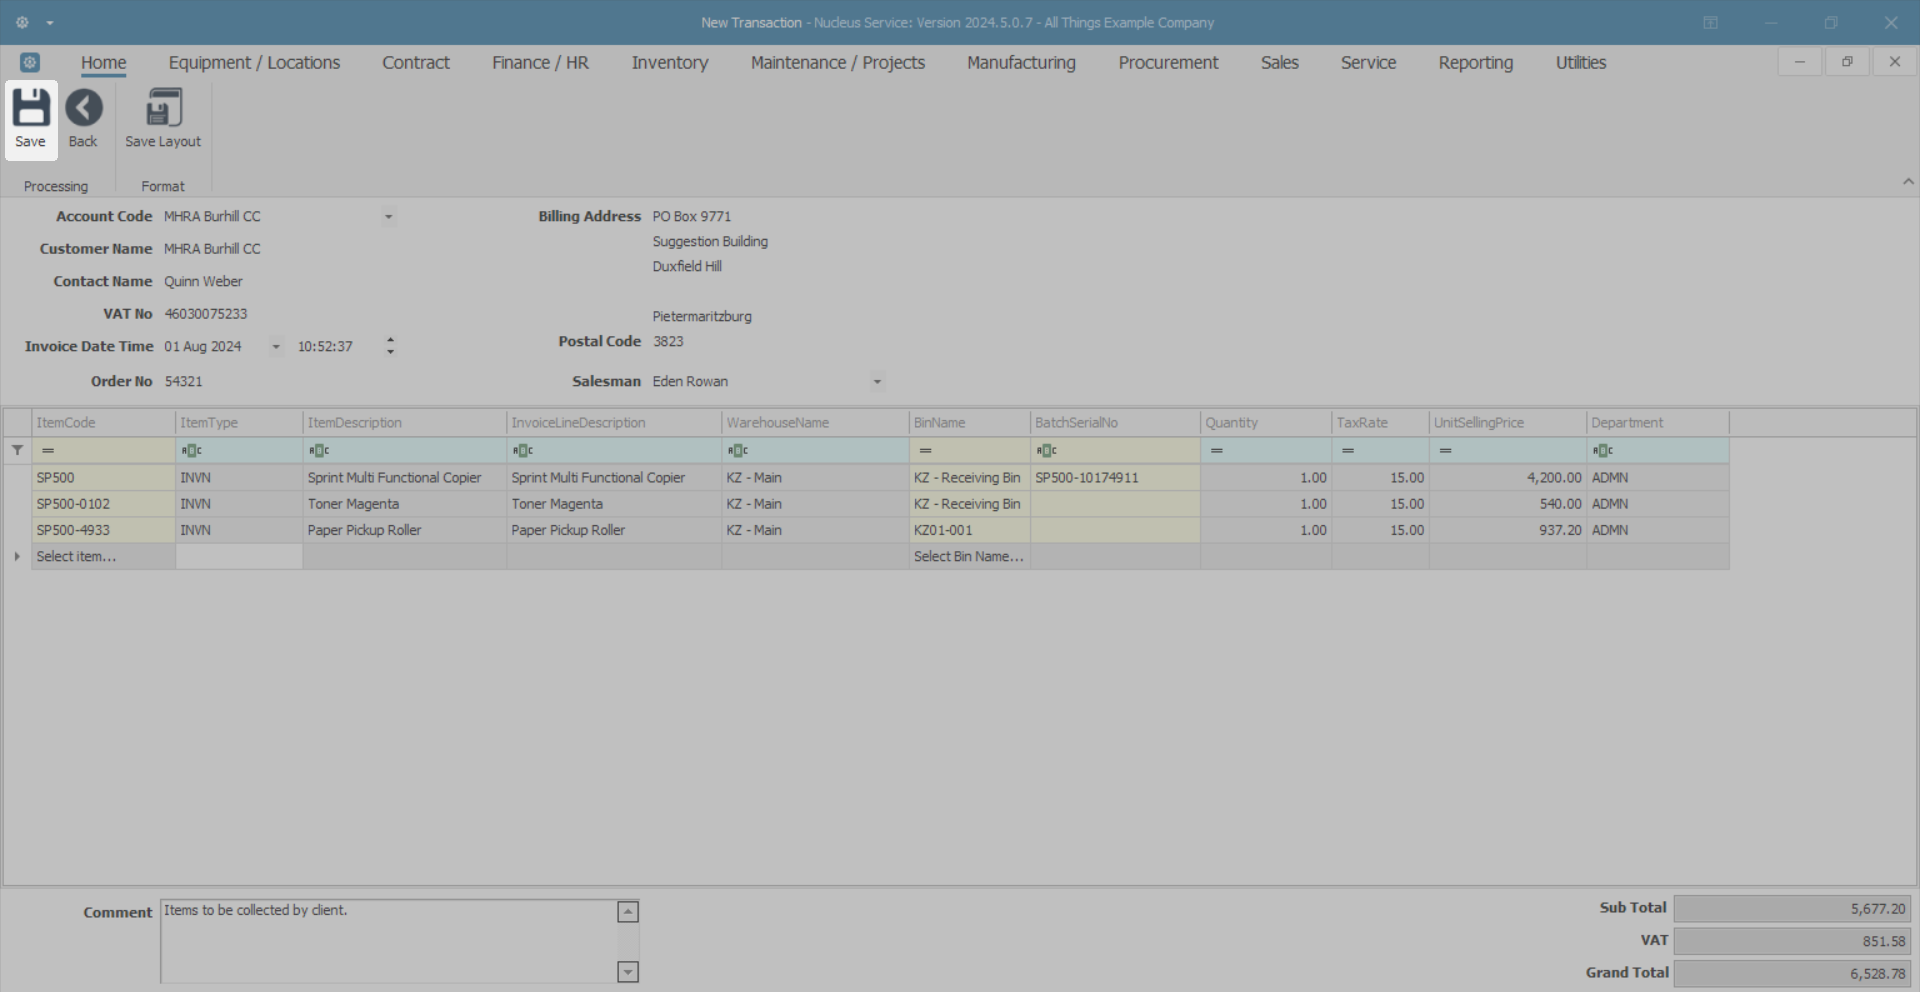
- You will return to the Invoices listing screen.
- You will receive the Customer Processing message to confirm -
- New invoice has been created : []
- Click on OK.
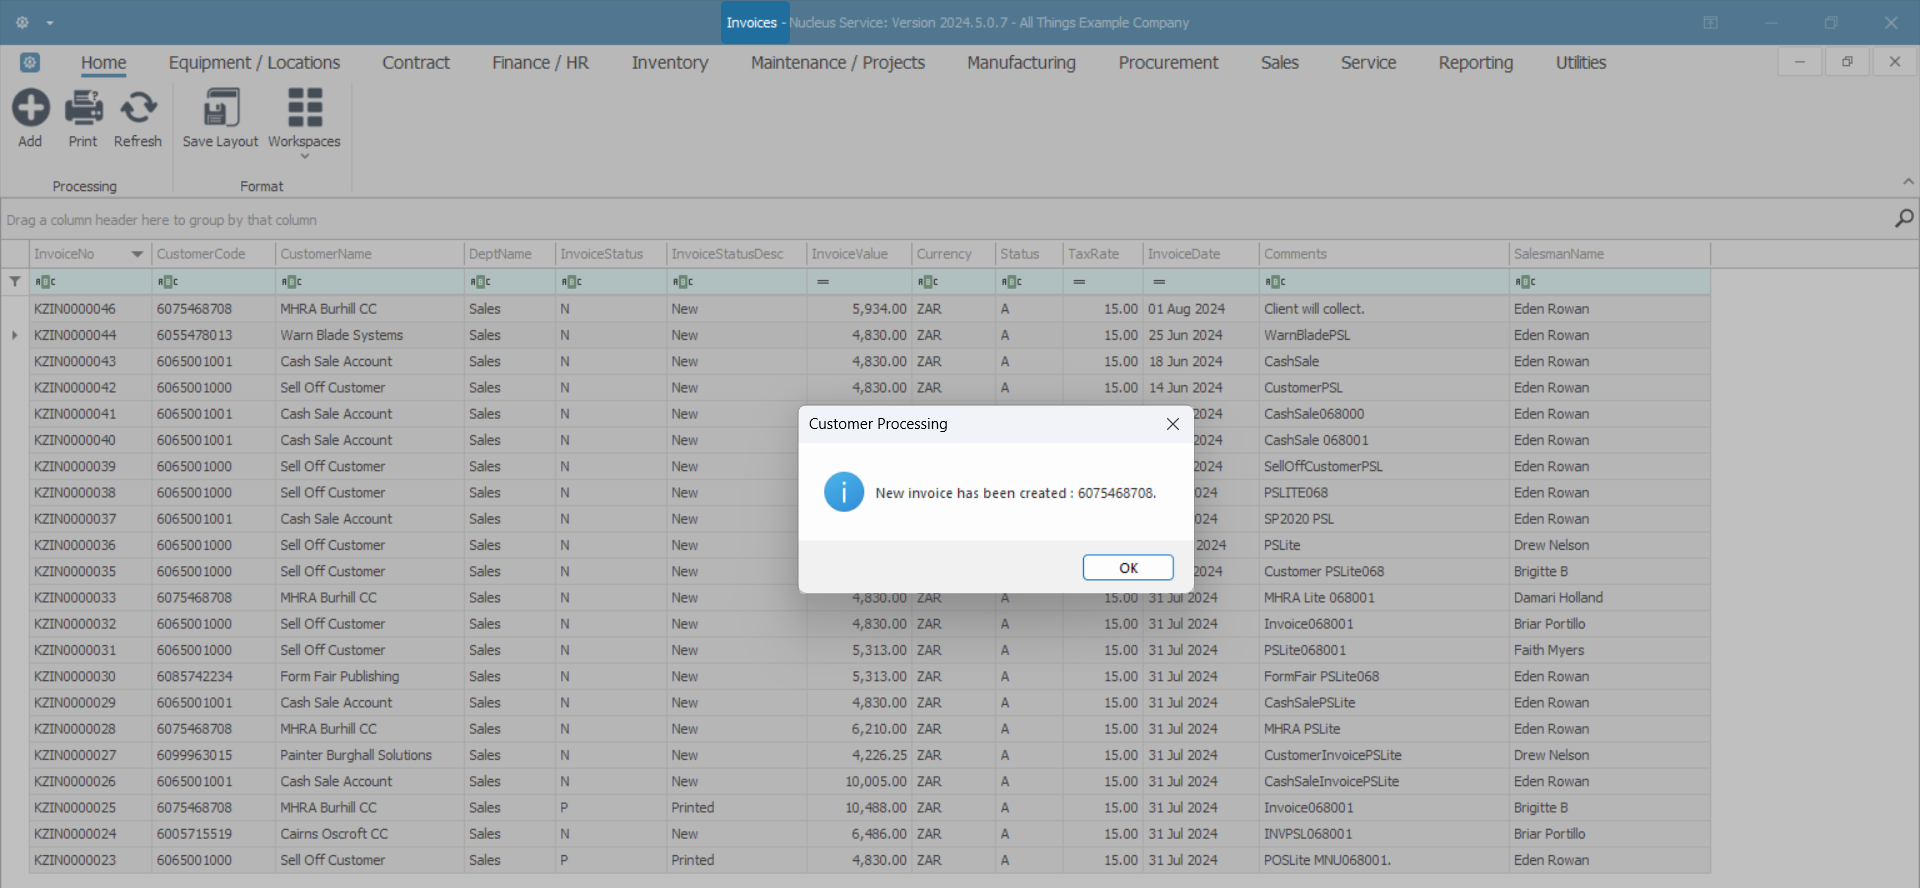
- The Invoices listing screen will be updated with the newly created POS Invoice.

MNU.068.001