We are currently updating our site; thank you for your patience.
CRM Customers
View / Print Credit Notes
In CRM, you can view and print Sales Credit Notes for your Customers.
However, it is important to note that Sales Credit Notes are created in BPO only.
| Ribbon Access: Webpage > http://[servername]:[portno]/BPOCRM/User.aspx |
In CRM, Credit Notes can only accessed from the selected Customer Home page so you will first need to navigate to the Customers listing page to select your customer.
Navigate to Customer Dashboard (Home page)
- In the Dashboard (Home page),
- Click on the Customers tile.
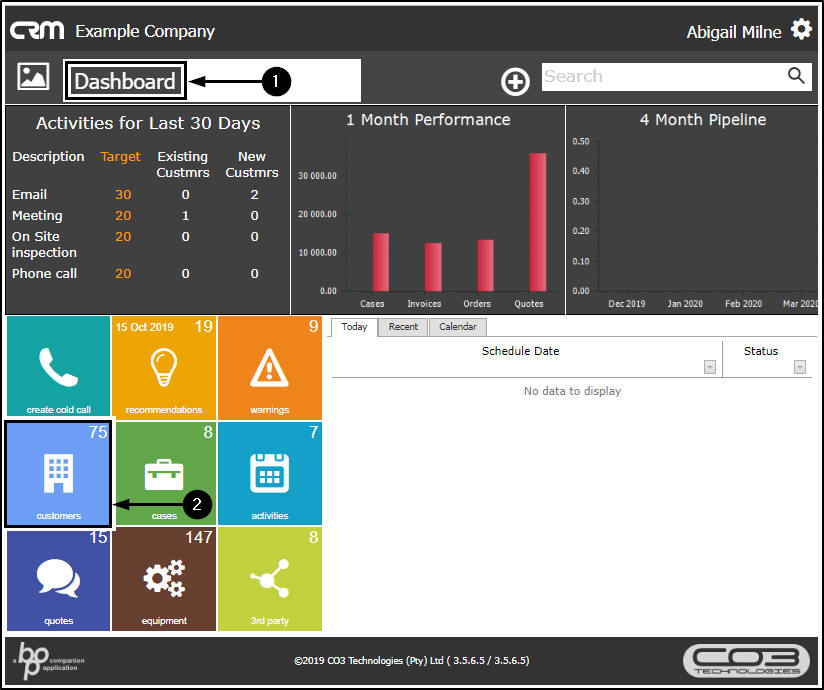
- The Customers listing page will open.
Search and Select Customer
- You can use the Page Reference field,
- the Filter Row or
- the Filter Text Box to search for your customer.
- Click on the selected Customer icon in the View column.
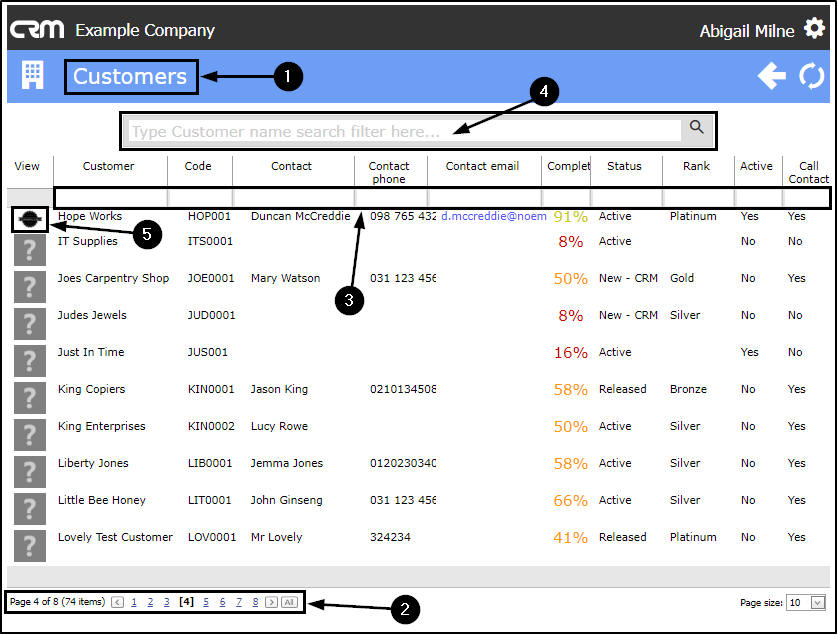
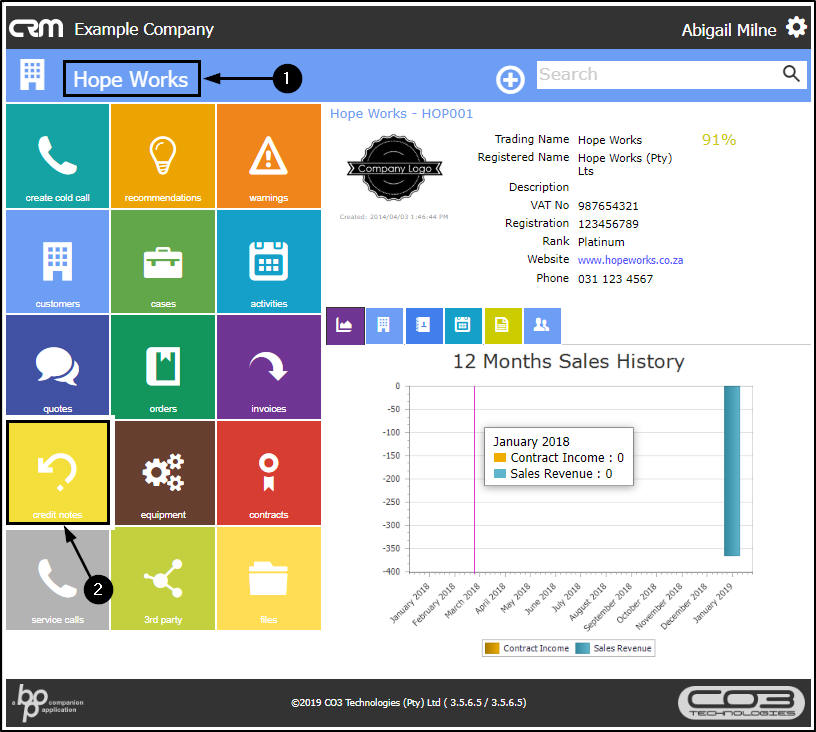
- The selected Customer Home page will open.
-
Note that for the
purpose of this manual, the
Customer Dashboard has been hidden from this page.
- Click on the Credit Notes tile.
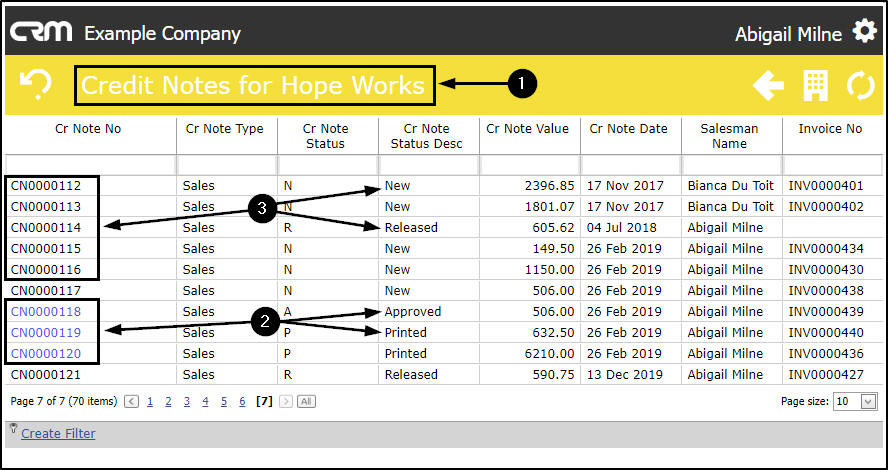
The Credit Notes for [selected Customer] listing page
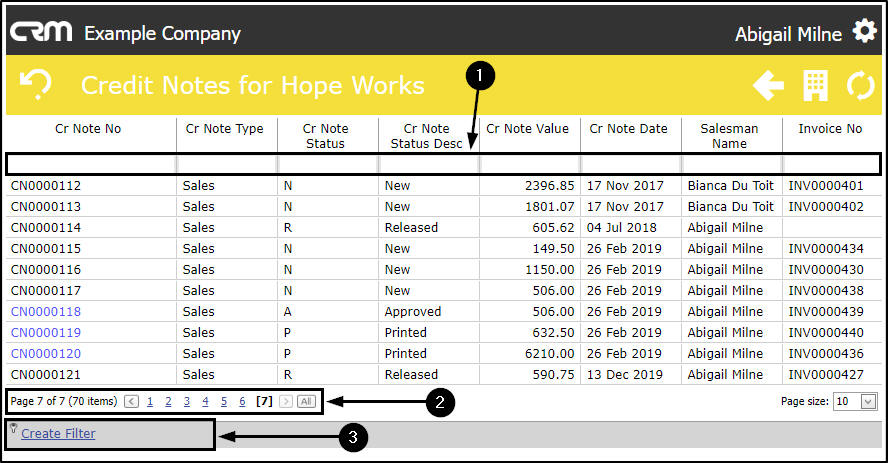
- The Credit Notes for [selected Customer] listing page will open.
- The blue highlighted Credit Note numbers can be selected to be viewed and/or printed. These Credit Notes are in either the Approved or Printed status in BPO.
- The black Credit Note numbers cannot be viewed or printed. They are in the New, Released or Declined status in BPO.
For more information about Credit Note status in BPO refer to Introduction to Credit Notes.
Search for and Select a Credit Note
- You can use the Filter Row,
- the Page Reference field, or
- the Create Filter row to search for a specific Credit Note.
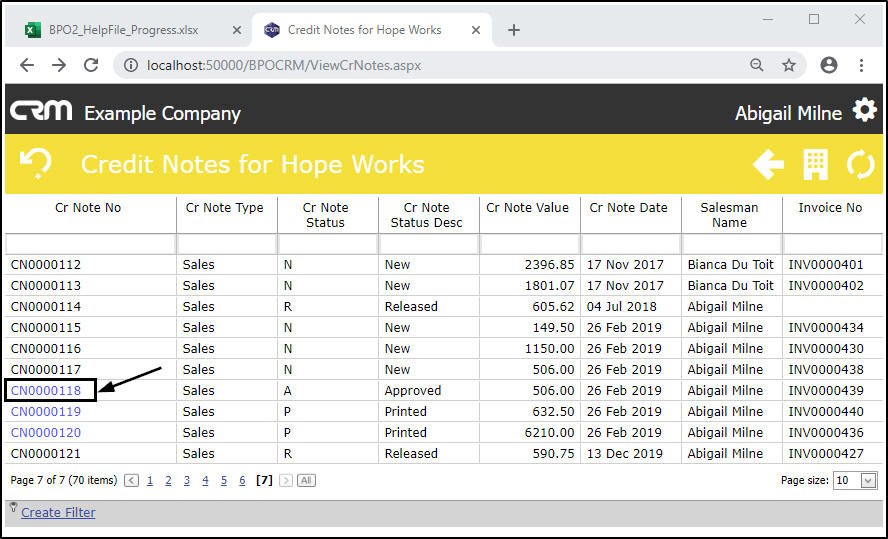
View, Download or Print Customer Credit Note
- In the Credit Note No. column, click on a blue number of the Credit Note that you wish to View, Print or Download .
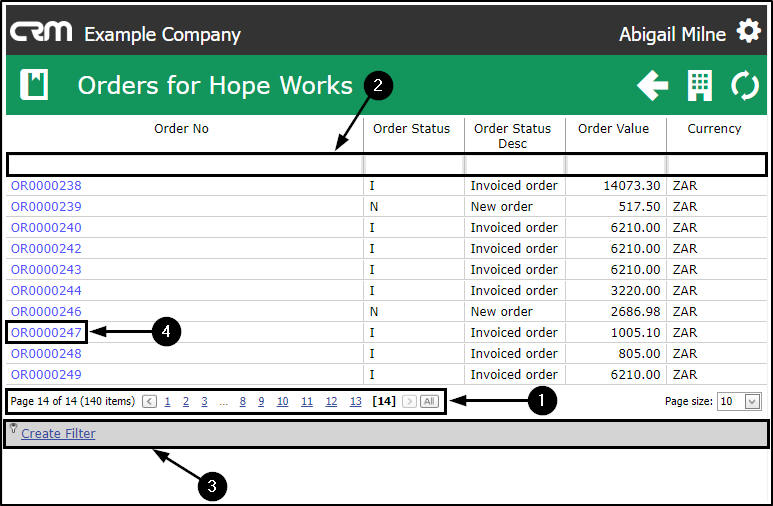
- In the Order No. column, click on the blue number of the Order that you wish to View, Print or Download .
- The Report Viewer and Emailer page will open.
- The selected Credit Note will be displayed.
- Here you can Download the Credit Note and/or
- Print the Credit Note.
Email Credit Note
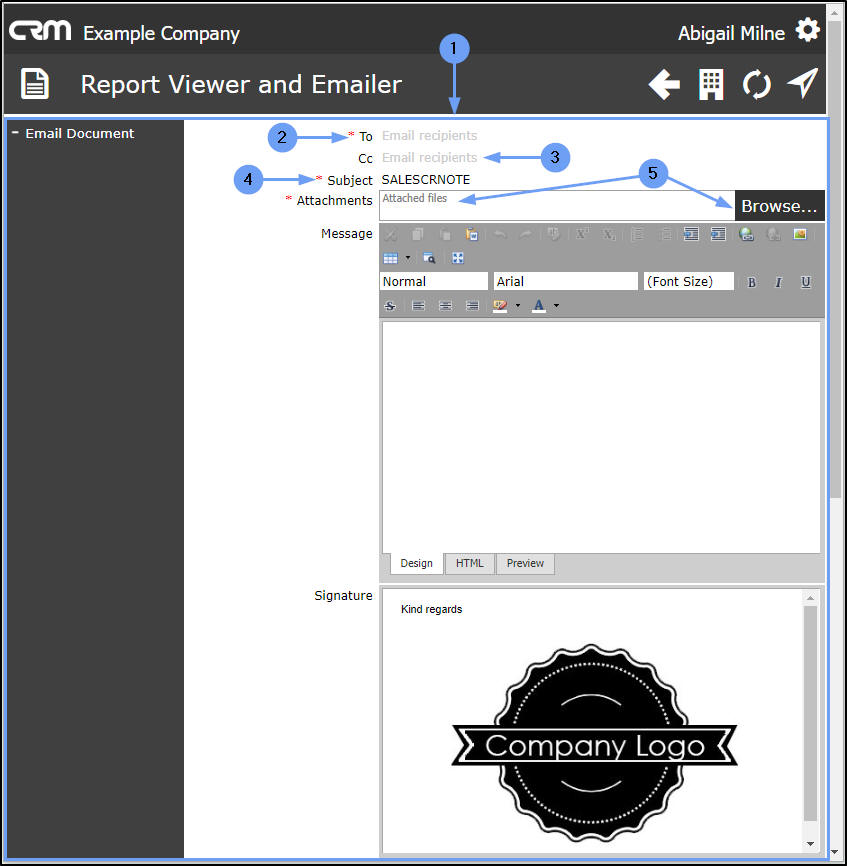
- Click on the expand icon [ + ] on the Email Document tab.
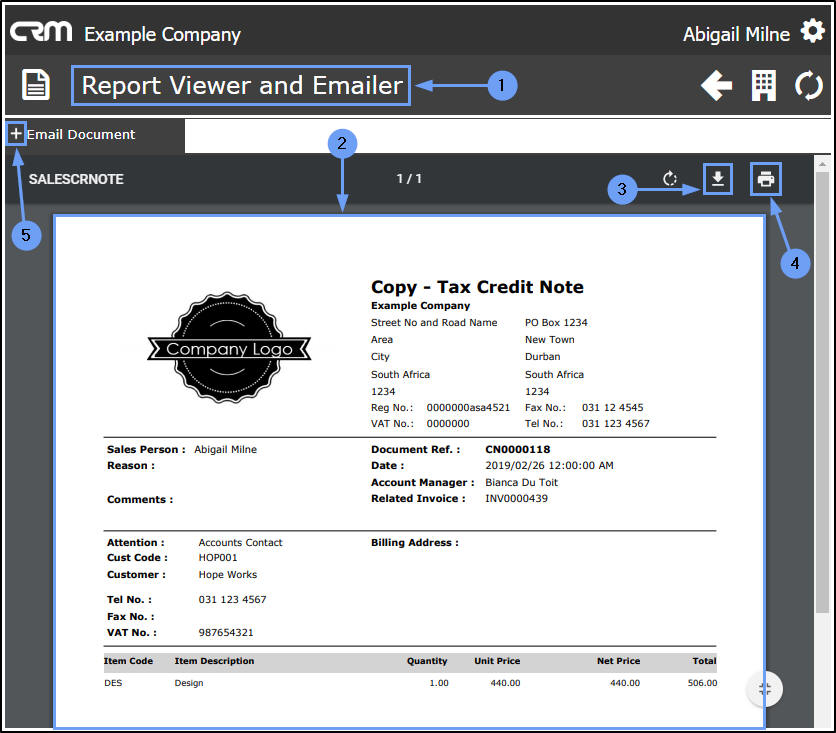
- The Email Document frame will be expanded.
-
Check and/or add the following details, as necessary:
- To: Either click in the field and select the preferred contact from the list, or type in the contact email address.
- Cc: Here, you can add other email recipients, if applicable.
- Either click in the field and select customer contacts from the list, or type in additional addresses as noted above (separated by a semi-colon and a space).
- Subject: This field will auto populate with SALESCRNOTE but you can edit this, if required.
Add an Attachment
You can add other documents, as attachments, if required.
- Attachments: Click on Browse.
- The Open screen will pop up.
- Search for and select the file you wish to link to this Order.
- Click on Open .
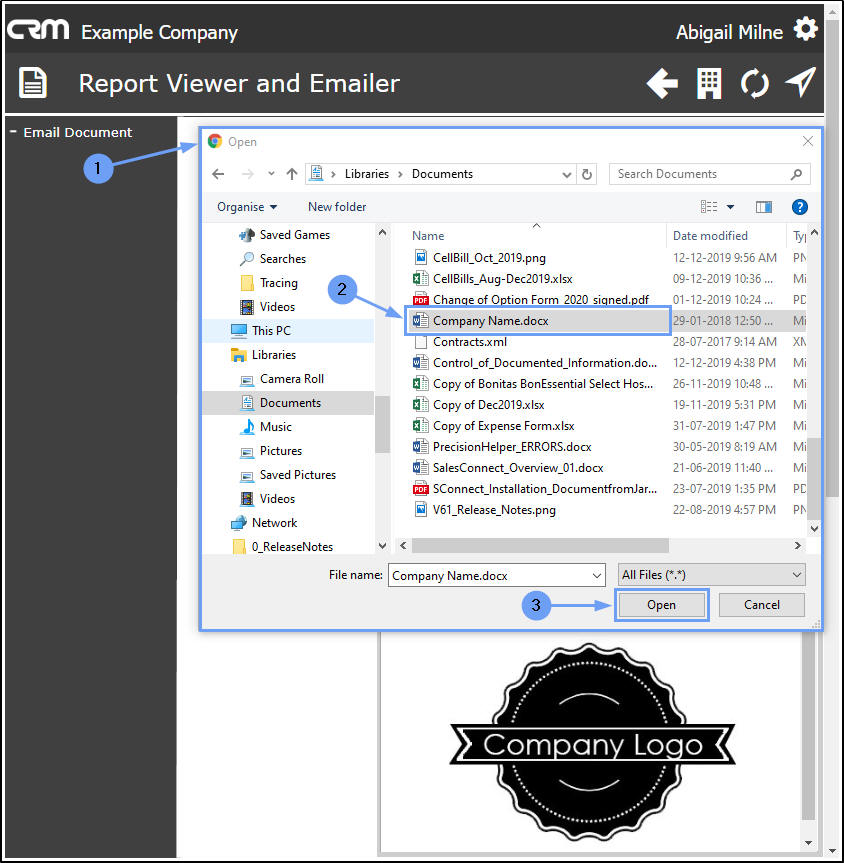
- The file will now be attached to the email.
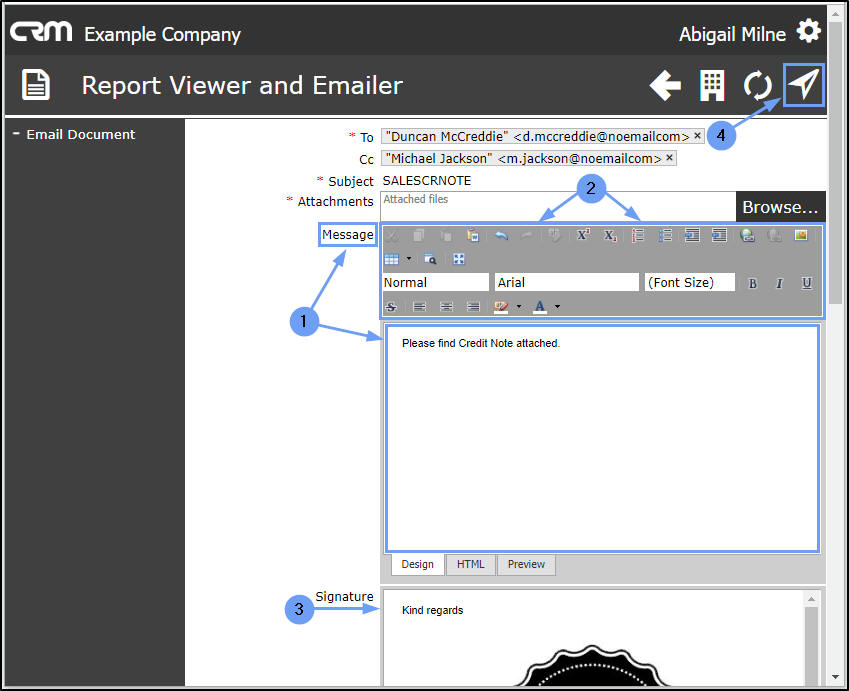
- You can delete the attachment if required by clicking on either of the Delete icons.

- Type a relevant message in the Message body.
- The Message tool bar can be used to customise your email message.
- Signature: If you have a Signature configured in CRM - your Signature will pull through here, otherwise the Company default CRM mail signature will pull through.
- Click on the Send icon.
- A message box will pop up informing you of the status of the sent email.
- Click on Back .
- *Image*********************
- You will return to the Credit Notes for [selected customer] listing page.
- Select another Credit Note to View, Download, Print or Email, if required.
- Click on the Customers icon to return to the Customer Dashboard (Customer Home page).
- Click on the CRM icon to return to the Dashboard (Home page).
- *Image*************************
![]()
CRM.002.009