We are currently updating our site; thank you for your patience.
Sales Connect
Add Notes / Comments to an Activity
You can link notes directly to an activity in Sales Connect. These notes will pull through to CRM where they can be viewed and deleted or edited. Any changes made in CRM or in Sales Connect will reflect in the other respective application.
Select the Activity
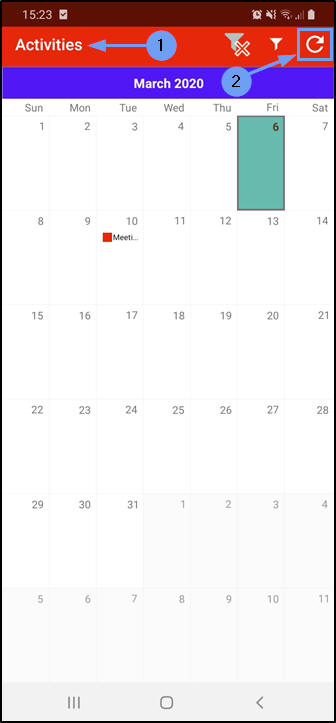
- After initial login to Sales Connect the Activities screen will open.
- This will display a calendar view of the current month.
- Swipe left to view future months.
- Swipe right to view previous months.
- Tap on the date that contains the Activity that you wish to link a note to.
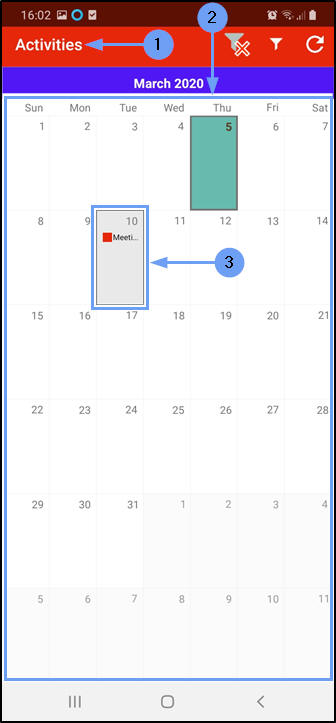
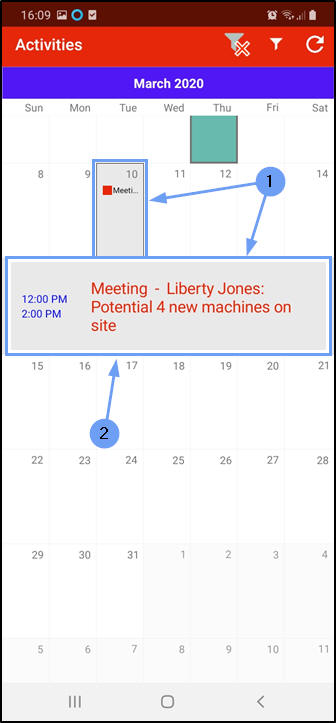
- A text box will pop up with more information regarding the activity.
- Tap on this text box.
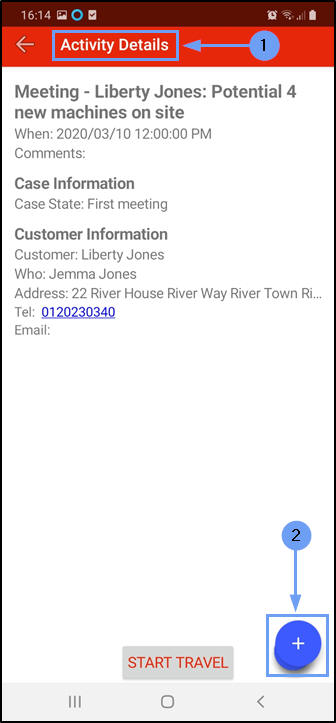
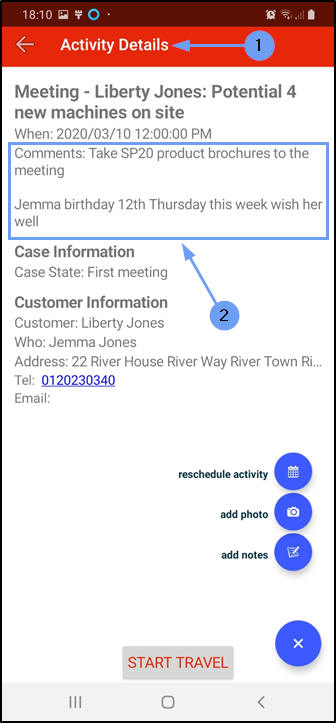
The Activity Details Screen
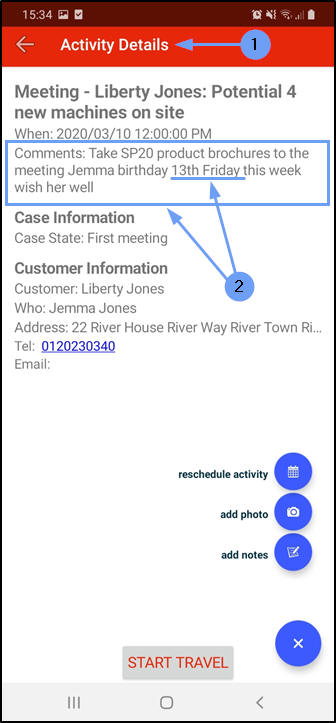
- The Activity Details screen will be displayed.
- Tap on the Expand icon.
The Activity Edit Buttons
- The screen will now display 3 editing buttons:
- reschedule activity
- add photo
- add notes
Add Note
- Tap on add notes.

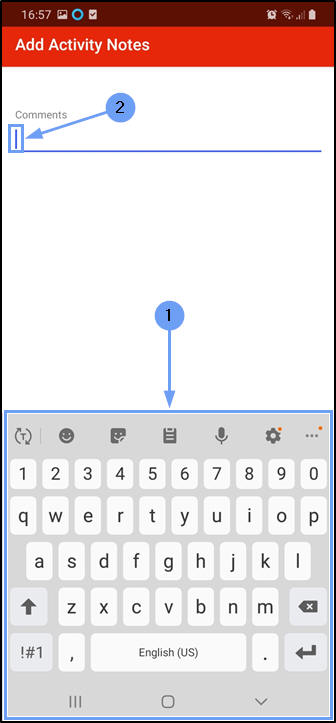
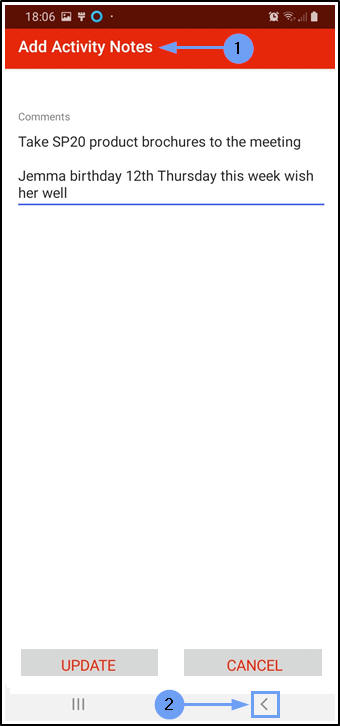
The Add Activity Notes Screen
- The Add Activity Notes screen will open.
- Tap in the Comments section.
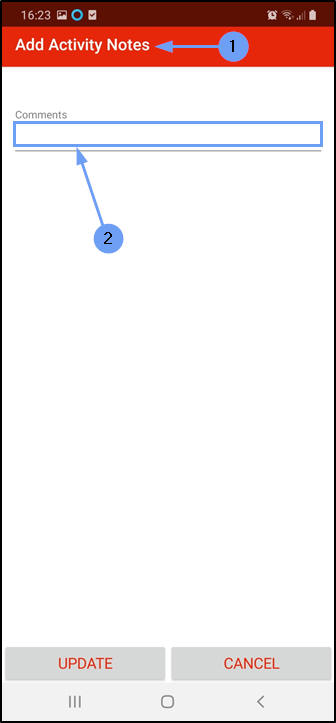
- Your device's keyboard will display on the screen.
- A cursor will appear in the Comments section.
You can now start typing in your note.
Notes (Comments) Content
Notes (comments) can be:
- Related directly to the Activity:
- e.g. "Take SP20 product brochures to the meeting"
- Of a more personal nature - to prompt you to build good relationship with your customer:
- e.g. "[Customer's name] birthday this week. Be sure to acknowledge this"
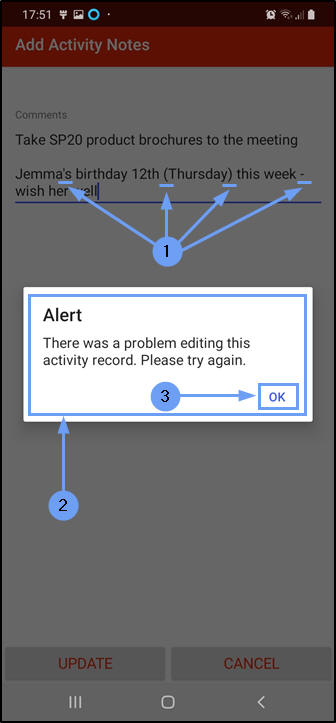
Note Content Alert
- Comments cannot contain text other than letters and numbers.
- Any other text symbols and characters will cause this Alert error to appear on the screen when you try to save/update the note.
- Tap on OK and then delete the unsupported characters in your Comments section.
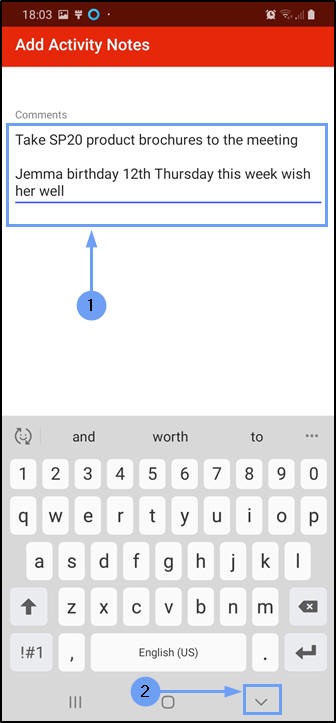
Close the Keypad
- When you have finished adding the Note (Comment) (and have removed any unsupported characters),
- Close the device keyboard.
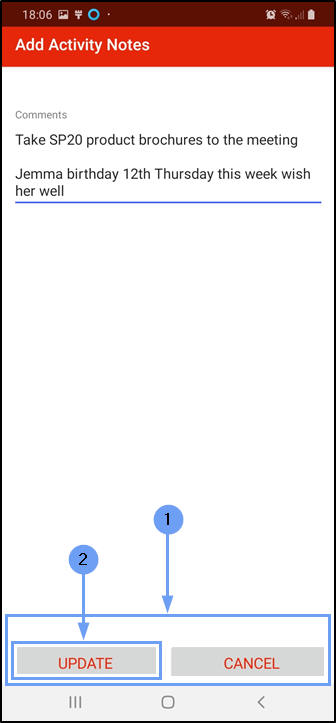
Save / Update Notes
- You will be able to view the Update and Cancel buttons again.
- Tap on Update.
View Notes in the Activity Details Screen
- You will return to the Activity Details screen.
- The added notes can now be viewed in the Comments section.
View Activity Notes in CRM
These notes will pull through to your CRM.
- In your CRM Dashboard,
- click on the Activities tile.
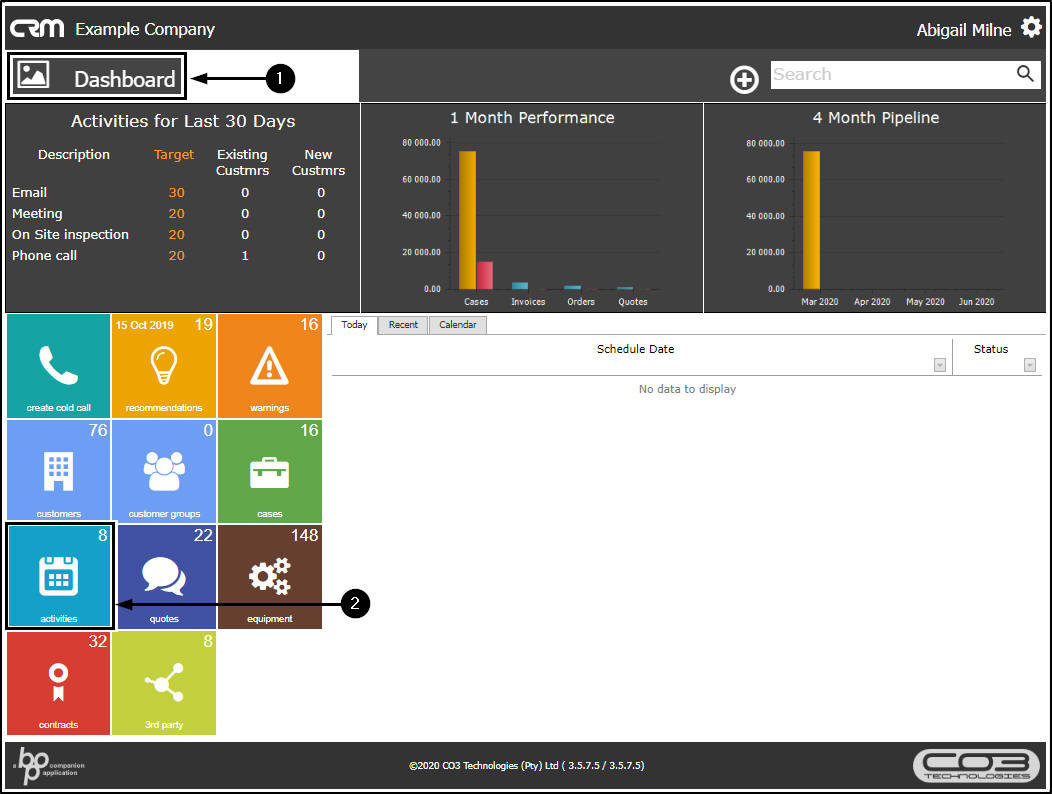
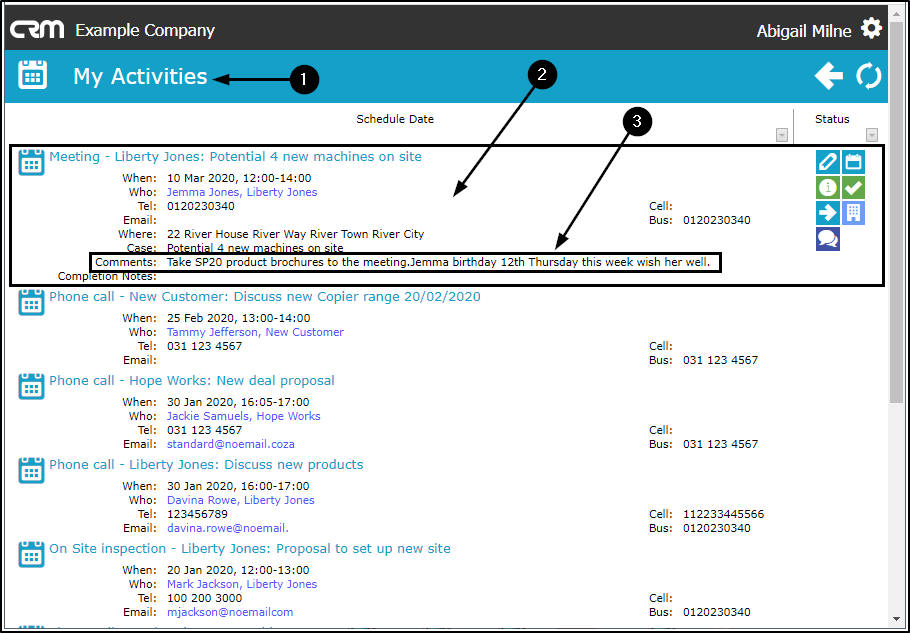
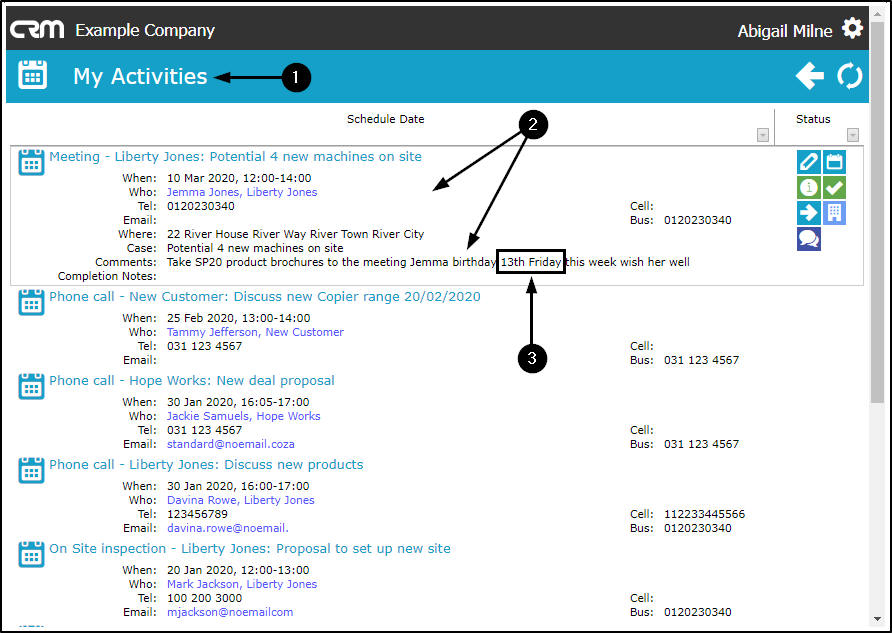
- The My Activities page will open.
- Single click anywhere on the sameActivity that you added the note to.
- The Activity frame will expand to display the Comments section. Here you can view the added note.
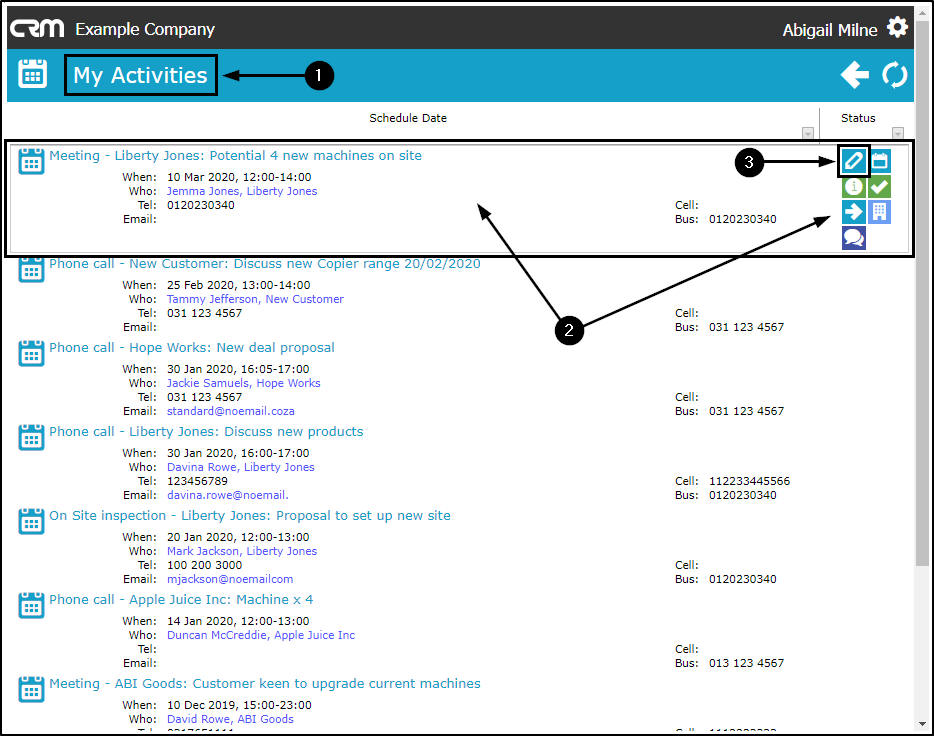
Edit Activity Notes in CRM
You can edit these Activity notes directly in CRM but for any changes to reflect in Sales Connect, you will need to go to the Activities screen in your device and tap on Refresh.
- In the My Activities page,
- Hover over the same Activity that you added the note to, until the Action Buttons appear.
- Click on the View/Edit this Activity button.
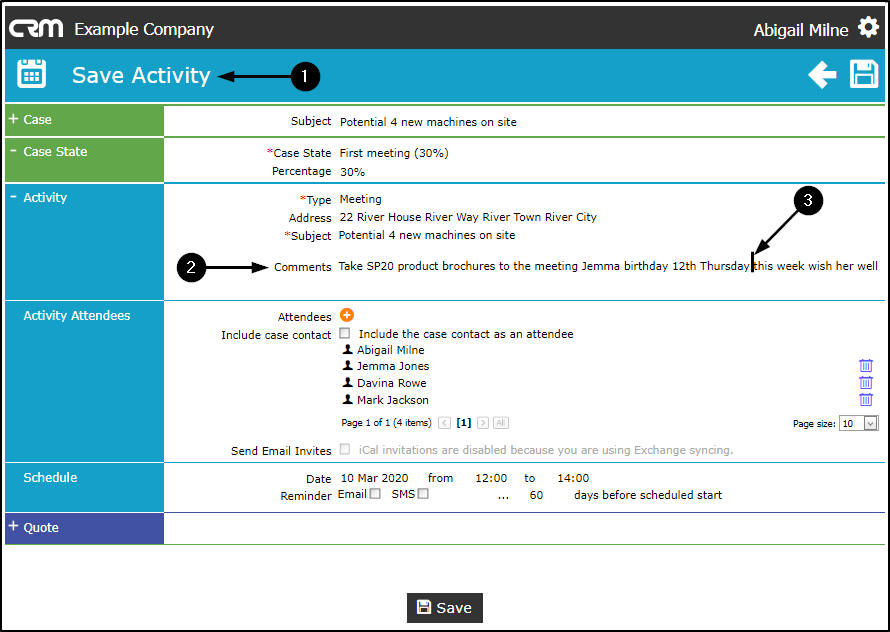
- The Save Activity page will open.
- Go to the Comments section.
- Place your cursor next to the part of the comment that you wish to either add text to or remove text from.
Save Changes
- When you are happy with your changes (in this example, the birth date and day has been changed),
- Click on Save.
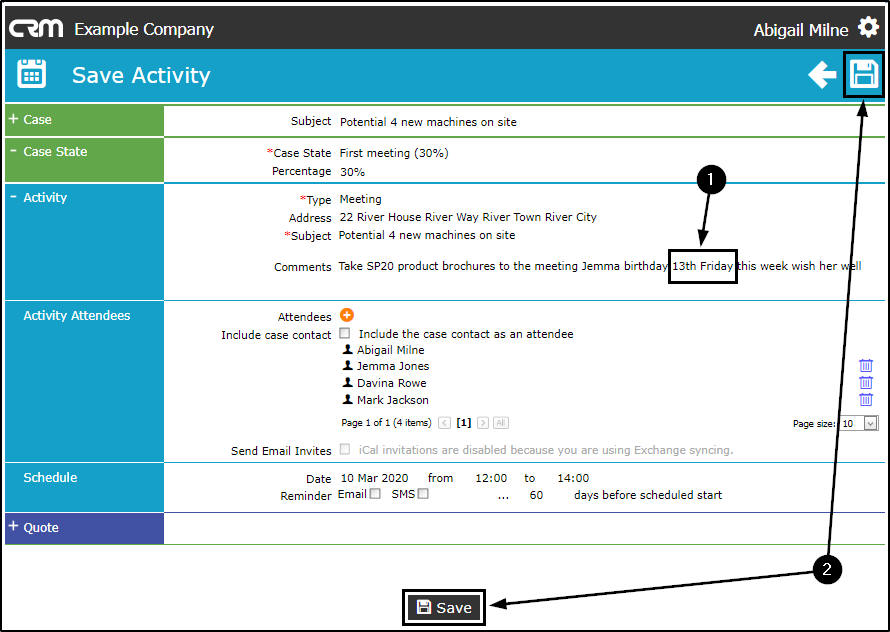
- You will return to the My Activities page.
- Click on the Activity to expand the frame and display the Comments section.
- You can see the contents have been updated.
Remember: To see these changes in Sales Connect, you will need to go to the Activities screen and tap on Refresh.
View Changes in Sales Connect
- If you are already in the Add Activity Notes screen,
- you will need to go Back to the Activity Details screen and then the Activities screen to be able to Refresh the app.
- In the Activity Details screen,
- tap on Back to return to the to the Activities screen.

- In the Activities screen,
- you can now tap on Refresh .
- Navigate back to Activity Details screen.
- The Comments will have updated to match the changes made in CRM.
MNU.160.006