We are currently updating our site; thank you for your patience.
Sales Connect
Link Image or Photo to an Activity
You can link an image directly to an Activity Case in Sales Connect. This image will pull through to the Case section of the Save Activity page in CRM where it can be downloaded, viewed, edited or deleted, as required.
Select the Activity
- After initial login to Sales Connect the Activities screen will open.
- This will display a calendar view of the current month.
- Swipe left to view future months.
- Swipe right to view previous months.
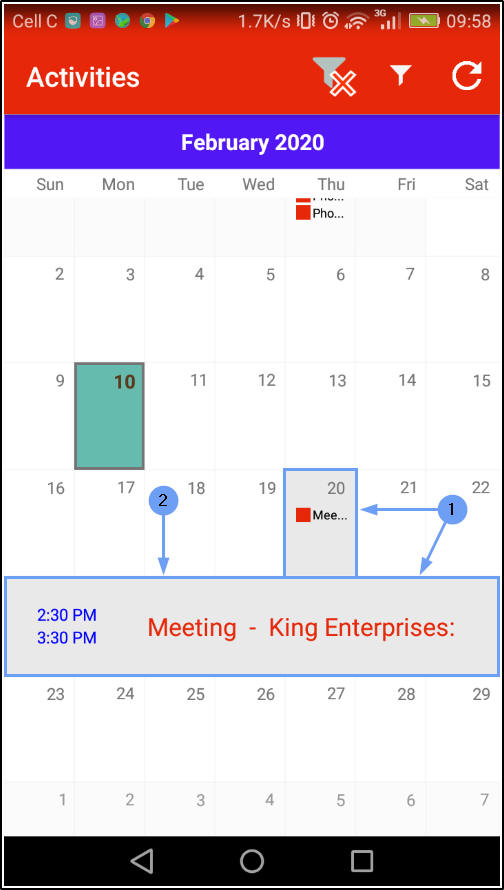
- Tap on the date that contains the Activity that you wish to link an image to.
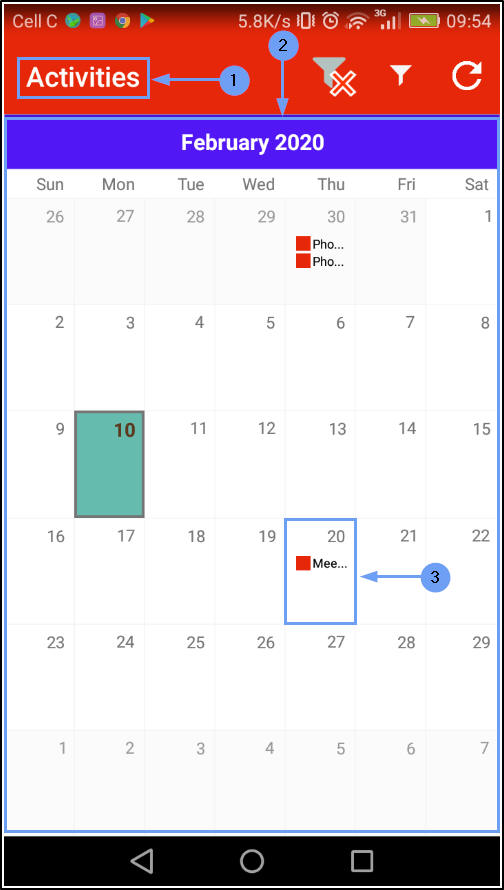
- A text box will pop up with more information regarding the activity.
- Tap on this text box.
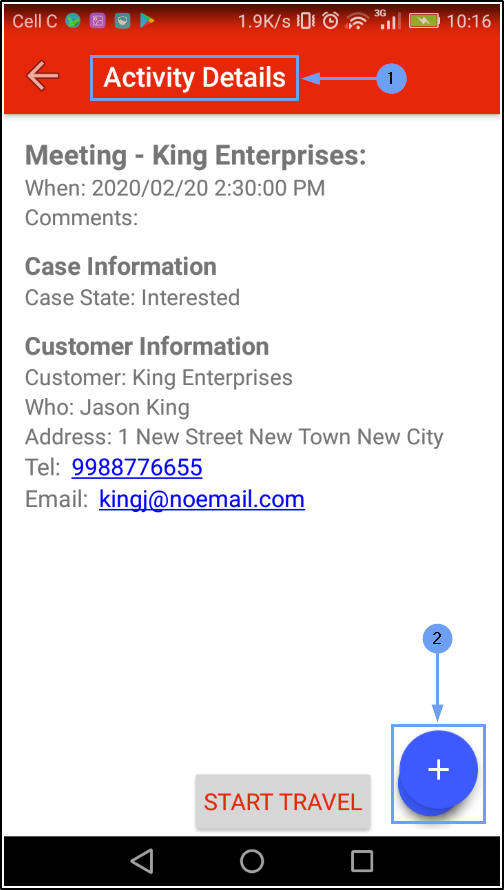
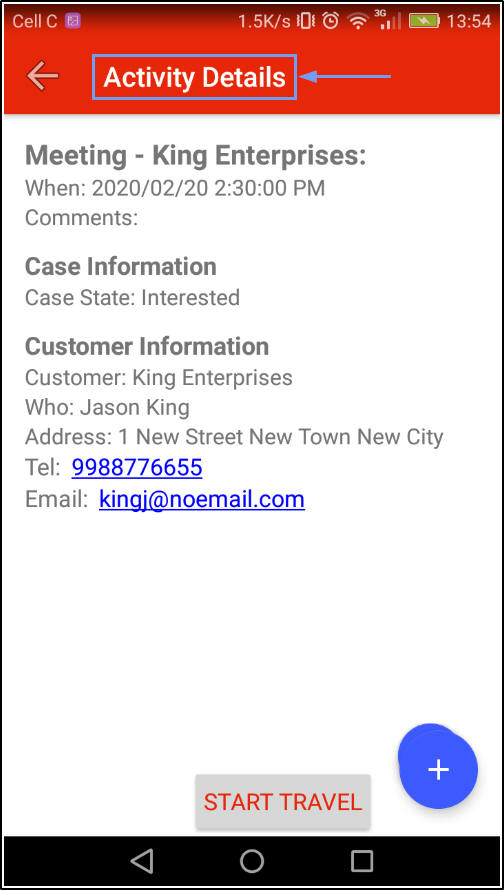
The Activity Details Screen
- The Activity Details screen will be displayed.
- Tap on the Expand icon.
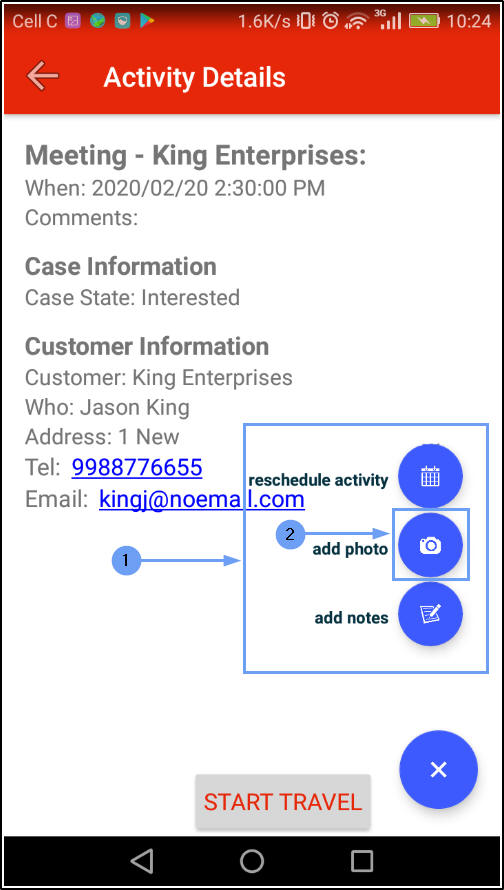
The Activity Edit Buttons
- The screen will now display 3 editing buttons:
- reschedule activity
- add photo
- add notes
Add Photo
- Tap on add photo.
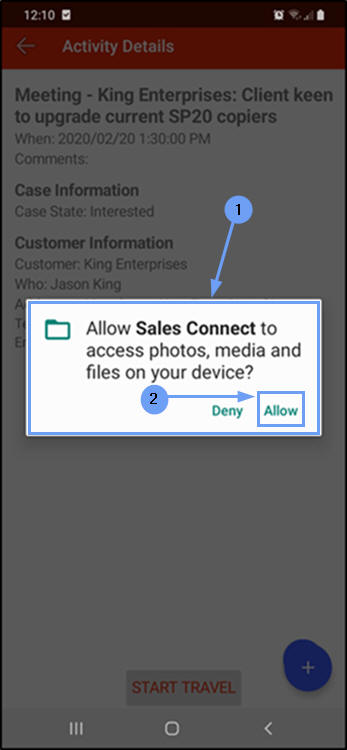
- An Access message box may pop up in this screen asking;
- Allow Sales Connect to access photos, media and files on your device?
- Tap on Allow.
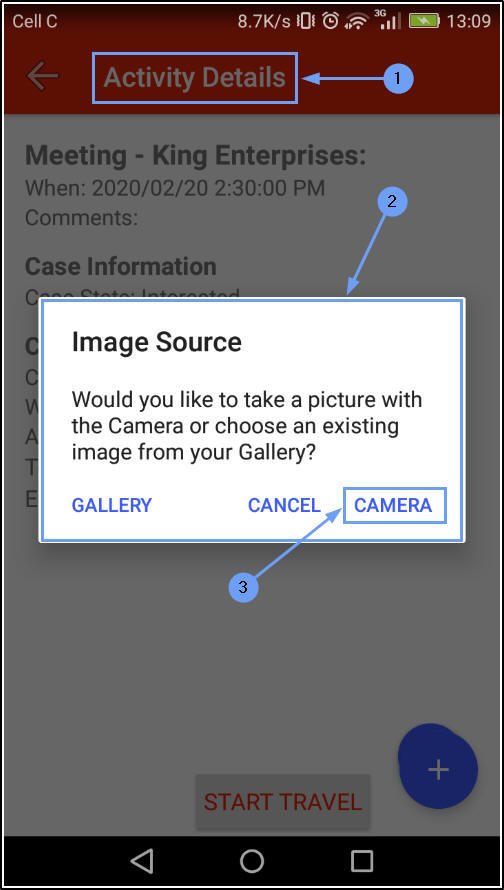
i. Select Image Source - Gallery
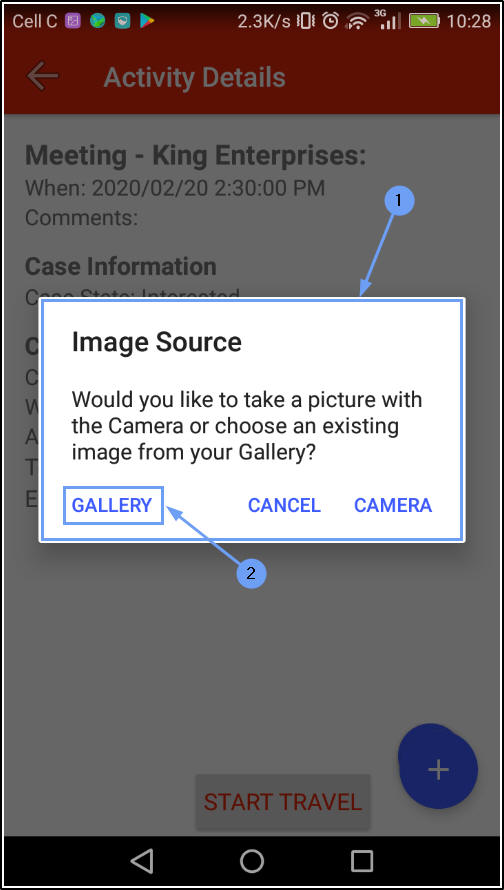
- An Image Source message box will pop up asking;
- Would you like to take a picture with the Camera or choose an existing image from your Gallery?
- Tap on Gallery.
- For convenience, the Recent screen will open with the most recently taken images displayed.
ii. Select Image from Other Sources
-
You will have the option to select images from other sources depending on the contents of your device.
- Tap on the menu button.
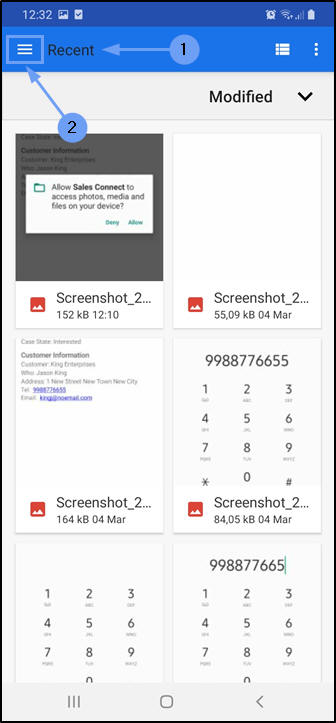
- The Open from screen will be displayed.
- There are 4 different image sources linked to this particular device:
- Images
- Recent
- Downloads and
- SD card
- In this example, Images is selected.
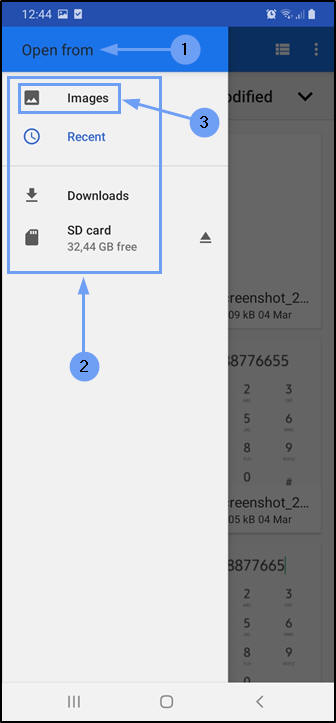
- The Images screen will open.
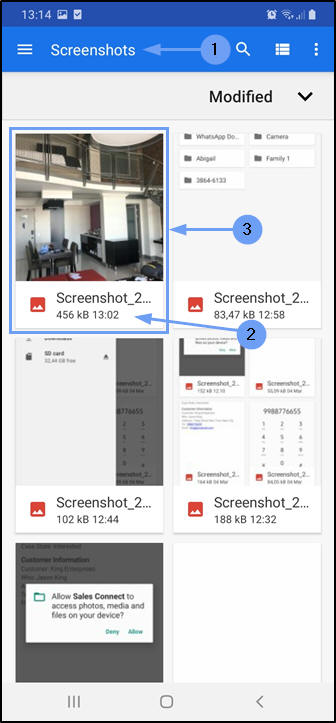
Select Image Folder
-
You will have the option to select images from different folders - depending on the contents of your device.
- Tap on the selected folder - in this example, Screenshots.

- The Screenshots screen will open with the most recent screenshots - that have been uploaded to your device - displayed first.
- The Time and File Size will be listed at the foot of each image.
Select Image
- Tap on the image that you wish to link to your selected activity.
- Process under construction...
- Text...
- Text...
- Process under construction...
- Text...
- Text...
![]()
- Process under construction... .
- Text...
- Text...
![]() iii. Select Image Source - Camera
iii. Select Image Source - Camera
- In the Activity Details screen, after you have selected add photo,
- the Image Source message box will pop up.
- Select Camera.
- A message box may pop up in this screen asking;
- Allow Sales Connect to access photos, media and files on your device?
- Tap on Allow.
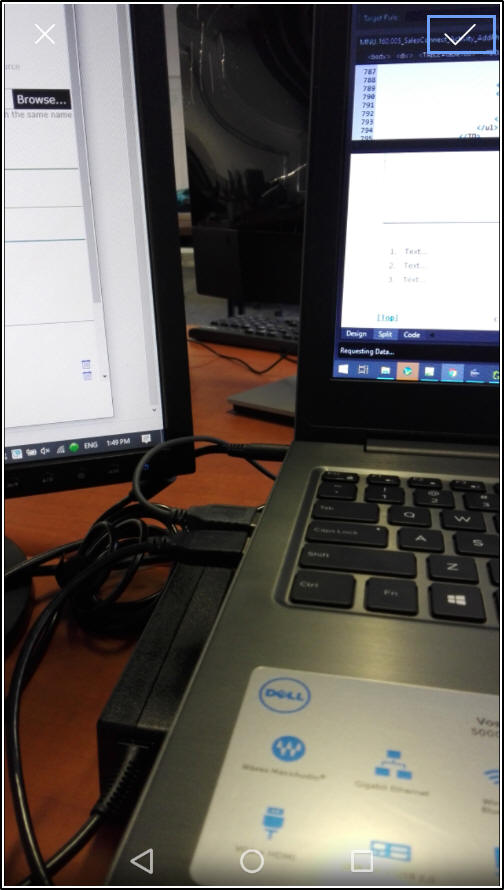
The Camera Capture Screen
- The Capture screen will open on your device.
- When you have selected the scene that you wish to record/photograph, tap on Capture.

- Your captured image will be displayed on the screen.
Save Image
- Tap on the Save/OK button (specific to your device).
- Your image will be linked to the selected activity in CRM and you will return to the Activity Details screen.
View Linked Image in CRM
- Log in to your CRM Dashboard.
- Select the Activities tile.
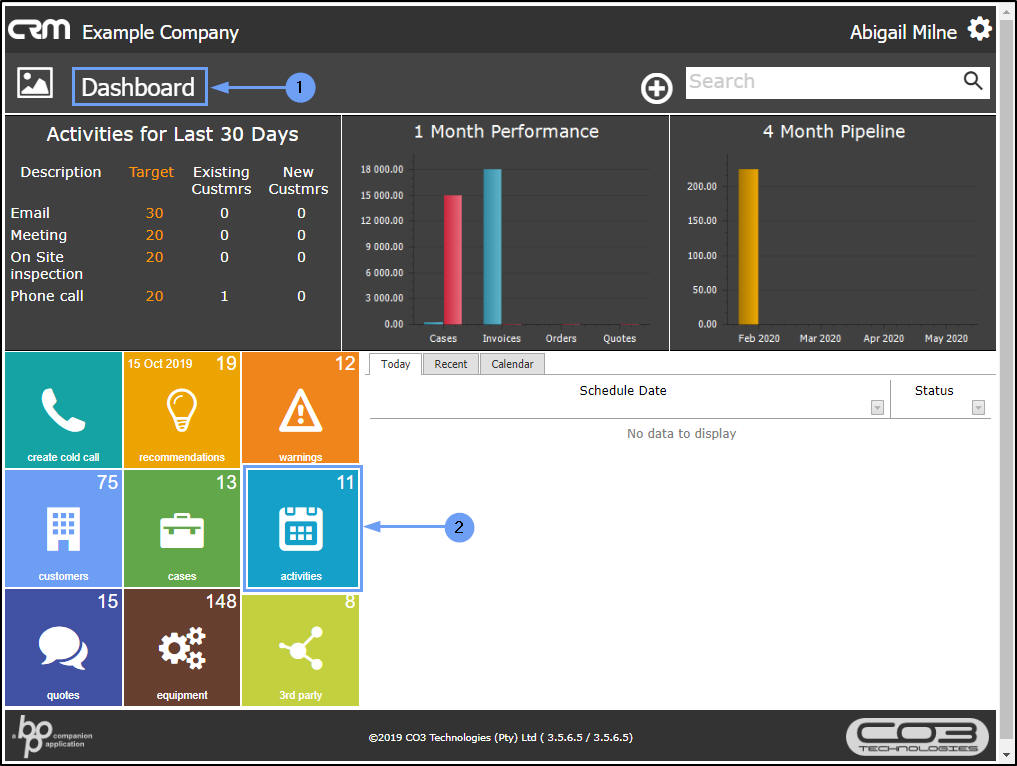
- The My Activities page will open.
- Hover over the Activity (that is linked to the image) until the Actions buttons are displayed.
- Select View/Edit this Activity.

- The Save Activity page will open.
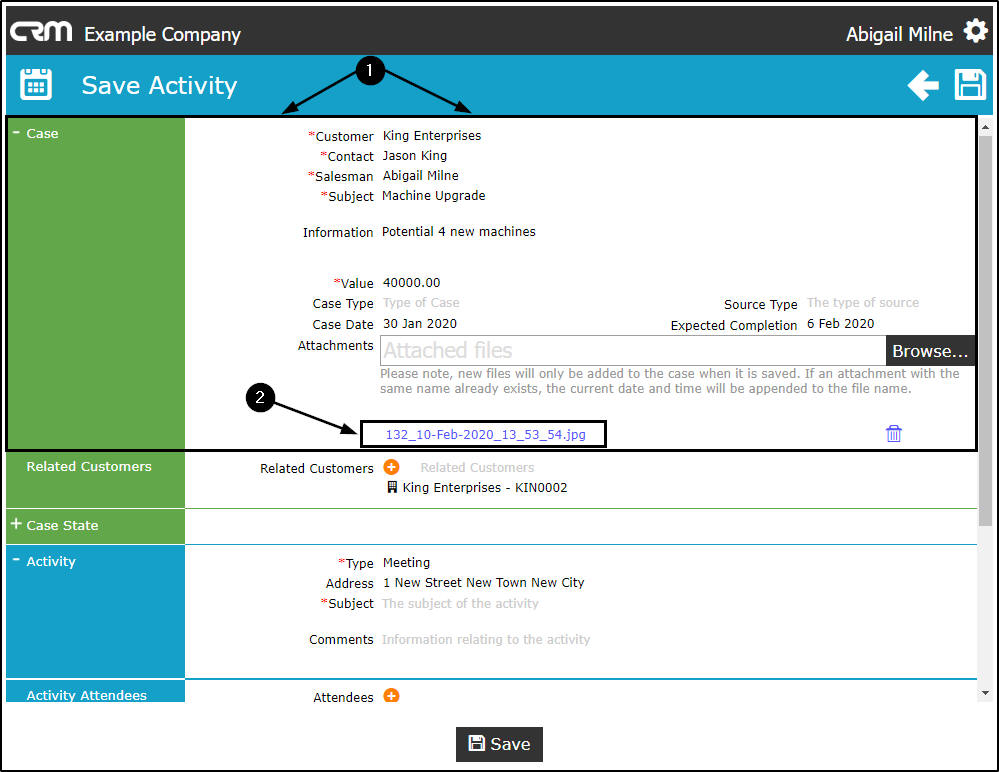
- Expand the Case section.
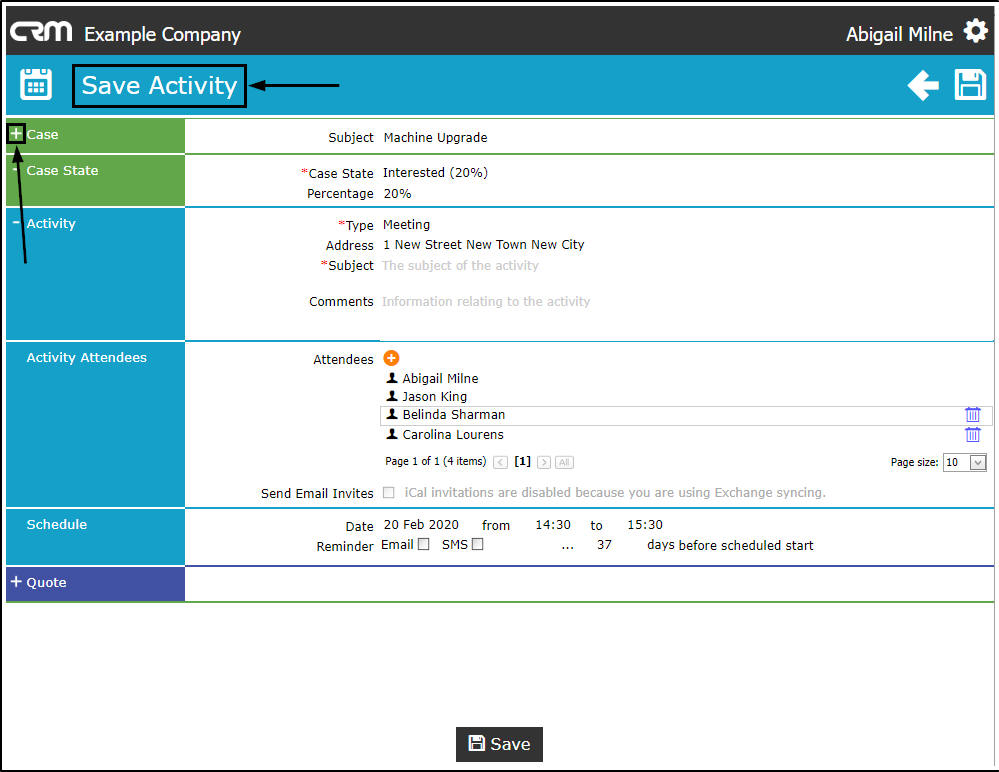
- You can now view more details regarding the Case.
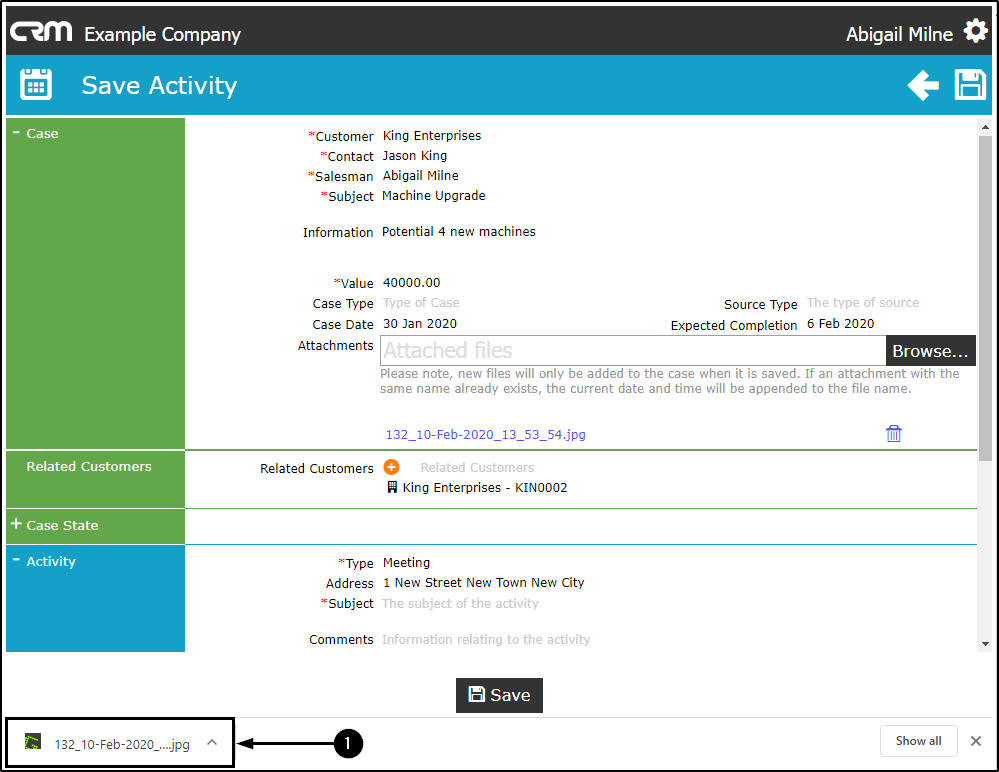
- Go to the Attachments section.
- You can see that a file is linked to this activity, click on the file name.
- In the bottom left of the page, a download notification box will appear. Click on this box.
- You will be prompted to select a method of opening the image file.
- In this example, Greenshot image editor is selected.
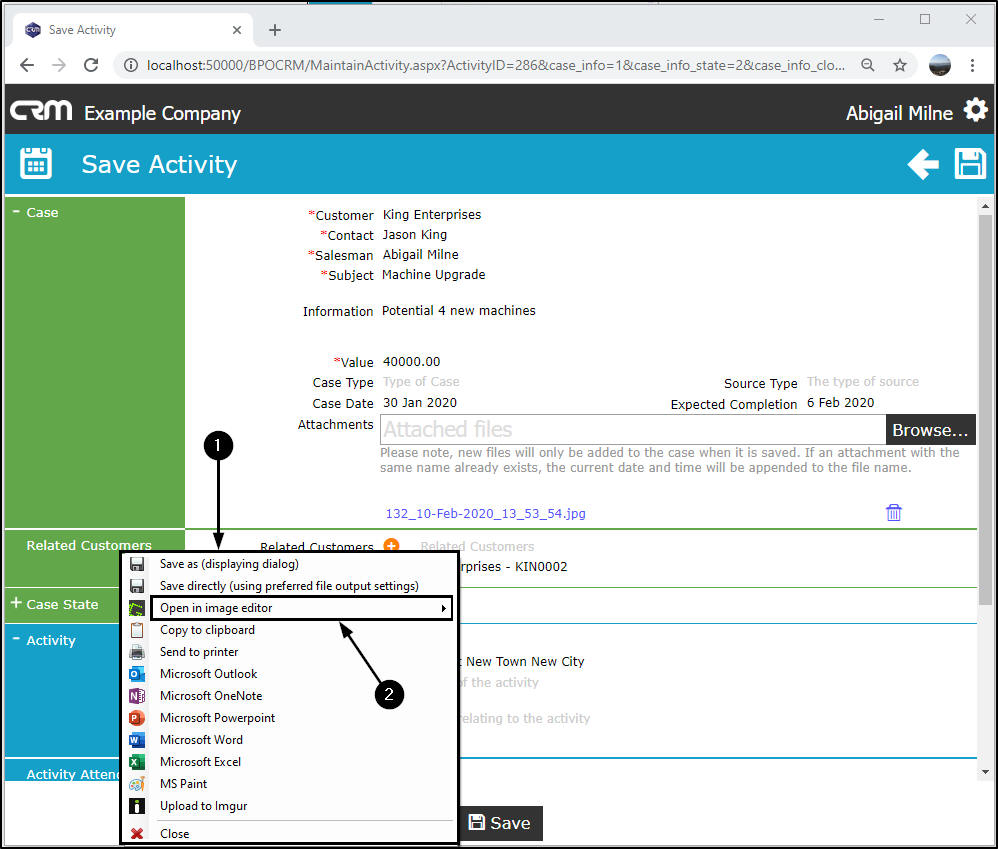
- The image editor will open.
- You can now view your image.

MNU.160.005