Inventory
Part Build Up
The 'Part Build Up' process will, within one transaction, adjust:
- The unit parts out of stock (for example, A4 Plastic Cover, A4 Cardboard Backing, A4 Note Paper).
- The whole unit into stock (for example, A4 Architects Drawing Book).
- If you are using the Stock Batch Tracking option, make sure to select the Batch Number for C-Class (non-serialised) items when adjusting stock. For more details, refer to Inventory: Stock Batch Tracking.
Ribbon Select Inventory > Adjustments
- The Adjustment Requests listing screen will be displayed.
- Select the Site.
- In this image KwaZulu-Natal has been selected.
- The State filter will default to 'New' upon opening, this does not need to be changed in order to continue with this process.
- Click on Add.
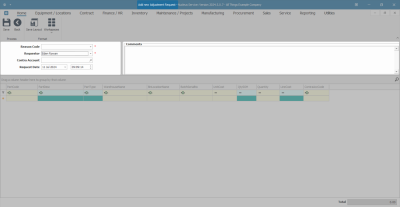
- The Add new Adjustment Request screen will be displayed.
New Adjustment Request Details
- Reason Code: Click on the drop-down arrow and select from the list, the code you wish to link to this request.
- Requestor: This will auto populate with the person currently logged on to the system. You can click on the drop-down arrow and select from the list, an alternative person if required.
- Contra Account: Click on the search icon and select from the Select a contra account for this adjustment pop up screen, the account you wish to link this adjustment to.
- Request Date and Time:This will auto populate with the current date and time.
- Date: You can either type in or click on the drop-down arrow and use the calendar function to select the date.
- Time: You can either type in or use the directional arrows to select the time.
- Comments:Type in a comment related to this part knock down, if required.
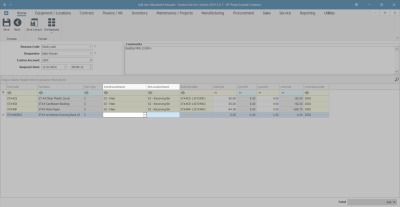
Select First Unit Part to be Adjusted Out of Stock
- Method 1
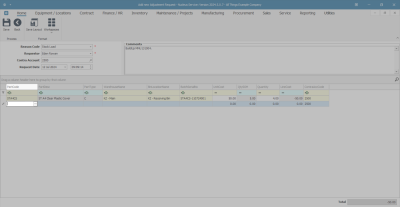
- Click in the Part Code text box. (As you click in this field, the Contra Account Code text box will populate with the previously selected Contra Account Code made in the Adjustment Request Details frame. (This can be changed per item line).
- An Ellipsis button will be revealed.
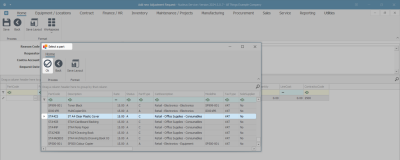
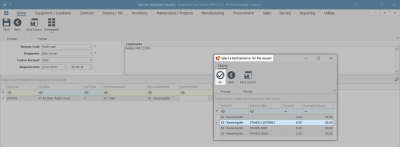
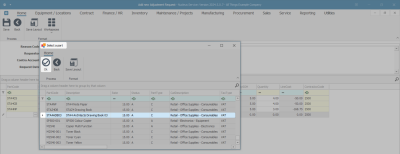
- Click on this button to display the Select a part pop-up screen.
- Method 2
- In the Parts / Items frame, right click anywhere in a row of this data grid. (As you click in this field, the Contra Account Code text box will populate with the previously selected Contra Account Code made in the Adjustment Request Details frame. (This can be changed per item line).
- A Process menu will pop up.
- Click on Add - Add Item to display the Select a part pop-up screen.
- In the Select a part pop-up screen, select the row of the part/item that you wish to adjust out of stock.
- In this image, an A4 Clear Plastic Cover is to be adjusted out of stock.
- Click on Ok.
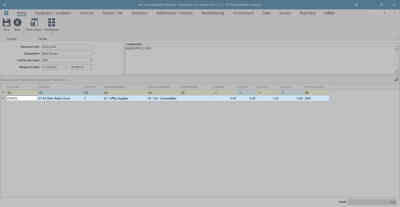
- The row will now populate with the selected Part Code details.
Select Warehouse
If the item selected is linked to a default warehouse then the WarehouseName field will auto-populate with that warehouse name. (This can be changed.) If the item is not linked to a default warehouse then you can select one.
- Follow this process to select an alternative Warehouse Name:
- Click in the Warehouse Name text box to reveal an ellipsis button.
- Click on this button.
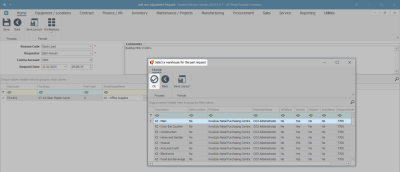
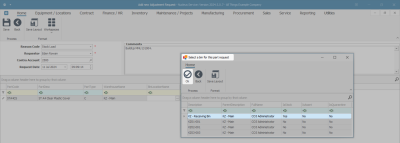
- The Select a warehouse for this part request screen will pop up.
- Select the row of the Warehouse that you wish to adjust this item out of.
- In this image, KZN Main has been selected.
- Click on Ok.
Select Bin Location
- Follow this process to select an alternative Bin Location Name:
- Click in the Bin Location Name text box to reveal an ellipsis button.
- Click on this button.
- The Select a bin for this part request screen will pop up. This screen will contain details of the bins that you can choose from within this warehouse.
- Select the row of the bin location.
- In this image, bin location KZN - Receiving Bin has been selected.
- Click on Ok.
Note: If there is only 1 bin linked to the warehouse, as you click on the ellipsis button, the Bin Location Name text box will populate with that one particular bin name and the 'Select...' screen will not pop up.
Select Batch/Serial Number
- Follow this process to select a Batch/Serial Number:
- Click in the BatchSerialNo text box.
- An ellipsis button will be revealed.
- Click on this button.
- The Select a batch//serial no. for this request screen will pop up.
- Select the row of the batch/serial number that you wish to adjust.
- Click on Ok.
If this is an A-Class or B-Class item that is being adjusted out of store then this becomes the Serial No column for A/B-Class items - so search for the correct serial number if this is a serialised item.
If this a C-Class item being adjusted out of store, and you are using Stock Batch Tracking, then you will need to select the correct batch that you wish to adjust the C-Class item out of.
If you are not using Stock Batch Tracking, then the BatchSerialNo text box can remain blank.
As the above text boxes populate, you will notice the following fields will adjust:
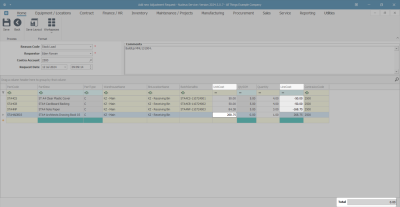
Unit Cost
- With C-Class items, weighted average cost is calculated over multiple batches within the same bin location, therefore the Unit Cost populates as the Bin Location Name is selected.
- With A or B-Class items, only once the Serial No. is selected, will the Unit Cost field populate as each serial no. is priced individually.
Quantity Stock on Hand
- You will note that the QtySOH (Quantity Stock on Hand) amount has adjusted to what stock is available in the selected batch.
- With C-Class items, this text box will populate with the current Stock on Hand quantity of the C-Class item in the selected Bin Location.
- With A or B-Class items, this field will only populate once the serial no has been selected and will always populate with 1 as only one A or B-Class item can be selected at a time.
Line Cost
- This will populate with the sum of the Unit Cost x Quantity. This will be a minus figure as you are adjusting this unit part out of stock.
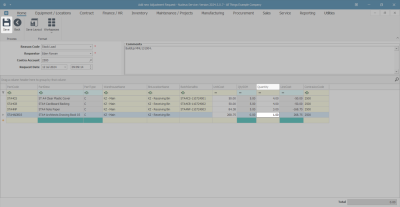
Select Quantity
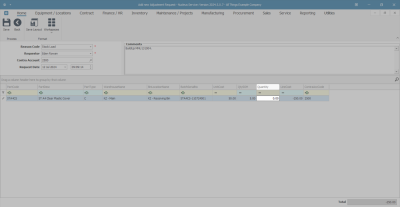
- In this example, we will be 'building up' one A4 Architects Drawing Book. We will be adjusting the individual parts out of stock. Therefore the (end) Quantity (in stock) amount of this part must be changed.
- Click in the Quantity field.
- Either type in or use the arrow indicators to select the quantity - this will be the quantity of this part that is required to make up the whole unit.
- In this example, the sum will be: Quantity Stock on Hand: (5) - the adjusted out quantity (1) = the total end quantity (in stock) = (4).
Add Remaining Unit Parts to be Adjusted Out of Stock
- If a new row has not yet appeared in the data grid, click on the last text box in the row and press Enter on your keyboard.
- Click in the Part Code text box of the new row to display the ellipsis button.
- Repeat the Select the First Unit Part to be Adjusted Out of Stock process until you have all the parts that make up the whole unit, listed in the data grid.
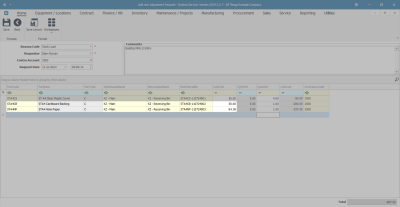
- In this example, A4 Cardboard Backing, A4 Note Paper have been added to the list.
Quantities of Additional Items
- A4 Clear plastic Cover:
- In this example, the sum is: Quantity Stock on Hand: (5) - the adjusted out quantity (1) therefore the total end Quantity (in stock) = (4).
- A4 Cardboard Backing:
- In this example, the sum is: Quantity Stock on Hand: (5) - the adjusted out quantity (1) therefore the total end Quantity (in stock) = (4).
- A4 Note Paper:
- In this example, the sum is: Quantity Stock on Hand: (5) - the adjusted out quantity (2) therefore the total end Quantity (in stock) = (3).
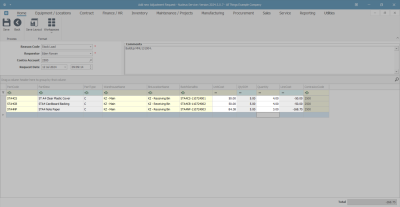
- Summary: To build up the whole unit (the Architect's Drawing Book) the parts required are:
- 1 x A4 Clear Plastic Cover
- 1 x A4 Cardboard Backing
- 2 x A4 Note Paper
Select the Whole Unit to be Adjusted Into Stock
You now need to add the whole unit item that is to be adjusted into stock:
- Click in the Part Code column to bring up the ellipsis button.
- Click on this button to bring up the Select a part pop-up screen.
- Select the whole unit in this screen.
- Click on Ok.
- The row will now populate with the selected Part Code details.
Select Warehouse and Bin Location for Whole Unit
- Select the Warehouse and Bin Location for this whole unit.
Whole Unit Cost
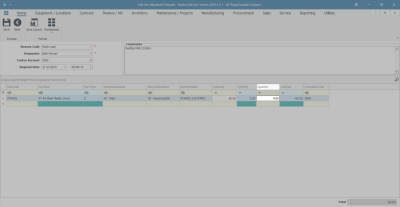
- Click in the Unit Cost text box and either type in or use the arrow indicators to select the unit cost of the whole unit.
Important Note: The Line Cost for the unit parts you are writing out of stock and the total unit you are writing into stock should counteract each other exactly.
- In this example, you can see:
- The line cost for the unit parts is (-268.75) and the total unit being written into stock (268.75) will balance each other out.
- This will result in the Total being 0.00.
Quantity of the Whole Unit
- This will default to 1.
- In this example, only 1 whole unit is being adjusted in so this can remain unchanged.
Save Adjustment Request
- Click on Save.
Print Adjustment Request
- A Report Generation message box will pop up asking -
- Do you want to print the adjustment request [ ]?
- Click on Yes.
- You will return to the Adjustment Requests listing screen.
- An Adjustment Request Processing message box will pop up asking -
- Adjustment Request No. [ ] saved successfully [ ].
- Click on OK.
Report Preview
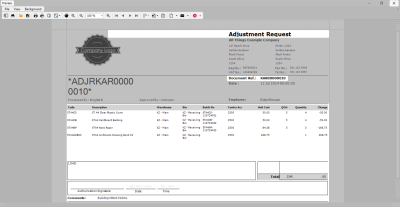
- The Report Preview screen will open.
- Here you can view the details of:
- The unit parts being adjusted out.
- The whole unit being adjusted in.
- The original Stock on Hand Quantities.
- The Quantities after the adjustment.
- The Total recorded as 0.
- From this screen you can View, Print, Email or Export the adjustment report.
- Close the Preview screen when you are done.
View New Adjustment Request
- You will return to the Adjustments Request screen.
- You can now view the new adjustment in the data grid.
- This request can now be Approved or Declined.
Important Note: This request must be authorised before the stock adjustment is complete.
MNU.131.004


