We are currently updating our site; thank you for your patience.
Procurement
Add Back to Back Supplier Invoice
Contracts with Fees or Meters with a Finance Party linked, must be billed before the B2B Supplier Invoice can be created, as these are charges billed to the customer on behalf of a third party.
You now have the ability to load multiple supplier invoices that big companies tend to send and match them by grouping lines into said invoice number as per the supplier's schedule thus decreasing time taken to create invoices separately.
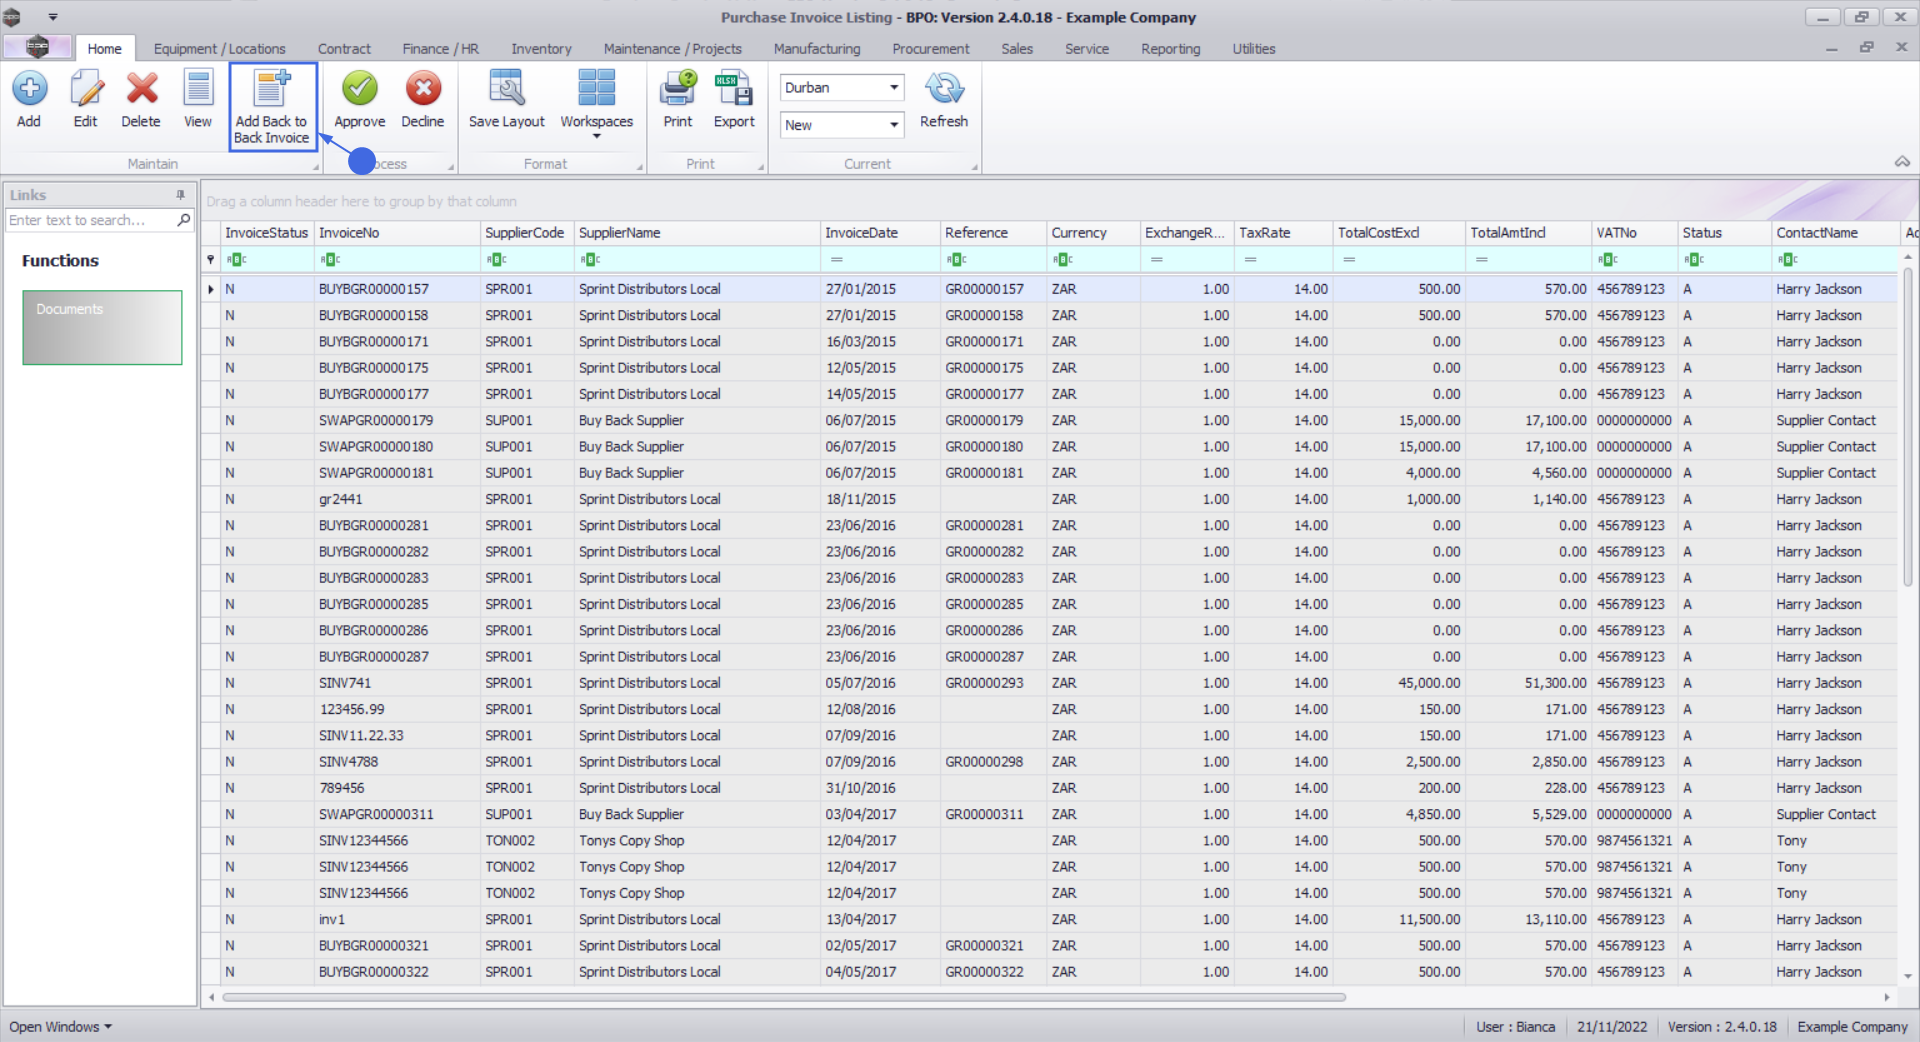
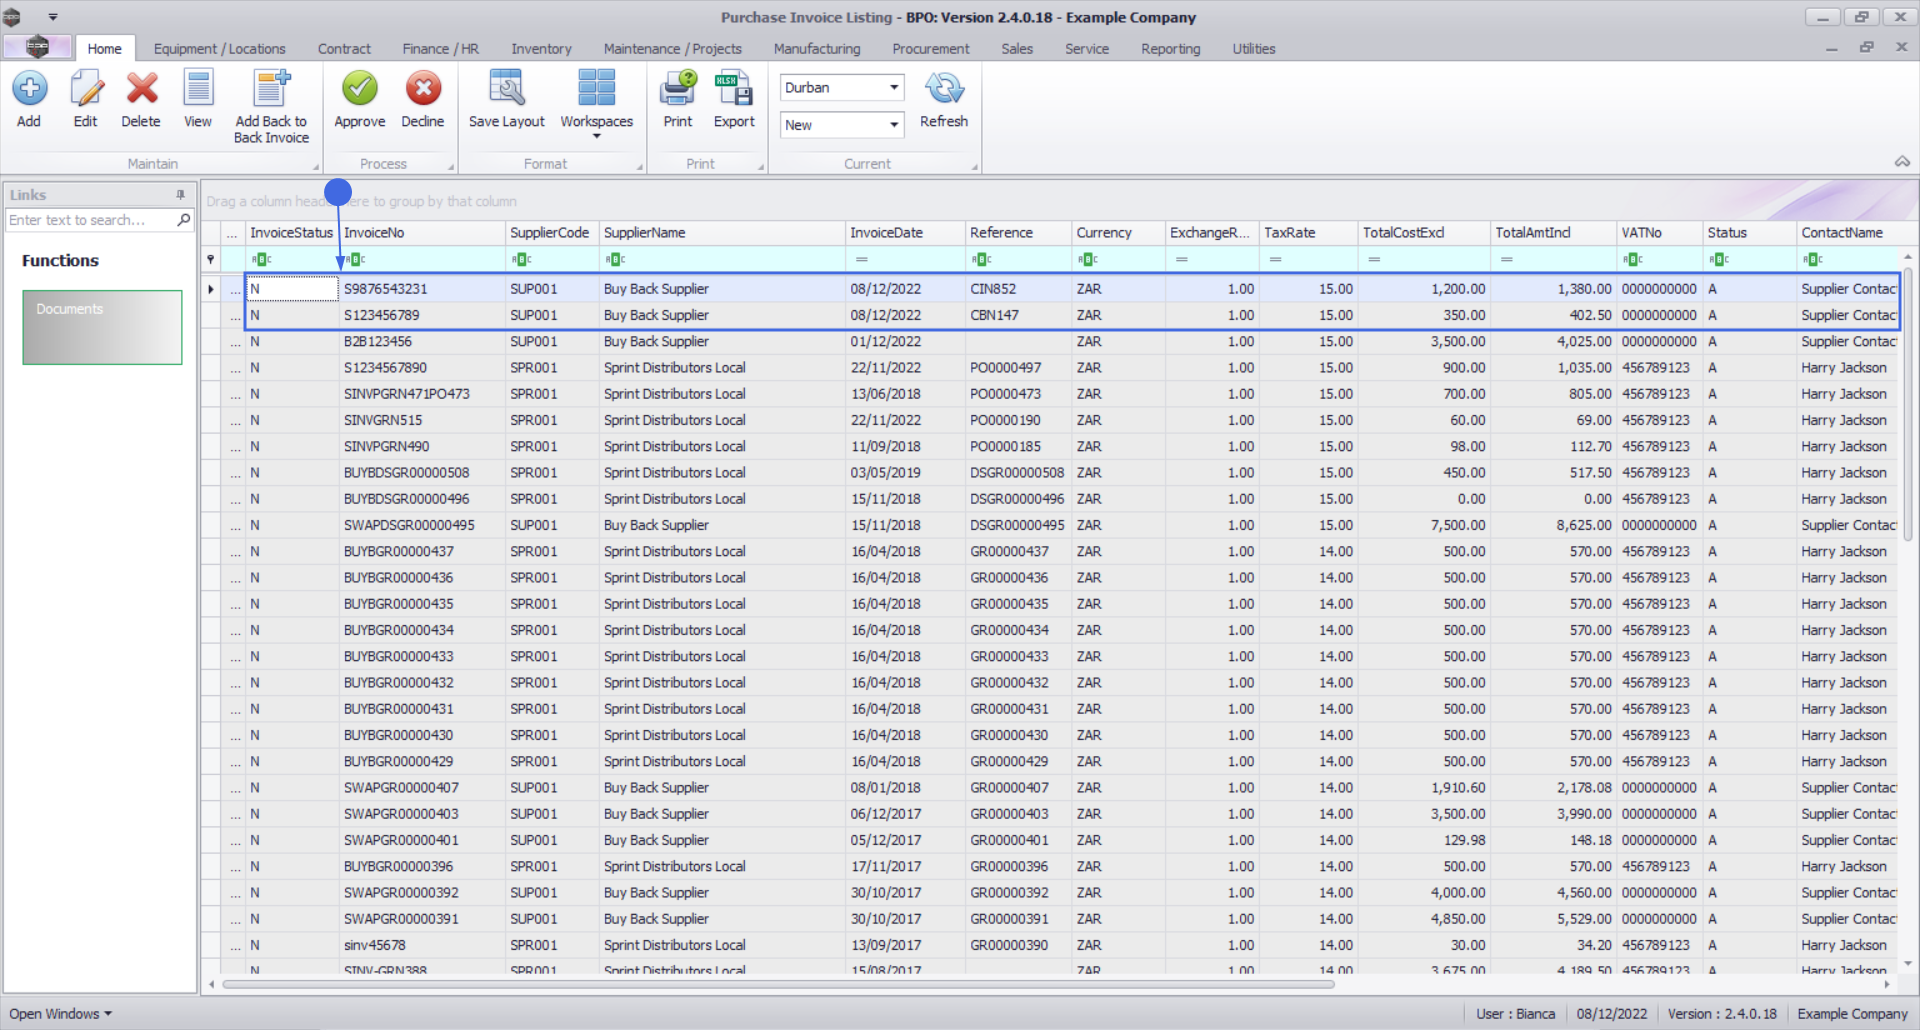
Ribbon Select Procurement > Invoices

The Supplier Invoices Listing screen will be displayed.

Your employee user record should be linked to a default site. In this case, the site will auto populate with this default, otherwise the site must be manually selected.
Another site can be selected, if required, and if you have the security rights to access the site.
If All Sites displays here, then you do not have a default site configured on your user record, and need to select the required site.
Upon opening, this screen will default to the New status.

Add Supplier Invoice
- Click on the Add Back to Back Invoice button.
Supplier Invoice Header
The Back to Back Supplier Invoice maintain screen will be displayed, where the Supplier / Finance Party and Billing Period must be selected. You can optionally further filter the items by Serial Number.
The screen contains two data grids - the right grid will contain the Invoice Header where you will be prompted for an Invoice Number and the left grid contains a list of the available fee and / or meter line items, which populates once the Supplier has been selected.
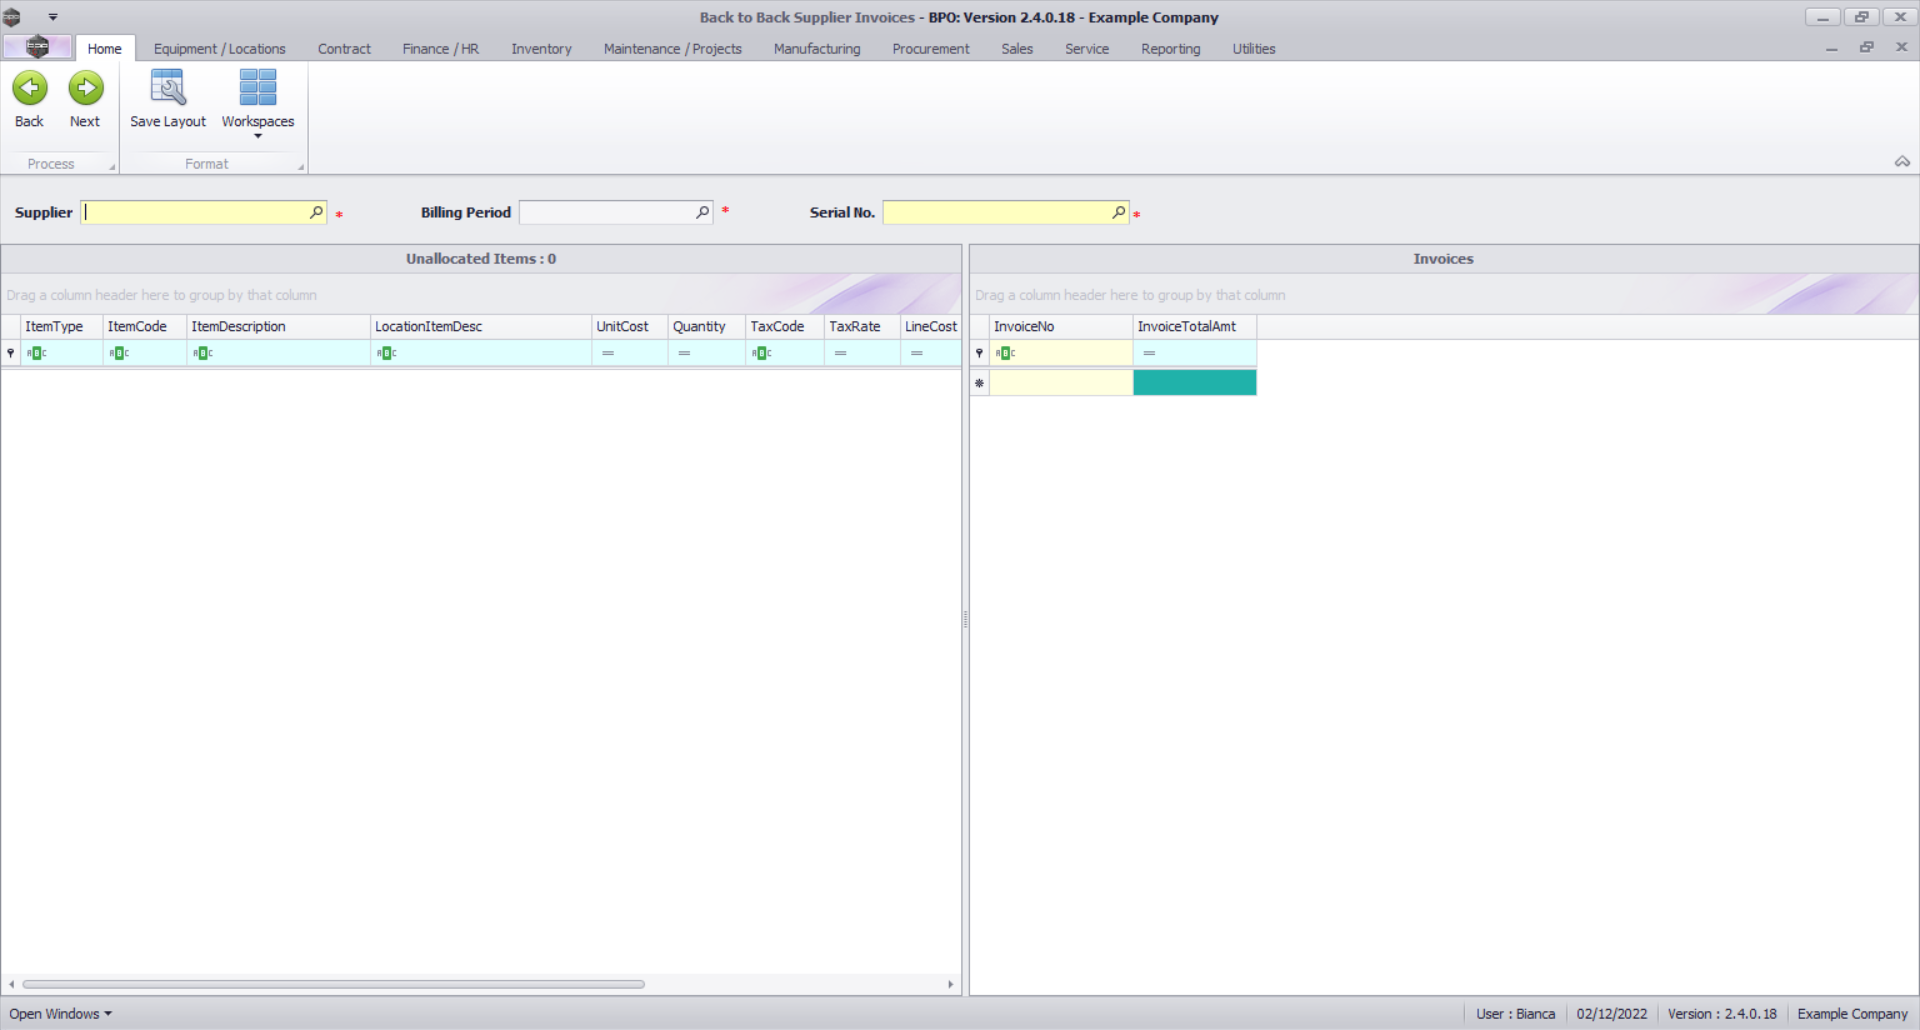
- Search for and select the Supplier

- Search for and select the Billing Period
The list of items billed for the selected supplier and billing period will display.
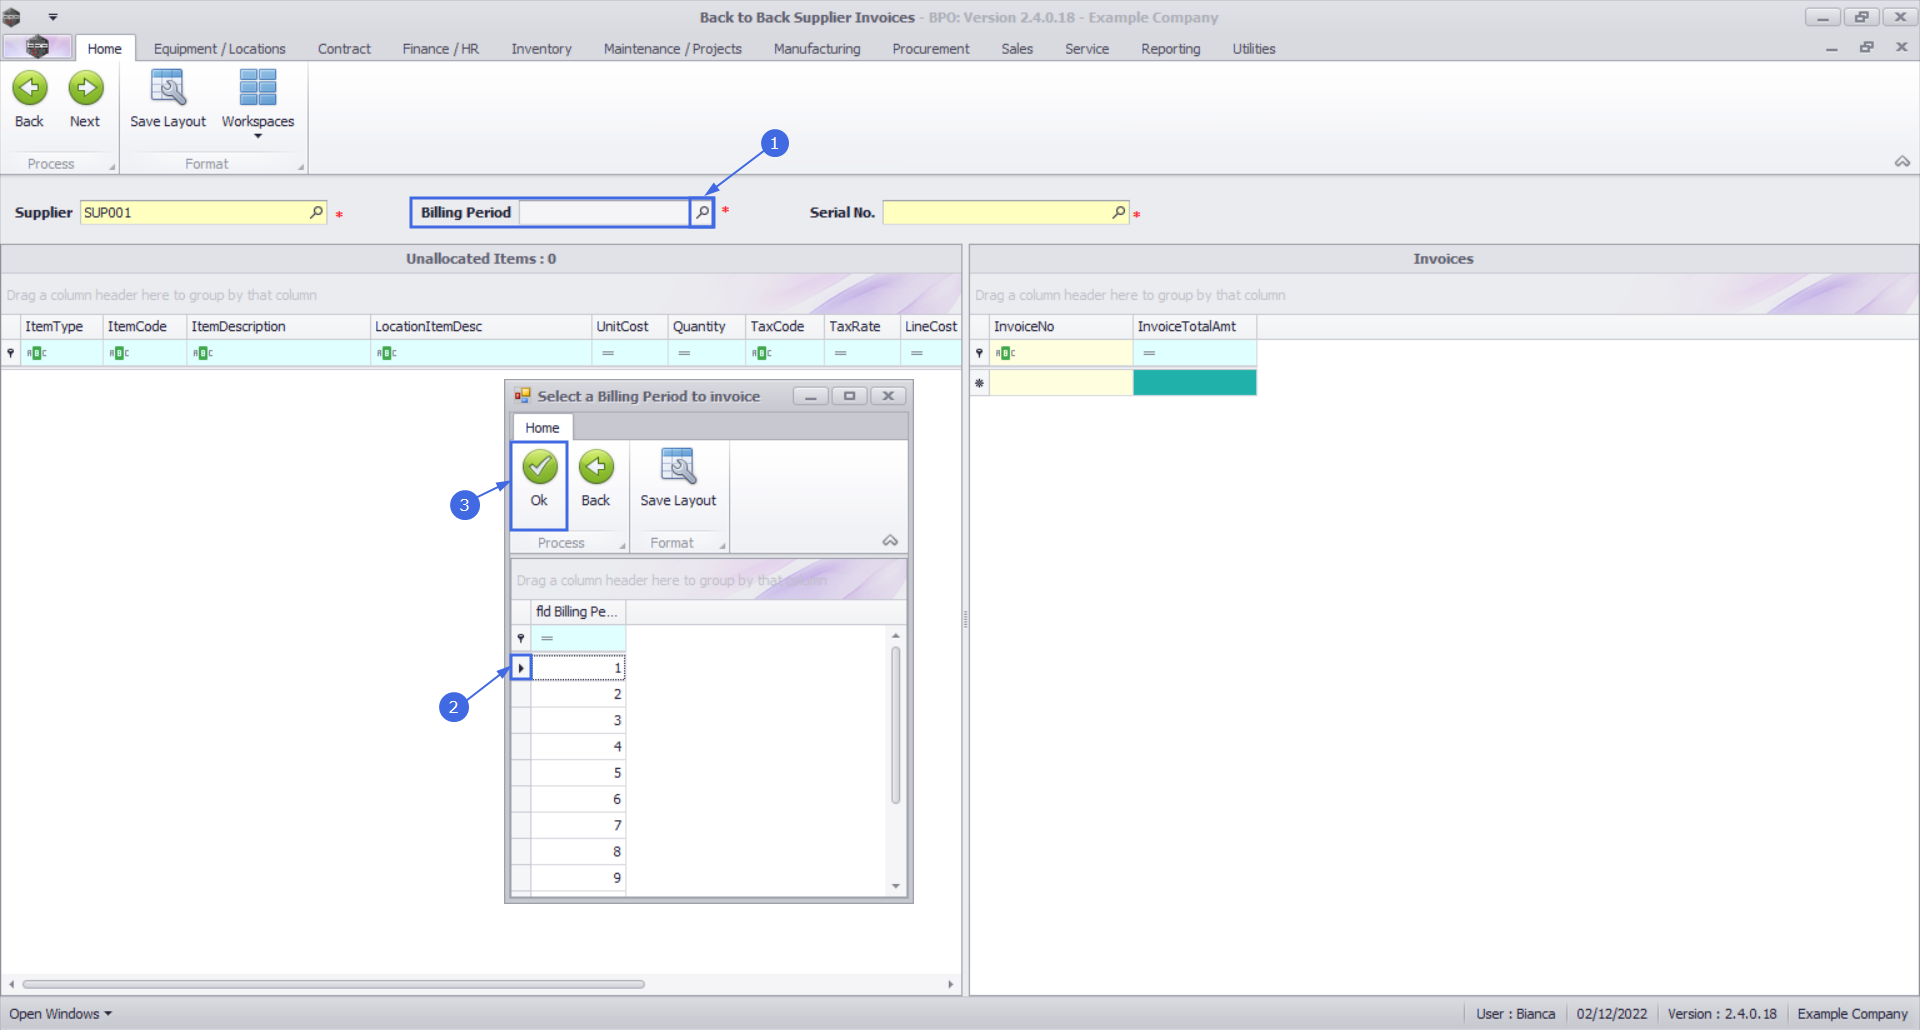
The list of relevant Fees and Meters will populate
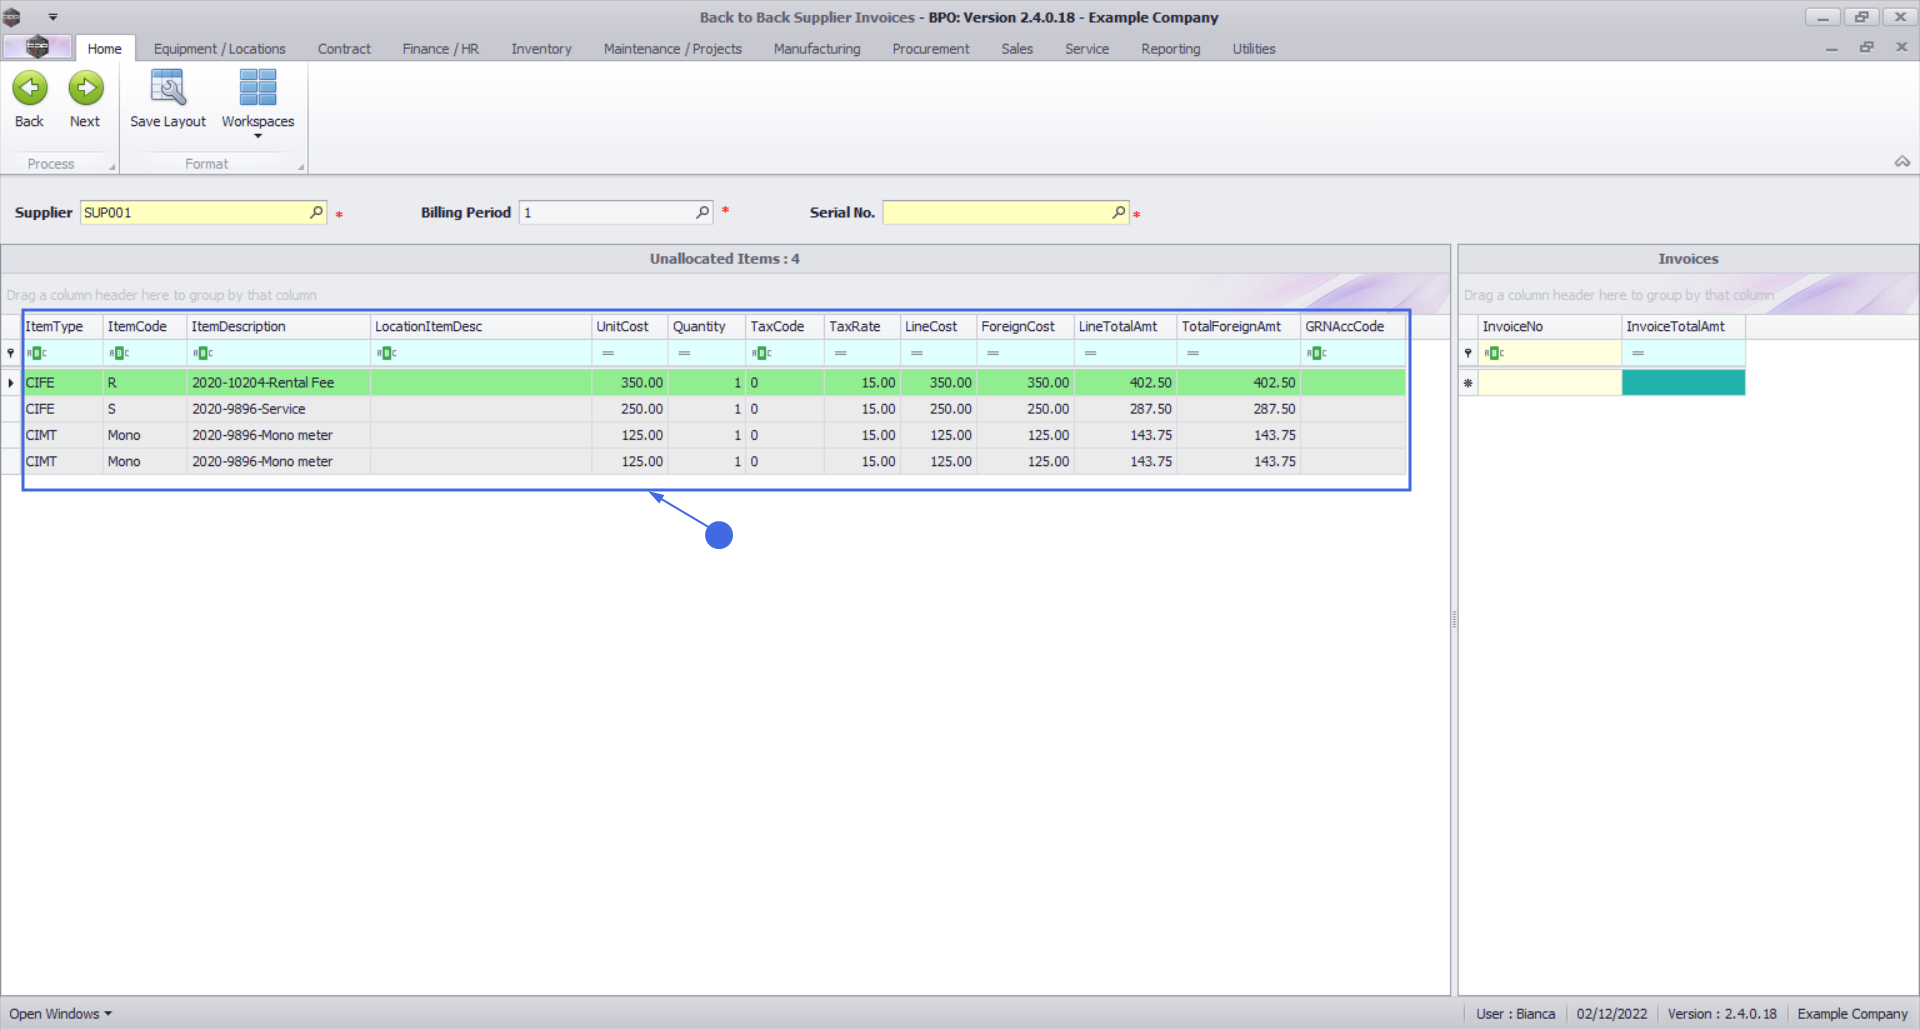
You can further filter the list if you would like, by selecting the Serial Number. This is optional.
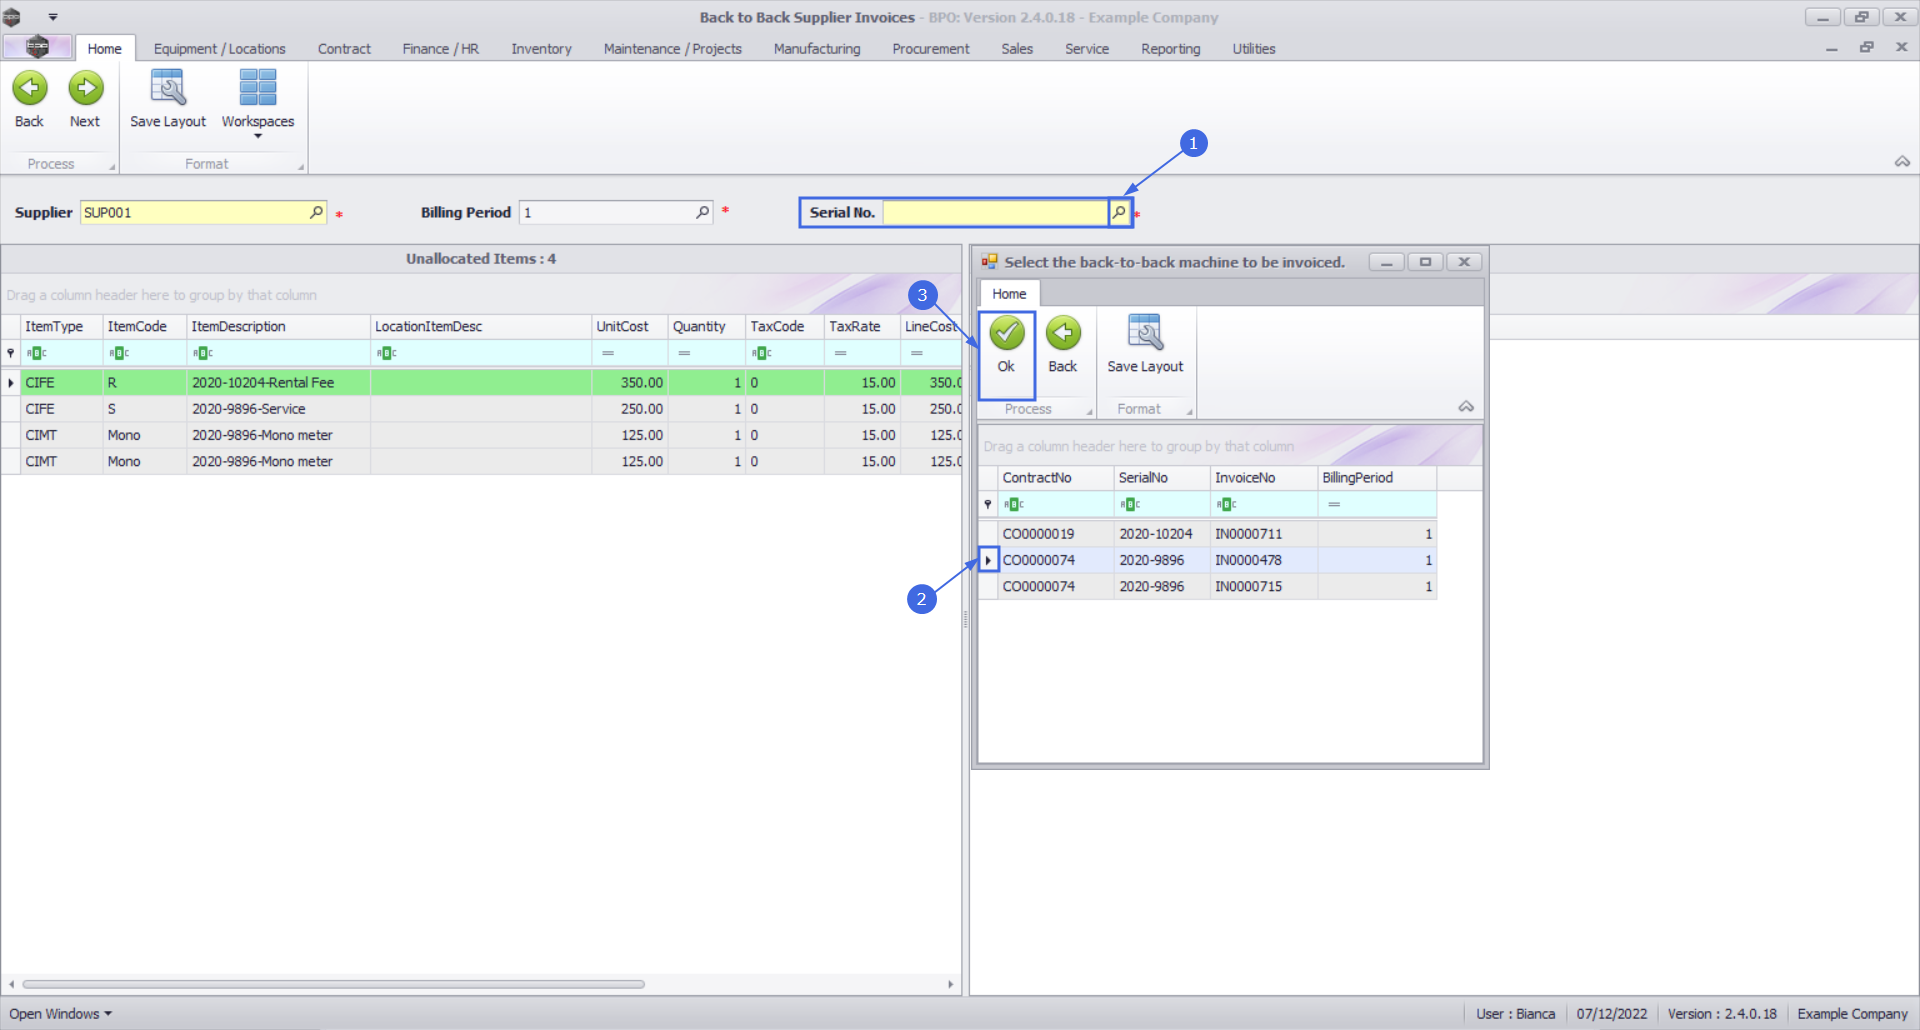
- Search for and select the Serial Number. The lookup list will display the contract invoice number related to the back to back charge.
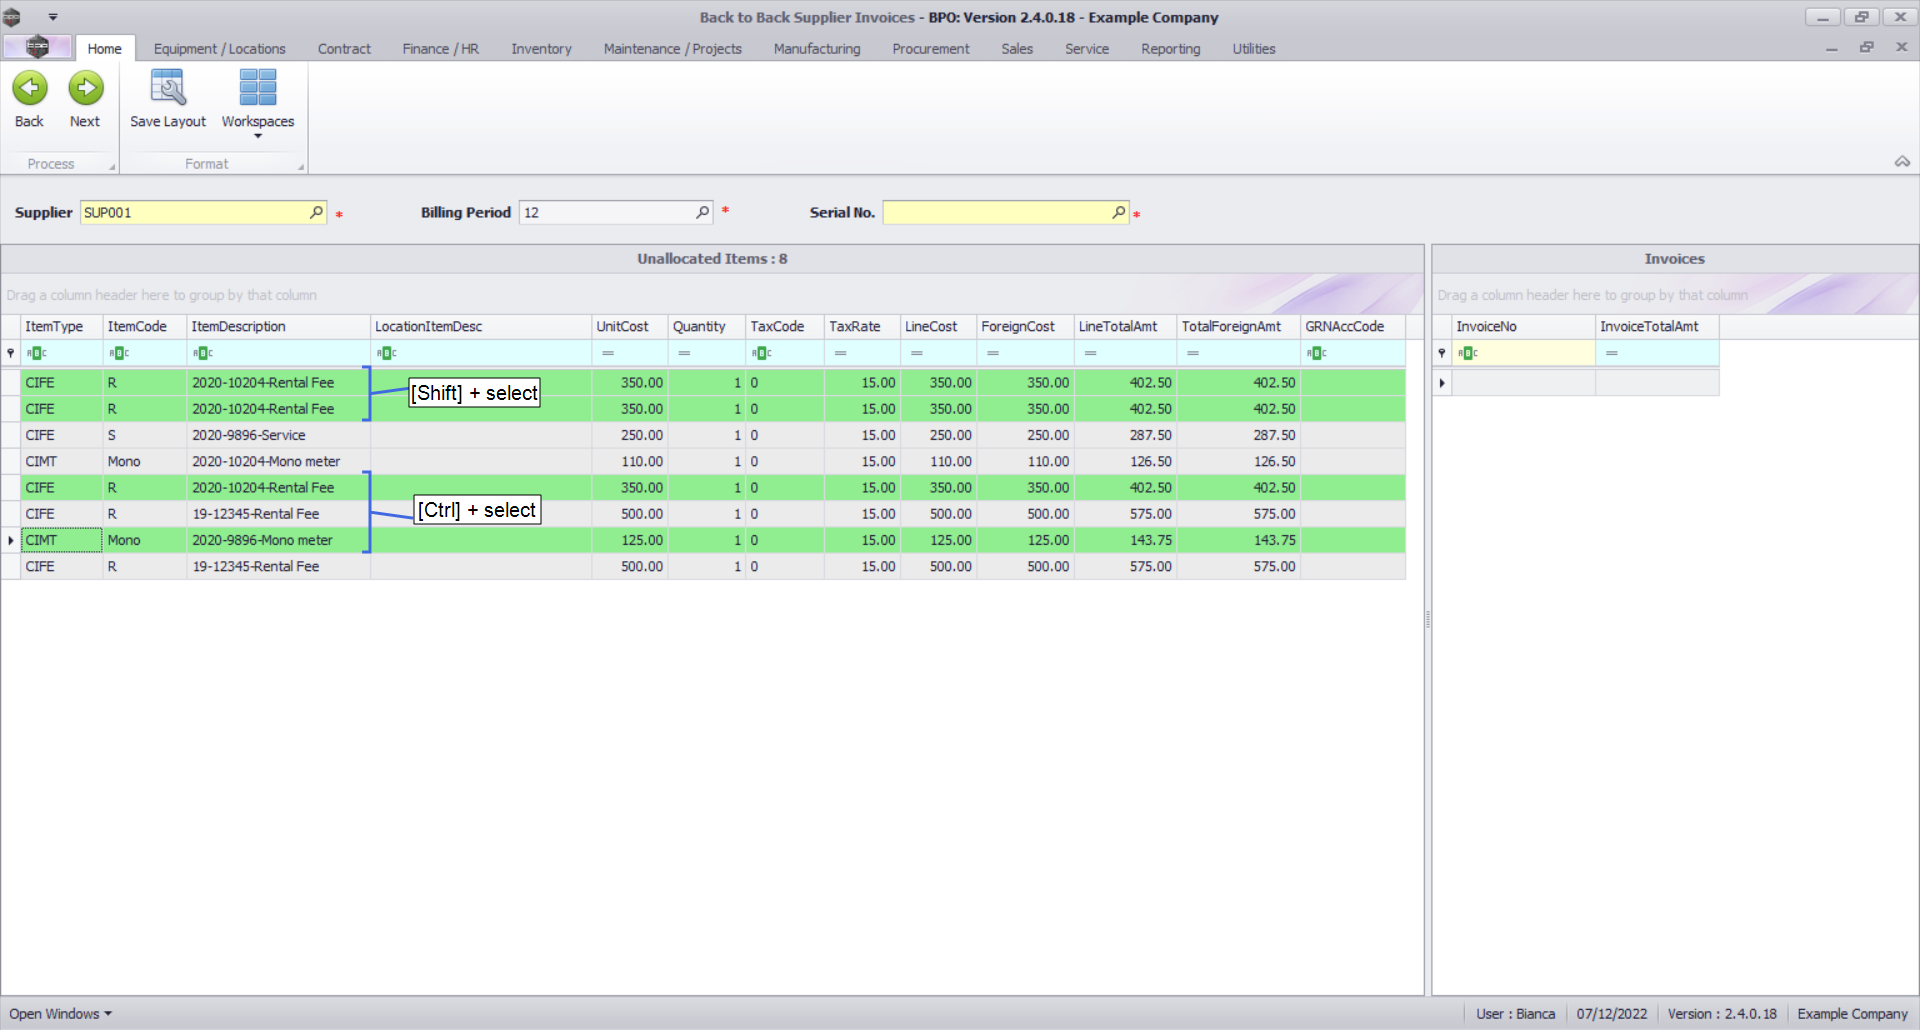
- Select the item, then drag and drop into the invoice header data grid on the right.
- Use either [Shift] + select or [Ctrl] + select to highlight multiple items.
You can drag the item(s) into a new row to create a new invoice, or into an invoice that has already been created. At this point, no invoice headers have been created yet.
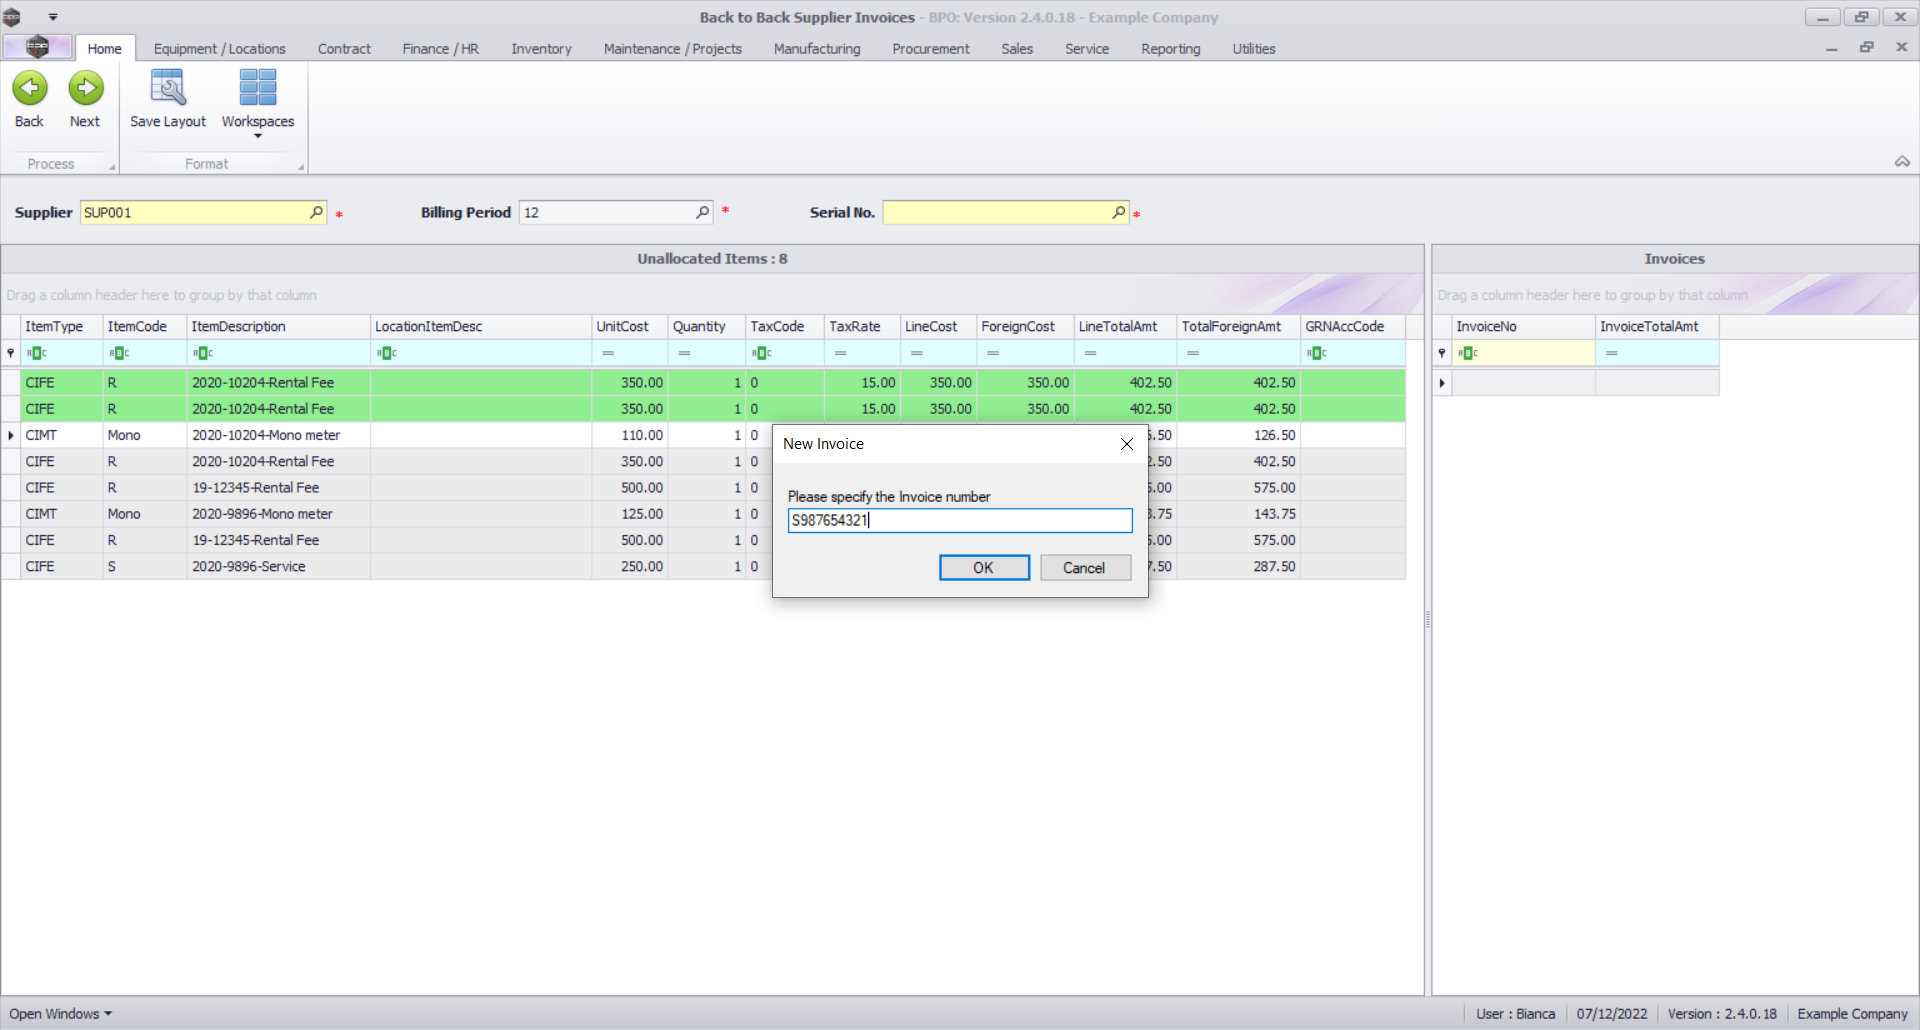
On dragging the item(s) into a new row, you will be prompted for the Supplier Invoice Number.
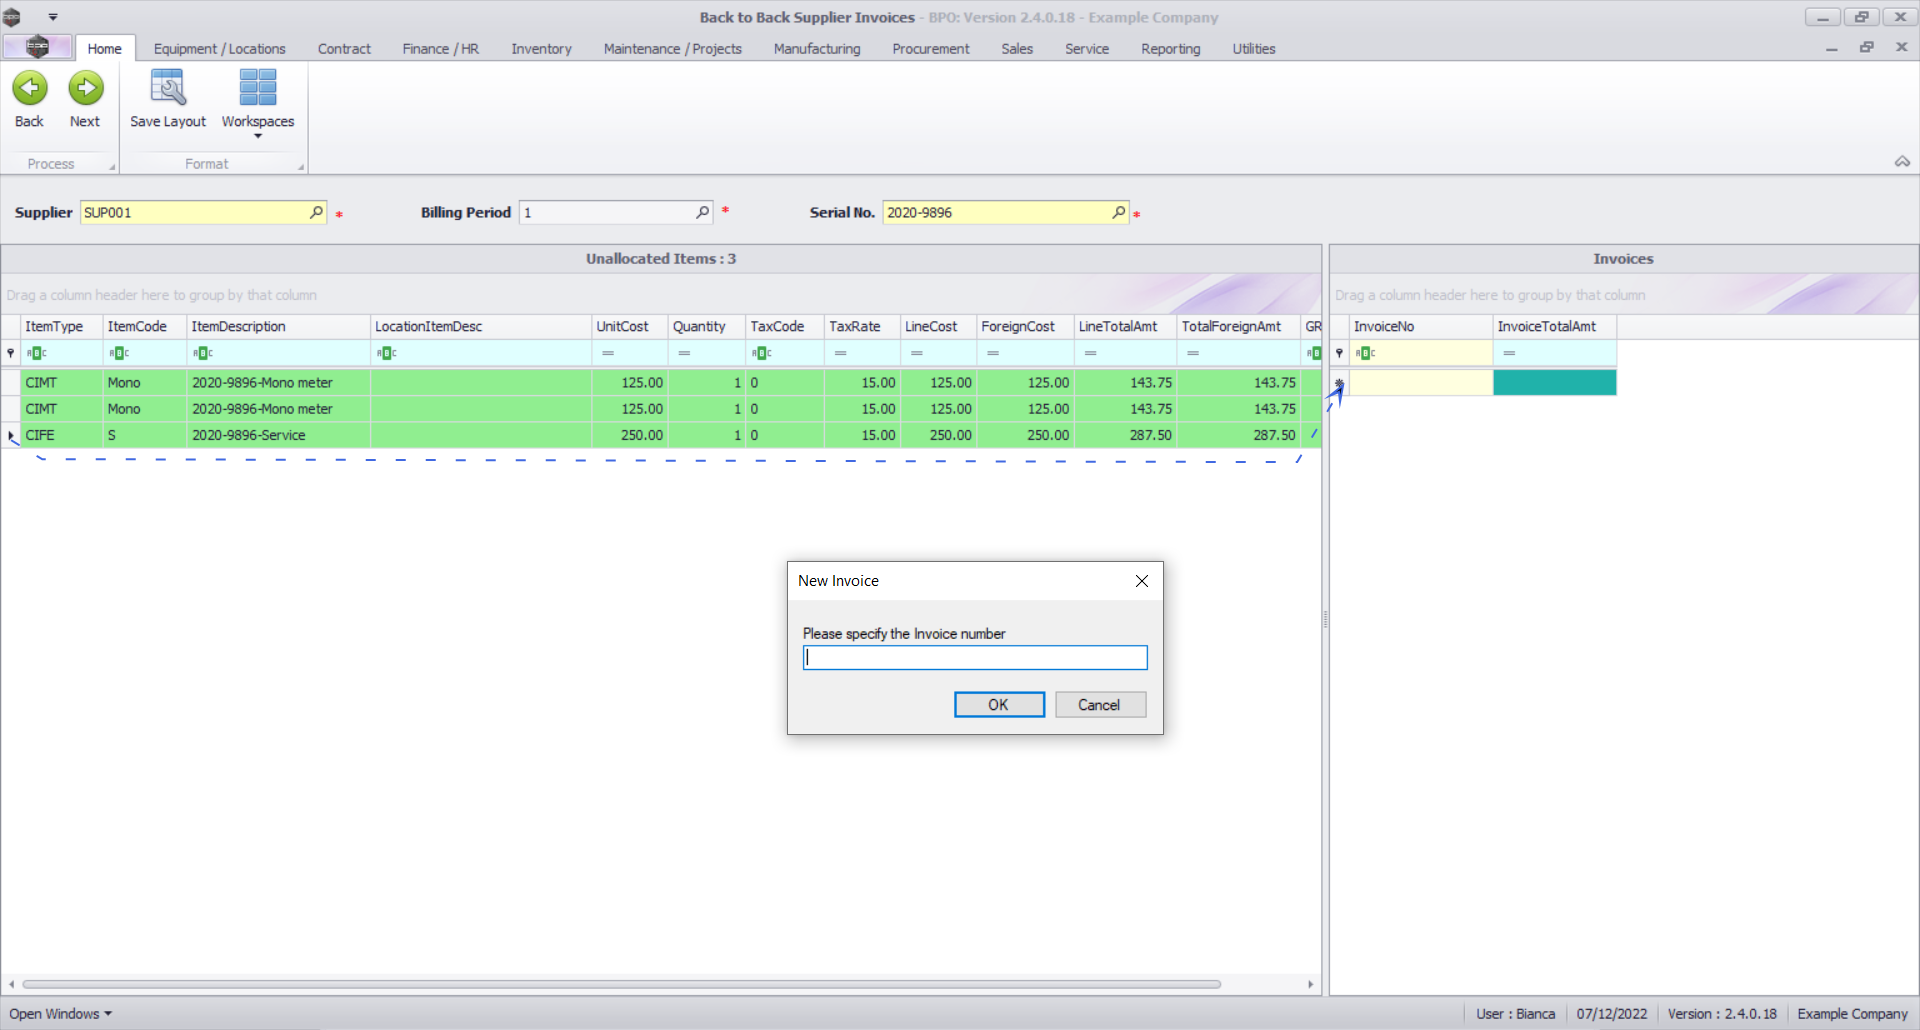
- Type in the Supplier Invoice Number.
- Click on the Ok button.
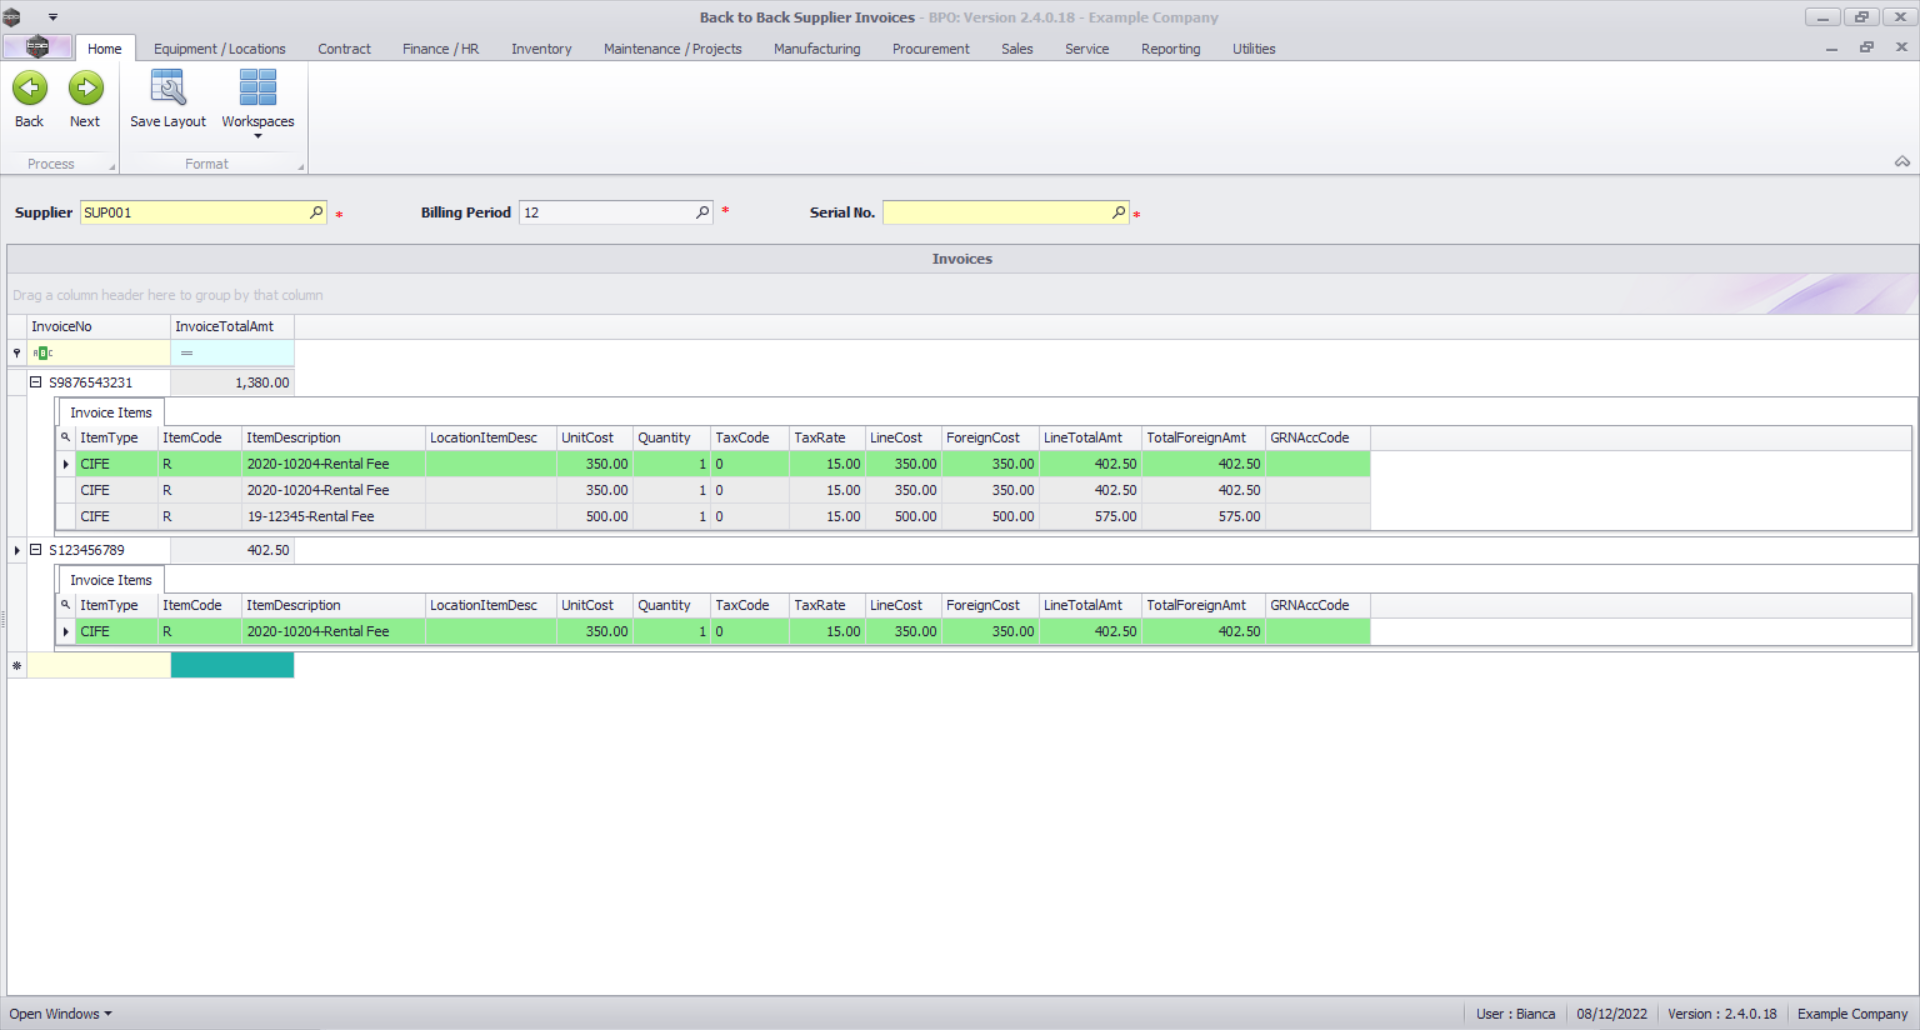
The new line will be populated with the Supplier Invoice number and the Invoice Total Amount (based on the current items listed).
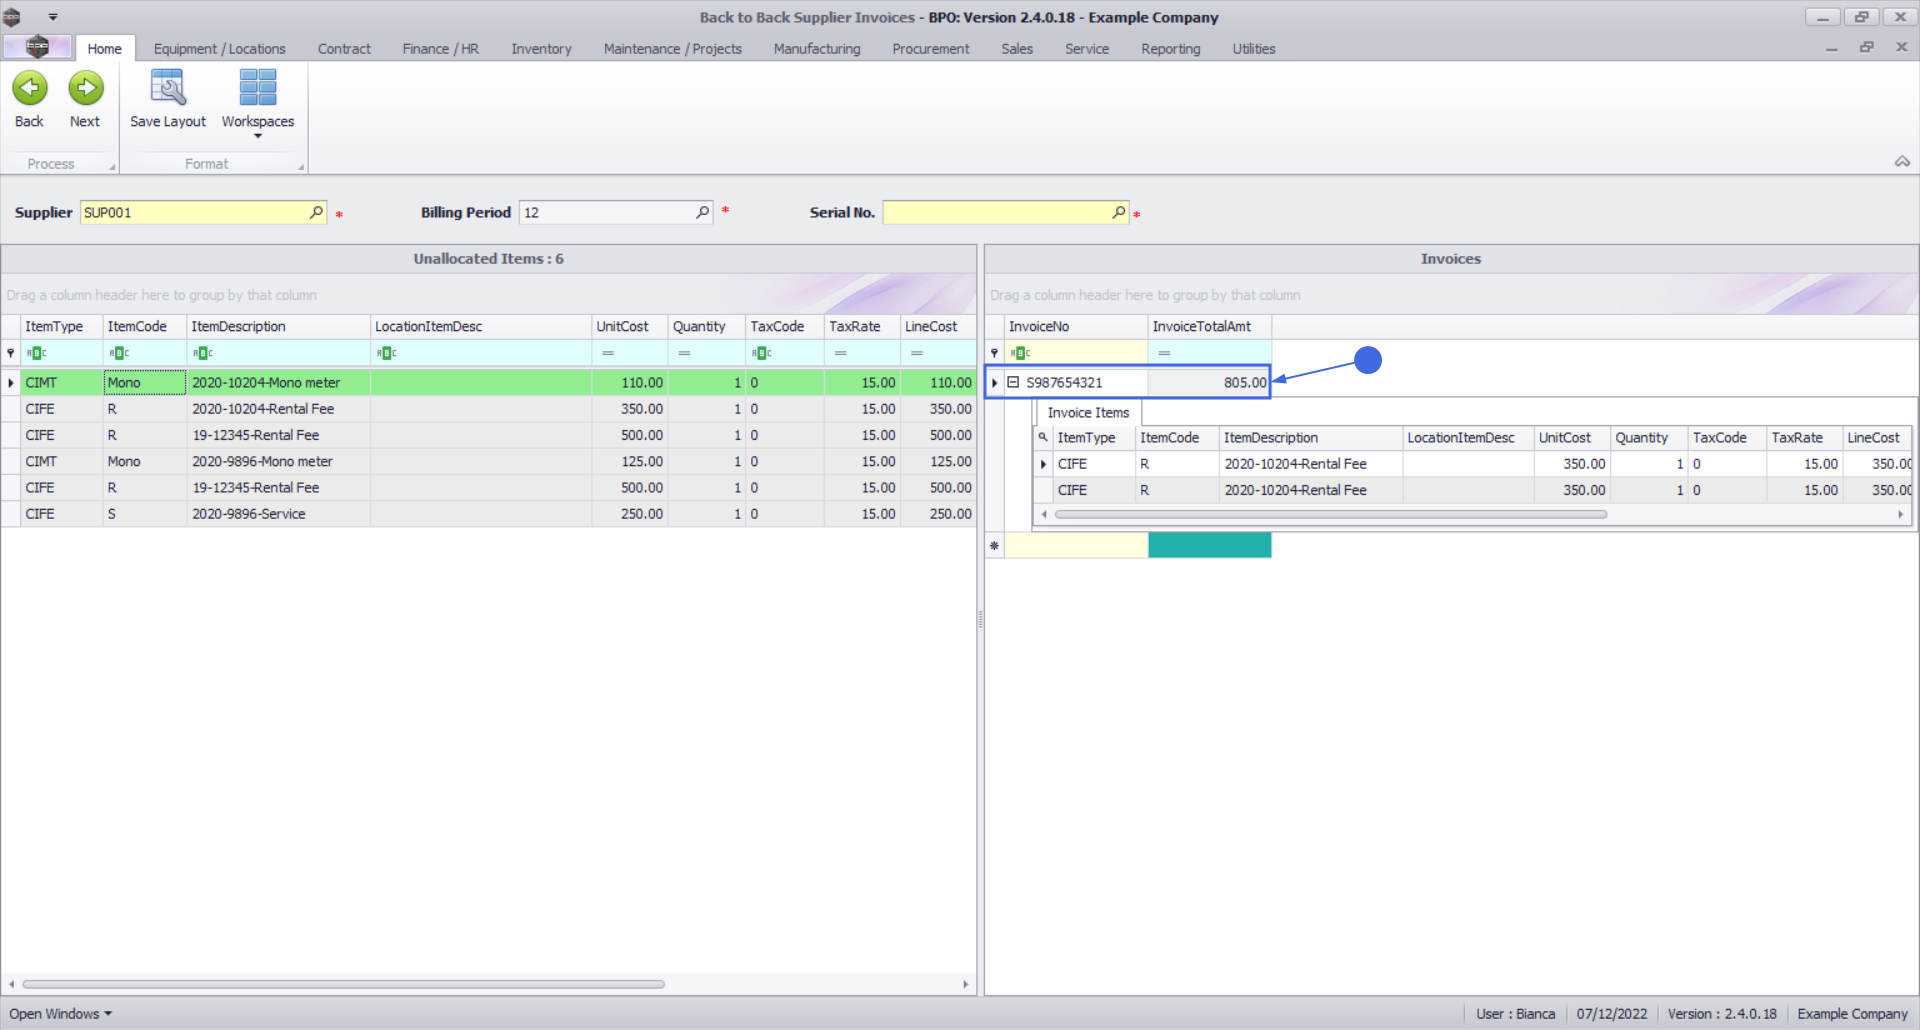
Below the Invoice line, the Invoice Items sub data grid will expand and display the fees and / or meters that you dragged across.
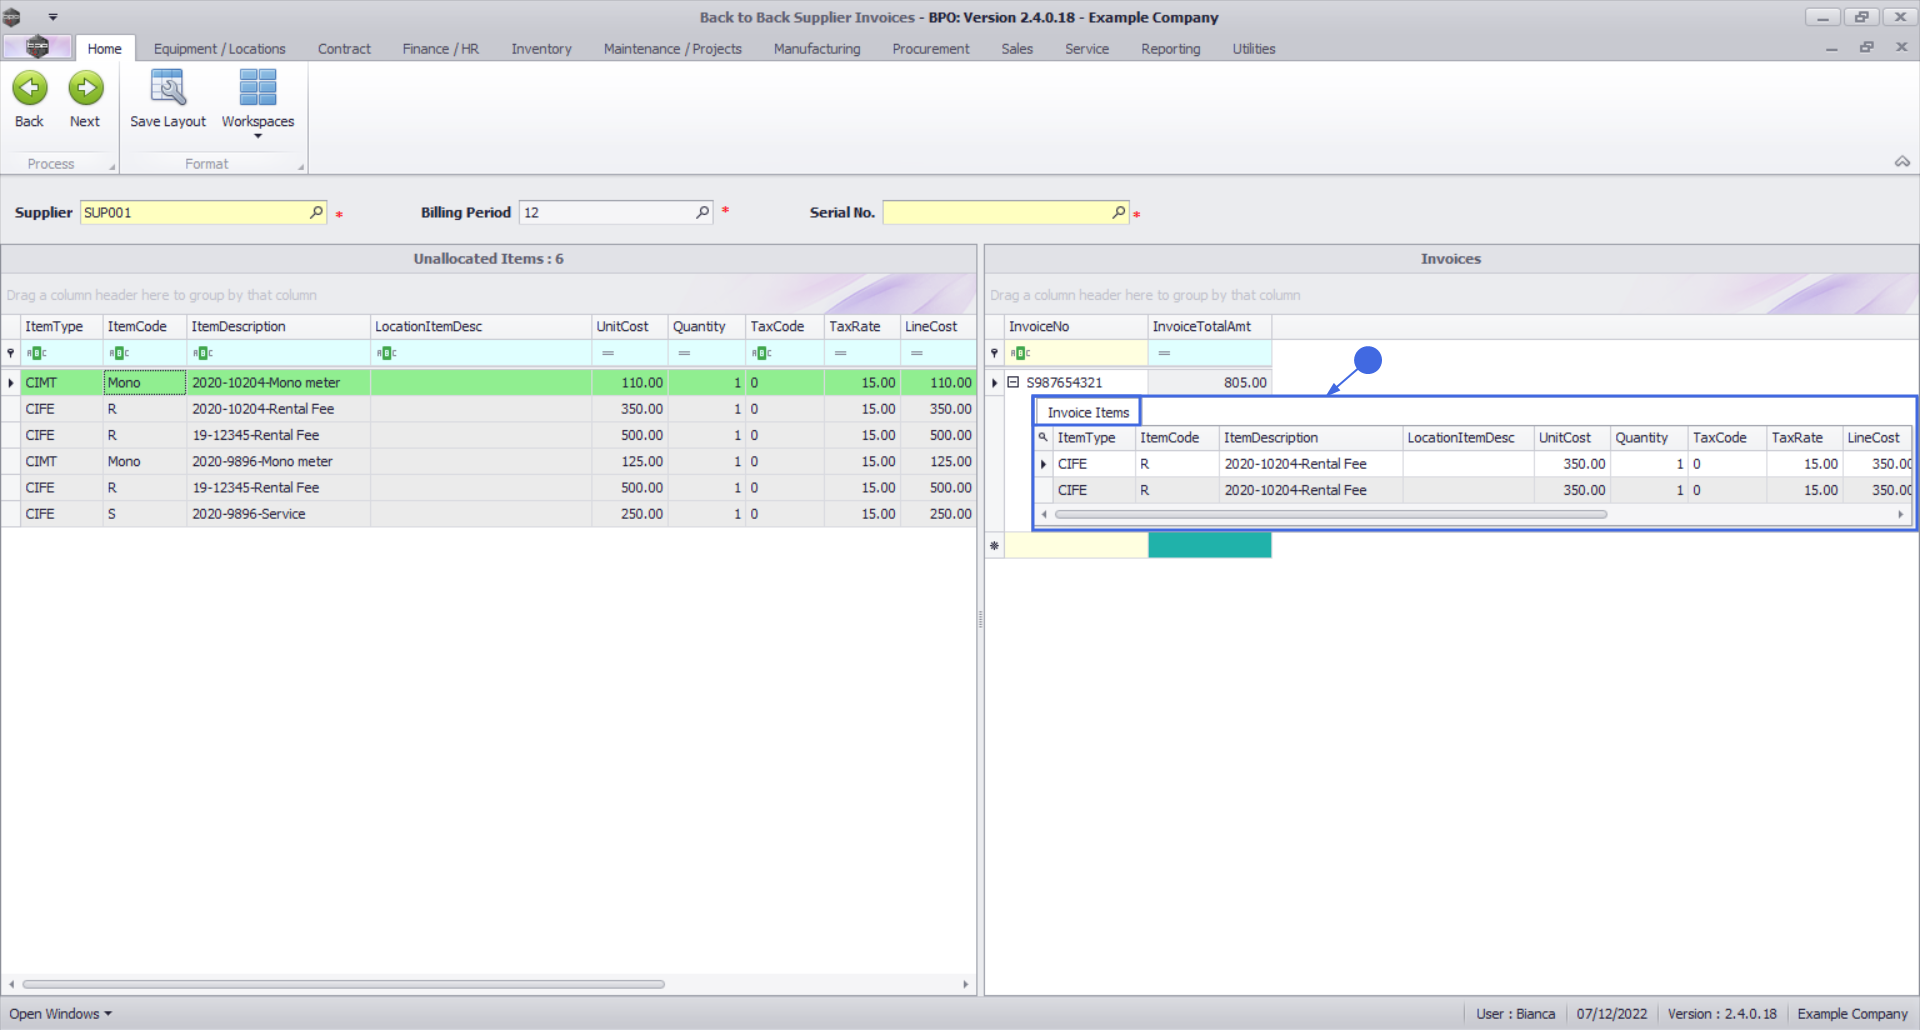
You can now drag and drop more items into this Invoice Header or into a new line to create a new Invoice Header.
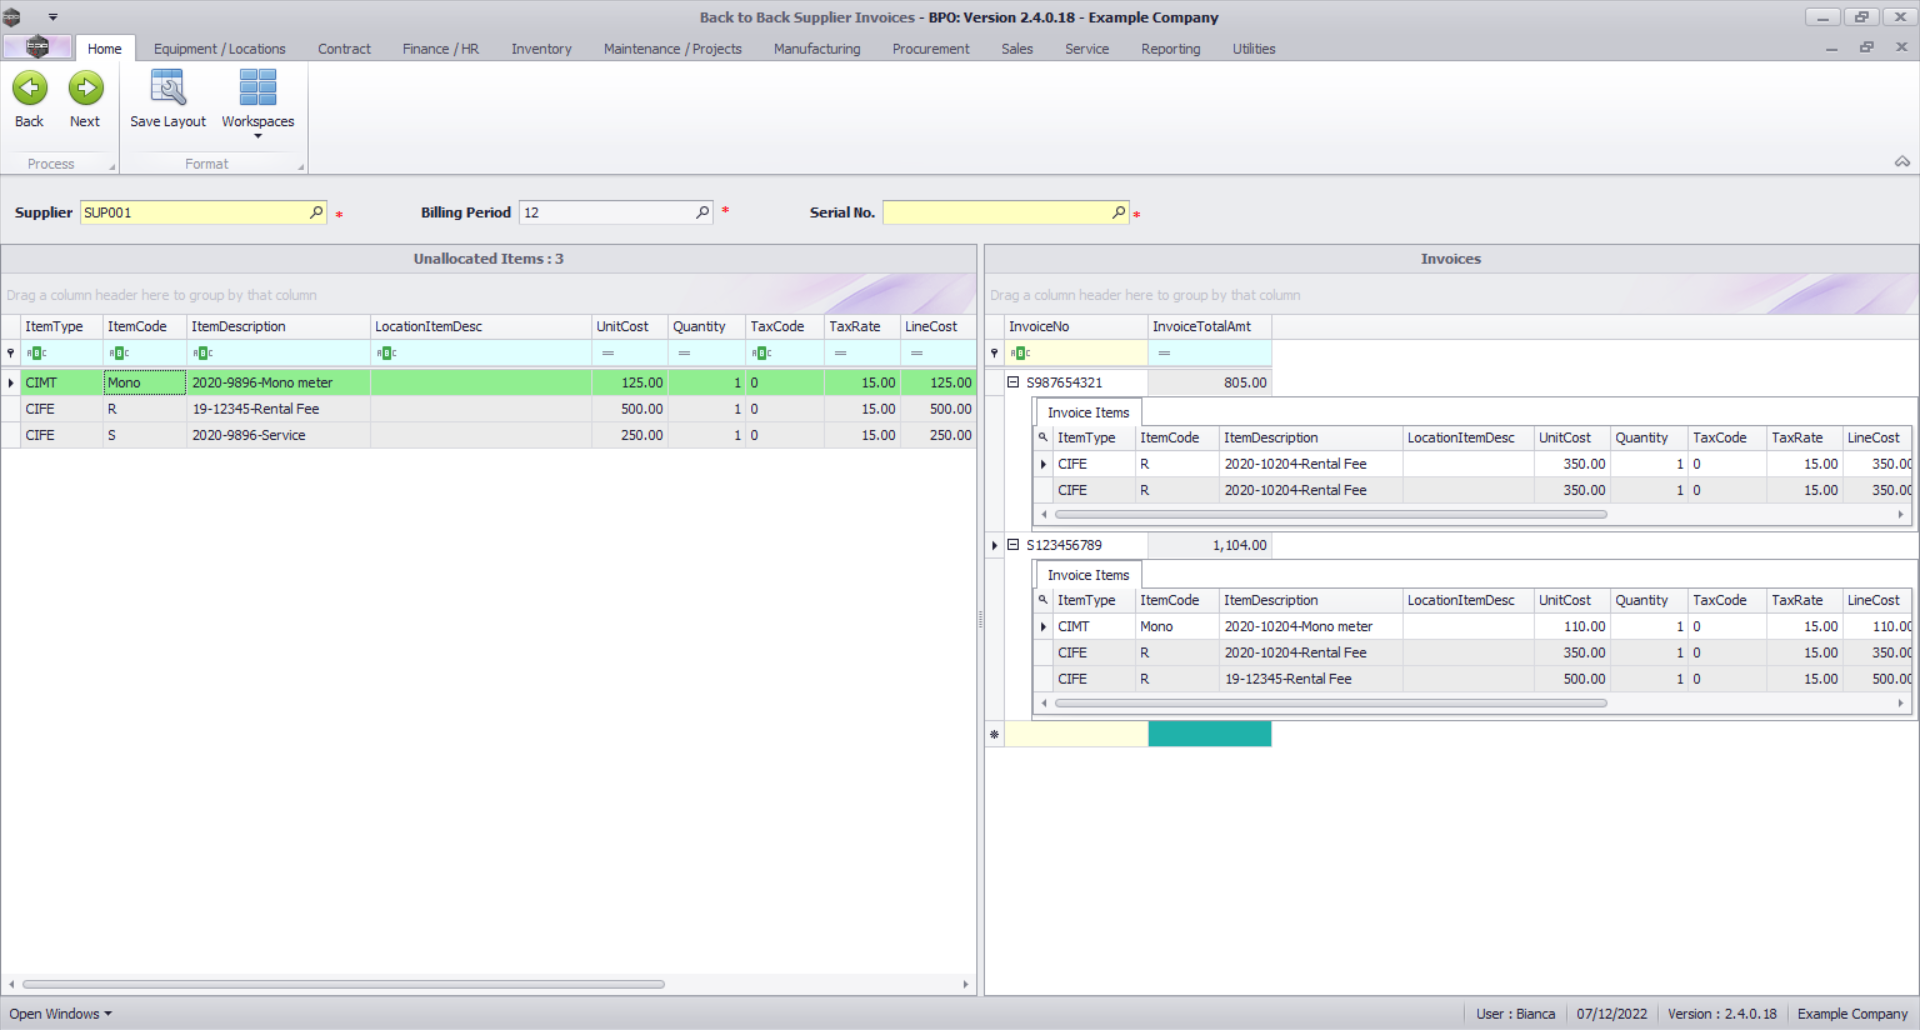
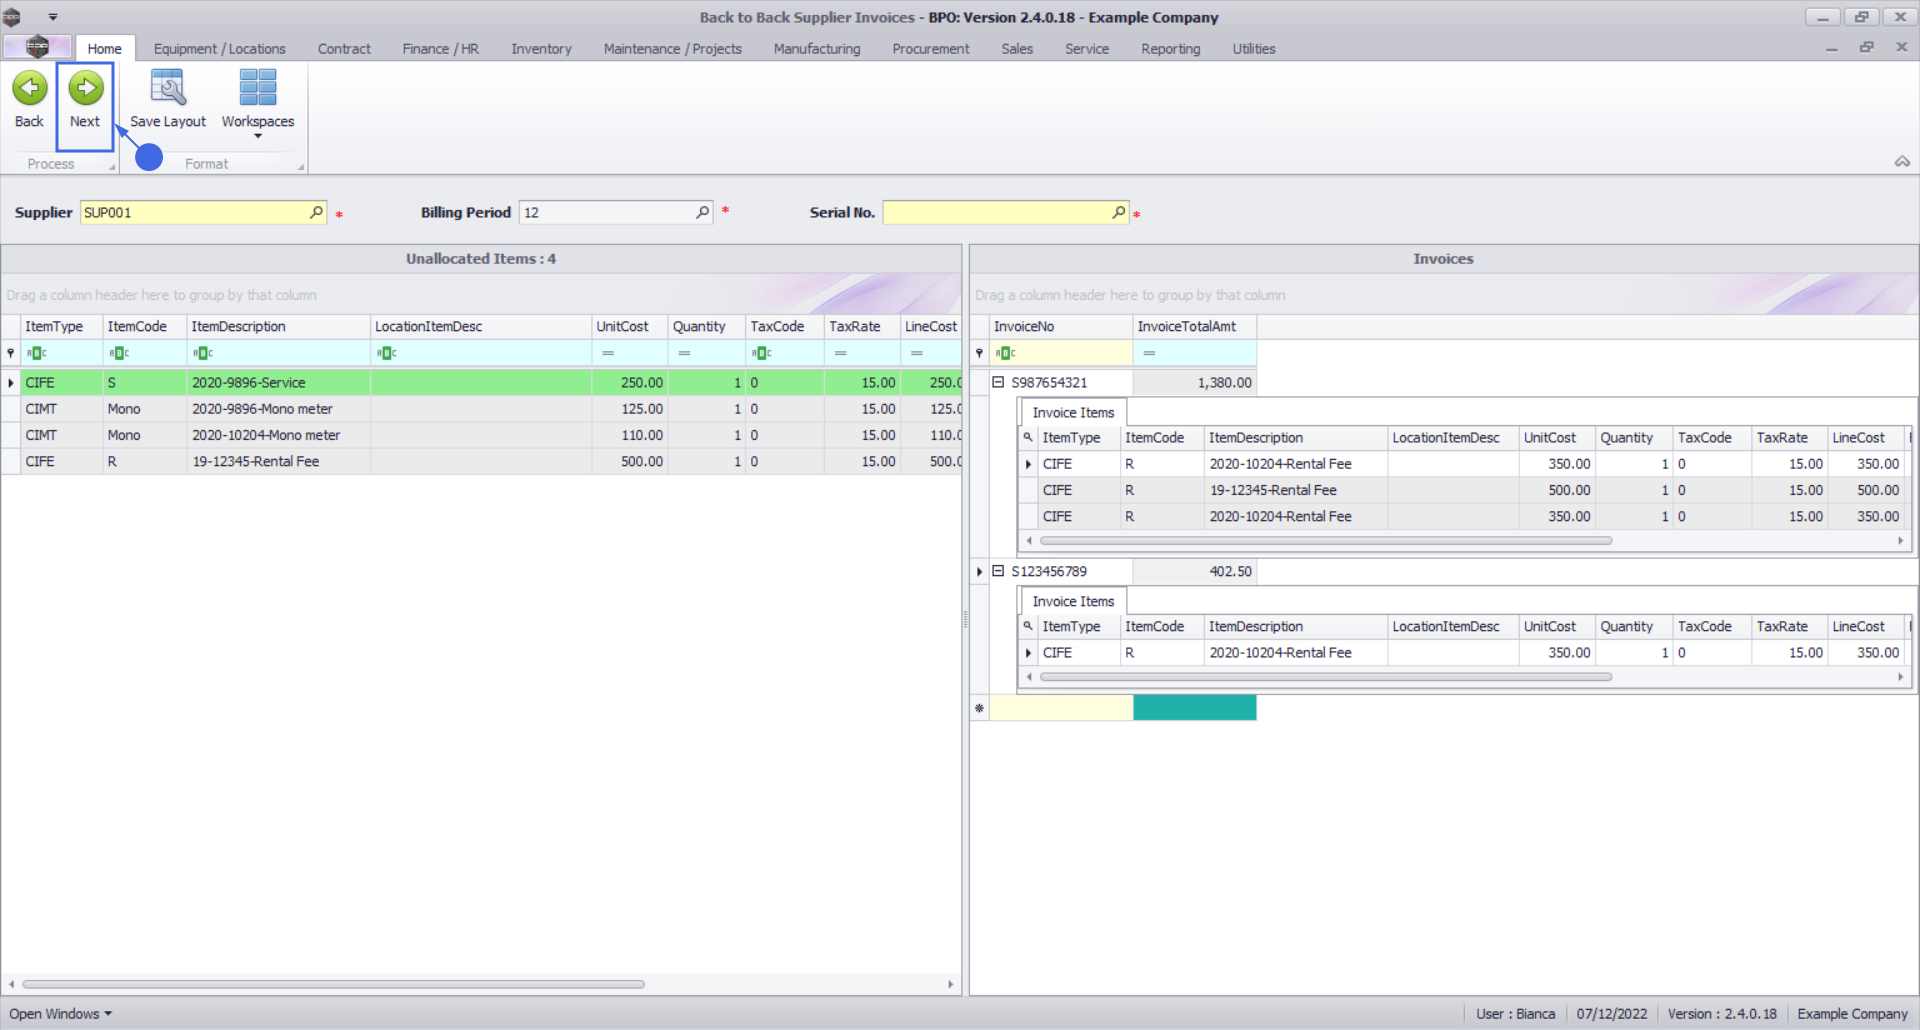
Once you have moved all the relevant items to the invoice header(s):
- Click on the Next button.
![]() Note You may have remaining unallocated items, but are still able to move onto the next step, as there could be items that were not invoiced by the Supplier. Once the Supplier sends the invoice for those items, you can create an Invoice for those.
Note You may have remaining unallocated items, but are still able to move onto the next step, as there could be items that were not invoiced by the Supplier. Once the Supplier sends the invoice for those items, you can create an Invoice for those.
Supplier Invoice Summary
If you have created multiple Invoice Headers, you will be shown a summary of the Invoice headers and the underlying items per invoice.
If you find items that should not be on the list, you will have the ability to delete those lines (via right click).
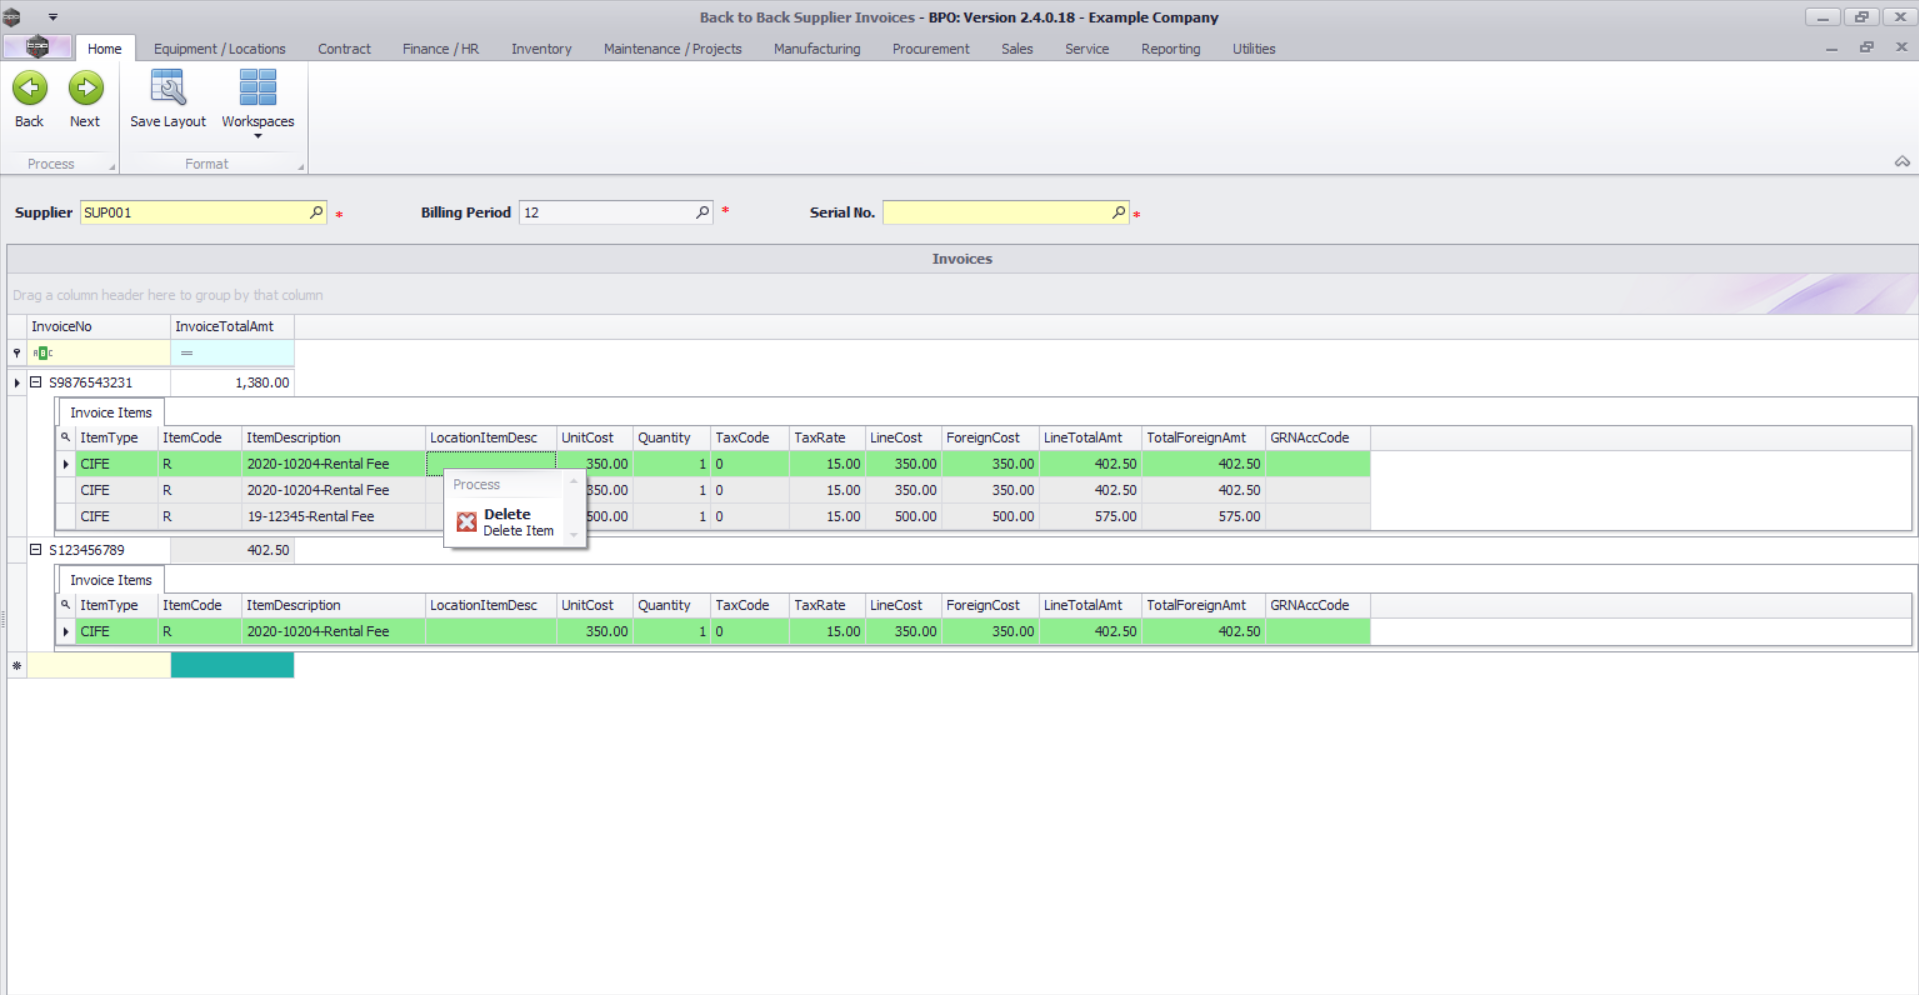
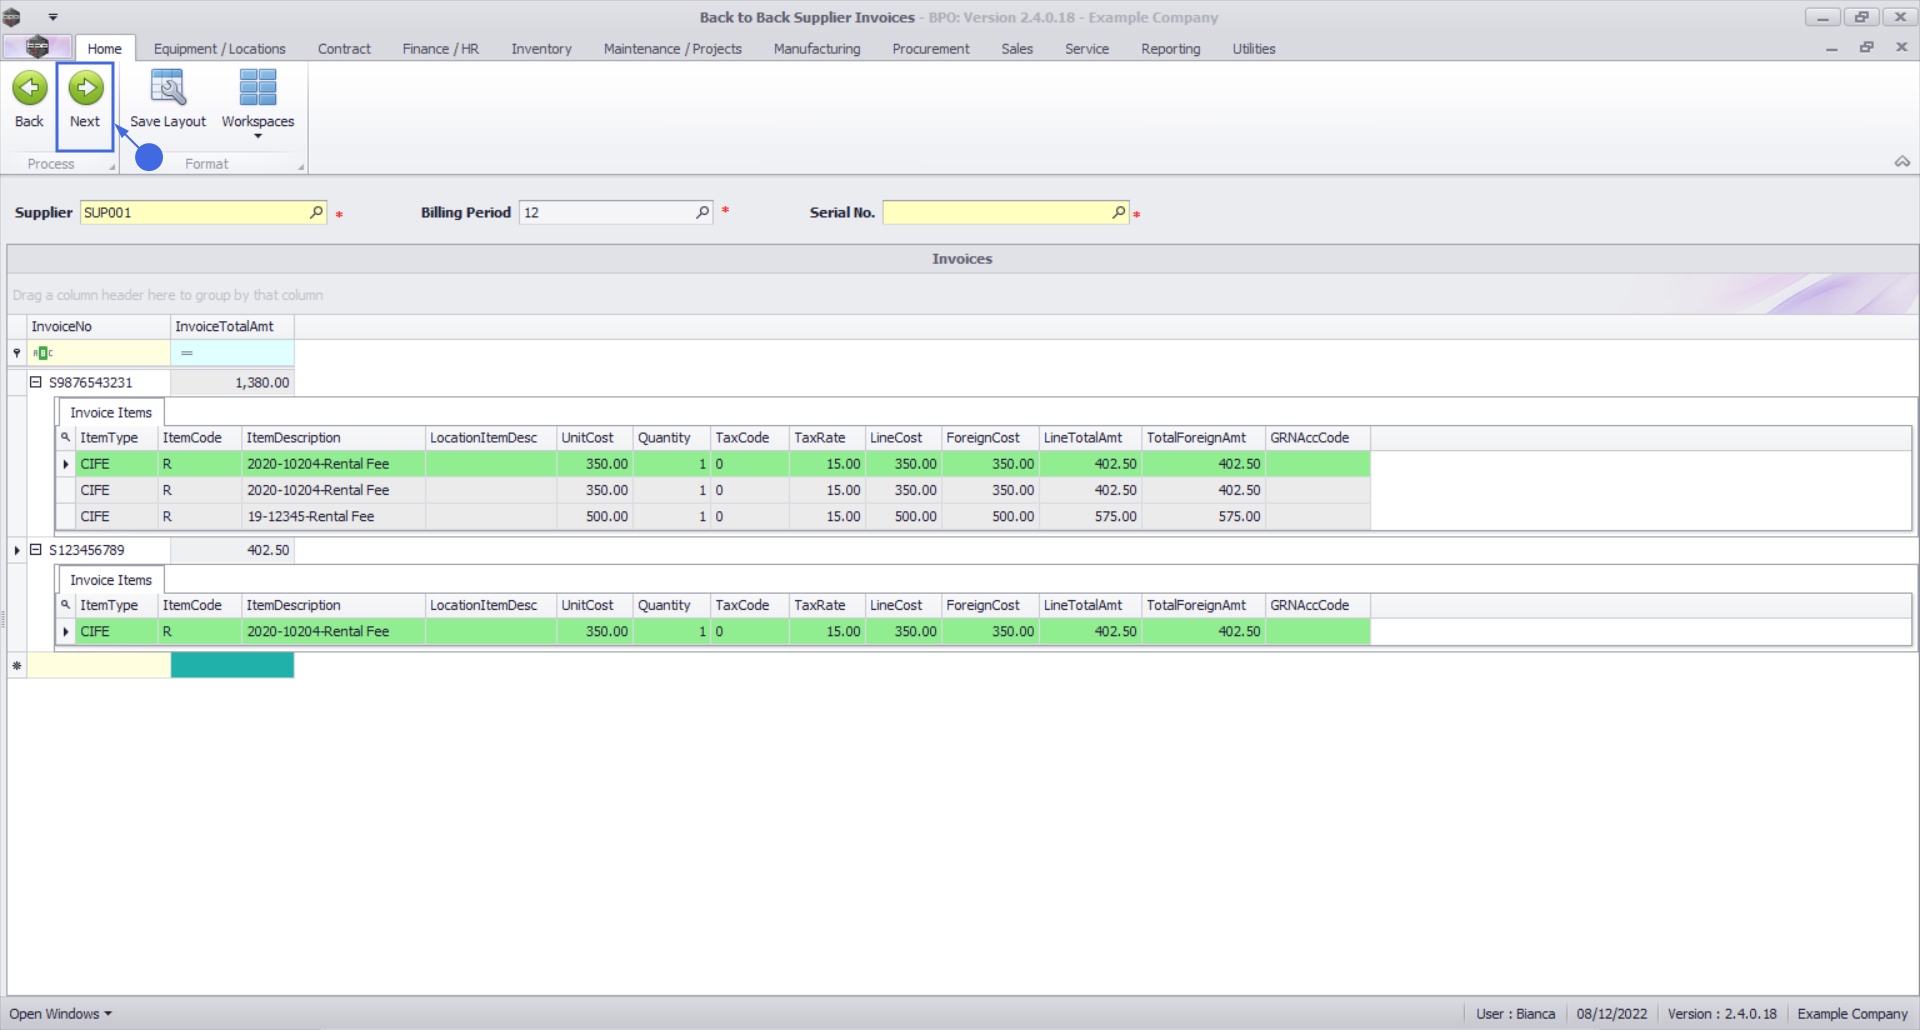
Once you have ensured the correct lines exist in this summary:
- Click on the Next button.
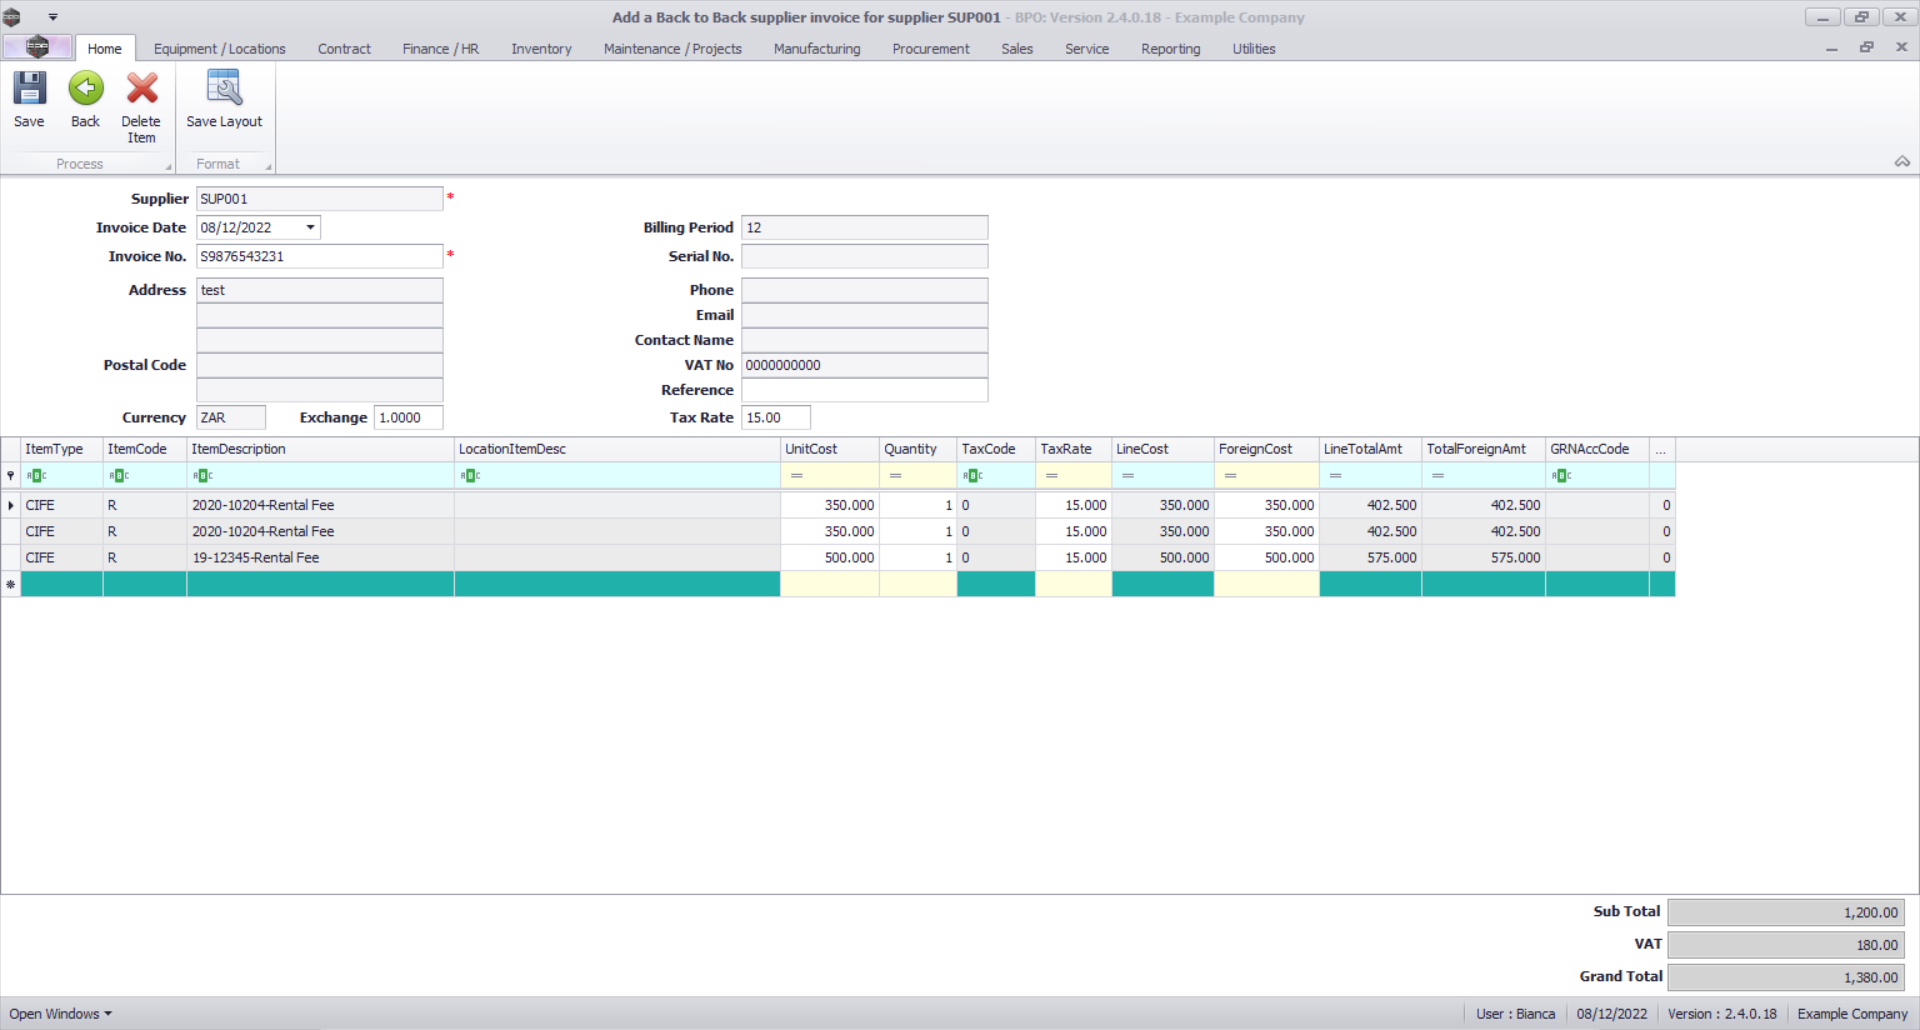
Supplier Invoice Maintain
You will see the Back to Back Supplier Invoice maintain screen for the Invoice header you created previously. If you created multiple invoice headers, you will see the details for the first Invoice Header.
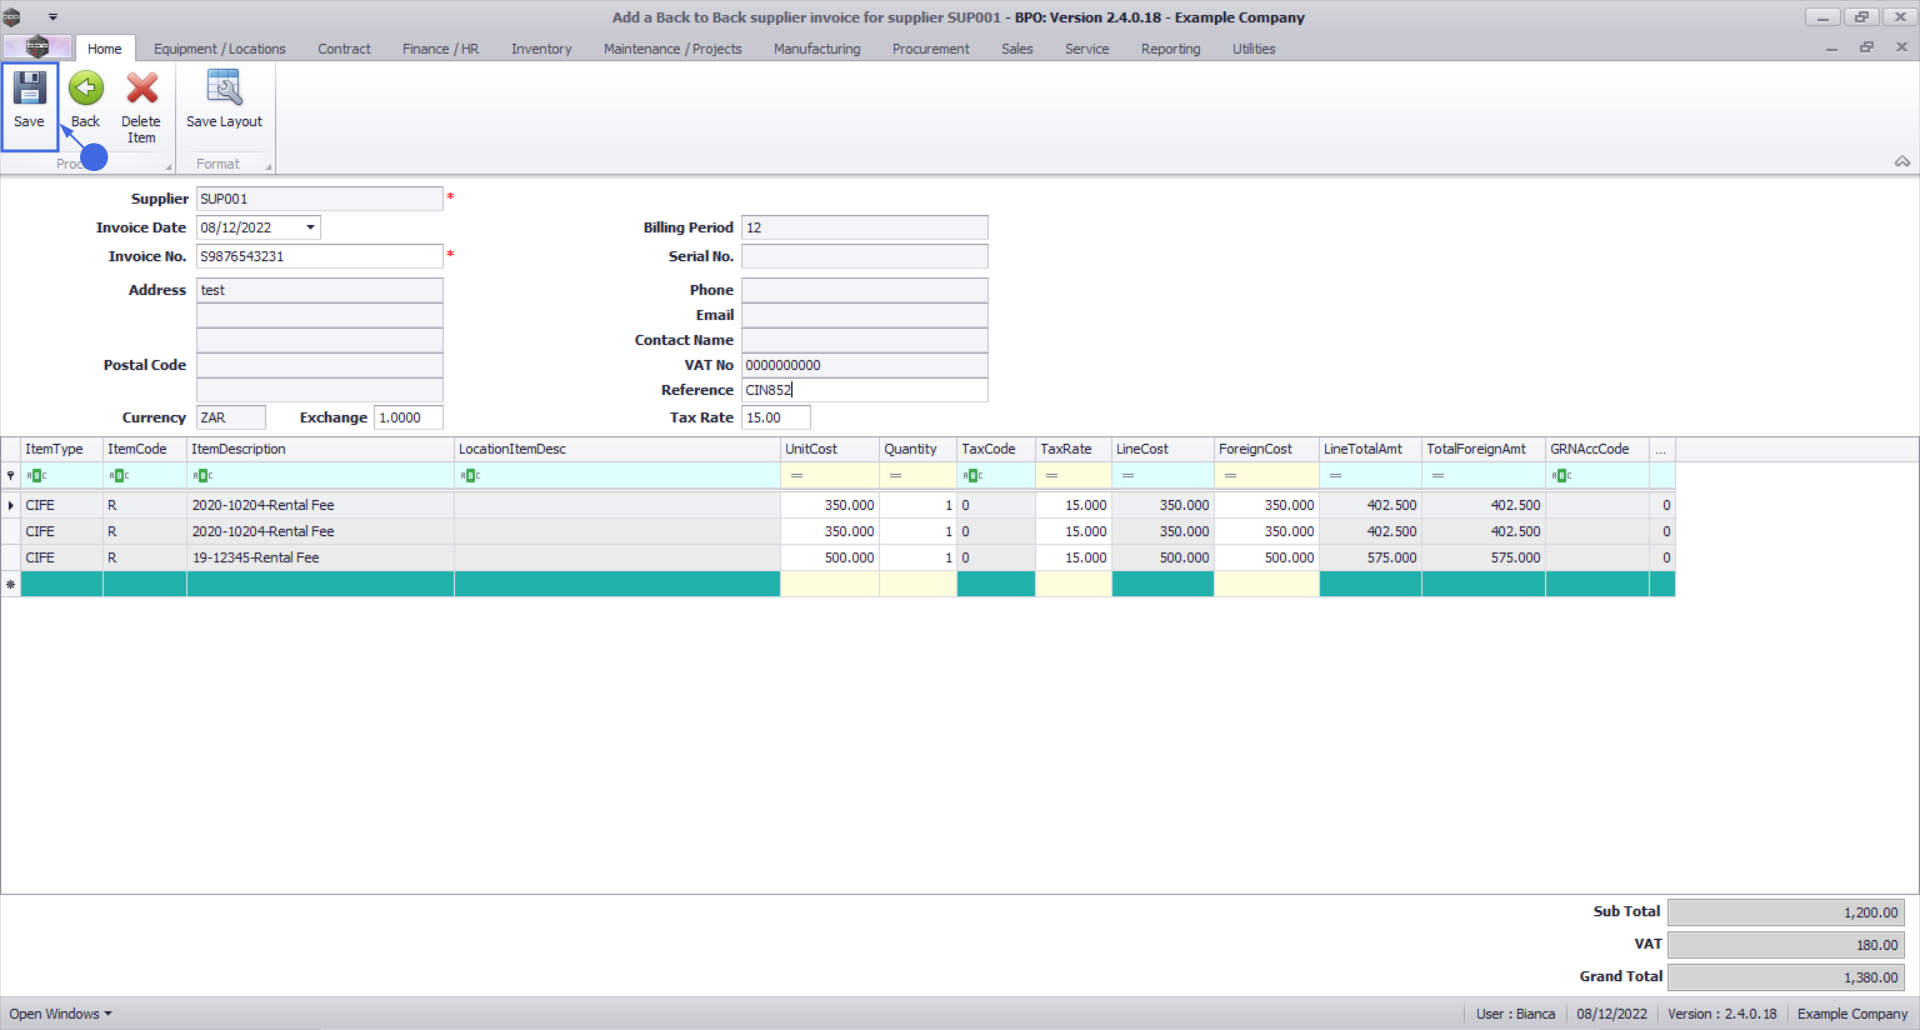
All the Invoice header details will be populated, but you can set the Reference:
- Type in the Reference number for this B2B Supplier Invoice.
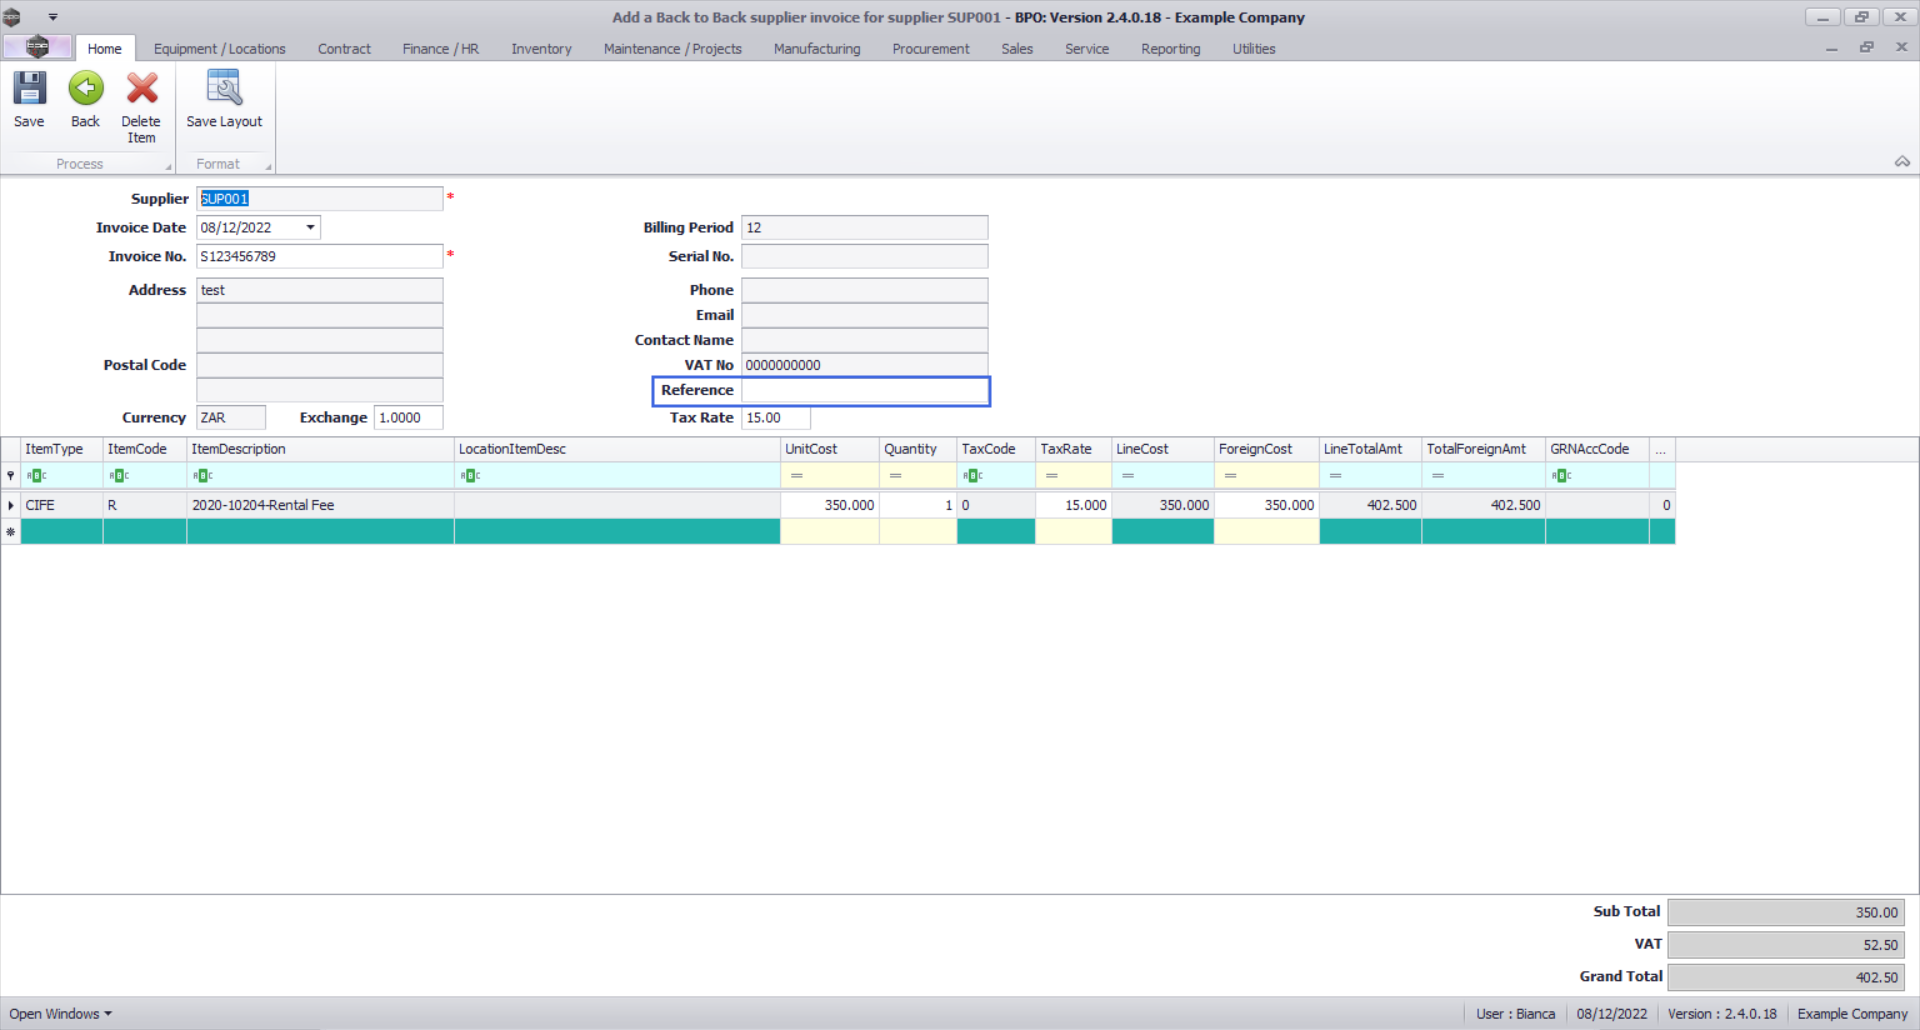
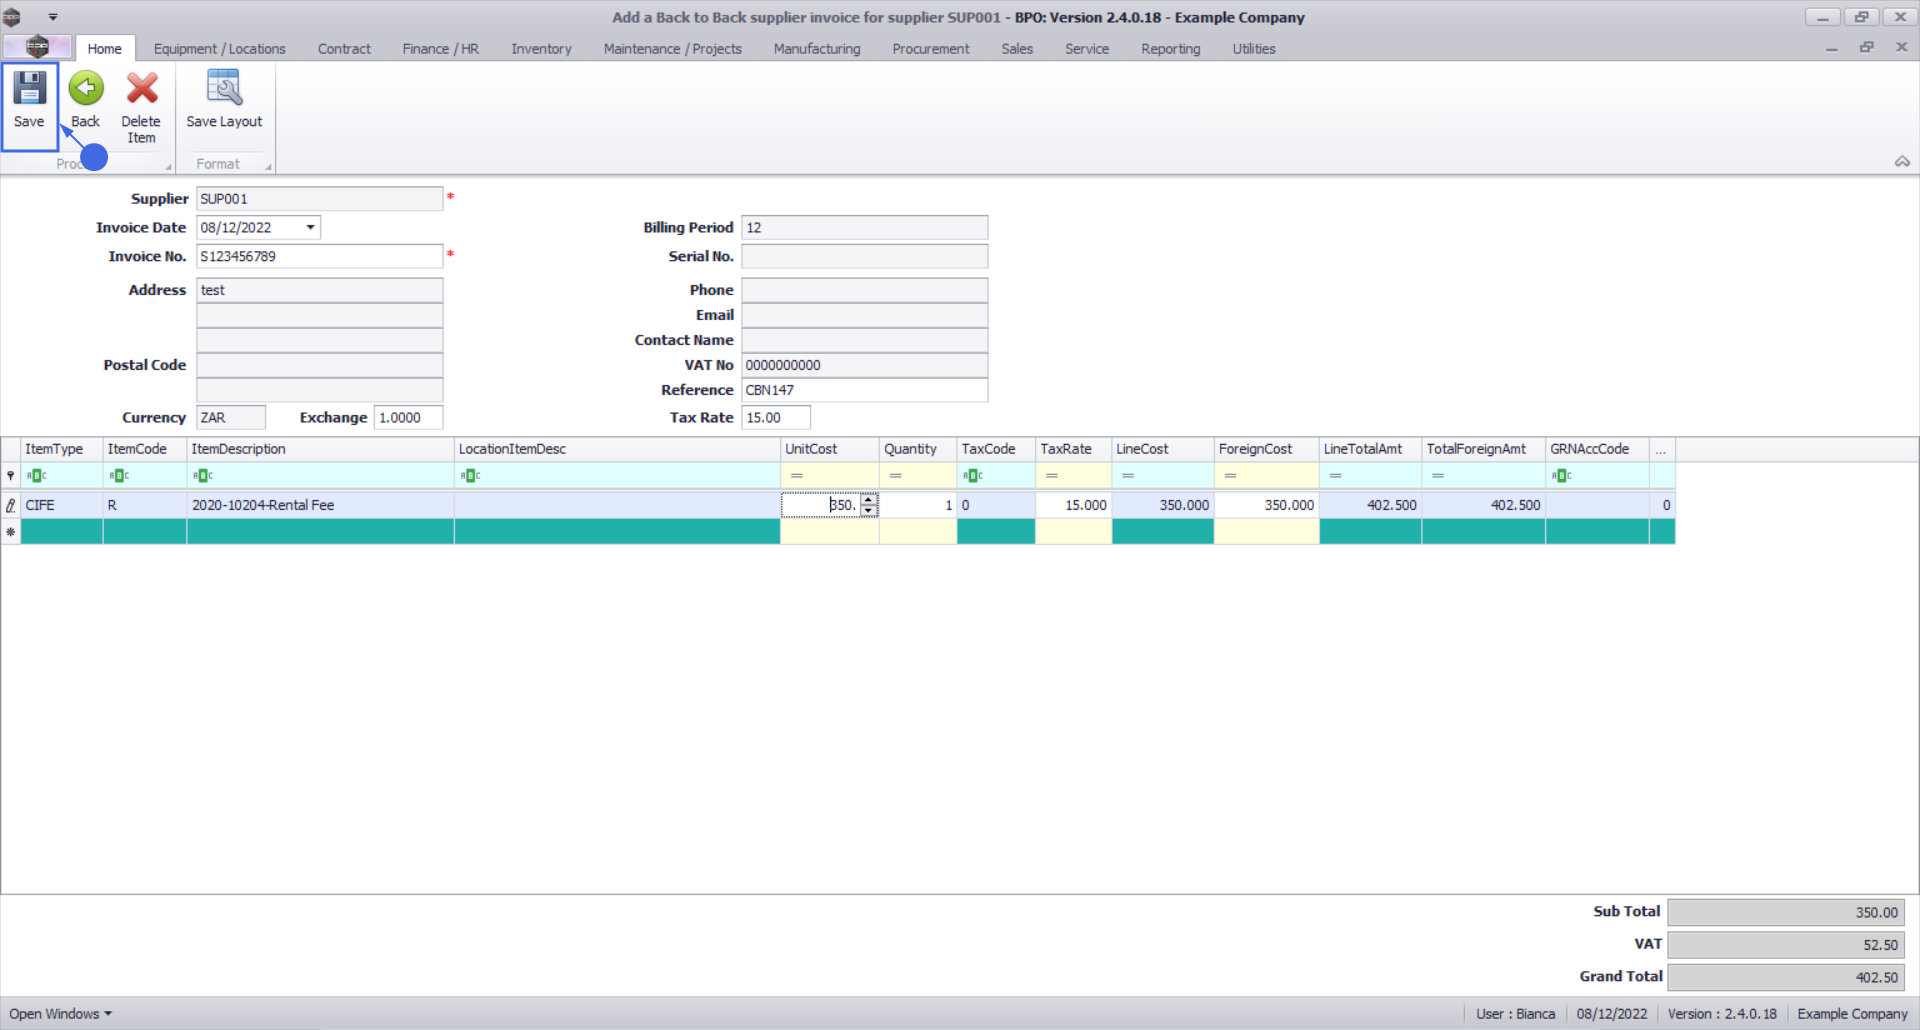
Supplier Invoice Items
You can check that the item details are correct and amend if necessary, but removing line items or editing the following fields: the Quantity, Unit Cost, Foreign Cost and Tax Rate columns are editable.

Once you have checked all the details and reviewed the totals to make sure they match the invoice from the Supplier / Finance Party:
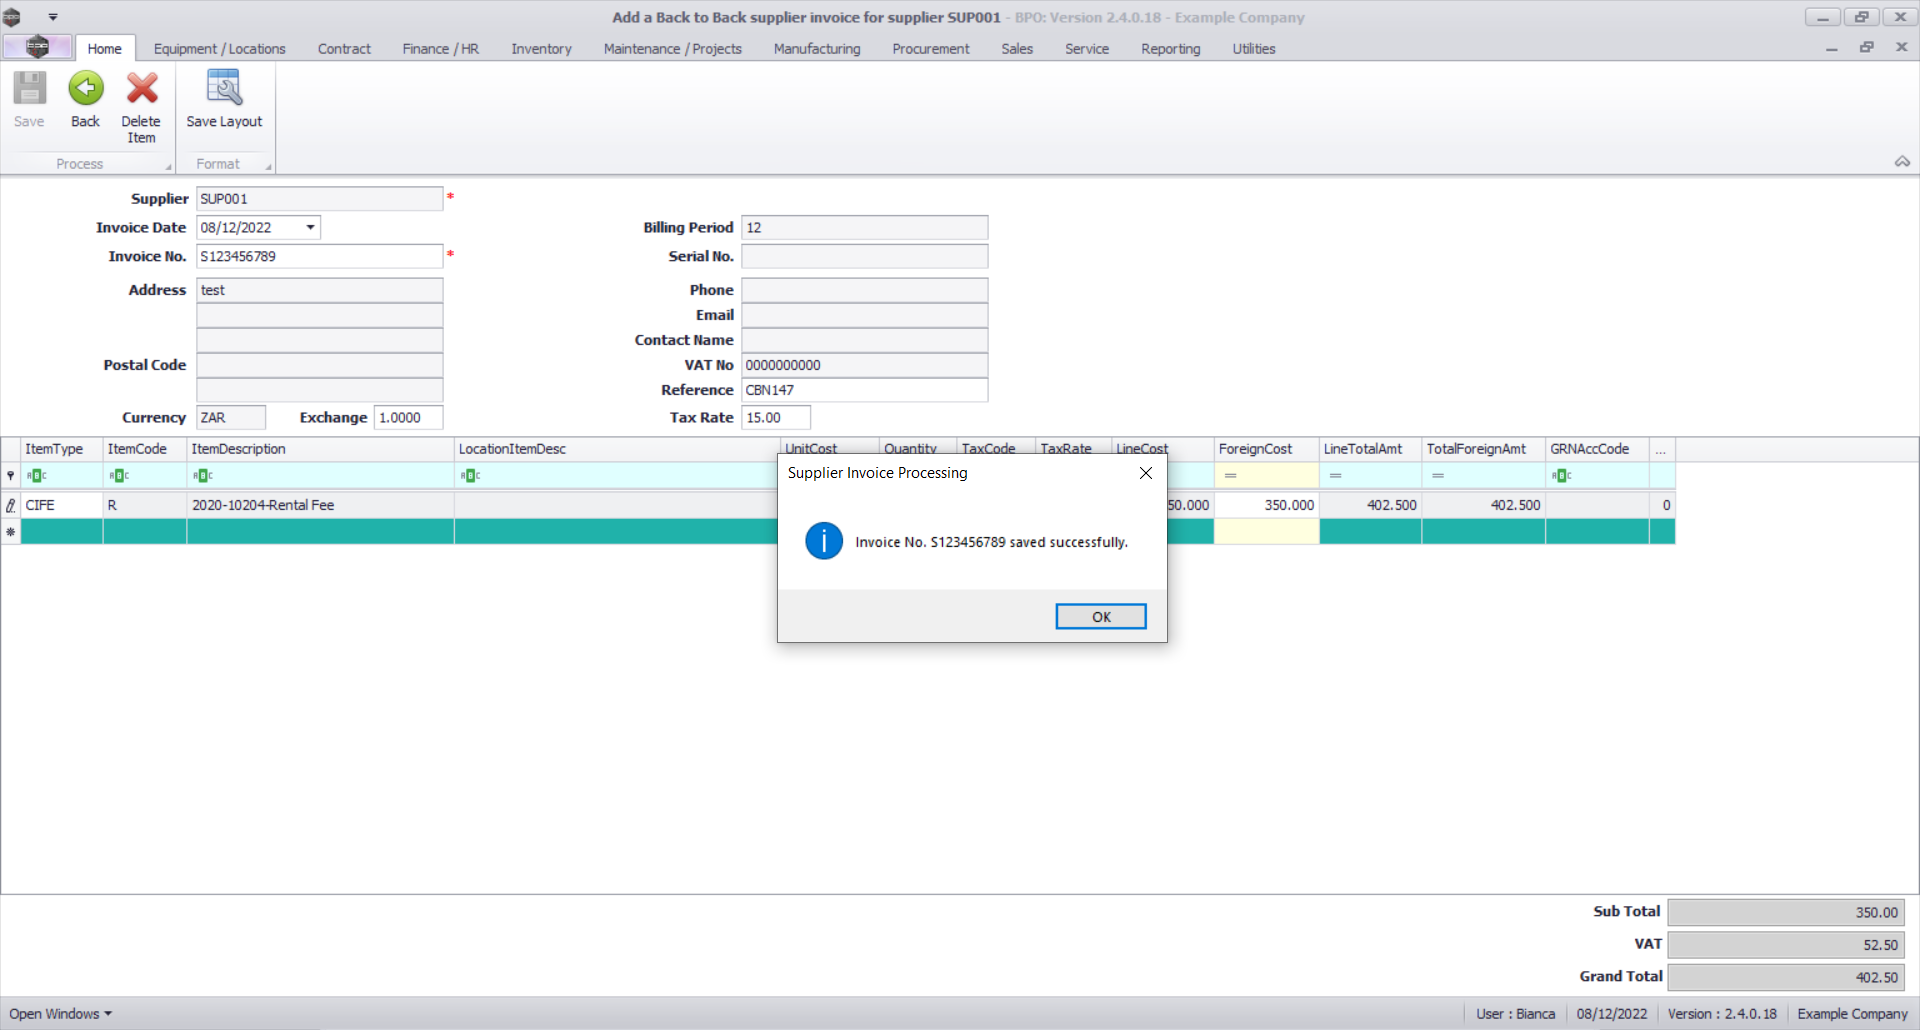
- Click on the Save button.
A message box will come up noting: Invoice No [invoice number] saved successfully.
- Click on the Ok button.
Print Supplier Invoice
A message box will come up asking: Do you want to print the invoice [invoice number]?
- Click on the Yes button, if you wish to Print Preview the document at this point.

Multiple Supplier Invoices
If you created multiple invoice headers, you will send the next Back to Back Supplier Invoice detail populated in the maintain screen.
Follow the steps above to update the details above, then Save. Go on to Print Preview, if required.
View Supplier Invoice(s)
The invoice(s) will be display in the listing under the New status.
The Supplier Invoice must be Approved in order to post the financial transaction.
- The financial transaction will post via the SINV driver when the Supplier Invoice is Approved.
NUCL.PRCH.SINV.0002