Sales
Invoices - Print Sales Invoice
The first time an invoice is printed, it will state: Tax Invoice. Each time thereafter, it will state Copy - Tax Invoice.
If you need to re-print an original Tax Invoice due to a network connection issue, etc., then you will need to use the Print Queue Reprint functionality.
When using the 'Email' option to send a Sales Invoice, note that it will be emailed via the Nucleus Service Email Service on the server and not from Microsoft Outlook on your desktop.
Ribbon Select Sales > Invoices

- The Sales Invoices listing screen will be displayed.
- Select the Site where the invoice can be located.
- The example has KwaZulu-Natal selected.
- Ensure that the Status is set to New Order.
- Refer to the Introduction above for explanation on printing previously emailed invoices.
- Select the row of the invoice you wish to print.
- Click on Print.
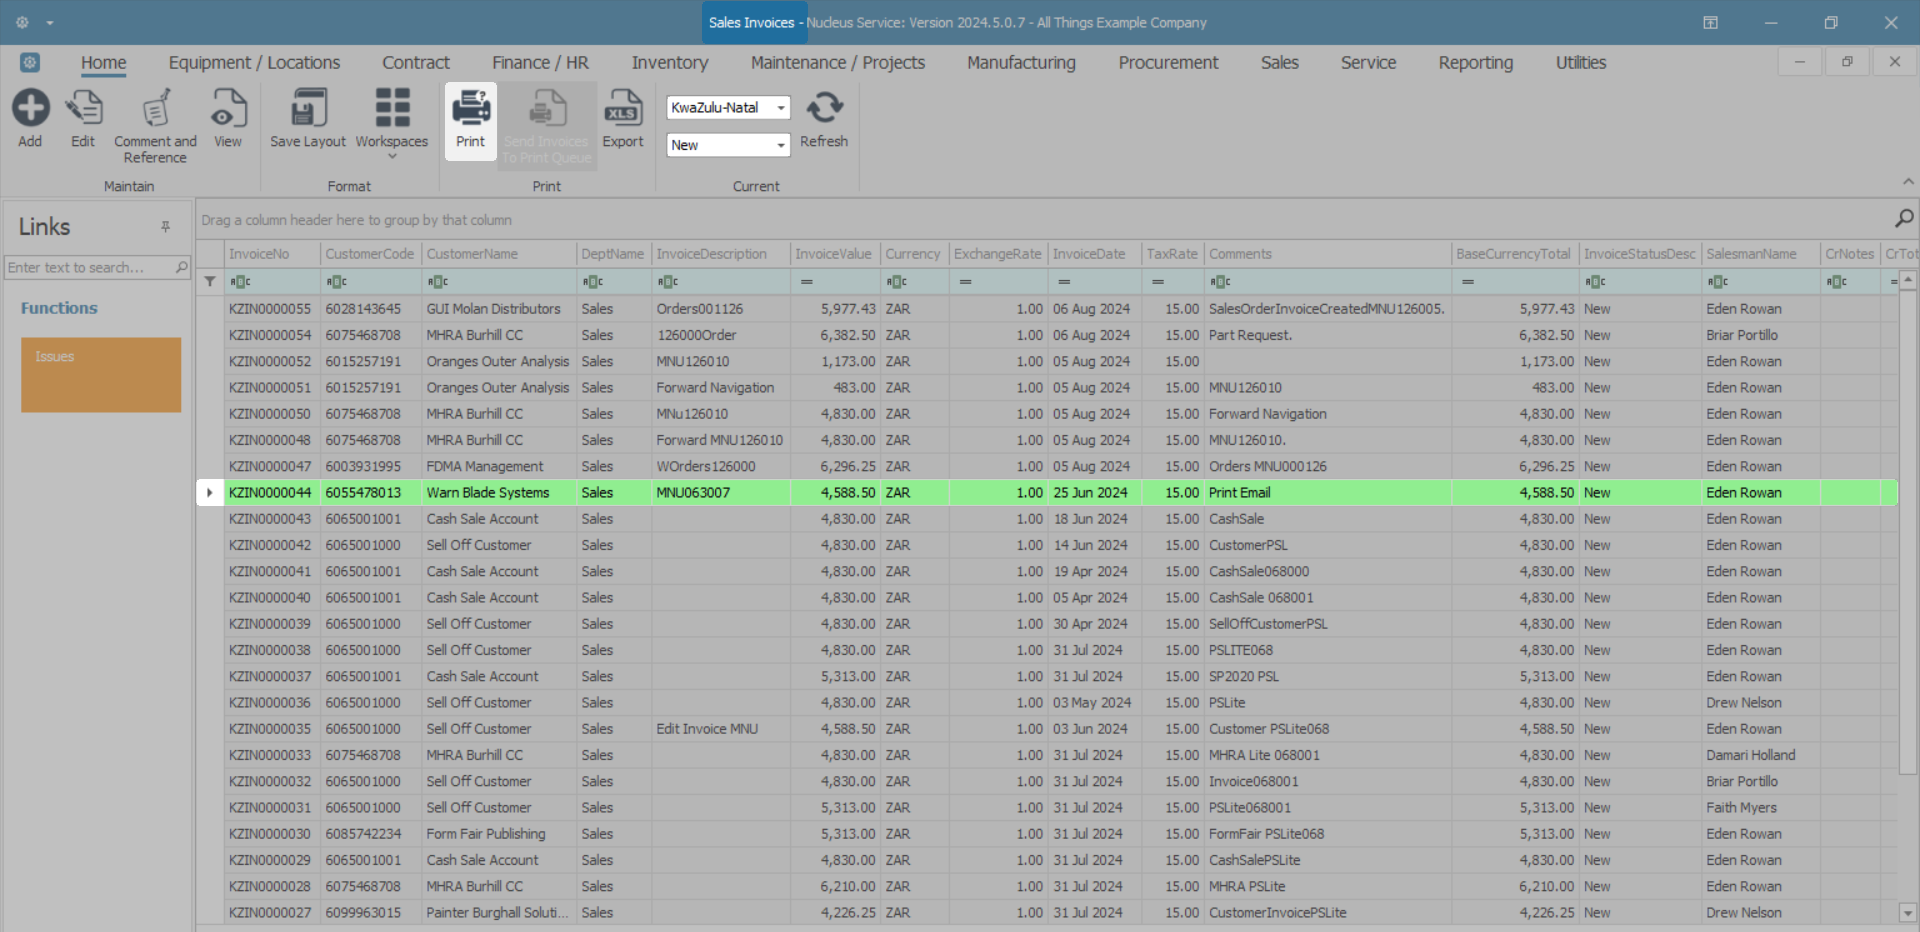
- The Select the option as desired screen will display.
Print Tax Invoice
- To print the Tax Invoice, click on the Print Invoice radio button.
- Click on Accept.
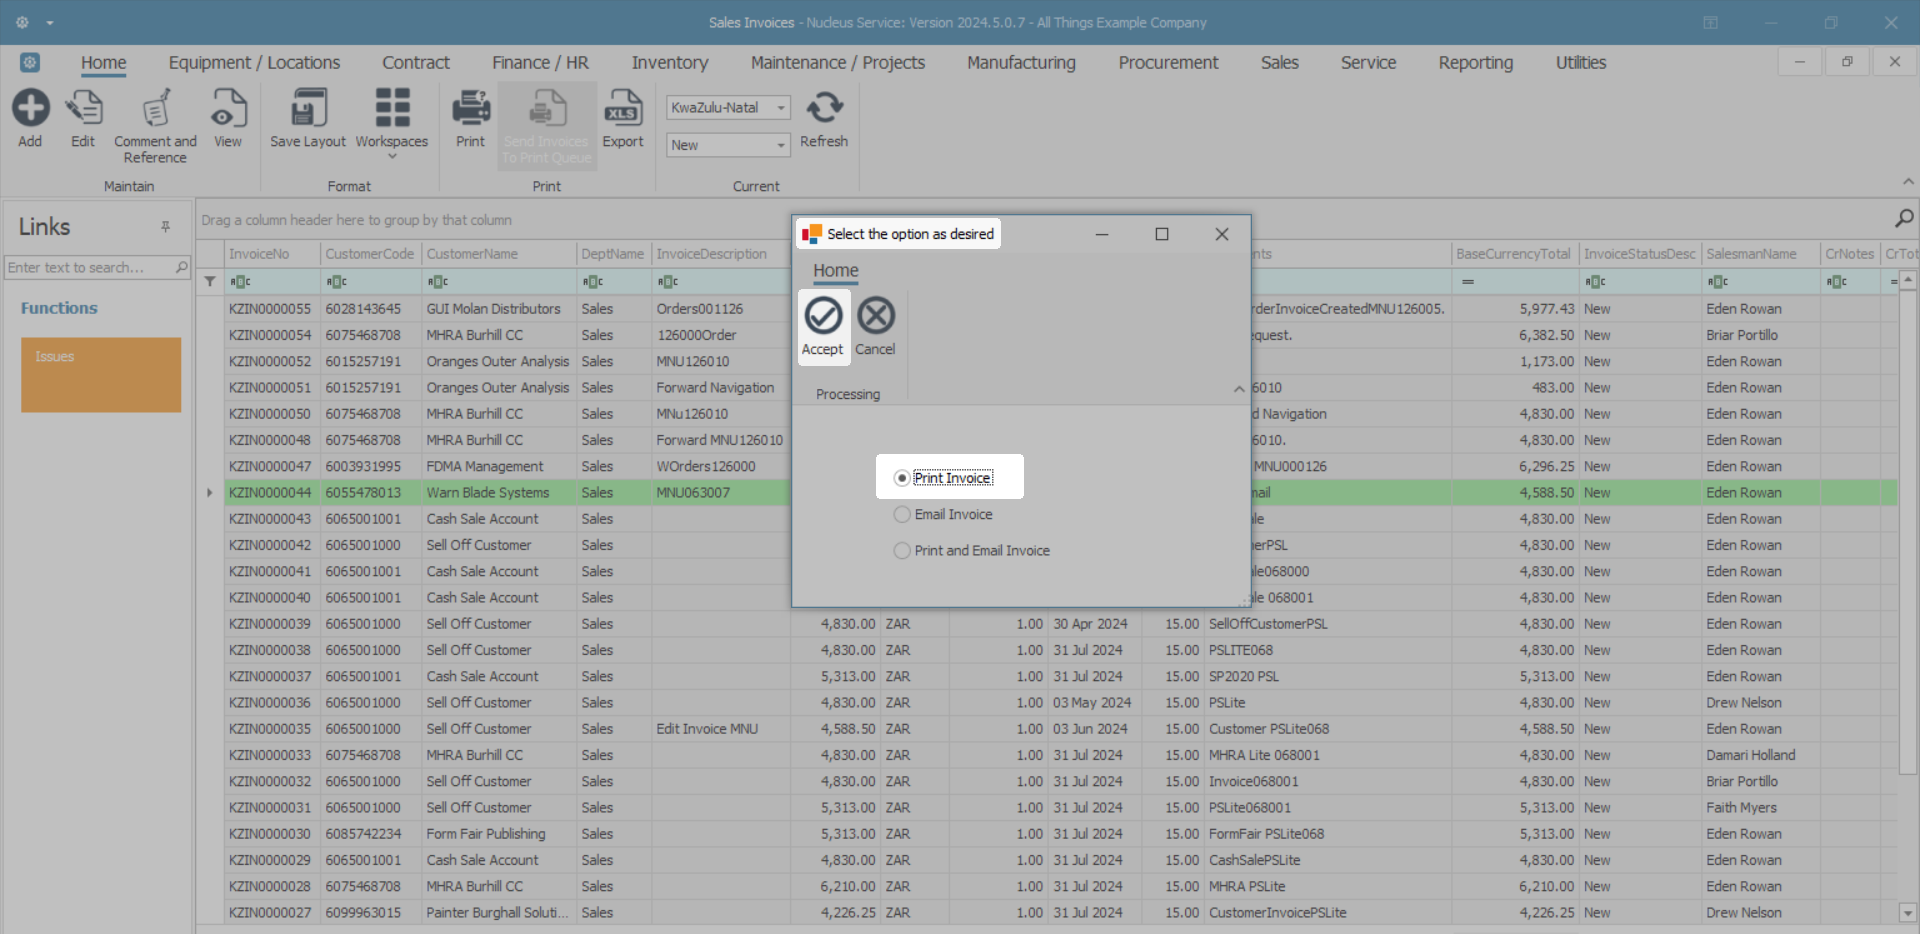
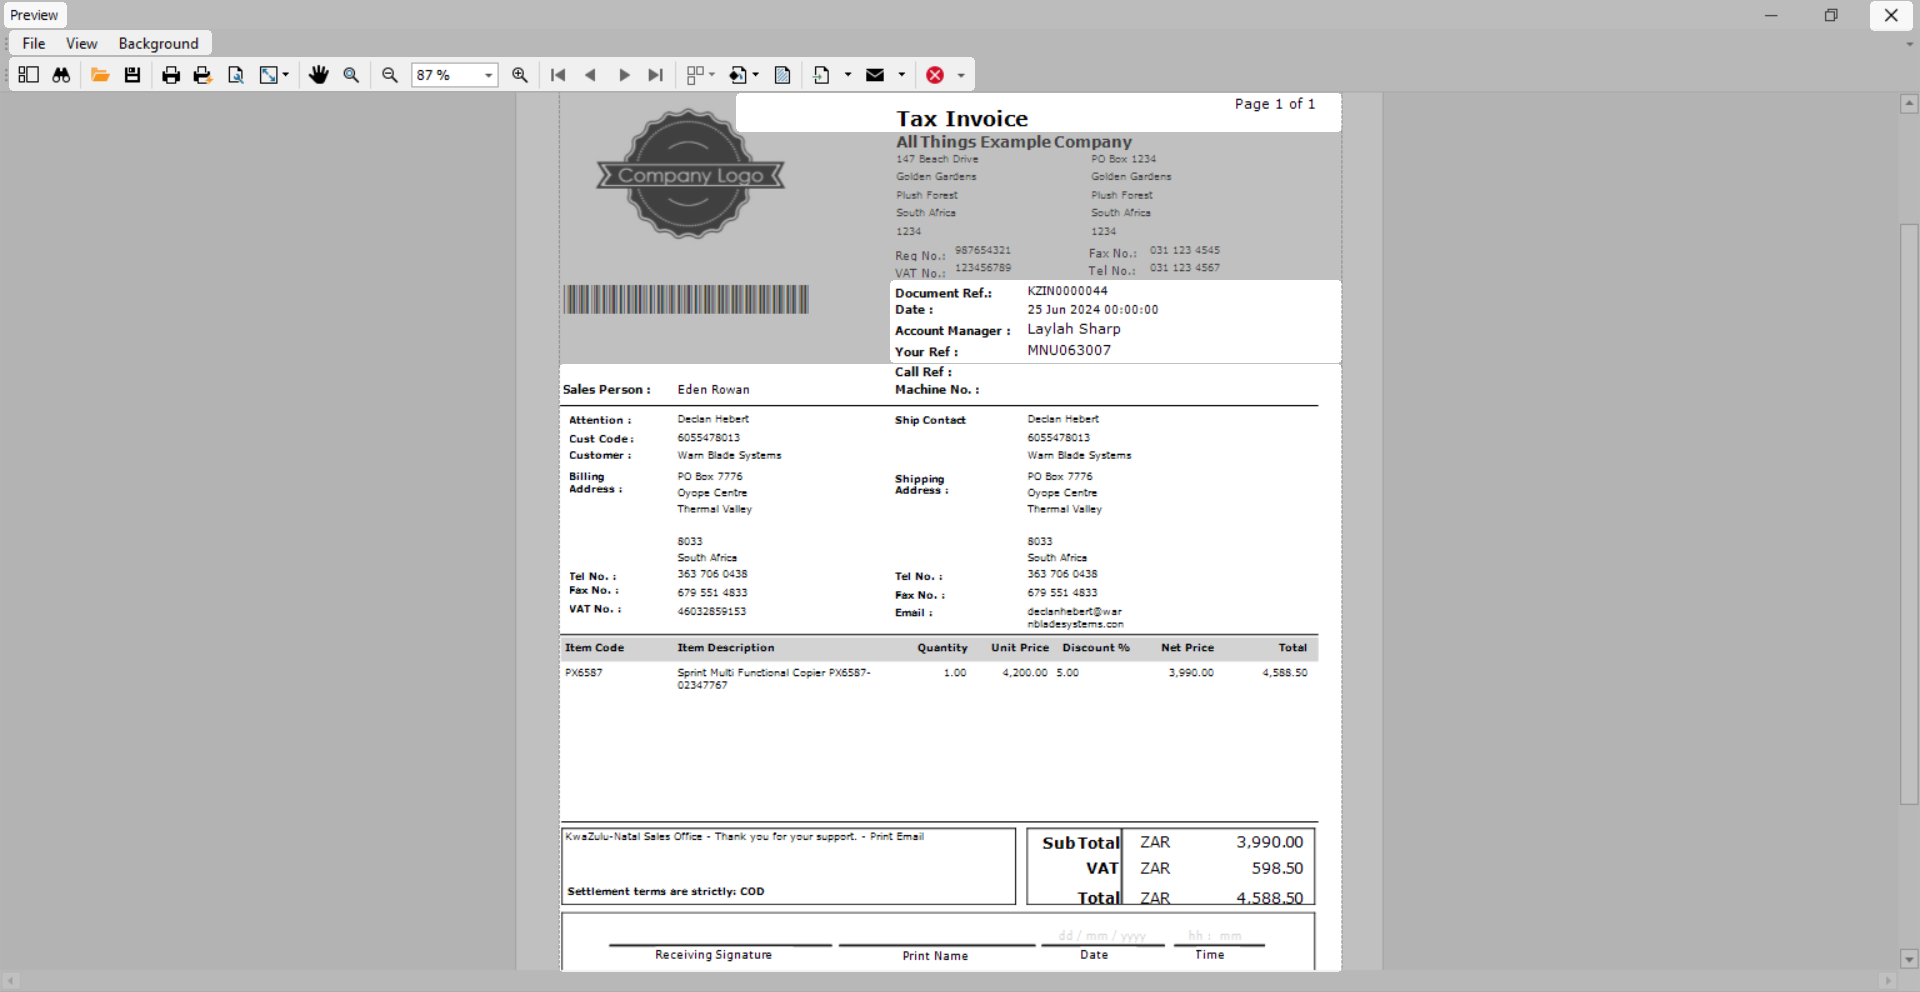
- The Report Preview screen will display.
 Note that the header reads Tax Invoice. The first time an invoice is printed, it will state: Tax Invoice. Each time thereafter, it will state Copy - Tax Invoice.
 - From the preview screen you can make cosmetic changes to the Tax Invoice, as well as Save, Zoom, Add a Watermark, Export or Email from the preview screen.
- Click on Close to return to the Sales Invoices listing screen.
Email Invoice / Print and Email Invoice
![]() If you get an error when trying to email the document, ask your administrator to make sure that the correct shared folder location has been configured in Nucleus Service and that you have the relevant folder rights to access the shared folder on the server.
If you get an error when trying to email the document, ask your administrator to make sure that the correct shared folder location has been configured in Nucleus Service and that you have the relevant folder rights to access the shared folder on the server.
- From the Select the option as desired screen -
- Click on the Email Invoice radio button.
- Click on Accept.
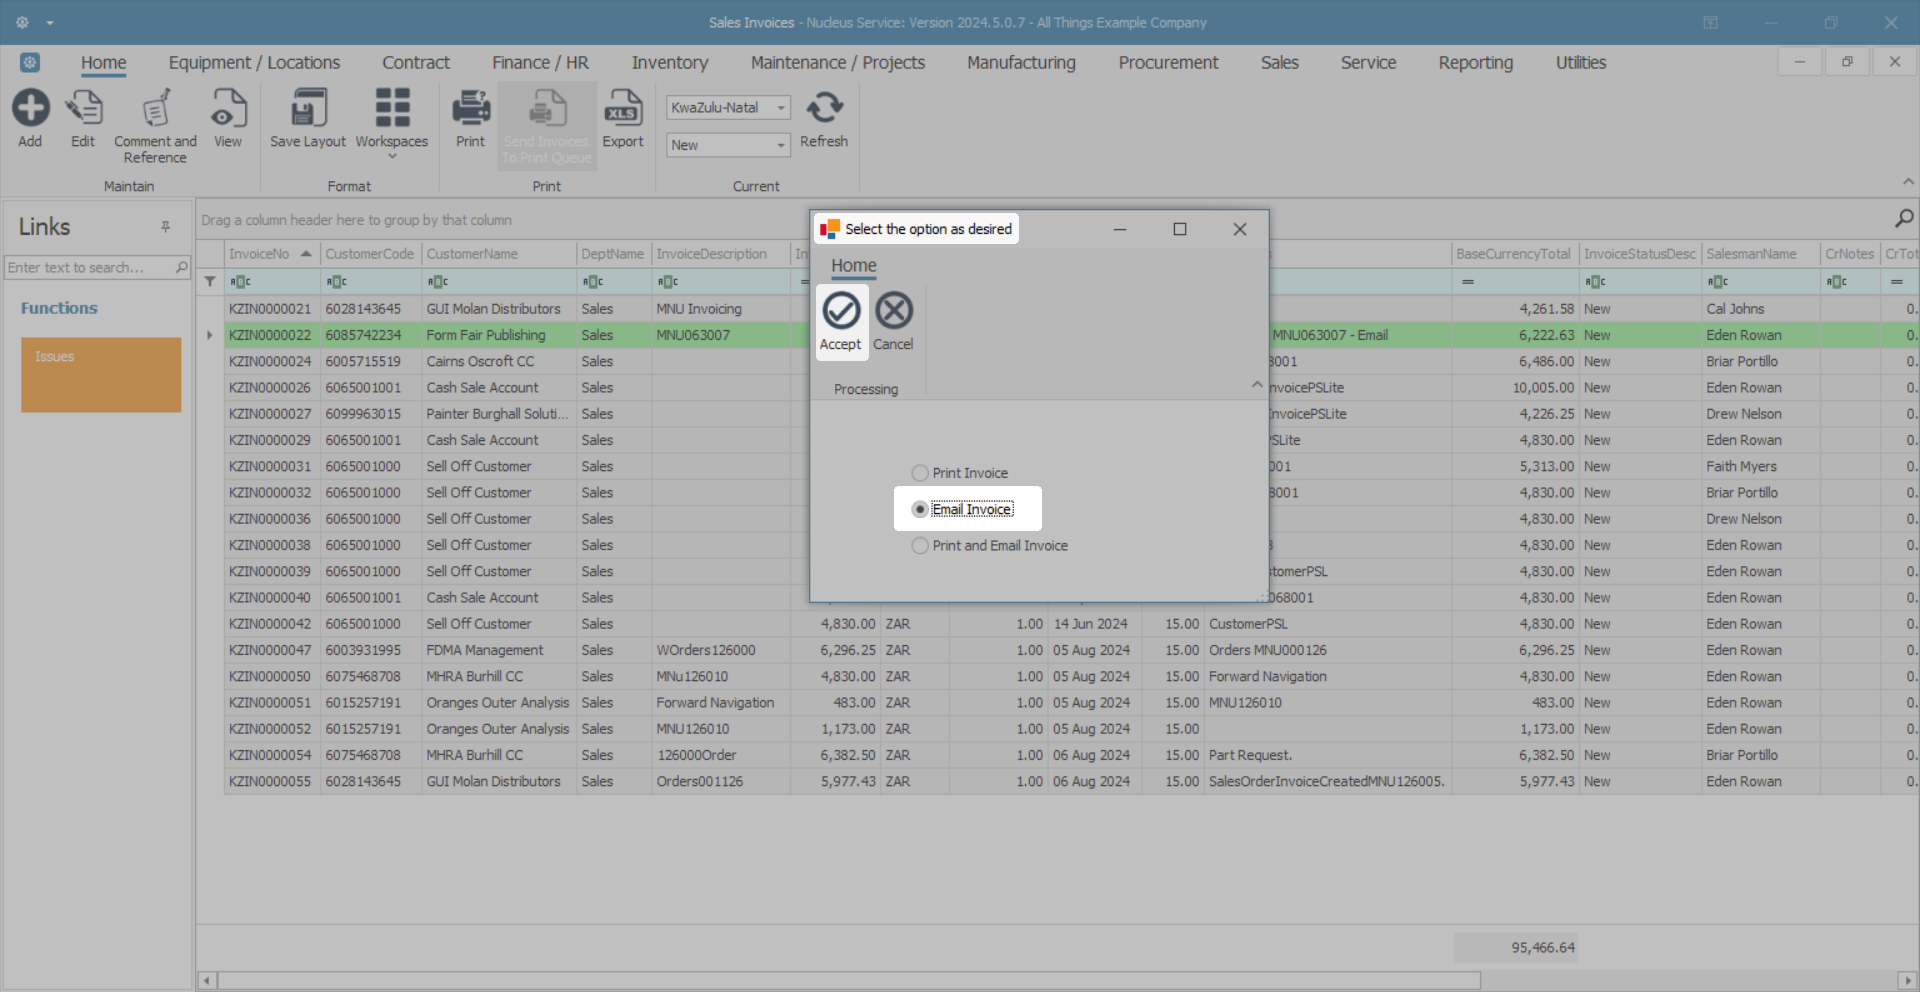
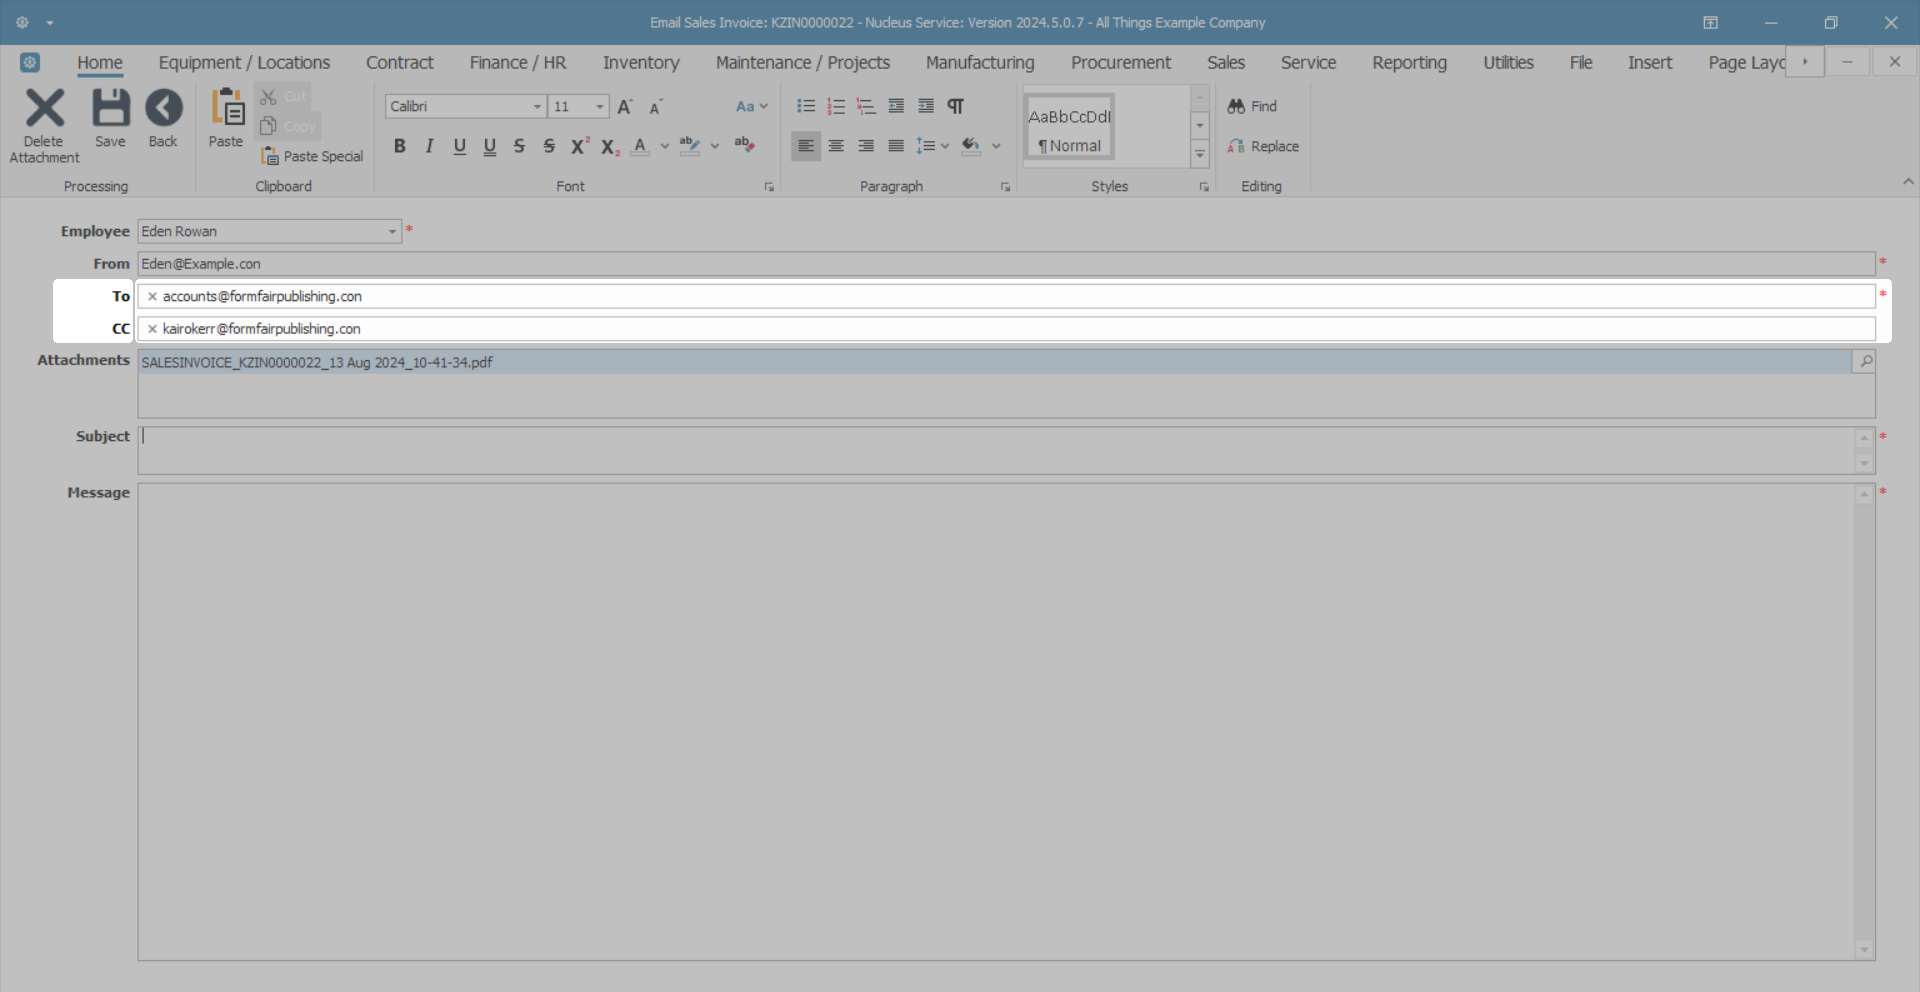
- The Email Sales Invoice: KZIN [ ] screen will display, for both Email Invoice and Print and Email Invoice options.
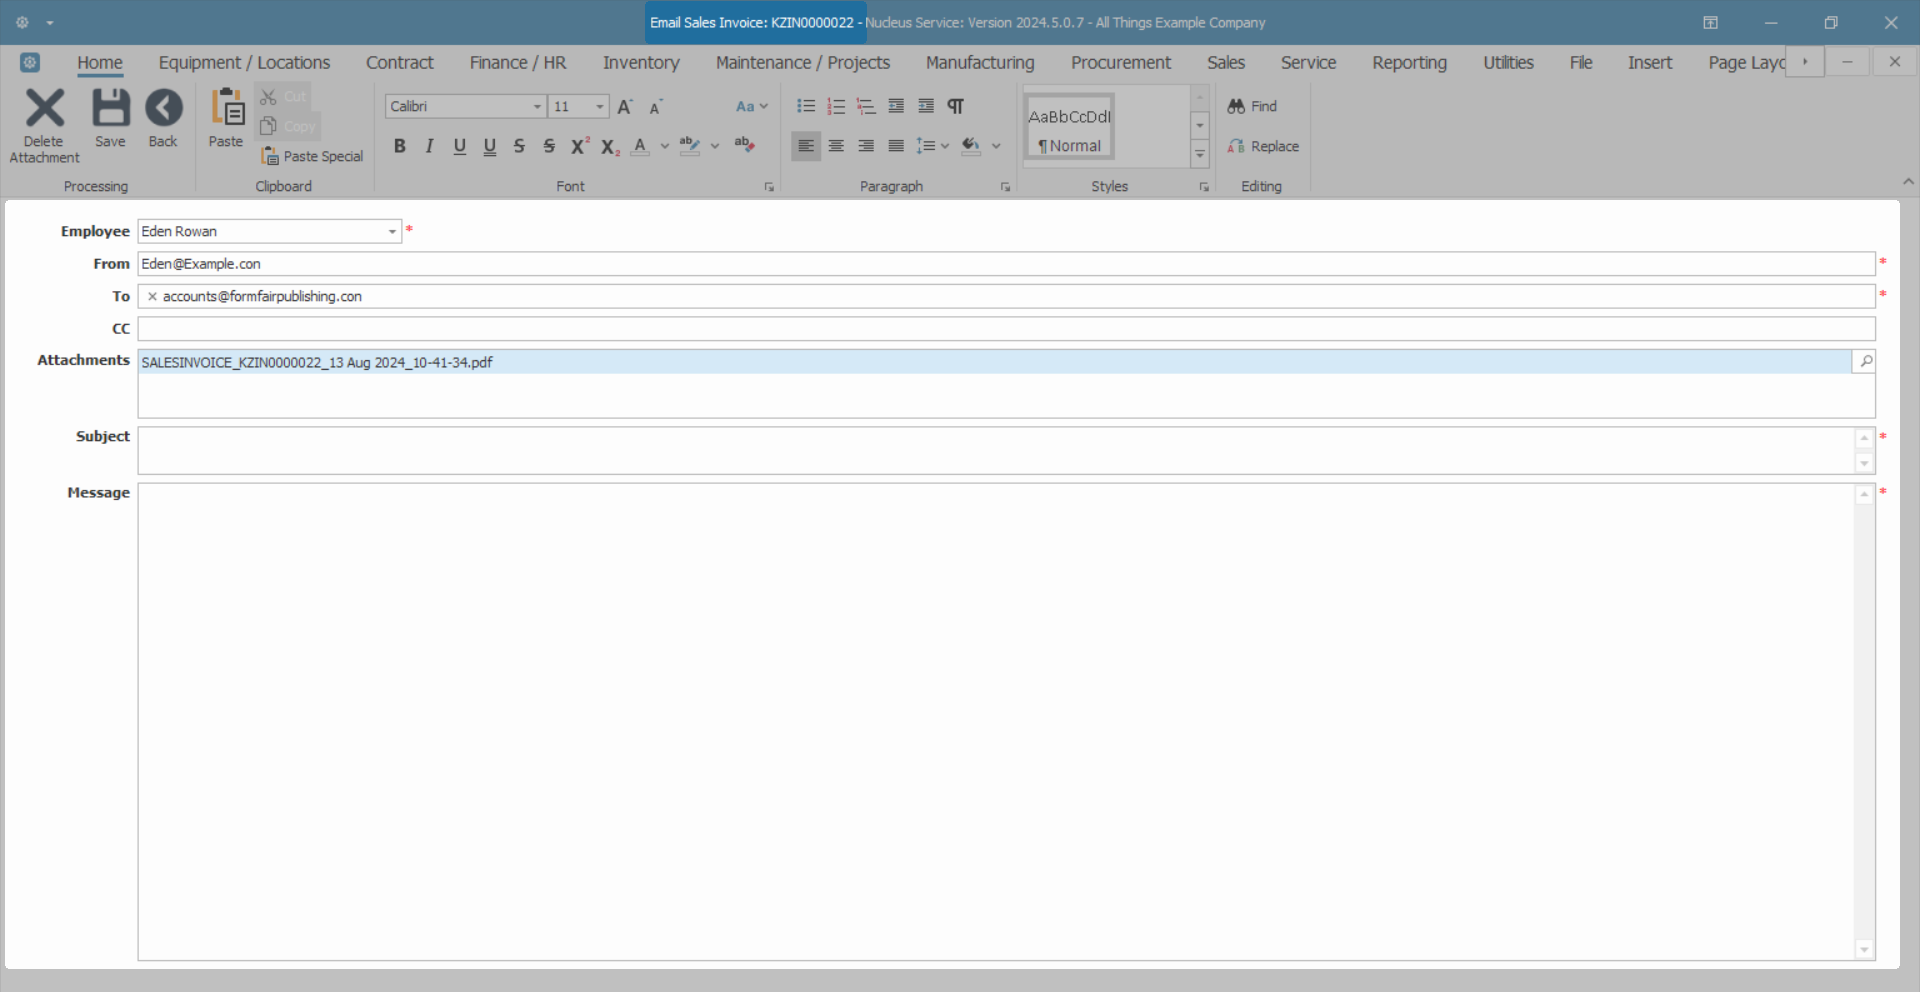
Email Header
- Employee: The employee who is currently logged on will display in the employee field. Click on the drop-down arrow to choose an alternative employee name, if required.
- From: The email address of the employee will display in this field.
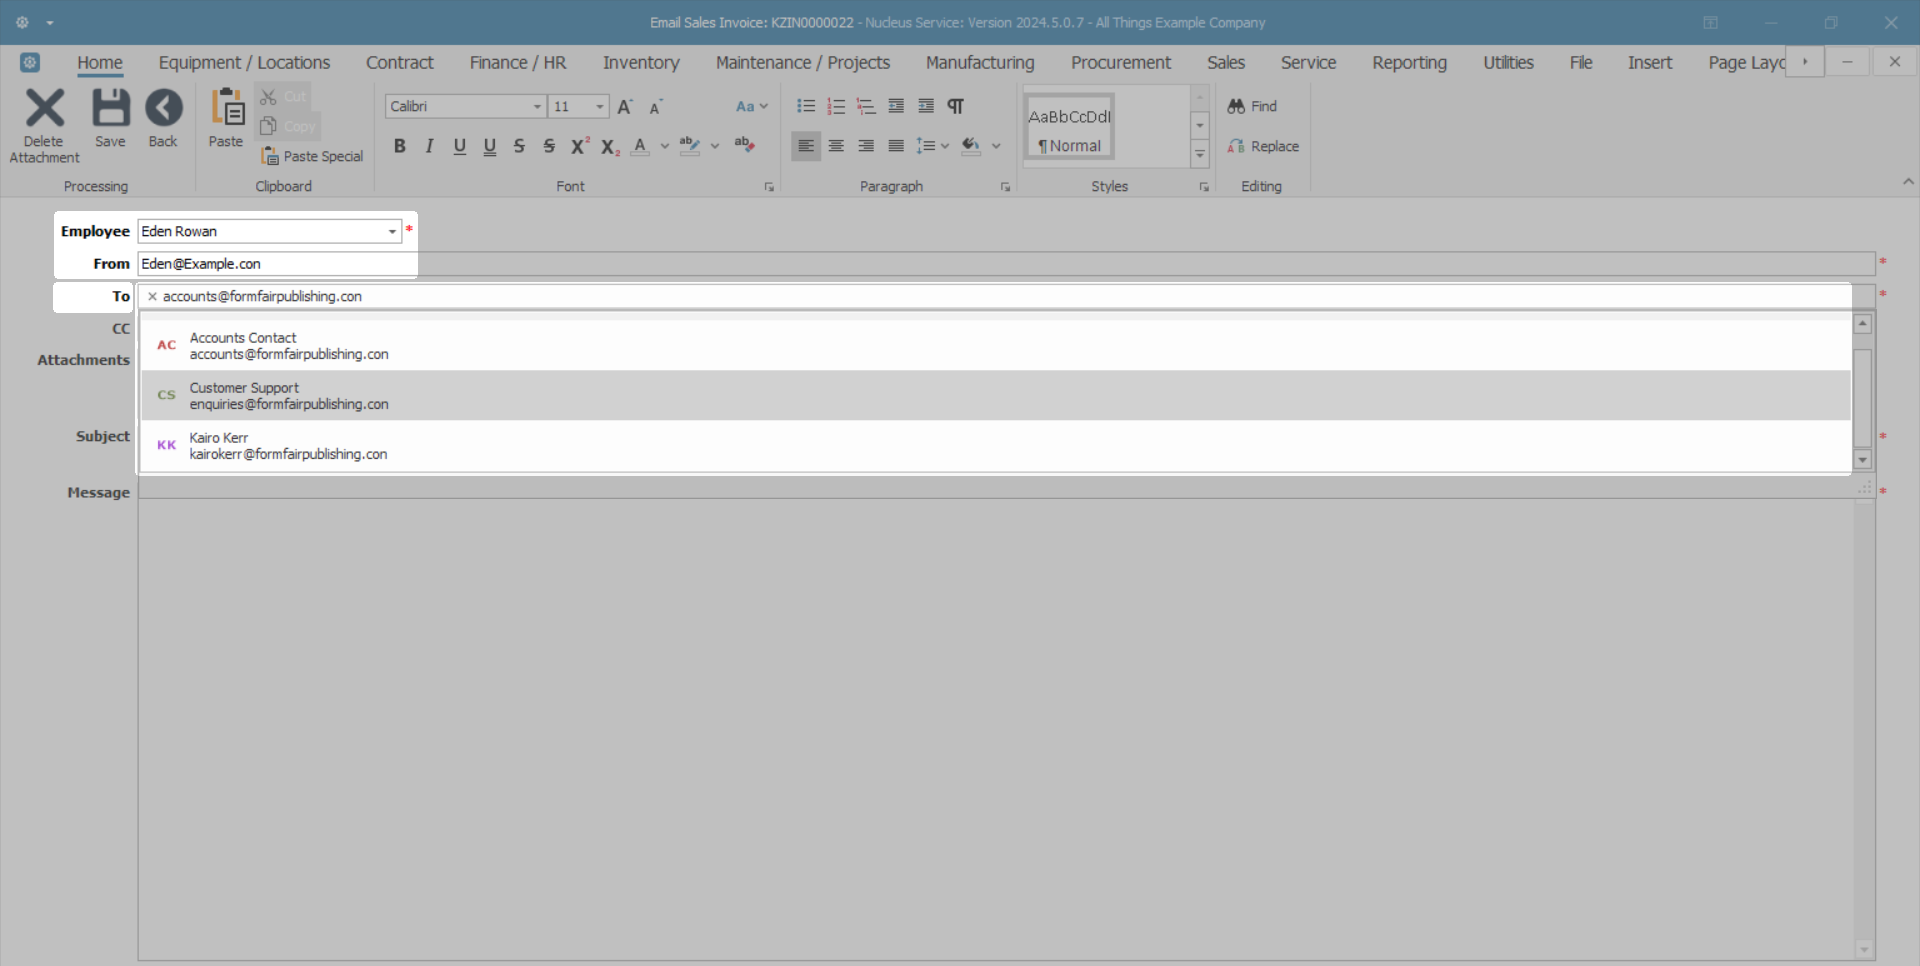
- To: To add or change a contact email address -
- Click in the row to display a drop-down menu with the linked email address(es) for this customer.
- Click on the email address of the contact that you wish to add.
- The selected email address will be added to the row.
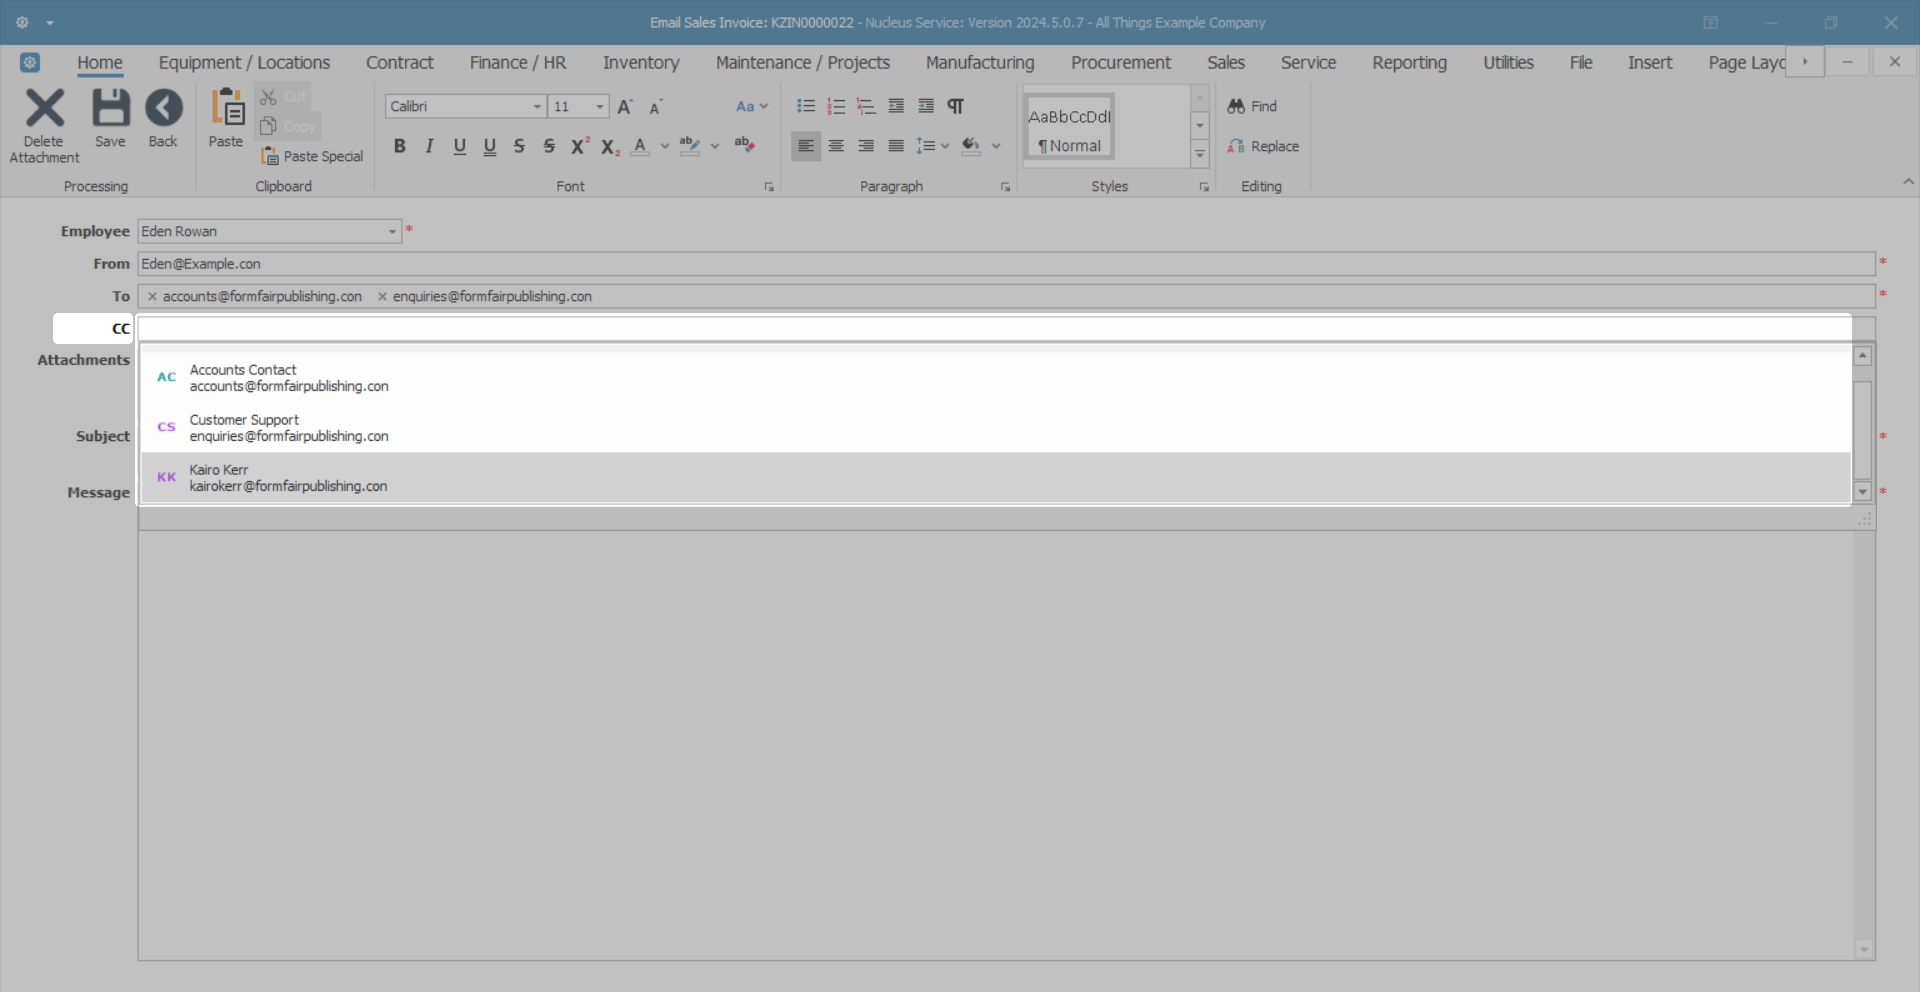
- CC: If a group email address has been set up on the order or accounts contact, then the group email address will display here.
- Alternatively click in the row to display a drop-down menu with the linked email addresses for this customer.
- Click on the email address of the contact that you wish to add.
- The selected email address(es) will be added to the row.
- If you wish to remove an email address from the row, click on the X icon.
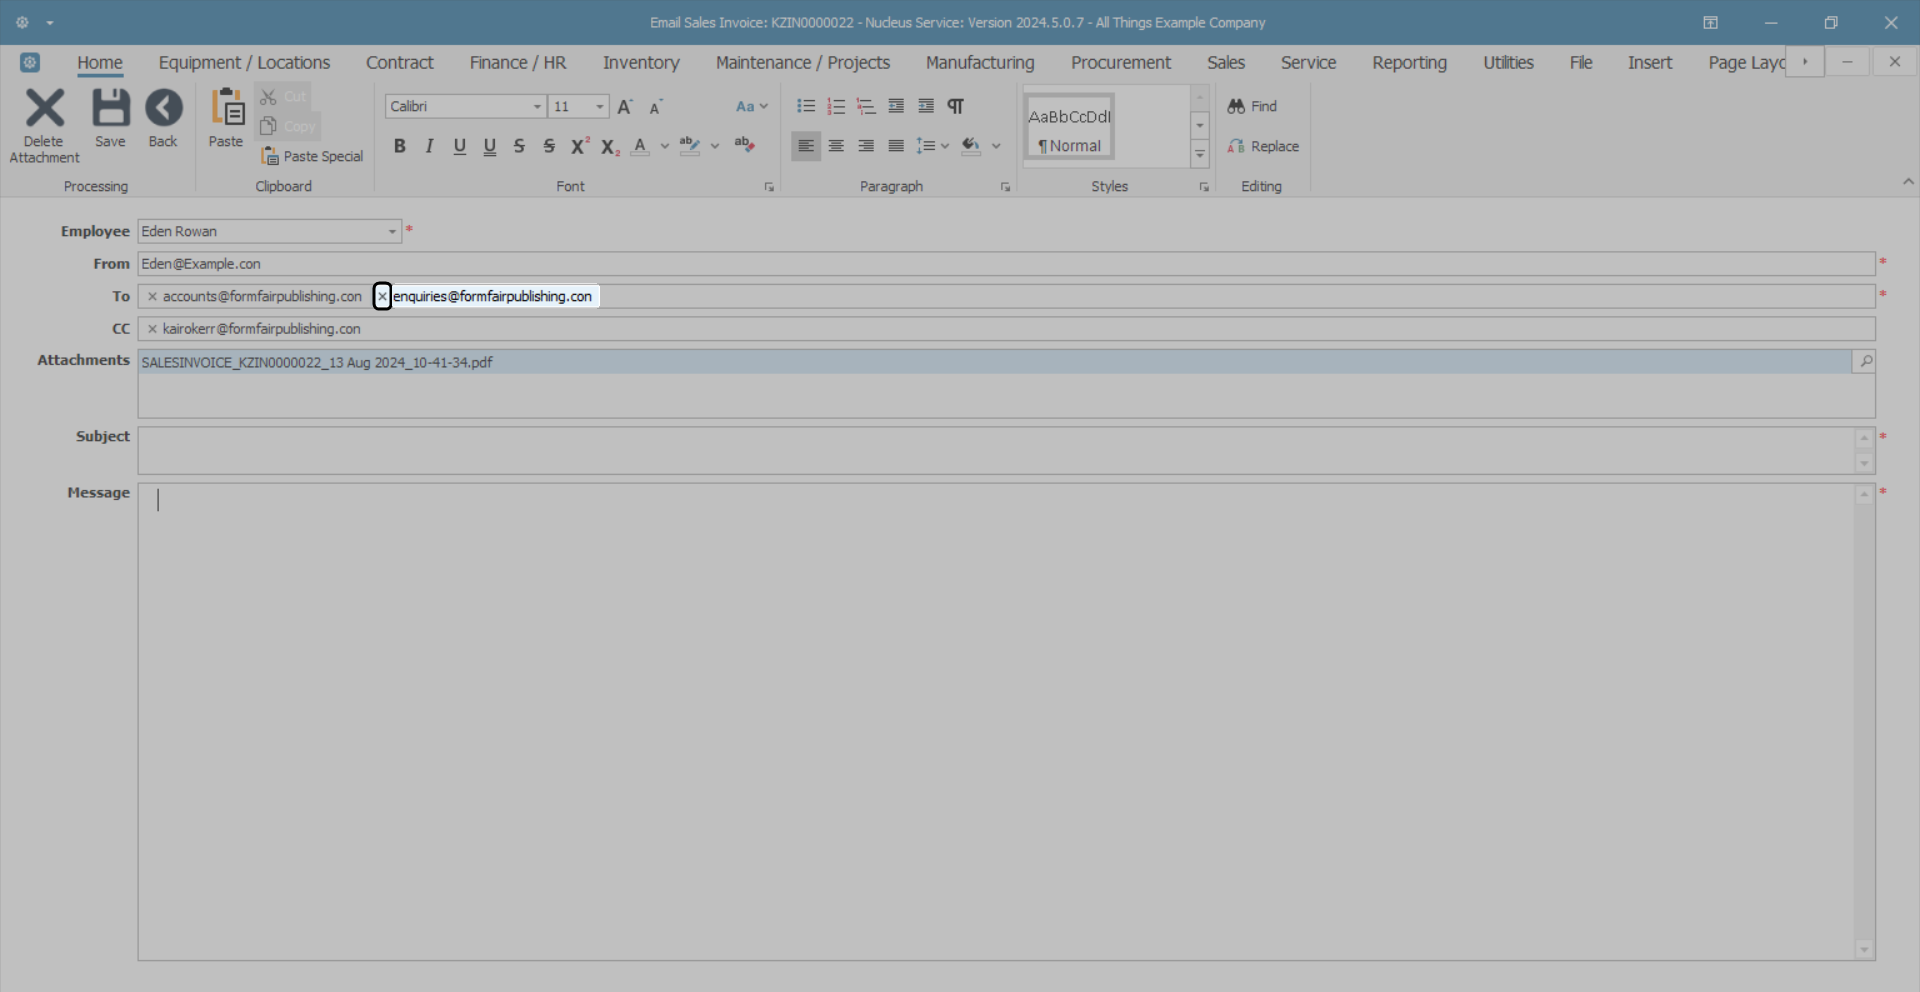
- This example has email addresses added to To:accounts@formfairpublishing.con and CC:kairokerr@formfairpublishing.con.
![]() Note: If you have clicked on the Back ribbon button in error, you will receive a Cancel Email message stating, "If you cancel now, the current email will be lost. Do you wish to cancel anyway?"
Note: If you have clicked on the Back ribbon button in error, you will receive a Cancel Email message stating, "If you cancel now, the current email will be lost. Do you wish to cancel anyway?"
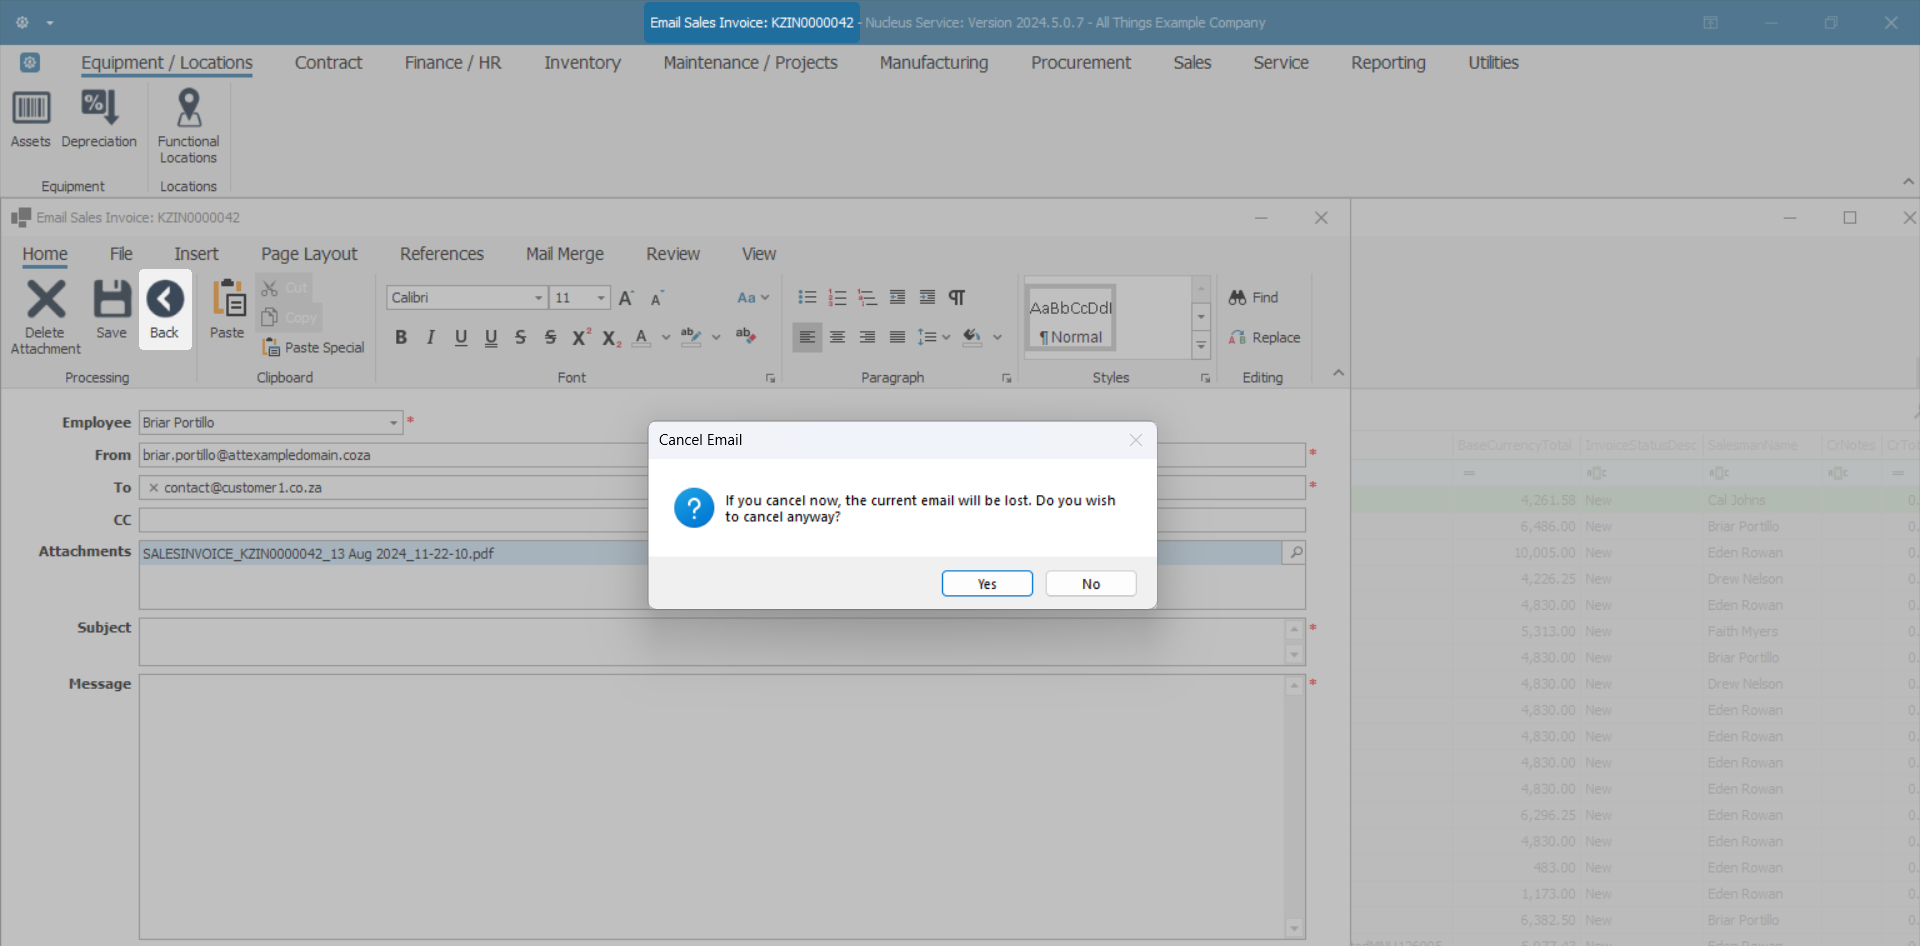
![]() If you click Yes, the email will not be sent and you will have to go to the Printed status list to find the email and follow the instructions above to email the document. (If you click No, you will remain in the Email Sales Invoice: KZIN [ ] screen.)
If you click Yes, the email will not be sent and you will have to go to the Printed status list to find the email and follow the instructions above to email the document. (If you click No, you will remain in the Email Sales Invoice: KZIN [ ] screen.)
Email Attachments
- Attachments: Nucleus Service will create a PDF of the order and attach it automatically (you can attach additional documentation if required).
 If there are outstanding parts that have not been issued, a Back Order report will also be attached.
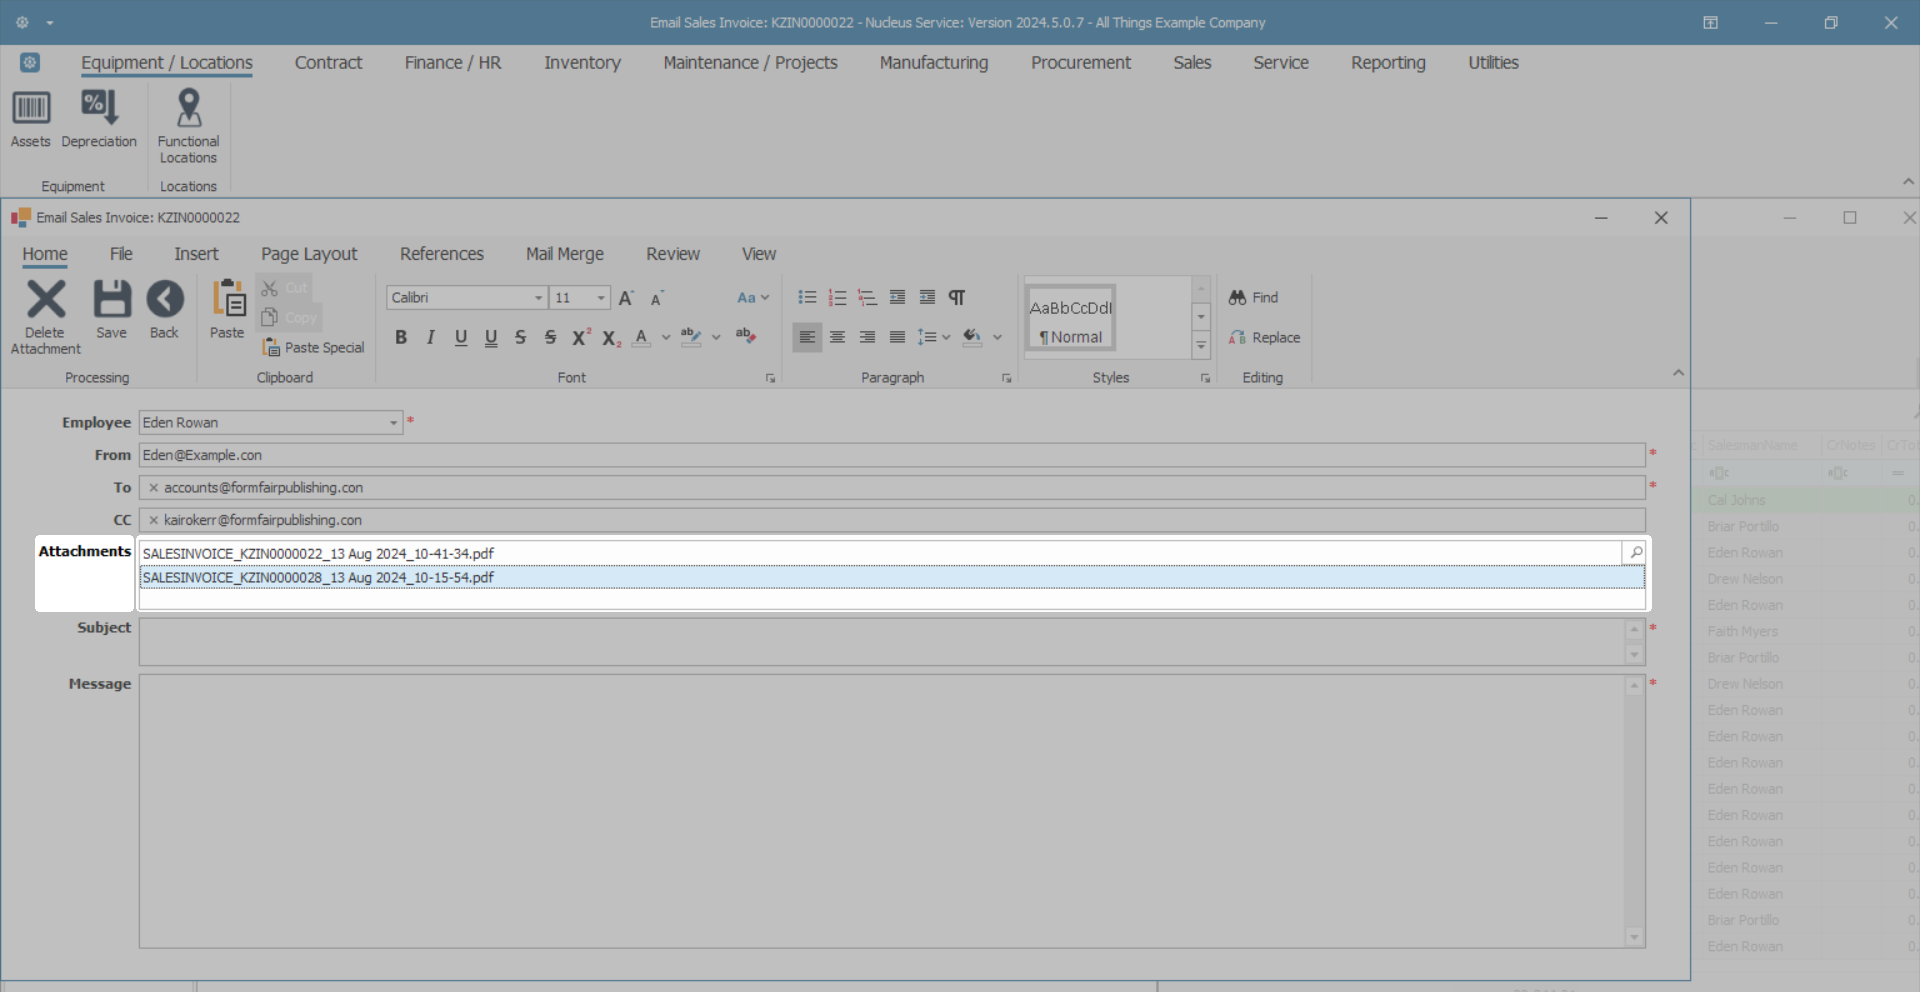
- To add an additional attachment, click on the search button in the Attachments field to display the Select File window.
- You can browse to find the file location of the document you with to attach, then click on the file you wish to attach.
- Once you have selected the file, click on Open.
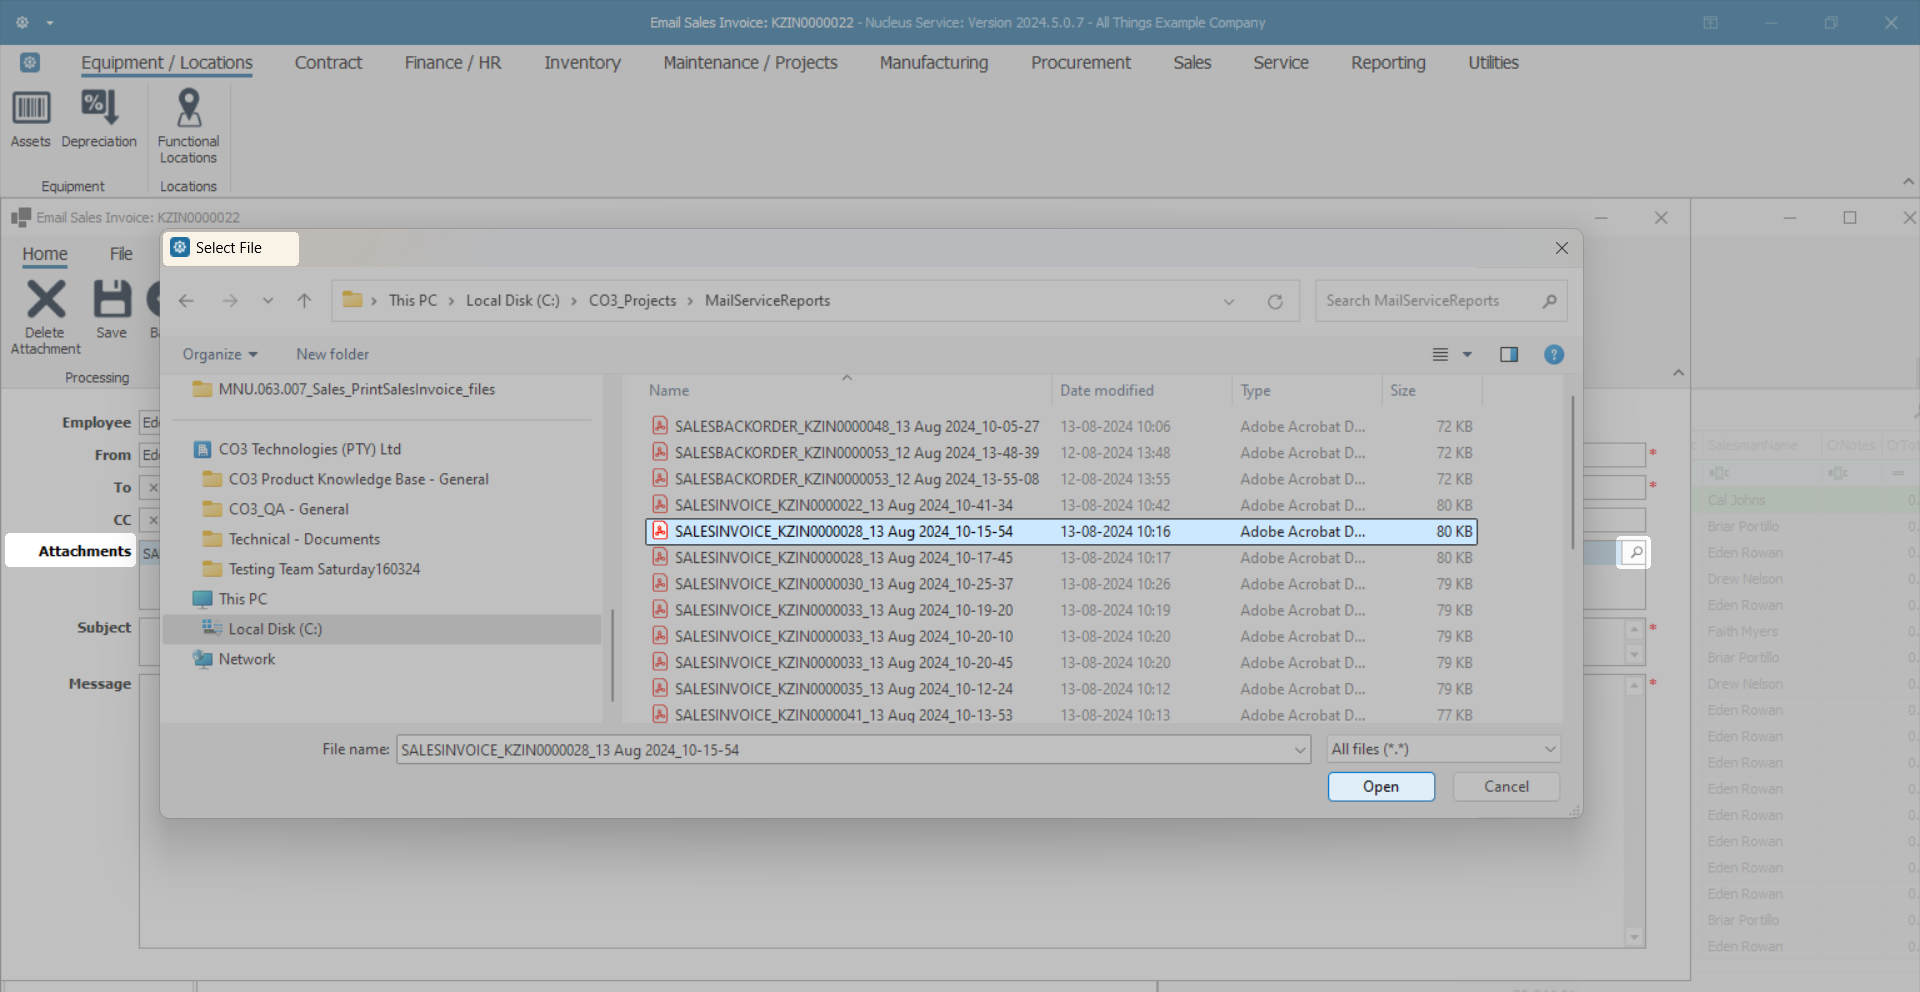
- The document has been added as an Attachment.
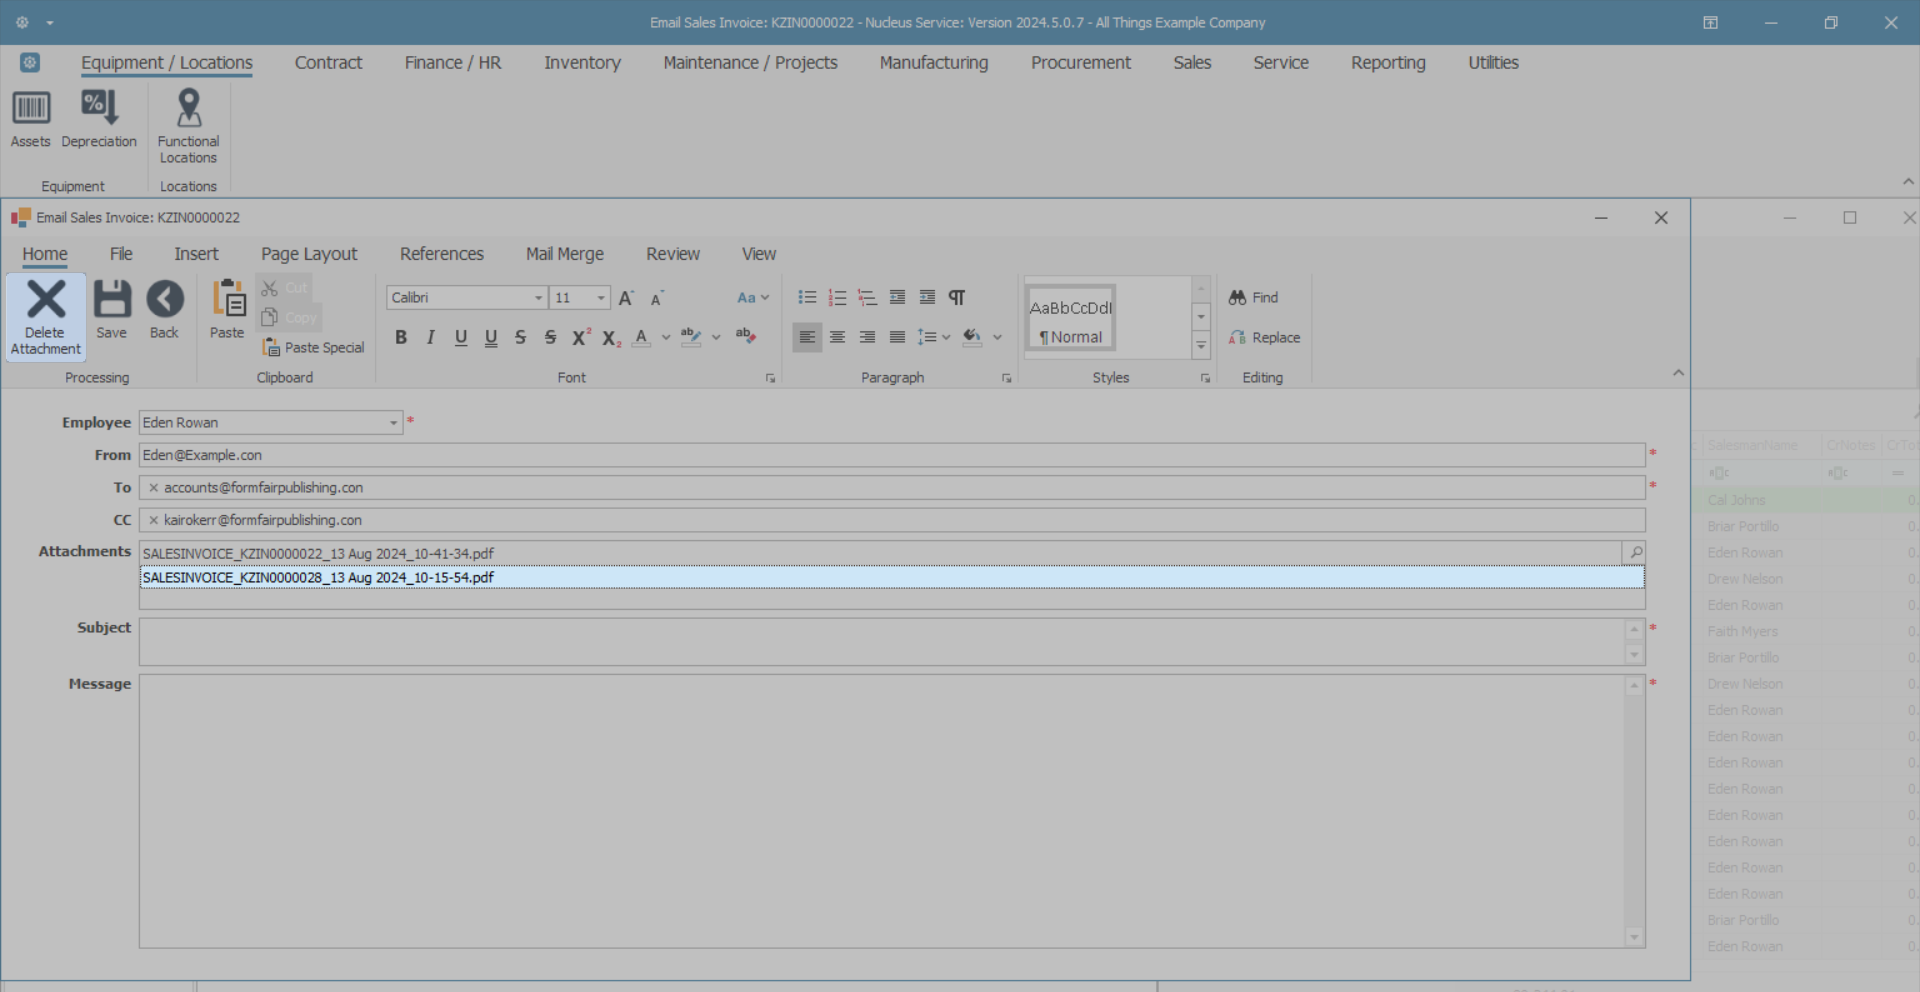
Delete Attachment
You may choose to delete an obsolete or incorrectly attached document.
- Click on the attachment you wish to remove.
- Click on Delete Attachment.
Email Subject and Message
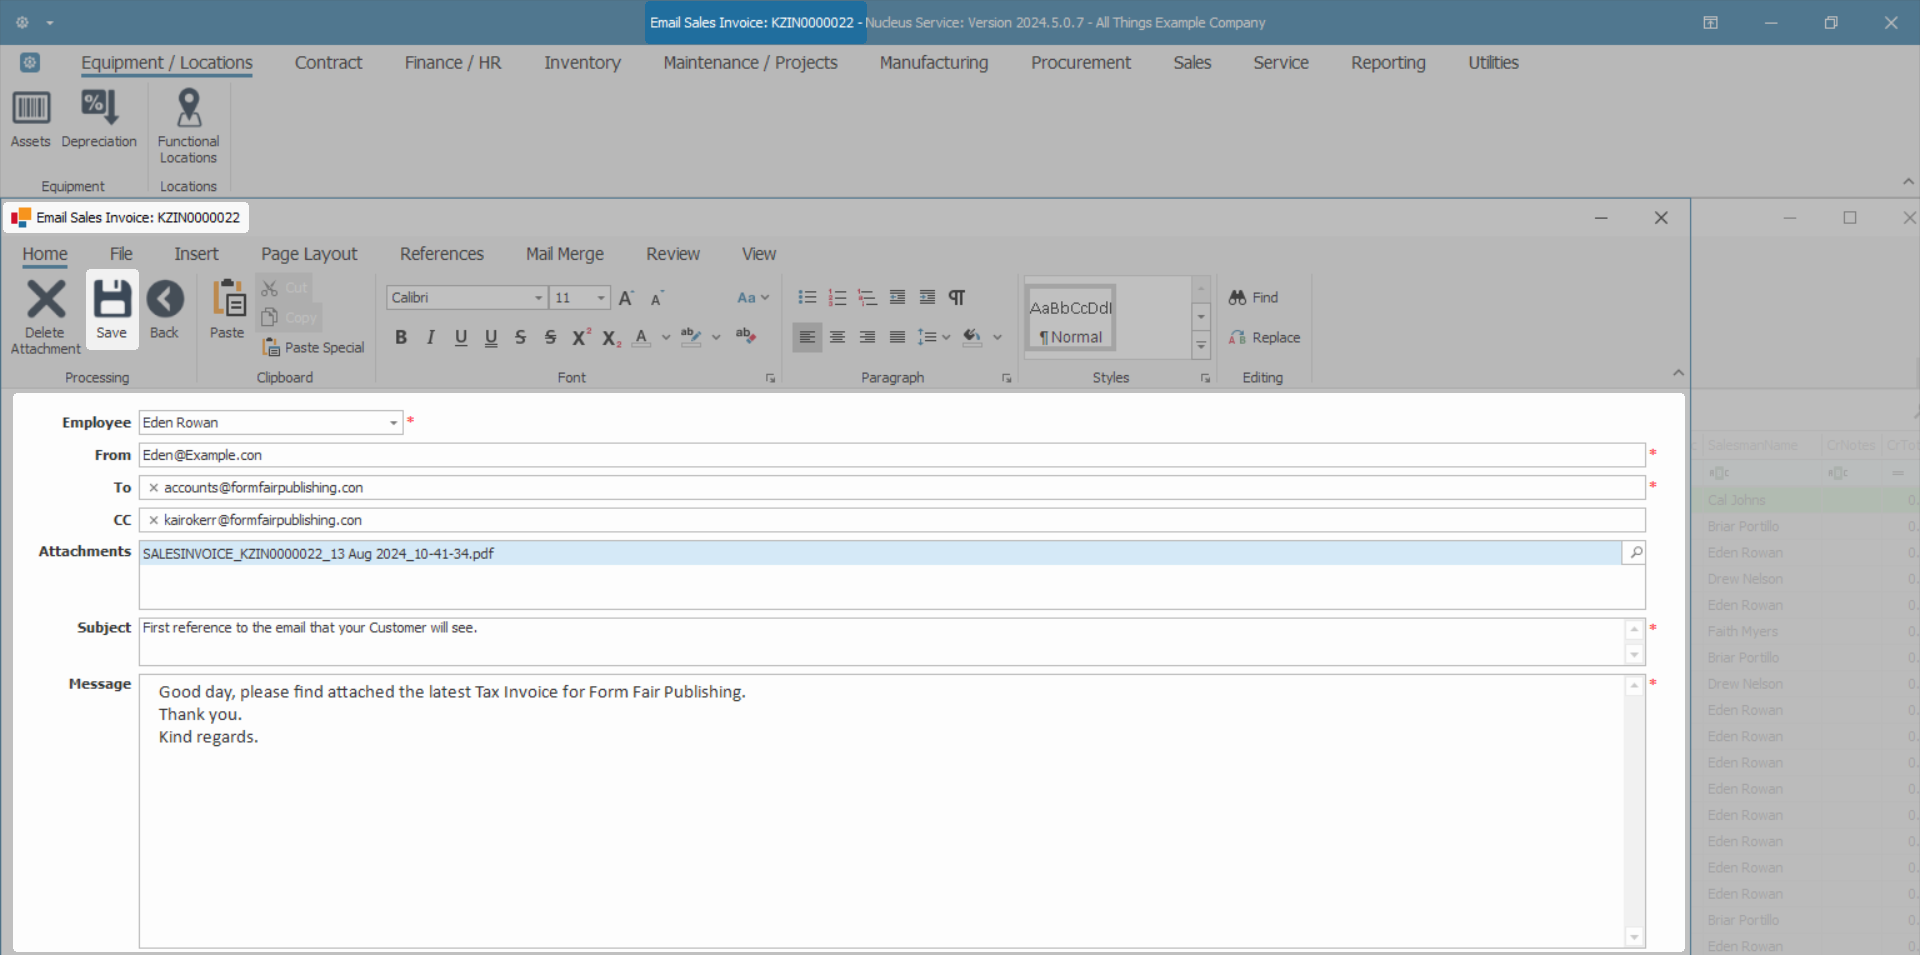
- Subject: Click in the text box to type the email subject line. Remember that this is the first reference to the email that your Customer will see.
- Message: Type an email text message.
- Once you have completed your email, click on Save.
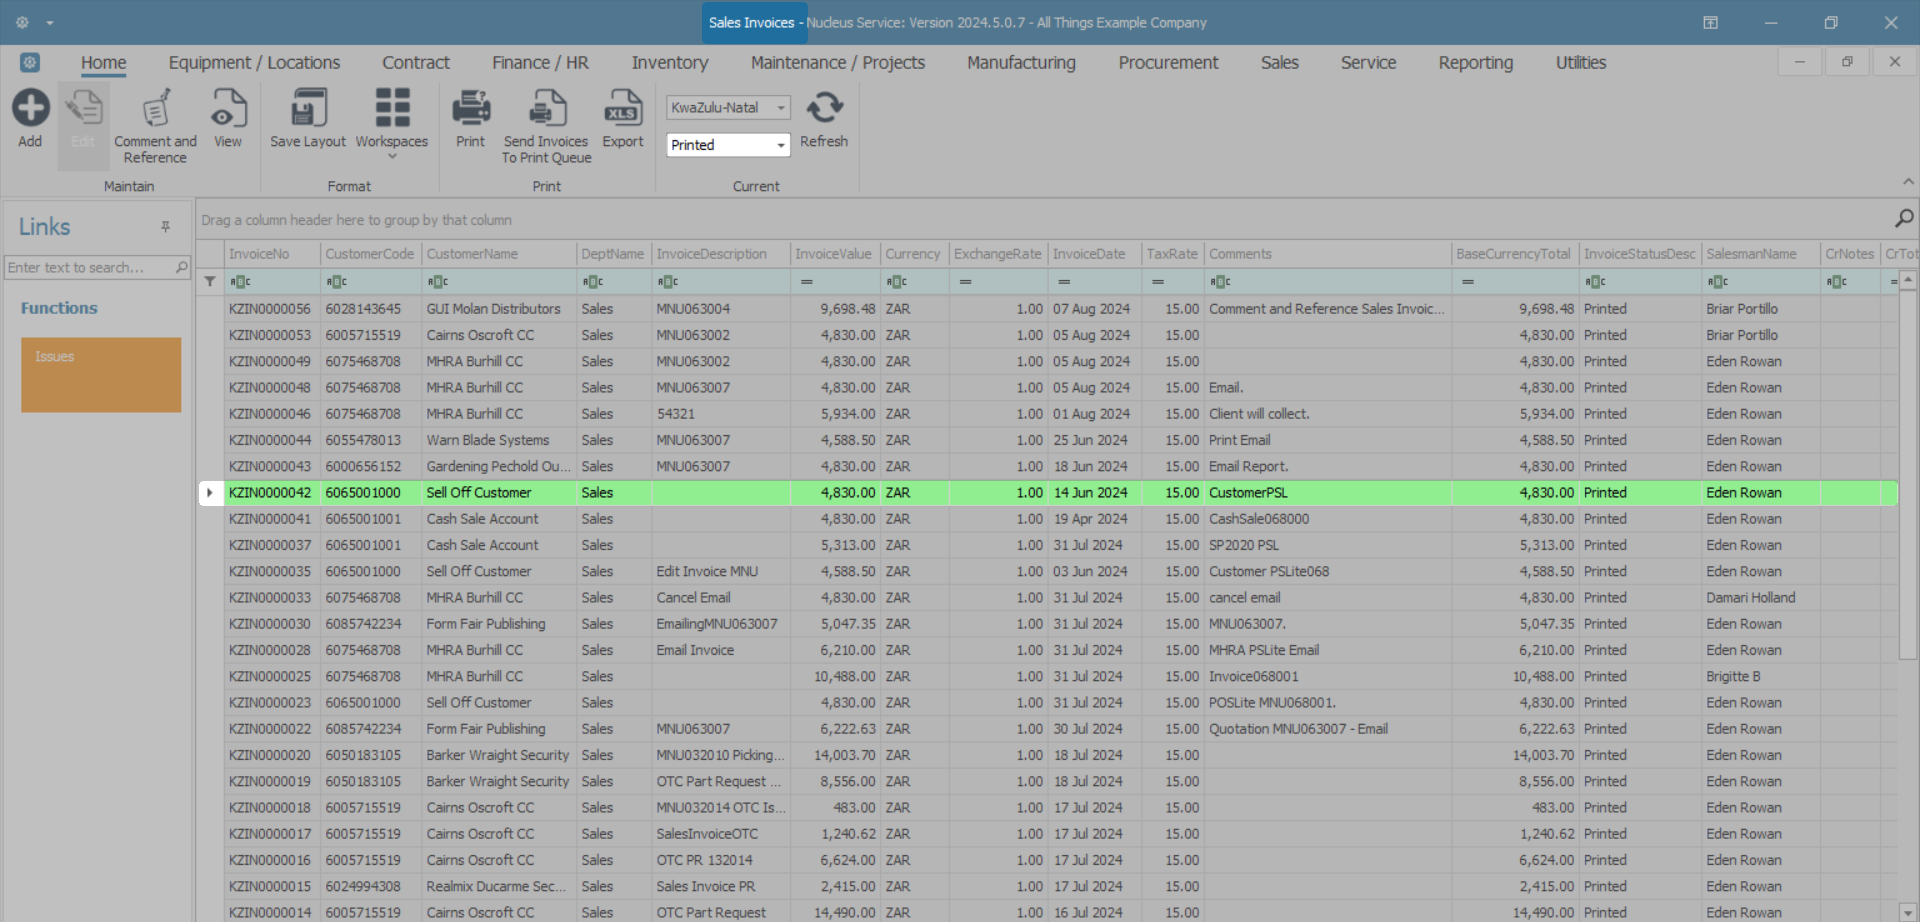
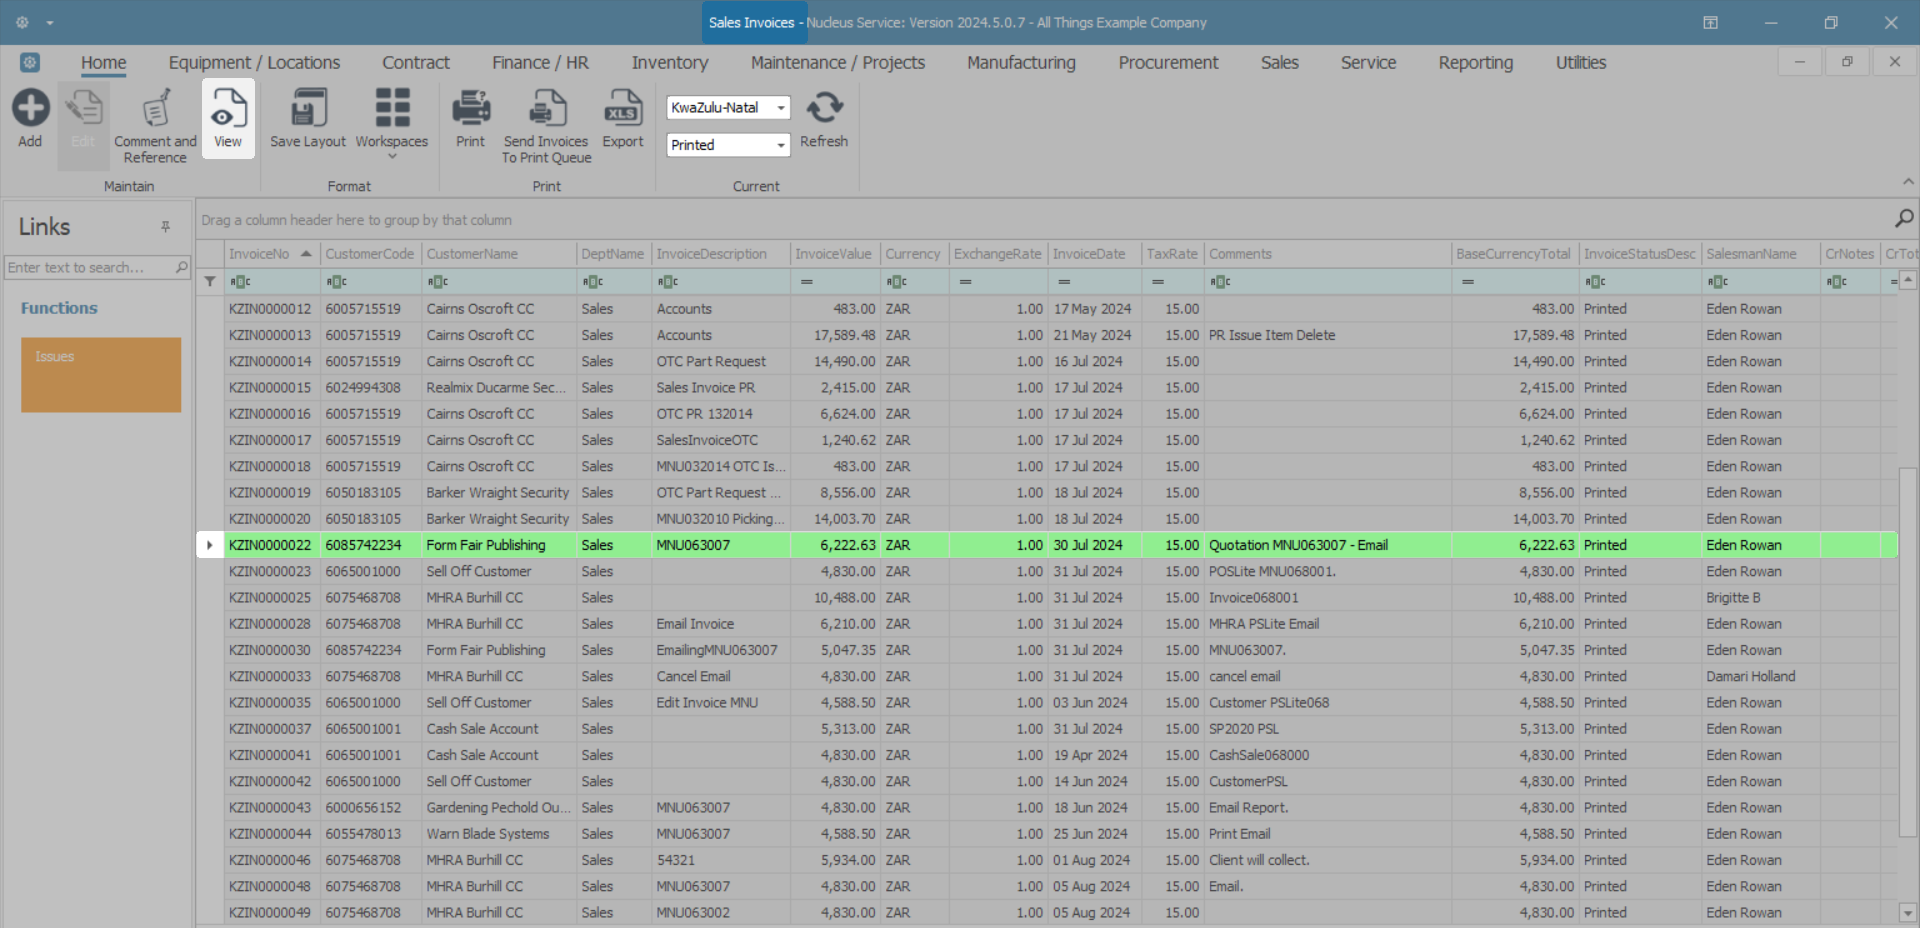
- You will return to the Sales Invoices listing screen. You will not be able to view the Invoice in the New Status list.
- Click on the drop-down arrow to change the Status to Printed.
MNU.063.007