Inventory
Parts - Add Part Definition Details
Part Definition (or Inventory Definition) describes and defines a part.
A Part Definition is a way of classifying a part when dealing with inventory.
Keeping good records of parts is critical to inventory management.
When adding a new Part Definition to the system, it is important to include as much information as possible about the part to differentiate it from other similar parts.
The Add new Part screen details will differ slightly for a C-Class Part Definition compared to an A or B-Class Part Definition.
The differences are set out below.
Ribbon Select Inventory > Parts

- The Part Listing screen will open.
- The data grid will display a list of all the part definitions currently on the system.
- Click on Add.

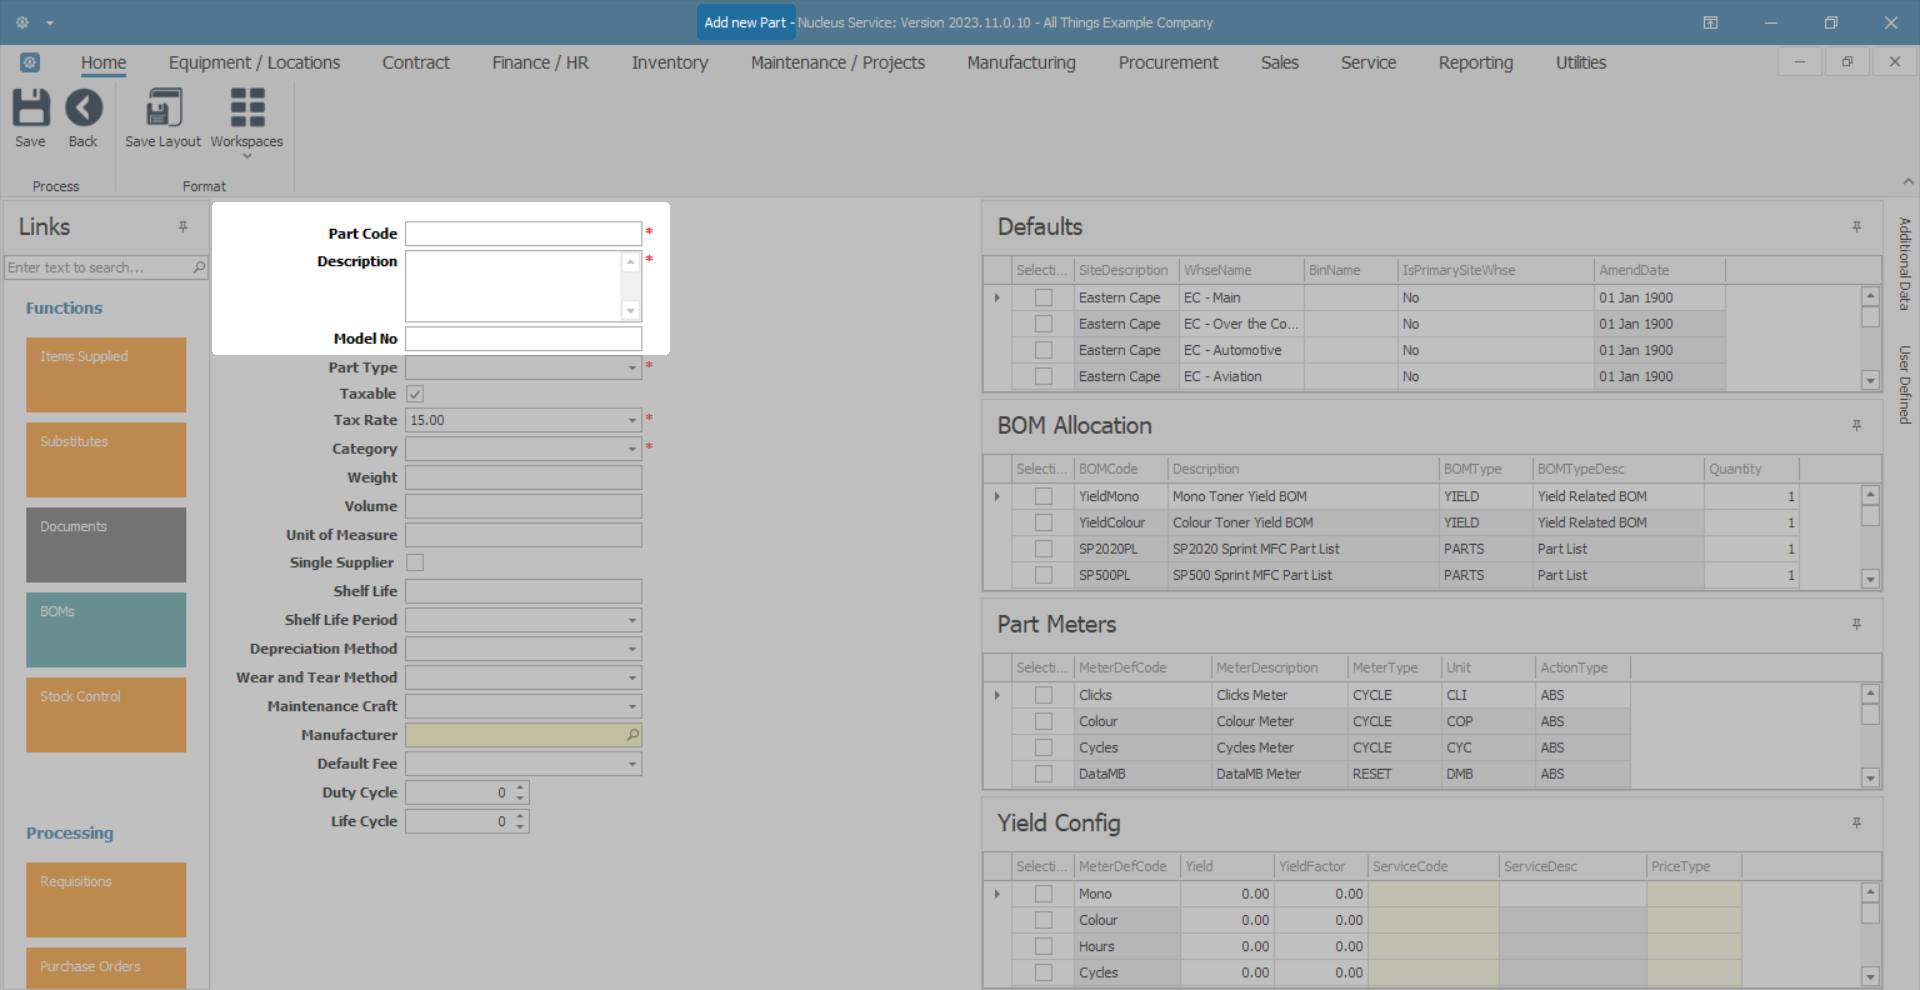
- The Add new Part screen will be displayed.
- The part definition details section is on the left-hand side of the screen.
Add A-Class Part Definition Details
In this example, an A-Class part definition will be added to the system.
Select the check box, type in or use the drop-down arrow to add the required information to the following fields:
- Part Code: Type in the unique A-Class part definition number.
- Description: Type in a text description for this A-Class part definition.
- Model No: Type in a valid supplier model number for this A-Class part definition, if applicable.

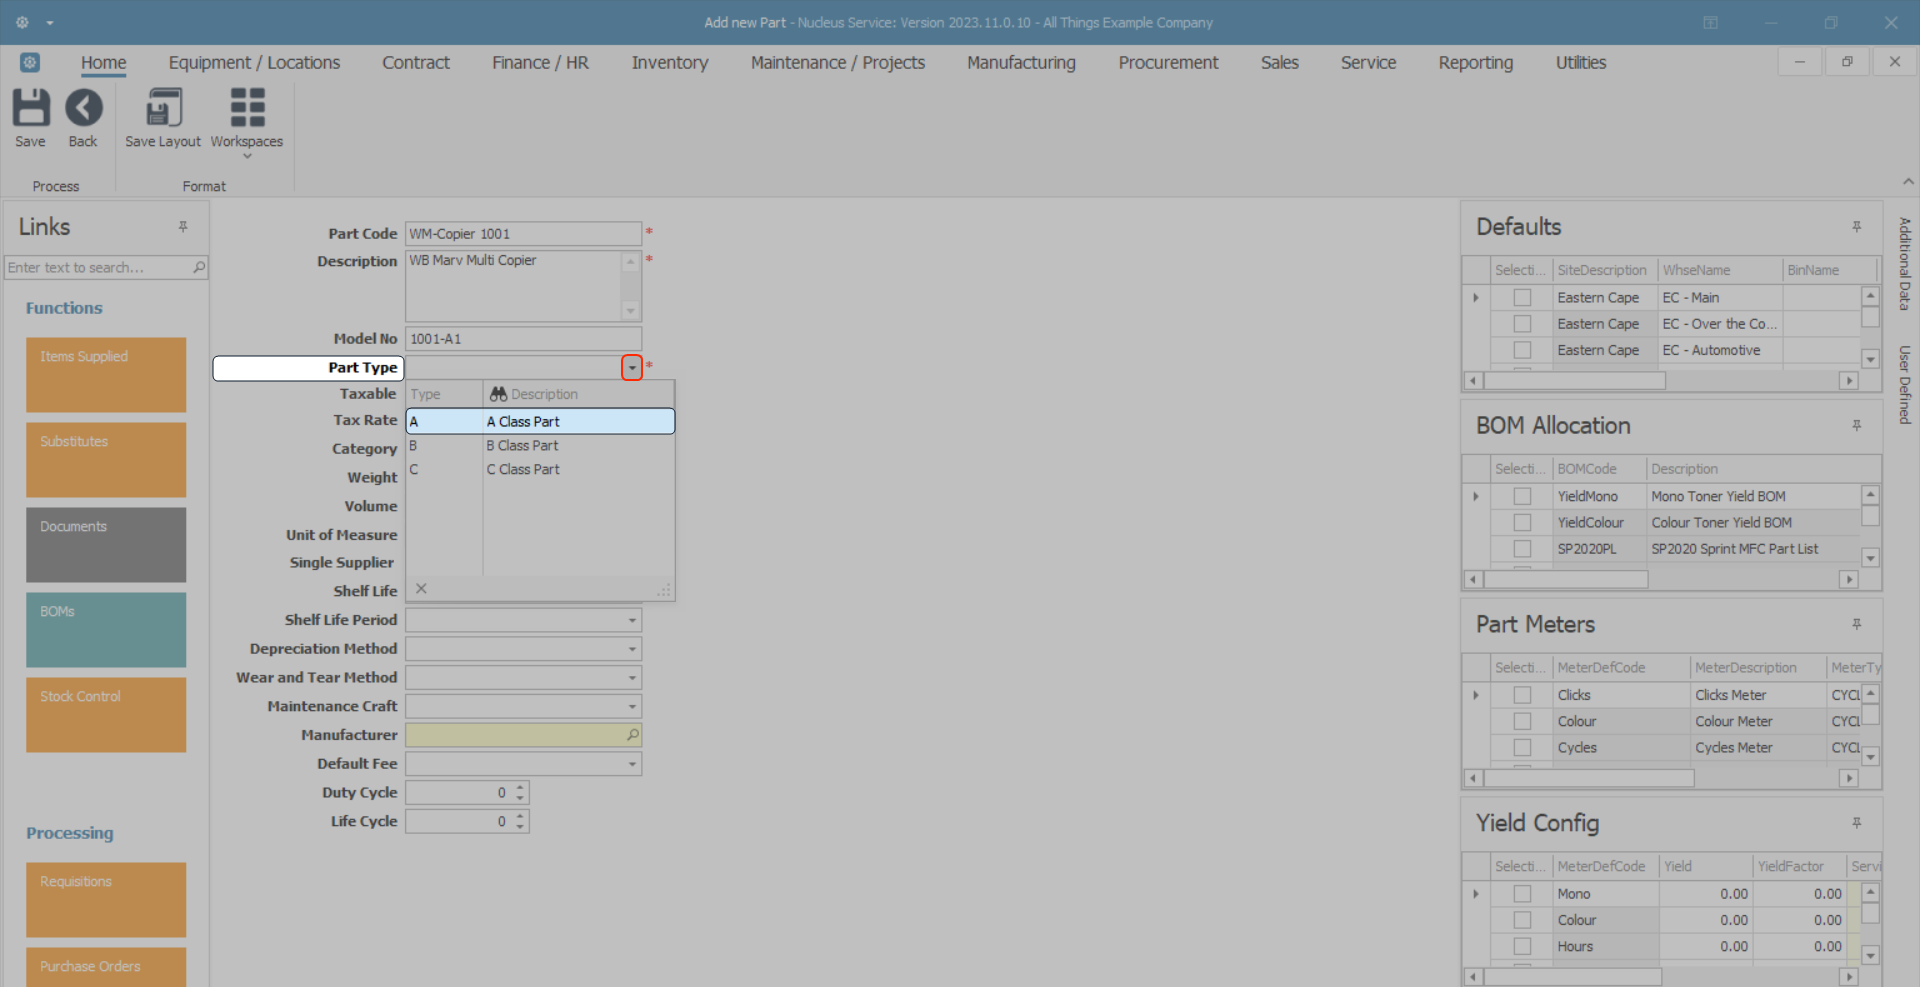
- Part Type: Click on the drop-down arrow to display the part definition Type menu:
- In this example, Type A will be selected as an A-Class part is being added.
- Taxable: Select this check box if this part is taxable.
- Tax Rate: Click on the drop-down arrow and select from the list, the tax code applicable to this part. These tax rates are set up in the Configurator.
- Category: Click on the drop-down arrow and select from the list, the category applicable to this part.
Note: The Category selected here will affect the Sites and Warehouses that are available for selection in the Defaults panel. See Add and Edit a Category for more information.
- Weight: Type in the weight of the part, if required.
- Volume: Type in the volume of the part, if required.
- Unit of Measure: Type in the unit used to measure the part, for example: kilograms, pounds.

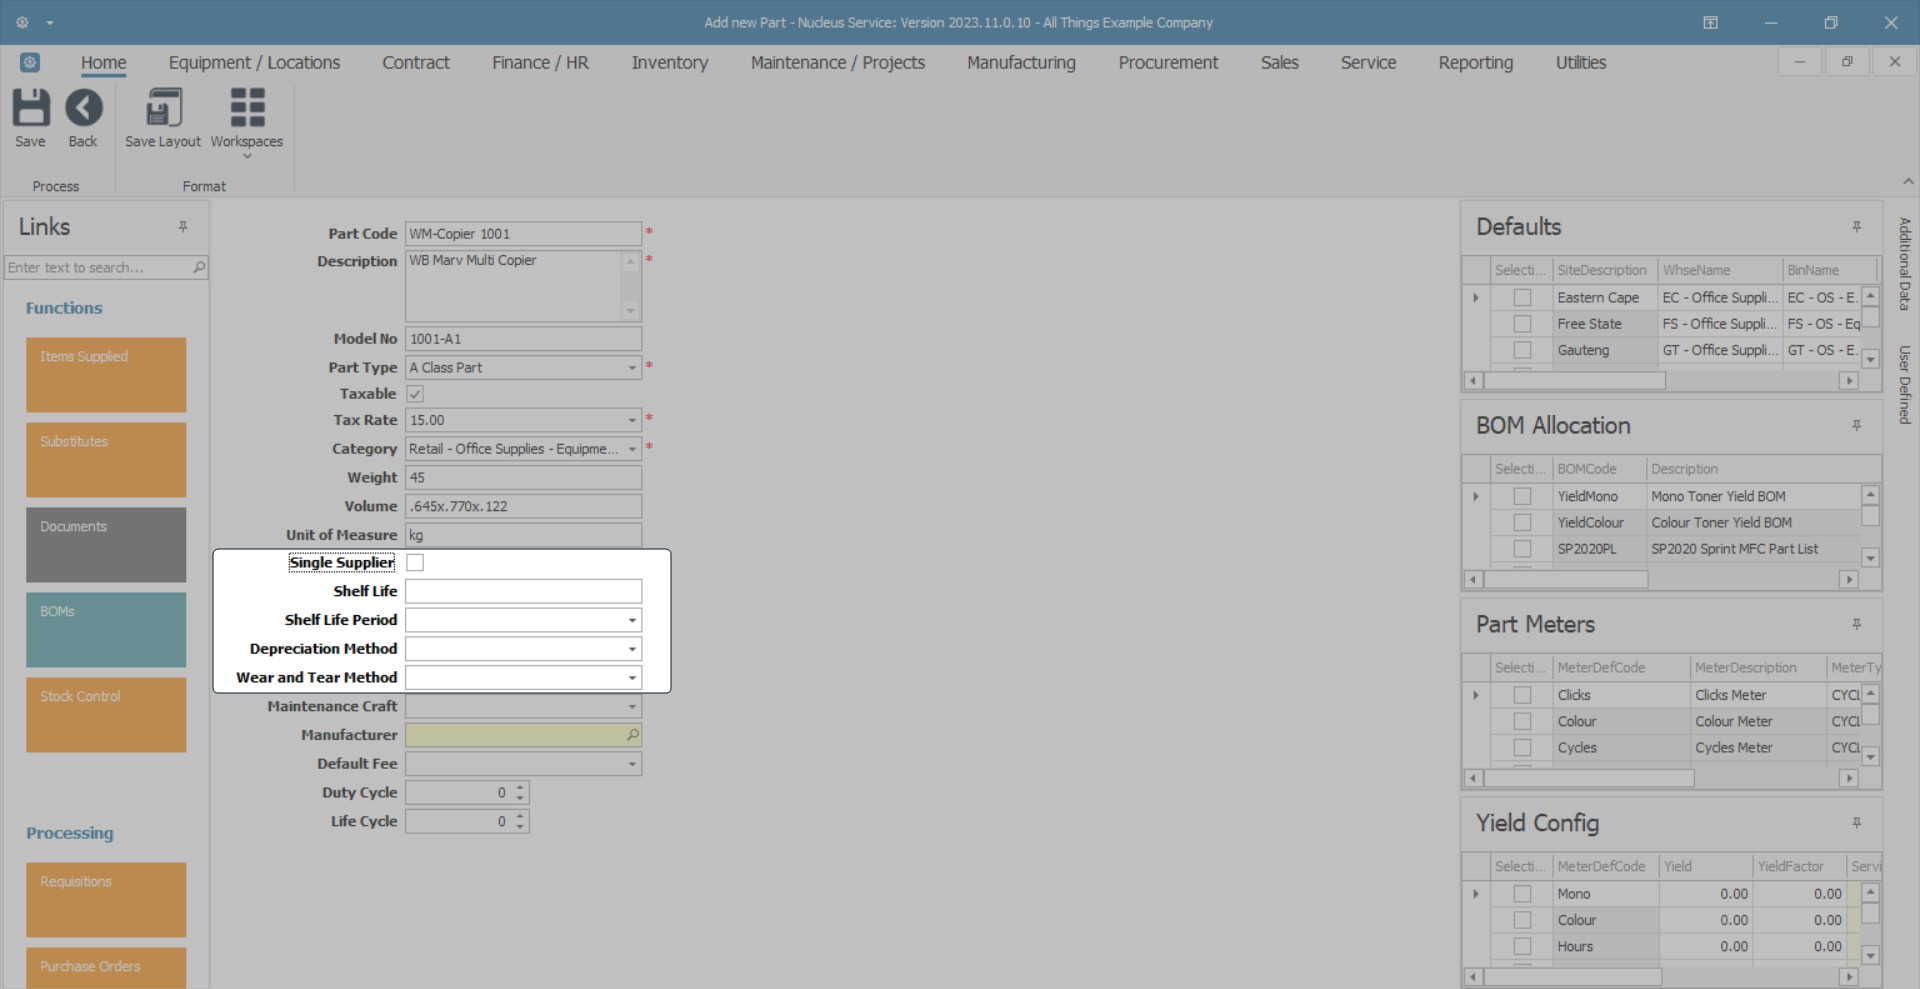
- Single Supplier: Select this check box if the part is procured from only one supplier.
- Shelf Life: Type in the shelf life or life expectancy of this part.
- Shelf Life Period: Click on the drop-down arrow and select from the list, the unit of time applicable to the shelf life period, for example, months, years.
- Depreciation Method: Click on the drop-down arrow and select from the list, a depreciation method, e.g. 3 or 5 Year Straight Line
 This is the most commonly used method to calculate depreciation. It is also known as fixed instalment method. Under this method, an equal amount is charged for depreciation of every fixed asset in each of the accounting periods. This uniform amount is charged until the asset gets reduced to nil or its salvage value at the end of its estimated useful life. This method derives its name from a straight line graph. This graph is deduced after plotting an equal amount of depreciation for each accounting period over the useful life of the asset.Thus, the amount of depreciation is calculated by simply dividing the difference of original cost or book value of the fixed asset and the salvage value by useful life of the asset.
The formula for annual depreciation under straight line method is:
Annual Depreciation Expense = (Cost of an asset – Salvage Value)/Useful life of an asset.
This is the most commonly used method to calculate depreciation. It is also known as fixed instalment method. Under this method, an equal amount is charged for depreciation of every fixed asset in each of the accounting periods. This uniform amount is charged until the asset gets reduced to nil or its salvage value at the end of its estimated useful life. This method derives its name from a straight line graph. This graph is deduced after plotting an equal amount of depreciation for each accounting period over the useful life of the asset.Thus, the amount of depreciation is calculated by simply dividing the difference of original cost or book value of the fixed asset and the salvage value by useful life of the asset.
The formula for annual depreciation under straight line method is:
Annual Depreciation Expense = (Cost of an asset – Salvage Value)/Useful life of an asset.
Note: You will only be able to add a depreciation method here if this is a serialised equipment item (Class-A), or a serialised spares item (Class-B). Otherwise the field will be greyed out (inactive).
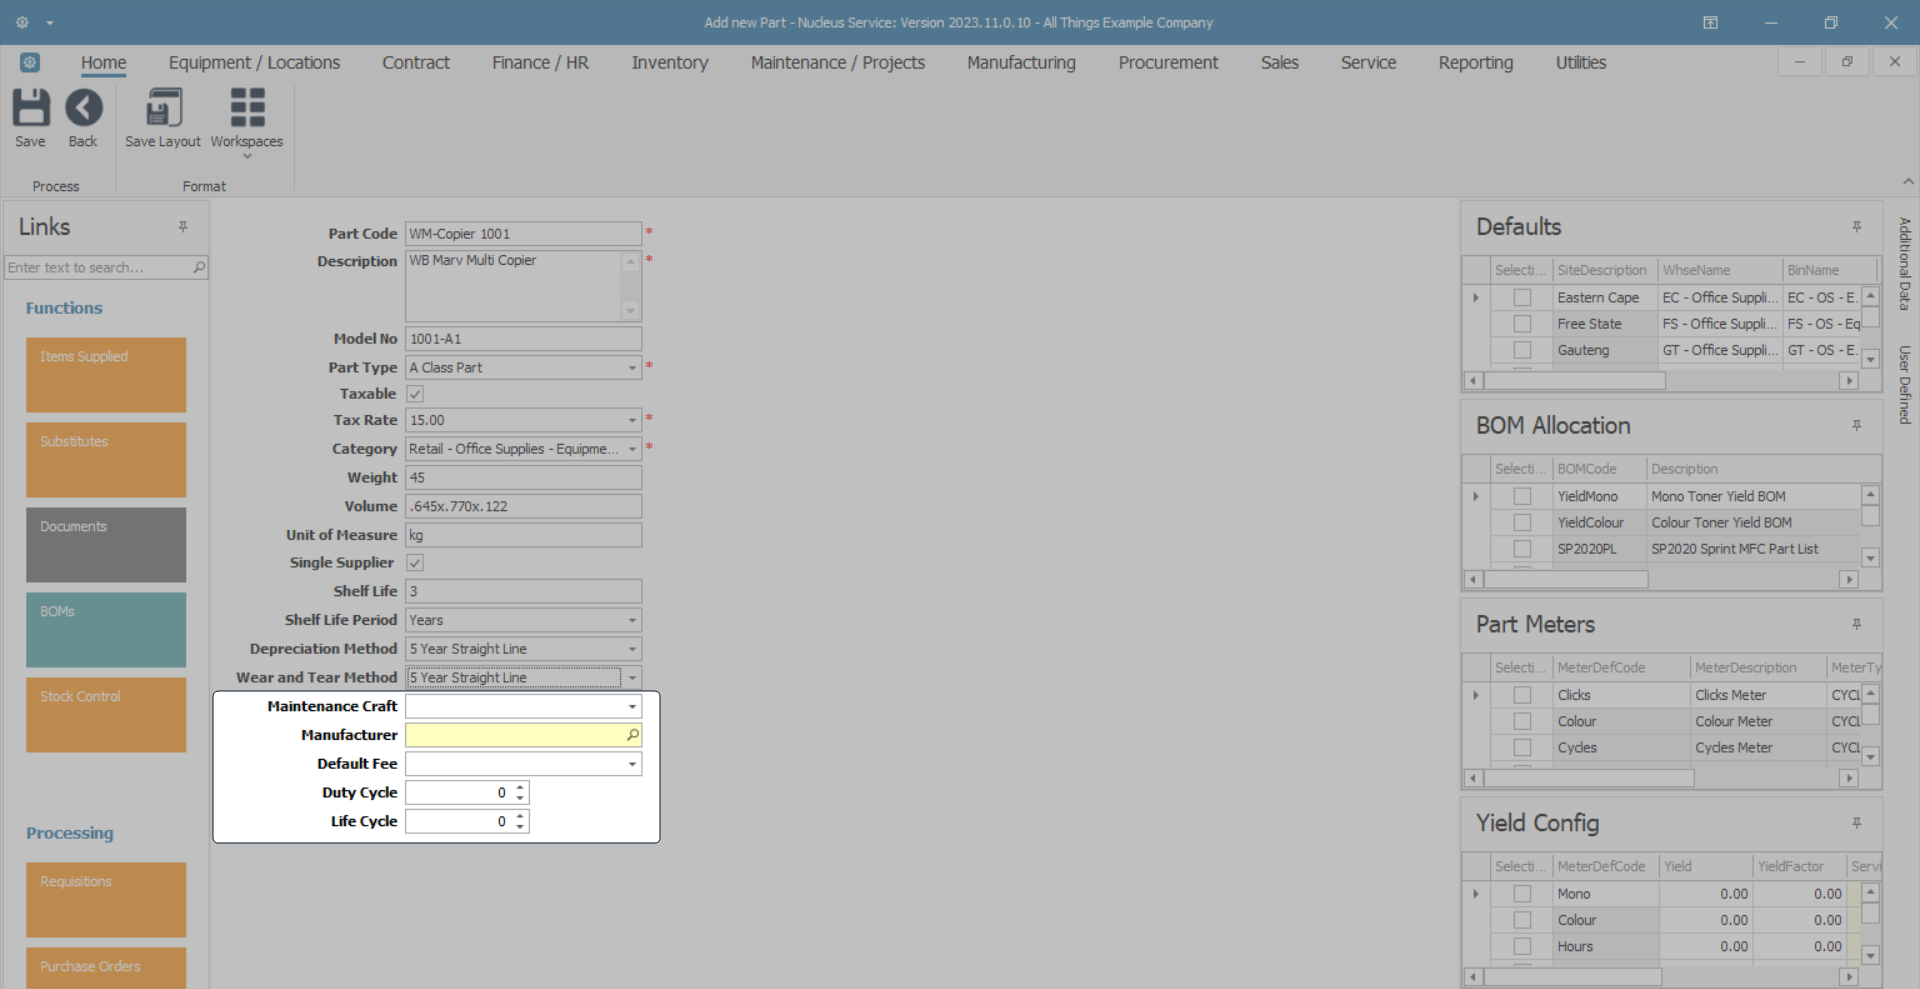
- Wear and Tear Method: Click on the drop-down arrow and select a wear and tear method Wear and tear tracks the total asset life from it's first conversion from stock to asset as it would be determined by Inland Revenue. If an internal asset is converted back to stock, the wear and tear will pause until such time as the item becomes an asset again and will catch up any wear and tear not calculated while the item was deemed to be stock. from the list, e.g. 3 or 5 year straight line.
- Maintenance Craft: Click on the drop-down arrow and select from the list, the default craft A craft is the skill set or qualification(s) linked to an employee. (skill) utilised when maintaining this part.
- Manufacturer: Click on the search button and select the manufacturer A manufacturer is a company that produces goods in large numbers often by converting raw materials into finished products. of this part.
- Default Fee: Click on the drop-down arrow and select from the list, the default fee associated with this part, if applicable.
- Duty Cycle: The cycle of operation of an item that operates intermittently rather than continuously. This is generally expressed as a percentage.
- Life Cycle: The full lifespan of the item, generally from commission through acquisition, operation and maintenance to decommission.
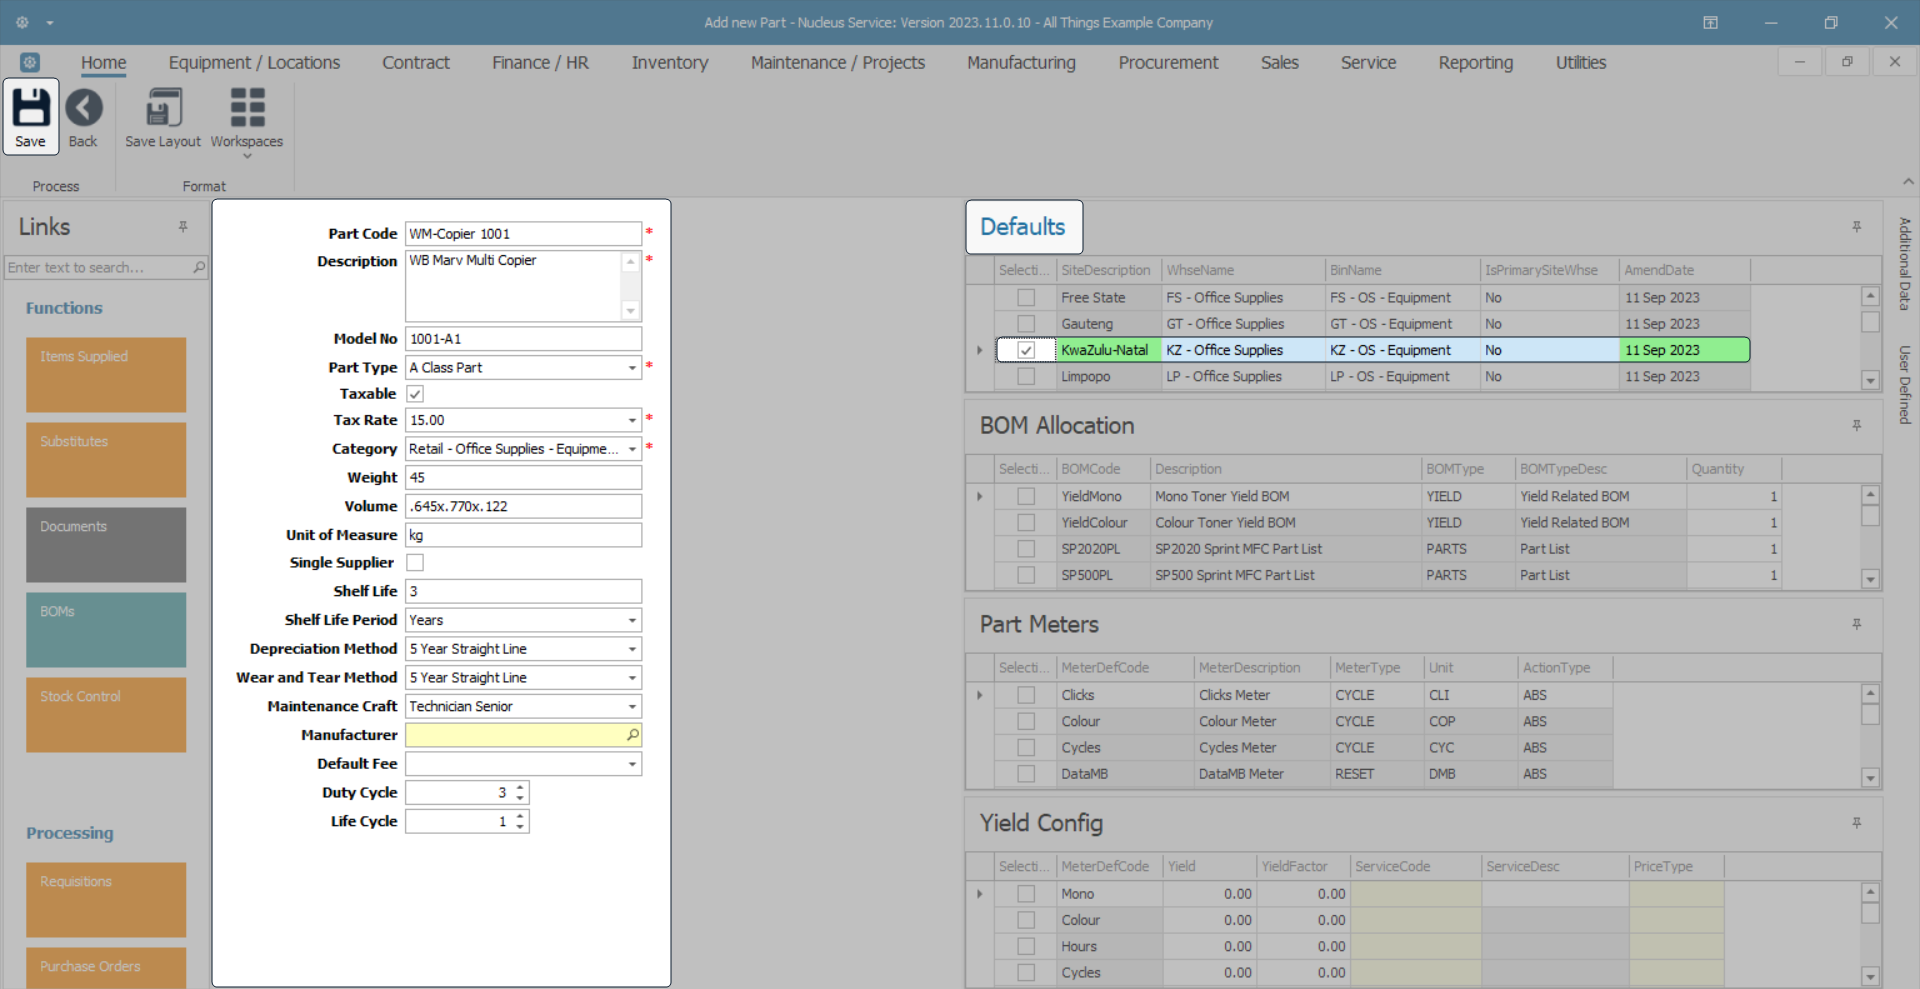
- Once you have filled in the mandatory details and the optional details, as required, you can follow the process to Add the Part Definition Defaults.
Note: A part definition must have at least one site selected in the Defaults panel. If none are linked, you will not be able to Save the part definition details.
C-Class Non-Serialised Parts
The process to add C-Class![]() These are low cost, non-serialised items that can be received in batches. Non-Serialised part definitions differs in the following way:
These are low cost, non-serialised items that can be received in batches. Non-Serialised part definitions differs in the following way:
- The Depreciation Method field will automatically grey out (become inactive). Depreciation does not apply to C--Class parts.
- The Part Meters panel will automatically grey out (become inactive). C-Class parts do not have meters linked to them.
Add C-Class Non-Serialised Part Definition Details
Navigate to the Add new Part screen.
Select the check box, type in or use the drop-down arrow to add the required information to the following fields:
- Part Code: Type in the C-Class part definition number.
- Description: Type in a text description for this C-Class part definition.
- Model No: Type in a valid supplier model number for this C-Class part definition, if applicable.
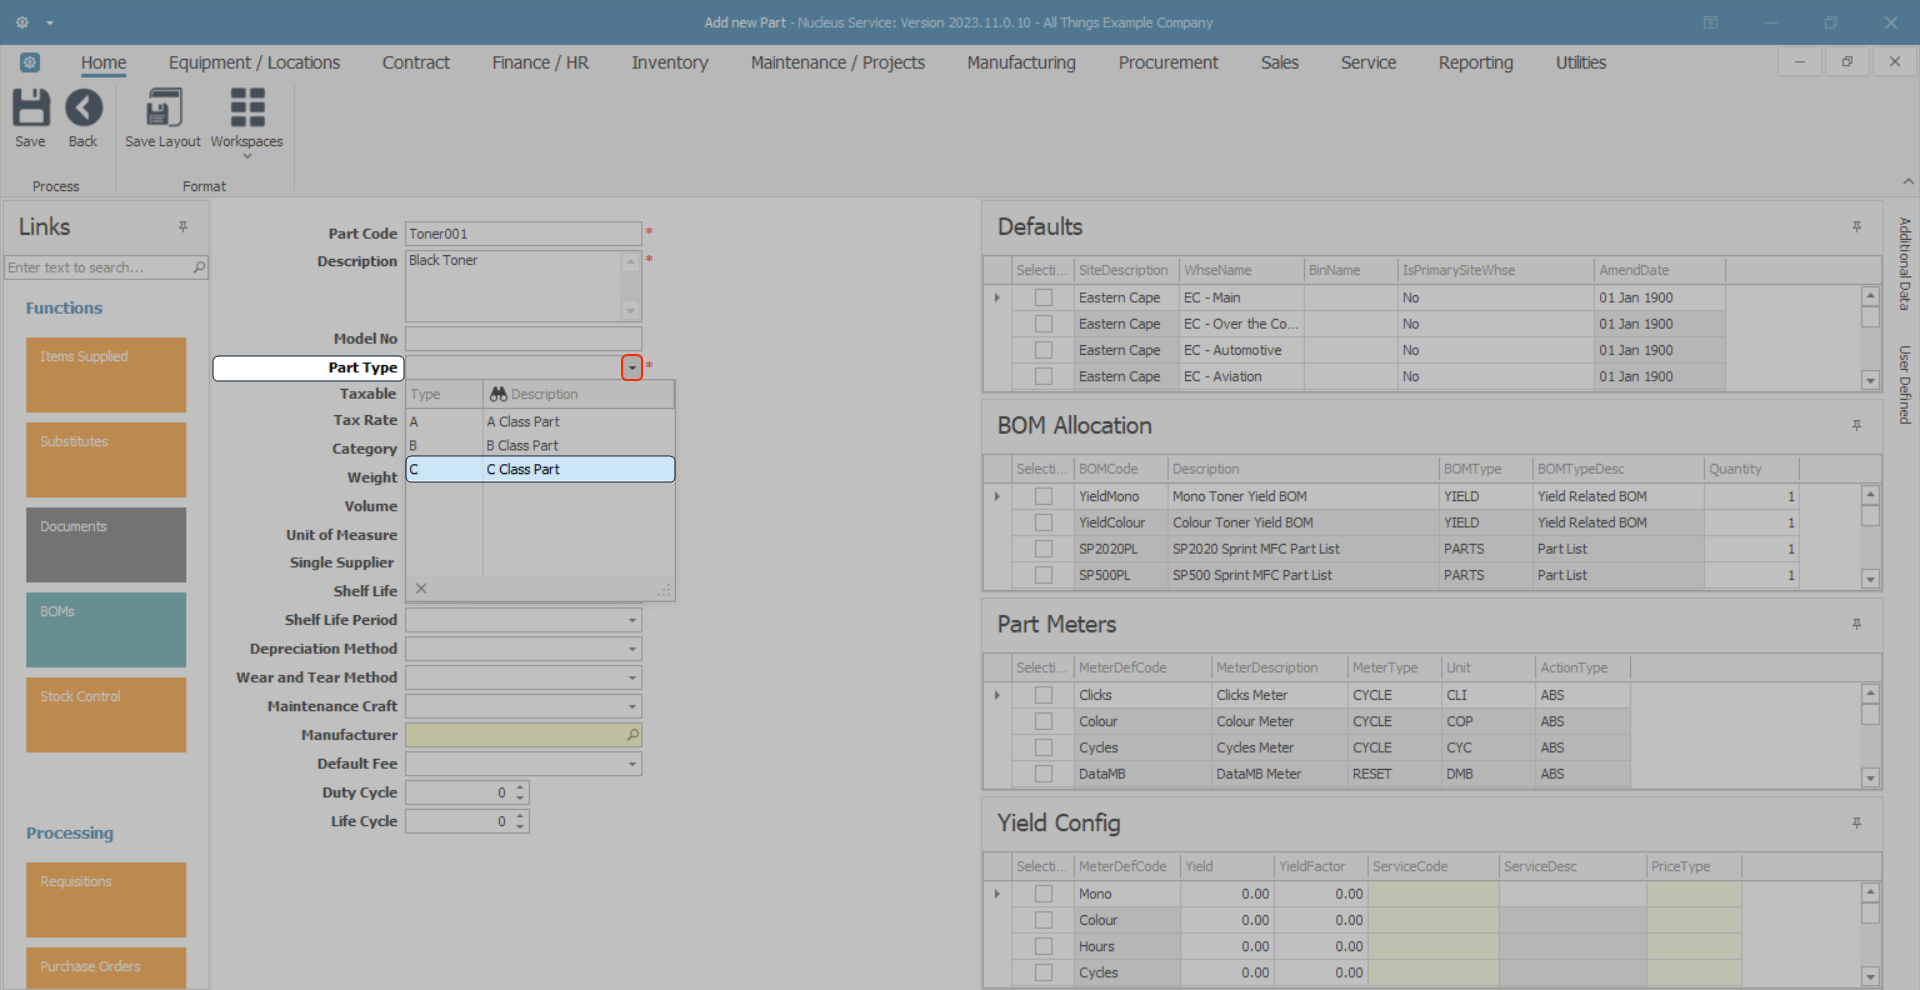
- Part Type: Click on the drop-down arrow to display the part definition Type menu:
- In this example, Part Type C will be selected as a C-Class part is being added.
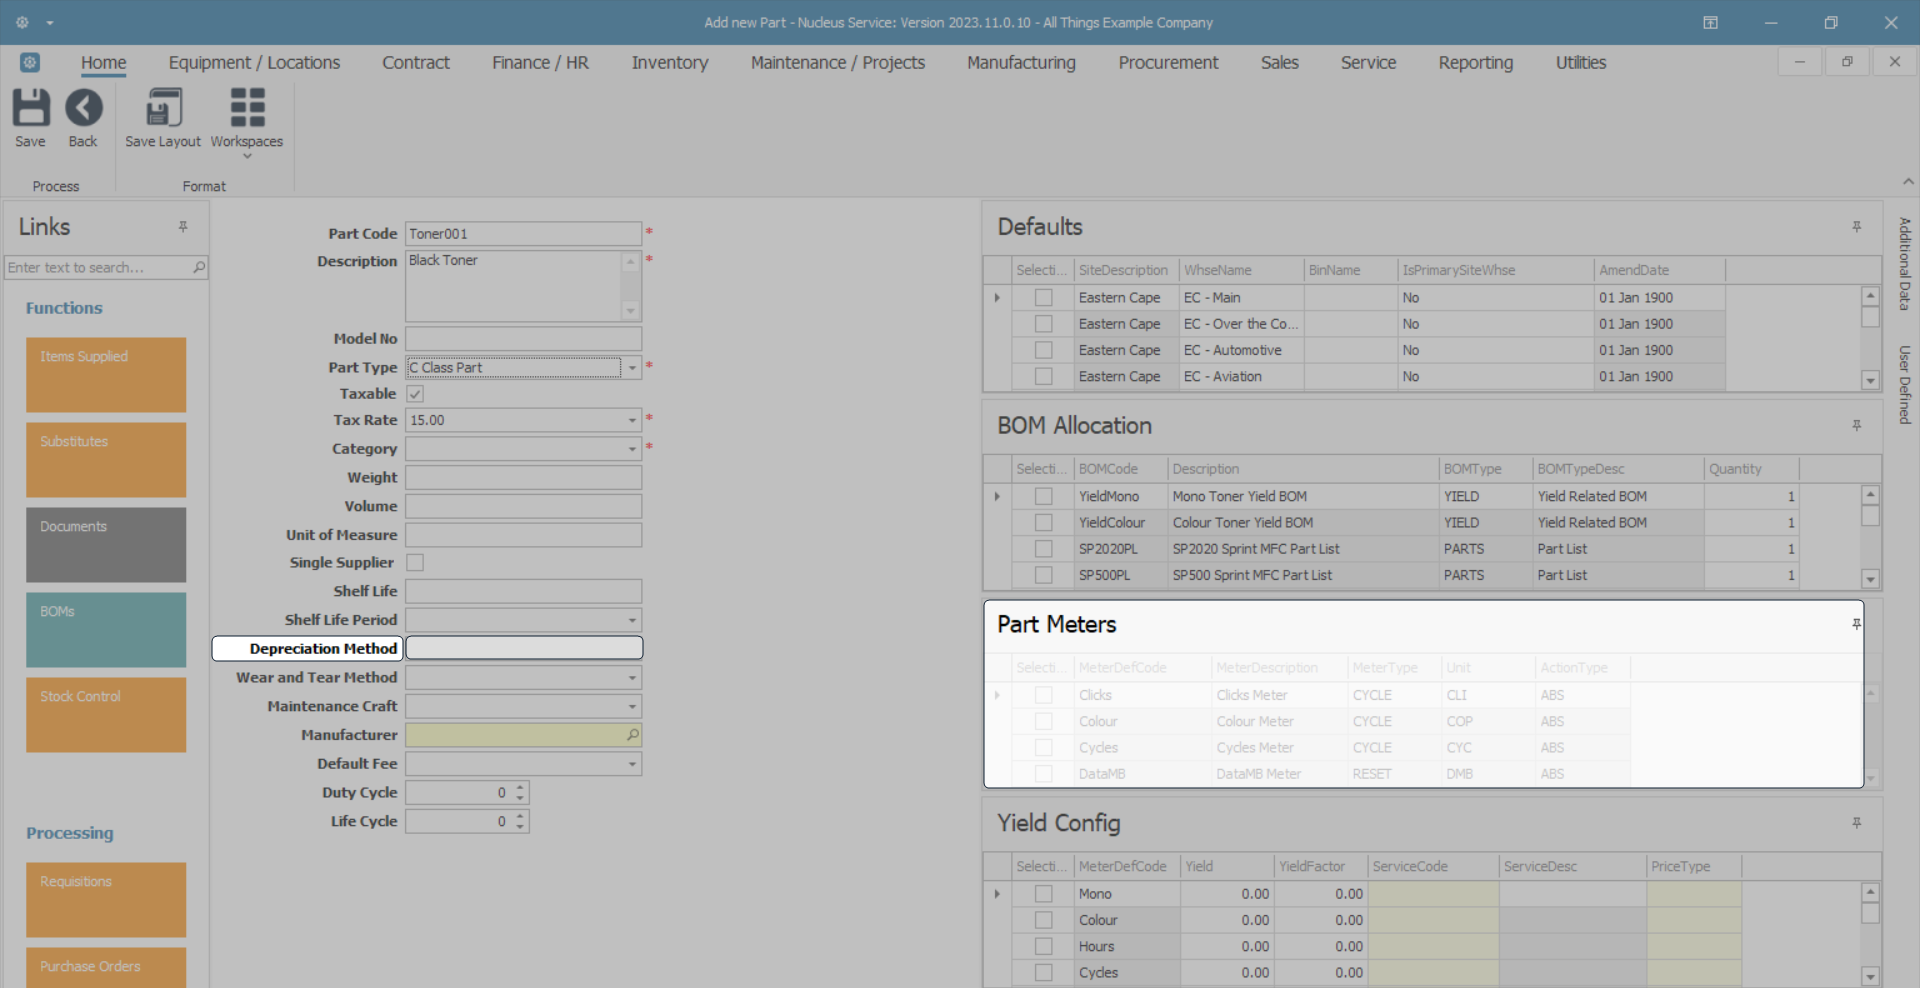
- Note that, after the C-Class Part Type is selected, the Depreciation Method field and Part Meters panel greys out, and becomes inactive.
- Only a serialised equipment item, A-Class, or a serialised spares item, B-Class, can have depreciation applied.
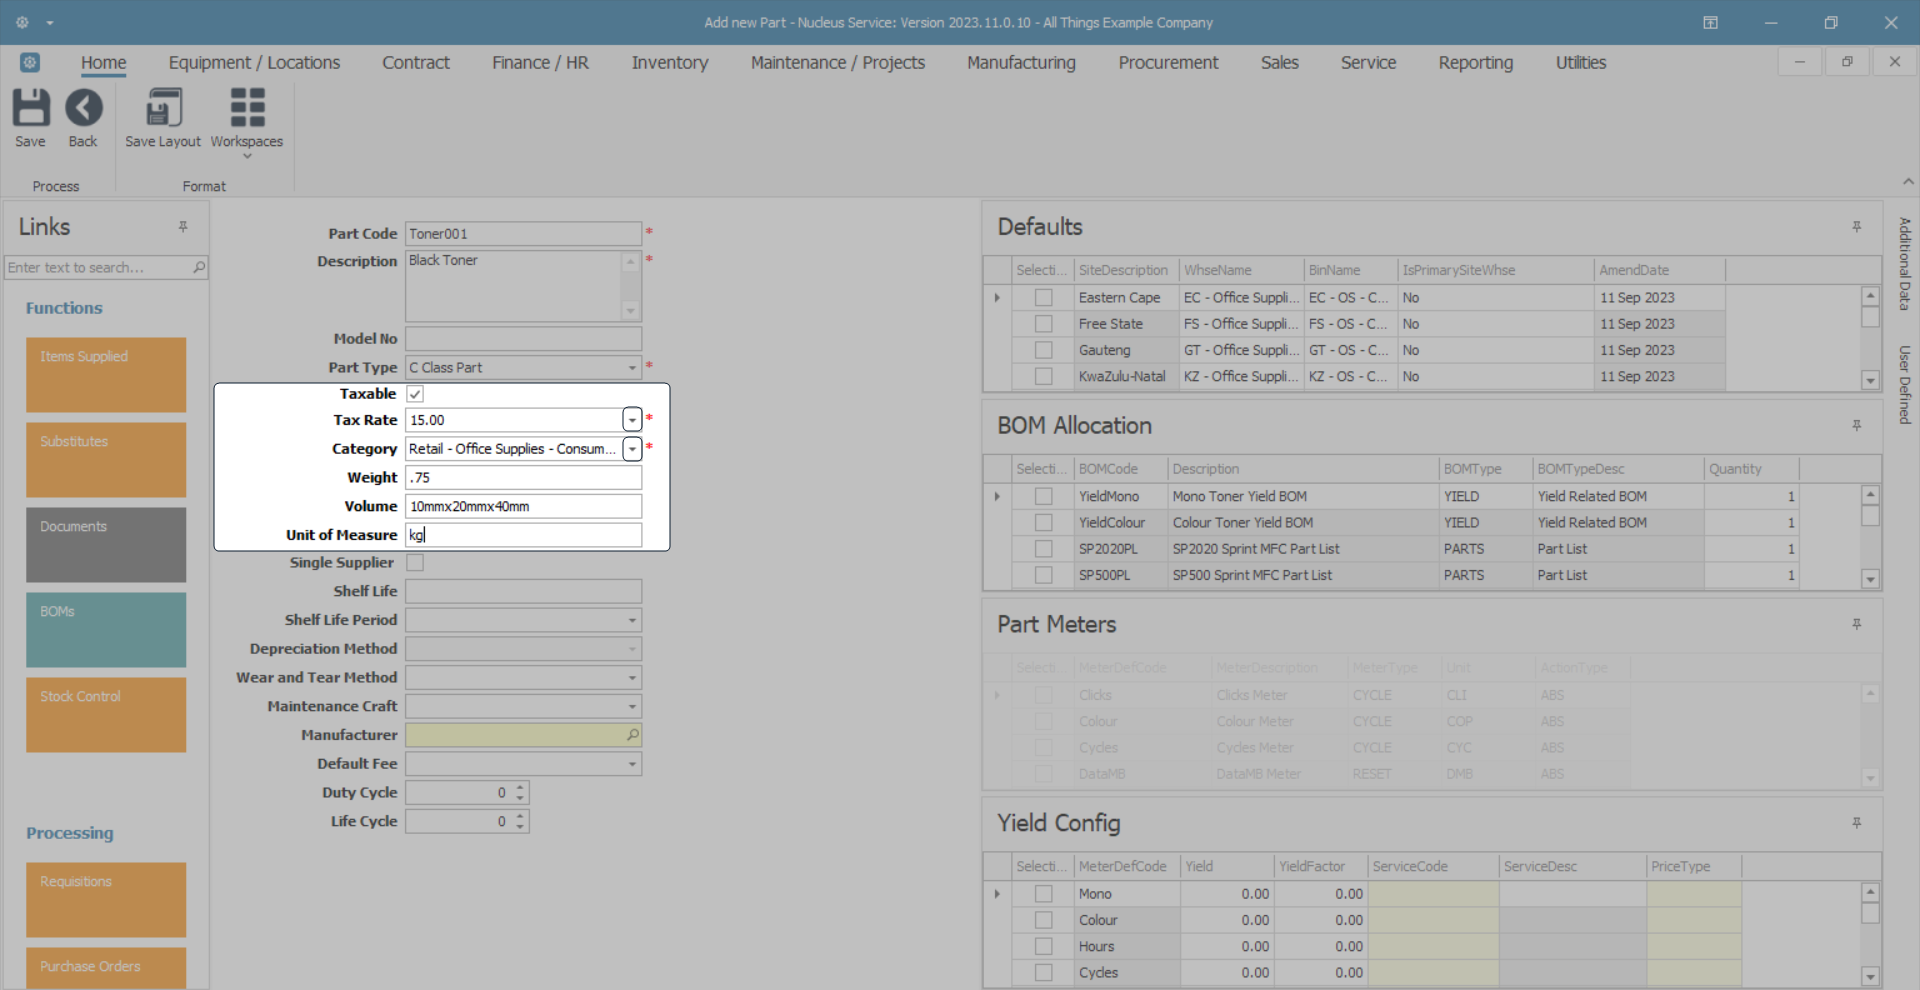
- Taxable: Select this check box if this part is taxable.
- Tax Rate: Click on the drop-down arrow and select from the list, the tax code applicable to this part. These tax rates are set up in the Configurator.
- Category: Click on the drop-down arrow and select from the list, the category applicable to this part.
Note: The category selected here will affect the Sites and Warehouses that are available for selection in the Defaults panel. See Add and Edit a category for more information.
- Weight:Type in the weight of the part, if required.
- Volume:Type in the volume of the part, if required.
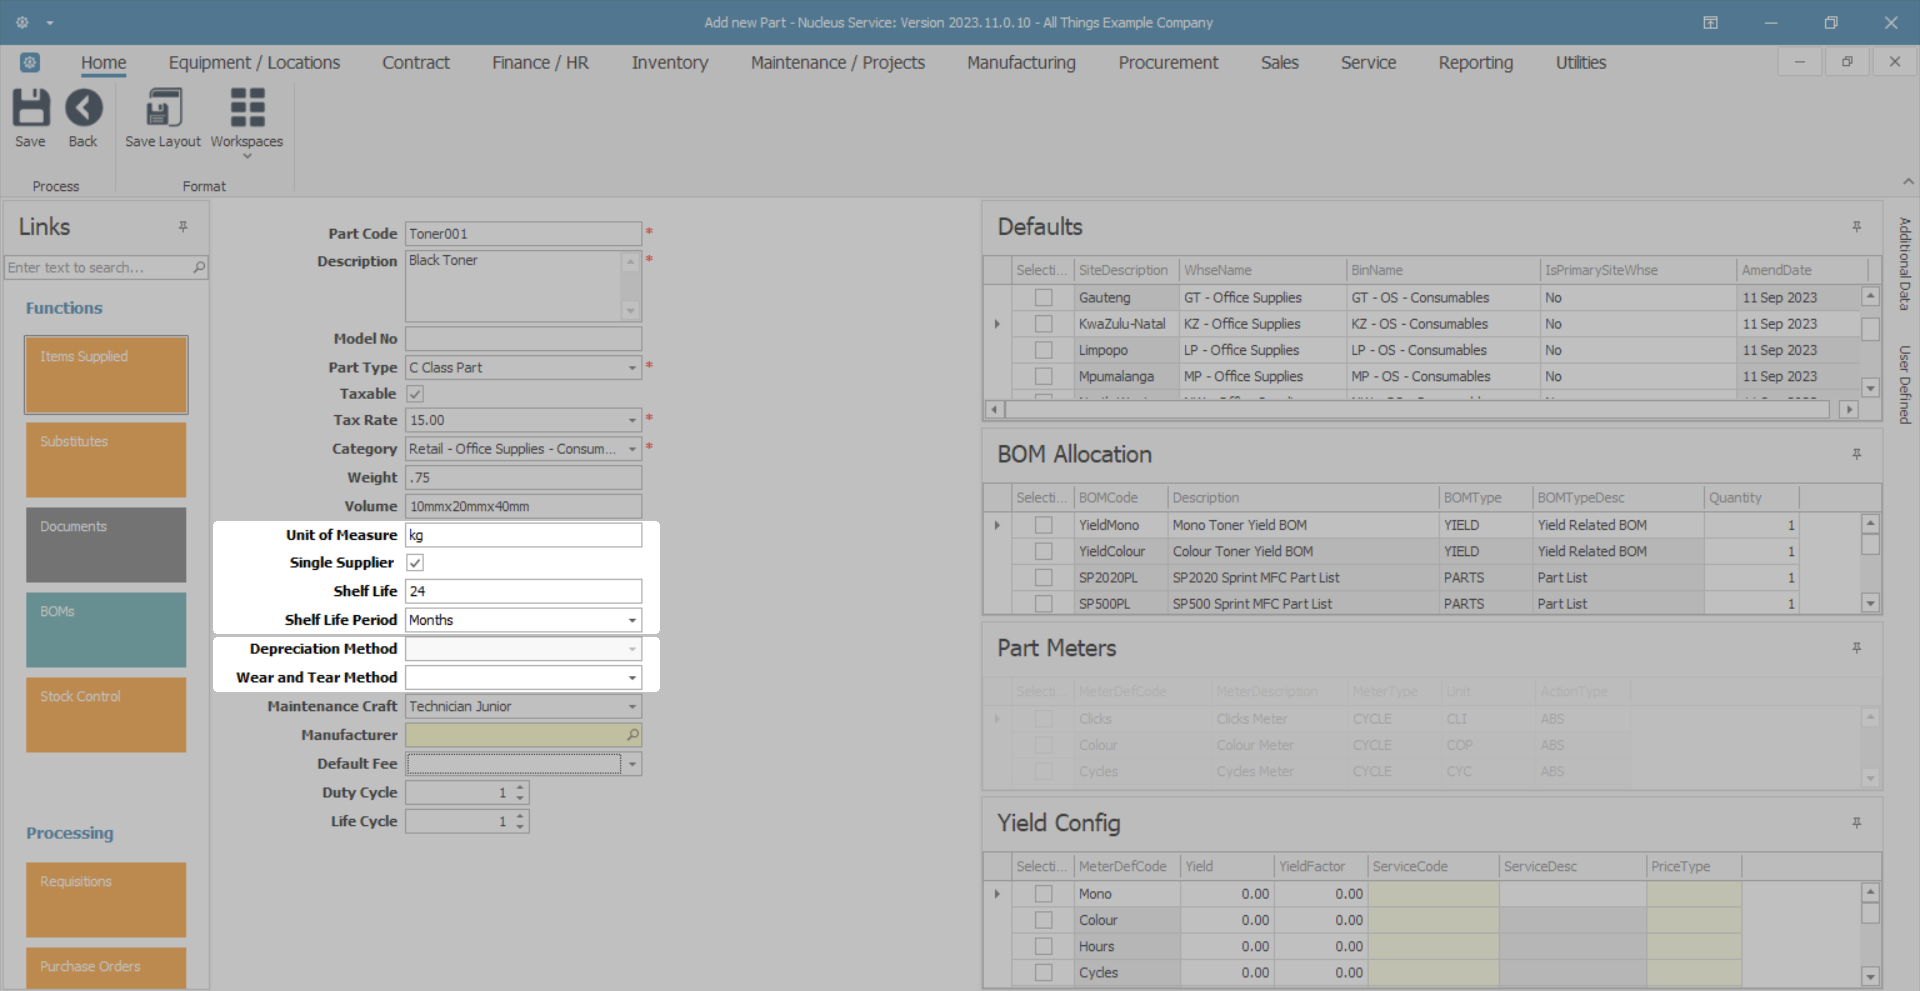
- Unit of Measure: Type in the unit used to measure the part, e.g. kg.
- Single Supplier: Select this check box if the part is procured from only one supplier.
- Shelf Life: Type in the shelf life or life expectancy of this part.
- Shelf Life Period: Click on the drop-down arrow and select from the list, the unit of time applicable to the shelf life period e.g. months, years.
- Depreciation Method: This field will be greyed out (inactive) for a C-Class part.
- Wear and Tear Method Wear and tear tracks the total asset life from it's first conversion from stock to asset as it would be determined by Inland Revenue. If an internal asset is converted back to stock, the wear and tear will pause until such time as the item becomes an asset again and will catch up any wear and tear not calculated while the item was deemed to be stock.: As wear and tear methods are linked to asset depreciation, this field will not be applicable to C-Class part definitions.
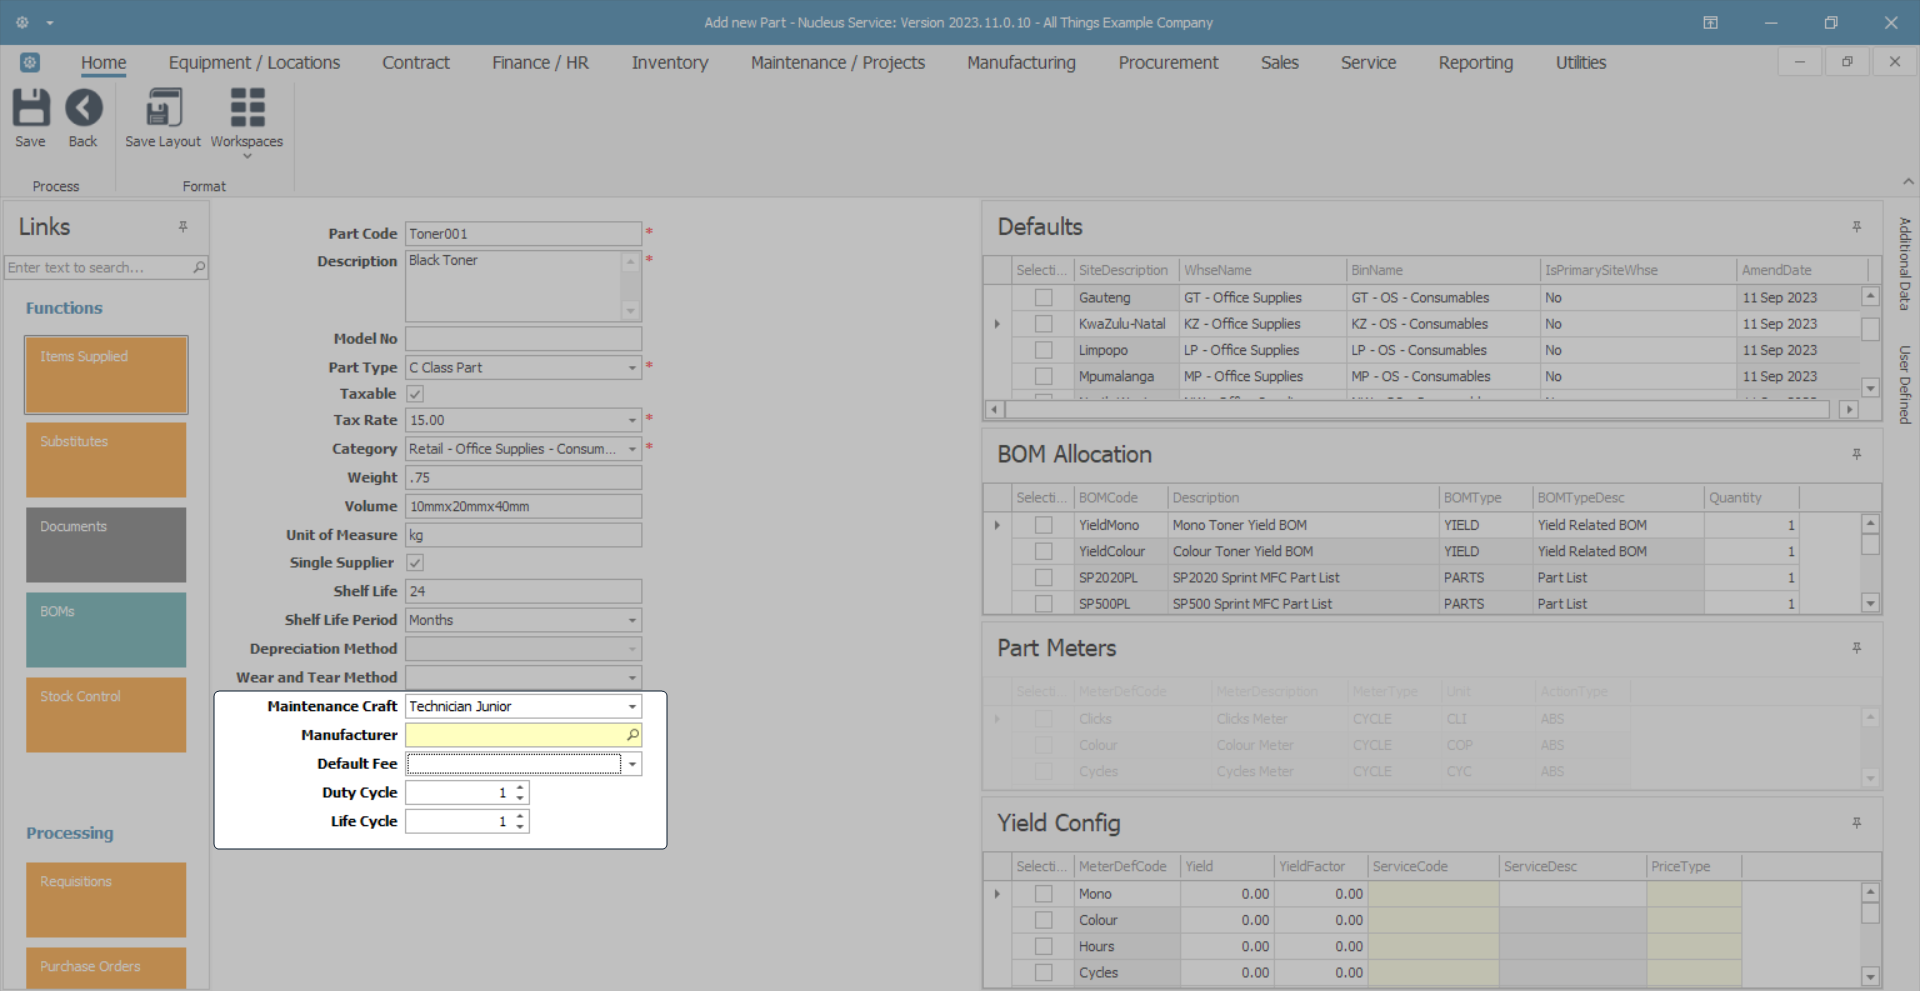
- Maintenance Craft: Click on the drop-down arrow and select from the list, the default craft A craft is the skill set or qualification(s) linked to an employee. (skill) utilised when maintaining this part.
- Manufacturer: Click on the search button and select the manufacturer of this part.
- Default Fee: Click on the drop-down arrow and select from the list, the default fee associated with this part, if applicable.
- Duty Cycle: Click on the arrows to choose the operational cycle or usage pattern of this part. For non-serialised C--Class parts, the duty cycle represents how frequently they are used or replaced within a given time frame.
- Life Cycle: Click on the arrows to choose the life cycle of this part. Non-serialised C--Class parts follow a simple life cycle - procurement, storage, usage and replenishment.
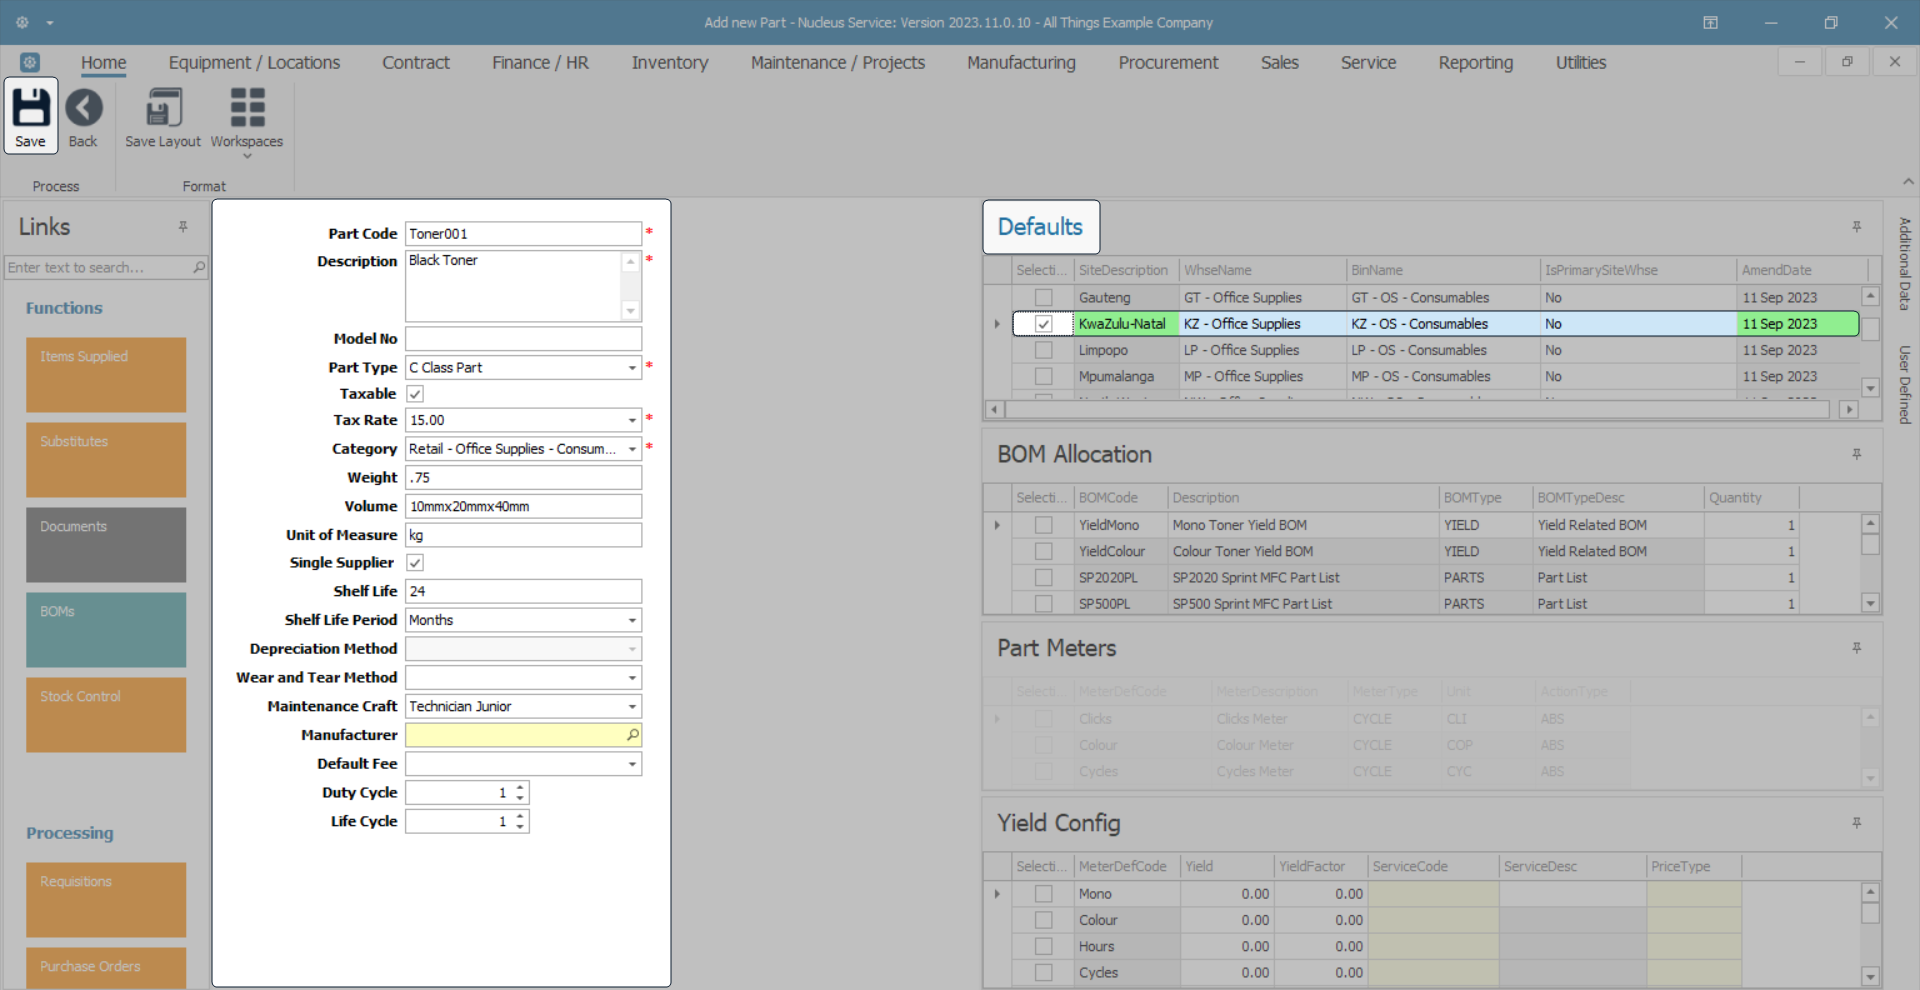
Once you have filled in the mandatory details and the optional details, as required -
Follow the process to Add the Part Definition Defaults.
Note: A part definition must have at least one Site and Warehouse selected in the Defaults panel. If none are linked, you will not be able to Save the part definition details.
MNU.026.030