We are currently updating our site; thank you for your patience.
Maintenance
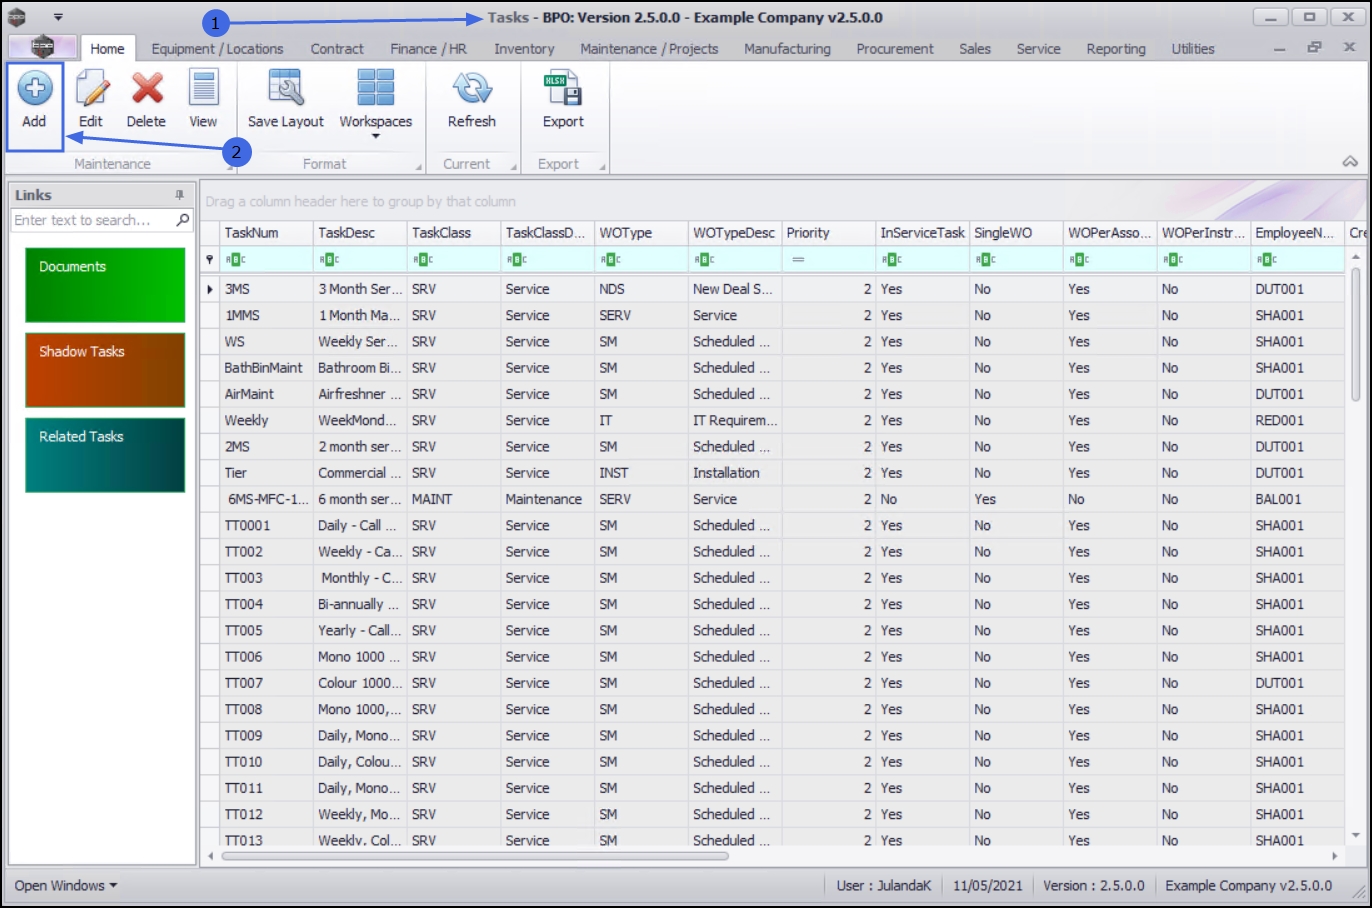
Tasks - Add a Task
Tasks are set up in order to perform scheduled maintenance / service and are linked to Serialised Items / Locations, with 'Last Done' and 'Next Due' information.
The following items are important when setting up tasks:
- Task Work Order Type: The selected work order type code must also exist as a call type (if you want to generate a call from the task).
- Task Type must be set to 'Duplicate'.
- Task Generate Strategy: Create call per work order (if you want to generate a call from the task).
- The Generation Methodology must be set up (Task Interval)
- At least one instruction must be linked to the task.
If the Company Configuration is set to Auto Apply Task Configuration to WO, then all required resources for the task will be created as requested on all the work orders that are created with the same Work Order Type. If this is the case, make sure that each task is linked to a different Work Order Type.
The Auto Apply Task to WO functionality is meant for use in a simplified planned maintenance environment where Project Methodology is not used. These two functionalities cannot be used together.
| Ribbon Access: Maintenance / Projects > Tasks |

- The Tasks listing screen will be displayed.
Add an Instruction
- Click on Add.
 Short cut key: Right click to display the Process menu list. Click on Add.
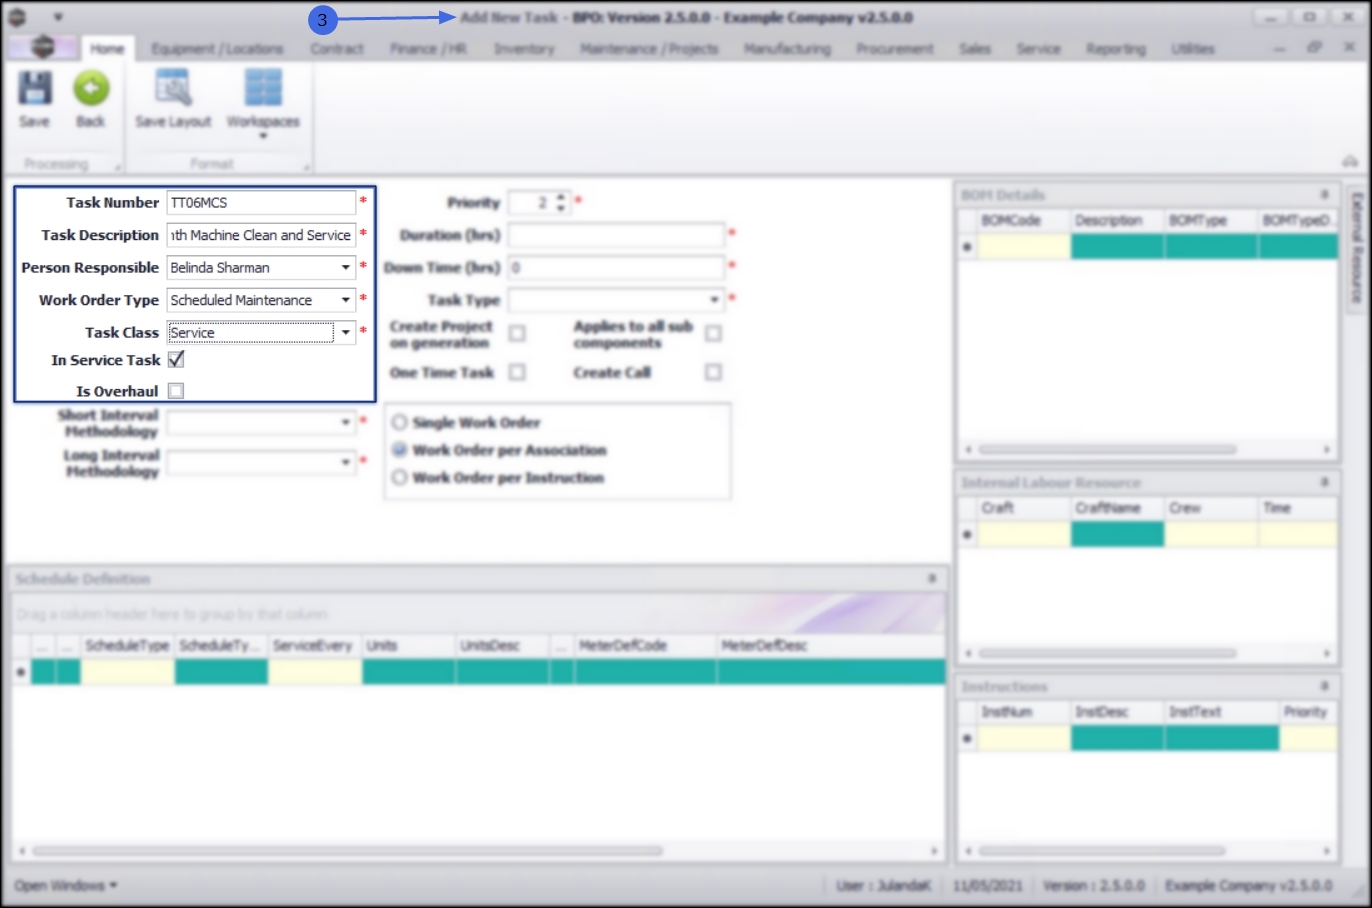
- The Add New Task screen will be displayed.
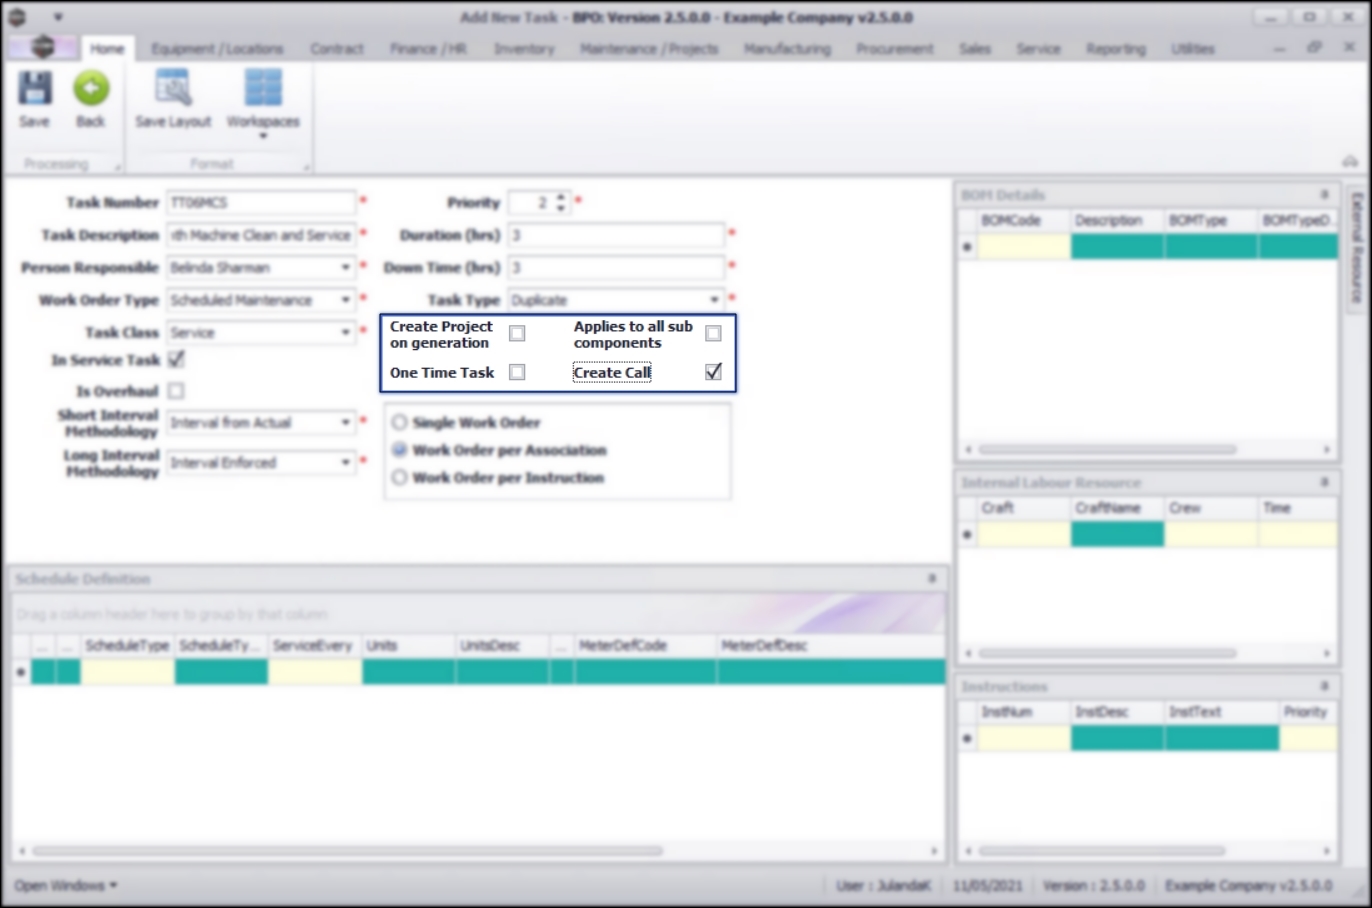
Task Details
- Task Number: Type in the number for the task.
- Task Description: Type in a short description to identify the task.
- Person Responsible: Click on the drop-down arrow and select the person who will be responsible for this task, from the menu list.
- Work Order Type: Click on the drop-down arrow to select the work order type, from the menu list, e.g. Scheduled Maintenance.
![]() Note 1: If the Company Configuration is set to Auto Apply Task Configuration to WO (as explained in Important Notes), then all required resources on this task will be created as requests, on all work orders that are created with the same Work Order Type. Alternatively, make sure that each task is linked to a different Work Order Type.
Note 1: If the Company Configuration is set to Auto Apply Task Configuration to WO (as explained in Important Notes), then all required resources on this task will be created as requests, on all work orders that are created with the same Work Order Type. Alternatively, make sure that each task is linked to a different Work Order Type.
![]() Note 2: The selected work order type code must also exist as a call type code if you want to call to be auto generated from the task.
Note 2: The selected work order type code must also exist as a call type code if you want to call to be auto generated from the task.
- Task Class: Click on the drop-down arrow to select a task class from the menu list, e.g. Maintenance.
- In Service Task: Click on the check box if this is an In Service task.
- Is Overhaul: Click on the check box if this is an Overhaul task.
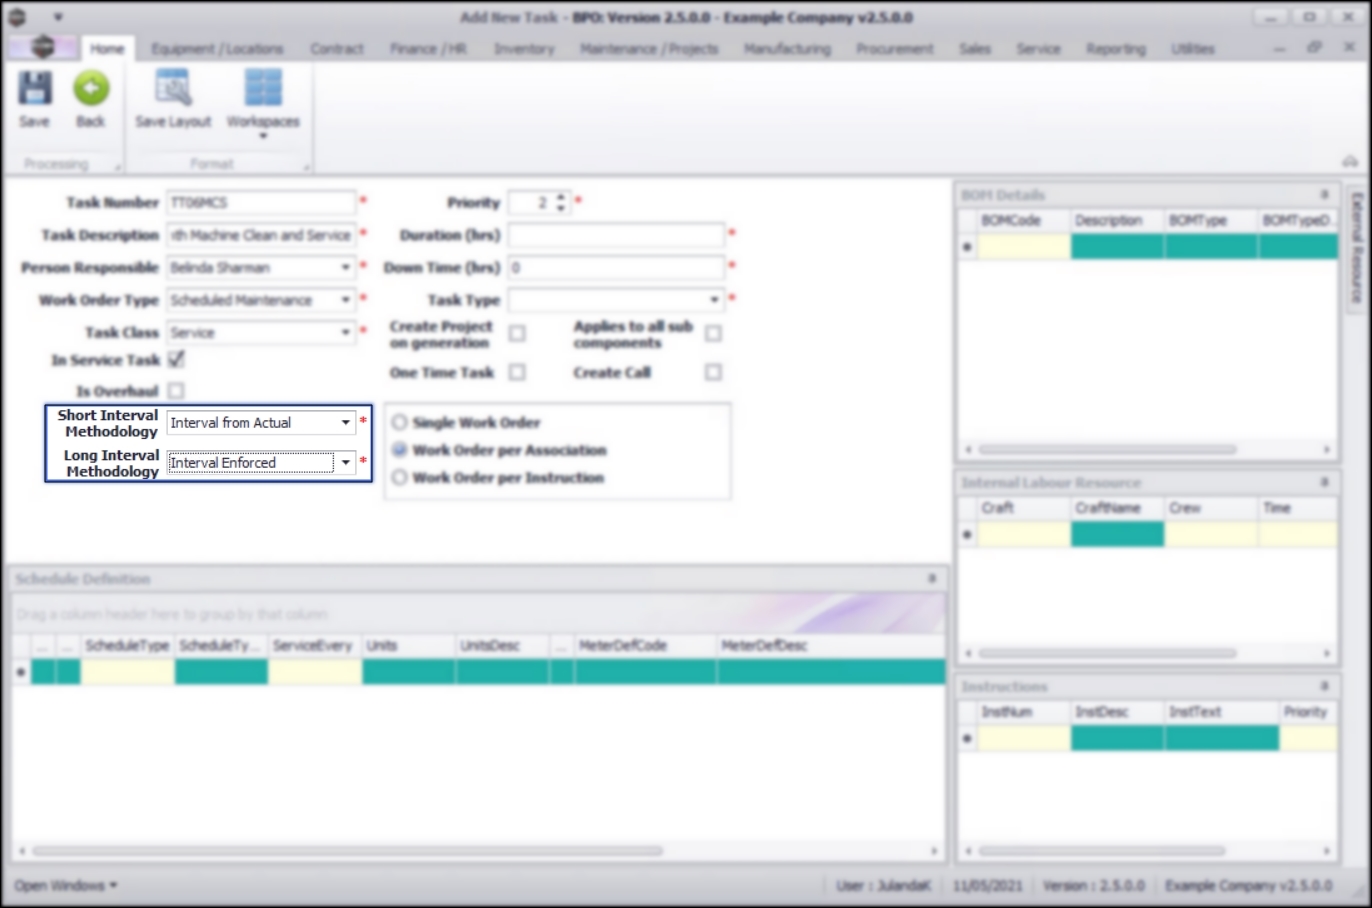
Interval Methodology
You will need to set the Interval Methodology for this task
In the follow examples: Lets say a task is due every 7 days, and was last done on the 1st of the month, which makes the next interval the 7th of the month, and following that the 14th of the month:
- Short Interval Methodology: (Task was performed early - before the due date or condition was met)
- Interval from Actual: Next performance will be calculated from early performance plus task interval, e.g.
- The task was done on the 5th - next due will be set to the 12th.
- Interval with Tolerance: Next performance will be due as it should have been, had the previous task been performed on time, e.g.
- The task was done on the 5th - next due will be set to the 14th.
- Interval from Actual: Next performance will be calculated from early performance plus task interval, e.g.
- Long Interval Methodology: (Task was performed late - after the due date or condition was met)
- Interval from Actual: Next performance will be calculated from late performance plus task interval, e.g.
- The task was done on the 9th - next due will be set to the 16th.
- Interval with Tolerance: Next performance will be due as it should have been, had the previous task been performed on time, e.g.
- The task was done on the 9th - next due will be set to the 14th.
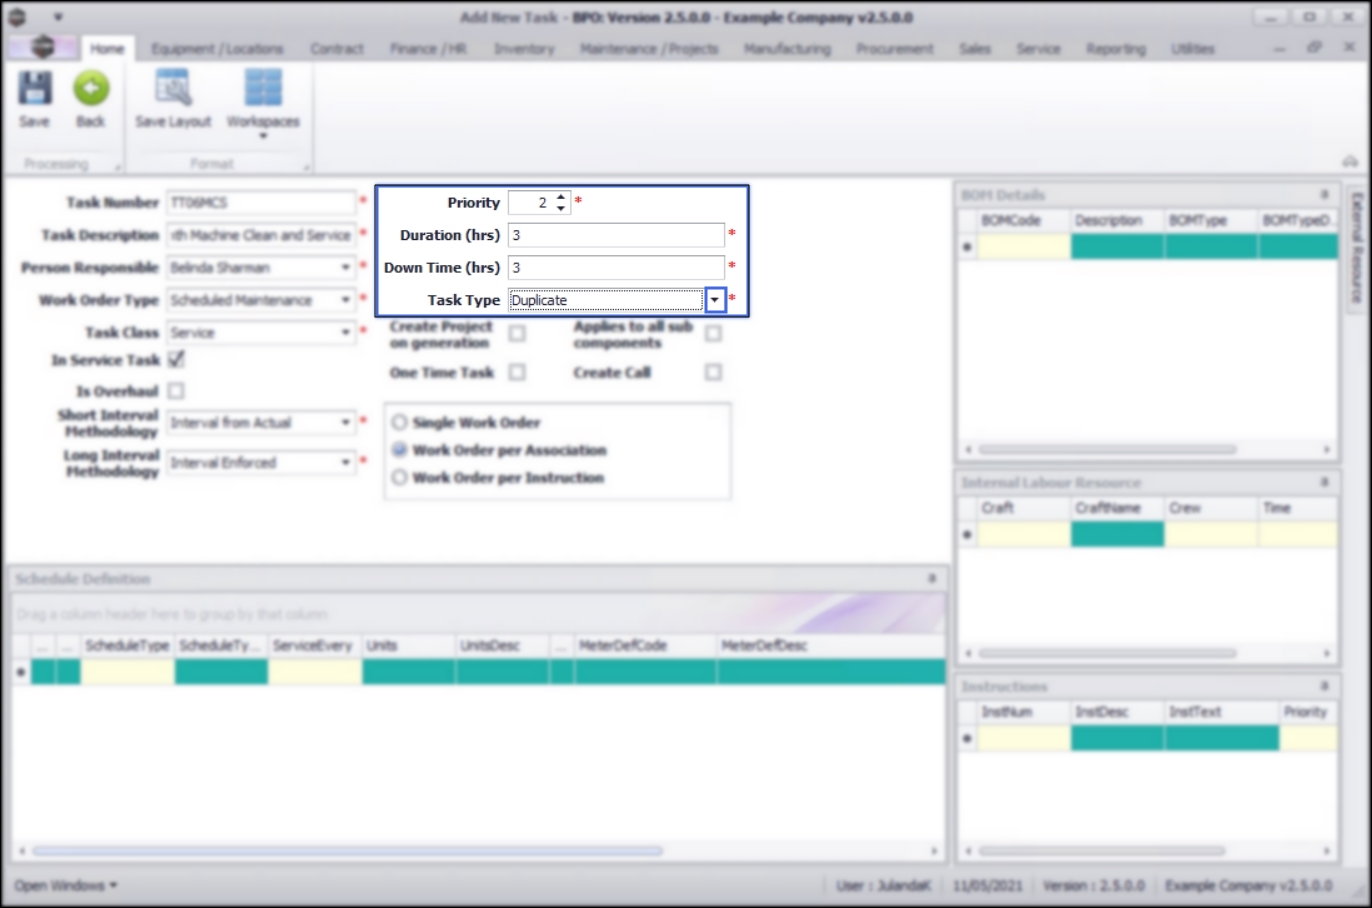
- Priority: Specify the priority level for the work.
- Task Duration (hrs): Specify how long, in hours, it will take to complete the task.
- Down Time (hrs): Specify how long, in hours, the machine will not be in working order due to the task being completed.
- Task Type: Click on the drop-down arrow and select D - Duplicate Task Type from the list. This is the only valid option.
- If F - Absolute or V - Relative exist in the drop down, DO NOT select them. These obsolete options will be removed in a future upgrade.
- Create Project on generation: Click on the check box if you would like to create a project when this task schedule is generated.
- One Time Task: Click on the check box if the task is not a repetitive task and needs to be completed once only.
- Applies to all sub components: Click on the check box if you would like to assign the task, with all its sub-components, to the main component.
- Create Call: Click on the check box if you would like to create a call per work order for the task. Use this option when the tasks are being generated for services on machines that are located at the Customer.
![]() Note that the selected work order type code must exist as a call type code if you want a call to be auto generated from the task.
Note that the selected work order type code must exist as a call type code if you want a call to be auto generated from the task.
Generate Strategy
In this section, you can decide whether to create a:
- Single Work Order: Selecting this option will create one work order for all the components that have the same inspection due.
- Work Order per Association: This is the default and recommended option as it will create a work order per machine.
- Work Order per Instruction: Selecting this option creates a work order per instruction that is assigned to the inspection and will link all machines to the same work order.
You are now ready to:
- Add a Generation Methodology to the task.
- Link an Instruction to the task. At lease one instruction must be linked to the task.
- Add BOM details, Internal Labour Resources and External Labour Resources where applicable.
Save the Task
- When you have finished adding all the relevant information to the task details from, click on Save.
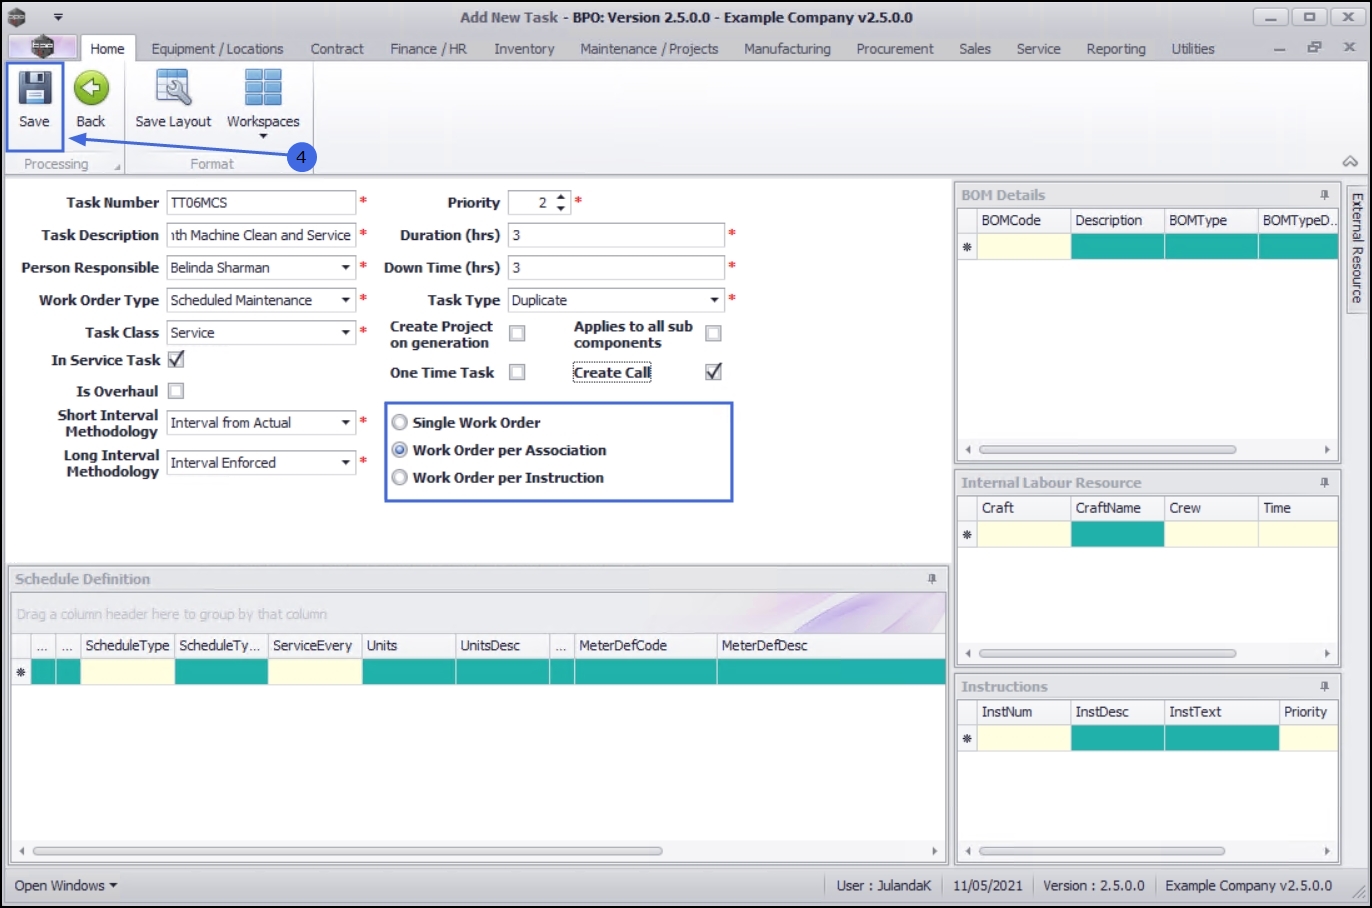
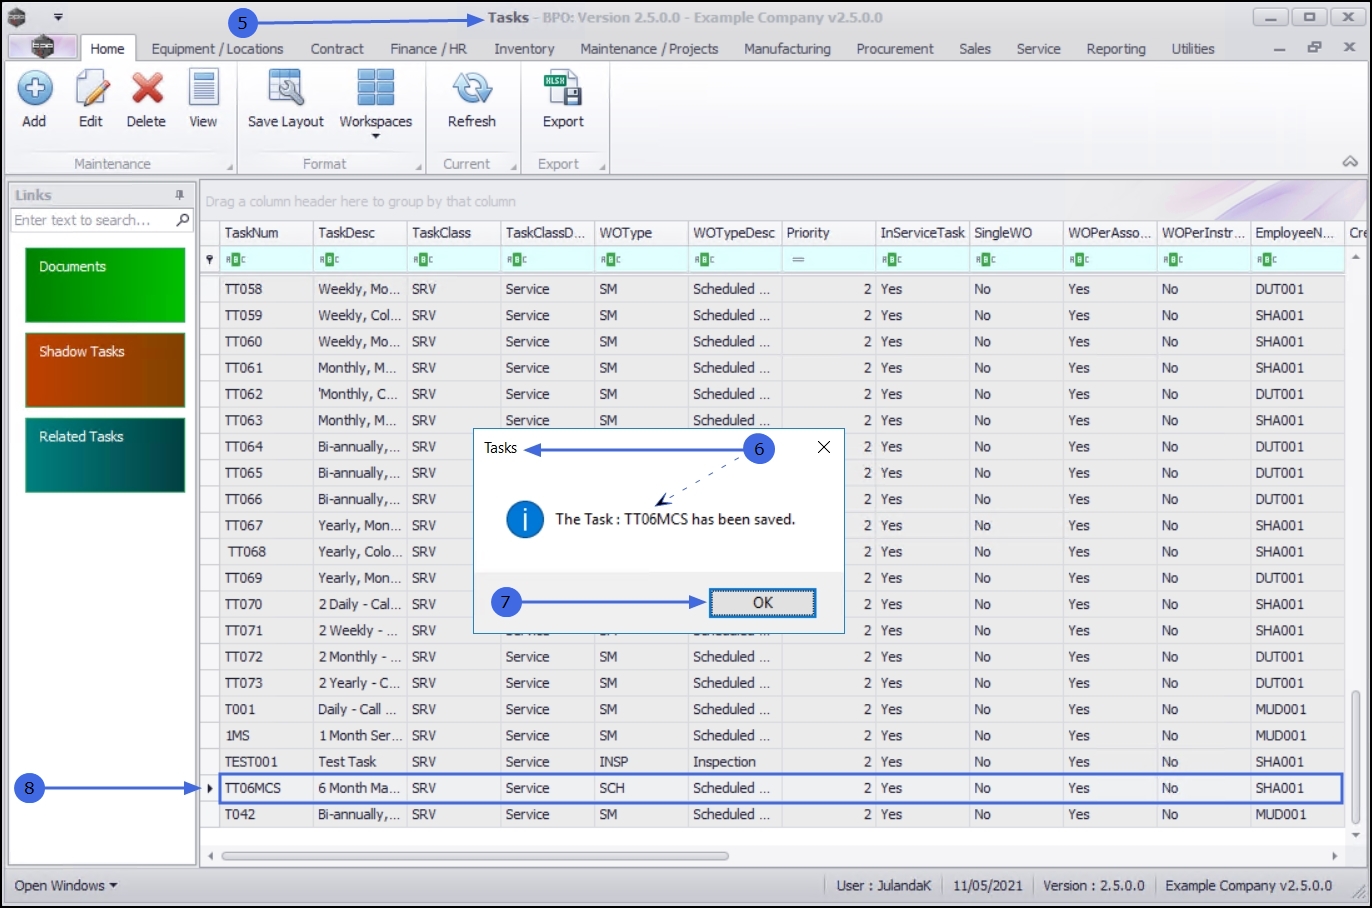
- You will return to the Tasks listing screen.
- When you receive the Task message to confirm that;
- The Task: [task number] has been saved.
- Click on OK.
- The Task listing screen has been updated with the new task details.
MNU.044.002