We are currently updating our site; thank you for your patience.
Equipment
Assets - View Internal Asset
The View button in the Asset![]() An asset is an item that is generating income for the company e.g. a rental item or an item that has been sold to a customer. Listing screen (Machine List for [ ] screen) allows you to view more details with regards to a selected asset.
An asset is an item that is generating income for the company e.g. a rental item or an item that has been sold to a customer. Listing screen (Machine List for [ ] screen) allows you to view more details with regards to a selected asset.
This screen lists relevant asset information depending on whether the asset selected is:
- a Client Machine (Customer Asset)
- an Internal Asset or
- a Serialised Stock Item
In this process, we will examine the details for an internal asset. This is an asset that is owned by the company, that will be used for rental or loan unit purposes, i.e. to generate a revenue.
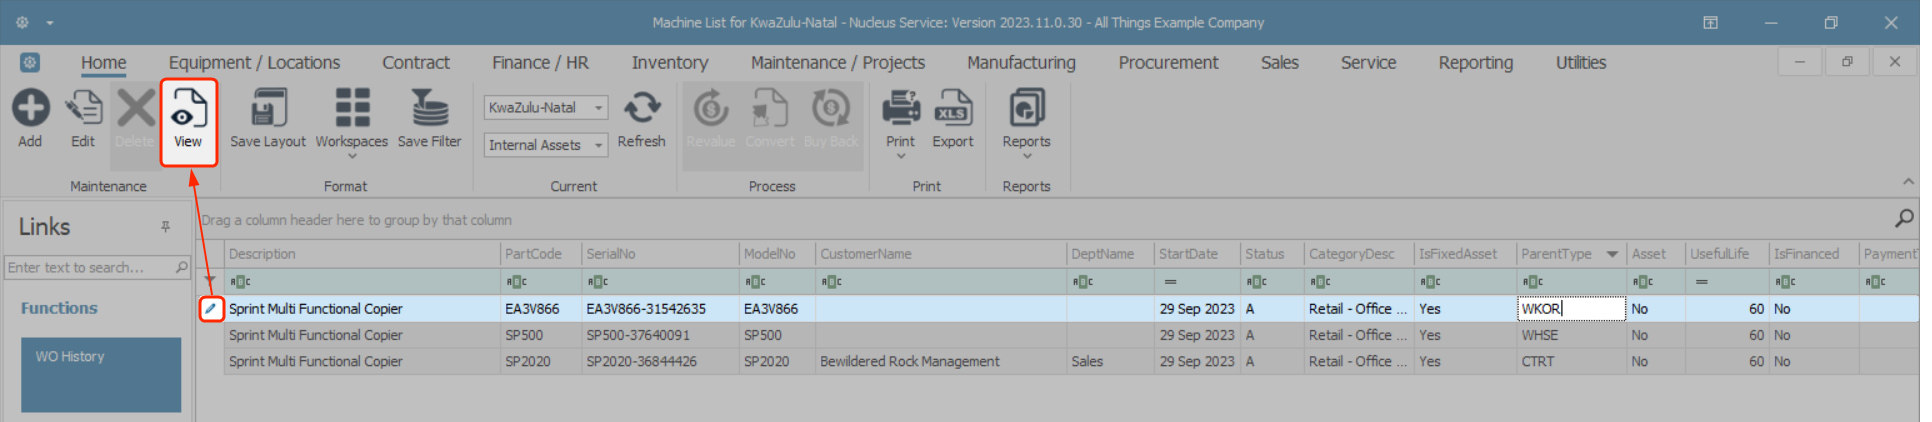
Asset Listing Screen
Ribbon Select Equipment and Locations > Assets

- The Machine Listing screen will be displayed.
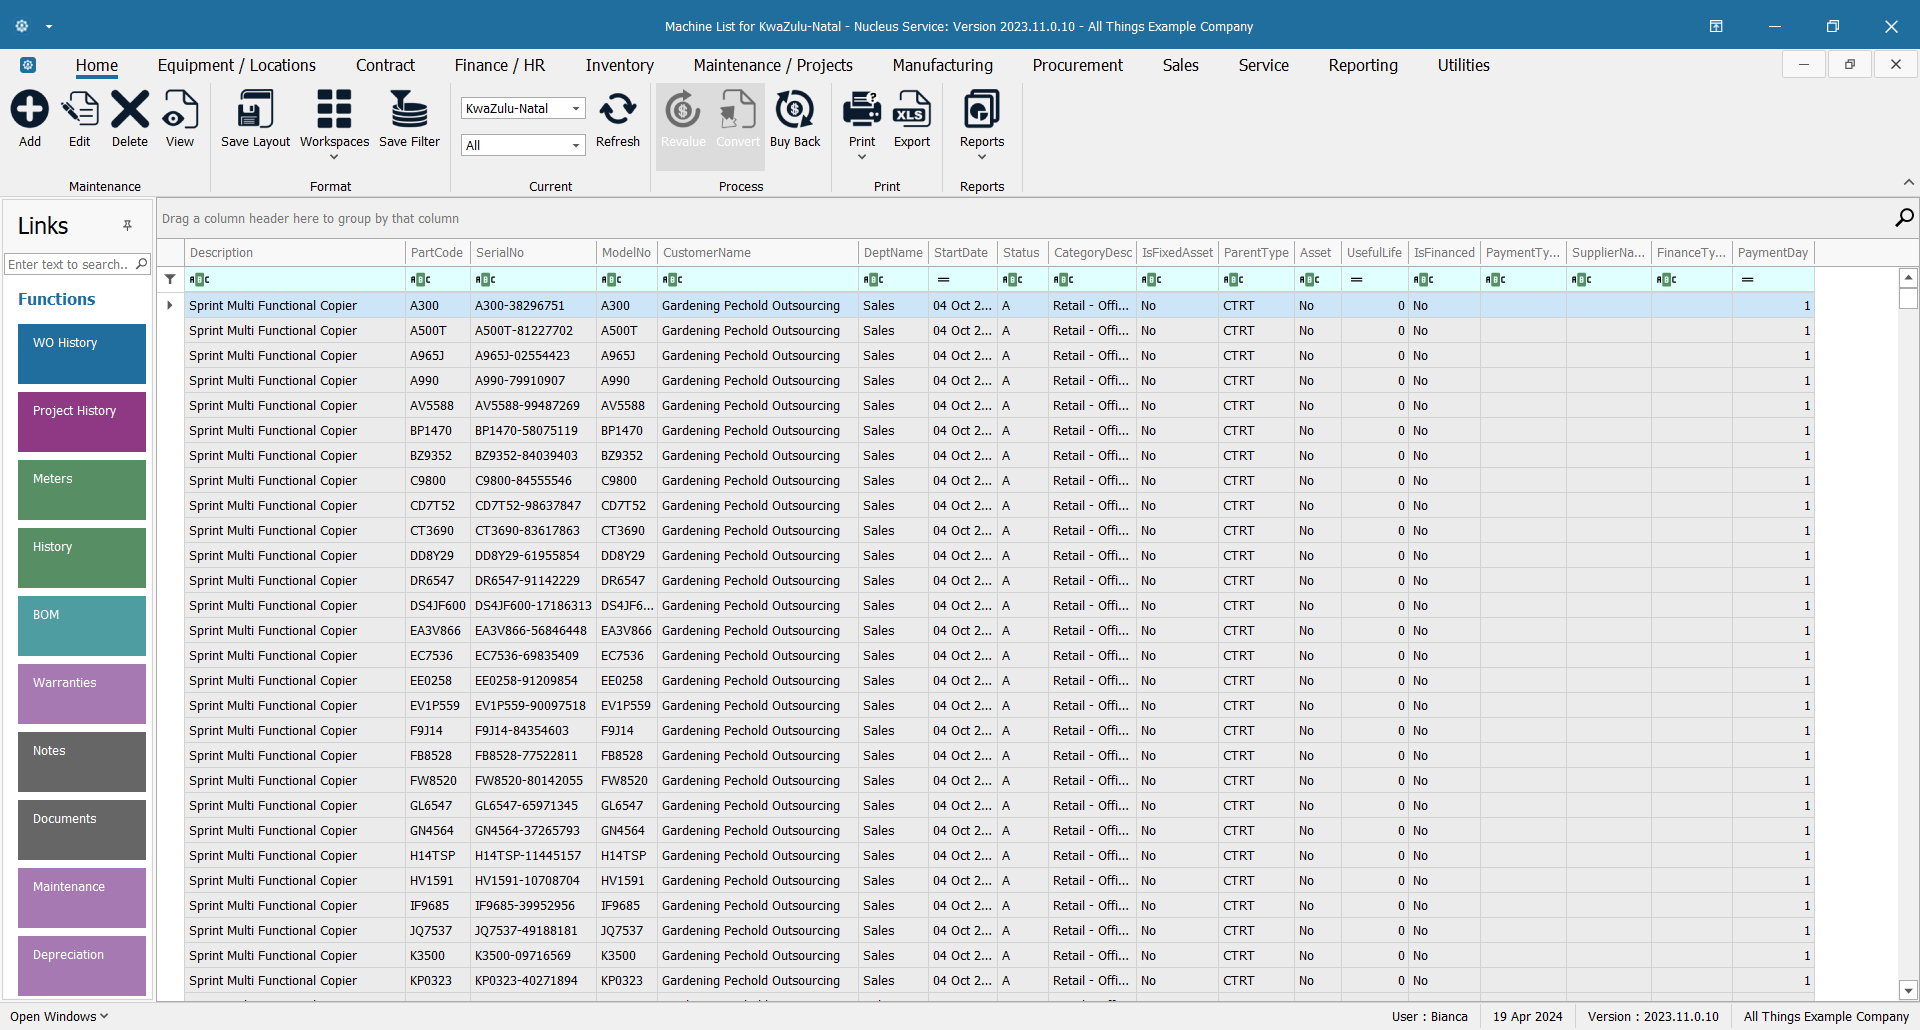
Your employee user record should be linked to a default site. In this case, the site will auto populate with this default, otherwise the site must be manually selected.
Another site can be selected, if required, and if you have the security rights to access the site.
If All Sites displays here, then you do not have a default site configured on your user record, and need to select the required site.
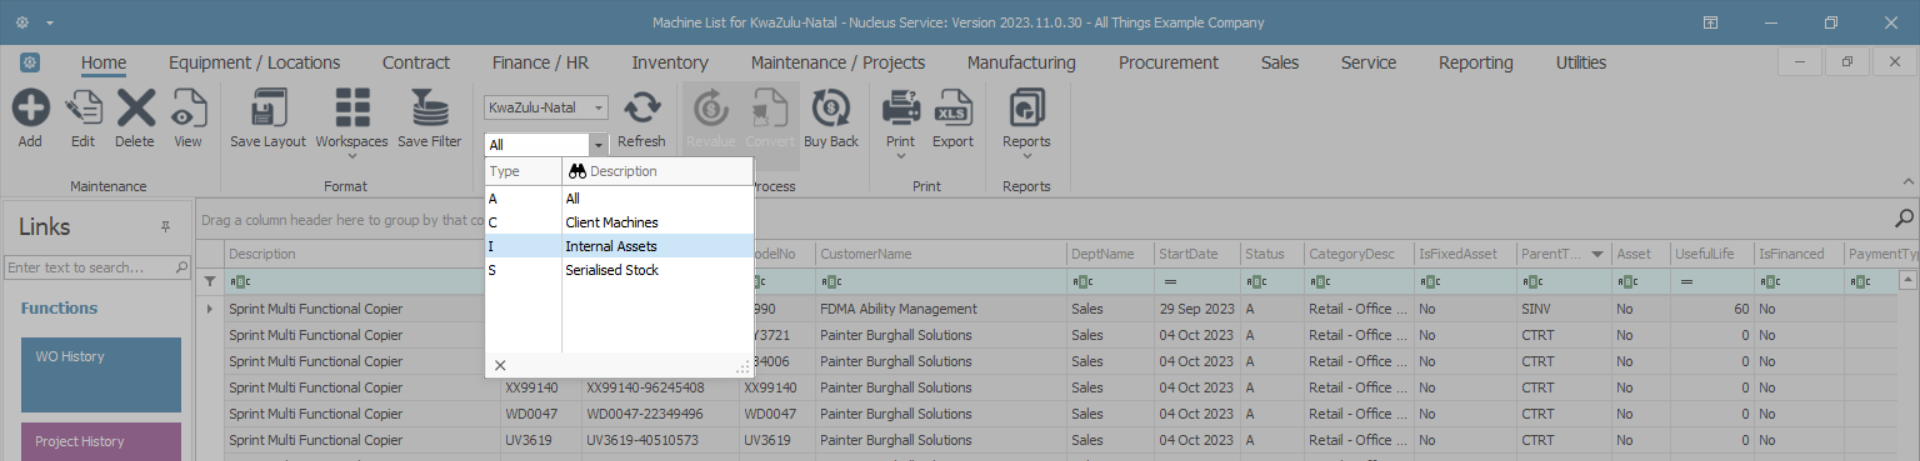
- To ensure that you will select the correct type of asset, ensure that the Status is set to Internal Assets.
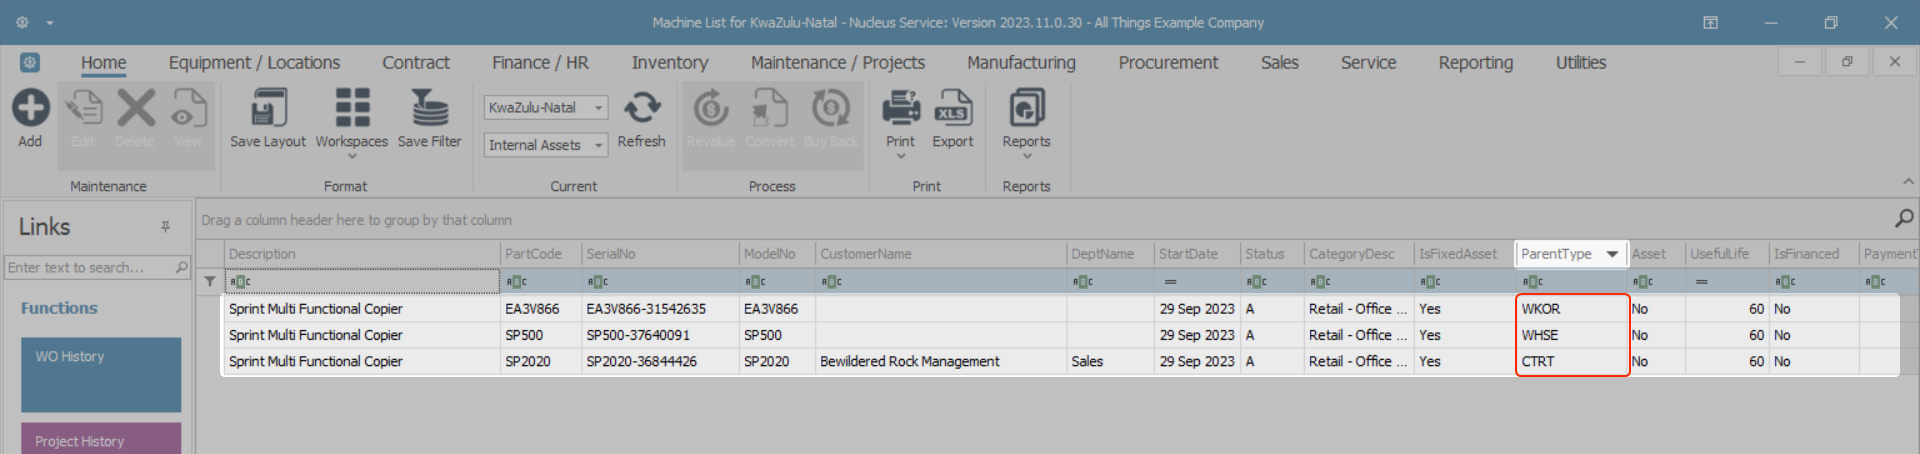
Internal Asset - Parent Types
- With the Site selected as required and the Status set to Internal Assets,
- you will note that there are 3 potential Parent Types for an internal asset;
- CTRT - Contract
- WHSE - Warehouse
- WKOR - Work Order
Each of these Parent Types will affect which fields and what field content can be viewed in the next screen.
In the following screen shots, we will look at an example of an internal asset linked to each Parent Type.
Internal Asset - CTRT
Select the Asset
- In the Machine List for [ ] screen,
- Select the row of the internal asset you wish to view.
- Take note of the Parent Type of this asset. In this example it is: CTRT - Contract.
- Click on View.
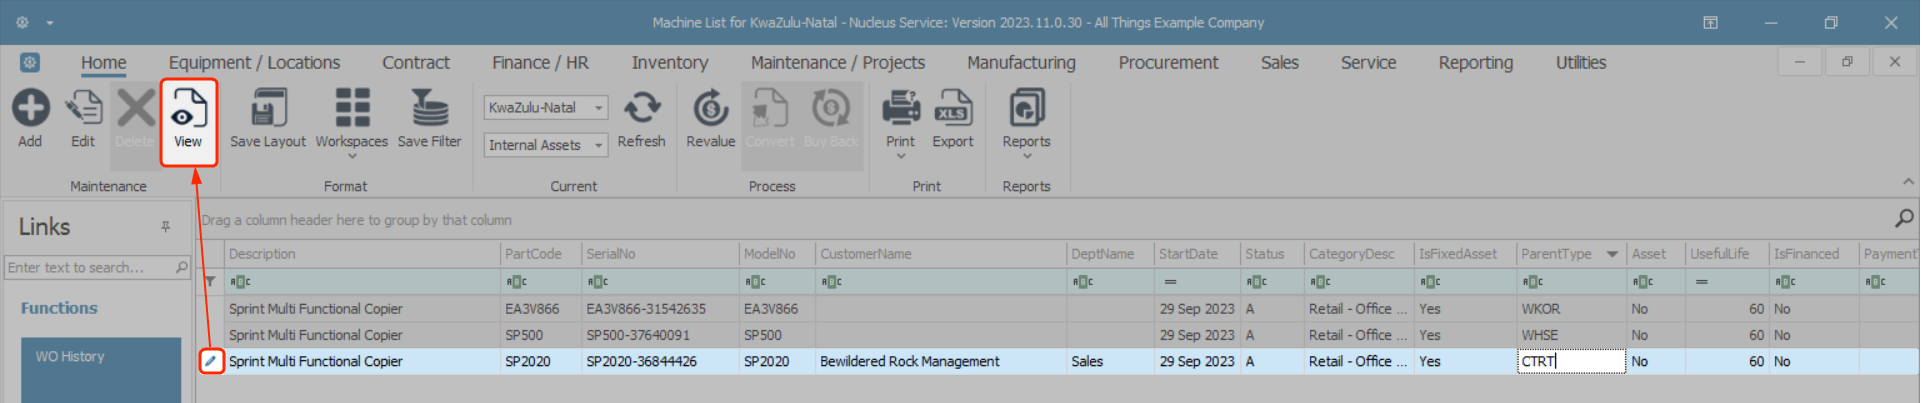
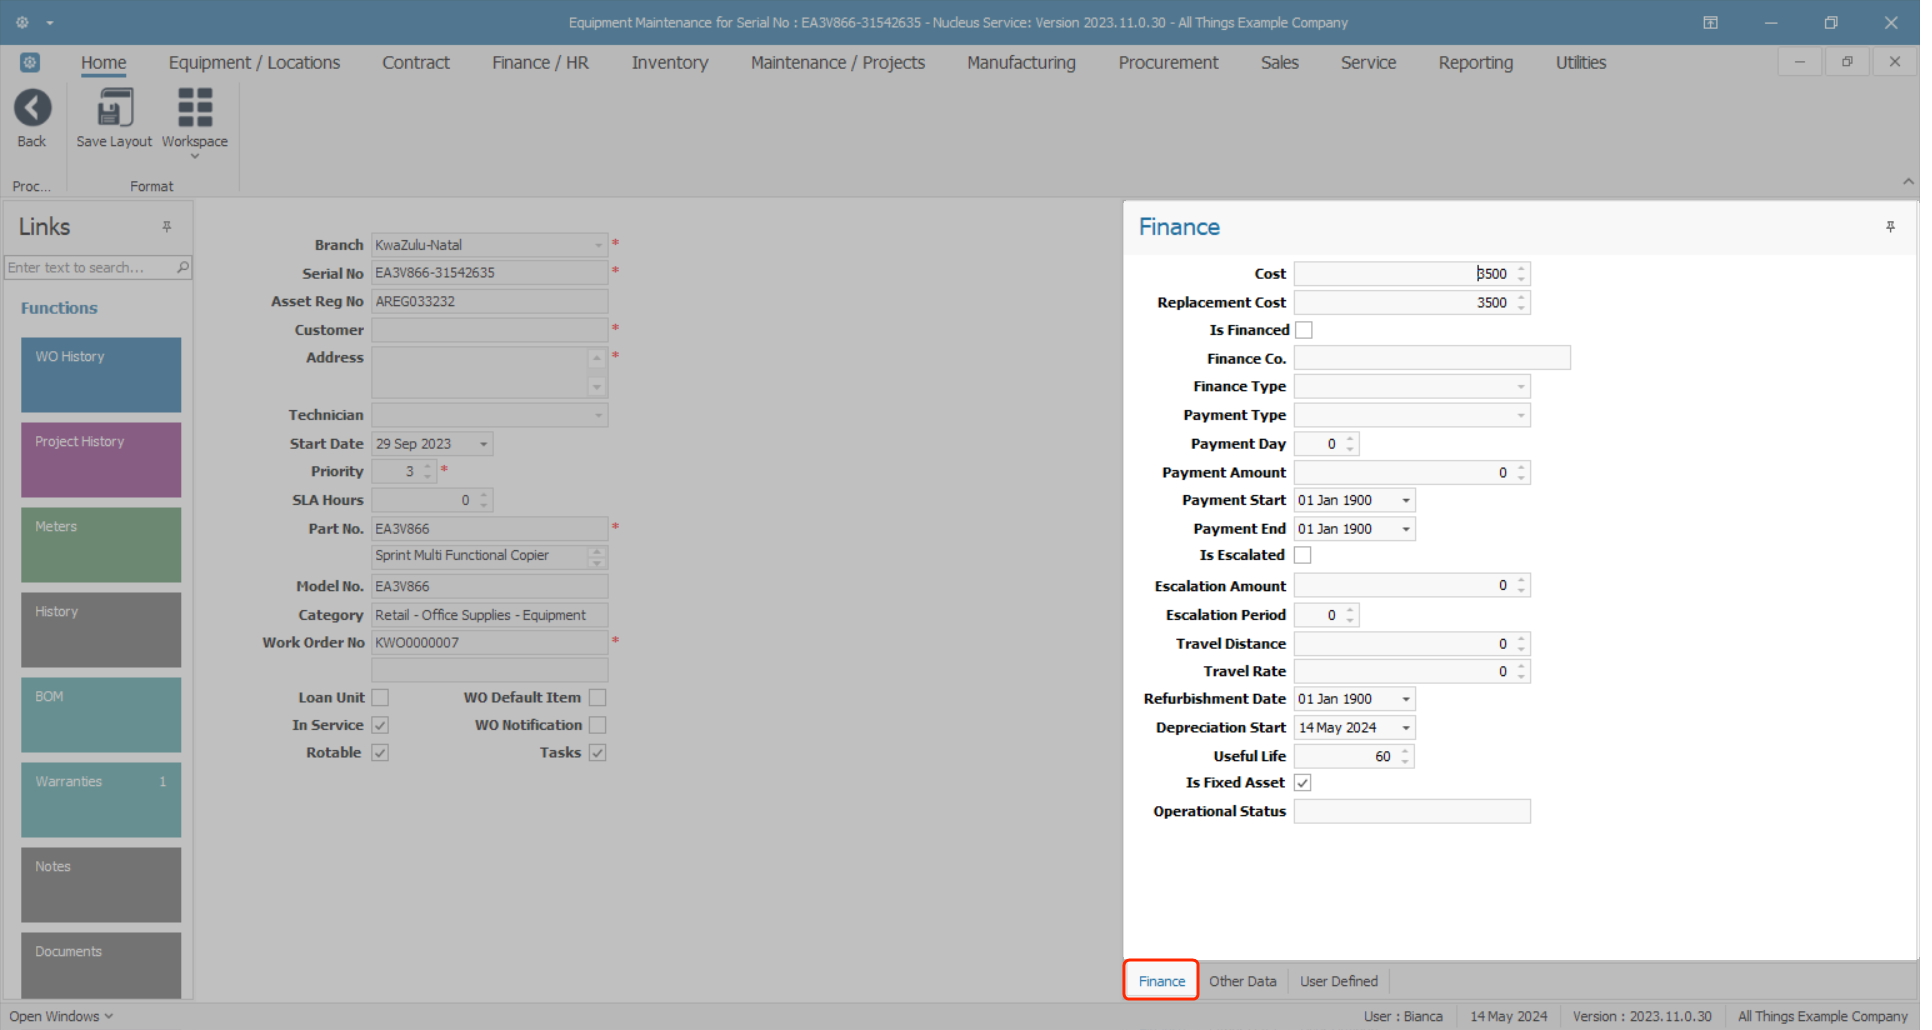
- The Equipment Maintenance for Serial No: [ ] screen will open.
- You will note that there is only a Back button. This is because this is a view only screen, no changes can be saved in this screen.
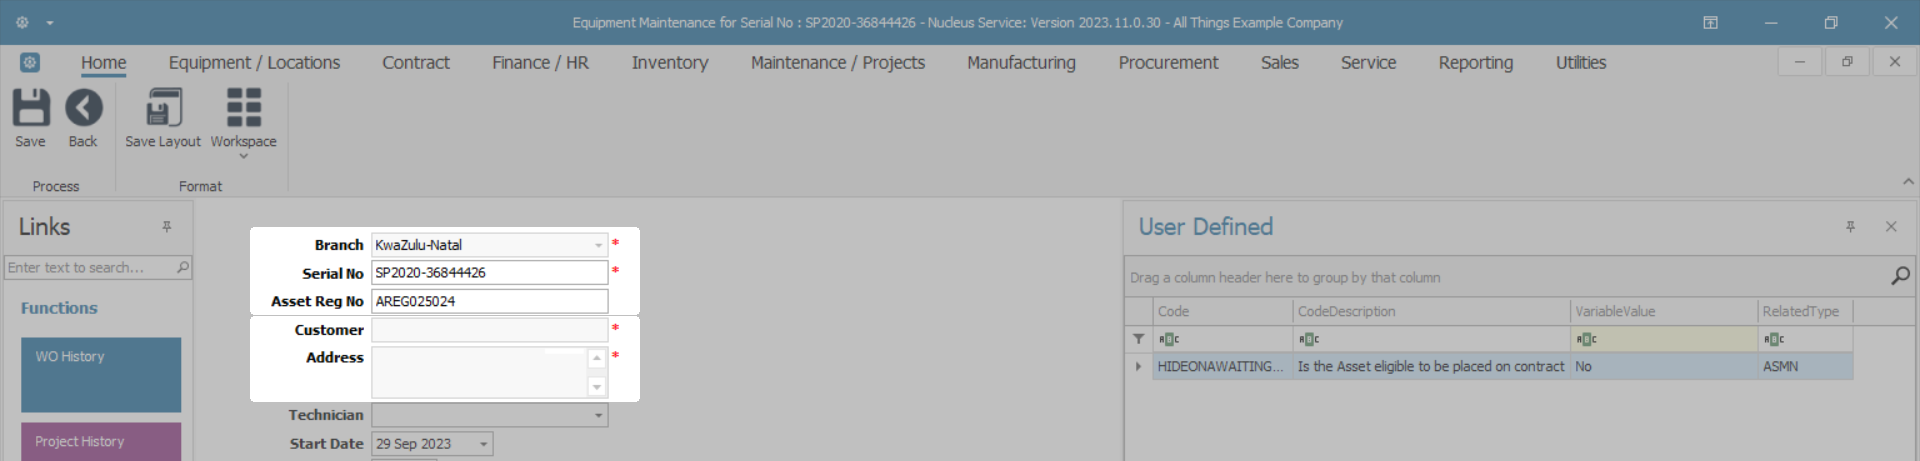
View Asset Details
- The left side of this screen lists the asset details.
- The first 3 fields are used across all asset types:
- Branch: This is the branch or Site the asset is linked to.
- Serial No.: This is the unique identifier of the asset provided by the manufacturer of the item.
- Asset Register No.: Also known as a Fixed Asset Number and is generally used for internal assets to make it easier for the maintenance team to identify the assets as per the company's unique internal system.
- The next 2 fields: Customer and Address, are used only when dealing with a Customer Asset. In this topic we are looking at an internal asset so these fields will remain blank.
- Customer: This field will be blank for an Internal Asset.
- (This field will only be populated if this is a Client Machine and will then contain the name of the client that owns the asset.)
- Address: This field will be blank for an Internal Asset.
- (This field will only be populated with the address of the client - as above - if this is a Client Machine.)
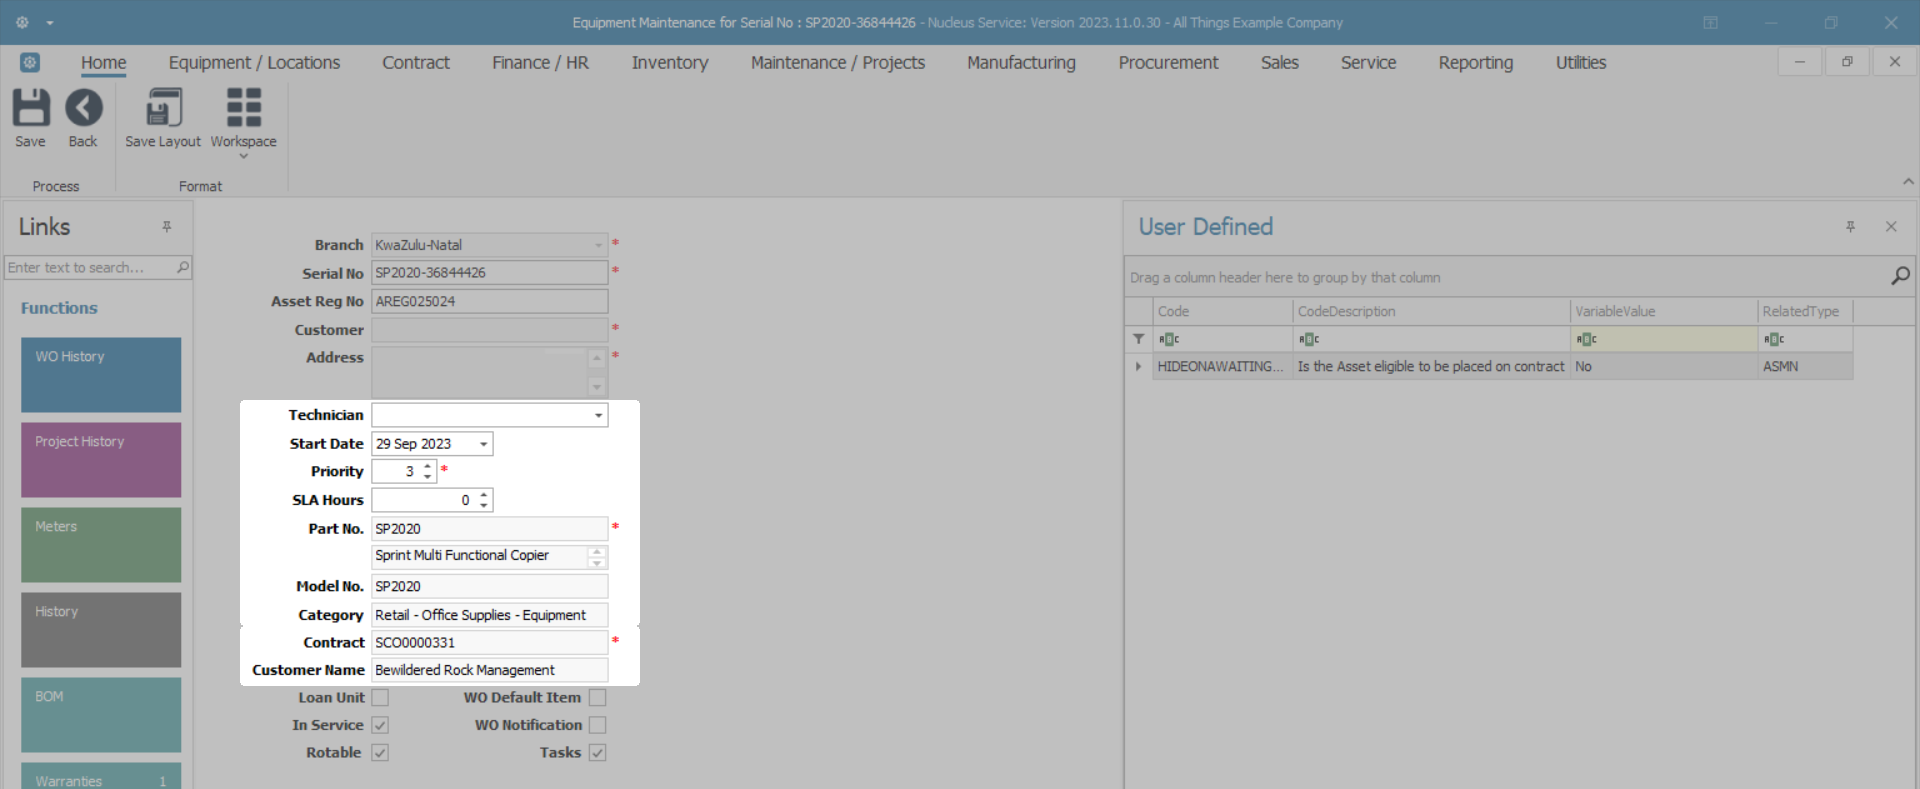
- The following fields are used across all asset types:
- Technician: View the technician currently linked to this item.
- Start Date: View the date that this internal asset was acquired.
- Priority: View the priority of this internal asset. (1 = Most Important, 5 = Least Important).
- SLA Hours: View the Service Level Agreement Monitor (in hours).
- Part No. and Description: View the part no. and description of the asset.
- Model No.: View the model no. of the asset, if applicable.
- Category: View the category of the asset e.g. Hardware, Accessories.
CTRT-specific Fields
- The next 2 field names will differ depending on the Internal Asset Parent Type. In this example, an asset with the Parent Type: CTRT - Contract was selected.
- Contract: This will be populated with the contract no. linked to the selected internal asset.
- Customer Name: This will be populated with the customer linked to the above mentioned contract.
If the asset selected had the Parent Type = WHSE - Warehouse, these fields would be different:
Internal Asset - WHSE
Select the Asset
- In the Machine List for [ ] screen,
- Select the row of the internal asset you wish to view.
- Take note of the Parent Type of this asset. In this example, it is: WHSE - Warehouse.
- Click on View.
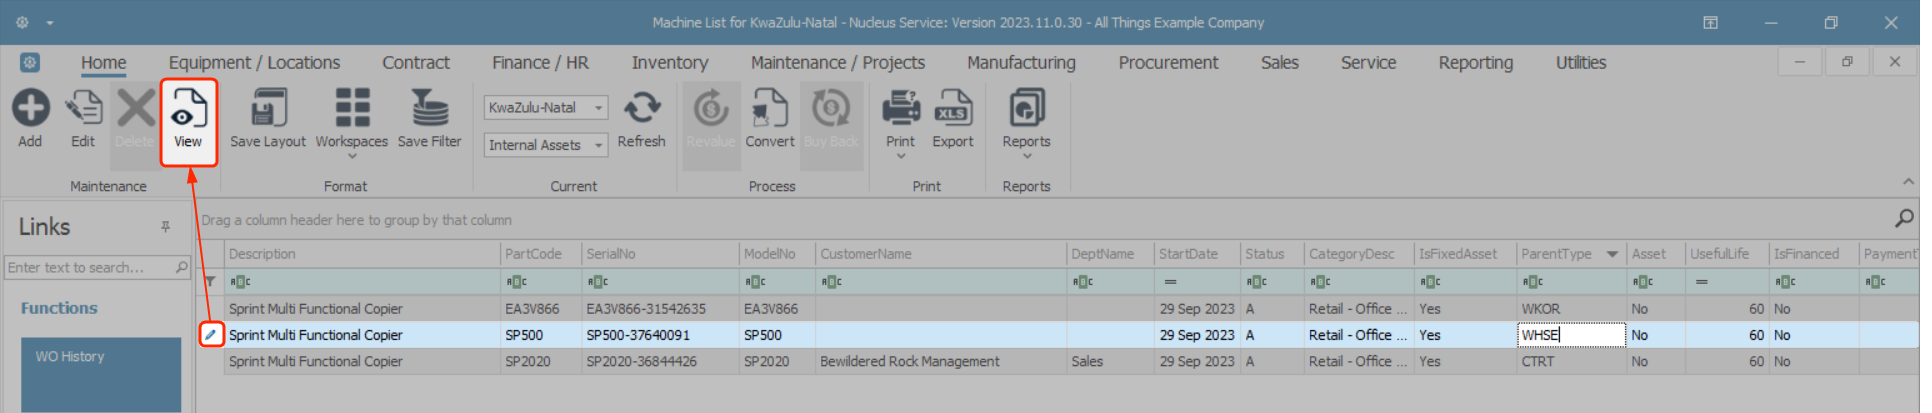
- The Equipment Maintenance for Serial No: [ ] screen will open.
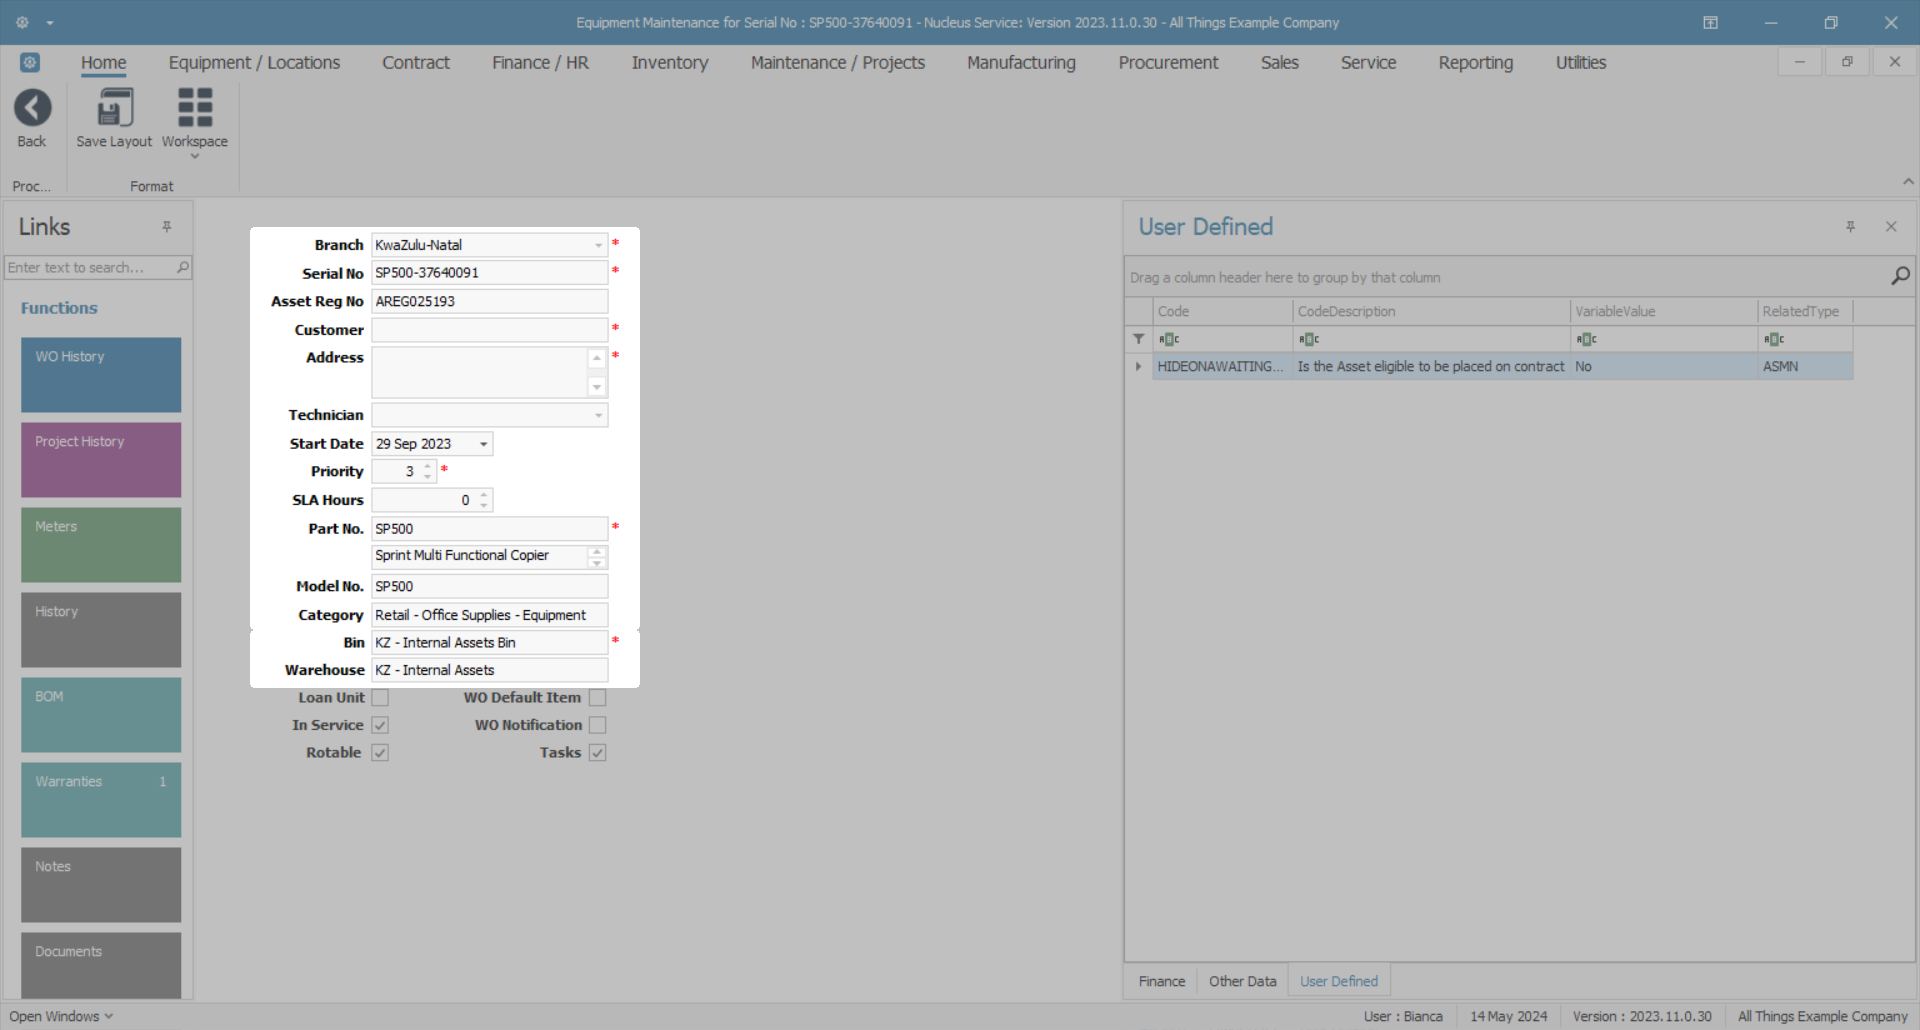
View Asset Details
- All of the fields are the same as described above for Internal Asset - CTRT, except for the Contract and Customer Name fields.
WHSE-specific Fields
- These have been replaced with Bin and Warehouse.
- Bin: This field will be populated with the bin name linked to the internal asset warehouse (below) set up in the system.
- Warehouse: This field will be populated with the name of the specific internal asset warehouse set up in the system.
In this example, the item is in the Internal Assets bin within the Assets Warehouse.
If the asset selected had the Parent Type = WKOR - Work Order, these fields would be different again:
Internal Asset - WKOR
Select the Asset
- In the Machine List for [ ] screen,
- Select the row of the internal asset you wish to view.
- Take note of the Parent Type of this asset. In this example, it is: WKOR - Work Order.
- Click on View.
- The Equipment Maintenance for Serial No: [ ] screen will open.
View Asset Details
- All of the fields are the same as described above for Internal Asset - WHSE, except for the Bin and Warehouse fields.
WKOR-specific Fields
- These have been replaced with Work Order No.
- Work Order No: This field will be populated with the work order number currently linked to the internal asset.
- For example, this internal asset might be out on loan to a customer whilst the customer machine is being repaired - the asset cannot be linked to the internal asset bin and warehouse fields or the contract no and customer name fields as this is a temporary loan machine.

All Internal Assets no matter which Parent Type they are linked to, display the following:
Asset Details Check Boxes
- Loan Unit: Select this check box if this is a loan machine to be issued and sent out to a client whilst their machine is being repaired
- In Service: Select this check box to indicate whether this machine falls within a Service plan and needs to be periodically serviced. (Similar to a vehicle having a service plan.) This functionality is not currently in use in BPO2.
- Rotable: Select this check box to indicate whether this machine is included in a rotable service plan. Rotable is a servicing method in which an already-repaired equipment item is exchanged for a failed equipment item, which in turn is repaired and kept for another exchange. This functionality is not currently in use in BPO2.
- WO Default Item: If this option is set in the company configuration, one machine per customer needs to be marked as the default (this machine will pull through automatically when a customer is selected on a new call).
- WO Notification: Select this check box to indicate whether this machine is linked to an automated/scheduled task set up. A work order notification will be sent out when the machine is due to be serviced.
- Tasks: This check box is related to the above, and is linked to the Maintenance / Project screen. Refer to Introduction to Tasks for more information.

Finance Frame
If the Finance frame is not already displayed, click on the tab to bring it to the fore.
The Financial details frame will be expanded. The population of these fields will depend on several factors:
- Whether the equipment item is financed.
- Whether a depreciation method has been applied to this equipment item.
- Whether an escalation amount and period have been applied to this equipment item.
- Cost: This is the purchase price of the item. Either type in or use the arrow indicators to enter the cost of the item.
- Replacement Cost: This is the cost of replacing the machine. Either type in or use the arrow indicators to enter the replacement cost of the item.
- Is Financed: This field shows whether a third party has provided funds for this item e.g. the item has been financed by a bank. Click on this check box if this item is financed by a third party (this would also apply to a client owned asset).
- Finance Co.: Click on the drop-down arrow and select the finance company supplying finance/funds for this item, if applicable.
- Finance Type: This field shows what finance type has been provided for this item.Click on the drop-down arrow and select the finance type e.g. Hire Purchase, Lease Agreement, Rental Agreement.
- Payment Type: Click on the drop-down arrow and select the payment type e.g. Debit Order, Cheque, Bank Transfer.
- Payment Day: Either type in or use the arrow indicators to enter the day of the month (e.g. 25th) that this payment will be made.
- Payment Amount: Either type in or use the arrow indicators to enter the payment amount that is to be paid monthly.
- Payment Start: Either type in or click on the drop-down arrow and use the calendar function to select the payment start date.
- Payment End: Either type in or click on the drop-down arrow and use the calendar function to select the payment end date.
- Is Escalated: Click on this check box if this payment amount is to be escalated after a period of time. (e.g. a 10% increment yearly.)
- Escalation Amount: Either type in or use the arrow indicators to enter by how much the repayment amount will increase.
- Escalation Period: Either type in or use the arrow indicators to enter the time period (e.g. the month) after which this payment amount will be escalated.
- Travel Distance: Type in the total travel distance in kilometres, if you want the system to include travel on all call invoices raised.
- Travel Rate: Type in the travel rate if using Travel Distance.
- Refurbishment Date: Either type in or click on the drop-down arrow and use the calendar function to select the date when the item is to receive an overhaul and/or repair.
- Depreciation Start: Depreciation is a measure of how much an item drops in value each year. Either type in or click on the drop-down arrow and use the calendar function to select the date when the depreciation of the item will start.
- Useful Life: This is the estimated lifespan of a depreciable item - how many years it is likely to remain in service. This is important from an accounting perspective, where the usefulness of a machine is calculated before it gets written off, e.g. 5 years. Type in the number of months that the item will be in condition before it is considered a write off. This field is affected by depreciation, if it is enabled.
- Is Fixed Asset: This check box will be auto-ticked as this is an internal asset.
- Operational Status: Here you have the ability to add information or comments about anything related to the machine e.g. machine passed Useful Life, or may be stripped for parts or may still be useful for short term loan out. This function provides information about the suitability of the item for operation. Type in whether the item is operational or not and why, if required.
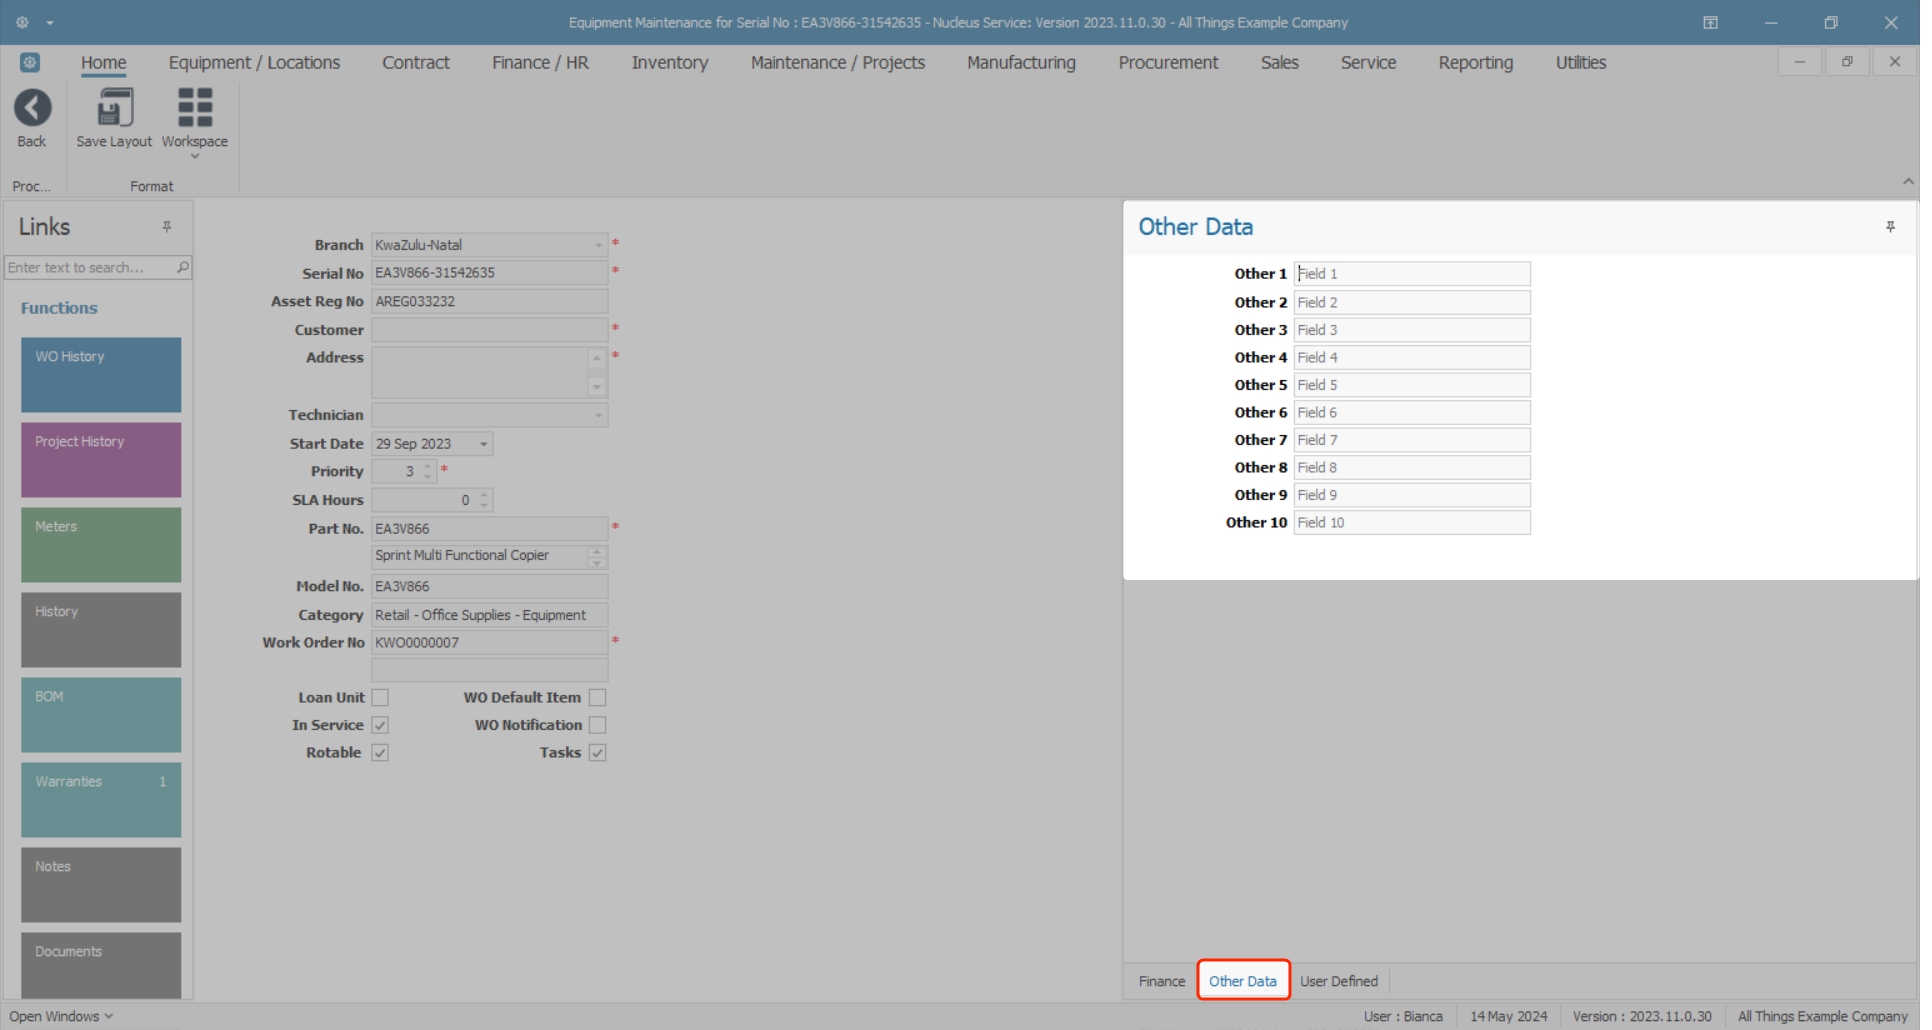
Other Data Frame
- Click on the Other Data tab to bring this frame to the fore.
- There are 10 fields in this screen that can be utilised for additional information that you would like to log against an internal asset.
For more information refer to Other Data.
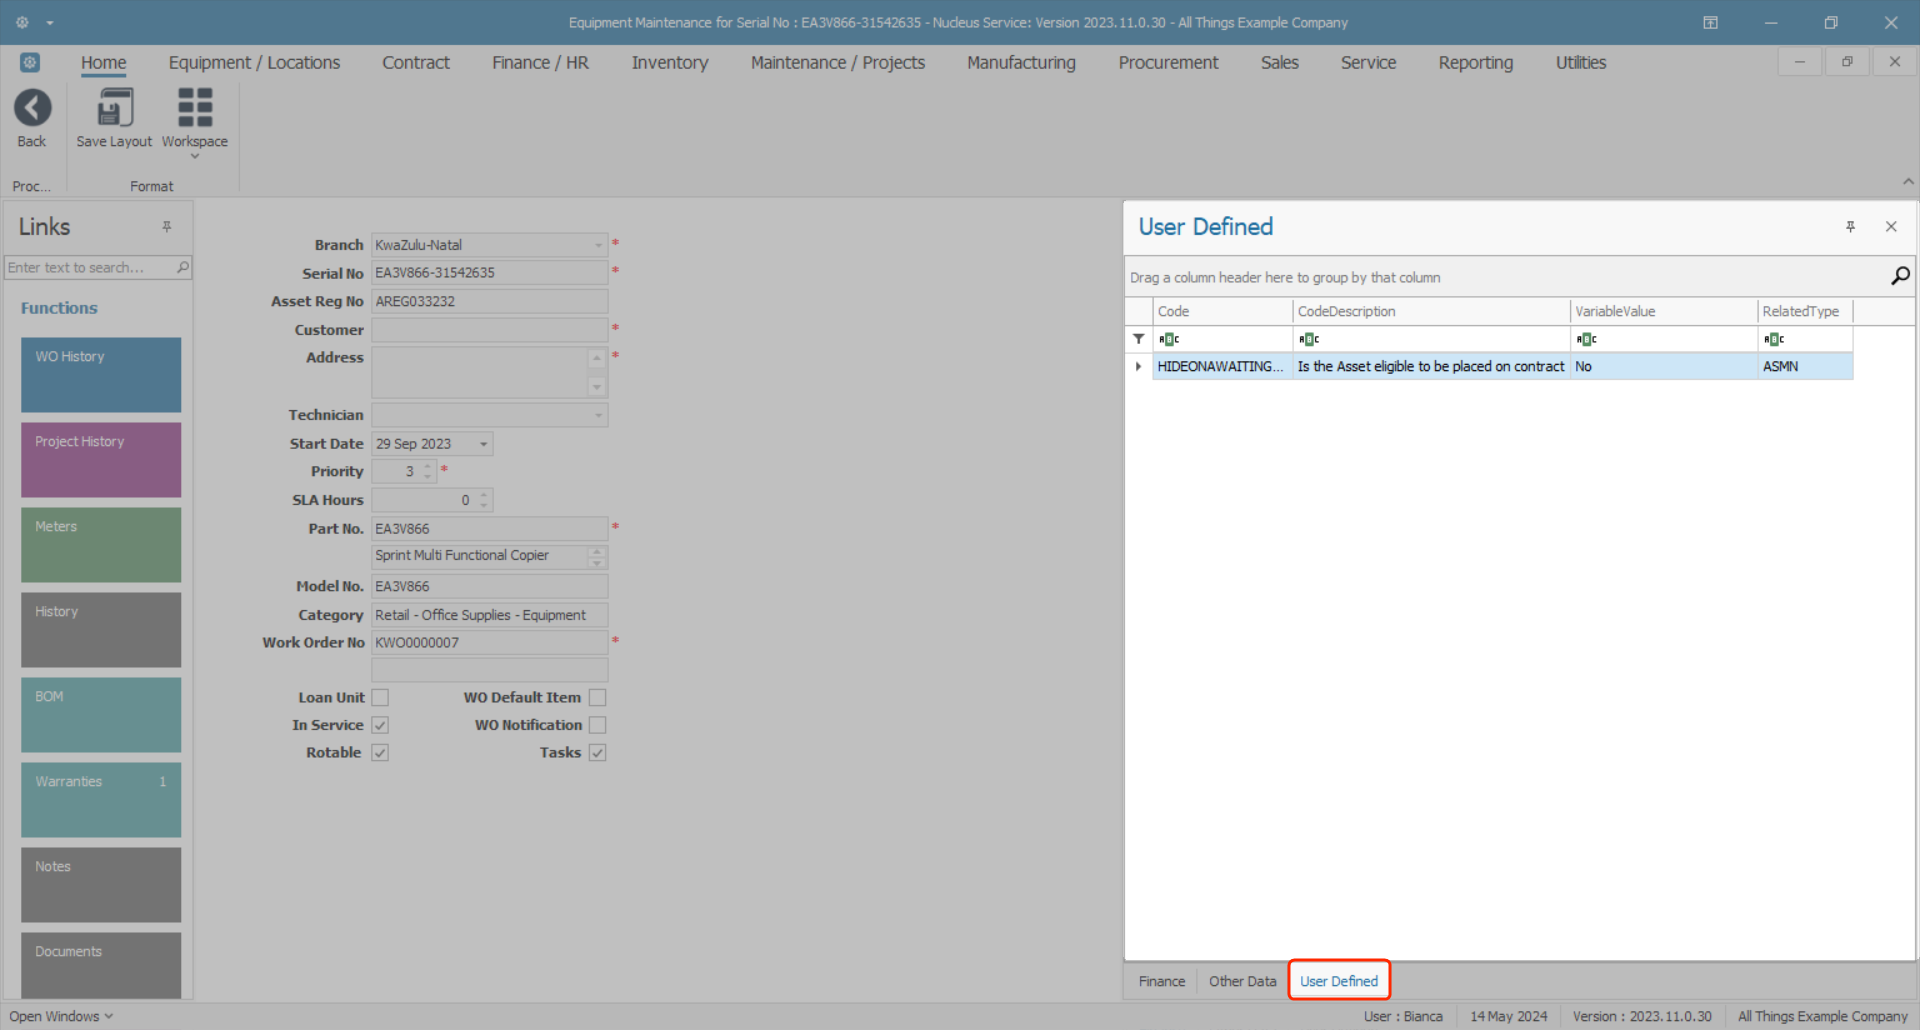
User Defined Frame
- Click on the User Defined tab to bring this frame to the fore.
At present, these fields in the Equipment - Assets module can be used to add extra information relevant to the selected asset.
- The added custom fields will reflect in the User Defined panel in the Asset Maintain screen across all assets on the system.
- However, the Variable Values selected for each User Defined field will be unique to the selected asset.
This information will also reflect in the Call Maintain screen where the asset is linked. Although the fields can be viewed from the Call Maintain screen, the actual information can only be edited in the Asset Maintain screen.
For more information refer to Add or Edit User Defined.
MNU.007.038