We are currently updating our site; thank you for your patience.
Locations
Functional Locations - Work Order History
| Ribbon Access: Equipment / Locations > Functional Locations |
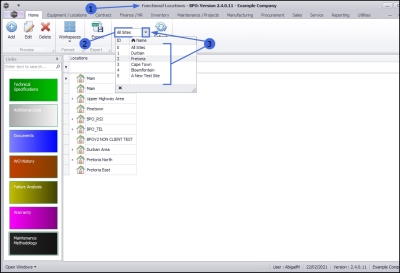
- The Functional Locations screen will be displayed.
Select the Site
- The Site filter will be set according to your company configuration.
- You do not need to select a specific site, however if you wish to narrow your filter parameters, you can click on the down arrow and select a particular site from the list.
Select the Location
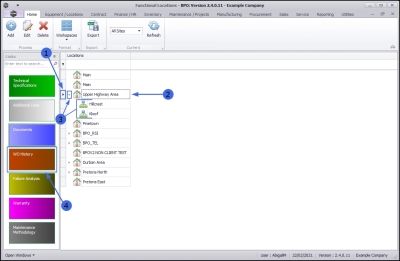
- Select the row of the location where you wish to view the Work Order History.
Main Location
- If you wish to view the Work Order History of a main location, select the row of that main location. In this example Upper Highway Area is a main location.
Sub-location
- If you wish to view the Work Order History of a sub-location, ensure that you expand the main (parent) location to be able to view and select the row of that sub-location. In this example, Hillcrest and Kloof are sub-locations of Upper Highway Area.
View Location Work Order History
- When you have selected the location, click on the WO History tile.
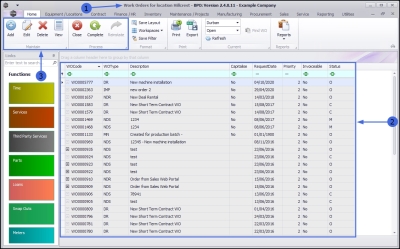
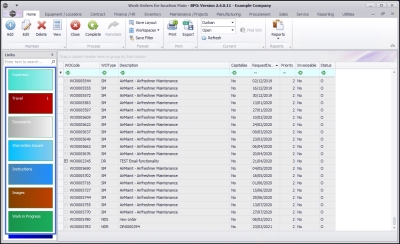
- The Work Orders for location: [] screen will open.
- If there are any Work Orders currently linked to the selected location, they will be listed here.
Location Work Order Action Buttons
- From this screen, you can utilise the following action buttons:
Location Work Order Functions Tiles
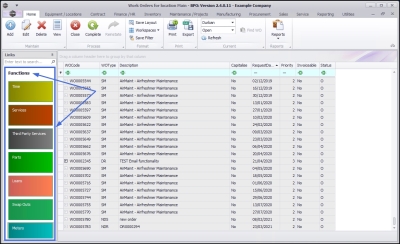
The following Work Order Functions tiles are available in this screen:
Note: Click on the link in the tile description to direct you to a more detailed handling of that topic.
Ensure you select the correct work order before clicking on a tile.
- Time: Click here to be directed to the Time Bookings for WO Code screen, where you can log labour time for the selected work order.
- Services: Click here to be directed to the Internal Services for WO Code screen, where you can add, edit or delete an Internal Service linked to the selected work order.
- Third Party Services: Click here to be directed to the Service Requests for WO Code screen, where you can add, edit, delete and raise a requisition for a Third Party Service linked to the selected work order.
- Parts: Click here to be directed to the Part Requests for WO Code screen, where you can add, edit, delete raise a requisition for a part linked to the selected work order. From here you can also, issue a part, view add a note to a part, change the warehouse of a part, remap a part and view the Purchase orders linked to a selected part.
- Loans: Click here to be directed to the Loan Requests for WO Code screen, where you can add, edit or delete a loan request linked to the selected work order.
- Note: Loans can only be created against work orders linked to a Call.
- Swap Outs: Click here to be directed to the Swap Outs for WO Code screen, where you can add a swap out linked to the selected work order.
- Note 1: Only Call related work orders can process swap outs.
- Note 2: Swap outs can only be transacted against an existing contract which is linked to a Call.
- Meters: Click here to be directed to the Meters for WO Code screen.
- Expenses: Click here to be directed to the Expense Claims for WO Code screen, where you can add, edit or delete an expense claim.
- Travel: Click here to be directed to the Travel Claims for WO Code screen, where you can add, edit or delete an travel claim .
- Documents: Click here to be directed to the Documents for WO screen, where you can add, or delete a digital document.
- Warranties Issued: Click here to be directed to the Issued Warranties for WO screen, where you can add, edit or delete a warranty.
- Instructions: Click here to be directed to the Instructions for WO Code screen, where you can add, edit, delete or complete a task instruction.
- Images: Click here to be directed to the Images for WO screen, where you can view the images.
- Work in Progress: Click here to be directed to the Work in Progress for WO Code screen, where you can return, invoice a WO, and invoice a Call or Project.
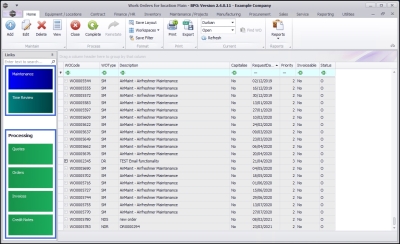
- Maintenance: Click here to be directed to the Maintenance Methodology for Location screen, where you can add, edit and delete the maintenance tasks .
- Time Review: Click here to be directed to the Time Not Billed for Work Order Code screen, where you can utilise the functionality explained in more depth in the Time Review topic.
Location Work Order Processing Tiles
The following work order Processing tiles are available in this screen:
- Quotes: Click here to be directed to the Sales Quotes for Work Order screen, where you can add, edit, delete and view the sales quotes.
- Orders: Click here to be directed to the Sales Orders for Work Order screen, where you can add, edit delete and view the sales orders.
- Invoices: Click here to be directed to the Sales Invoices for Work Order screen, where you can add, edit, comment and reference, and view the sales invoices .
- Credit Notes: Click here to be directed to the Sales Credit Notes for Work Order screen, where you can add, edit delete and view the sales credit notes.
MNU.001.005

