We are currently updating our site; thank you for your patience.
Procurement
Introduction to Suppliers
A supplier is anyone who supplies you with goods and/or services. Supplier types can be set up within the system to distinguish between your suppliers.
You need to have a supplier set up in order to create a Purchase Order.
| Ribbon Access: Procurement > Suppliers |

The Supplier Listing screen will be displayed.
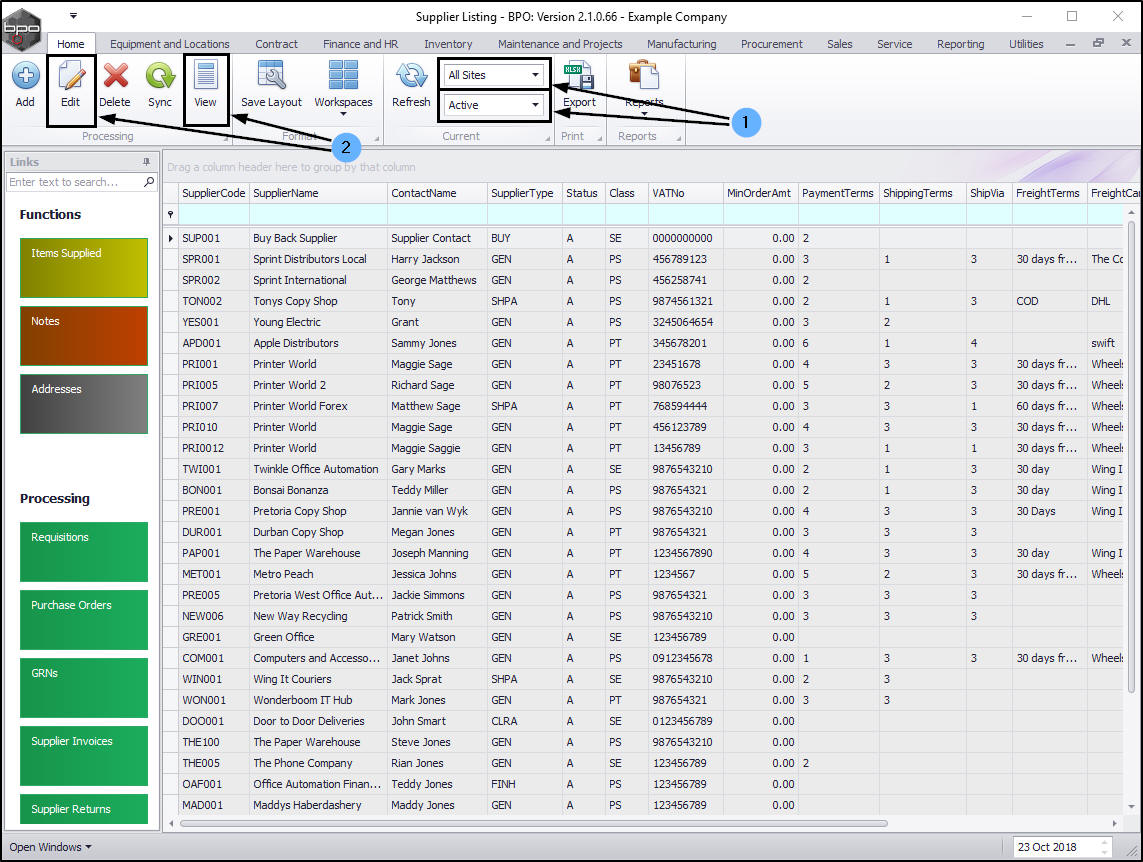
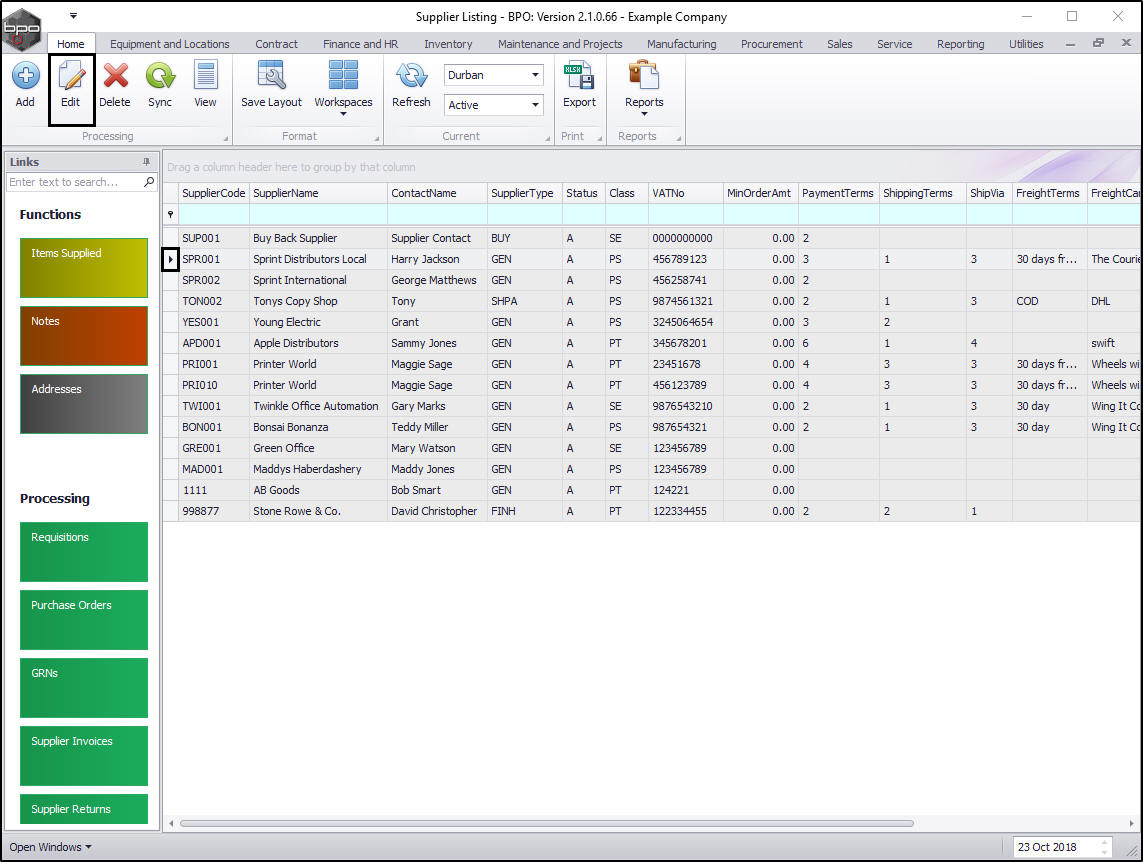
Supplier Listing Screen
- The screen site selection field will default to All Sites on opening and the screen status will default to Active.
- You can View any supplier in this status but if you wish to Edit a Supplier you must select a site first. (The system will prompt you to do this).
View Supplier Details
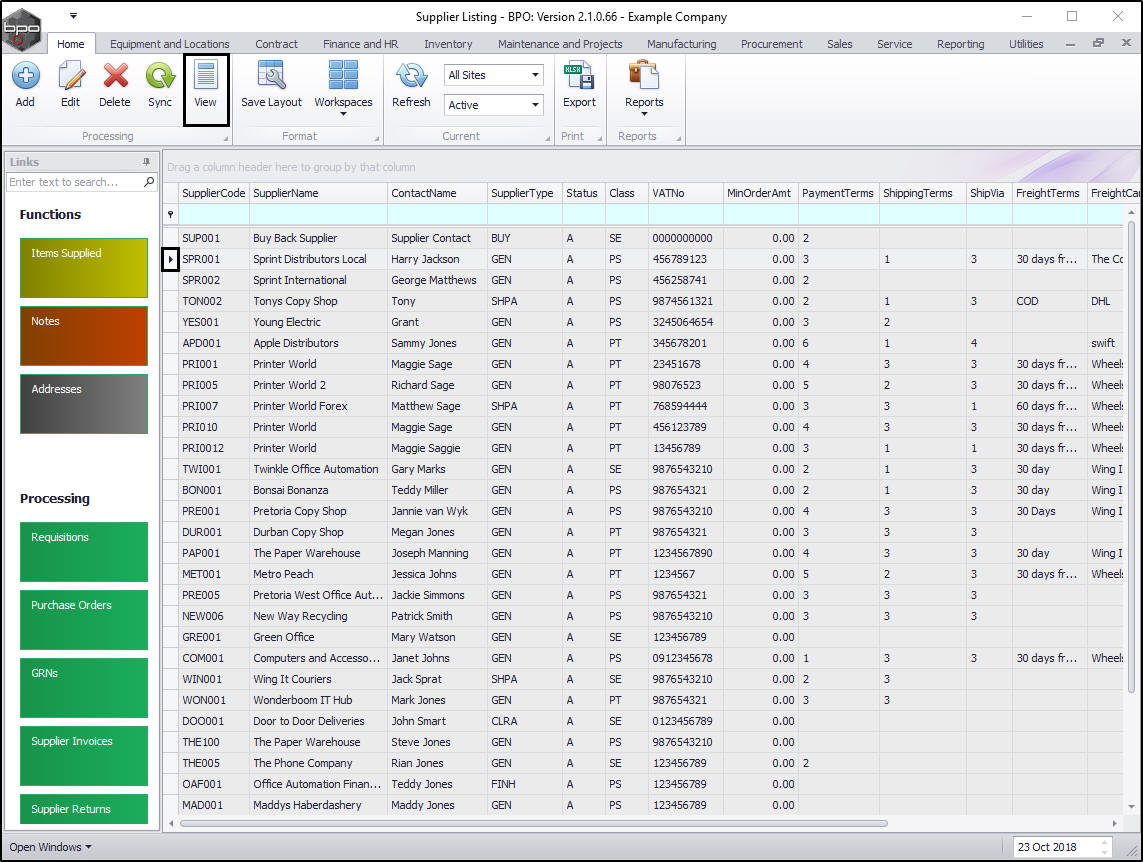
- Click on the row selector in front of the supplier that you wish to view the details of.
- Click on View.
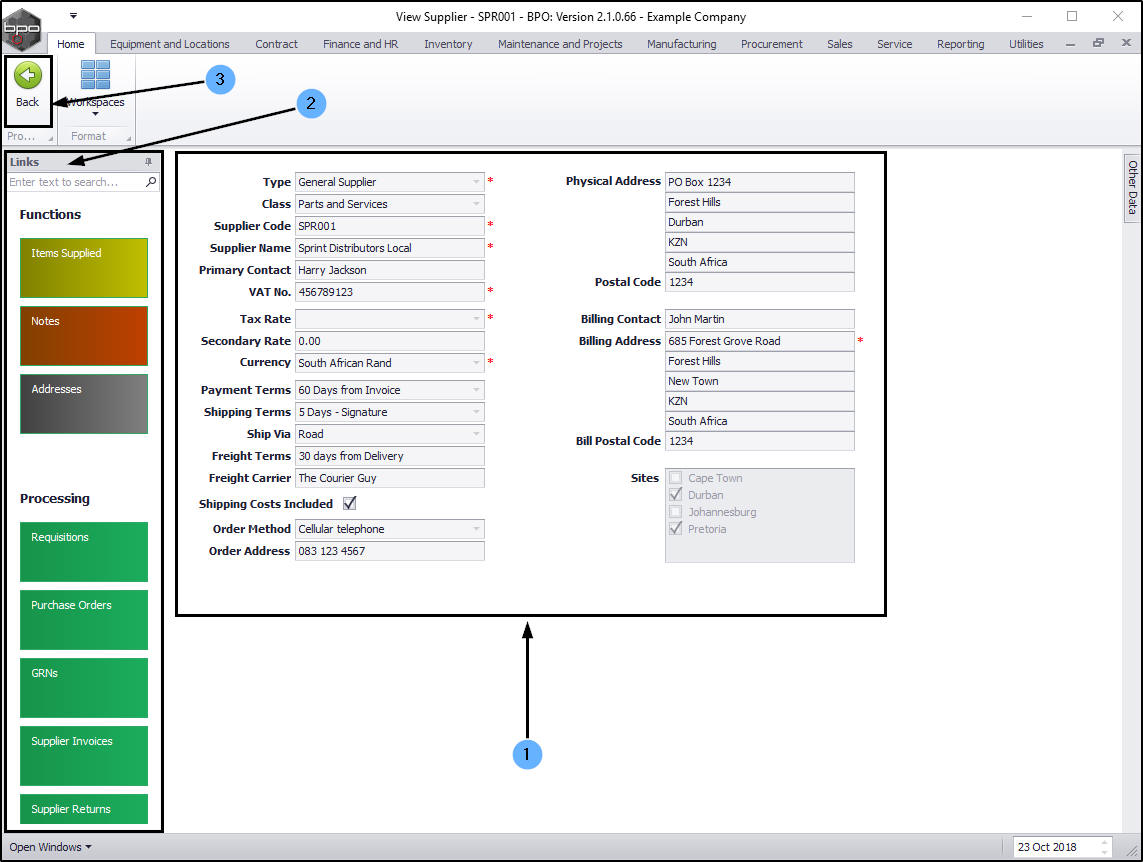
The View Supplier - [ ] screen will be displayed.
- Here you can only view the supplier details.
- You will note that the Links frame is in this screen, as in the Supplier Listing screen. The information linked to these Functions tiles is editable but this will be covered further in this manual.
- Click on Back to return to the Supplier Listing screen.
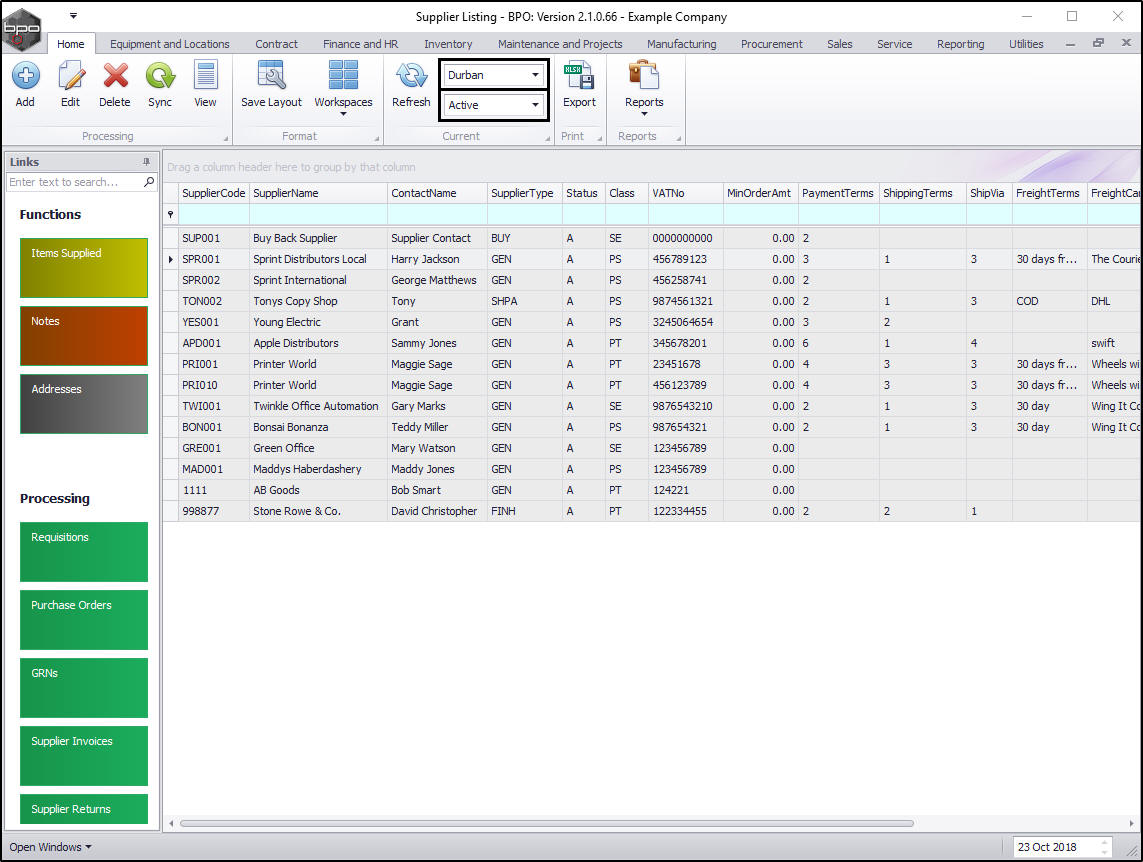
- In the Supplier Listing screen, select the site.
- In this image Durban has been selected.
- The status can be set to Active or Inactive. You will most likely working in the Active status for editing purposes.
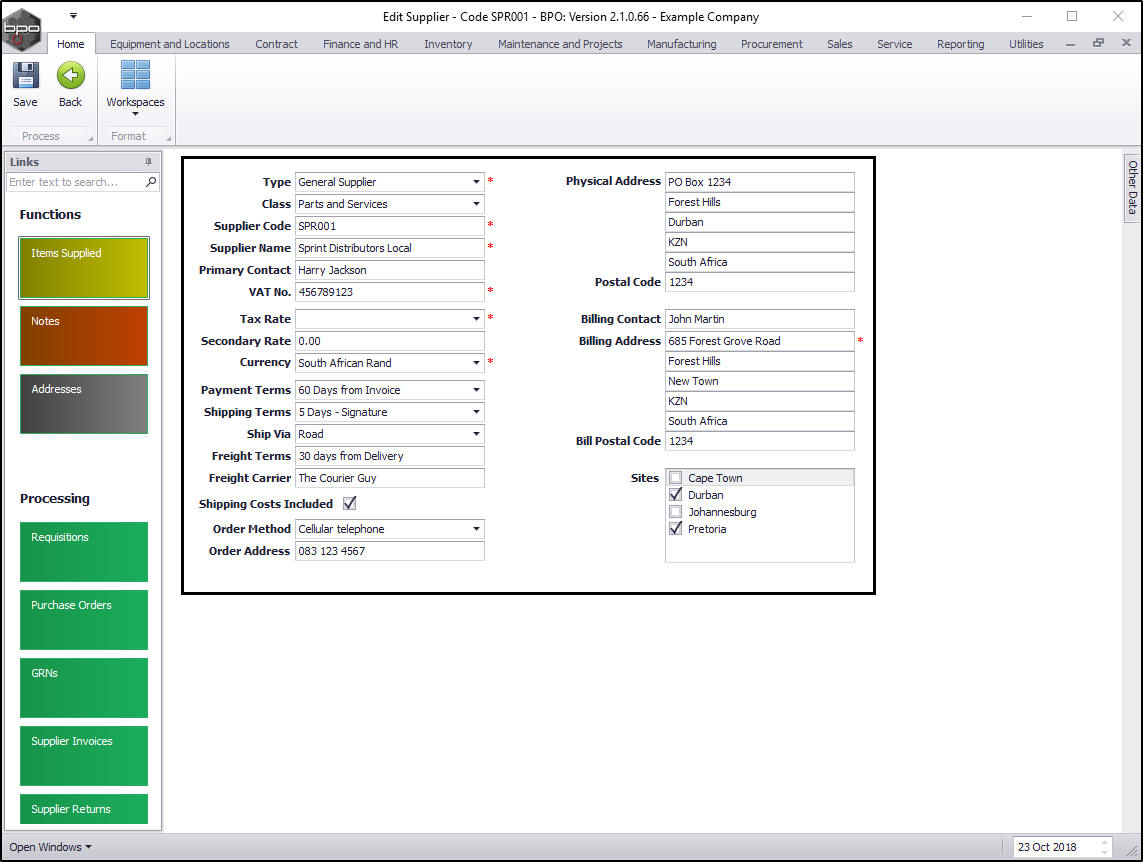
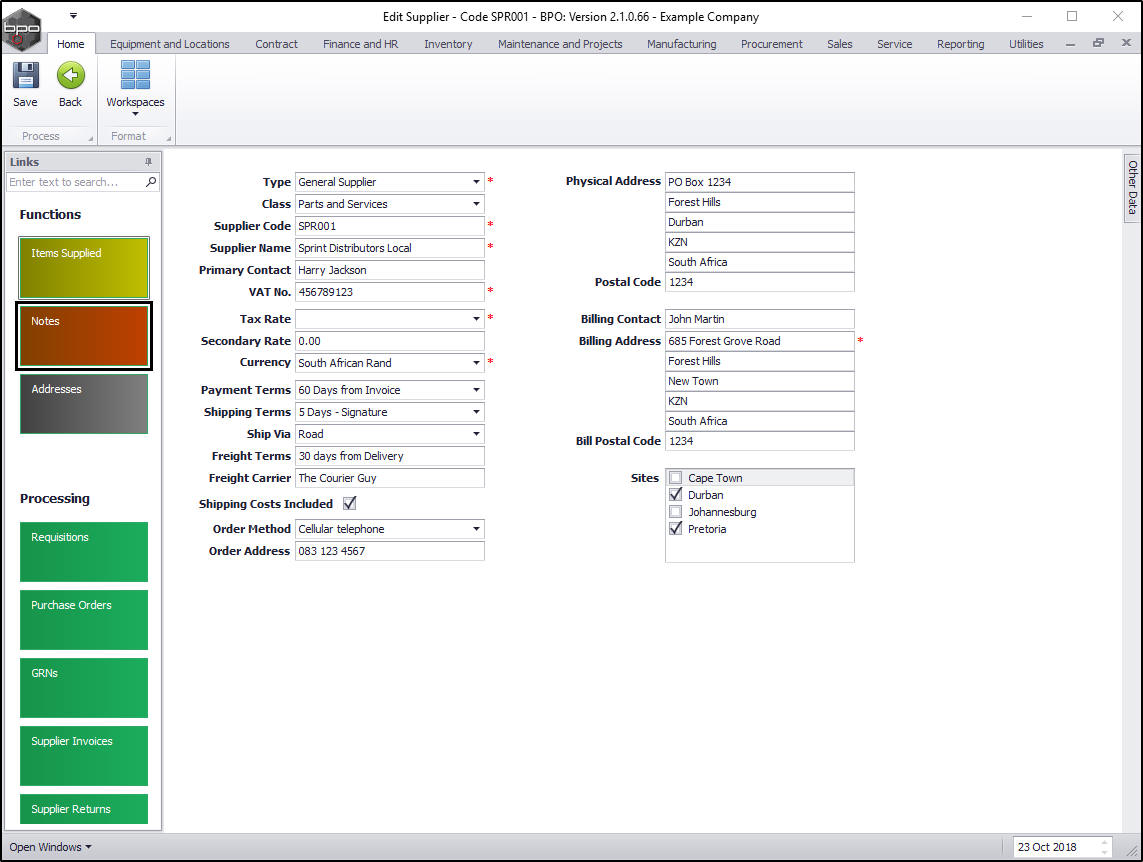
View Edit Supplier Screen
- Click on the row selector in front of the supplier that you wish to edit the details of.
- Click on Edit.
- The Edit Supplier - Code [ ] screen will be displayed.
- Here you can edit or update the supplier details as necessary.
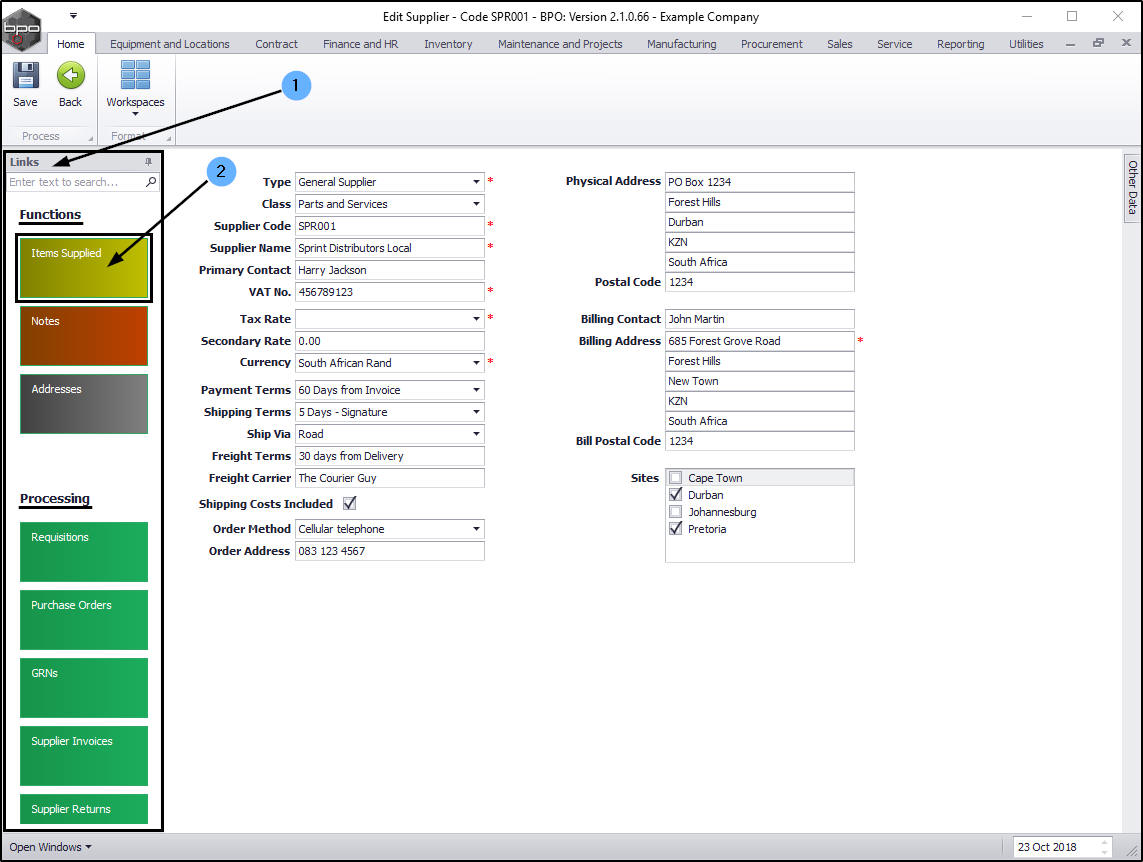
Functions Tiles
- The Links frame contains Functions tiles and Processing tiles which will direct you to further information regarding the selected supplier.
Items Supplied
- Click on the Items Supplied tile.
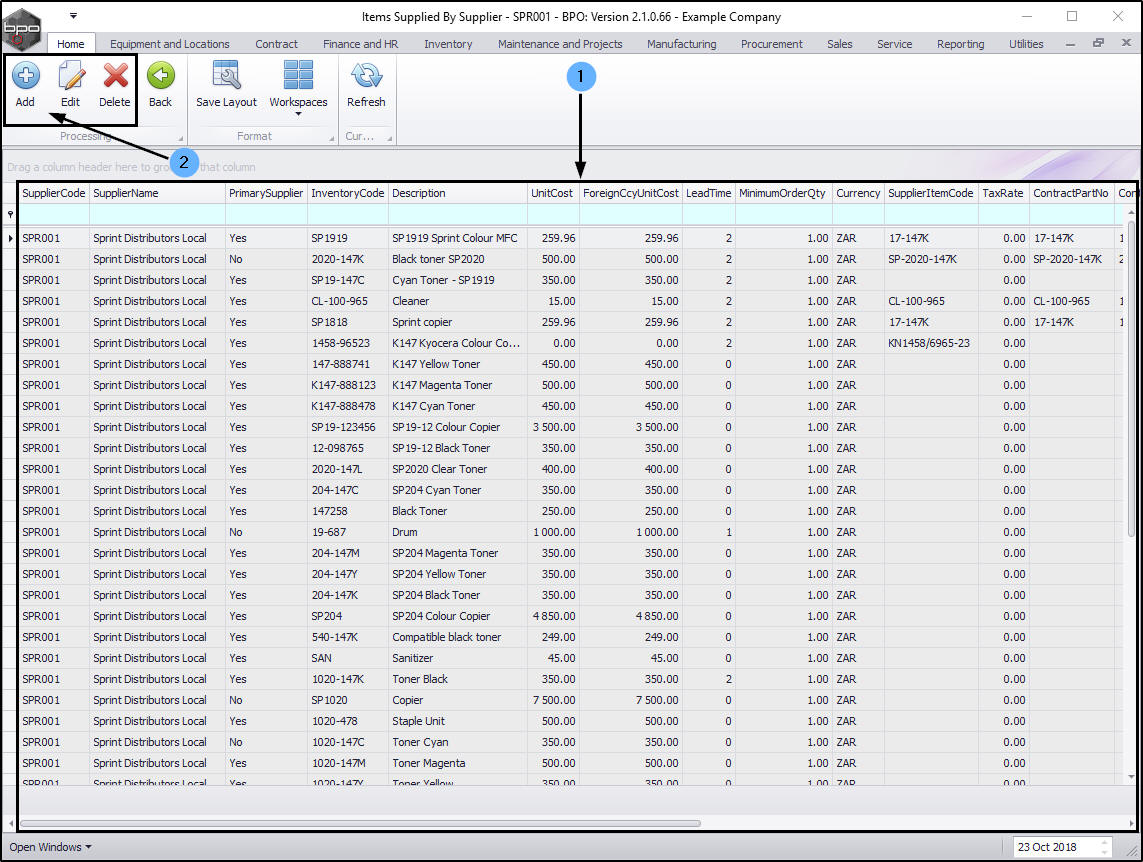
The Items Supplied by Supplier screen will be displayed.
- Here you can view all the parts supplied by this Supplier.
- In this screen you can Add, Edit or Delete a part.
- Click on Back to return to the Edit Supplier - Code [ ] screen.
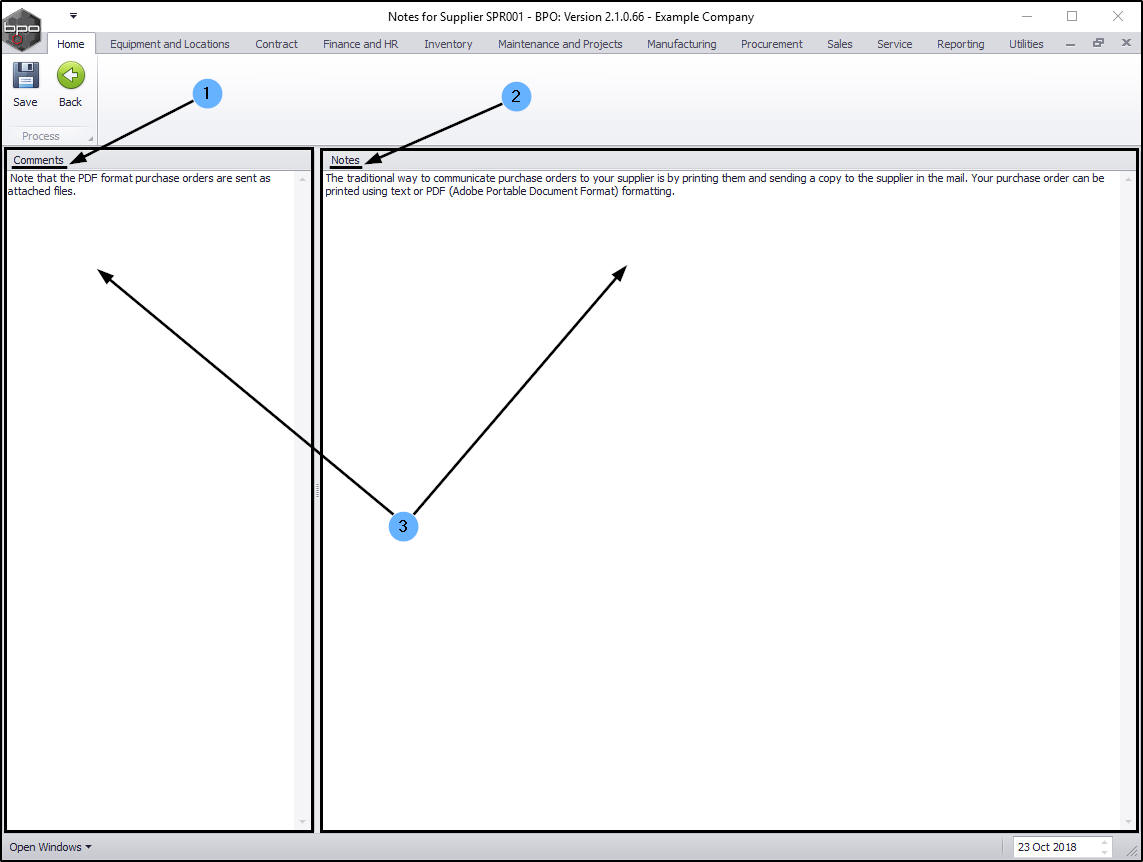
Notes
- In the Edit Supplier screen, click on the Notes tile.
The Notes for Supplier [] screen will be displayed. In this screen you can view the
- Comments: Internal notes regarding the Supplier and
- Notes: Notes concerning orders to this supplier, which will pull through to the Purchase Order.
- Type in the relevant text boxes to add a note or comment as required.
- Click on Back to return to the Edit Supplier - Code [ ] screen.
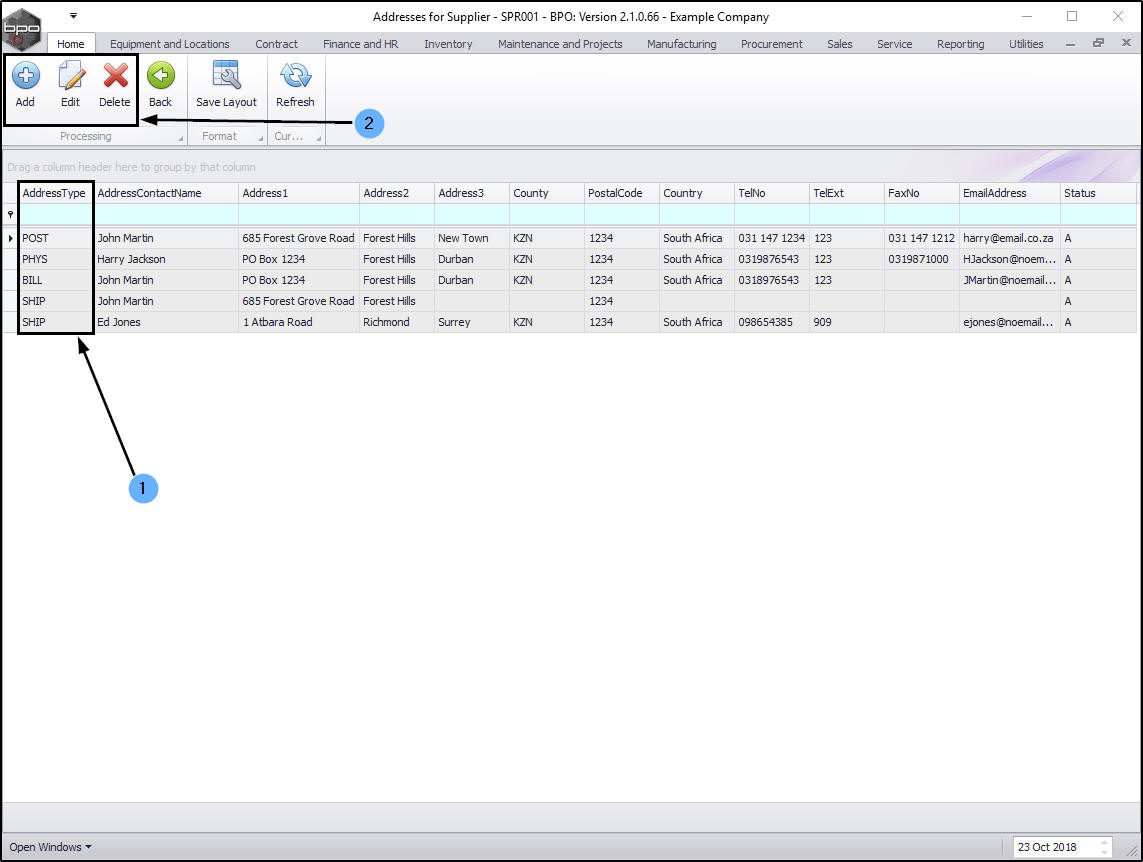
Addresses
- In the Edit Supplier Code - [ ] screen, click on the Addresses tile.

The Addresses for Supplier - [] screen will be displayed.
- Here you can view the different address types; Postal, Physical, Billing and Shipping.
- Note: Make sure you have a Physical address set up, as this pulls through to the Purchase Order.
- In this screen you can Add, Edit or Delete an address type.
- Click on Back to return to the Edit Supplier - Code [ ] screen.
Processing Tiles
The Links frame also contains the Processing tiles:
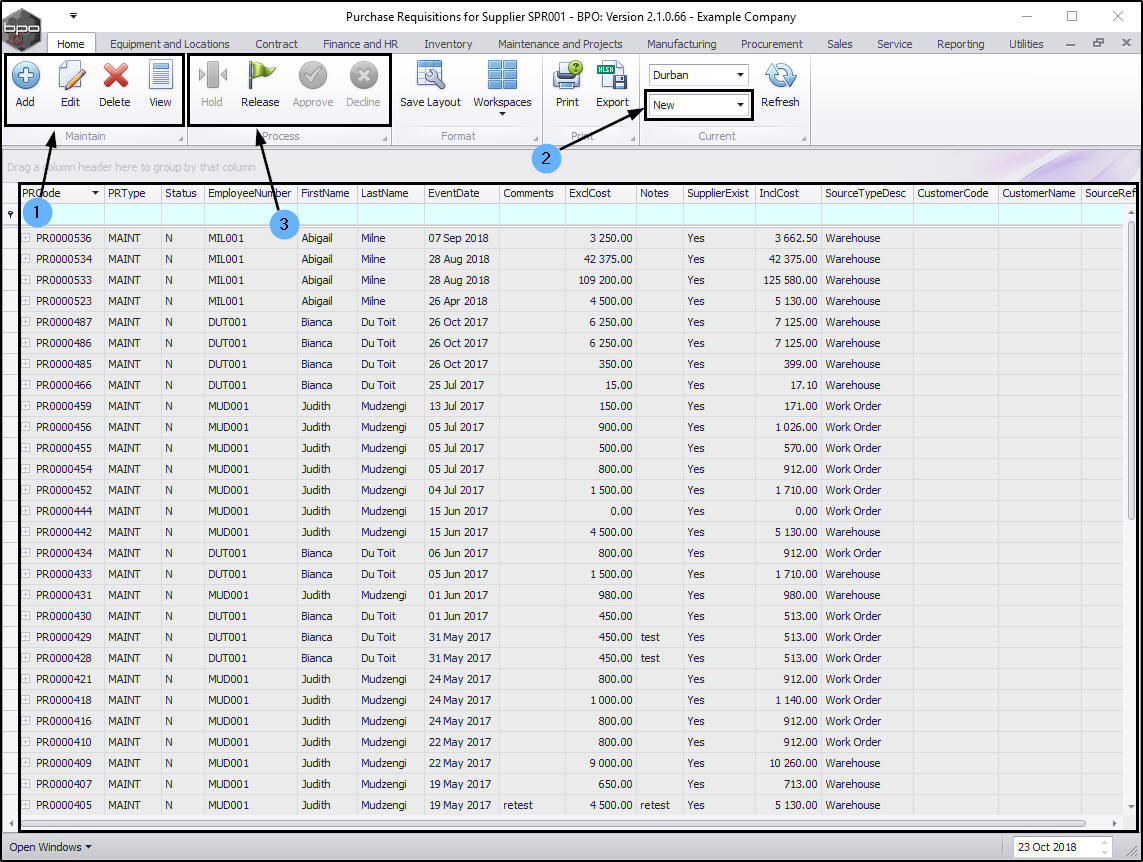
Requisitions
- In the Edit Supplier - Code [ ] screen, click on the Requisitions tile.

The Purchase Requisitions for Supplier [ ] screen will be displayed. This screen will default to the site selected in the Supplier Listing screen and the status will default to New.
- In this screen, you can Add, Edit, Delete and View a selected requisition.
- and depending on the status that is selected,
- you can either Hold, Release, Approve or Decline a selected requisition.
- Click on Back to return to the Edit Supplier - Code [ ] screen.
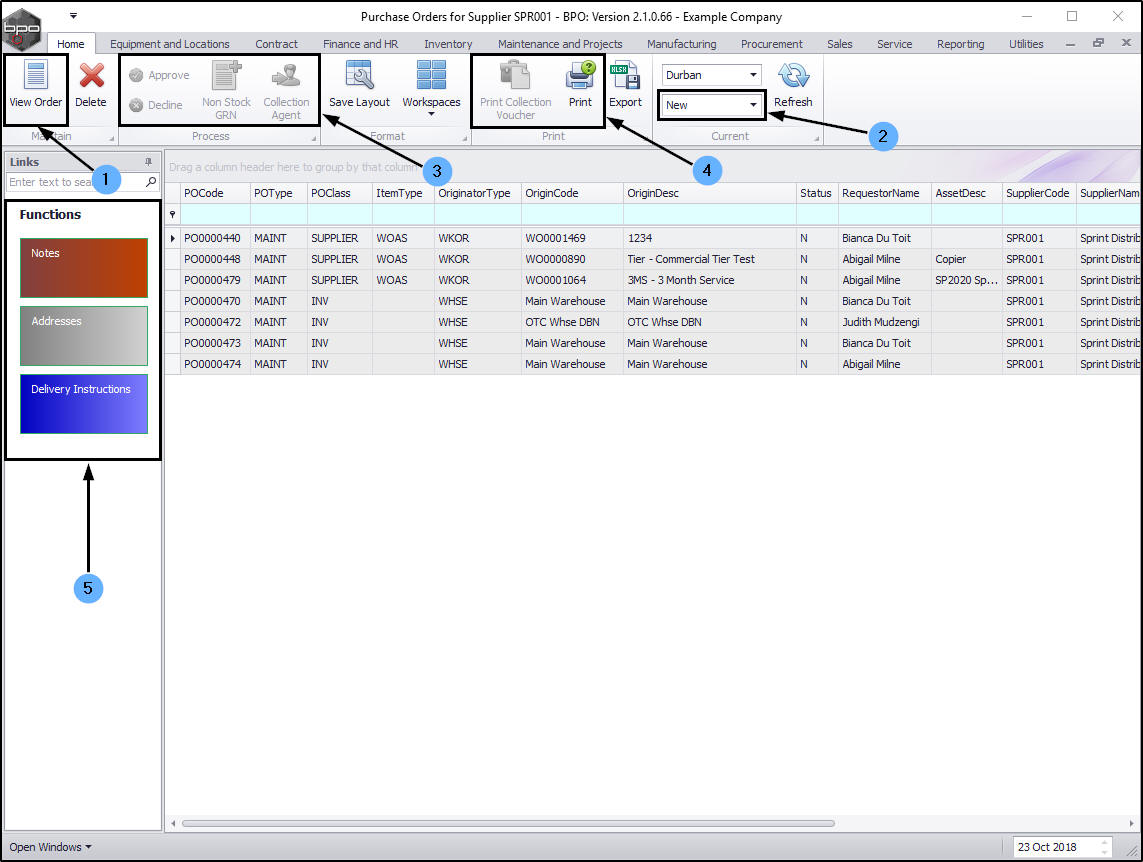
Purchase Orders
- In the Edit Supplier - Code [ ] screen, click on the Purchase Orders tile.

The Purchase Orders for Supplier [ ] screen will be displayed. This screen will default to the site selected in the Supplier Listing screen and the status will default to New.
- In this screen, you can view a list of purchase orders linked to this supplier. Click on View to see further detail for a selected order.
- and depending on the status that is selected and the company procurement approval process set up
- You can create a Non Stock GRN or arrange a Collection Agent for a purchase order.
- You can also Print a Collection Voucher and Print the purchase order which activate the goods receiving against a selected order.
- There are also supplier Functions tiles in this screen that will direct you to more information regarding the supplier.
- Close the screen to return to the Edit Supplier - Code [ ] screen.
GRNs
- In the Edit Supplier - Code [ ] screen, click on the GRNs tile.
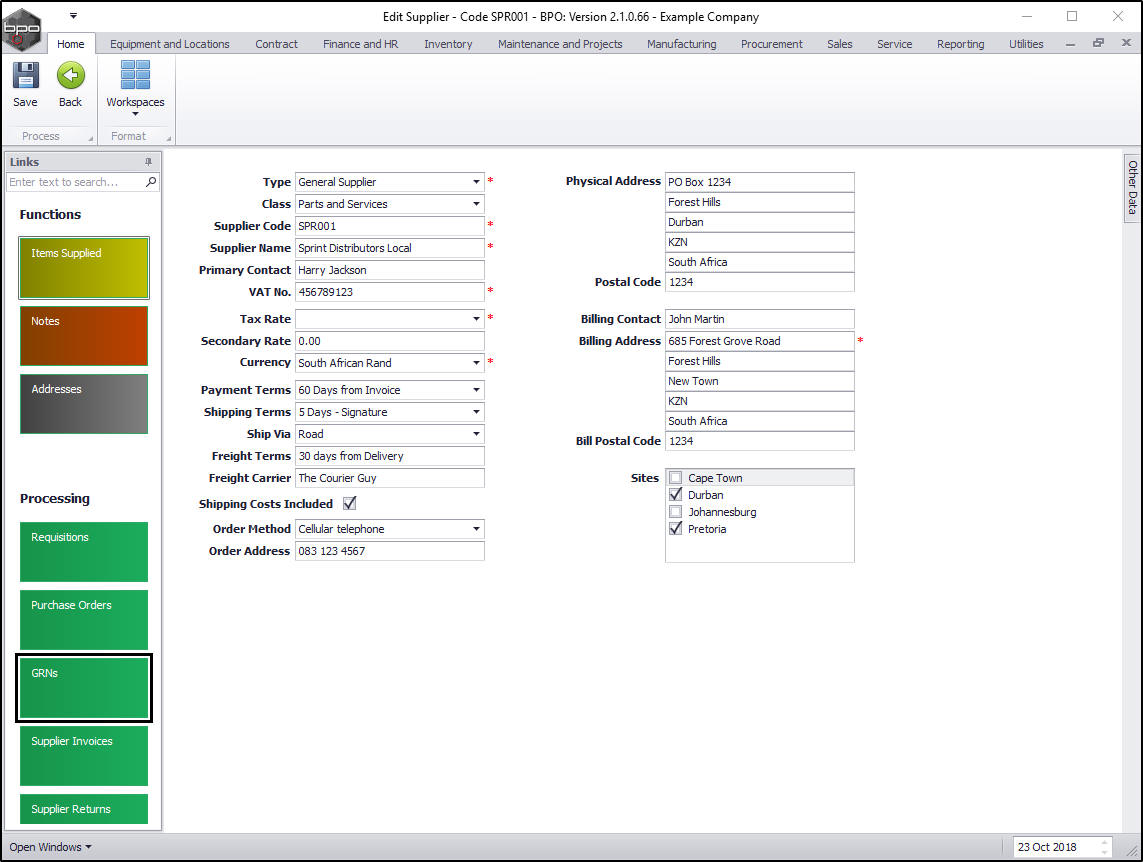
The Goods Received Notes for Supplier [ ] screen will be displayed. This screen will default to the site selected in the Supplier Listing screen and the status will default to New
- In this screen you can view the Stock and Non Stock GRNs linked to this supplier.
- Depending which status you are in,
- you can either Complete or View a selected GRN.
- Close the screen to return to the Edit Supplier - Code [ ] screen.

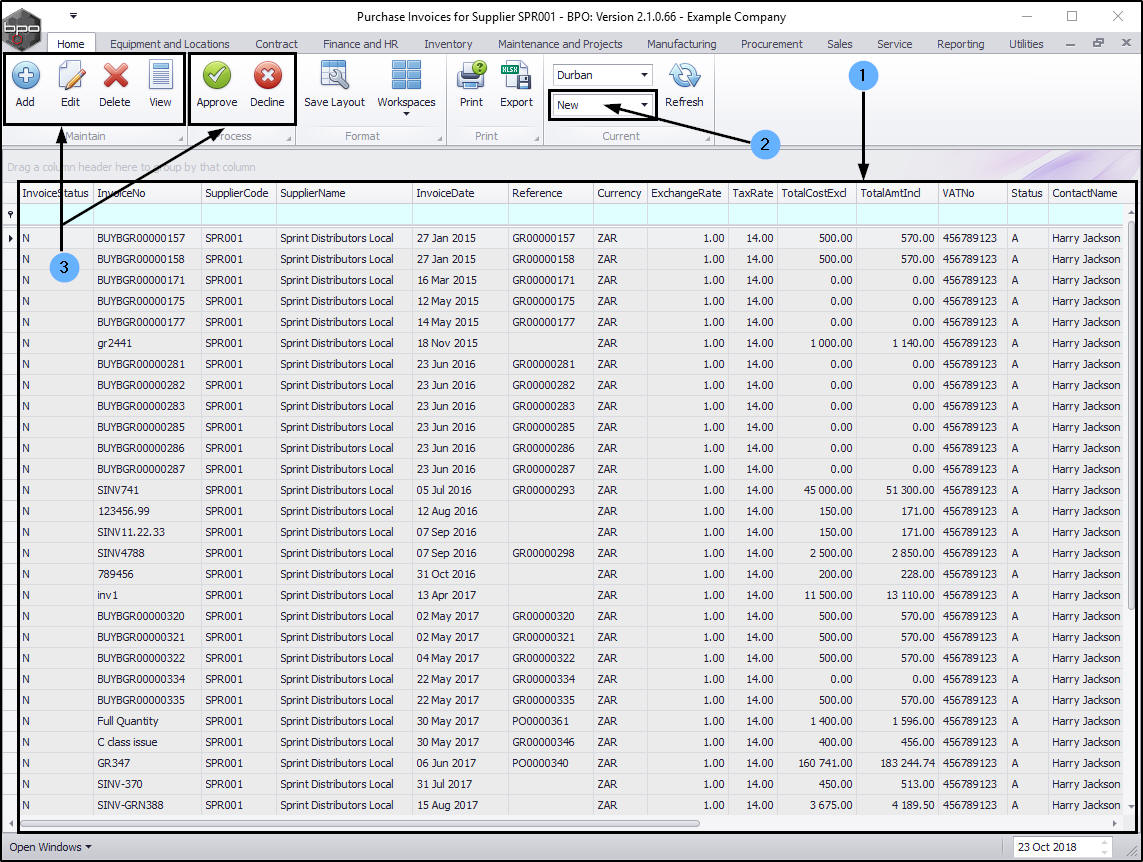
Supplier Invoices
- In the Edit Supplier - Code [ ] screen, click on the Supplier Invoices tile.
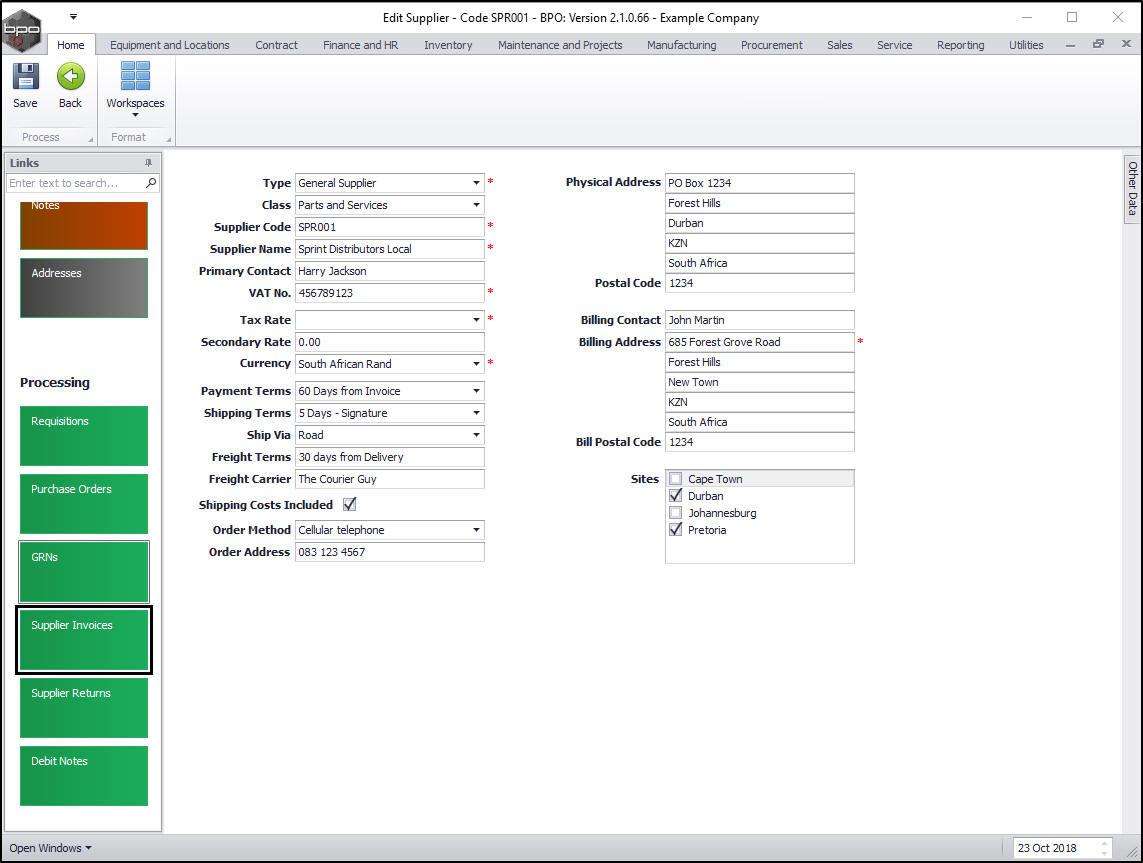
The Purchase Invoices for Supplier [ ] screen will be displayed. This screen will default to the site selected in the Supplier Listing screen and the status will default to New.
- In this screen you can view a list of the Supplier Invoices linked to this supplier.
- Depending which status you are in,
- you can Add, Edit, Delete, View, Approve or Decline a supplier invoice.
- Close this screen to return to the Edit Supplier - Code [ ] screen.
Supplier Returns
- In the Edit Supplier - Code [ ] screen, click on the Supplier Returns tile.
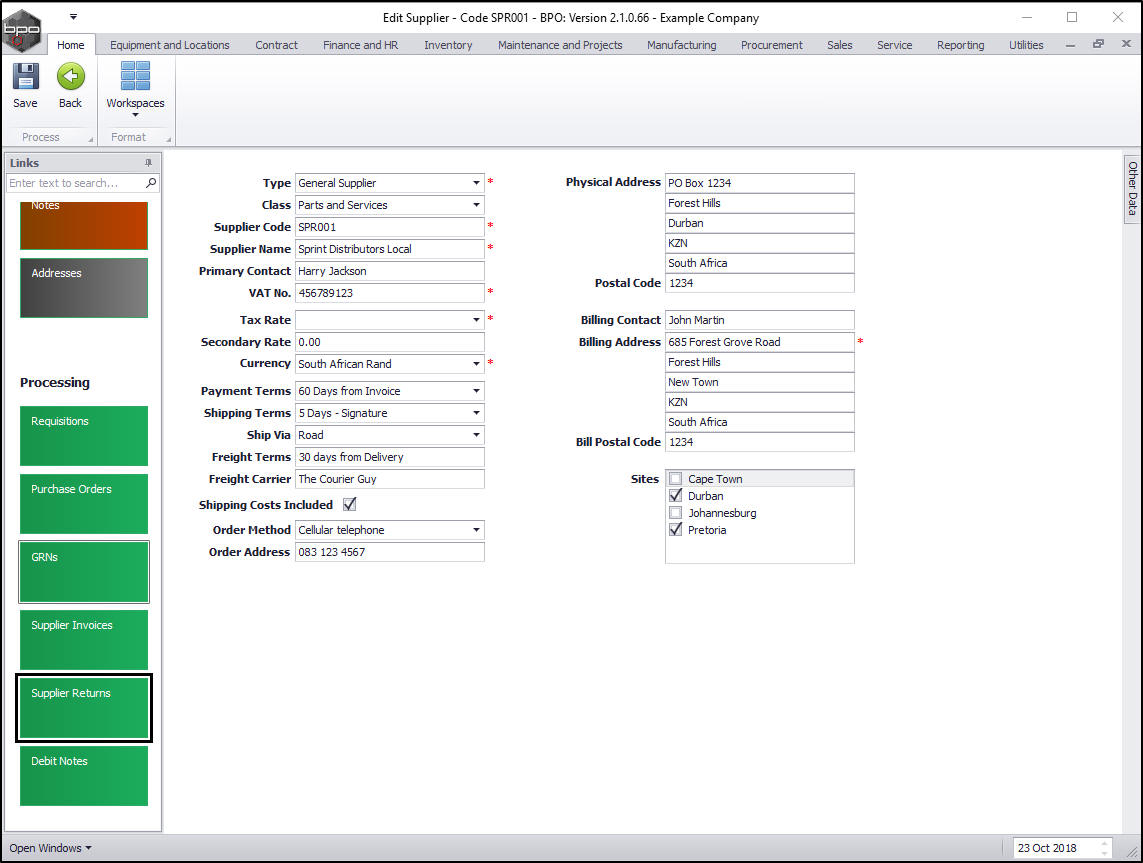
The Supplier Returns for Supplier [ ] screen will be displayed. This screen will default to the site selected in the Supplier Listing screen.
- In this screen you can view a list of the Stock and Non Stock Returns linked to this supplier.
- You can also Add, Edit, or View a supplier return.
- Close this screen to return to the Edit Supplier - Code [ ] screen.

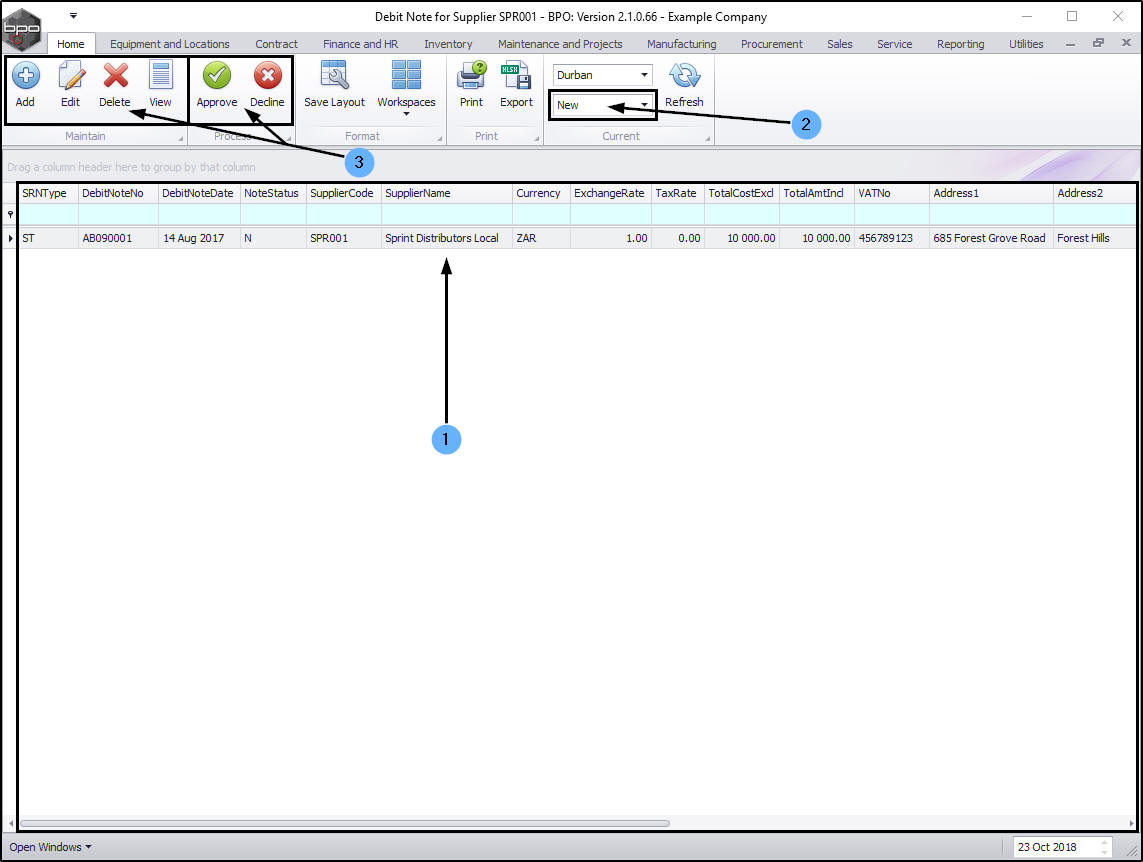
Debit Notes
- In the Edit Supplier - Code [ ] screen, click on the Debit Notes tile.
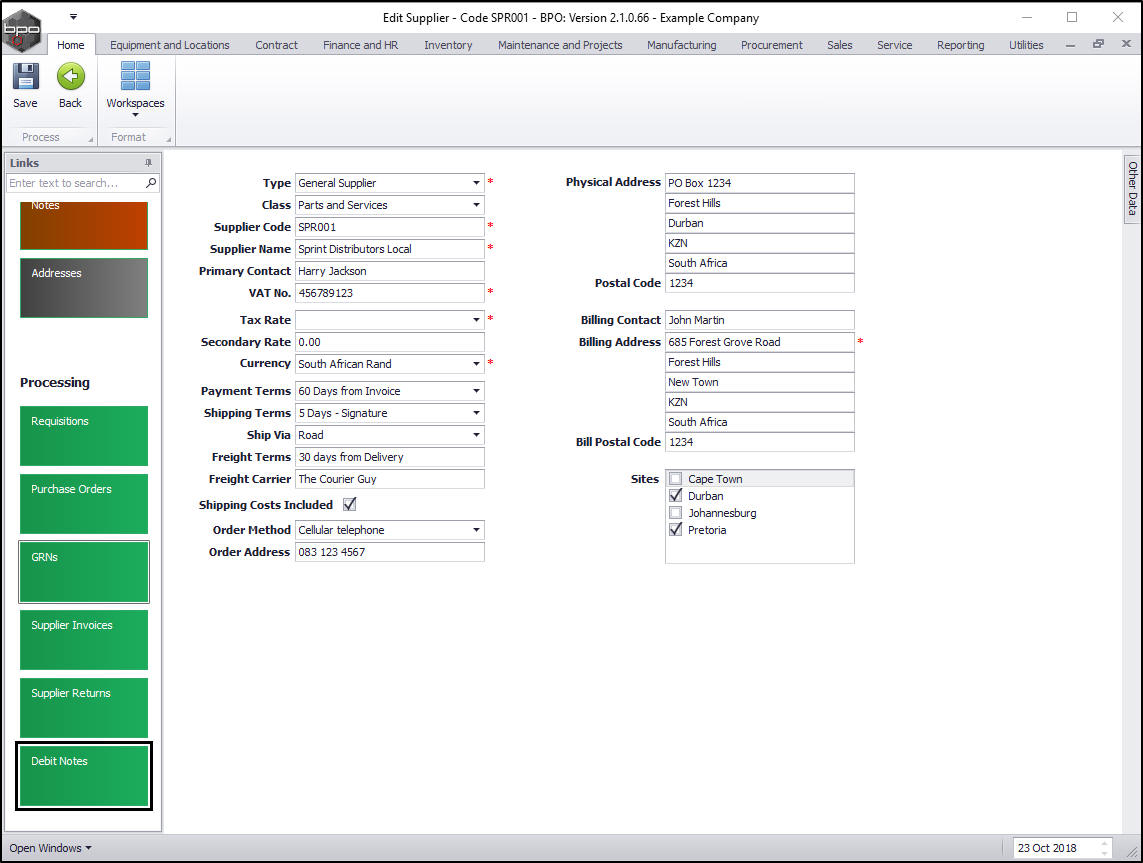
The Debit Note for Supplier [ ] screen will be displayed. This screen will default to the site selected in the Supplier Listing screen and the status will default to New.
- In this screen you can view a list of the Debit Notes linked to this supplier.
- Depending which status you are in,
- you can Add, Edit, Delete, View, Approve or Decline a supplier debit note.
- Close this screen to return to the Edit Supplier - Code [ ] screen.
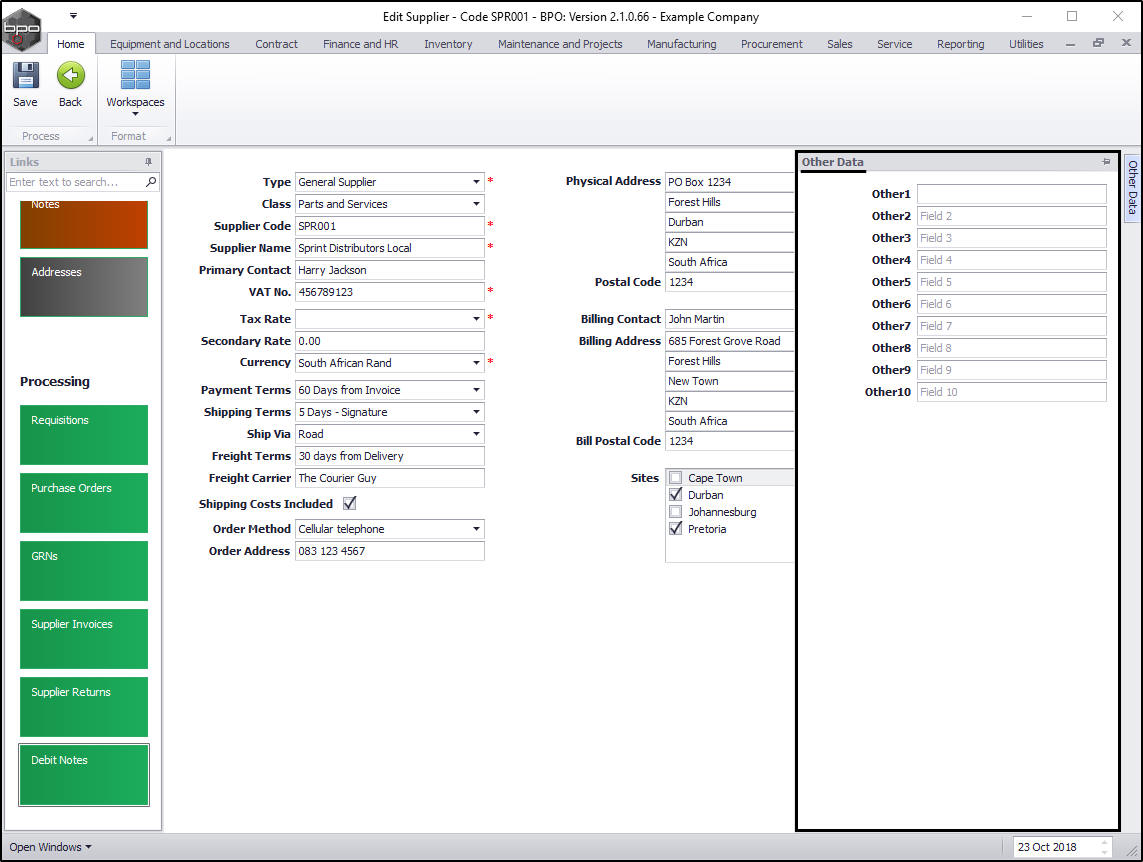
Other Data
- In the Edit Supplier - Code [ ] screen, click on the Other Data tab.

- Here, there are 10 fields where you can type in additional information pertinent to this supplier. These additional data labels (Other 1, Other 2 etc.) can be re-named as per your company's requirements.
BPO.MNU.056